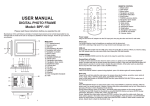
1
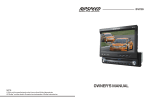
DX-T700
1
2
3
4
5
MPEG4 files on discs
9
Multi-angle
Dolby Digital
32
Subtitle choices
KODAK picture CD
8
Audio choices
16:9 LB
MP3 files on CD-R/CD-RW
TV Aspect Ratio modes
DVD video
R RESTRICTED Parental Lock
6
7
8
9
10
11
12
13
DB5113
14
Message
Do you want to start
Auto Search ?
OK
Cancel
15
16
Audio Channel
Channel
eng
Sound Mode
LR
Audio PID:102
17
TV Program List
No.
Program Name
1
2
3
4
Ideal World
,
UKTV Br tldeas
TMF
The HITS
2004/11/19 16:17
16:00-16:30
Good Food Bites
16:30-17:00
Gardens Unplugged
18
DVD-ROM Drive
DVB
USB
19
20
21
22
23
24
25
26
27
28
29
30
31
32
33
34
35
36
37
38
39
40
41
42
43
44
User Manual
DVD\DVB-T COMBO PLAYER
DX-T700
Please read this User Manual carefully to ensure proper use of this
product and keep this manual for future reference.
Forward
The machine has two major functions. It can act as a set-top box
for receiving DVB-T broadcasts. It can also act as an DVD player.
Table of Contents
Table of Contents-------------------------------------------------------------------------------------------------- 1
Important Safety Instructions----------------------------------------------------------------------------------- 2
Caution-------------------------------------------------------------------------------------------------------------- 5
Features------------------------------------------------------------------------------------------------------------- 6
Front panel and Rear pane illustration------------------------------------------------------------------------- 7
Connecting to a TV Set------------------------------------------------------------------------------------------- 8
Connecting to AV Amplifier with 2 Channel Analog Audio Input---------------------------------------- 9
Connecting to an AV Amplifier with Digital Audio Input----------------------------------------------------- 10
USB-------------------------------------------------------------------------------------------------11
LED screen--------------------------------------------------------------------------------------------------------- 12
Remote Control----------------------------------------------------------------------------------------- ---------- 13
Remote Control Introduction ------------------------------------------------------------------------ ---------- 15
The setup menu system---DVD PART------------------------------------------------------------------------- 21
MP3 Playback----------------------------------------------------------------------------------------------------- 32
Kodak picture CD Playback------------------------------------------------------------------------------------ 33
The setup menu system---DVB PART------------------------------------------------------------------------- 34
Troubleshooting-------------------------------------------------------------------------------------------------- 43
Specifications----------------------------------------------------------------------------------------------------- 44
1
Important Safety Instructions
1. The apparatus shall not be exposed to dripping
or Splashing and that no objects filled with liquids,
such as Vases, shall be placed the apparatus.
2. The mains plug is used as the disconnect device,
the disconnect device shall remain readily operable.
3. To be completely disconnect the power input,
the mains plug of apparatus shall be disconnected
from the mains.
4. The mains plug of apparatus should not be
obstructed or should be easily accessed during
intended use.
This symbol indicates that this product incorporates
double insulation between hazardous mains voltage
and user accessible parts. When servicing use only
identical replacement parts.
WARNING: To reduce the risk of fire or electric shock,
do not expose this apparatus to rain or cords.
2
3
4
Caution
5
Features
Full compatibility with MPEG4,DVD, CD, MP3, Kodak Picture CD, CD-R and CD-RW (f i na l i ze d)
Screensaver
M u l t i p l e p l a y b a c k m o d e s : P r o g r a m , Search
Coaxial digital audio output
S-video, composite video and component (Y, Pb, Pr) video outputs
Disc formats supported by this player:
MPEG4 files on discs
9
Multi-angle
Dolby Digital
32
Subtitle choices
KODAK picture CD
8
Audio choices
16:9 LB
MP3 files on CD-R/CD-RW
TV Aspect Ratio modes
DVD video
R RESTRICTED Parental Lock
This product incorporates copyright protection technology that is protected by method claims of
certain U.S.patents and other intellectual property rights owned by Macrovision Corporation and other
rights owners. Use of this copyright protection technology must be authorized by Macrovision
Corporation, and is intendedfor home and other limited viewing uses only unless otherwise authorized
by Macrovision Corporation. Reverse engineering or disassembly is prohibited.
The product complies with the KODAK Picture CD format and will display KODAK Picture CDs. The "KODAK
Picture CD Compatible" logo is a trademark of Eastman Kodak Company and is used with permission.
Manufactured under license from Dolby Laboratories. "Dolby" and the double-D symbol are trademarks of
Dolby Laboratories. Confidential Unpublished Works. c 1992-1997 Dolby Laboratories, Inc. All rights reserved.
6
Front panel and Rear pane illustration
Front panel
1 POWER
5 OPEN/CLOSE BUTTON
2 CABIN DOOR
6 PLAY/PAUSE BUTTON
3 LED SCREEN
7 STOP BUTTON
4 SENSOR
8 USB PORT
Rear panel
1 MAINS CABLE
6 S-VIDEO output jack
2 RF IN
7 Component Video output (Y, Pb, Pr)
3 RF LOOP THROUGH
8 Digital Audio COAXIAL output jack
4 Audio output (L/ R )
9 SCART OUT
5 VIDEO output jack
10 SCART IN
7
Connecting to a TV Set
TV Aerial
Notes:
There are four ways of connecting the player s AV o utput to the TV s et:
1. S-Video cable and CVBS Video cable[ set the (S-Video) to (Video)].
2. Component video cable [set the (Video) to (INTERLACE-YUV or P-SCAN Y, Pb, Pr)].
3. SCART cable[set the (video type) to TV-RGB] .
4. Left/Right Audio cable [ set the (Audio out) ].
8
Connecting to an AV Amplifier with 2 Channel Analog Audio Input
Notes:
1. Set the TV to the AV input connected to the DVD player.
2. Set the Amplifier to the AV input connected to the DVD player.
9
Connecting to an AV Amplifier with Digital Audio Input
Notes:
1. Select the Coaxial digital audio output.
2. Set the player's Audio out to Raw or PCM mode .
3. Set the digital Amplifier to the AV input connected to the DVD player.
10
USB
USB interface
This unit have a USB jack, when you want to play the USB DISC, you can insert a USB
DISC or a MP3 Player with USB Interface to play the MP3 music or and JPEG files or
other files. Press the <SOURCE> button to choose USB mode. All the function is the
same to play a disc.
11
LED screen
LED screen
DVD DISC
2 VCD
PLAY
PAUSE
DISC PLAY
PLAY TIME
REPEAT
MP3 DISC
PBC
10 DOLBY DIGITAL
Note:
In DVB mode,channel number and time(HOUR:MINUTE) will be displayed in area
12
Remote Control
OPEN/CLOSE
POWER
0-10+ NUMBER KEY
MUTE
EPG
TITLE/TTX
MENU
INFO
FAVORITE
PAUSE
GOTO
SETUP
MOVE(
VOL+/VOL-
)
STOP
SOURCE
PLAY
REV
32
RETURN
FWD
CH+
PBC
ENTER
34
SUBTITLE
35
PROGRAM
CH-
36
LANGUAGE
TV/RADIO
37
REPEAT
NEXT
38
A-B
PREV
VIDEO
ZOOM
P/N
L/R
SLOW
ANGLE
Note:
1. Please note that reference numbers for the remote are described beginning on page 15 to 20 of this manual.
2. In this manual,
will be used to represent different NAVIGATION ARROWS on the remote
respectively.
3. In order to operate any of the remote functions, you must first press the Power button on the DVD player.
4. Some of the keys is multiple key.Function before / can be used in DVD mode, after / can be used in DVB
mode.
13
Using the remote control
Insert batteries
1
1. Open the cover.
2
2. Insert batteries.
Point the remote control at the remote sensor.
(The pictures below are for reference only.)
Make sure to match the "+" and "-" of the batteries
with the marks inside the battery compartment.
3
3. Close the cover.
Remarks: Do not expose the remote sensor of the DVD Player
to a strong light source, such as direct sunlight.
DB5113
Notes:
Improper use of batteries may cause battery
leakage and corrosion. To operate the remote
control correctly,follow the instructions below:
Do not insert the batteries in the wrong direction.
Do not charge, heat, open, or short-circuit
the batteries.
Do not throw batteries into a fire.
Do not leave dead batteries in the Remote
Control.
Do not use different types of batteries together, or mix old and new batteries.
If you do not use the remote control for a
long period of time, remove the batteries
to avoid possible damage from battery
corrosion.
If the remote control does not function correctly or the operating range becomes reduced, replace all batteries with new ones.
If battery leakage occurs, clean the battery
compartment, then insert new ones.
Notes:
Point the remote control directly at the
player's remote sensor.
Do not leave the remote control in an
extremely hot or humid place.
Do not spill water or put anything wet
on the remote control.
Battery life is ~1 year under normal
conditions.
14
Remote control Introduction
Remote Control Buttons:
1. POWER
Software Power On/Off Press <POWER> button, turn on the machine if the machine
is off, and turn it off if it is already on.
2. MUTE
Press <MUTE> button will mute the audio, and display "
Press < MUTE> again will cancel mute audio.
" on the screen.
3. TITLE/TTX
In DVD mode, Returns to the disc's title. In DVB mode, this displays teletext
information.
4. MENU Menu/Play Back Control
Press <MENU> in DVD mode will return to the disc's menu. In DVB mode, this button
will bring the DVB Menu, and press <RETURN>,<MENU>or<SETUP> will return to
channel playback.
5. FAVORITE
In DVB mode, Press <FAVORITE> button to turn on the favorite Channel Groups,
Press <FAVORITE> button again will turn off the favorite Channel Groups.
NOTE: The <FAVORITE> button has no effect in DVD mode.
6. GOTO
In DVD mode, pressing <GOTO> button will bring up a Goto menu, and the direction
and number buttons can be used to select Track, Title, Chapter, and Time.
Use the number keys to input the desired Time, Title or Chapter, then press ENTER to
confirm.
In DVB mode, pressing <GOTO> will enter the Auto Scan menu. as below:
Message
Do you want to start
Auto Search ?
Cancel
OK
15
7. VOL+/In DVD mode and DVB mode, Pressing <VOL+> button increases the volume,
pressing <VOL-> button decreases the volume. A volume bar will be displayed on
the screen.
8. STOP
Press <STOP> button to hold playback during playback.
Press <PLAY >to reseume playback from the point you pressed STOP.
Press <STOP> twice to stop playback completely.
NOTE: The <STOP> button has no effect in DVB mode.
9. PLAY
Press <PLAY> from stop mode to start play, In the DVB mode, Press the <PLAY>
button to display the TV program list.
10.RETURN
Pressing <RETURN> from a setup menu will go up one level in the menu. For DVB
full-screen play mode, pressing <RETURN> will switch to the channel stored in
memory.
11.CH+
In DVB mode ,If you want to change channels, you can press the <CH+> button to
change the channels.
12. ENTER
Pressing <ENTER> will enter the selected item in a menu.
13.CHIn DVB mode ,If you want to change channels ,you can press the <CH-> button to
change the channels.
14.TV/RADIO
In DVB mode, press <TV/RADIO> to switch between television and radio mode.
NOTE: This button has no effect in DVD mode.
15. NEXT
I n DVD mode, Press <NEXT> to skip to the next chapter or track, In D VB mode, the
<NEXT> button function same the <CH+> button.
16.PREV
In DVD mode ,Press <PREV> to skip to previous chapter or track, In DVB mode, the
<PREV> button function same the <CH-> button.
17.VIDEO
Press <VIDEO> button to change video output format.
S-VIDEO->RGB->P-SCAN->YUV
16
18. ZOOM
Press <ZOOM> multiple times to enlarge (X1, X2, 4X) the display, in that order.
The OSD will display the current zoom mode. In ZOOM mode, you can press <UP>,
<DOWN>and <LEFT>, <RIGHT> button to move the pictures station.
19. P/N
Press the <P/N> button to switch between PAL and NTSC TV output formats.
Formats are NTSC ,PAL, and AUTO.
20. L/R
Press <L/R> to select between Left, Right audio channels. This button has no effect
when playing a DVD disc. In DVB mode, Press the <L/R> button to display the Audio
channel. In the Audio channel options, you can press the NAVIGATION ARROWS to
choose the RR, LR, LL mode. As below:
Audio Channel
Channel
eng
Sound Mode
LR
Audio PID:102
21.SLOW
In DVD mode, press <SLOW > button to enter slow playback, and cycle between
different speeds. The possible speeds are ,1/2, 1/4, 1/8, 1/16, 1/32, and normal.
NOTE: The <SLOW> button has no effect in DVB mode.
22. ANGLE
In DVD mode, pressing <ANGLE> will change the view angle, on DVD that support
this feature. NOTE: In the DVD mode ,This <ANGLE> button has effect in the
special DVD disc . NOTE: The <ANGLE> button has no effect in DVB mode.
23. OPEN/CLOSE
In DVD mode, press <OPEN/CLOSE> to immediately eject or close the disc tray.
NOTE: The <OPEN/CLOSE> button has no effect in DVB mode.
24.Number
In DVD mode, press a number key a select a title or track. The number keys are also
used for inputting a password. To select a track from 0 to 9, directly press a key from
<0> to <9>. In order to select a track 10 or greater, first press <10+>. For DVB mode,
use <0> to <9> to directly input a two digit channel number. The <10+> key has no
effect in this mode.
17
25. EPG
In the DVB mode, Press the <EPG> button to display the electronic program guide
again press <RIGHT> button to display more detail. As below:
TV Program List
No.
Program Name
1
2
3
4
Ideal World
,
UKTV Br tldeas
TMF
The HITS
2004/11/19 16:17
16:00-16:30
Good Food Bites
16:30-17:00
Gardens Unplugged
NOTE: The <EPG> button has no effect in DVD mode.
26. INFO
In DVD mode, pressing <INFO> will bring up a information menu, and the direction
and number buttons can be used to select Track, Title, Chapter, and Time. As below:
In the DVB mode, Press <INFO> button to display the Program information options,
Press the <RETURN> to exit the INFO option. As below:
27. PAUSE
In DVD mode, press <PAUSE> to pause playback. From this state, press <PAUSE>
to advance one video frame. For audio-only media, pressing <PAUSE> the second
time will resume playback. For DVB, press <PAUSE> to pause and again press
<PAUSE> to resume playback.
28. SETUP
In DVD mode, Pressing <SETUP> button will enter the DVD setup menu. I n DVB
mode, press <SETUP> button to display the DVB main menu. Press <SETUP>
button again to exit the setup menu.
18
29. UP/DOWN/LEFT/RIGHT
Used to navigate menus. When not in a menu, there are also DVB specific uses for
each button. In the DVB mode, Pressing <UP>/<DOWN> button will go the next/
previous channel, in the list of all channels.
30. SOURCE
P ress the< SOURCE> button to switch between DVD, DVB and USB operation.
As below:
DVD-ROM Drive
DVB
USB
31. REV
In DVD mode, press <REV> to enter Fast-Reverse playback. Press the same button
again to increase speed, from X2 to X4 to X8 to X16 to X32.
NOTE: The <REV> button has no effect in DVB mode.
32. FW D
In DVD mode,press<FWD>to enter fast forward playback.
Press this key again to increase speed from X2 to X4 to X8 to X16 to X32.
NOTE: The <FWD> button has no effect in DVB mode.
33. PBC
In DVD mode, it is PBC.
NOTE: The <PBC> button has no effect in DVB mode.
34. SUBTITLE
In DVD mode, press <SUBTITLE> button to display subtitle.
NOTE: In the DVD mode ,This <SUBTITLE> button has effect in the special DVD
disc. In the DVB mode, Press <SUBTITLE> button to display the language options.
As below:
19
35.PROGRAM
In DVD mode , Press the <PROGRAM> button to display the PROGRAM options.
As below:
NOTE: The <PROGRAM> button has no effect in DVB mode.
36. LANGUAGE
In DVD mode, pressing <LANGUAGE> will change between different Audio
languages, if playing DVD or AVI media. This button has no effect for VCD/CD/MP3/
WMA/JPG media. In DVB mode, use this button to select different languages on the
current channel.
37.REPEAT
In DVD mode, press <REPEAT> to select repeat mode. Press multiple
times to cycle between Title Repeat, Chapter Repeat, and Repeat Off.
38. A-B
Repeat Segment In DVD mode, press <A-B> once to set the starting point for repeat
segment. Press it again to set an end point, and the player will repeat the segment
from the start to end point. Press it once more to turn off repeat segment.
NOTE: The <A-B> button has no effect in DVB mode.
20
The setup menu system---DVD PART
NOTE: In the DVD setup and System setting options. If you press <SETUP> into the
DVD setup and System setting option when playing disc, the some options has no
effect.
1. General Steps of setup menu
In the DVD mode, Press the <STOP> button or open mode, Then press <setup>
button, the DVD main setup menu appears.
A. DVD Setup-language Setup
Press the Up and Down button move on the DVD setup and to enter.
the DVD Setup-lanuage Setup option appear the screen.
In the DVD Setup-language Setup, you can setup the Menu, Audio, Subtitle, External
subtitle Press the <UP>, <DOWN> and <LEFT>, <RIGHT> arrow buttons to highlight
the icon of the desired page, then press the <DOWN >or <RIGHT> arrow button to
activate that page. For example, if you want to setup the audio setup, press <DOWN>
button to highlight the Audio Option, the Audio setup page will be displayed on the
screen.
1). MENU
Highlight the MENU option, and press the Arrow buttons to choose the menu
language you prefer. Press <ENTER> to confirm. If the disc you are playing has that
Language availabel. It will display the menu in the language.
Notes:
If your preferred language is not availabel, the disc s default language
will be played.
21
2). AUDIO
Highlight the AUDIO option, and press the Arrow buttons to choose the audio
language you prefer. Press <ENTER> to confirm. If the disc you are playing has that
language available, it will output the language.
3). SUBTITLE
Highlight the SUBTITLE option, and press the Arrow buttons to choose the subtitle
language you prefer. Press <ENTER> to confirm. If the disc you are playing has that
language available, it will display subtitles in that language.
4). EXTERNAL SUBTITLE
Highlight the EXTERNAL SUBTITLE option, and press the Arrow buttons to choose
the supported subtitle language when playing MPEG4 format discs.
22
B. DVD Setup-Audio Setup
Press <DOWN> arrow button to highlight the Audio Setup option on the screen
In the DVD setup-Audio Setup ,you can setup the Digital Out, Analog Out, Downmix,
Center, Rear. Press <UP>, <DOWN> and <LEFT>, <RIGHT> arrow buttons to
highlight the icon of the desired page, then press the <DOWN> or <RIGHT> arrow
button to activate that page. For example, if you want to setup the Rear setup,
press <DOWN> button to highlight the Rear Option, the Rear setup page will be
displayed on the screen.
1).DIGITAL OUT
Highlight the DIGITAL OUT option, and press the Arrow buttons to choose the audio
output mode you prefer. Press Enter to confirm. There are 3 optional audio output
modes: SPDIF / RAW, and SPDIF/ PCM, OFF.
Notes:
When digital output is NOT in use, It is recommended to turn OFF , the digital
output setting for the purpose on minimizing circuit interference.
2). ANALOG OUT
Highlight the ANALOG OUT option, and press the Arrow buttons to choose the audio
output mode you prefer. Press <ENTER> to confirm.
NOTE: If you choose OFF , cut off analog audio output.
23
3). DOWNMIX
There are two modes, one is LO/RO, one is LT/RT.
C. DVD Setup-Custom Setup
Press the <Down> arrow button to highlight the Custom Setup option on the screen
In the DVD setup-Custom Setup ,you can setup the Parental Ctrl, Angle Mark.
Press the <UP>, <DOWN> and <LEFT>, <RIGHT> arrow buttons to highlight the
icon of the desired page, then press the <DOWN> or <RIGHT> arrow button to
activate that page. For example, if you want to setup the Angle Mark setup,
press <DOWN> button to highlight the Angel Mark Option, the Angel Mark setup page
will be displayed on the screen.
24
1). PARENTAL CTRL
Parental Ctrl:1,2:G,3:G,4:PG13,5,6:R,7:NC17,8 the eight levels. The first level discs
are open to people of ever age and eight level only suitable for the adult. If you want to
change the parental ctrl setting, enter the user s a ge control i tem a nd t hen e nter f our
digital password. The default password is 6666 (if you are using this player for the
first time, just input this code).If the input code has been confirmed, the level setting
up menu will appear. Move the cursor to choose the expected level and press
<ENTER> button to confirm and memory it. Move the cursor to the ENTER and
press <ENTER> button to confirm and withdraw to the user setup menu or press
<ENTER> button to directly with draw from the operation.
2).ANGLE MARK
There are On and Off the two choices for this item. If in the ON mode, when play
a disc which the content is multi-angle shot, you may press the <ANGLE> button
on the remote control to enjoy the scene in different angles.
25
D. DVD Setup-Exit
Press the <DOWN> arrow button to highlight the <EXIT> option on the screen
In the DVD Setup-Exit ,Choose the Exit option to return the DVD main Setup.
2. DVD Mode of System Setting
Press the <SETUP> button, the DVD main setup menu appears the screen,
then press the <DOWN> button to highlight the system setting option.
A. System Setting Menu-language Setup
Press the <UP> and <DOWN> button move on the System setting and to enter
button. the System setting Menu-lanuage Setup option appear the screen.
In the System setting Menu-language Setup, you can setup the OSD option.
26
1. OSD LANGUAGE
Highlight the OSD LANGUAGE option, and press the Arrow buttons to choose the
OSD language you prefer. Press <ENTER> to confirm, and it will display OSD in that
language.
B. System setting Menu-Display Setup
Press the <DOWN> arrow button to highlight the Setup option on the screen
In the System Setting Menu-Display Setup ,you can setup the TV Standard, Display
Type, Video Output, Brightness, Contrast option. Press the <UP>, <DOWN> and
<LEFT>, <RIGHT> arrow buttons to highlight the icon of the desired page, then
press the <DOWN> or <RIGHT> arrow button to activate that page. For example,
if you want to setup the Contrast setup, press <DOWN> button to highlight the
Contrast Option, the Contrast setup page will be displayed on the screen.
1). TV Standard
According to the Color System of the TV, you can choose the TV Standard.
27
2).Display TYPE
According to the Display type, you can choose 4:3PS,4:3LB or 16:9 .
3).VIDEO OUTPUT
According to the output jack of TV set, you can choose CVBS+S-VIDEO,
CVBS+RGB , CVBS+YUV, YUV+ P-SCAN.
4).BRIGHTNESS
According to the Brightness, you can choose Normal, Bright or soft .
5). CONTRAST
Use the <UP> and <DOWN> arrow buttons to move the scroll and adjust the contrast.
28
C. System setting Menu-Preference
Press the Down arrow button to highlight the Preference option on the screen
In the System Setting Menu-Preference Setup, you can setup the UI Style, Change
PIN, Default Type, and Default options. Press the <UP>, <DOWN> and <LEFT>,
<RIGHT> arrow buttons to highlight the icon of the desired page, then press the
<DOWN> or <RIGHT> arrow button to activate that page. For example, if you want
to setup the Default setup, press Down button to highlight the Default Option,
the Default setup page will be displayed on the screen.
1). UI Style
According to UI Style, you can choose Style1,Style2,Style3,Style4.
2). Change PIN
The default password is 6666.
29
3). Default Type
In the Default Type options, you can choose the DVD MODE, DVB MODE, USB
MODE, User Select MODE, Last operation Type MODE.
NOTE: In the Default Type, If you choose the DVB MODE. That next power on the
PLAYER will direct enter DVB MODE, no again display the SOURCE list.
4). Default
The Default setup options are RESTORE factory setup, Let your PLAYER work on
the default state.
5). System Info
The system info includes model, HW, SW and Date.
30
3. Game options
Press the <SETUP> button, the DVD main setup menu appears the screen, then
press the <DOWN> button to highlight the Game option.
A. Press the <UP> and <DOWN> button move on the DVD setup and press <ENTER>
button to confirm the Main Menu-Game option, appear the screen.
In the Main Menu-Game Setup, you can setup the Mine, Tetris, Rush Hour,
Calendar four kinds of games. For example:
If you want to play the Mine Game, you can press the <DOWN> button to highlight
the Mine options. Then press the <ENTER> button to enter. As below:
Other Game options operation same to the Mine Game.
31
MP3 Playback
When a Mp3 disc is loaded, the screen will display as follows:
Current
directory
name
Current MP3/JPEG file
name. If a JPEG file is
playing, the name should
have a JPEG extension.
Press
to select the file when the cursor appears in the file window. Press select
to play the current file select by the cursor.
Press
to switch between the directory window and the file window.
Note: The player will not function correctly under the following condition:
1. The disc is badly scratched, damaged or dirty.
2. The disc is not finalized.
3. The recording format is not supported by the player.
32
Kodak picture CD Playback
General function:
You can set sideshow transition modes for any pictures.
Press PAUSE to stop playing.
Press or
to see the previous or next picture.
Press PLAY to continue sideshow transitions.
Press STOP to return to root menu.
IMAGE ROTATION
Press the DIRECTION button (
)to rotation the image as you prefer.
26
Zoom function:
This player provides both Zoom in /out and Zoom pan function. Press the ZOOM
consecutively, the picture will zoom in/out in turn as followings:
Q2
Q3
Q4
Q1/2
QOFF
33
Q1/3
Q1/4
The setup menu system---DVB PART
1. First Time Installation
After all the connections have been made properly, switch on your TV. Make sure the
receiver is connected to the mains and press <POWER> to switch the receiver on.
If you are using the receiver for the first time, a First Time Installation menu will be
displayed to guide you through the initial setup. Use the remote controller to finish
the setup.
A. At the First time installation menu, select YES and press <ENTER> button on
the remote controller to proceed.
Do you want to start first time
Installation Wizard?
B. Enter your regional settings, include your Country, Language, Time Zone .
Then select <NEXT> to proceed.
C. Select Yes to start the automatic channel search.
34
D. Wait to complete the scanning.
In case you want to stop the scanning, press the <RETURN> button. The channels
already found will still be stored.
E. When finished, all active channels found will be stored automatically.
The last found channel will be played.
2. DVB Mode of Main Menu
Press the <SETUP> button, the DVB main setup menu appears the screen,
then press the <DOWN> button to highlight the DVB Menu option.
A. Press the <UP> and <DOWN> button move on the DVB Menu and to enter button
to enter the DVB Menu-Program list option, appear the screen.
In the DVB Menu-Program list, you can setup the TV Program, Music Program, Sort
options. Press the <UP>, <DOWN> and <LEFT>, <RIGHT> arrow buttons to
highlight the icon of the desired page, then press the <DOWN> or <RIGHT> arrow
button to activate that page. For example, if you want to setup the Sort setup, press
<DOWN> button to highlight the Sort Option, the Sort menu page will be displayed
on the screen.
35
1).TV Program
Press the <RIGHT> button to highlight the TV Program, Then press the <ENTER>
button to enter the TV program options, appear the screen.
All active channels are listed in the Program List, allowing you to make your own
favorite channel group, move, delete channels.
Creating Favorite Channel Groups
This feature allows you to group your favorite channels. To create your favorite
groups:
a. Select the channel which you would like to add to the group and go to the Favor
column.
b. When the Favor column of the desired channel is highlighted, one red heart
symbol will appear after press the <ENTER> button. Pressing the <ENTER>
button again will un-select the channel of the favorite group.
C. Once your favorite group is created, you can press the <FAVORITE> keys to
quickly access your favorite channels.
Moving a Channel
a. Select the channel which you like to move and go to the Move column.
b. Press <ENTER> button and a
symbol will be displayed.
c. Use the <UP / DOWN> key to move the channel to a desired position.
d. Press <ENTER> button again will be exit the moving channel mode.
36
Deleting a Channel
a. Select the channel which you like to delete and go to the Del column.
b. Press <ENTER> button and an X symbol will be displayed. Repeat
this step in the channel to be deleted.
c. Press <SETUP> or <RETURN> button and the marked channel will be
deleted.
d. Press <ENTER> button again will exit the deleting channel mode.
2).Music Program
Press the <DOWN> button to highlight the Music Program, Then press the <ENTER>
button to enter the Music program options, appear the screen.
NOTE: This Music program options operation same the TV Program.
3).Sort
Press the <DOWN> button to highlight the Sort options, yon can choose the channels
Sort style. As: By Name, By Service ID, By Channel number
37
B. Press the Up and Down button move on the DVB Menu-Program Search option
appear the screen.
In the DVB Menu-Program Search, you can setup the Automatic Search,
Manual Search options
1).Automatic Search.
Choose the Automatic Search options, This operation same the First Time Installation.
Refer to First time Installation.
2).Manual Search.
If any channel is missing after auto search, or you want to add newly launched
channels, you can use Manual Search to scan the desired channels. To manually
search the target channel, you must know its parameters, e.g., the channel number.
After the channel is found, it is appended to the current channel list.
a. Enter the Manual Search menu via Main Menu > Program Search > Manual
Search.
b. Specify the appropriate channel number in the Channel No field by press <DOWN>
and <UP> button. Enter your selection, the frequency and bandwidth values are
changed accordingly.
c. Select <ENTER> button to start manual search
d. If no signal is found, a message indicating no signal will appear. Otherwise
scanned channel will be saved and appended to the current channel list.
38
C. Parental Control
This feature allows you to prevent children or unauthorized people from watching
channels.
1). Enter Main Menu > Parental Control. First, you will need to enter PIN as
prompted to use the parental control menu. (The default PIN is 6666.)
2). After correct PIN input, the following options are provided:
Channel Lock: Allows you to activate or de-activate the overall parental control.
When set to YES, all the channels with locking settings will be locked.
Parental Setting: In the channel list, select the channel you want to lock and then
press <ENTER>. A padlock symbol will be displayed. To remove the lock, press
<ENTER> again.
Antenna Power
The default setting is OFF. Set this option to ON if this receiver box is connected to an
external active antenna that amplifies the received signal. This receiver box can
supply 5V DC at 50mA maximum.
39
Caution: If you are using a normal passive antenna,
make sure to set this setting to OFF .
2).Country
In the Country options, you can choose a kinds of the Countries. As: England
Germany, Italy, France, Spain etc.
3).Language
Press the <DOWN> button to highlight the Language options, then Press the
<ENTER> button to into the Language setup.
.
1 st /2nd Audio : This option allows you to select your first and second choice for
the audio language. If neither of your selected language is available on the program
transmitted, the main language of the program will be used.
Subtitle : Allows you to select the subtitle language. If your selected language is
not available on the program transmitted, the main language of the program will
be used. Exit: you can choose the Exit options to return the System setting.
40
4).GMT usage:
Allows you to enable/disable Greenwich Mean Time (GMT) usage. If you know the
GMT time zone of your location, set GMT usage to ON and select an appropriate
time zone. If you prefer to set the time manually, select OFF in GMT usage item and
then manually select the date and time.
5). Time Zone
Select an appropriate time zone to display the local time correctly. Both EPG and
system schedule need a correct time zone setting.
6). System Schedule
Press the <DOWN> button to highlight the System Schedule options, then Press the
<ENTER> button to into the System schedule setup.
41
This feature allows the receiver to automatically switch on and tune to a
pre-specified channel for a pre-set length of time. Up to10 tasks can be scheduled.
a. In the Schedule pane, use the <UP / DOWN> key to select a task and use <RIGHT
/ LEFT > key to switch between Inactive and Active.
b. Press <ENTER> to enter the detail page.
c. Enter the following settings as required. Use the <UP / DOWN> key to move
between setting items, the <RIGHT / LEFT> key to switch between available
selections and numeric keys to enter numeric value. Mode: You can repeat the task
by setting the frequency as Once, Daily or Weekly. Or you can select Stop to
disable the task. Start and End Time: Enter the start and end time that
automatically turns on and off the receiver. Channel Type: Select TV or radio
channel as required. Channel No: Select the channel to be played at scheduled
time.
d. When the setting is done, press <SETUP> or <RETURN> to save the changes.
2. DVB System Setting
In the DVB mode, the DVB System Setting options setup same as the In DVD mode.
Refer to the System Setting of DVD mode.
3. DVB Game
In the DVB mode, the DVB Game options setup same as the In DVD mode. Refer to
of the Game of DVD mode.
42
Troubleshooting
I f you have any questions, please consult the troubleshooting guide below.
NO PICTURE OR SOUND
BAD DISC DISPLAYED
Ensure the power button is on.
Ensure the disc is not warped, damaged or deformed.
Ensure the power outlet is operational.
Ensure the disc is not badly stained or damaged.
Ensure the power cord is not damaged.
Ensure the disc format is compatible with the player.
Ensure the power plug is connected firmly to the outlet.
Please check whether you have tried to play a software CD.
If so, please restart the player.
PICTURE BUT NO SOUND
REMOTE NOT WORKING
Ensure the audio jacks are securely connected..
Make sure the Main unit s POWER button is on
Ensure the audio connector is not damaged.
Ensure the remote batteries are working.
Ensure the volume is turned up in VOL/CH setup.
Point the remote control directly at the player s IR
Ensure you have set the player s AUDIO settings correctly.
sensor.
Ensure you have entered the correct AV input for your TV.
Remove any obstacles between the remote and the
Ensure the audio is not set to mute.
IR sensor.
SOUND BUT NO PICTURE
UNIT NOT WORKING
Ensure the video jacks are securely connected.
Turn off the power and then turn it on again.
Ensure you have entered the correct AV input for your TV.
Ensure the video connector is not damaged.
Ensure you have set the player s VIDEO settings correctly.
POOR PICTURE OR SOUND
NO DISC DISPLAYED
Ensure you have set the player s AUDIO settings correctly.
Ensure you have put the disc on the tray.
Ensure the disc is not scratched or stained.
Ensure the disc is not upside down.
Ensure the AV connector or the output terminal is not
Ensure the disc is not distorted, stained or scratched.
damaged.
43
Specifications
Power requirements: 100-240V~ 50/60Hz
Power consumption: 20W
Video standard: NTSC/PAL/AUTO
Unit Weight: 1.8kg
Video out
Video out: 1.0V(p-p)/75 , sync, negative polarity, RCA pin jack x 1
S-video output connector(separate Y C signal output connector):
Y output: 1.0V(p-p)/75 , sync, negative polarity
C output: 0.286V(p-p)/75
Audio out
2 channel out: RCA pin jackx2
Coaxial out: 0.5V(p-p75 ,RCA pin Jack x l
Frequency response: 20Hz to 20kHz
S/N ratio:>90dB
Total harmonic distortion: <0.0025%
[Accessories]
Video/ Audio cable x 1
Remote Control x 1
User s M anual x 1
Battery x 2
Specifications are subject to change without notice. Weight and dimensions are
approximate.
This symbol on the product or in the instructions means that your electrical and
electronic equipment should be disposed at the end of life separately from your
household waste, There are separate collection systems for recycling in the EU.
For more information, please contact the local authority or your retailer where
you purchased the product.
44