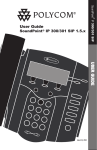
1
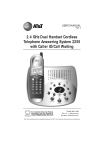
5840_CIB_2ATT
2003.3.5
6:11 PM
Page II
USER’S MANUAL
Part 2
5.8 GHz Cordless Telephone
Answering System 5845
with Caller ID/Call Waiting
Please also read
Part 1 — Important
Product Information
© 2002 Advanced American Telephones. All Rights Reserved.
AT&T and the Globe Symbol are trademarks of AT&TCorp., licensed to Advanced American Telephones.
5840_CIB_2ATT
2003.3.5
6:11 PM
Page III
Visit us at www.telephones.att.com
© 2002 Advanced American Telephones.
All Rights Reserved.
AT&T and the Globe Design are
trademarks of AT&T Corp., licensed to
Advanced American Telephones.
Printed in China. Issue 1AT&T 03/05
5840_CIB_2ATT
2003.3.5
6:11 PM
Page V
CONTENTS
Parts List................................................ 1
About Caller Identification
(Caller ID) ...................................... 2
About the Calls Log......................... 2
About Adding Handsets.................. 2
End Intercom.................................
Answer an Incoming Call While
on an Intercom Call...................
Blind Call Transfer.........................
Announced Call Transfer...............
Conference Calling........................
INSTALLATION ....................... 3
PHONE BOOK ...................... 42
BEFORE YOU BEGIN .................. 1
39
39
40
40
41
Table/Desk Installation ................... 3
About Handset registration.............. 5
Register an additional Handset
(Model 5800 Handset)...................... 5
Wall Installation............................... 6
Spare Battery/
Power Failure Backup................. 7
Belt Clip ............................................. 8
Headset ............................................ 8
Store a Number and Name in
Phone Book............................... 42
Keypad Characters..........................43
Dial a Number in Phone Book..... 44
Edit a Number/Name in
Phone Book............................... 45
Delete a Number/Name in
Phone Book............................... 46
FEATURE SETUP – HANDSET...... 9
Review Calls Log ........................... 48
Store Record in Phone book..........48
Display Dial.....................................49
Remove Call Records..................... 50
Feature Setup Menu........................ 9
Set Time........................................... 9
Clock Mode.................................... 10
Sound Select................................... 11
Ringer Volume............................... 12
Ringer Melody................................ 13
Vibrate Control............................... 14
Low Batt Tone............................... 15
Range Tone.................................... 16
Keypad Tone.................................. 17
Set Contrast.................................... 18
Language Setting............................ 19
FEATURE SETUP – BASE .......... 20
Ringer Volume...............................
Ringer Melody................................
Dial Mode (Tone/Pulse)................
Contrast ..........................................
Language........................................
20
21
22
23
24
TELEPHONE OPERATION......... 25
Make a Call....................................
Answer a Call.................................
Volume...........................................
Handset Speakerphone.................
Base Speakerphone.......................
Redial..............................................
Flash/Call Waiting..........................
Mute................................................
Hold................................................
Temporary Tone Dialing...............
Display Screen Messages..............
Handset Icons................................
Base Icons......................................
Base Lights.....................................
Tones and What They Mean.........
25
25
26
27
28
29
30
31
32
33
34
35
36
36
37
INTERCOM OPERATION .......... 38
Intercom Calls................................ 38
Answering Intercom...................... 39
CALLER ID OPERATION........... 47
ANSWERING SYSTEM OPERATION
AT THE BASE......................... 51
Audible Indicators ......................... 51
Turning Answering System
On/Off ........................................ 51
Set the Clock.................................. 51
About Mailboxes .......................... 52
About Announcements.................. 52
Record Your Announcement......... 53
Answering System Feature Setup ... 54
Feature Summary........................... 55
Listen to, Save & Delete Messages.. 56
Adjust Playback Volume................ 57
Call Screening/Intercept ............... 57
Record Memo................................. 58
Message Window Display............. 59
ANSWERING SYSTEM OPERATION
AT TOUCH TONE PHONE .............. 60
Connect with the
Answering System...................... 60
Voice Menu.................................... 60
Remote Access Commands............ 61
BATTERIES ......................... 62
Battery Life..................................... 62
Battery Indicator............................ 62
Charge the Handset Battery Pack..62
Spare Battery.................................. 63
Replace the Handset
Battery Pack............................... 64
IN CASE OF DIFFICULTY ......... 65
DEFAULT SETTINGS............... 71
TECHNICAL SPECIFICATIONS.... 72
INDEX ............................... 73
5840_CIB_2ATT
2003.3.5
6:11 PM
Page VI
BEFORE YOU BEGIN
Parts List
Your box should include:
Wallet Card
This User’s
Manual
Quick Start Guide
Charger
Base unit
Handset
Charger Wall
mount adapter
NiMH battery pack
Power cord
Wall mount adapter
Telephone line cords
1
5840_CIB_2ATT
2003.3.5
6:11 PM
Page 1
About Caller Identification (Caller ID)
This product has a Caller ID with Call Waiting feature that works with
service from your local phone service provider.
Caller ID with Call Waiting lets you see who’s calling before you answer
the phone, even when you’re on another call.
You may need to change your phone service to use this feature.
Contact your phone service provider if:
• You have both Caller ID and Call Waiting,but as separate
services (you may need combined service)
• You have only Caller ID service,or only Call Waiting service
• You don’t subscribe to any Caller ID or Call Waiting services.
You can use this product with regular Caller ID service,and you can
use this product’s other features without subscribing to either Caller ID
or combined Caller ID with Call Waiting service.
There are fees for Caller ID services,and they may not be available in
all areas.
This product can provide information only if both you and the caller
are in areas offering Caller ID service,and if both telephone companies
use compatible equipment.
About the Calls Log
This phone assigns each incoming call a number from 1 to 50 at the
handset,1 to 99 at the base. The most recent call will ha ve the lowest
number. When the memory is full,the oldest call information is deleted
to make room for new incoming call information. See CALLER ID
OPERATION, beginning on page 46, for more details.
If you answer a call before call information appears on the screen,it
will not appear in the calls log.
About Adding Handsets
This product is compatible with the AT&T 5800 Expansion Handset.
You may register a total of six handset to this telephone system (Model
5800 Handset sold separately) to this phone. Follow the instructions
provided with the additional handset(s) for installation and registration.
NOTE: Although you can register up to six handsets, only four
¥can
be used at one time.
2
5840_CIB_2ATT
2003.3.5
6:11 PM
Page 2
INSTALLATION
Table/Desk Installation
NOTE: Install this telephone away from electronic equipment,
¥such
as personal computers, television sets or microwave ovens.
Avoid excessive heat, cold, dust or moisture.
1
2
Connect the telephone line cord.
Connect the power cord.
flashes in the
message window.
Standard
electrical
outlet
Modular
telephone
jack
Use only the power cord supplied with this product.
If you need a replacement,call 1 800 222–3111.
3
5840_CIB_2ATT
2003.3.5
3
6:11 PM
Page 3
Install the handset battery.
Use only AT&T Battery 2401,SKU# 91077.
a) Remove batter y
compartment cover by
pressing on indentation
and sliding downward.
b) Align the contacts and
place the battery pack in
the battery compartment.
c) Replace cover by
sliding it on its
track up over
battery case until
it snaps firmly
into place.
4
5
Charge the handset battery.
• Place the handset in the base.
• Charge the battery at least 12 hours. After the first charge,
the battery will charge in eight hours.
Check for dial tone.
• After the batteries are charged, lift the handset and press
; you should hear a dial tone.
4
5840_CIB_2ATT
2003.3.5
6:11 PM
Page 4
About Handset Registration
1
2
3
4
The cordless handsets that came with your system are automatically
registered as Handset 1,and Handset 2.There is no need to re-register.
You may register up to a total of six Expansion Handsets to this
telepnone system(Model 5800 handset Sold Separately).
Additional handsets will be assigned Handset 3,handset 4,Handset5,
and Handset 6.
When you install the handset battery pack,the handset will display
SEARCHING FOR BASE (if it’s registered) or ENTER BASE ID (If it
has not been registered).
Register an additional Handset(Model 5800 handset)
1
2
3
4
5
6
7
5
Make sure the handset battery pack has been charged for at least 12
hours and that the power cord is plugged into the base unit.
At the base display press
softkey.
Use
to select DISPLAY BASE-ID.
Press
.The base screen will display the 15 digit Base ID code
for approximately 30 seconds,the return to the idle screen.
Using the handset keypad,enter the 15 digit base ID code(including
# or *).
Use the softkey to select OK.The screen displays PLEASE WAIT!! and
then SEARCHING FOR BASE.
After about 45 seconds the handset should find the base,The screen
will display the appropriate handset and it is ready for use.if the
handset displays BASE BUSY TRY THE LATER,the base is in use.
5840_CIB_2ATT
2003.3.5
6:11 PM
Page 5
Wall Installation
1
2
figure a
3
4
5
figure b
6
figure c
7
Connect the power cord and
telephone line cord to the underside
of the corded base, as shown
(figure a).
Position the mounting bracket as
shown (figure b).
Feed the telephone line cord through
the hole in the center of the mounting
bracket (figure b), align the bracket
with the base, and slide it into the
hole on the base as shown (figure c).
Lock the mounting bracket in place
(figure d).
Plug the telephone line cord into a
modular wall jack, and mount the
base on the wall (figure e).
a) Align holes on base with mounting
studs on wall jack.
b) Place power cord as shown.
c) Pull base down on mounting studs
until it locks into place.
Plug the power cord into an
electrical outlet not controlled by a
wall switch (figure e).
Use only the power cord supplied
with this product. If you need a
replacement, call 1 800 222–3111.
Follow Steps 3–5 in “Table/Desktop
Installation.”
figure d
figure e
6
5840_CIB_2ATT
2003.3.5
6:11 PM
Page 6
Spare Battery/Power Failure Backup
You can buy a spare handset battery (AT&T Battery 2401, SKU# 91077,
sold separately) and keep it charged in the base at all times.
In the event of a power failure,a fully charged battery in the spare
battery compartment will allow you to make and receive calls from the
cordless handset only for up to 2 1/2 hours.
The spare battery will fully charge in 24 hours.
7
5840_CIB_2ATT
2003.3.5
6:11 PM
Page 7
Belt Clip
You can remove the belt clip from the handset.
a) Slide
down
into
grooves.
b) Press tabs
on belt clip
into slots
on back of
handset to
reattach.
c) To remove,
lift one
side
with your
thumbnail
and push
back.
Headset
You can use this telephone
hands-free when you install
any industry standard 2.5
mm headset . For best
results use an AT&T 2.5 mm
headset.
Plug the headset into the
jack located on the left side
of the handset (under the
small rubber flap). Do not
force the connection,but
make sure the plug fits
securely.
8
5840_CIB_2ATT
2003.3.5
6:11 PM
Page 8
FEATURE SETUP – HANDSET
Feature Setup Menu
Press the softkey under
Setup menu. Use
features,then select
or
to enter the Feature
to choose
to save your choice.
NOTE: If you wait more than 20 seconds
¥without
pressing a key, the handset returns to
the idle screen.
If you receive an incoming call while in
¥NOTE:
feature setup, the phone automatically exits the
menu to take the call.
Set Time
You can choose to set the time manually, or you
can allow it to be set automatically with incoming
Caller ID information.
1 Press
.
2 Press
until the screen displays
▲
3
4
▼
Press
. The screen displays the
current time setting. Use
to move
the cursor, and use the keypad to change a
digit. Select
.
Press
to save the displayed time.
NOTE: To set up the answering system clock,
¥please
see ANSWERING SYSTEM OPERATION on
page 51 in this manual.
9
5840_CIB_2ATT
2003.3.5
6:11 PM
Page 9
Clock Mode
You can choose to display the time when the phone
is idle at the handset,or you can turn this feature off.
The default setting is .
1 Press
.
2 Press
until the screen highlights
▲
▼
3
Press
. The screen displays
4
5
Press
Press
or
.
to save the displayed setting.
10
5840_CIB_2ATT
2003.3.5
6:11 PM
Page 10
Sound Select
This telephone uses the latest acoustic receiver design,
providing you with four different sound quality settings.
During a call, you can adjust the quality of the sound.
Pressing
repeatedly will cycle you through
four different responses.
NOTE: The mid-boost setting is hearing-aid
¥compatible.
BASS – Low frequency sounds enhanced.
MID – Mid-range sounds enhanced.
TREBLE – High frequency sounds enhanced.
NATURAL – No frequency enhancement.
NOTE: This feature is available only on the
¥handset,
not on the speakerphone or optional
headset.
11
5840_CIB_2ATT
2003.3.5
6:11 PM
Page 11
Ringer Volume
Adjust the volume of the handset ringer. Setting the
volume so that no bars show on the graph turns the
ringer off.
1 Press
, then
until the screen
highlights
.
2 Press
.
3 Press
when
is
highlighted. The screen displays
4
5
Press
or
to hear samples of
ring volumes.
Press
to save the displayed setting.
NOTE: Ringer Volume and Vibrate settings are
¥independent.
Adjusting Ringer Volume does not
affect Vibrate.
12
5840_CIB_2ATT
2003.3.5
6:11 PM
Page 12
Ringer Melody
The Ringer Melody sets which ringer you hear when
you have an outside call. The Ringer Melody default
setting is
; there are eight Ringer Melody selections.
1 Press
, then
until the screen
highlights
.
2 Press
, then
until the screen
highlights
.
3 Press
. The screen displays
▲
4
5
13
▼
Press
or
to display desired
setting. A sample of the displayed setting is
played briefly.
Press
to save the displayed setting.
You will hear a confirmation tone.
5840_CIB_2ATT
2003.3.5
6:11 PM
Page 13
Vibrate Control
When this feature is on,the handset vibrates when you
have an incoming call. The default setting is
.
1 Press
, then
until the screen
highlights
.
2 Press
, then
until the screen
highlights
.
3 Press
. The screen displays
4
5
Press
Press
or
.
to save the displayed setting.
Vibrate and Ringer Volume settings are
¥NOTE:
independent. Adjusting Vibrate does not affect
Ringer Volume.
14
5840_CIB_2ATT
2003.3.5
6:11 PM
Page 14
Low Batt Tone
You can set the handset to sound a tone when battery
power is low, or you can turn the tone off. Default
setting is .
1 Press
, then
until the screen
highlights
.
2 Press
, then
until the screen
highlights
.
3 Press
The screen displays
4
5
15
Press
Press
or
.
to save the displayed setting.
5840_CIB_2ATT
2003.3.5
6:11 PM
Page 15
Range Tone
You can set the handset to sound a tone when you are
approaching the range limit, or you can turn this tone
off. The default setting is .
1 Press
, then
until the screen
highlights
.
2 Press
, then
until the screen
highlights
.
3 Press
The screen displays
4
5
Press
Press
or
.
to save the displayed setting.
16
5840_CIB_2ATT
2003.3.5
6:11 PM
Page 16
Keypad Tone
When this feature is on,each key press makes a sound.
The default setting is .
1 Press
, then
until the screen
highlights
.
2 Press
, then
until the screen
highlights
.
3 Press
The screen displays
4
5
17
Press
Press
or
.
to save the displayed setting.
5840_CIB_2ATT
2003.3.5
6:11 PM
Page 17
Set Contrast
You can adjust the screen contrast for easy viewing.
1 Press
, then
until the screen
highlights
.
2 Press
, then
until the screen
highlights
.
3 Press
The screen displays
4
5
Press
or
to increase or
decrease contrast.
Press
to save the displayed setting.
18
5840_CIB_2ATT
2003.3.5
6:11 PM
Page 18
Language Setting
You can set each registered handset so the display
appears in English, Spanish or French. The default
setting is
.
1 Press
, then
until the screen
highlights
.
2 Press
, then
until the screen
highlights
.
3 Press
The screen displays
▲
4
5
19
Press
language.
Press
▼
to highlight the desired
to save the displayed setting.
5840_CIB_2ATT
2003.3.5
6:11 PM
Page 19
FEATURE SETUP – BASE
Ringer Volume
Setting the volume so that no bars show on the graph
turns the ringer off.
1 Press
. Use
to highlight
, then press
.
2
3
4
▲
▼
▲
▼
Highlight
, then press
.
Press
to reduce volume,press
to increase volume. At the lowest setting,the
base will not ring when a call comes in.
Press
to save the displayed setting.
20
5840_CIB_2ATT
2003.3.5
6:11 PM
Page 20
Ringer Melody
1
2
3
4
21
Press
. Use
, then press
to highlight
.
▲
▼
▲
▼
Highlight
, then press
.
Press
or
to scroll through
eight melodies and hear samples.
Press
to save the displayed setting.
5840_CIB_2ATT
2003.3.5
6:11 PM
Page 21
Dial Mode (Tone/Pulse)
This phone comes set for touch tone dialing. If you
have dial pulse (rotary) service, you must set the dial
mode to
.
1 Press
. Use
to highlight
, then press
.
2
3
4
Highlight
Press
Press
▲
▼
▲
▼
, then press
.
or
.
to save the displayed setting.
22
5840_CIB_2ATT
2003.3.5
6:11 PM
Page 22
Contrast
1
2
3
4
23
Press
. Use
, then press
to highlight
.
▲
▼
▲
▼
Highlight
, then press
.
Press
or
to decrease or
increase screen contrast.
Press
to save the displayed setting.
5840_CIB_2ATT
2003.3.5
6:11 PM
Page 23
Language
1
2
3
4
Press
Highlight
Press
language.
Press
. Use
, then press
or
to highlight
.
▲
▼
▲
▼
then press
.
to highlight desired
to save the displayed setting.
24
5840_CIB_2ATT
2003.3.5
6:11 PM
Page 24
TELEPHONE OPERATION
Make a Call
At the Handset
1
2
Press
, then dial the number
— OR —
Dial the number, then press
.
To end the call,press
or place the handset
in the base.
Answer a Call
At the Handset
1
2
Press
to answer a call.
To end the call,press
or place the handset
in the base.
At the Base
1
2
25
Press
to answer a call.
To end the call,press
again.
5840_CIB_2ATT
2003.3.5
6:11 PM
Page 25
Volume
Handset
You can adjust the volume of what you hear through
the handset during a conversation by pressing
or
on the right side of the handset. You will hear a
special tone when you reach the highest or lowest
setting.
Base Speaker
Press VOLUME
or VOLUME
to adjust the base
speaker volume while on a call. You will hear a special
tone when you reach the highest or lowest setting.
26
5840_CIB_2ATT
2003.3.5
6:11 PM
Page 26
Handset Speakerphone
When the handset speakerphone is activated, you
can use the phone hands-free. Stand the handset on
a flat surface (not in the base) and continue your
conversation.
E: For best performance, use the handset
¥sNpOeaTkerphone
in a quiet location with the handset
facing you from no more than four feet away.
Make a Call
1
2
Press
, then dial the number
— OR —
Dial the number, then press
.
To end the call,press
— OR —
Place the handset in the base.
Answer a Call
1
2
Press
to answer a call.
To end the call,press
— OR —
Place the handset in the base.
Switch Between Handset and Speakerphone
While on a call you can press
to switch to
speakerphone. While on a speakerphone call,press
to return to the handset.
press
while you are on the
¥NspOeaTkeE:rpIfhoyou
ne, you will flash the call and switch
to the handset earpiece.
27
5840_CIB_2ATT
2003.3.5
6:12 PM
Page 27
Base Speakerphone
You can use the base speakerphone to answer calls,or
to make calls from the Caller ID log.
Make a Call
1
2
3
Press
, then
until the screen
highlights
.
Press
, then
or
to
select the Caller ID record you want to dial.
Press
to dial the displayed number
— OR —
Choose a new dialing option (see below).
Dialing Options
1
While a call record is displayed,press
,
then select
.
2 Use
or
to highlight the number
the way you want to dial it.
For example:
5551212
15551212
9085551212
19085551212
Then,press
to dial the
or
displayed number.
The number of dialing options (up to four) available
for each call displayed depends on the format of the
original call.
Answer a Call
1
2
Press
to answer a call.
To end the call,press
again.
28
5840_CIB_2ATT
2003.3.5
6:12 PM
Page 28
Redial
The last ten phone numbers dialed at the handset
are stored in redial memory.
1
2
3
Press
then press
or
to scroll through the numbers in redial
memory.
Press
or
to dial the highlighted
number.
Press
to end the call.
Save a Redial Number
1
2
3
4
Press
.
Press
or
until the screen
displays the number you want to dial,then
press
.
Press
. The screen displays
.
Using the chart on page 42,enter the name
associated with the redial number, then press
. The screen displays
and gives a confirmation tone.
Delete a Redial Number
1
2
3
4
29
Press
.
Press
or
until the screen
displays the number you want to delete.
Press
.
Press
. You will hear a confirmation
tone.
5840_CIB_2ATT
2003.3.5
6:12 PM
Page 29
Flash/Call Waiting
If you subscribe to Call Waiting service with your local
telephone service provider, you can answer a new
incoming call without losing your current call.
Handset
1
2
Press
/
to connect to the new call
when you receive a call-waiting signal.
Press
/
again to return to the
original call.
other phone
¥NcoOmTpEa:nyUsesubscriber/ servictoes,access
as described by
your provider.
Base
1
2
Press
to connect to the new call when
you receive a call-waiting signal.
Press
again to return to the original
call.
: Use
to access other phone company
¥NsuObTscEriber
services, as described by your provider.
30
5840_CIB_2ATT
2003.3.5
6:12 PM
Page 30
Mute
Handset
1
During a telephone conversation, mute the
handset microphone by pressing
.
The other party will be unable to hear
anything on your end. The screen displays
2
To return to two-way conversation,press
again.
Base
Press
on the base to prevent the other party
from hearing you,the screen displays
. Press
again to return to two-way
conversation.
31
5840_CIB_2ATT
2003.3.5
6:12 PM
Page 31
Hold
Handset
is on hold, the screen displays
¥NOTE: When a.call
If the clock feature is on, this
message will be displayed for five seconds, then
return to the clock display with H on top of the
screen.
After five minutes, the handset will ring to remind
you there’s a call on hold. If you do not answer
the ring, the call will be disconnected.
1
2
While on a call,press
. You can now
use the intercom if you wish (see page 38).
To return to the call,press
again.
Base
1
2
While on a call,press
. You can now
use the intercom if you wish (see page 38).
To return to the call,press
again.
32
5840_CIB_2ATT
2003.3.5
6:12 PM
Page 32
Temporary Tone Dialing
If you have dial pulse (rotary) service, you can change
from dial pulse to touch tone dialing during a call.
1 Make the call,and wait until it is connected.
2 Press
. Keys pressed after this send
touch tone signals.
3 After you hang up, the phone automatically
returns to dial pulse (rotary) service.
33
5840_CIB_2ATT
2003.3.5
6:12 PM
Page 33
DISPLAY SCREEN MESSAGES
SCREEN DISPLAYS:
WHEN:
You have an incoming phone call (without
Caller ID).
You have an incoming call from [
], for example
. Once an
intercom call is underway, the handsets
will show the icons of the participating
parties; the base will show
.
The handset battery is low.
Another phone on this line is in use.
Both this phone and another phone on this
line are in use.
The handset is out of range.
The base refuses to accept the handset,
either because it is in use by six handsets,
or the handset registrations on the base
have been deleted.
The handset has finished
and has made the link.
Another device of the phone system is
using the telephone line; for example,if
the base is using the line,the handsets will
all show this message.
[
]
The number of distinct unanswered calls
with Caller ID which have not been
viewed in the calls log.
A call on hold has been on hold for five
minutes;pick up the call again.
The base is being powered by the spare
battery rather than by AC from a wall
outlet; check that the base is properly
plugged into a working electrical outlet.
34
5840_CIB_2ATT
2003.3.5
6:12 PM
Page 34
HANDSET ICONS
THIS ICON:
INDICATES
Line In Use indicator
On steadily with no number next to it when another
phone on this line is in use.
On steadily with one or more numbers next to it,
indicating which extensions are using the line.
For example,
indicates that Handset 1 and
Handset 2 are on an outside call.
Intercom indicator
On steadily with the extension numbers cur rently on
an intercom call. For example,
indicates that the
Base and Handset 2 are on an intercom call.
Battery indicator
When the handset is removed from the charger, this
lets you know the level of charge in the battery pack,
from Full (
) to Empty (
).
Cycles (Low, Medium,and Full) when Handset battery
is charging.
Flashes when a low battery condition is detected.
Ringer Off indicator
is displayed when the ringer is turned off.
E
Enhanced Mode indicator
On steadily when active handset is in Enhanced
mode. The handset will enter Enhanced mode
automatically when in an area with interference.
M
Mute indicator
On steadily when the handset microphone is muted.
H
Hold indicator
On steadily when the line is on hold.
Handset Registration indicator
is displayed when a handset is either not registered,
or searching for the base unit.
0–6
35
Handset indicator
Number is displayed to show which handset is in use.
5840_CIB_2ATT
2003.3.5
6:12 PM
Page 35
BASE ICONS
THIS ICON:
INDICATES
Ringer Off indicator
is displayed when the ringer is turned off.
Battery indicator
Cycles (Low, Medium,and Full) when a battery pack
is charging in the spare battery compartment.
BASE LIGHTS
LIGHT
STATUS:
INDICATES:
IN USE
on
Handset or base is on a call
IN USE
flashing
Extension is in use
SPEAKER
on
Speakerphone is in use
SPEAKER
flashing
HOLD function is activated
ON/OFF
on
Answering system is on
ON/OFF
off
Answering system is off
CHARGING
on
Handset is in the base charging
PLAY/STOP
flashing
New messages in this mailbo x
PLAY/STOP
on
Old or reviewed messages in
this mailbox
PLAY/STOP
off
No messages in this mailbox
36
5840_CIB_2ATT
2003.3.5
6:12 PM
Page 36
TONES AND WHAT THEY MEAN
TONE:
INDICATES:
Three quick beeps
Battery charge is low
One beep
Handset registration is complete
— OR —
A programming command is successfully
completed
One long beep
Indicates an error in programming
— OR —
Handset is out of range of the base
37
5840_CIB_2ATT
2003.3.5
6:12 PM
Page 37
INTERCOM OPERATION
Intercom Calls
If you have more than one handset (AT&T 5800,
purchased separately) registered with your 5840 base,
you can make intercom calls between handsets.
From Base to All Handsets
1
2
Press
Press
then press
on the base.
until
.
is highlighted,
From Base to Selected Handset
1
2
Press
on the base.
Press
until the desired handset is
highlighted, then press
.
From Handset to Base
1
Press
2
3
Press
Press
press
, then press
until
is highlighted.
.
until
is highlighted,then
.
From Handset to Handset
1
2
3
Press
, then press
until
is highlighted.
Press
.
Press
until the desired handset is
highlighted,then press
.
From Handset to Base/Handset(s)
1
2
3
Press
, then press
is highlighted.
Press
.
Press
until
then press
.
until
is highlighted
38
5840_CIB_2ATT
2003.3.5
6:12 PM
Page 38
Answering Intercom
At handset, press
.
At base, automatically answered.
End Intercom
At handset, press
At base, press
.
.
Answer an Incoming Call While on an
Intercom Call
If an incoming call is received while you are using the
intercom, you will hear a beep and the screen will
display call information as usual for 15 seconds.
To answer the incoming call,press
handset or
on the base.
39
on either
5840_CIB_2ATT
2003.3.5
6:12 PM
Page 39
Blind Call Transfer
If you have installed additional AT&T 5800 handsets
(purchased separately) with your 5840 telephone, you
can transfer a call from one handset to another.
From the Handset
1
2
Press
, then use
to highlight
where you want the call transferred.
When the desired destination is highlighted,
press
to transfer the call.
From the Base
1
2
Press
or
, then use
to
highlight where you want the call transfer red.
Press
.
NOTE: An unanswered call will ring back to the
¥originating
handset or base if not answered
within 30 seconds.
Announced Call Transfer
1
2
3
4
5
6
Press
Press
to put the call on hold.
, then use
to highlight
.
Press
, then use
to highlight
call destination,then press
again.
When the handset or base answers,announce
the caller.
Press
on the handset or
on
the base to end the call.
Press
(on the receiving handset) or
on the base to pick up the call
on hold.
40
5840_CIB_2ATT
2003.3.5
6:12 PM
Page 40
Conference Calling
1
2
41
If one handset is already on a call, you can
connect a second handset to the call by
pressing
on the second handset
— OR —
If you are on a call and have a second call on
hold, press
to add the held call to the
conference call.
Disconnect either or both handsets by
pressing
.
5840_CIB_2ATT
2003.3.5
6:12 PM
Page 41
PHONE BOOK
This telephone can store up to 50 telephone numbers
and names. Each number can be up to 32 digits long
and each name can be up to 16 characters.
Store a Number and Name in Phone Book
1
Enter the number you want to store. The
screen displays the number you enter. To
delete a digit,press
/
; to clear the
screen,press and hold
/
.
2
Press
3
Use the keypad and the chart on page 42 to
enter the name
4
. The screen displays
To add a space,press
. To delete a
character press
.
Press
. The screen displays
42
5840_CIB_2ATT
2003.3.5
6:12 PM
Page 42
Keypad Characters
Dial
Key
1
2
3
Presses
4
5
&
’
,
.
1
A
B
C
a
D
E
F
G
H
J
6
7
b
c
2
d
e
f
3
I
g
h
i
4
K
L
j
k
l
5
M
N
O
m
n
o
6
P
Q
R
S
p
q
r
T
U
V
t
u
v
8
W
X
Y
Z
w
x
y
0
*
#
43
8
9
s
7
z
9
5840_CIB_2ATT
2003.3.5
6:12 PM
Page 43
Dial a Number in Phone Book
1
Press
. The screen displays
▲
2
Press
or
to scroll through
memory in alphabetical order
— OR —
Enter the first letter of a name (then
or
, if necessary) to display the name
you’re searching for
▲
3
▼
▼
— OR —
Press
, then enter the first few letters
of the name you’re searching for and press
again.
Press
or
to dial the displayed
number.
44
5840_CIB_2ATT
2003.3.5
6:12 PM
Page 44
Edit a Number/Name in Phone Book
1
Press
. The screen displays
▲
2
Press
or
to scroll through
memory in alphabetical order
— OR —
Enter the first letter of a name (then
or
, if necessary) to display the name
you’re searching for
▲
3
4
5
6
45
▼
▼
— OR —
Press
, then enter the first few letters
of the name you’re searching for and press
again.
Press
twice. The handset displays
Press
or
, depending on
which you want to edit.
Press
to move the cursor to the
character or digit you want to edit,then enter
the corrections as needed. Press
or
to toggle between functions if
necessary.
Press
to save changes. The screen
will display the updated entr y.
— OR —
Press
to exit without saving.
5840_CIB_2ATT
2003.3.5
6:12 PM
Page 45
Delete a Number/Name in Phone Book
1
Press
. The screen displays
▼
▲
2
Press
or
to scroll through
memory in alphabetical order
— OR —
Enter the first letter of a name (then
or
, if necessary) to display the name
you’re searching for
▼
▲
3
— OR —
Press
, then enter the first few letters
of the name you’re searching for and press
again.
Press
. The handset displays
4
Press
5
To delete only the displayed name and
number, press
— OR —
To delete all records,press
. The
screen displays
6
To delete all records,press
without deleting,press
. The screen displays
. To exit
.
46
5840_CIB_2ATT
2003.3.5
6:12 PM
Page 46
CALLER ID OPERATION
If you subscribe to Caller ID service with your local phone service
provider, this phone stores all incoming calls (up to 50 at the handset,
up to 99 at the base) with valid Caller ID information in the calls log.
Name, number, time and date information can all be stored,if they are
sent with the call. Calls are automatically stored in the order they are
received,with call “1”stored as the most recent call. The calls log
number appears next to the phone number on the screen display.
NOTE: The number of new calls displayed on each handset and
¥the
base may not be the same. For example, if you answer a call
on Handset 2, it will not consider that call information as new,
but the base and other handsets will.
If Caller ID information has been received you can see a summary of
the calls log on the idle screen. After you review all new call records,
the NEW CALLS indicator will go off.
47
5840_CIB_2ATT
2003.3.5
6:12 PM
Page 47
Review Calls Log
1
Press
, then press
. The screen
displays the most recent call in the calls log.
2
Press
records.
or
to scroll through call
Store Record in Phone Book
1
2
3
While the call information is displayed,press
, then use
to scroll through dialing
options, if you want to change the format.
For example:
555-1212
1-555-1212
908-555-1212
1-908-555-1212
— OR —
While the call information is displayed,press
to scroll through dialing options if you
want to change the format,then press
.
For example:
555-1212
1-555-1212
908-555-1212
1-908-555-1212
Press
.
The screen displays
.
48
5840_CIB_2ATT
2003.3.5
6:12 PM
Page 48
Display Dial
While you are reviewing the calls log, you can dial a
number displayed on the screen. You can change the
format of the number using “Dialing Options”below.
Press
or
to dial the displayed number.
Dialing Options
1
While a call record is displayed,press
, then select
.
2 Use
or
to highlight the
number the way you want to dial it.
For example:
5551212
15551212
9085551212
19085551212
Press
,
or
to dial the
displayed number.
The number of dialing options (up to four) available
for each call displayed depends on the format of the
original call.
49
5840_CIB_2ATT
2003.3.5
6:12 PM
Page 49
Remove Call Records
Removing a Specific Call Record
1
2
Press
, then press
.
Press
or
to scroll through call
records until the call you want to delete is
displayed.
3
Press
displays
4
Press
. The call record is deleted and
you hear a confirmation tone.
, then press
. The screen
Removing All Records
1
2
Press
, then press
.
Press
, then press
. The screen
displays the most recent call record.
3
Press
4
Press
press
. The screen displays
to delete all call records or
to exit without deleting.
50
5840_CIB_2ATT
2003.3.5
6:12 PM
Page 50
ANSWERING SYSTEM OPERATION
AT THE BASE
Audible Indicators
This system gives you voice prompts for feature
operations and voice confirmations when you press a
button or complete an operation.
Turn Answering System On/Off
Press
to turn the system on or off. When
the system is turned on, you will hear “Machine on”
and the ON/OFF light will be lit.
If you turn the system on,it works using the default
setting and pre-recorded outgoing announcements.
Set the Clock
1
2
3
4
5
6
Make sure the answering system is on.
Press
. The system announces the
clock setting,then announces “To change
clock, press
.”
Press
.
Press
until the system announces the
correct day, then press
.
Press
until the system announces the
correct hour, then press
.
Press
until the system announces the
correct minutes,then press
. The
system announces the current clock setting.
You can press and hold
¥NOTE:
advance the minutes setting by tens.
51
to
5840_CIB_2ATT
2003.3.5
6:12 PM
Page 51
About Mailboxes
This answering system has three voice mailboxes. Callers using a touch
tone phone can select the mailbox in which their messages will be
recorded by pressing , , or . All other messages will be recorded
in Mailbox 1.
About Announcements
•
•
•
•
•
You can record up to two different announcements — one for
normal answering and one for when you’ve set the system to play
the announcement only.
Use normal answering when you want the system to record callers’
messages. Use Announce Only when you want to give information
to callers without accepting messages.
If you choose not to record an announcement, the system answers
with a pre-recorded announcement.
The normal answering pre-recorded announcement says: “Hello.
Please leave a message after the tone.” The Announce Only
pre-recorded announcement says: “We’re sorry, messages to this
number cannot be accepted.”
By setting Announce Only to on or off, you decide which
announcement your callers will hear when the system answers a
call (the system comes set for normal answering, with Announce
Only turned off). See “Change announce only” on page 55 to
change your announcement selection.
52
5840_CIB_2ATT
2003.3.5
6:12 PM
Page 52
Record Your Announcement
If you have assigned different mailboxes
¥toNOTE:
different people, be sure to tell callers in your
announcement to press , , or
to leave a
message in the appropriate mailbox.
1
Press
until you hear “Change
announcement.”
2 Press
. After you hear “Now recording”
followed by a beep,speak toward the base to
record an announcement up to 90 seconds
long.
3 Press any PLAY/STOP button to stop recording.
The system plays back your recorded message.
To review your announcement at any time:
1 Press
until you hear “Change
announcement.”
2 Press any PLAY/STOP button.
To delete your announcement:
Press
during announcement playback.
The system will use the pre-recorded
announcement until you record a new one.
53
5840_CIB_2ATT
2003.3.5
6:12 PM
Page 53
Answering System Feature Setup
You can set up one feature at a time,or you can set up
a feature and then move on to set up another feature.
1 Make sure the answering system is on.
2 Press and release
until you hear the
system announce the feature you want to set.
Refer to the Feature Summary chart on page 55
for a description of the features and your choices.
3 Press
to hear the feature’s settings.
4 Press
to move on to the next feature
or press a PLAY/STOP button to exit Feature
Setup.
54
5840_CIB_2ATT
2003.3.5
6:12 PM
Page 54
FEATURE SUMMARY
Default settings indicated by
SYSTEM ANNOUNCES:
DESCRIPTION/DIRECTIONS:
“Change remote access code”
50 *
Set the remote access code you
will use to access features and
functions of the answering system
from a touch tone phone. The code
can be changed to any two-digit
number from 40–99.
“Change message alert”
Off *
On
When Message Alert is turned on,
the base beeps once every 10
seconds when new messages have
been received.
“Change announce only”
Off *
On
When you turn Announce Only on,
callers hear your announcement,
but cannot leave a message.
“Change call screening”
On *
Off
When you turn Call Screening off,
you will not hear incoming messages
as the caller leaves them.
“Change number of rings”
2
4*
6
Toll Saver
Choose how many times the phone
will ring before the system answers
a call. With Toll Saver active,the
system answers after two rings
when you have new messages and
after four rings when you have no
new messages.
*.
Exit Feature Setup at any time by pressing a PLAY/STOP
¥NOTE:
button.
55
5840_CIB_2ATT
2003.3.5
6:12 PM
Page 55
Listen to, Save & Delete Messages
The system automatically saves your messages until
you delete them,and can store approximately 15
minutes of messages,memos, and announcements
(up to a maximum of 99 messages).
Before playing a message,the system announces the
day and time it was received. While the message plays,
the message window displays the number of the
message. After playing the last message in a mailbox,
the system announces “End of messages.” If the
system has less than five minutes of recording time
left,it announces the remaining time.
Play Messages
Press a PLAY/STOP button to play messages in a
mailbox. Press again to stop playback.
Delete Messages
•
•
•
Press
to delete the messa ge that’s
playing.
To delete all messages in a mailbox,press
, then the appropriate PLAY/STOP
button.
You cannot delete a message until it’s been
reviewed;deleted messages cannot be
recovered.
56
5840_CIB_2ATT
2003.3.5
6:12 PM
Page 56
Adjust Playback Volume
Press VOLUME
or VOLUME
to adjust the base
speaker volume while playing back messages.
Call Screening/Intercept
1
2
3
57
Make sure the answering system and call
screening are ON, and set the message playback
volume control above level 1 so you can hear
the caller’s message.
If you decide to take the call,press
on
the handset.
If you pick up an extension phone during the
announcement and the announcement does not
stop right away, press and release the telephone
switchhook at the extension.
5840_CIB_2ATT
2003.3.5
6:12 PM
Page 57
Record a Memo
You can record a memo up to four minutes long to store as
an incoming message.
1 Press and release
.
2 Press a PLAY/STOP button to select a mailbox
for the memo. After the beep,speak toward
the microphone. The message window
displays the length of your memo.
3 To stop recording,press the PLAY/STOP
button again.
58
5840_CIB_2ATT
2003.3.5
6:12 PM
Page 58
MESSAGE WINDOW DISPLAY
WINDOW DISPLAYS:
WHEN:
No messages in any mailbox
–
Total number of messages in all mailboxes,
or current message number during
message playback.
↔
–
Counting
Memory is full,or total number of
messages is 99
to
, flashing
– , steadily for
one second
–
Duration of announcement or memo
recording (maximum announcement
length is 90 seconds)
Length of recording is more than 99
seconds
Indicates volume level selected when
VOLUME
or VOLUME
is pressed
Current Remote Access Code (40–99)
while setting
Announce Only mode
or
, steadily for
one second
↔ normal display
Displayed when any setting is changed
from on or off
Clock needs to be set
System is answering a call or is in remote
operation
, flashing
59
System is in programming mode or
initializing
5840_CIB_2ATT
2003.3.5
6:12 PM
Page 59
ANSWERING SYSTEM OPERATION
AT TOUCH TONE PHONE
Connect with the Answering System
You can access many features of this system remotely from a touch
tone phone.
1 Dial your telephone number.
2 When the system answers,enter your Remote Access Code
(preset to 50). The system beeps once and then announces
the number of new messages.
3 Enter a remote command (see “Remote Access Commands”on
page 61).
4 Press
to exit remote operation.
Voice Menu
The system has voice prompts to help you with remote operation.
Press
to hear the menu while remotely connected to the
answering system.
60
5840_CIB_2ATT
2003.3.5
6:12 PM
Page 60
REMOTE ACCESS COMMANDS
FUNCTION:
COMMAND:
Play messages
in a mailbox
Press , then enter the appropriate
mailbox number( , , or ). The system
plays new messages. If there are no new
messages,the system plays old messages.
Repeat a message
Press
while message is playing;each
press backs up another message.
Skip a message
Press
while message is playing;each
press advances another message.
Stop
Press
Save messages
Hang up.
Delete message
Press
Review announcement
Press
; system plays announcement,
then beeps.
Record announcement
Press
; after beep, record
announcement,press
to stop.
System plays back announcement.
Record memo
Press
; then mailbox number where
you want memo recorded;speak after
beep;press
to exit.
End remote access call
Press
Turn system off
Press
; the system announces,
“Machine off.” Press
again to turn
the system back on.
Turn system on
When system is off, it answers after 10
rings and announces,“Please enter your
remote access code.” Enter your remote
access code.
.
while message is playing.
.
If no key is pressed within 10 seconds of entering remote
¥NOTE:
access code, the voice menu will be announced. After the voice
menu announcement, if no key is pressed within 20 seconds, the
remote access call will automatically end.
61
5840_CIB_2ATT
2003.3.5
6:12 PM
Page 61
BATTERIES
Battery Life
A fully charged battery provides an average talk time of about eight
hours,or standby time of five days.
NOTE: Talk time and standby time may vary depending on
¥operating
conditions.
Battery Indicator
Ten to fifteen minutes before the battery charge indictor gets too low
to operate the handset,an empty battery icon (
) will flash on the
screen, you’ll hear three short tones, and the screen will display
.
If you continue to use the handset without charging the battery or
replacing it (you can purchase a spare batter y separately),the handset
will turn off automatically when there is no longer sufficient power.
Monitor the battery icon to make sure your battery is
¥NOTE:
sufficiently charged.
Charge the Handset Battery Pack
•
•
•
After a low battery indicator, the handset battery needs to be
charged.
Place the handset in the base so the CHARGING light goes on.
The battery pack is typically charged in eight hours.
If you repeatedly get a low battery indicator, even after eight hour s
of charging, the battery should be replaced. Use only AT&T Battery
2401,SKU# 91077.
CAUTION: Charge the battery provided with or identified for
use with this product only in accordance with the instructions
and limitations specified in the User’s Manual, Part 1.
62
5840_CIB_2ATT
2003.3.5
6:12 PM
Page 62
Spare Battery
You can buy a spare handset battery (AT&T Battery 2401, SKU# 91077,
sold separately) and keep it charged in the base at all times.
In the event of a power failure,a fully charged battery in the spare
battery compartment will allow you to make and receive calls from the
cordless handset only for up to 2 1/2 hours.
The spare battery will fully char ge in 24 hours.
63
5840_CIB_2ATT
2003.3.5
6:12 PM
Page 63
Replace the Handset Battery Pack
1
2
Install the handset battery.
Use only AT&T Battery 2401,SKU# 91077.
Charge the handset battery.
• Place the handset in the base.
• Charge the battery for at least 12 hours. After the first
charge,the battery will charge in eight hours.
a) Remove battery
compartment cover by
pressing on indentation
and sliding downward.
b) Align the contacts and
place the battery pack in
the battery compartment.
c) Replace cover by
sliding it on its
track up over
battery case until
it snaps firmly
into place.
64
5840_CIB_2ATT
2003.3.5
6:12 PM
Page 64
IN CASE OF DIFFICULTY
If you have difficulty operating this phone,try the suggestions below.
For Customer Service,visit our website at www.telephones.att.com
or call 1 800 222–3111. Please retain your receipt as your proof
of purchase.
PHONE
PROBLEM
SOLUTION
If the phone does not
• Make sure the power cord is plugged
work at all, check these
into the base and an electrical outlet
items first:
not controlled by a wall switch.
• Make sure the telephone line cord is
plugged firmly into the base unit and
the telephone jack.
• Make sure the battery pack is installed
correctly.
If the above suggestions do not solve the problem,try re-initializing the
handset and base (see “To re-initialize the handset and base”on page 66).
PROBLEM
SOLUTION
If you have no dial tone: Check all the previous suggestions.
If you still do not hear a dial tone,
disconnect the phone and try another
phone in the same jack. If there is
no dial tone on that phone either, the
problem is probably in your wiring or local
service.
PROBLEM
SOLUTION
If you hear a long
tone when you try to
use the handset:
• The handset and base are not
communicating properly. You might be
out of range. Move closer to the base
and try again.
• If moving closer to the base does not
help, follow the directions “To
re-initialize the handset and base”on
page 65. PH
65
5840_CIB_2ATT
2003.3.5
6:12 PM
Page 65
PHONE
PROBLEM
SOLUTION
To re-initialize the
handset and base:
1 Disconnect the power to the base.
2 Remove spare battery pack (if installed).
3 Remove the handset battery pack.
4 Wait at least 15 seconds.
5 Insert the handset battery pack.
6 Connect the power to the base.
PROBLEM
SOLUTION
If you hear noise or
interference when
using the phone:
• You may be out of range. Move closer to
the base.
• Household appliances plugged into the
same circuit as the base can sometimes
cause interference. Try moving the
appliance or the base to another outlet.
• The layout of your home or office may
be limiting the operating range. Try
moving the base to another location,
preferably on an upper floor.
• Using the handset near household
appliances (microwaves,computers,
televisions,stereos,etc.) can sometimes
cause interference. Move away from
appliances while using the handset.
PROBLEM
SOLUTION
If your handset displays ENTER BASE ID
or NO BASE SUBSCRIPTION
It is necessary to register the handset
to the base.Please follow instructions
under REGISTER THE HANDSET on
page 5 of this manual.
66
5840_CIB_2ATT
2003.3.5
6:12 PM
Page 66
PHONE
PROBLEM
SOLUTION
If the phone does not
ring when you receive
a call:
• Make sure the ringer is on.
• Make sure the telephone line cord is
connected firmly to the base and the
telephone jack.
• Make sure the AC adapter is plugged
firmly into an electrical outlet not
controlled by a wall switch.
• You might be too far from the base;move
closer.
• You might have too many extension
phones on your telephone line to allow
all of them to ring. Try unplugging some
of them.
PROBLEM
SOLUTION
If your telephone
misdials:
• If you have dial pulse (rotary) service,
you’ll need to set the dial method to
. Follow the instructions under
“Dial Mode (TONE/PULSE)”in the
FEATURE SETUP section of this manual.
• If you have touch tone service and you
hear clicks while you are dialing, you’ll
need to set the dial method to
.
Follow the instructions under “Dial Mode
(TONE/PULSE)”in the FEATURE SETUP
MENU – BASE section of this manual.
PROBLEM
SOLUTION
If you are unable to
operate special
telephone services or
other equipment
requiring touch tone
signals:
If you have dial pulse (rotary) service,
follow the directions under “Temporary
Tone Dialing”in the TELEPHONE
OPERATION section of this manual.
67
5840_CIB_2ATT
2003.3.5
6:12 PM
Page 67
CALLER ID
PROBLEM
SOLUTION
If the caller’s name or
phone number is not
displayed:
• Make sure you subscribe to Caller ID
service from your local telephone
company.
• Make sure the battery is charged.
• Caller ID service might not work when
the phone is connected to a Private
Branch Exchange (PBX).
PROBLEM
SOLUTION
If the caller’s name or
phone number is not
displayed during
Call Waiting:
• You should call your service provider to
confirm that you subscribe to combined
Caller ID with Call Waiting service.
• Caller ID information received during
Call Waiting is displayed only on the
handset that is in use.
• Make sure the battery is charged.
68
5840_CIB_2ATT
2003.3.5
6:12 PM
Page 68
ANSWERING SYSTEM
PROBLEM
SOLUTION
If messages are
incomplete:
• If a caller leaves a very long message,
part of it may be lost when the system
disconnects the call after four minutes.
• If the caller pauses for more than seven
seconds,the system stops recording and
disconnects the call.
• If the system’s memory becomes full
during a messa ge,the system stops
recording and disconnects the call.
PROBLEM
SOLUTION
If you have difficulty
hearing messages:
Check the volume setting.
PROBLEM
SOLUTION
If callers are unable to
leave messages in
Mailbox 2 or 3:
Make sure caller is dialing from a touch
tone phone.
PROBLEM
SOLUTION
If the system does not • Make sure that the answering system
answer after the correct is on.
number of rings:
• If Toll Saver is on,the number of rings
changes to two when you have new
messages waiting.
• In some cases,the system may be
affected by the ringing system used by
the local telephone company.
• If the memory is full or the system is off,
the system answers after 10 rings.
69
5840_CIB_2ATT
2003.3.5
6:12 PM
Page 69
ANSWERING SYSTEM
PROBLEM
SOLUTION
If
appears in the
message window:
You need to reset the clock. The answering
system clock is not set automatically with
incoming Caller ID information.
PROBLEM
SOLUTION
If the system does not
respond to commands
from a remote touch
tone phone:
• Make sure you are calling from a touch
tone phone. When you dial a number,
you should hear tones. If you hear clicks
instead,the phone is not a touch tone
telephone.
• The answering system may not detect
the Remote Access Code while your
announcement is playing. Try waiting
until the announcement is over before
entering the code.
• Make sure you enter your Remote Access
Code correctly.
• There may be noise or interference on
the phone line you are using. Press keys
firmly.
PROBLEM
SOLUTION
If your outgoing
announcement isn’t
clear:
• When you record your announcement,
make sure you speak in a normal tone of
voice, about nine inches from the base.
• Make sure there is no “background”noise
(TV, music,etc.) while you are recording.
70
5840_CIB_2ATT
2003.3.5
6:12 PM
Page 70
DEFAULT SETTINGS
DEFAULT SETTINGS
FUNCTION:
DEFAULT SETTING:
Dial Method
Tone
Handset Volume
2
Ringer Volume
3
Ringer Melody
1
Key Tone
ON
Remote Access Code
50
Clock
ON
Message Alert
OFF
Announce Only
OFF
Number of Rings
4
Call Screening
ON
Vibrate
OFF
71
5840_CIB_2ATT
2003.3.5
6:12 PM
Page 71
TECHNICAL SPECIFICATIONS
TECHNICAL SPECIFICATIONS
RF Frequency Band
(Handset to base)
2400 MHz – 2483.5 MHz
RF Frequency Band
(Base to handset)
5725 MHz – 5850 MHz
Number of Channels
95
Channel Spacing
864 kHz
Handset Transmit Power +23 dBm
Base Transmit Power
+29 dBm
Sensitivity
–93 dBm
Modulation
GFSK
Operating Temperature 0°C – 50°C
Base Unit Voltage
(AC Voltage,60Hz)
96 – 127 Vrms
Base Unit Voltage
(DC Adapter Output)
7 Vdc @ 1A
Handset Voltage
(2-Cell NiMH Battery)
2.0 – 3.0 Vdc,1400mAh
72
5840_CIB_2ATT
2003.3.5
6:12 PM
Page 72
INDEX
A
D
46,50
Announce Only 52, 55, 59, 71
announcements 52, 56
default settings 71
46
53, 54
Dial Mode 22
Dial Tone 4, 65
dialing options 28,48,49
Display Screen Messages 34
B
Base 1, 25, 28, 31, 39,40, 66, 72
Base icons 36
Base lights 36
Base ringer 20, 21
20–24
Base Unit See Base
11
battery 4, 7, 35, 62–64, 72
Beeps 37, 55, 57,60, 61
Belt Clip 8
C
Calls Log 2
32
Call Screening 55
Call Waiting 2
Caller ID 2, 28, 47
51, 54
28, 49,50
3, 59,70
42
10
10
conference call 41
18, 23
73
E
45,46
Empty (
) 35, 62
English 19
42
42 ,4 8
F
Feature Setup Menu 9
44
30
French 19
Full (
) 35
G
38
H
Handset 1, 2, 8, 11, 25–27, 31, 35,
38–41, 62, 65, 66, 71, 72
Handset battery See battery
Handset Icons 35
Handset ringer 12–14
Headset 8, 11
Hold 32, 35, 41
32,40
5840_CIB_2ATT
2003.3.5
6:12 PM
Page 73
I
N
Idle Screen 9
38,40
interference 66,70
K
17
11
47
NiMH Battery pac k 1
noise or interference 66,70
45
O
25, 27, 29, 39–41
9
51
L
19, 24
long tone 65
Low Batt Tone 15
low battery 35, 62
62
M
42
memos 56
9
Message Alert 55
message window 56,58
Message Window Display 59
messages 56
messages are incomplete 69
31
11
mute 31
31
31
P
25, 27, 29, 39, 49, 57
Power Cord 1, 3, 6, 65
Power Failure Backup 7
pulse (rotary) 22, 33, 67, 68
22, 67
R
range limit 16
range tone 16
re-initialize 66
53, 58
redial 29
29
Remote Access Commands 61
13
Ringer Melody 13, 21, 71
13, 21
Ringer Volume 12, 14,20, 71
12,20
74
5840_CIB_2ATT
2003.3.5
6:12 PM
Page 74
S
V
9, 42, 45,48
9
sound quality settings 11
11
Spanish 19
Spare Battery 7, 63
Speaker 26, 57
25, 27–29, 39,40, 49
Speakerphone 11, 27, 28
standby time 62
subscriber services 30
Vibrate 12, 14, 71
T
talk time 62
Technical Specifications 72
Telephone line cord 1, 3
46
Time 9,10, 47, 56
51
Toll Saver 55
tone 15, 16, 26, 71
33
Tone/Pulse 22
22
Tones 37, 62
touch tone 22, 33, 52, 55, 67, 68
11
75
14
Voice Mailboxes 52
voice prompts 51,60
volume 12,20, 26, 57, 59, 71
VOLUME
26, 57, 59
VOLUME
26, 57, 59
X
40