1
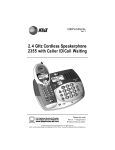
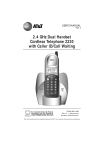
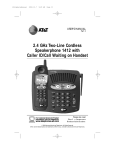
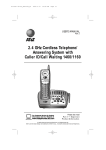
USER’S MANUAL
Part 2
2.4 GHz Cordless Telephone
2320 with Caller ID/Call Waiting
Please also read
Part 1 — Important
Product Information
© 2002 Advanced American Telephones. All rights reserved.
AT&T and the Globe Design are trademarks of AT&T Corp. licensed to Advanced AmericanTelephones.
Visit us at www.telephones.att.com
© 2002 Advanced American Telephones.
All rights reserved.
AT&T and the Globe Design are
trademarks of AT&TCorp. licensed to
Advanced American Telephones.
Printed in China. Issue 2AT&T 08/02
CONTENTS
BEFORE YOU BEGIN . . . . . . 1
Parts List . . . . . . . . . . . .
About Caller Identification
(Caller ID). . . . . . . . . .
About the Call Log . . . . .
About Adding Handsets . .
...1
...2
...2
...2
INSTALLATION . . . . . . . . . . 3
Base Installation . . . . . . . . . . 3
Headset . . . . . . . . . . . . . . . . 5
FEATURE SETUP . . . . . . . . . 6
Feature Setup Menu . . . . . . . 6
Ring Volume . . . . . . . . . . . . . 7
Ring Pattern . . . . . . . . . . . . . 8
Key Click . . . . . . . . . . . . . . . 9
Handset Name . . . . . . . . . . 10
Language Setting . . . . . . . . . 11
Clear Message Waiting . . . . . 12
Set Dial Method . . . . . . . . . 13
TELEPHONE OPERATION . . . 14
Idle Screen . . . . . . . . . . . . . 14
Make a Call . . . . . . . . . . . . 14
Answer a Call . . . . . . . . . . . 14
Handset Volume . . . . . . . . . 14
Call Timer . . . . . . . . . . . . . . 15
Speakerphone . . . . . . . . . . . 15
Redial . . . . . . . . . . . . . . . . . 16
Flash/Call Waiting . . . . . . . . 16
Mute . . . . . . . . . . . . . . . . . 16
Page/Handset Locator . . . . . 17
Temporary Tone Dialing . . . .17
Display Screen Messages . . . 18
Display Screen Icons . . . . . . 19
Base Lights . . . . . . . . . . . . . 20
Tones and What They Mean . 21
INTERCOM OPERATION . . . 22
Intercom Calls . . . . . . . . . .
Answer an Incoming Call
While on an Intercom Call
Transfer a Call . . . . . . . . . .
Forward a Call . . . . . . . . .
Conference Calling . . . . . .
. 22
.
.
.
.
23
23
24
25
PHONE BOOK . . . . . . . . . . 26
Store a Number and Name
in Phone Book . . . . . . .
Dial a Number
in Phone Book . . . . . . .
Edit a Number/Name
in Phone Book . . . . . . .
Delete a Number/Name
from Phone Book . . . . .
. . 26
. . 29
. . 30
. . 32
CALLER ID OPERATION . . . 34
Review Call Log . . .
Remove Call Records.
Store a Call Record
in Phone Book. . .
Display Dial . . . . . .
. . . . . . 35
. . . . . 36
. . . . . . 38
. . . . . . 39
BATTERIES . . . . . . . . . . . . 40
Battery Life . . . . . . . . . . . . . 40
Charge the Handset
Battery Pack . . . . . . . . . . .40
Replace the Handset
Battery Pack . . . . . . . . . . . 41
IN CASE OF DIFFICULTY . . . 42
DEFAULT SETTINGS . . . . . . 46
TECHNICAL
SPECIFICATIONS . . . . . . 47
INDEX . . . . . . . . . . . . . . . 48
BEFORE YOU BEGIN
Parts List
Your box should include:
This User’s
Manual
Quick
Start
Guide
Power
adapter
Handset
Telephone
line cord
NiCd battery pack
Base unit
1
BEFORE YOU BEGIN
About Caller Identification (Caller ID)
This product has a Caller ID with Call Waiting feature that works with
service from your local phone service provider.
Caller ID with Call Waiting lets you see who’s calling before you answer
the phone, even when you’re on another call.
You may need to change your phone service to use this feature.
Contact your phone service provider if:
• You have both Caller ID and Call Waiting,but as separate
services (you may need combined service)
• You have only Caller ID service,or only Call Waiting service
• You don’t subscribe to any Caller ID or Call Waiting services.
You can use this product with regular Caller ID service,and you can
use this product’s other features without subscribing to either Caller ID
or combined Caller ID with Call Waiting service.
There are fees for Caller ID services,and they may not be available in
all areas.
This product can provide information only if both you and the caller
are in areas offering Caller ID service,and if both telephone companies
use compatible equipment.
About the Call Log
This phone assigns each incoming call a number from 1 to 50.
The most recent call will have the lowest number. When the memor y
is full,the oldest call information is deleted to make room for new
incoming call information. See CALLER ID OPERATION, beginning
on page 34, for more details.
If you answer a call before call information appears on the screen,
it will not appear in the call log.
About Adding Handsets
This product is compatible with the AT&T 2300 Expansion Handset.
You may use up to three 2300 units (purchased separately) with this
phone. Follow the instructions provided with the additional handset(s)
for installation and registration.
2
INSTALLATION
Base Installation
NOTE: Install the base unit away from electronic equipment,
¥such
as personal computers, television sets or microwave ovens.
Avoid excessive heat, cold, dust or moisture.
1
Connect the power cord to the base and an electrical
outlet not controlled by a wall switch.
Standard
electrical
outlet
2
Connect the
telephone
line cord.
Modular
telephone
jack
Use only the power cord supplied with this product.
If you need a replacement,call 1 800 222–3111.
3
3
Install the handset battery.
Use only AT&T Battery 3301,SKU# 91076.
a) Remove battery
compartment cover by
pressing on indentation
and sliding downward.
b) Plug the battery pack
connector into handset.
Place the battery pack and
wires in the compartment.
c) Replace cover by
sliding it on its
track up over
battery case until
it snaps firmly
into place.
4
5
4
Charge the handset battery.
• Place the handset in the base.
• Charge the battery for at least 12 hours. After the first
charge,the battery will charge in eight hours.
Check for dial tone.
• After the batteries are charged, lift the handset and press
; you should hear a dial tone.
Headset
You can use this telephone
hands-free when you install
any industry standard 2.5 mm headset (purchased separately).
For best results use an AT&T
2.5 mm headset.
Plug the headset into the jack located on the right side of
the handset (under the small rubber flap). Do not force the connection,
but make sure the plug fits securely.
5
FEATURE SETUP
Feature Setup Menu
When you follow the directions to “Clear
¥NOTE:
Message Waiting”or “Set Dial Method” you change
settings for ALL registered handsets.All other
features must be set separately at each handset .
(See “About Adding Handsets”on page 2 for
details about additional handsets.)
Press
to enter the Feature Setup menu. Use
or
to choose features,then press
to save your
choice.
Press
at any time to return to the previous menu
item. Press
repeatedly to exit Feature Setup and
return to the idle screen.
If you wait more than 30 seconds
¥NOTE:
without pressing a key, the handset returns to
the idle screen.
NOTE: If you receive an incoming call while in
¥Feature
Setup, the phone automatically exits the
menu to take the call.
6
Ring Volume
Adjust the volume of the handset ringer. Setting volume
to turns the ringer off and displays the ringer off icon
( ) on screen. The default setting is .
1
Press
2
Press
3
Press
4
Use the keypad to enter a volume setting
( – )
— OR —
Press
or
to hear samples of ring volumes.
Press
to save desired setting.
5
. The screen displays
or
until the screen displays
. The screen displays
7
Ring Pattern
The external ring pattern sets which ringer you hear
when you have an outside call. The internal ring
pattern sets which ringer you hear when you have
an intercom call from another registered handset (if
installed). External ring pattern default setting is ;
intercom ring pattern default setting is .
1 Press
. The screen displays
2
Press
3
Press
4
Press
or
then
to choose
or
.
Use the keypad to enter a ring pattern
selection ( – )
— OR —
Press
or
to display desired setting.
A sample of the displayed setting is played
briefly.
Press
to save displayed setting. You will
hear a confirmation tone.
Press
to exit ring pattern setup.
5
6
7
8
or
until the screen displays
. The screen displays
Key Click
When this feature is on,each key press makes a sound.
Default setting is .
1
Press
2
Press
3
Press
4
Press
or
to select .
— OR —
Press
or
to select
.
Press
to save the displayed setting.
5
. The screen displays
or
until the screen displays
. The screen displays
9
Handset Name
You can customize the handset to display a name or
word of your choice (up to 16 characters) in place of
•
on the idle screen and
•
(during intercom calls).
The default setting is
.
1
Press
2
Press
3
Press
4
Use the keypad and the chart on page 27 to
enter a handset name.
Press
to save the displayed name.
5
. The screen displays
or
until the screen displays
. The screen displays
To change the name again at any time,simply repeat
Steps 1-5.
10
Language Setting
You can set each registered handset so the display
appears in English, Spanish, or French. The default
setting is
.
1
Press
. The screen displays
2
Press
3
Press
. The screen displays the cur rent
language
4
Press
or
to scroll through the
language choices.
5
Press
to save the displayed language.
The display will show in the language you have
selected.
or
until the screen displays
11
Clear Message Waiting
If you subscribe to telephone company voice mail
service,and the message waiting indicator remains
on even after you have reviewed all messages, follow
the directions below to turn off the indicator.
These steps will clear the message waiting
¥NOTE:
indicator for ALL registered handsets (See “About
Adding Handsets”on page 2 for details about
additional handsets.)
1
Press
. The screen displays
2
Press
3
Press
4
Press
to confirm and remove the message
waiting indicator
— OR —
Press
to exit the menu without clearing
the message waiting indicator.
or
until the screen displays
. The screen displays
The screen returns to
12
Set Dial Method
NOTE: When you change the dial method setting
¥ALL
registered handsets are affected. (See “About
Adding Handsets”on page 2 for details about
additional handsets.)
This phone comes set for touch tone (
) dialing.
If you have dial pulse (rotary) service, you must set
the dial method to
.
1
Press
2
Press
3
Press
4
Press
or
to select
— OR —
Press
or
to select
.
Press
to save the displayed setting.
5
. The screen displays
or
until the screen displays
. The screen displays
13
TELEPHONE OPERATION
Idle Screen
When the handset is within range of the base and not
on a call or in Feature Setup mode,the screen displays
If you assign a name to the handset (see “Handset
Name”on page 10),that name will be displayed
instead of
.
Make a Call
1
2
Press
, then dial the number
— OR —
Dial the number, then press
.
To end the call,press
again
— OR —
Place the handset in the base.
Answer a Call
1
2
Press
to answer a call.
To end the call,press
again
— OR —
Place the handset in the base.
Handset Volume
You can adjust the volume of what you hear through
the handset during a conversation by pressing
VOLUME
or VOLUME . While you adjust the
volume level,the screen display is similar to
You will hear 3 short beeps when you
¥NOTE:
have reached the minimum or maximum le vels
of volume.
14
Call Timer
When the handset is on a call,the screen displays a
timer whether the call is external or intercom.
For example:
Speakerphone
When the handset speakerphone is activated, you can
use the phone hands-free. Stand the handset on a flat
surface (not in the base) and continue your
conversation.
Make a Call
1
2
Press
, then dial the number
— OR —
Dial the number, then press
.
To end the call,press
again
— OR —
Place the handset in the base.
Answer a Call
1
2
Press
to answer a call.
To end the call,press
again
— OR —
Place the handset in the base.
Switch Between Handset and Speakerphone
While on a call you can press
to switch to
speakerphone. While on a speakerphone call,press
to return to the handset.
15
Redial
The last five phone numbers dialed at the handset
are stored in redial memory.
Press
repeatedly until the number you want to
call is displayed,then press
to dial the displayed
number
— OR —
Press
, then press
repeatedly until the
number you want to call is displayed. Press
to
dial the displayed number.
Flash/Call Waiting
If you subscribe to Call Waiting service with your local
telephone service provider, you can answer a new
incoming call without losing your current call.
1
2
Press
to connect to the new call when
you receive a call-waiting signal.
Press
again to return to the original call.
NOTE: Use
to access other phone
¥company
subscriber services, as described
by your provider.
Mute
16
1
During a telephone conversation, mute
the handset microphone by pressing
.
The other party will be unable to hear anything
on your end. The screen is similar to
2
To return to two-way conversation,press
again.
Page/Handset Locator
NOTE: If you have installed additional AT&T
¥2300
handsets (purchased separately) with your
2320 base, pressing
registered handsets.
will signal ALL
Page the handset(s) from the base by pressing
. The handset will sound a repeating
tone.
To cancel the pa ge press any key on the handset,or
on the base,or wait 60 seconds.
Temporary Tone Dialing
If you have dial pulse (rotary) service, you can change
from dial pulse to touch tone dialing during a call.
1 Make the call,and wait until it is connected.
2 Press
. Keys pressed after this send touch
tone signals.
3 After you hang up, the phone automatically
returns to dial pulse (rotary) service.
17
DISPLAY SCREEN MESSAGES
SCREEN DISPLAYS:
WHEN:
You have an incoming phone call
(without Caller ID).
You have an incoming intercom call.
The screen also shows the calling
location (for example,
).
This handset is not registered to
the base.
A new uncharged battery has been
installed. Place the handset in the
base to charge the batter y.
The handset battery is recharging
and may not have enough power for
normal operation yet.
The battery is low.
The phone line is disconnected.
Check the line jacks.
Another phone on this line is in use.
The handset is out of range.
You have unreviewed voice mail
messages. (You must subscribe to
Voice Mail service from your local
telephone service provider.)
18
DISPLAY SCREEN ICONS
THIS ICON:
INDICATES:
The handset ringer is turned off.
(See “Ring Volume”on page 7
for details.)
The battery needs to be recharged.
The Caller ID information displayed
is an unreviewed call.
NEW
There are unreviewed calls in the call log.
19
BASE LIGHTS
LIGHT:
STATUS:
INDICATES:
CHARGING
on
Handset is in the base
charging
IN USE
on
Handset is on a call
IN USE
flash
Phone line is disconnected
IN USE
fast flash
Handset registration is in
progress
20
TONES AND WHAT THEY MEAN
TONE:
INDICATES:
Three quick beeps
Handset is out of range of the base
One double beep
Handset has failed to register
with base
Two double beeps
Handset battery char ge is low
One beep
Handset registration is complete
21
INTERCOM OPERATION
The features in this section work only
¥ifNOTE:
you have installed additional AT&T 2300
Expansion Handsets with your AT&T 2320
Telephone.(See “About Adding Handsets”on
page 2 for more information.)
Intercom Calls
If you have more than one handset (AT&T 2300,
purchased separately) registered with your 2320 base,
you can make intercom calls between handsets.
1 Call one handset from another by pressing
.
2 Use
or
to scroll through the list of
registered handsets.
3 Press
when the desired handset is
highlighted.
4 To answer, press
on the second handset.
Call All
You can send an intercom call signal to all registered
handsets at once. The first handset to answer the call
will be connected.
1 Press
on the handset
2 Use
or
to highlight
.
3 Press
.
4 To answer, press
at another handset.
Only the first handset to respond will be
connected to the intercom call.
22
Answer an Incoming Call While on an
Intercom Call
If an incoming call is received while you are using the
intercom, you will hear a double beep and the screen
will display call information as usual for 15 seconds.
To answer the incoming call,press
on either
handset. The intercom call is automatically ended.
To end the intercom call without answering the
incoming call,press and hold
. The screen displays
Transfer a Call
If you have installed additional AT&T 2300 handsets
(purchased separately) with your 2320 telephone, you
can transfer a call from one handset to another and
announce the caller.
1
Press
. Your call is put on hold and the
screen displays.
2
Use
or
to scroll through the list of
registered handsets.
Press
when the desired handset is
highlighted.
When someone at the other handset answers
the call,announce the caller. Then press
or place the handset in the base
to complete the transfer.
— OR —
To have a conference call, pess and hold
.
3
4
23
Forward a Call
If you have installed additional AT&T 2300 handsets
(purchased separately) with your 2320 telephone, you
can forward a call from one handset to another without
announcing the caller.
1
Press
. Your call is put on hold and the
screen displays
2
Use
or
to scroll through the list of
registered handsets.
Press
when the desired handset,or
is highlighted. The call will ring at the
selected handset(s),and
will be displayed.
3
If a forwarded call is not answered within 30 seconds,
the call will automatically be returned to the forwarding
handset. The screen displays
or the CID
information (if available). If the returned call is not
answered within 20 seconds, the call is automatically
disconnected.
24
Conference Calling
1
If one handset is already on a call, you can
connect a second handset to the call by
pressing
on the second handset
— OR —
You can first intercom another handset by
pressing
.,then
when the desired
handset is highlighted. After the other handset
answers the intercom call, press and hold
.
2 Disconnect either or both handsets by
pressing
.
25
PHONEBOOK
This telephone can store up to 50 telephone numbers
and names. Phone book entries are stored in alphabetical
order. Storing a number and name in one handset
automatically stores it in ALL registered handsets. (See
“About Adding Handsets”on page 2 for details about
additional handsets.)
Store a Number and Name in Phone Book
1 Press
26
. The screen displays
2
Press
. The screen displays
3
Press
4
Press
5
Press
6
Enter the telephone number (up to 24 digits).
. The screen displays
to select
. The screen displays
. The screen displays
Dial
Key
1
7
Press
8
Enter a name connected with this number,
using the chart below. You must store a name
with each number.
2
. The screen displays
3
Presses
4
5
6
7
8
9
r
s
y
z
1
A
B
C
2
a
b
c
D
E
F
3
d
e
f
G
H
I
4
g
h
i
J
K
L
5
j
k
l
M
N
O
6
m
n
o
P
Q
R
S
7
p
q
T
U
V
8
t
u
v
W
X
Y
Z
9
w
x
*
?
!
/
(
)
#
’
,
-
.
&
0
To erase a digit or character press either
(DELETE) or
Pressing
will move the cursor one space to the right.
.
27
9
Press
. The screen returns to
— OR —
If the phone book is already full,the screen
displays
10 Begin at Step 4 to enter another telephone
number and name
— OR —
Press
to exit.
28
Dial a Number in Phone Book
1 Press
. The screen displays the first
phone book entr y.
Skip to Step 5.
— OR —
Press
. The screen displays
2
Press
. The screen displays
3
Press
4
Press
. The screen displays the first phone
book entry and looks similar to
5
Enter the first letter of the stored name you
want to find,then scroll using
or
— OR —
Press or to scroll through phone book entries.
6
When you find the number you want to call,
press
to dial the displayed number.
The screen display is similar to
. The screen displays
29
Edit a Number/Name in Phone Book
1 Press
. The screen displays the first
phone book entry.
Skip to Step 5.
— OR —
Press
2
Press
3
Press
4
Press
. The screen displays the first phone
book entry and looks similar to
5
Enter the first letter of the stored name you
want to find,then scroll using
or
— OR —
Press
or
to scroll through phone book
entries.
When you find the number you want to edit,
press
to enter edit number mode.
6
30
. The screen displays
. The screen displays
. The screen displays
7
Press
(DELETE) to erase a digit
— OR —
Press and hold
(DELETE) to delete
entire telephone number.
8 Press
to store the edited number, and
enter name mode.
9 Press
(DELETE) to erase a character
— OR —
Press and hold
(DELETE) to delete entire
name.
10 Press
to confirm the change. The screen
displays the edited entry.
11 Press
; the screen returns to
31
Delete a Number/Name from Phone Book
1 Press
. The screen displays the first
phone book entr y.
Skip to Step 5.
— OR —
Press
. The screen displays
32
2
Press
. The screen displays
3
Press
4
Press
. The screen displays the first phone
book entry and looks similar to
5
Enter the first letter of the stored name you
want to find,then scroll using
or
— OR —
Press or to scroll through phone book entries.
. The screen displays
6
When you find the number you wish to
delete,press
(DELETE) to delete the
entire displayed entry. The screen display is
similar to
7
Press
. The entry is deleted and the screen
displays the next phonebook entry.
33
CALLER ID OPERATION
If you subscribe to Caller ID service with your local phone service
provider, this phone stores all incoming calls with valid Caller ID
information in the call log. Name, number, time and date information
can all be stored,if they are sent with the call. Calls are automatically
stored in the order they are received,with call “1”stored as the most
recent call. The call log number appears next to the phone number on
the screen display. New (unreviewed) call information includes
in the display.
If an incoming phone number matches one already in the call log,
the old call information will be deleted when the new call information
is saved in the call log.
If an incoming phone number matches an existing phone book entry,
the caller’s name will appear in the call log as you saved it in the
phone book (not as it was sent with incoming Caller ID information).
For example
Caller IDinformation is shared by ALL registered
¥NOTE:
handsets. (See “About Adding Handsets”on page 2 for more
information.) Removing a call record from one handset also
removes it from the others.
If Caller ID information has been received you can see a summary of the
call log on the idle screen. For example if the screen displays
there are two calls in the call log,and one of them is unreviewed (
Press
34
).
at any time to exit the call log and return to the idle screen.
Review Call Log
1
Press
. The screen displays the most
recent call in the call log and displays if
the call is new.
Skip to Step 3.
—OR—
. The screen displays
Press
2
Press
. The screen displays the most
recent call in the call log and displays if
the call is ne w.
3
Press
or
to scroll through the call log.
35
Remove Call Records
Removing a Specific Call Record
1
Press
. The screen displays the most
recent call in the call log and displays if
the call is new.
Skip to Step 3.
—OR—
. The screen displays
Press
36
2
Press
. The screen displays the most
recent call in the call log and displays if
the call is new.
3
4
Press
or
to scroll through the call log.
When you find the call record you want to
remove,press and release
(DELETE).
The call record is removed and the next call
record is displayed.
Remove All Call Records
1
Press
. The screen displays the most
recent call in the call log and displays if
the call is new.
Skip to Step 3.
—OR—
. The screen displays
Press
2
Press
. The screen displays the most
recent call in the call log and displays if
the call is new.
3
Press and hold
displays
4
Press
to delete all call records.
The screen returns to the idle screen:
(DELETE). The screen
— OR —
Press
to exit without deleting.
The screen returns to the last viewed record.
37
Store a Call Record in Phone Book
You can store a number received by Caller ID in the
telephone phone book. For call records without a valid
name you will be prompted to enter a new name. You
can follow the directions in “Edit a Number/Name in
Phone Book” on page 30 to assign a name to the
number. A call record with no valid phone number
cannot be stored in the phone book.
1
Press
. The screen displays the most
recent call in the call log and displays if
the call is new.
Skip to Step 3.
—OR—
Press
38
. The screen displays
2
Press
. The screen displays the most
recent call in the call log and displays if
the call is new.
3
4
Press
or
to scroll through the call log.
When you find the call record you want to
three
store in the phone book,press
times. The call record is saved in the phone
book and you can continue to review the
call log.
Display Dial
While you are reviewing the call log, you can dial a
number displayed on the screen.
1
Press
. The screen displays the most
recent call in the call log and displays if
the call is new.
Skip to Step 3.
—OR—
. The screen displays
Press
2
Press
. The screen displays the most
recent call in the call log and displays if
the call is new.
3
Press
4
When the phone number you want to call is
displayed,press
. The phone
automatically dials the number and the screen
displays
or
to scroll through the call log.
Dialing Options
While a call record is displayed,press
until the
screen displays the number the way you want to dial it.
For example:
19085551212
9085551212
15551212
5551212
The number of dialing options available for each call
displayed depends on the format of the original call.
39
BATTERIES
Battery Life
Battery life depends on how far the handset is from the base,and other
environmental conditions.
For optimum performance, charge your handset on the
¥NOTE:
base every night.
Charge the Handset Battery Pack
•
•
•
•
•
This battery should remain charged for up to three days. A fully
charged battery provides an average talk time of about seven hours.
The battery pack needs charging when:
– The battery icon (
) flashes,
– A warning tone sounds,or
– The screen displays
when idle.
Place the handset in the base so the CHARGING light goes on.
The battery pack is typically charged in eight hours. For best
results,the initial charge should be 12 hours.
You can keep the battery fully charged by returning the handset to
the base after each use.
If you repeatedly get a low battery indicator, even after eight hour s
of charging,the battery should be replaced. Use only AT&T Battery
3301,SKU# 91076.
CAUTION: Charge the battery provided with or identified for
use with this product only in accordance with the instructions
and limitations specified in the User’s Manual, Part 1.
40
Replace the Handset Battery Pack
1
Install the handset battery.
Use only AT&T Battery 3301,SKU# 91076.
a) Remove battery
compartment cover by
pressing on indentation
and sliding downward.
b) Plug the battery pack
connector into handset.
Place the battery pack and
wires in the compartment.
c) Replace cover by
sliding it on its
track up over battery case until it
snaps firmly into
place.
2
Charge the handset battery.
• Place the handset in the base.
• Charge the battery for at least 12 hours. After the
first charge,the battery will charge in eight hours.
41
IN CASE OF DIFFICULTY
If you have difficulty operating this phone,try the suggestions below.
For Customer Service,visit our website at www.telephones.att.com
or call 1 800 222–3111. Please retain your receipt as your proof
of purchase.
TELEPHONE OPERATION
PROBLEM
SOLUTION
If the phone does not
• Make sure the power cord is plugged
work at all, check these into the base and an electrical outlet
items first:
not controlled by a wall switch.
• Make sure the telephone line cord is
plugged firmly into the base unit and
the telephone jack.
• Make sure the battery pack is installed
correctly.
• If the screen displays
,
place the handset in the base and charge
for at least eight hours.
• If the battery does not charge after eight
hours, replace it with AT&T Battery
3301,SKU# 91076.
PROBLEM
SOLUTION
If you have no
dial tone:
Check all the previous suggestions.
If you still do not hear a dial tone,
disconnect the phone and try another
phone in the same jack. If there is
no dial tone on that phone either, the
problem is probably in your wiring or
local service.
PROBLEM
SOLUTION
If you hear a two-beep
signal when you try to
use the handset:
The handset and base are not
communicating properly. You might
be out of range. Move closer to the base
and try again.
42
TELEPHONE OPERATION
PROBLEM
SOLUTION
If you hear noise or
interference when
using the phone:
• You may be out of range. Move closer to
the base.
• Household appliances plugged into the
same circuit as the base can sometimes
cause interference. Try moving the
appliance or the base to another outlet.
• The layout of your home or office may
be limiting the operating range. Try
moving the base to another location,
preferably on an upper floor.
• Using the handset near household
appliances (microwaves,computers,
televisions,stereos,etc.) can sometimes
cause interference. Move away from
appliances while using the handset.
PROBLEM
SOLUTION
If the phone does
not ring when you
receive a call:
• Make sure the ringer is on.
• Make sure the telephone line cord is
connected firmly to the base and the
telephone jack.
• Make sure the AC adapter is plugged
firmly into an electrical outlet not
controlled by a wall switch.
• You might be too far from the base;
move closer.
• You might have too many extension
phones on your telephone line to allow
all of them to ring. Try unplugging some
of them.
43
TELEPHONE OPERATION
PROBLEM
SOLUTION
If your telephone
misdials:
• If you have dial pulse (rotary) service,
you’ll need to set the dial method to
. Follow the instructions under
“Set Dial Method”in the FEATURE SETUP
section of this manual.
• If you have touch tone service and you
hear clicks while you are dialing, you’ll
need to set the dial method to
.
Follow the instructions under “Set Dial
Method”in the FEATURE SETUP section
of this manual.
PROBLEM
SOLUTION
If you are unable
to operate special
telephone services
or other equipment
requiring touch tone
signals:
If you have dial pulse (rotary) service,
follow the directions under “Temporary
Tone Dialing”in the TELEPHONE
OPERATION section of this manual.
CALLER ID
PROBLEM
SOLUTION
If the caller’s
name or phone
number is not
displayed:
• Make sure you subscribe to Caller ID
service from your local telephone
company.
• Make sure the battery is charged.
• Caller ID service might not work when
the phone is connected to a Private
Branch Exchange (PBX).
44
CALLER ID
PROBLEM
SOLUTION
If the caller’s name
or phone number is
not displayed during
Call Waiting:
• You should call your service provider
to confirm that you subscribe to
combined Caller ID with Call Waiting
service.
• Caller ID information received during
Call Waiting is displayed only on the
handset that is in use. The information
is stored in the Caller ID log on ALL
registered handsets.
• Make sure the battery is charged.
45
DEFAULT SETTINGS
DEFAULT SETTINGS
FUNCTION:
DEFAULT SETTING:
Dial Method
Tone
Handset Volume
3
Ring Volume
3
External Ring Pattern
0
Intercom Ring Pattern
1
Key Click
ON
46
TECHNICAL SPECIFICATIONS
TECHNICAL SPECIFICATIONS
Frequency Range
2400 MHz – 2483 MHz
Channels
95
Channel Spacing
864 kHz
Output Power
23 dBm
Sensitivity
-92 dBm
Modulation
GFSK
Operating Temperature 0°C – 50°C
Base Unit Voltage
(AC Voltage, 60Hz)
96 – 144 Vrms
Base Unit Voltage
(AC Adapter Output)
9 Vdc
Handset Voltage
3.6 – 4.6 Vdc, 600mAh
47
INDEX
18
A
answer a call 14
external 15
18
B
Base Unit 1
F
battery 40–41
forward a call 24
battery icon 40
24
23
11
C
H
24
hands-free 5
call log 34, 35, 38
Handset 1, 6, 8, 10
call record 36, 38–39
handset battery 4, 41
caller’s name or phone
number not displayed 44
Handset Name 10
Call Waiting 16
call-waiting signal 16
handset ringer 7
Handset Volume 14
I
Caller ID 34, 38
18, 42
charged battery 40
18
idle screen 6, 34, 37
incoming call 6, 16, 23
intercom 15
18
conference call 25
intercom calls 22
D
Delete a Number/Name from
Phone Book 32
interference when using
the phone 43
dial 14
K
Dial a Number in Phone Book
29
Key Click 9
dial method setting 13
dialing options 39
Display Dial 39
13
E
Edit a Number/Name in Phone
Book 30
11
erase a character 31
48
key press 9
L
language 11
low battery indicator 40
M
18
message waiting indicator 12
16
mute 16
INDEX
N
NEW 19
no dial tone 42
NiCd battery pac k 1
18
18
O
two-beep signal when
you try to use handset 42
U
unable to operate special
telephone services 44
V
volume 7
18
P
page 17
17
phone book 28, 29, 30, 32, 38
Phone book entries 26
phone does not ring 43
phone does not work at all 42
18
Power adapter 1
power cord 3
13
Q
Quick Start Guide 1
R
Remove All Call Records 37
ring pattern 8
S
Spanish 11
27
Storing a number 26
T
Telephone line cord 1, 3
telephone misdials 44
timer 15
touch tone 17
transfer a call 23
49