Transcript
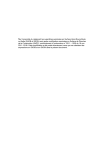
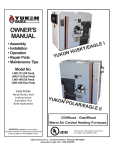
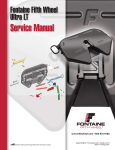
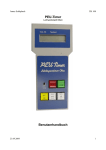
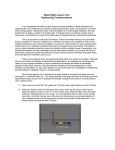
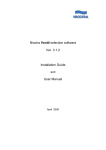
ASSEMBLY INSTRUCTIONS
Arbor Seat and Back
PLEASE READ COMPLETELY BEFORE BEGINNING ASSEMBLY
CHECK BOX FOR THESE CONTENTS
•
•
•
•
Seat assembly
Back rails (total 3)
Back mounting block (total 2)
Screws (total 18)
SEAT AND BACK INSTALLED IN ARBOR
HARDWARE
3” screw (12)
1 5/8” screw (6)
TOOLS YOU WILL NEED
•
•
•
•
•
Philips screwdriver (electric driver recommended)
Small hammer
Tape measure
Pencil
Four 2” nails
BACK ASSEMBLY
STEP 1
•
•
Block narrow end
Back rails
Line up the outer rails to the edge of the back block with the narrow
end pointing upward.
Secure the outer back rails using the 1 5/8” screws. Center the middle
rail and secure using 1 5/8” screws.
SEAT AND BACK TO ARBOR ASSEMBLY
STEP 2
•
•
•
•
•
Determine the height you prefer for the bench seat, usually from 16” to 18” above
ground.
Deduct 4 3/4” from the height and mark that height on each “leg” of the arbor, this
will locate the bottom of the seat support.
Drive nails in each of the arbor posts at the marked places.
Rest the seat on the projecting nails, line it up front and back with the arbor posts.
Hold the seat firmly to the arbor post and drive 3” screws into all four posts.
4”
STEP 3
•
•
•
4 3/4”
Position back 4” above seat, use books or blocks to support the back and
steady in place
Position outer edge of back blocks flush with the arbor post.
Secure the back to arbor using 3” screws.
Made in USA 2003
LWO Corporation, 3841 N. Columbia Blvd., Portland, OR 97217 (503) 286-5372 (800) 459-8718 www.arboria.com