1
X009-U
Assembly Instructions
1/6
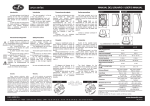
X009-U UNIVERSAL 9” INSTALLATION KIT
Kit Assembly Instructions
NOTE: This Universal Mounting Kit is intended for custom vehicle installation
by professional installers with advanced fabrication skills. It is not intended to
be a simple bolt-in installation. Additional parts and materials may be required.
X009-U
Assembly Instructions
2/6
X009-U
Assembly Instructions
3/6
X009-U
Assembly Instructions
4/6
Accessory List
Head Unit Box Parts (X009)
X009
X009 Head Unit
X009
X009 Camera Harness
X009-U
OM
USB Extension Cable
Quick Reference Guides
Registration Cards
Alpine
NAVTEQ
Registration Card Registration Card
Universal Installation Kit Parts (G-KTX-009-U)
Head Unit Power Harness
Key Harness
Bluetooth Microphone
Vehicle Mounting Brackets
Head Unit Mounting Brackets
Key Panel
Universal Trim Bezel
Bracket Mounting Hardware
Key Panel Mounting Screws
X009-U
Assembly Instructions
5/6
Kit Assembly Process
1
2
Place the radio brackets on the radio and
note the positioning of the holes. The
larger slotted holes should be on the
bottom side of the radio as shown.
Assemble the radio and vehicle side
brackets using the supplied bracket screws
and washers. Tighten these bolts just
enough so that the brackets can be
repositioned if necessary.
3
Bolt the assembled brackets to the radio
chassis using the supplied 8mm screws.
4
Note that the vehicle-side brackets allow
for easy radio position adjustment during
installation.
X009-U
Assembly Instructions
6/6
Kit Assembly Process (continued)
5
Attach the key panel into the bezel using
the guides on both sides. Turn the keys
towards the front until they snap into place.
7
Plug in the key connection harness with the
“external key unit” label to the key unit and
the 3.5mm “MIC IN” pig tail to the head unit.
Note the pigtail connection for the included
Bluetooth microphone.
Bluetooth
microphone
input
6
Secure the key panel to the bezel using the
three key panel screws provided in the kit.
8
Now the Universal Installation Kit is
assembled and ready for custom installation
in the vehicle. Note that trimming and drilling
of the mounting brackets may be required for
proper installation of this kit*.
*Note: Any modifications to the mounting
bracket may void the bracket’s warranty.
Contact Alpine tech support at 1-800TECH101 if you need assistance.