1
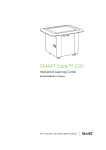
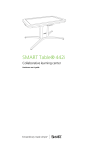
SMART Table® 230i
Hardware user’s guide
Product registration
If you register your SMART product, we’ll notify you of new features and software upgrades.
Register online at smarttech.com/registration.
Keep the following information available in case you need to contact SMART Support.
Serial number:
Date of purchase:
Trademark notice
SMART Table, SMART Board, SMART Exchange, SMART Podium, DViT, SMART Notebook, SMART Document Camera, SMART Sync, smarttech, the SMART logo
and all SMART taglines are trademarks or registered trademarks of SMART Technologies ULC in the U.S. and/or other countries. Windows is either a registered
trademark or trademark of Microsoft Corporation in the U.S. and/or other countries. Mac and Macintosh are registered trademarks of Apple Inc., registered in the U.S. and
other countries. All other third-party product and company names may be trademarks of their respective owners.
Copyright notice
© 2011–2012 SMART Technologies ULC. All rights reserved. No part of this publication may be reproduced, transmitted, transcribed, stored in a retrieval system or
translated into any language in any form by any means without the prior written consent of SMART Technologies ULC. Information in this manual is subject to change
without notice and does not represent a commitment on the part of SMART.
One or more of the following patents: US6326954; US6741267; and US7151533. Other patents pending.
03/2012
Important information
WARNING
l
Failure to follow the installation instructions shipped with your SMART Table® interactive
learning center could result in personal injury and product damage.
l
Ensure that any cables extending across the floor to your SMART product are properly
bundled and marked to prevent a trip hazard.
l
Make sure an electrical socket is near your SMART product and remains easily accessible
during use.
l
Lock the casters before allowing children to use your table.
l
Do not climb (or allow children to climb) on your table. Climbing on your table could result in
personal injury and product damage.
l
To reduce the risk of fire or electric shock, do not expose your SMART product to rain or
moisture.
l
Do not stare (or allow children to stare) directly into the projector’s beam of light.
l
Do not attempt to service the projector other than by performing routine lamp replacement.
Only an authorized service provider should provide service. Aside from the lamp module,
there are no user-serviceable parts inside the unit.
l
Do not remove any screws other than those specified in the lamp replacement instructions.
l
Do not touch or replace the projector lamp (which will be very hot) for at least an hour after
shutdown. Touching the lamp can cause severe burns.
l
Do not puncture, crush, heat or disassemble the remote control battery, expose it to fire or
any liquid, short its terminals, or abuse the battery in any other way because this may cause
the battery to explode or ignite, and could cause a fire or personal injury.
l
If the remote control battery leaks, ensure that you do not get battery fluid in your eye. If you
do, immediately rinse the affected eye with water and seek medical attention.
l
Do not install the remote control battery backward or reverse its polarity. Do not install
battery types other than the one specified in the documentation. Both of these actions can
cause damage to the remote control and can cause a fire or personal injury.
i
IMPOR T A N T IN F OR MA T ION
C A U TI ON
l
Disconnect the power cable only after you turn off the table as documented in this guide and
the indicator lights and fans turn off. Disconnecting the power cable at any other time can
shorten the life of the projector lamp.
l
Do not place cords, boxes or other items on the surface of your table. Doing so can scratch
the surface.
l
Do not place heavy items on the surface of your table or expose it to heat. Doing so can
damage the surface.
l
If your SMART product becomes wet, dry it completely before turning it on.
l
SMART Technologies recommends that you use the remote control to complete only the
procedures documented in this guide. Using the remote control for other purposes may
change the projector’s settings, which were specifically configured for the table.
I MPOR TA N T
l
Do not operate your table’s projector in environments that are higher than 10,000' (3,000 m)
above sea level.
l
Your SMART Table is sensitive to infrared radiation and can interpret bright light as touches.
It could be necessary to turn off or remove any pot lights or other incandescent lighting in the
room and move your table away from bright windows, or close any open blinds or curtains
before using your table.
l
Your table’s surface does not respond to touch until the computer completes its startup
process. Wait 30 to 60 seconds after you turn on your table before you touch the surface.
l
Before you clean your table, turn it off so that you do not inadvertently start applications when
you wipe the surface.
l
Do not place keyboards, mouse devices or other objects on the touch surface. The camera
may interpret these objects as touches if they are placed on the touch surface.
l
This product contains lithium button cell batteries in the computer and in the remote
control (perchlorate material—special handling may apply).
ii
Contents
Important information
i
Chapter 1: Getting started
1
About your SMART Table
How your SMART Table works
What’s included with your SMART Table
Using your SMART Table with other SMART products
Chapter 2: Using your SMART Table
Turning your SMART Table on or off
Using SMART Table software
Using your SMART Document Camera with your table
Chapter 3: Maintaining your SMART Table
Cleaning your SMART Table
Updating the software
Orienting the image
Replacing the projector lamp
Chapter 4: Using the remote control
Locating the remote control
Setting the projector for high altitudes
Replacing the remote control battery
Appendix A: Troubleshooting
Troubleshooting power and connection issues
Setting up your table for troubleshooting touch issues
Restarting SMART Table Activities
Diagnosing basic problems with touch
Remodeling the background
Appendix B: Hardware environmental compliance
Waste Electrical and Electronic Equipment regulations (WEEE directive)
Restriction of Certain Hazardous Substances (RoHS directive)
Batteries
Packaging
Covered electronic devices
China’s Electronic Information Products regulations
U.S. Consumer Product Safety Improvement Act
iii
1
2
3
4
5
6
8
9
11
11
11
12
14
15
16
16
17
19
19
20
21
22
24
27
27
27
27
28
28
28
28
Chapter 1
Getting started
About your SMART Table
How your SMART Table works
What’s included with your SMART Table
The SMART Table USB drive
Power cable
Keys
Projector remote control
Installation instructions
Warranty information
Using your SMART Table with other SMART products
This guide is intended for teachers and application developers. It introduces you to SMART Table
software and explains how to use, maintain and troubleshoot your table.
N OTE
For information on setting up your SMART Table interactive learning center or its accessories, see
the SMART Table 230i textless installation instructions (smarttech.com/kb/170197) included with
your table.
About your SMART Table
Your SMART Table interactive learning center has a
touch-sensitive surface. By touching the surface, students can
create, select, move and resize digital objects. More than one
student can touch the surface at a time. This encourages
collaboration and cooperation as students learn and play together.
Using a Wi-Fi® network connection to a computer with
SMART Sync™ classroom management software, teachers can
observe students’ tabletop activities from a distance, take control
of the table, and capture and print the tabletop image.
1
1
2
3
3
3
4
4
4
4
4
CHAPT ER 1
Getting started
SMART Table software includes interactive applications, learning activities and educational games.
You can also download any of the SMART Table activity packs or applications available on the
SMART Exchange™ website (exchange.smarttech.com) and customize the activities using
SMART Table Toolkit. Install and run the toolkit on your computer and then transfer your activity
packs using a USB drive or SMART Sync software.
You can use your table with other SMART products, including the SMART Document Camera™ and
SMART Notebook™ collaborative learning software, as part of an overall learning solution. For
example, you can introduce a new concept to students on a SMART Board® interactive whiteboard,
and then ask the students to explore the idea in detail using the SMART Table interactive learning
center.
How your SMART Table works
Your table contains five main components:
l
Computer
l
Projector
l
Speakers
l
Camera
l
Surface
The computer runs the SMART Table software, the projector projects the computer’s display onto the
surface, the speakers play the computer’s audio and the camera detects students’ touch on the
surface. Combined, these components allow students to interact with SMART Table software.
The computer, projector, speakers and camera are inside the SMART Table cabinet, and the surface
is on the SMART Table top.
Your SMART Table uses technology based on DViT® (Digital Vision Touch) technology to detect
multiple touches. Other SMART products use DViT technology, including select SMART Board
interactive whiteboards, SMART Board interactive displays and SMART Podium™ interactive pen
displays.
2
CHAPT ER 1
Getting started
What’s included with your SMART Table
Your table includes the following items:
l
SMART Table USB drive
l
Power cable
l
Keys
l
Projector remote control
l
Installation instructions
l
Warranty information
The SMART Table USB drive
The USB drive contains the SMART Table Toolkit software as
well as links to user’s guides. Use the USB drive to do the
following:
Install the SMART Table Toolkit on a Windows® or Mac
l
computer
l
Install new activity packs and applications on your SMART Table
l
Update any SMART Table software
N OTES
l
The SMART Table USB drive can store up to 4GB of files (preloaded software takes up
approximately half of the storage capacity).
l
If you lose your SMART Table USB drive, you can order a new one from your reseller, or you
can use another USB drive to transfer files to your table. The USB drive you use must be
formatted for use with Windows operating systems.
Power cable
The right-angled power cable provided with your SMART Table is
specific to your region and should work with outlets in your
school.
Connect the power cable to the SMART Table following the
instructions in the SMART Table 230i textless installation
instructions (smarttech.com/kb/170197).
3
CHAPT ER 1
Getting started
If you must extend the power cable across the floor, ensure it’s properly marked to prevent a trip
hazard. SMART Technologies recommends that you connect the power cable to a power bar rather
than directly to an outlet. If you lose the cable, or if it becomes damaged, contact your support
representative for a replacement.
Keys
The keys allow you to lock the cabinet to prevent unwanted access to the
computer and projector. Store the keys in a convenient, safe location.
Projector remote control
The projector remote control is stored on the inside of the cabinet. You don’t need the remote control
while using the table, but SMART recommends that you keep it inside the cabinet so you can easily
locate it when you need to turn the projector on or off or to adjust the projector’s settings while
servicing the table.
Installation instructions
Follow the SMART Table 230i textless installation instructions (smarttech.com/kb/170197) to
unpack and set up your SMART Table.
Warranty information
Retain the warranty information in case an issue occurs with your SMART Table during the warranty
period.
Using your SMART Table with other SMART
products
The SMART Table complements several SMART products including SMART Board interactive
whiteboards, SMART Sync software and SMART Document Cameras. You can easily transfer files
from your computer directly to the SMART Table using SMART Syncsoftware or a USB drive. You
can connect a SMART Document Camera directly to the SMART Table, allowing students to capture
images in real-time and explore them on the table’s surface.
4
Chapter 2
Using your SMART Table
Turning your SMART Table on or off
Turning on your SMART Table
Turning off your SMART Table
Using SMART Table software
Student mode
Teacher mode
Switching modes without inserting a USB drive
Using your SMART Document Camera with your table
After you set up your SMART Table as documented in the SMART Table 230i textless installation
instructions (smarttech.com/kb/170197) it’s ready to use.
C A U TI ON
Do not leave objects on the table’s surface for extended periods.
N OTE
Your SMART Table is sensitive to infrared radiation and can interpret bright light as touches. It
could be necessary to turn off or remove any pot lights or other incandescent lighting in the room
and move your table away from bright windows, or close any open blinds or curtains before using
your SMART Table.
5
6
6
7
8
8
8
9
9
CHAPT ER 2
Using your SMART Table
Turning your SMART Table on or off
After you set up your SMART Table, you can turn it on or off by following these procedures.
Turning on your SMART Table
g To turn on your table
1. Connect the power cable to an outlet or to a power bar and then turn on the power bar.
N OTE
SMART recommends connecting the power cable to a power bar.
2. Push the Reset button located on the side of your table.
Your SMART Table computer and projector turn on. The computer completes its startup
process, and the SMART Table Activities menu appears.
I MPOR TA N T
Avoid touching the table surface until the projector starts up and an image appears. Because
the table is touch-sensitive even though you cannot see an image, you could disrupt the
start-up process or open activities unintentionally.
6
CHAPT ER 2
Using your SMART Table
Turning off your SMART Table
N OTES
l
You can’t use the Reset button to turn off the SMART Table.
l
If you press the Reset button for more than 30 seconds, the computer restarts but the
projector stays on.
The following procedure shows the correct way to turn off your SMART Table.
g To turn off your table
1. From the SMART Table Activities menu, press
The
.
button moves to another corner.
2. Repeat step 1 for the number of students you’ve set up your table for.
A message appears, informing you that the computer shutdown process will begin in 30
seconds.
C A U TI ON
o
Do not disconnect the power cable or turn off the power bar until after the fans turn off.
Disconnecting the power cable or turning off the power bar at any other time can
shorten the projector lamp's life.
o
To prevent a power surge, wait 60 seconds before plugging in the power cable again.
TIPS
7
o
A chime sound plays when the message first appears. This is useful in situations
where you’re away from the SMART Table and the students accidentally press
.
o
Press Cancel if you accidentally press
.
CHAPT ER 2
Using your SMART Table
Using SMART Table software
SMART Table Activities starts automatically when you turn on the table. The SMART Table
Activities menu has two modes, Student and Teacher.
Student mode
Student mode is the default mode. It enables students to launch activities that were specifically
designed for students in early primary grades.
Teacher mode
Teacher mode appears when you connect a USB drive to one of the USB receptacles located on the
outside of your table. This mode enables you to set the number of students, orient the surface,
synchronize and choose activity packs and applications, and complete other configuration tasks as
documented in this guide.
For more information on SMART Table activities, see the SMART Table Software and SMART Table
Toolkit User’s Guide (smarttech.com/kb/155136).
8
CHAPT ER 2
Using your SMART Table
Switching modes without inserting a USB drive
You can also switch from Student mode to Teacher mode without inserting a USB drive.
g To switch from Student mode to Teacher mode without a USB drive
1. Hold five fingers down on the center of the table.
After approximately 10 seconds, the Cog wheel
icon appears in one corner of the table.
2. While maintaining finger pressure on the center of the table, press the Cog wheel
icon
with your other hand.
The menu switches to Teacher mode.
3. Press the Cog wheel
icon to return to Student mode.
Using your SMART Document Camera with your
table
With your SMART Document Camera connected to your SMART Table, you can capture images
directly from the document camera onto the table’s screen when using applications that support this
functionality. You can use the 280 and 330 models of the SMART Document Camera with your table.
You can use the zoom in and out feature from the control panel on the table’s display. Refer to your
SMART Document Camera User’s Guide for more information.
g To connect your document camera to your table
1. Verify that your SMART Table is on and in Student mode.
2. Connect your USB cable’s USB B plug to your document camera, and then connect the USB A
plug to one of your SMART Table USB connectors.
9
CHAPT ER 2
Using your SMART Table
3. Select an application such as Media or SMART Notebook software that supports the use of the
document camera.
The document camera icon appears on the table’s desktop. You can now capture images
directly from the camera onto the table's screen.
10
Chapter 3
Maintaining your SMART Table
Cleaning your SMART Table
Updating the software
Installing software updates
Orienting the image
Replacing the projector lamp
11
11
11
12
14
Your SMART Table requires minimal maintenance. This chapter describes the four most common
maintenance tasks.
Cleaning your SMART Table
Use an alcohol-free household glass cleaner, such as Windex® glass cleaner, to clean the surface at
regular intervals. You can also use a vinegar and water or a bleach and water solution to clean and
disinfect your table.
N OTE
Before you clean your SMART Table, turn it off so you don’t inadvertently start applications when
you wipe the surface.
Updating the software
Installing software updates
I MPOR TA N T
SMART Product Update (SPU) does not check for updates for the table computer’s software.
Refer to the SMART Table Software and SMART Table Toolkit User’s Guide
(smarttech.com/kb/155136) for instructions on manually checking the software version installed on
11
CHAPT ER 3
Maintaining your SMART Table
your table computer against the latest version available on the downloads page of the SMART
website (smarttech.com/downloads).
Orienting the image
Whenever you or a student touch the table’s surface, a small × or • should appear directly below the
touch point. If the × or • doesn’t align with your touch point, you might need to orient the image.
N OTE
Your SMART Table is sensitive to infrared radiation and can interpret bright light as touches. It
could be necessary to turn off or remove any pot lights or other incandescent lighting in the room
and move your table away from bright windows, or close any open blinds or curtains before using
your SMART Table.
g To orient the image
1. Turn on the SMART Table interactive learning center.
The SMART Table Activities menu appears.
2. Connect your USB drive to your table.
OR
Follow the procedure in Switching modes without inserting a USB drive on page 9.
The menu changes from Student mode to Teacher mode.
3. Press Orient.
The orientation screen appears.
12
CHAPT ER 3
Maintaining your SMART Table
4. Press your finger on the center of the first target until the red cross moves to the next target,
and then repeat this step for each target.
The display changes to the edge orientation mode and eight arrows appear around the edge of
the screen.
5. Use your finger to drag the highlighted arrow to the edge of the screen.
The arrow changes to a + symbol and the next arrow is highlighted.
6. Repeat step 5 for all remaining arrows.
When you complete the orientation procedure, the Teacher mode SMART Table Activities
menu appears.
13
CHAPT ER 3
Maintaining your SMART Table
7. Disconnect your USB drive.
OR
Press the Cog wheel
icon.
The menu changes from Teacher mode to Student mode.
Replacing the projector lamp
The average life of a projector lamp is 2,000 hours. When the projector lamp has been used for 2,000
hours or more, the following message appears on the SMART Table surface:
It is time to replace the lamp. Use the procedure in the User’s Guide
to replace the lamp as soon as possible.
For more information about replacing the lamp or adjusting the table’s image, see Replacing the Lamp
on your SMART Table ST230i (smarttech.com/kb/141683).
14
Chapter 4
Using the remote control
Locating the remote control
Setting the projector for high altitudes
Replacing the remote control battery
16
16
17
Your SMART Table includes a remote control for the projector. SMART Technologies configures the
projector for your SMART Table and you need to use the remote control in the following situations
only:
l
Setting the projector for high altitude use
l
Resetting the projector lamp time after replacing the projector lamp
C A U TI ON
SMART Technologies recommends that you use the remote control to complete only the
procedures documented in this chapter. Using the remote control for other purposes may change
the projector’s settings, which were specifically configured for the SMART Table.
N OTE
The projector’s receiver is located at the bottom of the projector. If you need to use the remote
control to make changes on the projector’s menu, open the door and point the remote at the bottom
of the projector.
15
CHAPT ER 4
Using the remote control
Locating the remote control
The remote control is located inside the cabinet behind the metal bar. Return it to the same location
when you’re finished using it.
Setting the projector for high altitudes
If you’re using your SMART Table at 5,000' to 10,000' (1,500 m to 3,000 m) above sea level, set the
projector for high altitude use. This increases the cooling efficiency of the projector’s fans.
I MPOR TA N T
Do not operate your SMART Table at altitudes higher than 10,000' (3,000 m) above sea level.
g To set the projector for high altitude use
1. Press MENU on the remote control.
The projector’s setup menu appears.
2. Press
until you select Option Settings 2, and then press ENTER.
3. Press
until you select High Altitude, and then press ENTER.
4. Press
or
to change the high altitude use setting from Off to On, and then press ENTER.
5. Press MENU to close the projector’s setup menu.
16
CHAPT ER 4
Using the remote control
Replacing the remote control battery
The remote control uses a CR2025 battery, which you can purchase from a retail store or supplier.
WARNING
Install only a CR2025 battery in the remote control. Installing any other type of battery can result in
an explosion and risk of fire and personal injury.
N OTE
Dispose of the old battery following local rules and regulations.
g To replace the remote control battery
1. Place your fingernail on the groove of the battery holder on the back
of the remote control (1).
2. While holding down the release on the side (2a), pull out the holder
(2b).
3. Remove the old battery from the battery holder.
4. Place the new battery in the battery holder.
WARNING
Ensure the + side of the battery is facing up (so that you can see it). Do not install the battery
upside down.
5. Place the battery holder back in the remote control, and then push it in until it clicks into place.
17
Appendix A
Troubleshooting
Troubleshooting power and connection issues
Setting up your table for troubleshooting touch issues
Restarting SMART Table Activities
Diagnosing basic problems with touch
Remodeling the background
19
20
21
22
24
If you set up your SMART Table following the procedures in the SMART Table 230i textless
installation instructions (smarttech.com/kb/170197) included with your table, touch should work
without any problems. However, if your table behaves unexpectedly, follow the procedures in this
chapter to resolve any issues. You can also visit smarttech.com/support to view and download howto and troubleshooting articles and more.
Troubleshooting power and connection issues
I MPOR TA N T
Turn off your SMART Table before checking or disconnecting cables inside the cabinet.
The following table presents solutions if the table isn’t operating properly:
Issue
Solution
The table isn’t receiving power. Check that the computer’s power cable is securely plugged in.
The Reset button’s blue
Check that the computer’s power cable is securely plugged in.
indicator isn’t illuminated.
There’s no image on the table's
screen.
The projector didn’t start properly due to a power interruption or
reset.
Use the projector’s remote control to turn on the projector.
19
APPENDIX
A
Troubleshooting
Issue
Solution
The Windows Advanced
Options menu appears on the
The software didn’t start properly due to a sudden power loss or
reset.
table’s screen.
To restart the table’s software
1. Connect a keyboard to one of the two USB receptacles on
the side of the table.
2. Restart the table.
3. Select Start Windows Normally.
The Unable to initialize camera
The SMART Table camera’s USB cable isn’t connected properly.
error appears.
To check camera cable connections
1. Turn off the SMART Table.
2. Remove the table’s door to access the computer and
projector.
3. Verify that the camera’s USB cable is properly connected to
the computer.
N OTE
Refer to the instructions that came with your table for
more information. You can also visit
smarttech.com/support to view and download how-to and
troubleshooting articles.
4. Verify that the USB cable is properly connected to the
camera by disconnecting and connecting the cable.
Setting up your table for troubleshooting touch
issues
The troubleshooting procedures in the following sections require you to close SMART Table
Activities, and then connect a keyboard and mouse.
You can connect to your SMART Table any keyboard and mouse that have USB connectors using
the two USB receptacles on the side of the unit.
g To set up your SMART Table for troubleshooting
1. Turn on your SMART Table.
The SMART Table Activities menu appears.
20
APPENDIX
A
Troubleshooting
2. Connect your USB drive to your table.
OR
Follow the procedure in Switching modes without inserting a USB drive on page 9.
The menu changes from Student mode to Teacher mode.
3. Press
.
The SMART Table Activities software closes.
4. Disconnect your USB drive (if connected), then connect a keyboard and mouse to the USB
connectors on the side of your SMART Table.
I MPOR TA N T
Do not place the keyboard or mouse on the touch surface.
The camera might interpret the mouse and keyboard as
touches if they are on the touch surface.
Restarting SMART Table Activities
After resolving problems with touch, restart SMART Table Activities.
g To restart SMART Table Activities
1. Minimize, but don’t close, the SMART Touch Service window.
2. Double-click the SMART Table Activities shortcut icon.
SMART Table Activities start.
21
APPENDIX
A
Troubleshooting
Diagnosing basic problems with touch
The following table presents basic touch-related problems and solutions:
Issue
Solution
Touch isn’t working, and the
SMART Table software isn’t installed, or the software isn’t
running. Click the SMART Table icon on the desktop to start the
software.
Windows desktop is visible.
The camera may have disconnected from the computer during
message appears informing you shipping.
Open the table's cabinet and reconnect the cable from the camera
that the camera failed to
to the computer. If touch doesn’t work or the camera doesn’t
initialize.
initialize, launch SMART touch service from your desktop, or see
Fixing Touch Issues with Your SMART Table
(smarttech.com/kb/135486).
Touch isn’t working, and a
Touch isn’t working properly,
and one or more white spots
appear in the two upper
quadrants of the SMART Touch
Service screen.
Infrared radiation may be interfering with the camera’s ability to
sense touch.
Turn off or remove any pot lights or other incandescent lighting in
the room.
Close any open blinds or curtains to prevent direct sunlight from
shining on your table.
To access the SMART Touch Service screen
1. Set up your table for troubleshooting. (See Setting up your
table for troubleshooting touch issues on page 20.)
2. Select SMART Touch Service on the Windows task bar.
Touch isn’t working or doesn’t
line up with your contact point.
The orientation may be incorrect. When orienting the image, press
and hold each target until the red cross moves to the next target or
touch the surface lightly. Pressing too hard on the surface might
register as multiple touches.
I MPOR TA N T
Ensure the cabinet doors are closed when orienting or using the
table.
22
APPENDIX
A
Troubleshooting
Issue
Solution
Touch isn’t working, and the
The camera drivers didn’t load in the correct sequence.
SMART Tables Activities menu To restart the drivers in sequence
appears.
1. Set up your table for troubleshooting. (See Setting up your
table for troubleshooting touch issues on page 20.)
2. Click SMART Touch Service, and then select Options >
Settings.
The SMART Touch Options dialog box appears.
3. Press Restore Defaults, and then check to see if touch is
working properly.
4. Restart the table to load the drivers in sequence.
You followed the solutions in
Remodel the background. (See Remodeling the background on the
this table but touch still isn’t
next page.)
working.
23
APPENDIX
A
Troubleshooting
Remodeling the background
When you turn on your SMART Table, the camera models the touch surface’s background allowing
the camera to detect touch. Problems with background modeling can cause the camera to detect
extra touches, causing your table to respond unexpectedly. Remodel the background in these
situations to remove the detection of extra touches.
g To remodel the background
1. Set up your table for troubleshooting. (See Setting up your table for troubleshooting touch
issues on page 20.)
2. Click the SMART Touch Service task bar button.
The SMART Touch Service screen appears.
3. Ensure the keyboard, the mouse and your fingers aren’t on the touch surface, and then select
Calibration > Model Background.
The SMART Table software models the background. When you move your fingers across the
touch surface, a set of red markers appears in the bottom-left quadrant of the SMART Touch
Service window.
24
APPENDIX
A
Troubleshooting
4. If touch is working correctly, restart the SMART Table applications.
OR
If touch is behaving unexpectedly, contact SMART Support by visiting
smarttech.com/support.
25
Appendix B
Hardware environmental
compliance
SMART Technologies supports global efforts to ensure that electronic equipment is manufactured,
sold and disposed of in a safe and environmentally friendly manner.
Waste Electrical and Electronic Equipment
regulations (WEEE directive)
Waste Electrical and Electronic Equipment regulations apply to all electrical and electronic equipment
sold within the European Union.
When you dispose of any electrical or electronic equipment, including SMART Technologies
products, we strongly encourage you to properly recycle the electronic product when it has reached
the end of its life. If you require further information, please contact your reseller or
SMART Technologies for information on which recycling agency to contact.
Restriction of Certain Hazardous Substances
(RoHS directive)
This product meets the requirements of the European Union’s Restriction of Certain Hazardous
Substances (RoHS) directive 2002/95/EC.
Consequently, this product also complies with other regulations that have arisen in various
geographical areas, and that reference the European Union’s RoHS directive.
Batteries
Batteries are regulated in many countries. Check with your reseller to find out how to recycle used
batteries.
There are special regulations that must be met when shipping a product that has a lithium ion battery
packaged with the product or shipping a lithium ion battery. When returning a SMART Technologies
27
APPENDIX
B
Hardware environmental compliance
product which contains a lithium ion battery or returning a lithium ion battery, call
SMART Technologies RMA for information on the special shipping regulations.
l
1.866.518.6791, Option 4 (U.S./Canada)
l
1.403.228.5940 (all other countries)
Packaging
Many countries have regulations restricting the use of certain heavy metals in product packaging. The
packaging used by SMART Technologies to ship products complies with applicable packaging laws.
Covered electronic devices
Many U.S. states classify monitors as covered electronic devices and regulate their disposal.
Applicable SMART Technologies products meet the requirements of the covered electronic devices
regulations.
China’s Electronic Information Products
regulations
China regulates products that are classified as EIP (Electronic Information Products).
SMART Technologies products fall under this classification and meet the requirements for China’s
EIP regulations.
U.S. Consumer Product Safety Improvement Act
The United States has enacted the Consumer Product Safety Improvement Act which limits the lead
(Pb) content in products used by children. SMART Technologies is committed to complying with this
initiative.
28
SMART Technologies
smarttech.com/support
smarttech.com/contactsupport