1
MS40-717X Series
DuraDrive™ Series Spring Return
Proportional Actuators
General Instructions
Application
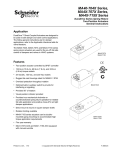
DuraDrive Direct Coupled Actuators are designed to be
used in both damper and valve control applications.
The following general instructions are for damper
applications, refer to the Applicable Literature table for
valve literature.
The MS40-717X series actuators are over the shaft
spring return actuators compatible with 2 to 10 Vdc or
4 to 20 mAdc1 control signals.
Features
• 150 lb-in (17 N-m) rated torque
• NEMA Type 4 housing (IEC IP56)
• Custom automatic current sensing motor control
provides extended reliability and repeatable timing
• Direct coupled to the damper shaft with dual
industrial hardened universal mounting clamps
• Integral wiring for proportional control by 2 to 10 Vdc
or 4 to 20 mAdc1
• Clockwise or counterclockwise spring return is
determined by actuator mounting position
• Accurate 92° travel digitally controlled
• Integral position indication scale
• Rugged die-cast housing
• Oil immersed gear train provides continuous
lubrication
• Integral transformer for high voltage systems
• Rated for operating temperature up to 140 °F
• Five year warranty
• MS40-717x series actuators can be doublemounted (gang mounting) to accommodate high
torque application requirements (2 to 4 actuators).
• Position feedback signal
1.
With the addition of a 500 Ohm resistor - not included
Printed in U.S.A.
1/10
© Copyright 2010 Schneider Electric All Rights Reserved.
F-26748-6
Applicable Literature
F-Number
Description
Audience
Purpose
MX40-6XXX-2XX, MX40-7XXX-2XX Series
Actuator/Linkage Assemblies General Instructions
–
–
–
–
–
Sales Personnel
Application Engineers
Installers
Service Personnel
Start-up Technicians
Describes the globe valve
actuator/linkage assembly’s features,
specifications, and possible applications.
Provides step-by-step mounting
instructions.
F-26646
MX40-7XXX, MX40-6XXX Series DuraDrive Actuator
Selection Guide
–
–
–
–
–
Sales Personnel
Application Engineers
Installers
Service Personnel
Start-up Technicians
Provides actuator specifications and part
number cross referencing of phased out
actuators with the new direct-coupled
actuators.
F-26752
VX-2000, VX-7000 Series
MX40-7XXX, MX40-6XXX Series
Ball/Linked Globe Valve Assemblies
Actuator/Linkage Assemblies Selection Guide
–
–
–
–
–
Sales Personnel
Application Engineers
Installers
Service Personnel
Start-up Technicians
Provides part number cross referencing of
phased out actuators with the new directcoupled actuators.
F-26080
EN-205 Water System Guidelines
–
–
–
–
Application Engineers
Installers
Service Personnel
Start-up Technicians
Describes Schneider Electric approved
water treatment practices.
F-13755
CA-28 Control Valve Sizing
F-11080
Valve Selection Chart Water
F-11366
Valve Selection Chart Steam (two-way valves only)
–
–
–
–
Application Engineers
Installers
Service Personnel
Start-up Technicians
Provides charts, equations, and diagrams
to assist in the configuration of valve
system applications. TOOL-150, valve
sizing slide rule may be purchased
separately.
F-26750
SPECIFICATIONS
Inputs
Control Signal: 4 to 20 mAdc (with the addition of a 500 Ohm resistor - not included) or 2
to 10 Vdc. See Figure-1 through Figure-8.
Power Input: See Table-1. All 24 Vac and 22-30 Vdc circuits are Class 2. All circuits 30 Vac
and above are Class 1.
Impedance: 2 to 10 Vdc, 121kΩ. 4 to 20 mAdc, 500Ω. (user supplied).
Connections:
Class 1 Power, 24 inch (61 cm) long, 18 AWG color coded pigtail leads.
Class 2 Power & Control, 36 inch (91 cm) long, 22 AWG color coded appliance cable
leads.
Ground, 36 inch (91 cm) long, 18 AWG green/yellow pigtail lead.
Outputs
Electrical:
Position Feedback Voltage, “AO” 2 to 10 Vdc (max. 0.5 ma) output signal for position
feedback or to operate up to four additional slave actuators.
Stroke, Electronically limited to 92° ±1°.
Action, Direct acting, 0° position with 4 mAdc or 2 Vdc input.
Torque See Table-1.
Duty Cycle 100%.
Timing See Table-1.
Mechanical:
Anti-Rotation Bracket,
Standard 9" long x 13/16" wide (229 x 21 mm), included with the actuator.
Optional Order AM-752 (4" long x 1-11/16" wide) for mounting the actuator in narrow
spaces.
Universal Mounting Clamps, Two clamps are required for all mounting configurations.
Standard 3/8" to 1/2" (10 to 13 mm) round and square shaft mounting clamps are
included with the actuator.
Optional Order AM-753 for 5/8" (16 mm) square and 3/4" to 1" (19 to 25 mm) round
damper shafts, two per package.
2
© Copyright 2010 Schneider Electric All Rights Reserved.
F-26748-6
Minimum Damper Shaft Length,
Standard Damper shaft must be at least 4-5/8" (117 mm) long for standard mounting.
Optional Shorter than standard length shafts require the AM-676 shaft extension
(order separately).
Position Indicator, Scale numbered from 0 to 95°, provided for position indication.
Nominal Damper Area, Actuator sizing should be done in accordance with damper
manufacturer’s specifications.
Direction of Rotation, Clockwise or counterclockwise rotation is determined by
actuator mounting. The zero (0) position on the position indicator is the normal or spring
return position.
Environment
Ambient Temperature Limits:
Shipping & Storage, -40 to 160°F (-40 to 71°C).
Operating, -25 to 140°F (-32 to 60°C).
Humidity: 5 to 95% RH, non-condensing.
Location: NEMA 1. NEMA Type 4 (IEC IP56) with customer supplied water tight conduit
connectors.
Agency Listings
UL 873: Underwriters Laboratories Inc. listed (File # E9429 Category TemperatureIndicating and Regulating Equipment).
CUL: UL Listed for use in Canada by Underwriters Laboratories. Canadian Standards
C22.2 No. 24-93.
European Community: EMC Directive (2004/188/EC). Low Voltage Directive
(72/23/EEC). See Table-1 for specific models.
Australia: This product meets requirements to bear the C-Tick Mark according to the terms
specified by the Communications Authority under the Radiocommunications Act 1992.
Table-1 Model Chart.
Actuator Power Input
Part
Number
Voltage
Running
Holding
4.7
5.5
7.8
5.0
5.6
2.5
MS40-7170
120 Vac ±10%
6.4
8.5
5.2
MS40-7171
240 Vac ±10%
7.2
10.8
9.0
a
50 60
VA
22-30 Vdc
MS40-7173
24 Vac ±20%
Running
Watts
Hz
Approximate 93° Rotation
Timing in Seconds @ 70° F
(21°C) for Rated Torque
50 60
Output Torque Rating
lb.-in. (N-m)
Powered
Spring
Return
Minimum
Maximum Stall
147
65
150 (17)a
545 (61.8)
Approximate 2% torque derating per 1°F above 122°F in the drive direction.
ACCESSORIES
AM-620
AM-621
AM-703
AM-704
AM-705
AM-706
AM-707
AM-708
AM-751
AM-752
AM-753
AM-754
AM-756
AV-607
AV-609
TF-711-02
TF-713-02
X-5521
F-26748-6
Remote mount single/dual damper actuator kit
Round damper shaft extension kit (1/2" ID x 1" OD) for dual actuator mounting
Span adjustment
Modulation Interface, converts a PWM to 2 to 10 Vdc
Positioner, remote/minimum positioning
Positioner, flush mount digital position indicator
Digital Indication
Resistor for 500Ω modulating signal conversion
Standard anti-rotation bracket 9" long x 13/16" wide (229 x 21 mm), included with
actuator
Optional anti-rotation bracket 4" long x 1-11/6" wide (102 x 43 mm), for narrow
spaces
Optional universal mounting clamps for 5/8"(16 mm) square shaft, 3/4" and 1"
(19 to 25 mm) round shafts (two per package)
Standard universal mounting clamps for 3/8" to 1/2" (10 to 13 mm) round and
square shafts, two included with actuator
Metric conduit adaptor M20 x 1.5 to 1/2" NPT (two per package)
Dual mount rack and pinion valve linkage kit for 2-1/2" through 5" VB-8xxx series
valve bodies and 2-1/2" to 4" VB-9xxx series valve bodies except VB-9323
Dual mount rack and pinion valve linkage kit for 6" VB-8xxx series valve bodies and
5" and 6" VB-9xxx series valve bodies except VB-9323
1/2" Sealtight water tight conduit connector (straight)
1/2" Sealtight water tight conduit connector (90°)
1/2" Pipe plug, included with actuator
© Copyright 2010 Schneider Electric All Rights Reserved.
3
TYPICAL APPLICATIONS (wiring diagrams)
2 to 10 Vdc
+
Yellow/Black
AI
Gray
COM
Control
Signal
MS40-7170
1
-
2
Position Feedback (-)
Signal 2 to 10 Vdc (+)
Blue
Black
120 Vac
AO
3
L1
White
L2
Green/Yellow
GRD
1 Unused conduit port must remain plugged with a water
tight pipe plug as shipped from factory to maintain
NEMA Type 4 or IP56 rating.
2 Color coding of wiring on older models (MX40-717x-00-0) manufactured prior to December, 2007, differs
from current models. See Table 4 on page 14. Consult
label on product to confirm wiring codes.
3 Keep AI, COM and AO wiring less than 30 meters
length to meet CE requirements.
Figure-1 Typical MS40-7170 2 to 10 Vdc Wiring Diagram.
4 to 20 mA
Yellow/Black
+
Control
Signal
AI
500 Ohm
1
Gray
-
MS40-7170
COM
2
Position Feedback (-)
Signal 2 to 10 Vdc (+)
Blue
120 Vac
AO
Black
L1
White
L2
Green/Yellow
GRD
3
1 Unused conduit port must remain plugged with a water
tight pipe plug as shipped from factory to maintain
NEMA Type 4 or IP56 rating.
2 Color coding of wiring on older models (MX40-717x-00-0) manufactured prior to December, 2007, differs
from current models. See Table 4 on page 14. Consult
label on product to confirm wiring codes.
3 Keep AI, COM and AO wiring less than 30 meters
length to meet CE requirements.
Figure-2 Typical MS40-7170 4 to 20 mA Wiring Diagram.
4
© Copyright 2010 Schneider Electric All Rights Reserved.
F-26748-6
2 to 10 Vdc
+
Control
Signal
Yellow/Black
AI
Gray
COM
Blue
AO
MS40-7171
1
-
2
Position Feedback (-)
Signal 2 to 10 Vdc (+)
Brown
240 Vac
3
L1
Light Blue
L2
Green/Yellow
GRD
1 Unused conduit port must remain plugged with a water
tight pipe plug as shipped from factory to maintain
NEMA Type 4 or IP56 rating.
2 Color coding of wiring on older models (MX40-717x-00-0) manufactured prior to December, 2007, differs
from current models. See Table 4 on page 14. Consult
label on product to confirm wiring codes.
3 Keep AI, COM and AO wiring less than 30 meters
length to meet CE requirements.
Figure-3 Typical MS40-7171 2 to 10 Vdc Wiring Diagram.
4 to 20 mA
Yellow/Black
+
Control
Signal
AI
MS40-7171
1
500 Ohm
Gray
-
COM
2
Position Feedback (-)
Signal 2 to 10 Vdc (+)
Blue
Brown
240 Vac
AO
3
L1
Light Blue
L2
Green/Yellow
GRD
1 Unused conduit port must remain plugged with a water
tight pipe plug as shipped from factory to maintain
NEMA Type 4 or IP56 rating.
2 Color coding of wiring on older models (MX40-717x-00-0) manufactured prior to December, 2007, differs
from current models. See Table 4 on page 14. Consult
label on product to confirm wiring codes.
3 Keep AI, COM and AO wiring less than 30 meters
length to meet CE requirements.
Figure-4 Typical MS40-7171 4 to 20 mA Wiring Diagram.
2 to 10 Vdc
+
Control
Signal
-
Yellow/Black
AI
Gray
COM
MS40-7173
1
2
Position Feedback (-)
Signal 2 to 10 Vdc (+)
Transformer
24 Vac or 22-30 Vdc
Blue
AO
3
Red
24H (DC+)
Black
24G (DC-)
Green/Yellow
GRD
1 Unused conduit port must remain plugged with a water
tight pipe plug as shipped from factory to maintain
NEMA Type 4 or IP56 rating.
2 Color coding of wiring on older models (MX40-717x-00-0) manufactured prior to December, 2007, differs
from current models. See Table 4 on page 14. Consult
label on product to confirm wiring codes.
3 Keep AI, COM and AO wiring less than 30 meters
length to meet CE requirements.
Figure-5 Typical MS40-7173 2 to 10 Vdc Wiring Diagram.
F-26748-6
© Copyright 2010 Schneider Electric All Rights Reserved.
5
4 to 20 mA
+
Control
Signal
-
Yellow/Black
AI
500 Ohm
Gray
COM
MS40-7173
1
2
Position Feedback (-)
Signal 2 to 10 Vdc (+)
24 Vac Transformer
or 22-30 Vdc
Blue
AO
Red
24H (DC+)
Black
24G (DC-)
Green/Yellow
GRD
3
1 Unused conduit port must remain plugged with a water
tight pipe plug as shipped from factory to maintain
NEMA Type 4 or IP56 rating.
2 Color coding of wiring on older models (MX40-717x-00-0) manufactured prior to December, 2007, differs
from current models. See Table 4 on page 14. Consult
label on product to confirm wiring codes.
3 Keep AI, COM and AO wiring less than 30 meters
length to meet CE requirements.
Figure-6 Typical MS40-7173 4 to 20 mA Wiring Diagram.
2 to 10 Vdc
Control
Signal
(+)
MS40-717X
Yellow/Black
AI
Gray
COM
Blue
AO
(-)
1
3
4
5
Green/Yellow
GRD
MS40-717X
Position Feedback (-)
Signal 2 to 10 Vdc (+)
Yellow/Black
AI
1
3
Gray
COM
4
5
Blue
AO
1 Unused conduit port must remain plugged with a
water tight pipe plug as shipped from factory to
maintain NEMA Type 4 or IP56 rating.
2 See table for power wire designations.
3 Both actuators must be set to operate in the same
direction.
2
Green/Yellow
Power
GRD
4 Color coding of wiring on older models (MX40-717x-00-0) manufactured prior to December, 2007, differs
from current models. See Table 4 on page 14. Consult
label on product to confirm wiring codes.
5 Keep AI, COM and AO wiring less than 30 meters
length to meed CE requirements.
Power Wiring Identification.
Voltage
Designation
24 Vac or
22-30 Vdc
24H (DC+)
120 Vac
240 Vac
Wire Color
Red
24G (DC-)
Black
L1
Black
L2
White
L1
Brown
L2
Light Blue
Figure-7 Two Actuators on the Same Damper Shaft.
6
© Copyright 2010 Schneider Electric All Rights Reserved.
F-26748-6
4 to 20 mA DC
Controller
MS40-717X
Yellow/Black
(+) 4 to 20 mA DC
AI
500 Ohm Gray COM
(-) Common DC
Blue
1
3
4
5
AO
GRD
Green/Yellow
MS40-717X
2
Yellow/Black
AI
Gray
COM
Position Feedback (-)
Signal 2 to 10 Vdc (+)
Blue
AO
1 Unused conduit port must remain plugged with a
water tight pipe plug as shipped from factory to
maintain NEMA Type 4 or IP56 rating.
1
4
Power
3
5
GRD
Green/Yellow
4 Color coding of wiring on older models (MX40-717x-00-0) manufactured prior to December, 2007, differs
from current models. See Table 4 on page 14. Consult
label on product to confirm wiring codes.
2 See table for power wire designations.
3 Both actuators must be set to operate in the same
direction.
5 Keep AI, COM and AO wiring less than 30 meters
length to meed CE requirements.
Power Wiring Identification.
Voltage
Designation
24 Vac or
22-30 Vdc
24H (DC+)
Red
24G (DC-)
Black
120 Vac
240 Vac
Wire Color
L1
Black
L2
White
L1
Brown
L2
Light Blue
Figure-8 Typical 4 to 20 mAdc Control Wiring For Two Actuators On The Same Damper Shaft.
INSTALLATION
Inspection
Requirements
Inspect the package for damage. If damaged, notify the appropriate carrier immediately.
If undamaged, open the package and inspect the device for obvious damage. Return
damaged products.
• Job wiring diagrams
• Tools (not provided)
–
–
–
–
Socket wrench 1/2 inch, used for universal mounting clamp nuts
Open-end wrench 10 mm, used for installing AM-676 universal shaft extension
Slotted screwdriver, used for installing anti-rotation brackets
Allen wrench 3/16", used for manual override
• Appropriate accessories
– Water tight 1/2 inch conduit seals TAC part number TF-711-02 or T&B #5332
(straight, TAC part number TF-713-02 or T&B #5352 (90°), or equivalent.
– Water tight 1/2 inch flexible conduit (e.,g. Anaconda: Sealtight) or 20 mm flexible
water tight conduit when using AM-756 metric conduit adapter with appropriate
metric water tight seals.
– Water tight 1/2" flexible conduit (Anaconda: Sealtight) or 20 mm flexible water tight
conduit when using AM-756 metric conduit adaptor
– Two #8 1/2" (13 mm) sheet metal screws for mounting (optional)
• Training: Installer must be a qualified, experienced technician
F-26748-6
© Copyright 2010 Schneider Electric All Rights Reserved.
7
Precautions
General
Warning:
• Electrical shock hazard! Disconnect the power supply (line power) before and during
installation to prevent electric shock and equipment damage.
• Make all connections in accordance with the wiring diagram and in accordance with
national and local electrical codes. Use copper conductors only.
Caution:
• Avoid electrical noise interference. Do not install near large contactors, electrical
machinery, or welding equipment.
• Avoid locations where excessive moisture, corrosive fumes, vibration, or explosive
vapors are present.
Federal Communications Commission (FCC)
Note: This equipment has been tested and found to comply with the limits for a Class B
digital device, pursuant to Part 15 of the FCC Rules. These limits are designed to provide
reasonable protection against harmful interference in residential installations. This
equipment generates, uses, and can radiate radio frequency energy and may cause
harmful interference if not installed and used in accordance with the instructions. Even
when instructions are followed, there is no guarantee that interference will not occur in a
particular installation. If this equipment causes harmful interference to radio or television
reception— which can be determined by turning the equipment off and on—the user is
encouraged to try to correct the interference by one or more of the following measures:
• Reorient or relocate the receiving antenna.
• Increase the separation between the equipment and receiver.
• Connect the equipment to an outlet on a circuit different from that to which the receiver
is connected.
• Consult the dealer or an experienced radio/television technician for help.
Canadian Department of Communications (DOC)
Note: This class B digital apparatus meets all requirements of the Canadian InterferenceCausing Equipment Regulations.
Cet appareil numerique de la classe B respecte toutes les exigences du Reglement sur le
material broilleur du Canada.
European Standard EN 55022
Warning: This is a class B (European Classification) product. In a domestic environment
this product may cause radio interference in which case the user may be required to take
adequate measures.
Location
Caution:
• To maintain NEMA Type 4 rating, use water tight 1/2" flexible conduit only, with 1/2"
conduit connector of the water tight type, TAC part number TF-711-02 or T&B #5332
(straight), TAC part number TF-713-02 or T&B #5352 (90°), or equivalent.
• For metric conduit applications using AM-756 conduit adapters, use the appropriate
metric water tight seals to maintain compliance with IP56 or NEMA Type 4 rating.
• Use a water tight 1/2" pipe plug in any unused actuator conduit ports and seal with
water tight tape to stay in compliance with NEMA Type 4 or IP56 rating. Use TAC part
number X-5521, Grinnell #8700159257 (black), Grinnell #8700159851 (galvanized), or
equivalent. Actuators with unused conduit ports are shipped with the unused port
plugged.
8
© Copyright 2010 Schneider Electric All Rights Reserved.
F-26748-6
Mounting
Mount the TAC DuraDrive Actuator directly on the damper shaft in locations that clear the
maximum dimensions of the actuator case and allow the actuator to be mounted flush to the
surface of the terminal box and perpendicular to the damper shaft.
Note: Some terminal boxes have sheet metal screw heads or other protrusions near the
damper shaft. In these cases, a spacer or shim may be added under the mounting tab of
the actuator to make the actuator perpendicular to the shaft.
Caution: To remain in NEMA 2 compliance the MS40-715X and MS40-707X series
actuators should be mounted with conduit end down.
Damper Actuator Sizing
Correct sizing of the actuator is necessary for proper control of dampers. The area of
damper that can be controlled by a given actuator is dependent upon the quality of the
damper, the pressure drop across the damper in the closed position, and the velocity of the
air flow through the damper. To obtain actual damper torque requirements, contact the
damper manufacturer.
Damper Shaft Sizing
Use the “Long Damper Shaft” mounting instructions if the damper shaft is at least 4-5/8"
(117 mm) long.
Use the “Short Damper Shaft” mounting instructions if the damper shaft is shorter than 4-5/8"
or the area around the damper shaft is too narrow to allow standard mounting, as described
in the “Long Damper Shaft” mounting section. See Figure-9 for minimum shaft length.
Min. 4-5/8" (117 mm)
Figure-9 Long Damper Shaft Dimensions.
Caution: The MS40-717X actuator is not designed to be used on aluminum damper
shafts, solid steel shafts smaller than 1/2" diameter round or 1/2" square, or hollow steel
shafts smaller than 3/4" round. The actuator can produce up to 545 in-lbs (61.8. N-m)
maximum stall torque, which could result in the actuator snapping off an aluminum damper
shaft or an improperly sized steel damper shaft. Refer to Table-2 for nominal damper shaft
sizes.
Table-2 Steel Damper Shaft Specifications.
Damper Shaft Shape
Round
Square
a
F-26748-6
Damper Shaft Type
O.D. (Nominal)a
I.D. (Maximum)
Solid bar
1/2" to 1"
0
Hollow tubing
Solid bar
3/4"
0.375
13/16"
0.683
27/32"
0.626
7/8"
0.805
15/16"
0.808
1"
0.930
1/2" to 5/8"
0
Damper shaft sizes over 1/2" (13 mm) O.D. require AM-753 universal mounting clamps.
© Copyright 2010 Schneider Electric All Rights Reserved.
9
Mounting the Actuator for Clockwise or Counterclockwise Dampers
The zero (0) position on the position indicator is the normal or spring return position. When
the actuator is mounted with the “R” side facing the installer and the control signal increases
the actuator will rotate in the counterclockwise direction. When the actuator is mounted with
the “L” side facing the installer and the control signal increases the actuator will rotate in the
clockwise direction.
Long Damper Shafts
1. Move the damper to its normal position. Verify the controller action is set to match the
damper application (normally closed or normally open). See TYPICAL APPLICATIONS
(wiring diagrams).
– For normally closed damper, when damper is closed the actuator position indicator
should be at 0°. When damper is open the actuator position indicator should be at
90°.
– For normally opened damper, when damper is open the actuator position indicator
should be at 0°. When damper is closed the actuator position indicator should be at
90°.
Note: The actuator comes equipped with two AM-754 universal mounting clamps. For
damper shafts larger than 1/2" (13 mm) in diameter, the AM-753 universal mounting clamps
are required (order separately). The AM-753 clamps accommodate round shaft sizes
ranging from 3/4" to 1" (19 to 25 mm) or 5/8" (16 mm) square shafts.
2. Slide the actuator over the shaft and into its desired final mounting position.
– If the damper shaft rotates clockwise to the closed position, mount the actuator with
the side marked “R” facing the installer. See Figure-10.
– If the damper shaft rotates counterclockwise to the closed position, mount the
actuator with the side marked “L” facing the installer. See Figure-11.
3. Hand tighten the nuts on both of the actuator’s universal mounting clamps.
4. Align the actuator at 90° (perpendicular) to the damper shaft. See Figure-12.
5. Slide the anti-rotation bracket pin into the mounting slot on the actuator and drill
mounting holes. See Figure-12. For narrow spaces the AM-752 anti-rotation bracket is
recommended (order separately).
6. Attach one side of the anti-rotation bracket to the mounting surface with one of the
screws provided. Leave the screw loose so that the bracket can be rotated. See
Figure-10 for clockwise or Figure-11 for counterclockwise spring return.
7. Pivot the anti-rotation bracket away from the actuator. See Figure-10 or Figure-11.
8. Loosen the universal mounting clamps, making sure not to move the damper shaft.
Rotate the actuator approximately 5° in the direction which would open the damper. See
Figure-10 or Figure-11.
9. Tighten all of the universal mounting clamp nuts with a 1/2" socket wrench. Apply
4 to 6 ft -lbs (5 to 8 N-m) of torque.
10. Manually rotate the actuator toward the full-closed position to apply pressure to the
damper seals. See Figure-10 or Figure-11.
11. Pivot the anti-rotation bracket into place and secure the other side of the bracket onto
the mounting surface using the other screw provided with the actuator. See Figure-10
or Figure-11.
12. Verify that the damper is in its full-closed position and actuator at 90° (perpendicular) to
the damper shaft. See Figure-10 or Figure-11.
10
© Copyright 2010 Schneider Electric All Rights Reserved.
F-26748-6
CENTERLINE
1
R
1
1 Two AM-754 Universal Mounting Clamp Assemblies
are provided with each actuator. Each clamp
assembly includes 1 universal mounting clamp and
1 retaining clip. Two Universal Mounting Clamp
Assemblies are required for all mounting
configurations.
5
Figure-10 Long Damper Shaft Mounting with Clockwise Spring Return for Normally Closed Damper.
F-26748-6
© Copyright 2010 Schneider Electric All Rights Reserved.
11
CENTERLINE
1
1 Two AM-754 Universal Mounting Clamp Assemblies
are provided with each actuator. Each clamp
assembly includes 1 universal mounting clamp and
1 retaining clip. Two Universal Mounting Clamp
Assemblies are required for all mounting
configurations.
5
Figure-11 Long Damper Shaft Mounting with Counterclockwise Spring Return for Normally Closed Damper.
Actuator mounting slot
AM-751
Anti-rotation bracket
90
90
Figure-12 Mounting Anti-rotation Bracket to Actuator.
12
© Copyright 2010 Schneider Electric All Rights Reserved.
F-26748-6
Short Damper Shafts
See Figure-13 for installation of actuator using the AM-676 Universal Shaft Extension.
Installation requires AM-676 Universal Shaft Extension and AM-753 Universal Mounting
Clamps for 3/4" to 1" (19 to 25 mm) shafts, these items must be ordered separately.
1. Loosen the V-clamp nuts on the AM-676 universal shaft extension.
2. Fit the universal shaft extension fully onto the damper shaft. Tighten the universal shaft
extension V-clamp nuts with a 10 mm open-end wrench. Apply 4 to 6 ft. lbs
(5 to 8 N-m) of torque.
3. Move the damper to its normal position. Verify the controller action is set to match the
damper application. See TYPICAL APPLICATIONS (wiring diagrams).
– For normally closed damper: when damper is closed, actuator position indicator
should be at 0°. When damper is open, actuator position indicator should be at 90°.
– For normally opened damper: when damper is open, actuator position indicator
should be at 0°. When damper is closed, actuator position indicator should be at
90°.
4. Remove the mounting clamps from the actuator and replace them with the AM-753
universal mounting clamps.
5. Loosen the nuts on both of the AM-753 universal mounting clamps on the damper
actuator.
– If the damper shaft rotates clockwise to the closed position, mount the actuator with
the side marked “R” facing the installer. See Figure-10.
– If the damper shaft rotates counterclockwise to the closed position, mount the
actuator with the side marked “L” facing the installer. See Figure-11.
6. Assemble the damper actuator onto the universal shaft extension, allowing the
extension to slide through the actuator’s universal mounting clamps. Make sure the
actuator is 90° (perpendicular) to the damper shaft. Then, hand tighten the nuts on both
of the actuator’s universal mounting clamps. See Figure-12
Note: If the universal shaft extension protrudes excessively above the damper actuator's
top universal mounting clamp:
•
•
•
•
remove the damper actuator from the universal shaft extension,
remove the extension from the damper shaft,
shorten the universal shaft extension by cutting it to the desired length,
then proceed to follow mounting instructions.
7. Slide the anti-rotation bracket pin into the mounting slot on the actuator. See Figure-12.
For narrow spaces, the AM-752 anti-rotation bracket is recommended (order
separately).
8. Position the actuator and bracket in the desired final mounting position on the mounting
surface and drill mounting holes. See Figure-13.
9. Attach one side of the anti-rotation bracket to the mounting surface with one of the
screws provided. Leave the screw loose so that the bracket can be rotated. See
Figure-10 for clockwise or Figure-11 for counterclockwise spring return.
10. Pivot the anti-rotation bracket away from the actuator. See Figure-10 or Figure-11.
11. Loosen the universal mounting clamps, making sure not to move the damper shaft.
Rotate the actuator approximately 5° in the direction which would open the damper. See
Figure-10 or Figure-11.
12. Tighten all of the universal mounting clamp nuts with a 1/2" socket wrench. Apply
4 to 6 ft-lbs (5 to 8 N-m) of torque.
13. Manually rotate the actuator toward the full-closed position to apply pressure to the
damper seals. See Figure-10 or Figure-11.
14. Pivot the anti-rotation bracket into place and secure the other side of the bracket onto
the mounting surface using the other screw provided with the actuator. See Figure-10
or Figure-11.
15. Verify that the damper is in its full-closed position and actuator at 90° (perpendicular) to
the damper shaft. See Figure-10 or Figure-11.
F-26748-6
© Copyright 2010 Schneider Electric All Rights Reserved.
13
Actuator
AM-753
Universal
Mounting
Clamps
Anti-rotation
Bracket
(included with
actuator)
1
AM-676
Universal Shaft
Extension
Mounting Surface
V-clamp
Duct
1 The AM-676 extends the
damper shaft approximately
9" (229 mm).
Damper Shaft
Figure-13 Installation of Universal Shaft Extension.
Wiring Requirements
Control and Power Leads
Remove blue plastic thread protectors before installing conduit fittings. See Figure-1 through
Figure 8 for typical wiring applications and Table-3 for maximum wire lengths.
Caution: The 24 Vac model contains a half-wave rectifier power supply and must not be
powered by transformers used to power other devices utilizing non-isolated full-wave
rectifier power supplies. Refer to EN-206 Guidelines for Powering Multiple Full-Wave and
Half-Wave Rectifier Devices from a Common Transformer, F-26363, for further information.
Note: Class 2 control and power lead wiring must be routed separately from line voltage
wiring and any other non-class 2 circuits.
Table-3 Control and Power Wiring Data.
Maximum Wire Run in ft. (m)
(5% Voltage Drop)
Actuator
Voltage
Part
Number
24 Vac and
22-30 Vdc
MS40-7173
120 Vac
MS40-7170
240 Vac
MS40-7171
14 AWG
16 AWG
18 AWG
981
(299)
617
(188)
388
(118)
Table-4 Wire Color Codes for Models Manufactured before December, 2007.
Part Number
Power
Voltage
L1
L2
Ground
24 H
24 G
Analog
Input
500 Ohms
Common
MS40-7173-0-0-0
Old Design
24 Vac
N/A
N/A
Green/Yellow
Black
Black/Blue
White
Red
Black
MS40-7170-0-0-0
Old Design
120 Vac
Black
White
Green/Yellow
N/A
N/A
White
Red
Black
MS40-7171-0-0-0
Old Design
240 Vac
Brown
Light
Blue
Green/Yellow
N/A
N/A
White
Red
Black
N/A: Not Applicable
14
© Copyright 2010 Schneider Electric All Rights Reserved.
F-26748-6
CHECKOUT
This procedure is for checking out a normally closed actuator that is typically mounted
unpowered. It is possible to mount the actuator with power applied for special applications.
Note: To check out a normally opened actuator the procedure is the same as below, except
the initial position is open and closed when powered.
After the entire system has been installed and the actuator has been powered up, the
following check can be made for proper system operation. Check for correct operation of the
damper while actuator is being stroked.
1. Apply power to the actuator and control system.
2. Set the controller to cause the actuator to drive open (set override controller output to
maximum).
3. Check to see that the actuator travels to the full-open position.
4. Set the controller to cause the actuator to drive closed (set override controller output to
minimum).
5. Check to see that the actuator travels to the fully closed position.
Note: If anticipated damper operation does not occur, verify the Long Damper Shaft or
Short Damper Shaft mounting procedures. Also, verify that the controller has the proper
action (direct or reverse) to match the damper required operation.
THEORY OF OPERATION
The actuator is, by means of dual mounting clamps, directly mounted onto the damper shaft.
The anti-rotation bracket supplied with the actuator prevents lateral movement of the
actuator. The damper actuator is not provided with and does not require any limiting
switches, but is electronically protected against overloading.
The angle of rotation is electronically limited to 92° ±1°. When reaching the damper or
actuator end position, the motor stops automatically. The position of the actuator is indicated
by means of scale reading 0 to 95°.
MAINTENANCE
Regular maintenance of the total system is recommended to assure sustained optimum
performance. The MS40-717X actuator is maintenance free.
FIELD REPAIR
None. Replace with functional actuator.
F-26748-6
© Copyright 2010 Schneider Electric All Rights Reserved.
15
DIMENSIONAL DATA
Figure-14 dimensions are in inches (mm).
R
4"
(102)
4"
(102)
1-27/64"
(36)
10-27/32 (275)
Figure-14 MS40-717X Damper Actuator.
On October 1st, 2009, TAC became the Buildings business of its parent company Schneider Electric. This document reflects the visual identity of Schneider Electric,
however there remains references to TAC as a corporate brand in the body copy. As each document is updated, the body copy will be changed to reflect appropriate
corporate brand changes.
Copyright 2010, Schneider Electric
All brand names, trademarks and registered
trademarks are the property of their respective
owners. Information contained within this
document is subject to change without notice.
F-26748-6
Schneider Electric
1354 Clifford Avenue
P.O. Box 2940
Loves Park, IL 61132-2940
www.schneider-electric.com/buildings