1
Having Problems with Your
Olympus Camera ?
Visit Our Web Site at www.olympus.com for Instant On-line Support
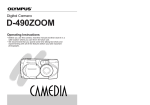
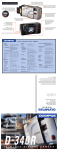
Thank you for choosing the Olympus® D-490 Zoom, the filmless digital camera
that gives you the convenience of a compact point-and-shoot camera, the
flexibility of a zoom camera, plus a host of advanced features and image quality
that only Olympus can provide. For the finest in filmless photography, look to
Olympus. World Leaders in film and filmless photography.
To ensure you are completely satisfied with your D-490 Zoom purchase, we’ve
prepared this easy-to-follow users’ guide. Just follow these simple instructions
to set up and begin using the D-490 Zoom. For more detailed instructions on
feature use, please refer to the complete Instructions Manual included in your
package.
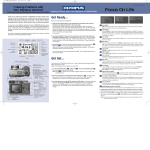
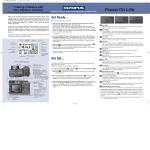
First, take a moment to familiarize yourself with the key areas of camera
operation by reviewing the illustrations below.
Selftimer button/Print button
Flash mode button/Erase button
Macro/Digital Telephoto button/Protect button
Viewfinder
Diopter
adjustment
dial
Monitor button
Taking Pictures with Your Olympus D-490 Zoom
Get Ready...
Focus On Life
Get Set...
Before you begin using the D-490 Zoom:
1. Load two CR-V3 battery packs in the compartment at the bottom of the camera as
shown in the diagram imprinted on the camera body.
For best results, Olympus America Inc. strongly recommends using two CR-V3 lithium
battery packs. Four AA (R6) alkaline, NiMH, lithium or NiCd batteries can also be used. Do
not use manganese batteries. An optional Olympus AC adapter (C-7AU) is available and is
recommended when downloading images to ensure a consistent power supply voltage.
2. Insert the SmartMedia™ card. With the camera facing you, open the card compartment
cover to the left of the lens barrier and slide the card into the slot.
This card is your “film.” It stores your images for reviewing, downloading, and printing. To
insert, simply slide the card with the gold contacts facing the back of the camera into the slot
and close the cover. To remove, gently pull the card out of the slot.
3. Turn on the power.
Slide open the lens barrier on the front of the camera until you feel a click. Icons representing
camera default settings appear on the camera control panel, along with the number of
pictures available at the preset memory settings. The lens barrel automatically extends.
To turn the camera off, slide the lens barrier halfway closed. The lens barrel retracts. Close
the lens barrier completely.
Now, perform the D-490 Zoom’s initial set-up. These are the default camera settings that will
affect every picture you take.
Note: These settings may be changed at any time.
1. Close the lens barrier and press the monitor button
monitor on.
to turn the camera and the
2. Press the Menu button
to select the items you want to adjust.
This button is located next to the monitor. Once you’ve selected the item, use the Arrow pad
to scroll through your choices and make your adjustments from the following modes:
MOVIE PLAYBACK:
To play movie pictures.
AUTOMATIC PLAYBACK:
To run through all the stored pictures automatically.
No. NUMBER DISPLAY:
To display the Frame number or File name.
Menu button
FUNCTION:
To edit out unneeded frames.
Arrow pad
Monitor
CARD SETUP:
OK button
ERASE ALL FRAMES:
To erase all stored pictures.
CARD FORMAT:
Shutter release button
Zoom lever
Tripod socket
Select this setting by pressing 䊲 on the Arrow pad, then press the OK button
OK
Flash
Control panel
Connector cover
Battery compartment open/close lever (bottom)
Note: Formatting a card erases all existing data on the card, even protected
images.
These images cannot be recovered.
DATE AND TIME:
Enter the year, month and day.
Macro mode
Flash mode
INDEX DISPLAY:
Choose the number of images to be shown in the Index-Display mode: 4, 9, or 16.
White balance
Record mode
Exposure compensation
MONITOR ADJUSTMENT:
To either increase or decrease the brightness of the monitor, use 䊲 on the Arrow pad.
Notice how the live preview changes as you make adjustments.
Sharpness
Lens
Spot metering
mode
ISO
Card compartment
cover
Lens barrier
Video output
connector
Computer
connector
AC adapter connector
Sequential
shooting
Self-timer
3. Press the OK button OK to confirm each setting. When finished, press the monitor
button
to turn off the display. Open the lens barrier to continue set up procedures for
taking individual pictures.
Remaining picture count
Card error/Card function
Writing
Battery check
VT125100
.
World Leaders in Film and
Filmless Photography
Taking Pictures with Your Olympus D-490 Zoom
Go...and Start Taking Pictures
CARD FUNCTION:
Select
Now you’re ready to take great pictures with the D-490 Zoom.
OK
FILE
RECORD MODE:
Choose an image resolution setting: Standard SQ or one of the High Quality
modes HQ or SHQ . To select SHQ-TIFF or SQ-HIGH , press and hold 䊱 on the
Arrow pad for two seconds while in SHQ or SQ mode respectively. The amount of
frames you can store in any SmartMedia card depends on the resolution setting
you’ve selected. See the chart below:
Approximate number of storable still pictures
Record mode
Card/Resolution
2MB
4MB
8MB
SHQ-TIFF
1600 x 1200
0
0
1
2
5
11
SHQ
1600 x 1200
1
2
5
11
22
45
16MB 32MB 64MB
HQ
1600 x 1200
3
7
16
31
64
128
SQ
SQ-HIGH
640 x 480
640 x 480
20
7
40
16
82
32
165
66
331
132
665
266
File Format
SHQ
Uncompressed
TIFF
SHQ Min. JPEG
Compression
HQ Std. JPEG
Compression
SQ-Normal Quality
SQ-High Quality
Approximate number of movie shooting seconds remaining
Resolution
HQ
SQ
320×240
WB
ISO
CAMEDIA master 2.0 software.
SHARPNESS:
NORMAL or SOFT sharpness can be chosen. The SOFT setting is ideal for processing
images on a computer.
SPOT METERING:
Choose Spot metering to obtain the right subject exposure regardless of the
backlighting, or use the standard ESP system.
160×120
2MB
4MB
5
25
11
51
SmartMedia capacity
8MB
16MB
23
104
48
211
32MB
64MB
96
424
193
851
WHITE BALANCE:
Control your light settings to match shooting conditions: Auto AUTO ,
Daylight
, Overcast
, Tungsten
or Fluorescent light
.
ISO SENSITIVITY:
These settings are equivalent to film speed settings. Select from AUTO, 100, 200 or
400. The higher the ISO setting, the faster the shutter speed that can be used and
the lower the amount of light required. With AUTO, the sensitivity increases
automatically in low-light situations.
DRIVE:
This item in the shooting menu allows you to switch from single shot to motor-drive
function. Select "SEQUENCE" to shoot up to 45 consecutive stills simply by
continually depressing the shutter release button.
FUNCTION SHOOTING:
SHOOTING MOVIE PICTURES:
To take movie pictures (15 frames/second), select
Keep the monitor on
and use it to set up the shot. Fully press and release the shutter release button
to start or stop shooting. Shooting also stops when the memory gauge is
temporarily full.
Call 1-888-553-4448 for Technical Support
• You also can view these pictures through any video source, such as a video or TV
monitor that has standard video input NTSC capabilities. Simply connect the D-490
Zoom to the “video in” jack of your video device using the video out cable included with
your camera.
successively, carefully overlapping the edges of each shot. Assemble with
to confirm each setting from the following modes:
EXPOSURE COMPENSATION:
Adjust using 䊲 on the Arrow pad to brighten a dark situation or 䊱 to darken a
mostly bright scene .
Record mode
to take panorama pictures with standard Olympus-brand SmartMedia
cards. Use the arrow pad to indicate the direction you are going to shoot. Shoot
1. With the lens barrier open and monitor on, press the Menu button
to select the
picture settings you want to adjust. This button is located next to the monitor.
Once you’ve selected the item, use the Arrow pad to make your adjustments.
2. Press the OK button
Still Having Problems with Your
Olympus Camera?
FILE NAMING:
A file numbering system can be especially useful when downloading data to a computer.
Select AUTO FILE for sequential numbering of each card used; select NAME RESET to
have numbers reset every time a new card is inserted into the camera.
BEEP SOUND:
Select either ON or OFF to either hear or mute the setting confirmation sounds.
SETTINGS:
You can save and reset settings.
3. For a telephoto or wide-angle shot, use the 3X zoom lever at the top of the camera.
Push the lever toward “T” to choose telephoto shooting; pull it toward “W” to choose wideangle shooting.
4. When the flash is needed, the orange lamp next to the viewfinder blinks. Simply flip up
the flash and half-press the shutter release button until the orange light goes off. When it
comes on again, the flash is charged. Choose from Auto-Flash for automatic flash firing; RedEye reduction Flash
to reduce the phenomena of red-eye; Fill-In Flash
for forced
flash activation; Slow Sync
for night photography;or Slow Sync (plus Red-Eye
reduction)
to photograph people at night and/or with dark backgrounds.
5. Choose Macro
for close-ups of subjects. Use Digital Telephoto Mode 1.0x , 1.6x , 2.0x ,
2.5x ,
to make your subject appear twice as close. Choose the Panorama Mode
to
lock exposure, utilize panorama guides and flag images in the camera for panorama pictures.
6. Point and Shoot. Take pictures using the optical viewfinder or use the monitor as your guide.
To use the color monitor, open the lens barrier, turn on the monitor, then...
• Compose your subject.
• Half-press the shutter release button.
• The green lamp goes on.
• The exposure and focus will be adjusted.
• Full-press the shutter release button to take the picture.
• A short beep indicates the shot has been taken.
• When the green lamp goes off, you’re ready to take the next picture.
Note: For QuickFocus overrides, on the Arrow pad press and hold the 䊱 for infinity focus
and 䊲 for 8 ft /2.5 m while pressing the shutter release button.
Enjoy Your Pictures
With the D-490 Zoom, you can easily view, save and download the photos you want—and
delete the ones you don’t want.
Viewing Pictures
• After you’ve taken a picture, close the lens barrier and turn on the monitor to enter playback
mode. Your picture will appear on the screen within seconds. Or, to quickly jump between
playback and shooting modes, simply press the monitor button
twice in rapid succession.
To switch back to playback mode, quickly press the monitor button
again.
• To review all the pictures stored in the SmartMedia card, close the lens barrier and turn on the
monitor. Use 䊴 䊳 on the Arrow pad to scroll through each of the pictures saved on your
SmartMedia card.
• To review movie pictures, first display the movie you want to see on the monitor. If it is currently
displayed, just press the OK button OK . If not, press the menu button to shut down
theshooting menu, select the movie to be reviewed, and reactivate the playback menu. Go to
, set to Start and press the OK button OK . After a few seconds the movie will begin.
Avoiding accidental erasure
• To lock a picture, you must be in playback mode. Notice the Lock
symbol on the
back of the camera. Press this button while the image you want to lock is displayed on
the monitor.
The lock icon will appear on the screen.
Deleting Pictures
• To delete a picture, advance to the desired image, press the Erase button
and then
press 䊱 䊲 on Arrow pad to select the delete operation. Confirm and delete the image
by pressing the OK button OK . When you delete a picture you’ve instantly freed up
space on your SmartMedia card for more pictures. So with the D-490 Zoom, there’s no
more wasted film or developing costs for pictures you don’t really want.
Note: A locked image cannot be deleted. Simply unlock the picture and repeat the
process.
Printing Pictures
• Store printing data in the SmartMedia card (using Card-Print) and make desired prints
using a printer or a lab that supports the Digital Print Order Format system. Since the
print order is already written in the card, you do not have to make orders at the lab.
Downloading Pictures
• Please refer to your Olympus Digital Camera Instructions Manual for easy-to-follow
instructions on how to install the enclosed software titles that will enable you to
download, view, edit, manipulate and store images on your computer.
Optional Accessories
For even more photographic creativity and enjoyment, Olympus offers a variety of optional
accessories for use with your D-490ZOOM Filmless Digital Camera
•
•
•
•
•
•
•
•
•
NiMH rechargeable batteries and Rapid Recharger for long-lasting power.
AC adapter (C-7AU) to ensure a consistent power supply when downloading images..
Photo Printers for Olympus Digital Cameras. • 1.45X Telephoto Lens (150mm equivalent)
Additional SmartMedia Cards in 8MB, 16MB, 32MB and 64MB Sizes
B-300 Telephoto Lens (180mm equivalent) • MAUSB-1 USB Reader/Writer
Carrying Case • MA-2 PCMCIA Card Adapter • Accessory Kits
MF-2 FlashPath Floppy Disk Adapter • B-28 Wide Angle Lens (28mm equivalent)
FL-40 Extension Flash • FL-BK01 Grip • FL-CB01 Cable
For best results with your inkjet printer, use the Olympus CAMEDIA/Pictorico branded
papers.
For more information, visit us online at www.olympus.com/digital, call 1-888-553-4448 or
contact your local authorized Olympus digital camera dealer.
Olympus is the registered trademark of Olympus LTD. Tokyo
All other trademarks and registered marks contained herein are recognized as property of their respective holders and are
hereby acknowledged.