1
Product Models
Interface Types & Speeds
Drive Types Supported
Data Connectors
Operating System
Requirements
Compliance
Shipping Weights
RAX210-3QJ, RAX211-3QJ, RAX210-3QJp, RAX211-3QJp
•
•
•
•
USB 3.0: up to 5 Gbps
USB 2.0: up to 480 Mbps
eSATA: up to 3 Gbps
FireWire 800: up to 800 Mbps
3.5-inch SATA Hard Drives
• One (1) USB 3.0/2.0 connector
• One (1) eSATA connector
• Two (2) FireWire 800 connectors
•
•
•
•
RAX Branding
Windows 8.1, 7, Vista, or XP
Windows Server 2012, 2008, or 2003 product families
Mac OS X 10.4.x or higher
Linux distributions that support the connection type used
EMI Standard: FCC Part 15 Class A, CE
EMC Standard: EN55022, EN55024
• 17 pounds without drives (includes accessories)
• 23 pounds with drives
Dimensions
16.89” x 16.26” x 1.73” (429mm x 413mm x 44mm)
Technical Support
Your investment in CRU products is backed up by our free technical
support for the lifetime of the product. Contact us through our website,
cru-inc.com/support or call us at 1-800-260-9800 or +1-360-816-1800.
Models Covered:
RAX210-3QJ
RAX211-3QJ
RAX210-3QJp
RAX211-3QJp
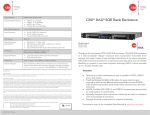
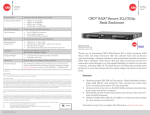
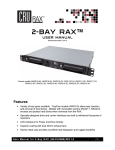
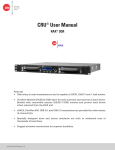
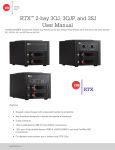
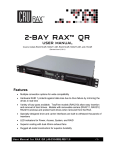
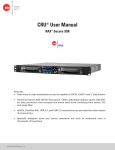
Thank you for purchasing CRU’s RAX 3QJ or 3QJp enclosure. RAX 3QJ and
3QJp enclosures are rack-mountable storage enclosures that incorporate
removable drive carriers that make it easy to use multiple hard drives in
the same enclosure. RAX 3QJ and 3QJp enclosures provide four connection
types that allow you the needed flexibility to connect to your host computer,
including USB 3.0 which provides up to a 5 Gbps transfer rate. RAX 3QJp
models also provide write protection to your hard drives with the simple
toggle of a switch on the front bezel.
2c85m76y
PMS 711C
© 2014 CRU Acquisition Group LLC, ALL RIGHTS RESERVED. RAX® and CRU® are trademarks of CRU Acquisition Group, LLC and are protected
by trademark law.
Product Warranty
CRU warrants this product to be free of significant defects in material and workmanship for a period of three years from the original date of purchase. CRU’s warranty is nontransferable and is limited to the original purchaser.
Limitation of Liability
The warranties set forth in this agreement replace all other warranties. CRU expressly disclaims all other warranties, including but not limited
to, the implied warranties of merchantability and fitness for a particular purpose and non-infringement of third-party rights with respect to the
documentation and hardware. No CRU dealer, agent, or employee is authorized to make any modification, extension, or addition to this warranty.
In no event will CRU or its suppliers be liable for any costs of procurement of substitute products or services, lost profits, loss of information or data,
computer malfunction, or any other special, indirect, consequential, or incidental damages arising in any way out of the sale of, use of, or inability
to use any CRU product or service, even if CRU has been advised of the possibility of such damages. In no case shall CRU’s liability exceed the
actual money paid for the products at issue. CRU reserves the right to make modifications and additions to this product without notice or taking
on additional liability.
FCC Compliance Statement: “This device complies with Part 15 of the FCC rules. Operation is subject to the following two conditions: (1) This
device may not cause harmful interference, and (2) this device must accept any interference received, including interference that may cause
undesired operation.”
This equipment has been tested and found to comply with the limits for a Class A digital device, pursuant to Part 15 of the FCC Rules. These limits
are designed to provide reasonable protection against harmful interference when the equipment is operated in a commercial environment. This
equipment generates, uses, and can radiate radio frequency energy and, if not installed and used in accordance with the instruction manual, may
cause harmful interference to radio communications. Operation of this equipment in a residential area is likely to cause harmful interference in
which case the user will be required to correct the interference at this own expense.
In the event that you experience Radio Frequency Interference, you should take the following steps to resolve the problem:
1)
Ensure that the case of your attached drive is grounded.
2)
Use a data cable with RFI reducing ferrites on each end.
3)
Use a power supply with an RFI reducing ferrite approximately 5 inches from the DC plug.
4)
Reorient or relocate the receiving antenna.
68c70m
PMS 2726
Features
• Optional write protection on the RAX 3QJp enclosure prevents data
from being overwritten or altered.
• TrayFree Models (RAX210) allow for easy insertion and removal of
hard drives. Models with removable carriers (RAX211) enclose and
protect hard drives when removed from the RAX enclosure.
• eSATA, FireWire 800, USB 2.0, and USB 3.0 connections are provided
for wide variety of connectivity.
• Specially designed drive and carrier interfaces are built to withstand
tens of thousands of insertions.
Download a copy of the complete User Manual at www.cru-inc.com.
FOR OFFICE OR COMMERCIAL USE
A9-210-0011-1 Rev. 1.0
CRU® RAX® 3QJ/3QJp Rack Enclosure
Forensic Device User Advisory (3QJp Models Only)
Before using this tool for accessing sensitive data, verify the write-blocking
function of the product. Attach a known good formatted drive and verify that the
drive mounts properly on your computer. Copy files to the drive. Due to the “spoof
writing” style of write-blocking employed by this product, the files will appear to
copy successfully. Next, unmount and remount the drive. The files that you copied
should not appear after the drive is remounted. If they do appear, there is a problem
with your forensic device and you should contact our support department for
further instructions.
1 Installation Steps
1.1 Installing Hard Drives
1.1.1 TrayFree™ Bay Drive Installation
NOTE: T
his subsection refers only to the RAX210-3QJ and RAX2103QJp enclosures.
1.2 Selecting the Operation Mode for Each Bay
Each bay comes equipped with a switch on the front bezel that switches between
Read/Write (R/W) Mode and Write Protect (WP) Mode. Flip the switch for each
bay to choose the appropriate operation mode.
NOTE: T
his section refers only to 3QJp write protect models.
Read/Write (R/W) Mode
Flip the bay’s switch to R/W. Using this mode, RAX 3QJp bays will operate like
standard external hard drives, performing standard read and write functions. The
drive bay must be set to R/W mode in order to format the hard drive.
Write Protect (WP) Mode
Flip the bay’s switch to WP. Using this mode, RAX 3QJp bays will protect data
already on the hard drive. The data on the drive can be read but cannot be altered.
NOTE: W
hen changing the mode of operation the new setting will
not take effect until the power is cycled or a drive is removed
or added. The mode LED will then change to indicate the new
mode.
a. Pull on the ejection handle to open the door.
b. Slide in your SATA hard drive, connector-end first with the label facing up.
c. Shut the door by pushing on the handle.
1.1.2 Drive Installation for RAX with Removable Carriers
NOTE: T
his subsection refers only to RAX211-3QJ and RAX211-3QJp
models.
1.3 Operating Your RAX Enclosure
Connect the data cables to the RAX enclosure and your computer. Plug in the
power cord to a grounded electrical outlet. Insert hard drives into the unit and
turn on the power.
a. Slide the drive carrier out of the RAX enclosure.
•
b. The carrier’s cover is held in place by a screw on the rear of the unit.
Remove the screw and then remove the cover.
•For the RAX211, use the included set of keys to turn the key 90 degrees
clockwise to power on each hard drive.
c. Slide the drive in from the front of the carrier.
d. Mate the connection on the drive with the connection on the drive carrier
circuit board.
e. Flip the drive/carrier assembly over and secure the drive in place with the
provided screws.
f.
Attach the Temperature Control Cooling Sensor to the top of the drive with
a piece of tape.
g. Replace the carrier cover and secure the screw on the rear of the carrier.
h. Slide the carrier into the RAX enclosure.
For the RAX210, the drives will begin to spin up automatically.
Your RAX enclosure is now ready to use! If the hard drive is already formatted, it
can be used right away. If the hard drives are brand new, or their file systems are
not compatible with your operating system, the drive will need to be formatted
before being used.
NOTE: If any of the drives are inaccessible after powering on the unit, try
the following steps:
1. Turn off the power.
2. Remove the drive(s) in question.
3. Reinsert the drive(s).
4. Turn on the power.
CRU Mark
10.25.12
PMS 711
2 cyan
85 magenta
76 yellow