1
RAX Branding
2c85m76y
PMS 711C
68c70m
PMS 2726
Table of Contents
1.2 Identifing Parts
1. Pre-Installation Steps
1.1 Box Contents
1.2 Identifying Parts
2
2
2
1.3 Warnings and Notices
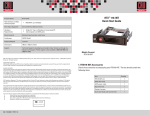
Take a moment to familiarize yourself with the parts of
RTX. This will help you to better understand the following
instructions.
3
2. Installation Steps
2.1 TrayFree Bay Drive Installation
2.2 Drive Installation for RTX with Removable
Carriers
2.3 Host Connections
3. Operation Steps
4. Write Portection Mode Selection (QJp model only)
5. LED Behavior
5.1 RTX220-3SJ
5.2 RTX221-3SJ and RTX222 Secure-3SJ
Front of RTX-3SJ
4
4
4
4
4
4
4
4
4
5.3 RTX220-QJ
5
5.4 RTX221-3QJ and RTX222 Secure-3QJ
5
5.5 RTX220-3QJp
5
5.6 RTX221-3QJp and RTX222 Secure-3QJp
5
6. Usage with Mac and Windows Operating
Systems
5
6.1 Usage with Mac OS X
5
6.2 Usage with Windows Operating Systems
6
7. Encryption (Secure models only)
7
8. Technical Specifications
8
Key
Lock
Drive
Power
LED
Drive
Activity
LED
Ejection Handle
Rear of RTX-3SJ
1. Pre-Installation Steps
1.1 Box Contents
Depending on which configuration and accessories you
purchased, the package may include fewer items than
what are listed here. Please contact CRU if any items are
missing or damaged:
RTX Unit
USB 3.0 A to B cable
eSATA cable (RTX-3QJ and RTX-3QJp only)
FireWire 800 cable
Power cord
Packet of keys for locks
1
2
2
2
1
1
Encryption keys (Secure models only)
4
Quick Start Guide and Warranty Info
1
60mm
exhaust
fan
USB 3.0 Port
eSATA /USB 2.0
combo Port
Power
Switch
AC power
inlet
CRU Mark
Page 2
10.25.12
PMS 711
2 cyan
Front of RTX-3QJ
1.3 Warnings and Notices
Please read the following before beginning installation.
1.3.1 General Care
Disk Temperature and
Health
LEDs
Fan
LED
•
Proper grounding is strongly recommended to
prevent electrical damage to the unit or other
connected devices, including the computer host.
Avoid all dramatic movement, tapping on the unit,
and vibration.
•
Avoid placing the unit close to magnetic devices,
high voltage devices, or near a heat source. This
includes any place where the product will be subject
to direct sunlight. Do NOT allow water to make
contact with the unit.
•
Before starting any type of hardware installation,
please ensure that all power switches have
been turned off and all power cords have been
disconnected to prevent personal injury and damage
to the hardware.
•
To avoid overheating, the unit should be operated in a
well-ventilated area.
•
Remove the drives before transporting the unit to
prevent damage to the drive interfaces.
Key
Lock
Ejection
Handle
Drive
Power
LED
Drive
Activity
LED
Front of RTX-3QJp
Read/Write,
Write Protect
LEDs
Disc Temperature and
Health
LEDs
Read/Write,
Write Protect
Switch
Key
Lock
Fan
LED
Ejection
Handle
1.3.3 Encryption (RTX Secure Models Only)
•
Though the Security Key port is mechanically identical
to the standard Mini-USB port, inserting Security Keys
into any other Mini-USB port may damage the keys
and render them useless. Please only use Security
Keys in RTX products.
•
Likewise, inserting a Mini-USB cable or other device
into the unit’s Security Key port on the carrier may
cause internal damage and potentially lead to loss of
data.
•
Any time power is cycled on the unit, the Security
Key should be installed prior to recycling the power in
order to access the data on the drive.
Drive
Power
LED
Drive
Activity
LED
60mm
exhaust
fan
Rear of RTX-3QJ and 3QJp
Dual
FireWire
800 Ports
eSATA /USB 2.0
combo Port
USB 3.0 Port
Power
Switch
AC power
inlet
CRU Mark
Page 3
10.25.12
PMS 711
2 cyan
2 Installation Steps
2.1 TrayFree Bay Drive Installation
If the hard drives are brand new, or their file systems are not
compatible with your operating system, the drive will need to
be formatted before being used.
Note: This section refers only to RTX220-3SJ, RTX220-3QJ,
and RTX200-3QJp
If any of the drives are inaccessible after powering on the
unit, try the following steps:
a)
Pull on the ejection handle to open the door.
b)
Slide in your SATA hard drive, connector-end first with the label facing up.
c)
Shut the door by pushing on the handle.
1.
2.
3.
4.
Turn off the power.
Remove the drive(s) in question.
Reinsert the drive(s).
Turn on the power.
4. Write Protection Mode Selection (RTX-3QJp)
2.2 Drive Installation for RTX with Removable
Carriers
Note: This section refers only to RTX221-3SJ, RTX Secure
222-3SJ, RTX221-3QJ, RTX Secure 222-3QJ, RTX221-3QJp,
and RTX Secure 222-3QJp models.
a)
Slide the drive carrier out of the RTXunit.
b)
The carrier’s cover is held in place by a screw on the rear of the unit. Remove the screw and then remove the cover.
c)
Slide the drive in from the front of the carrier.
d)
Mate the connection on the drive with the connection on the drive carrier circuit board.
e)
Flip the drive/carrier assembly over and secure the drive in place with the provided screws.
f)
Attach the Temperature Control Cooling Sensor to the top of the drive with a piece of tape.
g)
Replace the carrier cover and secure the screw on the rear of the carrier.
h)
Slide the carrier into the RTX unit.
• R/W (Read/Write)
RTX-3QJp bay will operate like a standard external hard
drive, performing standard read and write functions. The
drive bay must be set to R/W mode in order to format the
hard drive. If the bay is set to WP mode, new drives cannot
be formatted for use.
• WP (Write-Protect)
RTX-3QJp will protect the data already on the hard drive.
The data on the drive can be read but cannot be altered.
Note: When changing the mode of operation the new
setting will not take effect until the power is cycled or
a drive is removed or added. The mode LED will then
change to indicate the new mode.
2.3 Host Connections
5 LED Behavior
RTX-3SJ, -3QJ, and -3QJp units can connect to your
computer via USB 3.0, USB 2.0, or eSATA. RTX-3QJ and
-3QJp units can also connect via FireWire 800. Choose one
of these types to use and plug it into the unit. Each bay
requires its own data connection.
5.1 RTX220-3SJ
3 Operating Your RTX unit
Connect the data cables to the RTX and your
computer. Plug in the power cord to a grounded electrical
outlet. Insert hard drives into the unit and turn on the
power.
• For RTX220-3SJ, 3QJ, and 3QJp, the drives will spin up automatically
•
For RTX221-3SJ, -3QJ, and -3QJp and RTX Secure 222-3SJ, -3Qj, and -3QJp, use the included set of keys to turn the key lock 90 degrees clockwise to
power on each hard drive.
Your RTX unit is now ready to use! If the hard drive is
already formatted, it can be used right away.
LED
Behavior
Drive
Power
Glows green when the drive is in the unit and receiving
power.
Drive
Activity
Glows amber when the drive is being accessed, either
reading or writing from the drive.
5.2 RTX221-3SJ and RTX222 Secure-3SJ
LED
Behavior
Drive
Power
Glows green when the drive is in the unit and receiving
power. Flashes green in the event of a fan failure.
Drive
Activity
Glows amber when the drive is being accessed, either
reading or writing from the drive.
Key Error
(Secure
models
only)
Flashes red when the Seurity key is not present or not
functioning. Glows red when there is an encryption engine error. Contact Technical Support
Encryption
(Secure
models
only)
Glows green when the encryption key is present and
encryption is enabled.
CRU Mark
Page 4
10.25.12
PMS 711
2 cyan
CRU Mark
10.25.12
PMS 711
2 cyan
CRU Mark
10.25.12
PMS 711
2 cyan
6.2.2 Mounting and Unmounting Volumes
If the hard drive inside of the RTX carrier is already
formatted, you can begin using the volume right away.
When the RTX-3QR is properly connected and turned on, a
window may open to allow you access to the volume. If no
window appears, find the volume by double-clicking on the
My Computer icon on the desktop (Windows XP), by clicking
the Computer button in the Start Menu (Windows Vista, 7,
Server 2008 product family ), by clicking on Computer in the
navigation pane of a File Explorer window (Windows Server
2012 ), or by opening a File Explorer window (Windows 8.1,
RT 8.1, Server 2012 R2 ).
7 Encryption (RTX Secure models only)
•
RTX Secure uses full disk hardware encryption to
encrypt the entire contents of the drive—including
the boot sector, operating system and all files—
without performance degradation.
•
The Security Key must be installed prior to powering
on the RTX Secure for the data to be decrypted on the
drive. If the key is externally connected to the MiniUSB Security Key Port and is not internally installed,
then once it has been accepted, it may be removed
and stored in a safe location. Always store Security
Keys apart from the data so that in the event that the
drive is lost or stolen, the data is protected.
•
When a drive is formatted using an encryption key,
the same or a duplicate key must be used in order to
access the data. There is no “back door” to access
the data; lost keys make data recovery virtually
impossible.
Unmounting a USB or Firewire Volume
Unmount the RTX-3QR before powering it down by leftclicking the green arrow icon on the task bar (in Windows
XP) or the USB plug icon with the green checkmark on the
Desktop task bar (Windows Vista, 7, 8.1, RT 8.1, Server 2008
and 2012 product families ), and then selecting the proper
device from the menu that pops up. You may have to click
on the Show Hidden Icons arrow on the task bar to find
the correct icon. Windows will indicate when it is safe to
disconnect the RTX. Disconnecting the RTX without first
ejecting it can result in data loss.
Unmounting an eSATA Volume
If you purchased an eSATA host card that supports hotswapping, follow the instructions for unmounting a USB or
FireWire volume above. Many eSATA hosts do not support
this feature. However, freeware utilities are available on the
Internet that provide a similar function. You may download
one of these utilities or follow these instructions: Ensure
no file transfers are taking place by making sure the Drive
Activity LED is not blinking, as disconnecting the unit
while a file transfer is in progress can result in data loss.
Then disconnect power to RTX You may need to restart your
computer in order to remount RTX.
CRU Mark
Page 7
10.25.12
PMS 711
2 cyan
8. Technical Specifications
Product Models:
RTX220-3SJ, RTX221-3SJ, RTX Secure 222-3SJ,
RTX220-3QJ, RTX221-3QJ, RTX Secure 222-3QJ,
RTX220-3QJp, RTX221-3QJp, RTX Secure 222-3QJp
Data Interface
and Speeds:
• USB 3.0: Up to 5 Gbps
• eSATA: up to 2400 Mbps
• Dual FireWire 800: up to 800 Mbps (QJ and QJp
models only)
• USB 2.0: up to 480 Mbps
Drive Types
Supported:
3.5” SATA hard drives
Shock
Absorbing Bays:
Yes (RTX220-3SJ, RTX220-3QJ, and RTX220-3QJp
models only)
Lockable Bays:
Yes
Power LED:
Yes
Access LED
Yes
Power Switch:
2 position: On / Off
Power Supply:
Input: 100-240VAC
Output: 120 Watts
Cooling Fan
60mm exhaust fan
External
Material:
All-aluminum construction
Shipping
Weight:
8.5 pounds without drives, 11.5 pounds with drives
Dimensions:
278mm L x 174mm W x 160mm H
Compliance:
•
•
•
•
Warranty:
3 Years
Support
Your investment in CRU products is backed up by our
free technical support for the lifetime of the product. If
you need to contact us for any reason, please visit
cru-inc.com/support or call us at 1-800-260-9800 or
+1-360-816-1800.
EMI Standard: FCC Part 15 Class A
CE
EMC Standard: EN55022, EN55024
RCM
© 2013 CRU Acquisition Group LLC, ALL RIGHTS RESERVED.
RTX™ and CRU™ are trademarks of CRU Acquisition Group, LLC and are
protected by trademark law.
Product Warranty
CRU warrants this product to be free of significant defects in material and
workmanship for a period of three years from the original date of purchase.
CRU’s warranty is nontransferable and is limited to the original purchaser.
Limitation of Liability
The warranties set forth in this agreement replace all other warranties.
CRU expressly disclaims all other warranties, including but not limited
to, the implied warranties of merchantability and fitness for a particular
purpose and non-infringement of third-party rights with respect to the
documentation and hardware. No CRU dealer, agent, or employee is authorized to make any modification, extension, or addition to this warranty.
In no event will CRU or its suppliers be liable for any costs of procurement
of substitute products or services, lost profits, loss of information or data,
computer malfunction, or any other special, indirect, consequential, or
incidental damages arising in any way out of the sale of, use of, or inability
to use any CRU product or service, even if CRU has been advised of the
possibility of such damages. In no case shall CRU’s liability exceed the
actual money paid for the products at issue. CRU reserves the right to
make modifications and additions to this product without notice or taking
on additional liability.
FCC Compliance Statement: “This device complies with Part 15 of the FCC
rules. Operation is subject to the following two conditions: (1) This device
may not cause harmful interference, and (2) this device must accept any
interference received, including interference that may cause undesired
operation.”
This equipment has been tested and found to comply with the limits for a
Class A digital device, pursuant to Part 15 of the FCC Rules. These limits
are designed to provide reasonable protection against harmful interference
when the equipment is operated in a commercial environment. This equipment generates, uses, and can radiate radio frequency energy and, if not
installed and used in accordance with the instruction manual, may cause
harmful interference to radio communications. Operation of this equipment
in a residential area is likely to cause harmful interference in which case
the user will be required to correct the interference at this own expense.
In the event that you experience Radio Frequency Interference, you should
take the following steps to resolve the problem:
1)
Ensure that the case of your attached drive is grounded.
2)
Use a data cable with RFI reducing ferrites on each end.
3)
Use a power supply with an RFI reducing ferrite approximately 5 inches from the DC plug.
4)
Reorient or relocate the receiving antenna.
FOR OFFICE OR COMMERCIAL USE
CRU Mark
Page 8
10.25.12
PMS 711
2 cyan