1
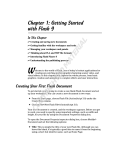
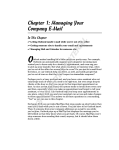
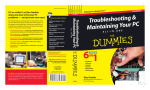
Chapter 1: Upgrading
to Microsoft Outlook
AL
In This Chapter
✓ Receiving a warm welcome
RI
✓ Discovering your Identity
✓ Upgrading from Entourage and Apple Mail
✓ Importing contacts from a text file
TE
✓ Upgrading from Gmail, Yahoo!, and Hotmail
MA
✓ Adding Email, Exchange, and Directory accounts
D
✓ Keeping track of your Identities
O
RI
GH
TE
utlook 2011 is a milestone in the history of Microsoft Office on the
Mac. Of course, all Microsoft Office for Mac products are designed
and built only on Macs, but Outlook 2011 is the first completely Cocoa Office
application in the Office suite. For you, making Outlook in Apple’s Cocoa
framework means Outlook has a distinctive Mac feel, and you can feel good
that it is made with purely Mac ingredients. Delicious!
CO
PY
Outlook is the productivity application within Office 2011 that provides
e-mail, calendar, contact manager, task, and notes taking tools to help
you stay organized. Integration with Messenger and Communicator
enables you to be aware of the presence of your colleagues and associates.
Outlook is the premier Microsoft Exchange client on the Mac. And if all
those terms sound bewildering, don’t worry because we explain them
all in this minibook.
Most people already have an e-mail account (or maybe several), and in this
chapter, we help you get your e-mail account(s) working in Outlook. And if
you get a new e-mail account, we show you how to make that one work, too.
704
Getting to Know Microsoft Outlook for Mac
Outlook is not available in the Home and Student edition of Microsoft Office.
If you have the Home and Student edition, we recommend using Apple
Mail, with Address Book and iCal, continue using Microsoft Entourage if
you have it already. To upgrade Home and Student to Home and Office, open
Microsoft Word. From Word’s menu bar, choose Word➪Purchase Options.
Choose either Enter Your Product Key if you already purchased an upgrade
key from a vendor, or choose Purchase a Product Key On Line to purchase
an upgrade key, and then return to this screen to enter it.
Getting to Know Microsoft Outlook for Mac
The New in Office 2011 icon could go next to every paragraph in this entire
minibook for Outlook 2011. But we’re sure you would get tired of seeing it,
so we just use it to alert you to specific features that are brand-new in
Outlook for Mac. Microsoft Outlook for Mac replaces Microsoft Entourage
and continues forward with these features:
✦ E-mail: Supports IMAP, POP, and Exchange protocols. Protocols are just
a way in which e-mail is handled by the mail server, and unless you’re an
administrator, you won’t ever need to know how these work!
Internet service providers usually offer two different kinds of service:
POP and IMAP. At one time, POP was the dominant method, but IMAP is
what we recommend now if you have a choice. Here’s a brief explanation
of the difference:
• IMAP: Configured to keep your mail inbox on the provider’s server.
You can create subfolders on the server to store mail in folders,
such as read mail, deleted messages, junk mail, or any folder you
want. The advantage of IMAP is that you can connect to the server
from various devices. Your message list appears the same from any
device, such as your iPod or cellphone, your computer at work, or
your laptop. Your e-mail account has the same messages available,
regardless of what device you use, no matter where you connect.
• POP: Usually configured to download e-mail messages to your local
computer and delete them from the server right away. This option is
fine if you have only one computer and one location. Although you
can set POP to leave the messages on the server, in general, you run
the risk of accidentally deleting a wanted message.
✦ Calendars: Supports W3C standard calendar protocol and Microsoft
Exchange calendar protocol. These are again various ways in which
calendars are configured.
Opening Outlook for the First Time
705
✦ Contacts: Supports W3C standard vCard protocol and Microsoft
Exchange calendar protocol. If you don’t want to get too much into this
protocol stuff, just be happy that Outlook handles so many of them!
✦ Notes: A built-in notes manager.
SkyDrive and SharePoint integration replaces the Entourage Project Center.
Opening Outlook for the First Time
The very first time you open Outlook, you’re greeted with the beautiful
welcome screen.
You can see Outlook’s six major new features immediately by clicking the
What’s New button in the welcome screen and reading a brief description
of each new feature you see in Figure 1-1. We cover details about all of
these features in this minibook. Other options from the Welcome screen
are as follows:
Figure 1-1:
Greetings
from Outlook
2011.
Upgrading to
Microsoft Outlook
✦ Tasks: A built-in task manager with calendar tie-in.
Book V
Chapter 1
706
Learning Your Identity
✦ Explore Outlook: Click this button to visit the Microsoft Outlook 2011
Web site in your default Web browser.
✦ Add Account: Click this button if you aren’t upgrading from Entourage,
Outlook, or another e-mail program. This option is for starting off completely fresh. Add Account opens the Accounts dialog, discussed later
in this chapter, in the “Adding an e-mail account” section.
✦ Import: This is the same as choosing File➪Import from the menu bar
while Outlook is running. Choose this option to import any of the
following into Outlook:
• Outlook data file from Windows or the really old Outlook for Mac.
(Yes, a decade or so ago Microsoft abandoned Outlook on the Mac
to create Entourage, and now it has come back around to Outlook —
call it a full circle.)
• Entourage information from an Entourage archive file or Entourage.
• Information, such as contacts, from another application.
• Contacts or messages from a text file.
• Add holidays to your Outlook calendar. (See Chapter 4 of this
minibook.)
✦ Close: Closes the welcome screen and runs Outlook.
• If your computer had Entourage 2004 or Entourage 2008 on it, Outlook
automatically upgrades your Identity and then runs Outlook. See the
section “Upgrading from Microsoft Entourage 2008 or 2004,” later in
this chapter.
• If your computer didn’t have Entourage 2004 or 2008 Identities to
upgrade, Outlook simply runs with an empty Identity when you
choose this option.
Usually, you get to see the welcome screen only once, but if you want to see
it again, choose Help➪Welcome to Outlook from the menu bar.
Learning Your Identity
Outlook has a special folder within the Mac OS X Finder called Office 2011
Identities. (See Figure 1-2.) You can locate it for yourself here:
/Users/Username/Documents/Microsoft User Data/
Learning Your Identity
707
Figure 1-2:
Locating
Outlook
Identities.
For Outlook 2011, the structure of an Identity folder is completely new.
Outlook now treats each item within an Identity as a discreet file. Each
e-mail, calendar event, or task is stored as its own file. This means Time
Machine backups for your Identity can take a fraction of a second instead
of several minutes or longer as it sometimes did in Entourage. Spotlight
searching is much improved as a beneficial side effect.
By default, Outlook makes an Identity for you called Main Identity, which
stores your first e-mail account’s information. It’s a good idea to learn where
your Identity folder is located, if for no other reason so that you know not
to delete or move it. Use Mac OS X Finder application (on your Dock) to
navigate your file system. Finder’s icon appears in the left margin.
It’s possible to have more than one Identity. Figure 1-2 shows that we have four
Identities stored in Documents\Microsoft User Data\Office 2011 Identities. Our
four Outlook Identities are called JBG, Main Identity, Test 2004, and Home.
Keep in mind that when you upgrade or add an e-mail account, calendar,
task, or note, the information is stored within an Identity.
Book V
Chapter 1
Upgrading to
Microsoft Outlook
Just like it sounds, this special folder contains everything about your
Outlook activities. Inside this folder, Outlook stores one folder for each
individual Identity. The name of the folder is the name of the Identity.
Each Identity folder stores your e-mail, account information, calendar
events, tasks, and notes in a database for each Identity. You may also
see a MeContact.plist file, which you should not disturb.
708
Upgrading from Entourage 2008 or 2004
Sticking with standards
The Word Wide Web Consortium (www.w3c.
org) is an international body that publishes
standards so that software engineers can
design applications that share compatible
files on a variety of platforms. The specifications are an alphabet soup including XML (eXtensible Markup Language), HTML (HyperText
Markup Language) used in Web browsers, and
HTML e-mail. There are standard file formats
for calendar events and contacts (vCards).
Office 2011 is designed to be compatible with
applications that adhere to W3C standards.
Sending and receiving HTML mail in Outlook
should work just fine with other up-to-date
standards-based e-mail applications. Sending
and receiving contacts and calendar events
using Outlook should work with other applications that adhere to W3C standards, such as
Gmail, Sunbird, and Thunderbird on Windows,
Macintosh, and Linux.
These scenarios illustrate times when having more than one Identity
is desirable:
✦ Separation of work and private life e-mail accounts: Your work may
require you to have an IMAP account, a Gmail account, and an Exchange
account, but you want to keep your personal e-mail accounts, contacts,
tasks, and notes from mixing in with your business activities. Use one
Identity for work and another for your private life.
✦ Keeping jobs independent: Perhaps you work two or more jobs and
don’t want to intermingle mail, calendars, and so on. Making an Identity
for each job can help you keep your jobs from getting crossed.
✦ Organization support: If you take care of the e-mail for a club or
organization, make a separate Identity to keep that mail segregated.
✦ Special event: If you manage a special event, such as a conference,
webinar, or colloquium, starting a new Identity and e-mail account
for the event is the perfect way to manage things.
Upgrading from Entourage 2008 or 2004
Note: If you started with Office 2011 and don’t have an older version of
Entourage installed, you can skip this section.
Upgrading from Entourage 2008 or 2004 is simple. After you install Office
2011, when you close the welcome screen, Outlook automatically upgrades
your Entourage Identity into a new 2011 Identity. Your old Entourage Identity
remains on your drive unchanged.
Upgrading from Entourage 2008 or 2004
709
✦ Categories, calendars, calendar events, tasks, and notes are all
supported in Outlook and will be carried forward.
✦ Outlook upgrades only one Identity automatically. If you have more
than one Identity, see the later section, “Manually upgrading an
Entourage Identity.”
✦ If you have any Project Center documents, they’re left undisturbed. If
your project documents are not already in shared locations and you
need to share them, consider moving your documents to SkyDrive,
SharePoint, Mac OS X sharing, or Windows shared folders.
✦ Project Center projects will be lost because Entourage Project Center
is not supported in Outlook.
✦ Outlook does not support Entourage’s link feature. Links that were in
Entourage will be abandoned when upgrading.
If you’re using a version of Entourage older than 2004 or 2008, Outlook may
not be able to import your Entourage Identity. To find out which version of
Entourage you have, choose Entourage➪About Entourage. Before installing
Office 2011, in Entourage choose File➪Export to save your Identity as an
Entourage Archive file (.rge). See Entourage help for details about how to
do this. In Entourage, choose Tools➪Accounts and gather all the account
information. You’ll need to re-create your accounts in Outlook. After installing
Office 2011, open Microsoft Outlook. Follow these steps to import your Identity
into Outlook from the .rge file using a wizard-like series of setup dialogs:
1. In Outlook, choose File➪Import from the menu bar.
The Begin Import dialog displays.
2. Select the Entourage Information from an Archive or Earlier Version
option and then click the right-arrow button at the lower-right corner
of the dialog.
The Choose an Application dialog displays.
3. Select the Entourage Archive (.rge) option and click the right-arrow
button at the lower-right corner of the dialog.
The Import file browser displays.
Book V
Chapter 1
Upgrading to
Microsoft Outlook
Later, when you’re satisfied that Outlook brought forward everything you
need from your old Identity, you can save your old Entourage Identity
for posterity or trash it. Your old Identity can be found in Documents\
Microsoft User Data folder\Office 2008 (or 2004) Identities. (Refer to
Figure 1-2.) Identities can be large, so when you’re satisfied that your
Identity is working fine in Outlook, deleting your old Identity can free
a considerable amount of disc space. Here are some fine details about
upgrading from Entourage 2008 or Entourage 2004:
710
Switching from Windows Outlook to Mac Outlook
4. Navigate to the saved Entourage archive .rge file and click the
Import button.
Outlook imports your Identity. If it seems like nothing is happening
and the progress bar got all the way to the end, just keep waiting.
Eventually you see the Done button.
5. Click Done.
Your Identity has been successfully imported.
6. In Outlook, choose Tools➪Accounts from the menu bar.
Enter account information to restore your accounts, as described later
in this chapter, in the “Managing Accounts in an Identity” section.
Switching from Windows Outlook to Mac Outlook
Microsoft makes it easy to switch to Outlook for Mac. As we mention earlier
in this chapter, Outlook 2011 is the first Outlook version to take advantage
of the new Outlook Identity format. Before starting this process, we recommend that you make a note of the account settings in Outlook for Windows.
In Outlook 2010 for Windows, choose File➪Info➪Account Settings.
If you’re using a version of Outlook for Windows older than Outlook 2010,
check Outlook Help for instructions for making an Outlook data file (.pst).
Saving an Outlook data file
You can migrate your Windows Outlook Identity by making an Outlook
data file (.pst) in Outlook for Windows and then importing the .pst file
into Outlook 2011 for Mac. Here’s how to save your Outlook data file in
Outlook 2010 for Windows.
1. In Outlook 2010 for Windows, choose File➪Options➪Advanced➪Export
and then click the Export button.
The Import and Export wizard displays. If you don’t see the wizard, try
minimizing the visible window, because the wizard may display behind
the current window.
2. Select Export to a File and then click the Next button.
The Create a File of Type dialog displays.
3. Select Outlook Data File (.pst) and then click the Next button.
The Select a Folder to Export From dialog displays with the proper
folder selected and the Include Subfolders check box selected.
Switching from Windows Outlook to Mac Outlook
711
4. Click the Next button.
The Save Exported File As dialog displays.
then click the Browse button to choose a file location. Note its location
and then click the Finish button.
Outlook asks whether you want to give your file a password.
6. Leave the Password fields blank and then click OK.
If you click the Cancel button, Outlook not only cancels adding a
password, it cancels making your (.pst) file, and you’ll have to
start over in frustration (as we did).
Outlook prepares the data file, which you should copy or move to your Mac
using a method of your choice. (DVD, USB drive, SkyDrive, and SharePoint
are but four of many possible transfer methods.)
Importing an Outlook for Windows data file
To import your saved .pst file in Outlook for Mac, follow these steps:
1. In Outlook 2011 for Mac, choose File➪Import from the menu bar.
The Begin Import dialog displays.
2. Select Outlook Data File (.pst) and then click the right-arrow button
at the lower-right corner of the dialog.
The Choose a File Type dialog displays.
3. Select Outlook for Windows Data File (.pst) and then click the
right arrow.
The Import file browser displays.
4. Navigate to the Outlook data file and click the Import button.
Outlook imports your Identity. If it seems like nothing is happening
and the progress bar got all the way to the end, just keep waiting.
Eventually you see the Done button.
5. Click Done.
Your Identity has been successfully imported.
6. In Outlook 2011 for Mac, choose Tools➪Accounts from the menu bar.
Enter account information to restore your accounts, as shown later in
this chapter, in the “Managing Accounts in an Identity” section.
Upgrading to
Microsoft Outlook
5. Give your file a name (be sure to use .pst as the file extension) and
Book V
Chapter 1
712
Upgrading from Apple Mail
Are you one of the hold-outs on System 9 (or 8.6 even!) still using the old
Outlook for Mac? Then hold out no more! Get yourself a nice Intel processorbased Mac and you can upgrade to new Outlook 2011. Before you do, in your
old computer’s Outlook, choose File➪Export to start a wizard that will let
you save your Outlook Identity as an Outlook for Mac (.olm) data file. Move
or copy the .olm data file to your new Mac and then follow the steps outlined in the previous steps. In Step 2, choose Outlook Data File for Mac .olm
instead of .pst. The rest of the steps remain the same.
Upgrading from Apple Mail
You may hesitate to upgrade to Outlook if you love Apple Mail. However, we
encourage you to try out Outlook. You can easily switch back to Apple Mail
if you decide you prefer it.
Upgrading to Outlook is quick and easy. If your Apple Mail is using Microsoft
Exchange, skip to the steps in the “Adding an Exchange account” section,
later in this chapter. For non-Exchange accounts, you upgrade to Outlook in
three stages. The first stage in the upgrade is to copy your e-mail messages,
accounts, rules, and signatures from Apple Mail to Outlook:
1. If Apple Mail is open, close it.
Check Apple Mail’s Dock icon to make sure there’s no indicator.
2. In Outlook, choose File➪Import from the menu bar.
The Begin Import dialog displays.
3. Select Information from Another Application and then click the
right-arrow button at the lower-right corner of the dialog.
The Choose an Application dialog displays.
4. Select Apple Mail and then click the right-arrow button.
The Import Items dialog displays.
5. Accept the default (all check boxes selected) and then click the
right-arrow button.
Outlook imports the selected items.
6. Click Finish.
Because Apple Mail is not integrated with iCal, the second stage imports
Apple iCal calendar events and to-do entries. Outlook understands W3C
standard calendar events in the .ics file format, as does Apple Mail, so
you can import calendar events as follows:
Upgrading from Gmail or Yahoo! Mail
713
1. In Apple iCal, choose File➪Export.
A Save As dialog displays.
remember, and then click the Export button.
Your calendar and events are ready to be imported into Outlook.
3. In Outlook, press Ô-2 to display the Outlook Calendar.
4. Drag the file you exported from iCal into the Outlook Calendar.
Your calendar events are now incorporated into your Outlook calendar.
The final stage copies your Apple Address Book entries into Outlook. We
take advantage of the fact that both Apple Address Book and Outlook use
W3C standard vCard files for sharing contacts:
1. In Apple Address Book, select all contacts that you want to bring to
Outlook’s Contact manager.
2. Drag the selected contacts to the desktop.
The single vCard file that appears contains the selected contacts.
3. In Outlook, press Ô-3 to display Outlook Contacts.
4. Drag the vCard into the list of Outlook contacts.
If you had groups in Apple Address book, the group members are given
the same category and are not put into an Outlook group.
Upgrading from Gmail or Yahoo! Mail
When you upgrade using IMAP with Gmail or Yahoo! mail, your mail is synchronized between Outlook and the Web. For example, when you delete an
e-mail in Outlook, it’s deleted simultaneously on the Web, and vice-versa.
Before you can use IMAP with these Web services, you must change the settings on the Web to allow IMAP connections to your Web service. Use the
Help feature in Gmail and Yahoo! mail and search for the term IMAP. Then
follow the instructions to allow your account to accept IMAP connections.
Also search the Web service Help for export. These services can export your
contacts in Comma Separated Values (.csv) file format, which Outlook can
import into your Outlook address book. Contacts between Outlook and the
Web can’t be synchronized.
Upgrading to
Microsoft Outlook
2. Name your exported file, choose a location that you can easily
Book V
Chapter 1
714
Upgrading from Hotmail
The next step is to add your Gmail or Yahoo! account to Outlook. See the
“Adding an e-mail account” section, later in this chapter. After you have
added your account, in Outlook choose File➪Import from the menu bar to
import the contacts from the .csv you saved from the Web. See the later
section, “Importing Contacts from a Text File,” for directions.
Upgrading from Hotmail
The default configuration that Outlook provides for Hotmail is a POP
account. We prefer to use IMAP with Hotmail. To use IMAP with Hotmail, we
found a wonderful application called mBox Mail for Mac. It’s $19.99 USD and
works beautifully with Outlook 2011! (No, we don’t get a cut of the price.)
Here’s where to get it:
http://fluentfactory.com/mboxmail-for-mac
See the later section, “Adding an e-mail account,” for instructions on how to
add your Hotmail account to Outlook.
Search Hotmail Help for instructions on how to export your contacts in the
Comma Separated Values (.csv) file format, which Outlook can import
into your Outlook address book, as explained in the next section. Contacts
between Outlook and the Web can’t be synchronized.
Importing Contacts from a Text File
As we mention earlier in this chapter, sometimes you need to make a .csv
file of your contacts in a different e-mail program so that you can bring your
contacts into Outlook. Outlook also supports -delimited text file formats
such as tab (.txt), comma (.csv), and MBOX file formats, which you can use
if your old e-mail program is capable of saving in these formats. Importing
Contacts is straightforward using a short series of dialogs:
1. In Outlook, choose File➪Import from the menu bar.
The Begin Import dialog displays.
2. Select Contacts or Messages from a Text File and then click the
right-arrow button at the lower-right corner of the dialog.
The Choose a File Type dialog displays.
3. Depending on the file type you need to import, choose either
• Import Contacts from a Tab- or Comma-Delimited Text File.
• Import Messages from an MBOX-Format Text File.
Managing Accounts in an Identity
715
4. Click the right-arrow in the lower-right corner of the dialog to display
the Import Text File dialog file browser.
Outlook displays the Import Contacts dialog shown in Figure 1-3.
6. Choose the field names from your old e-mail programs to equate them
with Outlook’s fields using the Import Contacts dialog. This maps the
old e-mail program’s field names to Outlook’s field names.
7. Click Import and then, in the next dialog, click Finish.
Your contacts from the old e-mail program are now in your Outlook
Contacts list.
Figure 1-3:
Mapping
imported
fields.
Managing Accounts in an Identity
Earlier in this chapter, we mention that the Welcome screen has an Add
Account button. If you click the button, you start with an empty Identity
and add the first e-mail account to the Identity. If you already have an
e-mail account within an Identity, you can add more accounts, one at a
time. You don’t have to stick with one kind of e-mail account, either. You
could have an IMAP account, an Exchange account, and a POP account
all in the same Identity.
You manage accounts within an Identity using the Account dialog. To activate
the Account dialog shown in Figure 1-4, click Add Account on the welcome
screen; or, in Outlook, choose Tools➪Accounts from the menu bar.
Upgrading to
Microsoft Outlook
5. Click the Import button.
Book V
Chapter 1
716
Managing Accounts in an Identity
Figure 1-4:
Managing
Accounts.
Set Default Account
The Account dialog lists your Identity’s accounts along the left. When you
choose an account, the account’s settings display on the right. You can
make the selected account the default account for the Identity by clicking
the Set Default Account button. To add a new account, click the plus (+)
sign, and to remove the selected account, click the minus (–) sign. When
you click the plus sign, you discover there are three kinds of accounts:
✦ E-mail: These are POP and IMAP accounts. (See “Getting to Know
Microsoft Outlook for Mac,” earlier in this chapter.)
✦ Exchange: An account that is hosted on a Microsoft Exchange Server.
✦ Directory: This is a lookup service using a protocol called LDAP
(Lightweight Directory Assistance Protocol). Large organizations
often offer LDAP service either internally or to the entire Internet.
Adding an e-mail account
You may be pleasantly surprised by how easy it is to add an e-mail account
to an Outlook Identity. Microsoft has gathered the settings for a large
number of popular e-mail providers so that in many cases, all you have
to do is enter your e-mail address and password, and Outlook takes care
of the rest.
Managing Accounts in an Identity
717
Of course, before you begin, you should obtain your e-mail address,
password, and account settings from your Internet service provider.
Here’s how to add a new e-mail account to an Identity:
The Account dialog displays. (Refer to Figure 1-4.)
2. Click the plus (+) sign in the lower-left corner. Choose E-Mail from
the pop-up menu.
An import form displays.
3. Enter the e-mail address and password for your e-mail account and
then click OK. (See Figure 1-5.)
As soon as you enter your e-mail address, additional form fields appear,
asking you to supply appropriate settings information provided by your
Internet service provider. If Outlook knows the settings, they will be
filled in for you and the Configure Automatically check box will
remain selected.
4. If Outlook didn’t automatically fill in the account settings, fill them
in manually.
5. Click the Add Account button to add your e-mail account to the
accounts list in the Account dialog.
Figure 1-5:
Entering
e-mail
account
settings.
Upgrading to
Microsoft Outlook
1. In Outlook, choose Tools➪Accounts from the menu bar.
Book V
Chapter 1
718
Managing Accounts in an Identity
Adding an Exchange account
Adding an Exchange account is easy to do:
1. In Outlook, choose Tools➪Accounts from the menu bar.
The Account dialog displays. (Refer to Figure 1-4.)
2. Click the plus (+) sign in the lower-left corner. Choose Exchange
from the pop-up menu.
An import form displays.
3. Enter your e-mail address, username, and password in the aptly
named text boxes. (See Figure 1-6.)
4. From the Method pop-up menu, choose User Name and Password.
In most cases, entering these three pieces of information and choosing
User Name and Password is all you need to do — Outlook does the rest.
If you need to use Kerberos to connect to Exchange, click the Method
pop-up button and choose Kerberos. Kerberos is an authentication
protocol — don’t worry too much about this unless your system or
the server administrator asks you to opt for this option.
5. Click the Add Account button.
Figure 1-6:
Entering
Exchange
account
settings.
Immediately after connecting, Outlook synchronizes itself with the Exchange
server bringing in all your mail, contacts, calendars, tasks, and notes.
We were impressed by how fast synchronization took place with our
Exchange server.
Managing Accounts in an Identity
719
Adding a directory account
1. In Outlook, choose Tools➪Accounts from the menu bar.
The Account dialog displays.
2. Click the plus (+) sign in the lower-left corner. Choose Directory
Service from the pop-up menu.
An import form displays.
3. Enter the name of the LDAP server and then click Add Account.
The account is added to the list of accounts in the Account dialog,
and the account settings display on the right.
4. (Optional) Click the Advanced button.
Advanced settings display, as shown in Figure 1-7. Adjust settings
as required for the LDAP server. In the Search Base field, typically
you enter something like c=US for a United States Server and
o=Organization’s name.
Figure 1-7:
Entering
advanced
LDAP
settings.
Upgrading to
Microsoft Outlook
A directory is a list of contacts provided in standard LDAP format, typically
for a large organization or entity. If you add a directory account to Outlook,
the contacts will be automatically available as you type e-mail addresses,
and you will be able to search the directory to find individuals. You will need
to obtain the LDAP directory settings from the server administrator prior to
attempting to add the server to your Outlook accounts. To add an account,
take these steps:
Book V
Chapter 1
720
Managing Identities
Managing Identities
At the beginning of this chapter, we introduce the concept of an Identity.
In Figure 1-2, we show where your Identities are stored on your Mac. Now
we explain how to take care of your Outlook Identities. The default Outlook
Identity is called Main Identity. Outlook gives you some tools to help you
manage your Identities.
Running Microsoft Database Utility
Microsoft Database Utility, shown in Figure 1-8, is your Identity-managing
toolbox.
You must quit Outlook before you can run the Database Utility. To run
the Utility, hold the Option key down as you open Outlook. Microsoft
Database Utility enables you to do the following:
✦ Create a new Identity. Click the plus (+) sign in the lower-left corner of
the Utility window, and then type a name for a new, empty Identity.
✦ Delete the selected Identity. Select an Identity from the list and then
click the minus (–) sign in the lower-left corner to move the selected
Identity’s folder from the Office 2011 Identities folder to the Trash.
✦ Set the default Identity. Select an Identity from the list and click the Set
as Default button to make it the Identity that Outlook uses when it opens.
✦ Rebuild an Identity. Select an Identity from the list and then click the
Rebuild button to build a new Identity of the same name from the contents of the selected Identity. The old Identity is renamed as Backed Up
with the date and time it was rebuilt, as shown in Figure 1-8. After enough
time has passed that you’re satisfied that the rebuilt Identity is functioning properly, use the Database Utility to delete the backed up file.
Figure 1-8:
Running
Outlook’s
Microsoft
Database
Utility.
Managing Identities
721
Manually upgrading an Entourage Identity
1. Quit Outlook (pressing Ô-Q quits any application).
2. Run the Microsoft Database Utility as described in the preceding
section.
3. In the Database Utility, click the plus (+) sign, and a new name is
added to the Identity Name list. Type a name for your new Identity.
4. Set the newly added Identity as the default Identity.
5. Click the red Close button to close the Microsoft Database Utility.
6. Open Outlook.
Outlook will open and run with an empty Identity.
7. Choose File➪Import from the menu bar.
This starts a series of dialogs. The Begin Import dialog displays.
8. Select Entourage Information from an Archive or Earlier Version and
then click the right arrow at the lower-right corner of the dialog.
The Choose an Application dialog displays.
9. Select either Entourage 2004 or Entourage 2008 as appropriate and
then click the right arrow.
The Import Items dialog displays with all check boxes selected.
10. Accept the default and click the right arrow.
The Select an Identity dialog displays.
11. Select the Identity you want to upgrade and then click the right arrow.
The default is to display Entourage Identities. You can click the Browse
button if your Identities aren’t stored in the default location.
12. Outlook upgrades your Identity and then opens so that you can use it.
If you’re prompted about allowing items to be updated in your Keychain,
choose Always Allow.
Rebuild your freshly imported Identity before using it. (See the previous
section, “Running Microsoft Database Utility.”)
Upgrading to
Microsoft Outlook
If you had more than one Identity in Entourage 2008 or 2004 you can manually upgrade them to Outlook 2008. Take these steps to upgrade one of your
old Identities. You can update one Identity at a time:
Book V
Chapter 1
722
Managing Identities
Switching Identities
Only one Identity at a time can display in Outlook. To switch Identities, take
these steps:
1.
2.
3.
4.
Quit Outlook (pressing Ô-Q quits any application).
Run the Microsoft Database Utility as described earlier in this chapter.
Change the default Outlook Identity.
Click the red close window button in the upper-left corner of the
Utility window to quit the Database Utility.
5. Start Outlook.
You can make the Outlook dialog shown in Figure 1-9 display automatically
whenever you open Outlook. To make the dialog available:
1.
2.
3.
4.
5.
Quit Outlook (pressing Ô-Q quits any application).
In Finder, open your Microsoft Office 2011 Identities folder.
Change the name of the folder of your default Outlook Identity.
Start Outlook.
Select the Show This List When Opening Outlook check box.
Be sure to select the Show This List When Opening Outlook check box. It’s a
handy tool for switching Identities instead of using the Database Utility. You
can then choose the Identity you want to use and click OK without having to
open the Database Utility.
Figure 1-9:
Outlook’s
Identity
chooser
dialog.