1
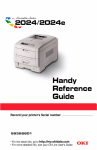
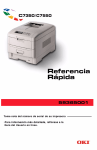
Important safety warnings follow.
Be sure to read and observe all
safety warnings in this Handy
Reference.
59375801
Contents
Walk-Up Operation . . . . . . . . . . . 3
The Scanner Control Panel . . . . . . 4
Using the Scanner/Copier. . . . . . . 7
Replacement Supplies . . . . . . . . 11
Purchasing Information . . . . . . . 11
The Printer Menu . . . . . . . . . . . . 13
Changing Settings . . . . . . . . . . . 13
Structure . . . . . . . . . . . . . . . . . 14
Print Media Settings . . . . . . . . . 15
Changing . . . . . . . . . . . . . . . . . 15
Weight . . . . . . . . . . . . . . . . . . . 17
by Paper Tray . . . . . . . . . . . . . . 19
by Type . . . . . . . . . . . . . . . . . . 22
Recommended . . . . . . . . . . . . . 25
Print Media Types . . . . . . . . . . . 26
Paper. . . . . . . . . . . . . . . . . . . . 26
Labels . . . . . . . . . . . . . . . . . . . 27
Transparencies . . . . . . . . . . . . . 28
Envelopes. . . . . . . . . . . . . . . . . 29
Thick Paper . . . . . . . . . . . . . . . 30
Oki Print Media . . . . . . . . . . . . . 31
Loading Print Media . . . . . . . . . . 32
Trays 1-5 . . . . . . . . . . . . . . . . . 32
MP Tray . . . . . . . . . . . . . . . . . . 33
Changing the MP Tray Default. . . 35
Printer Exit Paths . . . . . . . . . . . . 36
Face Down (Top) . . . . . . . . . . . . 36
Face Up (Side) . . . . . . . . . . . . . 37
Secure Print & Store to Hard Disk
Drive . . . . . . . . . . . . . . . . . . . . . 38
The Printer Control Panel . . . . . . 39
Keys . . . . . . . . . . . . . . . . . . . . 39
Lights . . . . . . . . . . . . . . . . . . . 41
Printer Power Save Mode . . . . . . 42
Cleaning the Printer LED Heads . 43
Printer Reports . . . . . . . . . . . . . . 46
Printer Error Messages . . . . . . . . 47
Printer Media Jams. . . . . . . . . . . 48
Service and Support . . . . . . . . . . 49
2
Walk-Up Operation
Access Control Feature
Access Control requires you to enter a
password before using the scanner. If
your administrator has enabled Access
Control, use the scanner panel’s
number keys (1) to enter your
assigned PIN, then press [Login]:
ES3640
e MFP
74
crop.jpg
ES3640e MFP
06.jpg
ES3640e MFP 06
crop.jpg
Important! When you are done, be
sure to press [Logout] to return the
scanner to the PIN entry screen.
Available Options
•
•
•
•
Copy
E-mail
Scan to Network
Scan to Mailbox
3
Walk-Up Operation
The Scanner Control Panel
–
T
ES3640e MFP 64.jpg
Touch Screen
Scan Functions
• COPY
Tilt feature:
• a = Release Button
• SCAN TO E-MAIL
• b = Handle
• SCAN TO NETWORK
• SCAN TO MAILBOX
4
Walk-Up Operation
The Scanner Control Panel
Control Keys
• INTERRUPT = Press to interrupt a
print job, in order to scan a
document.
START
Begins selected operation.
STOP
• POWER SAVE = Switches scanner
power save mode on/off.
Stops operation in progress.
• HELP = Displays help information
on touch screen.
Resets scanner settings to defaults.
RESET
LEDs
• SETUP = Switches to Setup mode
for entering e-mail addresses, etc.
POWER = Scanner is on.
ATTENTION = Scanner or printer: out
of paper, paper jam, etc.
Numeric Keypad
• 0 to 9 = enter numbers.
• Decimal Point = enter decimal
values or periods.
• Clear ( ) = deletes all text in the
selected box on the touch screen.
5
Walk-Up Operation
The Scanner Control Panel
Touch Screen Image Adjustment
Sets brightness, contrast, image
position, etc.
1.
: Enter adjustment mode.
2.
and
: Page through
items around perimeter of
Adjustment box.
3.
: Engage the selected item.
Value bar changes from black to
red.
4.
5.
and
: Change value.
: Engage the new value. Value
bar changes from red to black.
6. Repeat previous two steps until all
changes are made.
7.
and
8.
: Exit.
: Move to EXIT.
6
Walk-Up Operation
Using the Scanner/Copier
Loading a document
Scanner Glass
• Individual sheets
• Document size: min. 5.5" x 8.5",
max. 11.8" x 17"
• Weight: any. Leave lid open to scan
pages in books.
• Load documents face down, with
top edge facing left and placed
against back rear corner of the
scanner glass.
Automatic Document Feed (ADF)
• Up to 50 sheets: no staples, clips,
or ragged edges.
• Document size: min. 5.5" x 8.5",
max. 11" x 17"
• Weight Range: 16 to 28 lb. (60 to
106 g/m²).
• Load documents face up, with top
edge entering scanner.
ES3640
e MFP
72.jpg
ES3640
e MFP
73.jpg
7
Walk-Up Operation
Using the Scanner/Copier
To Scan and E-mail
For more information, see the User’s
Guide on the Documentation CD
provided with your system or at
http://my.okidata.com.
1. Load the document to be scanned.
2. Press the SCAN TO E-MAIL key.
The “E-Mail Send Mode” window
appears on the Touch Screen.
3. Touch the appropriate button
under [Address Source] and select
or key in the e-mail address, then
click [OK]
4. Make any needed changes in the
settings on the [Address],
[Message Text] and [Attachments]
tabs.
5. Press the START key.
To Make Copies
Note: The “Copy Mode” window is
the default which appears on
the Touch Screen. To switch
from another active mode to
Copy Mode, press the COPY
key.
1. Load the document to be copied.
2. Use the number keys to select the
number of copies (up to 999).
3. Make any other settings you need
on the Touch Screen tabs: [Basic
Settings], [Details], [Image
Quality], [Finishing].
4. Press the START key.
8
Walk-Up Operation
Using the Scanner/Copier
To Scan to an FTP Site
To Scan to a Mailbox
1. Load the document to be scanned.
2. Press the SCAN TO NETWORK key.
The “Network Send Mode” window
appears on the Touch Screen.
3. On the [FTP Server] tab, touch the
appropriate button under [Address
Source] and enter the [FTP Server
Name], then touch [OK].
4. Make any needed changes in the
settings on the [FTP Server] and
[Attachments] tabs.
5. Press the START key.
1. Load the document to be scanned.
2. Press the SCAN TO MAILBOX key.
The “Mailbox Send Mode” window
appears on the Touch Screen.
3. Touch the appropriate button
under [Address Source], then
follow the on-screen prompts to
enter the mail box name.
4. Make any needed changes in the
settings on the [Mailbox] and
[Attachments] tabs.
5. Press the START key.
9
Walk-Up Operation
Using the Scanner/Copier
To Scan to a Hold Queue
1. Load the document to be scanned.
2. Press the SCAN TO MAILBOX key.
The “Mailbox Send Mode” window
appears on the Touch Screen.
3. Touch [Hold Queue].
4. Enter your settings on the [Hold
Queue] and [Attachments] tabs.
5. Press the START key.
Clearing a Scanner Paper
Jam
ES3640e MFP 71.jpg
1. Press the release button (1) and
lift the ADF feed cover (2).
2. Pull out the sheet (3).
3. Close the ADF feed cover.
10
Replacement Supplies
Purchasing Information
Purchasing Information
Part Numbers
Where to Purchase
Consult the dealer where you
purchased your system.
Toner Cartridges
C96_Toner.jpg
Color
OKI Part #
Black ............................... 42918924
Cyan ................................ 42918923
Magenta ........................... 42918922
Yellow .............................. 42918921
11
Replacement Supplies
Purchasing Information
Image Drums
Other Consumables
C96_Fuser.jpg
C96_belt crop.jpg
1f.tif, 2f.tif
C96_Drum.jpg
Color
Black ...............................
Cyan ................................
Magenta ...........................
Yellow ..............................
OKI #
42918120
42918119
42918118
42918117
Consumable
Fuser
(
Oki #
) ............... 57102201, 120V
............. 57102202, 230V
Transfer Belt ( ) .............. 57102301
Toner Waste Bottle............. 57102401
12
The Printer Menu
Changing Settings
C96_ReadyToPrint.jpg
1. Press ENTER to switch to the menu
mode.
4. Use the ∇, ∆ and ENTER keys to
drill down to the item you wish to
change.
5. Use the ∇/ ∆ keys to move to the
setting you wish to engage.
6. Press ENTER.
An asterisk appears next to the
new setting.
7. Press ON LINE to exit the Menu
mode.
C98_Functio
ns_Menu_a.j
pg
2. Use the ∇ key to scroll down to the
Function you wish to change.
3. Press ENTER.
13
Menu
The Printer Menu
Structure
For more information, see the on-line
User's Guide on the Docu-mentation
CD provided with your printer or at
http://my.okidata.com.
– Menus
– Configuration
– Shut Down
• Page Count, Supplies Life.
• Network and System Settings.
• Size of paper automatically
detected in feed tray.
• Set the size, weight and type of
media for the various feed trays.
• Adjust system settings.
– Admin Setup
•
•
•
•
•
•
•
•
– Print Pages
•
•
•
•
•
PS Test Page, Configuration.
Job Log, Color Charts.
PS and PCL font lists.
Print Demo Page.
E-mail and Error lists.
– Suspend Printing
– Calibration
• Density adjustments,
Registration.
• Set calibration.
– Resume Printing
– Print Secure Job (Password
Protected)
• Print out documents from the
HDD.
Server and Network Setup.
Parallel and USB Setup.
Printer Setup.
PS and PCL Setup.
Color and Job Log Setup.
Change Password.
Set display language.
Reset to Factory Defaults.
– Print Statistics (Password
Protected)
14
Print Media Settings
Changing
Why Change?
All Print Jobs (Defaults)
Wrong media settings can cause:
• poor quality printing
• flaking
• damage to the printer
Control Panel
Right Side.jpg
Media Weight
1. Press ENTER.
2. ∇/ ∆ keys → Menus. Press ENTER.
3. With Tray Configuration highlighted,
press ENTER.
4. ∇/ ∆ keys → tray to be configured.
Press ENTER.
5. Use ∇, ∆ and ENTER to scroll
through the submenus and to
make your setting changes.
6. Press ON LINE to exit the Menu
mode.
The default media weight setting for
all trays is AUTO.
Individual Print Jobs
If you are using special media for only
one print job, you can adjust the
media settings in the driver. Load the
media in the appropriate tray (usually
the MP tray). In your application, click
[File] → [Print] and adjust the media
settings as necessary.
15
Print Media Settings
Changing
Reset to Factory Defaults
Control panel HRef Set1.jpg
1. Press ENTER.
2. Use the ∇ key to scroll down to
Admin Setup. Press ENTER.
3. ∇/ ∆ keys → Yes. Press ENTER.
Offline appears on the display
4. Wait for setup to run.
The Setup menu appears.
5. ∇/ ∆ keys → Factory Defaults. Press
ENTER.
6. ∇/ ∆ keys → Yes. Press ENTER.
The printer resets. Shutting down
appears on the display.
7. When the printer finishes shutting
down, press SHUT DOWN /
RESTART.
16
Print Media Settings
Weight
US Bond
Select the appropriate settings in either the printer menu or in the printer
driver.
Printer driver settings override printer menu settings.
Setting
US Bond (metric)
Auto (default)
17 to 57 lb. (64 to 216 g/m2)
Light
17 lb. (64 g/m2)
Medium Light
18 to 19 lb. (68 to 71 g/m2)
Medium
20 to 24 lb. (75 to 90 g/m2)
Medium Heavy
25 to 28 lb. (94 to 105 g/m2)
Heavy
29 to 34 lb. (109 to 128 g/m2)
Ultra heavy 1
35 to 50 lb. (132 to 188 g/m2)
Ultra heavy 2
51 to 58 lb. (192 to 218 g/m2)
Ultra heavy 3 [MP Tray only]
59 to 80 lb. (222 to 301g/m2)
17
Print Media Settings
Weight
Index
Setting
Index (metric)
Auto (default)
35 to 118.6 lb. (64 to 216 g/m2)
Light
35 lb. (64 g/m2)
Medium Light
37 to 40 lb. (68 to 71 g/m2)
Medium
42 to 50 lb. (75 to 90 g/m2)
Medium Heavy
52 to 56 lb. (94 to 105 g/m2)
Heavy
60 to 71 lb. (109 to 128 g/m2)
Ultra heavy 1
73 to 104 lb. (132 to 188 g/m2)
Ultra heavy 2
106 to 141 lb. (192 to 218 g/m2)
Ultra heavy 3 [MP Tray only]
123 to 166 lb. (222 to 301 g/m2)
Note: To determine if a paper weight is US Bond or Index, check the metric
equivalent. Example: 35 lb. US Bond = 132 g/m2; 35 lb.
Index = 64 g/m2.
For more information, go to www.paper-paper.com/weight.html.
18
Print Media Settings
by Paper Tray
Tray 1
Media Weight
17 to 57 lb. US Bond (64 to 216 g/m2)
Duplexing: 20 to 32 lb. US Bond (75 to 120 g/m2)*
Media Size
Paper:
• min. 4.1" x 5.8" (105 x 148 mm)
• max. 12" x 18" (305 x 457 mm)
• Custom sizes must be defined in driver before printing.
Transparencies: letter or A4
Takes
550 Sheets 20 lb. (75 g/m2) paper
200 transparencies
*Important!
Duplex printing is restricted to paper only, 20 to 32 lb. US Bond.
If you experience curling with 20 or 24 lb. paper, switch to 28 lb.
19
Print Media Settings
by Paper Tray
Optional Trays
• Optional trays 2 and 3
• Optional 3-Tray High Capacity Feeder.
Media Weight
17 to 57 lb. US Bond (64 to 216 g/m2)
Duplexing: 20 to 32 lb. US Bond (75 to 120 g/m2)
Media Size
Paper:
• min. 5.8" x 8.3" (148 x 210 mm)
• max. 12" x 18" (305 x 457 mm)
• Custom sizes must be defined in driver before printing.
Each Tray Takes
550 Sheets 20 lb. (75 g/m2) paper
No transparencies
20
Print Media Settings
by Paper Tray
MP (Multi-Purpose) Tray
This is also known as the manual feed tray.
Media Weight
Paper: 17 to 80 lb. US Bond (64 to 301 g/m2), up to 166 lb. Index
Duplexing: 20 to 32 lb. US Bond (75 to 120 g/m2)
Banners: 20 to 34 lb. US Bond (75 to 128 g/m2)
Media Size
Paper:
• min. 3" x 5" (76 x 127 mm)
• max. 12" x 18" (305 x 457 mm)
• Custom sizes must be defined in driver before printing.
Banners: up to 12" W x 47¼" L (305 mm x 1.2 m)
Transparencies: letter or A4
Takes
250 sheets 20 lb. US Bond (75 g/m2) paper
100 transparencies
25 envelopes
stack of label sheets approx. 1" (2.5 cm) high
21
Print Media Settings
by Type
Paper
Sizea
Feed Tray, Exit Trayb
Letter, Legal-13/13.5/14, Executive, Tabloid, Tabloid
Extra, A3, A3 Wide, A3 Nobi, A4, A5, B4, B5
All Trays,
A6
Tray 1 or MP Tray,
Face-Up only
Customc: min. 4.1" x 5.8", max. 12" x 18"
Tray 1, Face-Up only
Customc: min. 5.8" x 8.3", max. 12" x 18"
Trays 2 to 5, Face-Up only
Customc: min. 3" x 5", max. 12" x 18"
MP Tray, Face-Up only
Face-Down (up to 47 lb.) or
Face-Up (up to 57 lb.)
Banners to 47¼", max. 34 lb. US Bond
a. Media type = Plain, Media weight = 17 to 57 lb. US Bond
b. Face-Down = top exit tray (see page 36);
Face-Up = straight-through, side exit tray (see page 37)
c. Define in the printer driver before using.
22
Print Media Settings
by Type
Labels, Transparencies, Envelopes
Media
Media Size
Media Typea
Labels
Letter or A4
N.A.c
Feed Tray
Exit Trayb
MP Tray only
Face-Up only
Transparencies
Letter or A4
Transparency
Tray 1 or MP Tray
Face-Up only
Envelopes
COM-10 Envelope
N.A.
MP Tray only
Face-Up only
a. Media Weight = not applicable.
b. Face-Down = top exit tray (see page 36);
Face-Up = straight-through, side exit tray (see page 37)
c. N.A. = not applicable.
23
Print Media Settings
by Type
Thick Paper (Cards, Index, etc.)
Sizea
Media Weight, Index
Feed Trayb
Letter, Legal-13, Legal-13.5,
Legal-14, Executive, Tabloid, Tabloid
Extra, A3, A3 Wide, A3 Nobi, A4, A5,
B4, B5
up to 119 lb.
Any Tray
up to 166 lb.
MP Tray only
Customc: min. 4.1" x 5.8"
up to 119 lb.
Tray 1
Customc: min. 5.8" x 8.3"
up to 119 lb.
Trays 2 to 4
Customc: min. 3" x 5"
up to 166 lb.
MP Tray
Banners up to 12" x 47¼"
up to 71 lb.
MP Tray
a. Media type = Plain.
b. Thick paper: use the face-up exit (see page 37).
c. Maximum 12" x 18". must be defined in driver before printing.
24
Print Media
Recommended
Media Type
Recommended
Paper
Letter:
• OKI® Bright White, 32-lb. US Bond (see page 31)
• OKI Banner Paper, 70 lb., (see page 31)
• HammerMill® Laser Print Radiant, White, 24-lb. US Bond
• Xerox® 4024, 20-lb. US Bond
Tabloid/Tabloid Extra:
• OKI Bright White, 32-lb. US Bond (see page 31)
• HammerMill Laser Print Radiant, White, 24-lb. US Bond
Labels
Letter: Avery® 5161; A4: Avery 7162, 7664, 7666
Transparencies
Letter:
• OKI 52205701 (see page 31)
• 3M® CG3720
Envelopes
COM-10: OKI 52206301, 52206302 (see page 31)
Thick
Letter:
• OKI 52205601 series Card Stock (see page 31)
• Wausau Exact Index: 49108 (90-lb.) or 49508 (110-lb.)
25
Print Media Types
Paper
For more information, see page 22.
Sample Ream Label
Do not use
1
• Heavily coated, glossy, or smooth
paper
• Embossed, rough, or heavily
textured paper
• Recycled paper
• Paper with cutouts, perforations, or
excessive paper dust.
2
ReamLabel1.bmp
1 Media Weight, US Bond
2 Media Weight, Metric
26
Print Media Types
Labels
Windows Me/98/95
Properties → Setup tab → Paper
Feed Options
For more information, see page 23.
Caution!
Use labels designated for laser
printers. Labels must cover the
entire carrier sheet. The adhesive
must not be exposed.
Individual Print Jobs
Select the following settings in the
driver:
• Source = MP Tray
• Size = Letter long, Letter short, A4
Long edge, A4 Short edge
• Type = Labels
• Media Size = Off: Windows®
Adobe® PostScript® only:
Windows XP / 2000
Printing Preferences → Advanced
→ Document Options → Printer
Features
All Print Jobs (Make Labels
the Default)
Set the printer menu:
Press ENTER to switch to the Menu
mode.
Menus → Tray Configuration → MP Tray
Config →
• Paper Size → Choose Letter Long Edge,
Letter Short Edge, A4 Long Edge, or A4
Short Edge
• Media Type → Labels
• Media Weight → Choose Heavy, Ultra
Heavy1, Ultra Heavy2, or Ultra Heavy3
(see page 17).
27
Print Media Types
Transparencies
For more information, see page 23
Caution!
Avoid office transparencies
designed for use by hand with
marker pens. These will melt in the
fuser and cause damage.
Individual Print Jobs
Select the following settings in the
driver:
• Source = Tray 1 or MP Tray
• Size = Letter long, Letter short,
A4 Long edge, A4 Short edge
• Type = Transparency
• Media Size = Off: Windows®
Adobe® PostScript® only (see page
27).
All Print Jobs (Make
Transparencies the
Default)
Set the printer menu:
Press ENTER to switch to the Menu
mode.
For Tray 1
Menus → Tray Configuration → Tray1
Config → Media Type → Transparency.
For MP Tray
Menus → Tray Configuration → MPTray
Config →
• Paper Size → Choose Letter Long Edge,
Letter Short Edge, A4 Long Edge, or A4
Short Edge
• Media Type → Transparency
28
Print Media Types
Envelopes
For more information, see page 23
Individual Print Jobs
Important!
Select the following settings in the
driver:
• Source = MP Tray
• Size = COM-10
For the best print results, use only
the recommended envelopes (see
page 25).
Never use envelopes with metal
clasps, snaps, windows, or V-flap
seals:
Envelopes.jpg
All Print Jobs (Make
Envelopes the Default)
Set the printer menu:
Press ENTER to switch to the Menu
mode.
Menus → Tray Configuration → MPTray
Config → Paper Size → COM-10 Envelope
LEF.
29
Print Media Types
Thick Paper
For more information, see page 24
Caution!
To prevent damage to the printer, it
is very important to check the
printer’s media settings before
printing on thick paper.
Individual Print Jobs
Select the following settings in the
driver:
• Media Type = Medium Heavy,
Heavy, Ultra Heavy 1, Ultra Heavy
2, or Ultra Heavy 3.
Note: See page 17 for more
information on weight
designations.
All Print Jobs: (Make Thick
Paper the Default)
Set the printer menu:
Press ENTER to switch to the Menu
mode.
Tray 1, 2, 3, 4, or 5
Menus → Tray Configuration →
TrayZ Config → Media Weight →
Choose Medium Heavy, Heavy, Ultra Heavy1
or Ultra Heavy2.
MP Tray
Menus → Tray Configuration →
MPTray Config → Media Weight →
Choose Medium Heavy, Heavy, Ultra Heavy,
Ultra Heavy2, or Ultra Heavy3.
30
Print Media Types
Oki Print Media
To purchase Oki Media, contact your
dealer or visit http://my.okidata.com.
Bright White Proofing Paper
32-lb. US Bond
Oki Part #
Size
Qty
52206101
8½ x 11''
500/pack
52206102
11 x 17''
500/pack
52206103
12 x 18''
500/pack
Banner Paper*†
70 lb. Text, white, 12.9" x 35.4"
P/N 52206001, Box of 100
SynFlex™*†
Waterproof, Tear Resistant
White, 8½" x 11"
P/N 52205901, Box of 100
Premium Color Transparencies
Letter Size
P/N 52205701, Box of 50
Premium Envelopes*†
COM-10
Security tint, Redi-Strip seal
P/N 52206301, Box of 100
Premium Card Stock*†
Acid-free, white, 8½" x 11"
Oki Part #
Weight
Qty
52205601
60-lb. Cover
250/box
52205602
90-lb. Index
250/box
52205603
110-lb. Index
250/box
* For best print results:
Temperature = 65 to 77°F
Humidity = 40 to 65% RH
† MP Tray only
31
Loading Print Media
Trays 1-5
For more information, see the on-line
User's Guide on the Docu-mentation
CD provided with your printer or at
http://my.okidata.com.
3
Print side down:
1
C96_LoadPaperT
ray1_rev.jpg
Note: For Letterhead stationery:
C96_RearPaperStopper.jpg
Long edge feed—face
down, top toward the
back of the printer.
2
Letr_lef.bmp
Short edge feed—
face down, top to
the right:
fan_paper_F2_10.jpg
ltrhjd_se.bmp
32
Loading Print Media
MP Tray
For more information, see the on-line
User's Guide on the Docu-mentation
CD provided with your printer or at
http://my.okidata.com.
3
1
fan_paper_F2_10.jpg
4
Print side up.
ES2640e
MFP
75.jpg
2
ES3640e MFP 77.jpg
ES2640e MFP 76.jpg
33
Loading Print Media
MP Tray
Note: Letterhead Stationery (Letter,
A4 or B5):
Note: Transparencies & Labels:
• Print side up.
• Default = long edge feed.
Long edge feed—aim top toward
the back of the printer:
C96_LoadPa
perMPTray_L
abels_crop.j
pg
manl_le.jpg
Envelopes:
• Flap side down, aimed into
the printer:
Short edge feed—aim the top
into the printer:
manl_se.jpg
C96_LoadP
aperMPTray
_Envelopels
_crop.jpg
34
Loading Print Media
Changing the MP Tray Default
Check the Media Size
Default = Letter Long Edge
1. Press ENTER.
2. ∇/ ∆ keys → Menus. Press ENTER.
3. Highlight Tray Configuration. Press
ENTER.
4. ∇/ ∆ keys → MP Tray Config. Press
ENTER.
5. ∇/ ∆ keys → Paper Size. Press
ENTER.
6. ∇/ ∆ keys → appropriate size
(labels and transparencies: only
Letter or A4). Press ENTER..
7. Set the Media Type
(transparencies) or Media Weight
(labels, etc.), as described below.
Set Media Type: Transparencies
1. ∇/ ∆ keys → Media Type. Press
ENTER.
2. ∇/ ∆ keys → Transparency. Press
ENTER.
3. Press ON LINE to exit the Menu
mode.
Set Media Weight:
Labels, Thick Paper, etc.
1. ∇/ ∆ keys → Media Weight. Press
ENTER.
2. ∇/ ∆ keys → appropriate media
weight (see page 17). Press ENTER.
3. Press ON LINE to exit the Menu
mode.
35
Printer Exit Paths
Face Down (Top)
This is the tray that is normally used.
The tray holds up to 500 sheets of
20-lb. (75 g/m2) paper.
The Face-Up exit tray (see next page)
must be used for special media or for
heavy papers.
ES3640e MFP 81.jpg
36
Printer Exit Paths
Face Up (Side)
The side (face-up) exit tray provides a
straight-through print path. Use the
straight-through path when printing,
transparencies, labels, heavy card
stock, or any printing from the MP
Tray. It holds up to 250 sheets of
20-lb. (75 g/m2) paper.
2
Opening the Face-Up Exit Tray
1
ES3640e MFP 79.jpg
3
ES3640e MFP 78.jpg
ES3640e MFP 80.jpg
37
Secure Print & Store to Hard Disk Drive
7. Use the ∇/ ∆ keys to enter the
value for Set Collating Amount. Press
First the document is assigned a
password and processed to a print file
which is saved on the hard disk drive
(see the on-line User's Guide on the
Documentation CD provided with your
printer or at my.okidata.com.)
To print the document, you must go to
the printer and enter a password.
ENTER.
Secure Print: The document
prints. It is deleted from the
HDD.
Store to HDD: The document
prints. It remains stored until
you delete it.
To Print the Document
1. Press ENTER.
2. ∇/ ∆ keys → Print Secure Job. Press
ENTER.
3. Use the ∆ and ∇ keys to scroll to
the number for the first digit in
your password. Press ENTER.
4. Repeat the previous step for each
digit in the password.
5. Press ENTER.
6. Highlight Print. Press ENTER.
8. The printer goes on line.
To Delete the Document
1. Follow steps 1 through 5 above.
2. ∇/ ∆ keys → Delete. Press ENTER.
3. Select Yes to confirm the deletion.
4. Press ENTER.
The printer goes on line.
38
The Printer Control Panel
Keys
control_panel_no_callouts.jpg
SHUT DOWN /RESTART
Hold down for more than four (4)
seconds for a soft shutdown.
You can either restart the printer or
turn it off:
• Restart: press the button again.
• Turn off: use the on/off (power)
switch.
control_panel_no_callouts.jpg
BACK
Press to go back to the previous item
or category.
Up Arrow (∆)
Press to go to the previous category
or item in the menu.
Down Arrow (∇)
Press to enter the menu mode, or to
go to the next category or item in the
menu.
39
The Printer Control Panel
Keys
HELP
Press to provide additional
instructions for the error condition
which appears on the display.
control_panel_no_callouts.jpg
ENTER
Press to engage the menu item shown
on the display. An Asterisk (*)
appears next to the selected item.
ON LINE
Press to save any menu changes and
place the printer back on-line (Ready
to Print).
CANCEL
Press to cancel the current print job.
40
The Printer Control Panel
Lights
ATTENTION
On
Warning!
The printer needs attention, but will
continue to operate. An error message
displays: Toner Low, Paper Near End, etc.
Off
Normal.
control_panel_no_callouts.jpg
READY
Flashing
Alarm!
The printer needs attention
immediately. An error message
displays: Paper Jam, Tray1 Empty, etc.
On
The printer is on line.
Off
The printer is off line.
Flashing
The printer is receiving data.
41
Printer Power Save Mode
Disable Printer Power Save
Power Save sets how long the printer
waits before going into standby mode
(default = 60 min). This saves energy,
but the printer requires time to warm
up when it receives a print job or if
you want to enter the menu and
change settings.
1. Press ENTER.
2. ∇/ ∆ keys → Admin Setup. Press
ENTER.
3. ∇/ ∆ keys → Yes. Press ENTER.
Offline appears on the display.
4. Wait for Setup to run.
The Setup menu appears.
5. ∇/ ∆ keys → Printer Setup. Press
ENTER.
6. Keep pressing ENTER repeatedly
until Power Save appears.
7. ∇/ ∆ keys → Disable. Press ENTER.
8. Press ON LINE.
9. Press ENTER to select Exit Setup.
10.Wait for the printer to initialize.
Set the Time Interval
1. Press ENTER.
2. Use the ∇ key to scroll down to
Menus. Press ENTER.
3. ∇/ ∆ keys → System Adjust. Press
ENTER.
4. Highlight Power Save Time. Press
ENTER.
5. ∇/ ∆ keys → select the time
interval. Press ENTER.
6. Press ON LINE to exit the Menu
mode.
42
Cleaning the Printer LED Heads
Clean the printer’s LED head(s)
• when you install a new toner
cartridge.
• if the printed sheets show signs of
faded images, white stripes, or
blurred letters.
1. Place one hand firmly on the front
handle (1) of the scanner shelf,
then carefully press the release
handle (2) so that the shelf lifts
out of the way.
The scanner unit shelf includes
hydraulics to assist in moving the
shelf up and down.
NEVER OPERATE THE RELEASE
HANDLE (2) ON THE RIGHT SIDE OF
THE SHELF WITHOUT THE SCANNER
BOLTED TO THE SHELF.
ES3640e MFP 85.jpg
43
Cleaning the Printer LED Heads
2. Open the top cover about half way.
This allows access to the LED
heads.
3. Use the lens cleaner supplied with
the toner cartridges (or a clean,
soft cloth) to gently clean the LED
heads (1).
C96_Clean_LEDs1_CROP.jpg
C96_Clean_LEDs2_CROP.jpg
C96_Clean_LEDs3_CROP.jpg
44
Cleaning the Printer LED Heads
4. Close the printer cover.
TO PREVENT ANY
POSSIBLE CRUSHING
OF FINGERS, KEEP
YOUR HANDS AWAY
FROM THE POSTS AT
THE BACK OF THE
SCANNER STAND
WHEN MOVING THE
SHELF DOWN.
ES36
40e
MFP
82.jp
g
5. Place one hand firmly on the front
handle of the scanner shelf, then
press the release handle and
carefully lower the scanner shelf,
making sure it locks in place.
ES3640e MFP
85.jpg
45
Printer Reports
Printing Reports
• Job Log: prints the Job
Accounting software log. See the
Utilities Guide (on the
Documentation CD supplied with
your printer) for more
information.
• Color Charts: prints Pantone®,
CMY and RGB color charts.
• PS Font List: PostScript fonts in
the printer.
• PCL Font List: PCL fonts in the
printer.
• Demo Page: prints the Demo page.
• E-mail Log: lists data on emails,
including Status, From, To, Date,
Time, Subject, etc.
• Error Log: list of errors which have
occurred.
Control Panel
Right Side.jpg
Note: To print the Job Log or Color
Chart reports, tabloid paper
must be loaded in Tray 1.
1. Press ENTER.
2. ∇/ ∆ keys → Print Pages. Press
ENTER.
3. ∇/ ∆ keys → report you wish to
print:
• PS Test Page: provides a list of the
Fiery PostScript settings and
sample color swatches.
• Configuration: general information
on your printer’s configuration,
plus a listing of the current menu
settings.
4. Press ENTER.
The report prints and the printer
goes back on line.
46
Printer Error Messages
The printer has a built-in help system.
C96_Help.jpg
When an error message appears on
the printer display, press HELP. The
display shows information that will
help you correct the error.
Use the ∇/ ∆ keys to move through the
Help information.
For more information, see the on-line
User's Guide on the Docu-mentation
CD provided with your system or at
http://my.okidata.com.
47
Printer Media Jams
If you are experiencing frequent paper
jams, check the following.
• Is the printer level?
• Is the media you are using within
specification (see pages 17 through
25)? Media that is too light or too
heavy will often cause jams.
• Are the settings (printer and driver)
appropriate for the media being
used (see pages 17 through 24)?
• Do not used creased or curled
media.
• Remove the media from the tray.
Fan/ align the stack. Replace the
media.
fan_paper_
F2_10.jpg
• Envelopes are jamming. Make sure
the stack is properly aligned.
Envelopes must be loaded flap
down, top edge toward the printer.
ES3640
e MFP
83.jpg
• Clean the feed rollers: for more
information, see the on-line User's
Guide on the Documentation CD
provided with your printer or at
http://my.okidata.com.
48
Service and Support
• Consult the dealer where you
purchased your system.
• Visit
myokidata.jpg
49
OKI is a registered trademark of Oki Electric Industry Company, Ltd.
3M is a trademark or registered trademark of 3M.
Adobe, and PostScript are trademarks of Adobe Systems, Inc. which may be
registered in certain jurisdictions.
AMEX is a registered trademark of American Express Co.
HammerMill is a registered trademark of HammerMill.
MasterCard is a registered trademark of MasterCard International, Inc.
The Pantone trademark is the property of Pantone, Inc.
VISA is a registered trademark of Visa.
Xerox is a trademark of Xerox Corporation.
Wausau Exact is a registered trademark of Wausau-Mosinee Paper Corp.
50