1
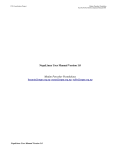
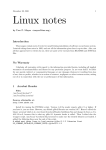
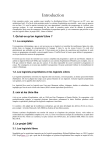
Part
I
PY
R
IG
1: Hacking the Installation
2: Customizing the User Environment
3: Configuring Devices
4: Adapting Input Devices
CO
Chapter
Chapter
Chapter
Chapter
HT
In This Part
ED
MA
TE
RI
AL
Optimizing Your System
CHAPTER
1
Hacking the Installation
What’s In This Chapter?
Which version of Ubuntu should you install?
Running Ubuntu from a USB drive, SD Card, and other kinds of removable
media
Using Ubuntu on a netbook
Upgrading Ubuntu
Tips for modifying the GRUB boot loader
This chapter explores options for installing and configuring devices. Where
you choose to install Ubuntu, which variation you install, and what options
you select will impact the system’s usability.
Before You Begin
Before you install the operating system, be sure to create a backup of anything
you want to keep. Copy all data on the system. You can save it to a CD-ROM,
copy it to a spare computer, or physically change hard drives—the method
does not matter. Do not keep sensitive data on the same system, even if it is
kept on a different hard drive or in a separate partition. If you accidentally
format or repartition a working hard drive that contains data you wanted to
keep, then the data will be gone.
3
4
Part I
■
Optimizing Your System
WARNING This chapter deals with drive partitioning, formatting, and installing
operating systems. If you play with a system that contains customized settings or
personal files, there is a serious risk of accidentally deleting your working
configuration and private data.
Drive device identifiers can be confusing—the label /dev/sda1 looks a lot
like /dev/sda2 and /dev/hda1. Before every partition, format, and copy, be
sure to triple-check the device identifier! When you make a mistake, there will
be no going back.
Selecting a Distribution
Ubuntu is a Linux distribution based on Debian Linux. Different Linux
distributions target different functional niches. The goal of Ubuntu is to bring
Linux into the desktop workspace. To do this, it needs to provide a stable user
interface, plenty of office tools, and drivers for a myriad of peripherals, while
still being user-friendly. Although different groups manage nearly every open
source project, Canonical Ltd. provides a central point for development and
support. Canonical, along with the Ubuntu community, can answer most of
your technical (and not so technical) questions.
WHICH DISTRIBUTION IS RIGHT FOR YOU?
Different Linux distributions fill specific needs. For example, although RedHat
started life as a unifying distribution, it primarily supported English applications. SuSE was a popular internationalized distribution. Many distributions
were maintained by modifying other distributions. For example, ASPLinux is
a version of RedHat with multilingual support for Asian and Slavic languages,
and the Beowulf clustered computing environment is based on RedHat.
Although RedHat has seeded many different distributions, it is not alone.
Debian Linux is another distribution with a significant following. As with
RedHat, Debian has been used to spawn many different niche distributions.
Although Ubuntu is based on Debian, it is also seeding other distributions.
Different distributions of the Linux operating system are sometimes
called flavors. There are hundreds different supported flavors of Linux, each
with a different focus. You can see the listing of official distributions at
www.linux.org.
Ubuntu is the basis for a variety of Linux distributions—most only differ in
the user interface, although some do include specific software configurations.
The basic Ubuntu distribution uses the Gnome desktop and is geared toward
desktop or server systems. Other distributions based on Ubuntu include:
Chapter 1
■
Hacking the Installation
Kubuntu—A variation of Ubuntu with the K Desktop Environment
(KDE)
Xubuntu—A variation of Ubuntu with the Xfce Desktop Environment
Edubuntu—A modified version of Ubuntu that is loaded with educational applications
In each case, it is possible to switch from one installed version to another. For
example, you can install Ubuntu, add in KDE, and remove Gnome, and you’ll
have an environment that looks like Kubuntu. To convert an Ubuntu installation to Kubuntu requires changing the desktop, office applications (OpenOffice
to KOffice), and swapping other tools. Instead of modifying one distribution
to look like another, you should just start with the right distribution.
NOTE Most people won’t install KDE and remove Gnome in order to change their
desktop. Instead, they will add KDE to the system and keep both Gnome and KDE
installed.
To give you an example of the complexity, here’s how to add KDE to an
Ubuntu system that already uses the Gnome desktop:
1. Install KDE.
sudo apt-get install kubuntu-desktop
This requires about 700 MB of disk space. The installation will ask if you
want Gnome (gdm) or KDE (kdm) as the default desktop.
2. Log out. This gets you out of the active Gnome desktop.
3. On the login page, select the user.
4. Select KDE from the Sessions menu (see Figure 1-1).
5. Log in using KDE.
Understanding Ubuntu Names
Each Ubuntu release is associated with a number and name. The release
number is the year and month of the release in an internationalized format. So
‘‘6.06’’ is July 2006 and ‘‘9.04’’ is April 2009 (and not September 2004). Each
release is also associated with a common name. Table 1-1 shows the current
names and release numbers. Releases are commonly referred to by their names.
For example, 9.04 is commonly called Jaunty Jackalope or simply Jaunty.
NOTE As a convention in this book, releases are referenced by their full names
and version numbers. This way, you do not need to remember that Hardy came out
in 2008.
5
6
Part I
■
Optimizing Your System
Figure 1-1: The login menu on Karmic Koala (9.10) after adding KDE to Ubuntu
Table 1-1: Ubuntu Releases
NAME
VERSION
END OF SUPPORT
Warty Warthog
4.10
April 2006
Hoary Hedgehog
5.04
October 2006
Breezy Badger
5.10
April 2007
Dapper Drake
6.06 LTS
July 2009 (desktop), June 2011 (server)
Edge Eft
6.10
April 2008
Feisty Fawn
7.04
October 2008
Gutsy Gibbon
7.10
April 2009
Hardy Heron
8.04 LTS
April 2011 (desktop), April 2013 (server)
Intrepid Ibex
8.10
April 2010
Jaunty Jackalope
9.04
October 2010
Karmic Koala
9.10
April 2011
Lucid Lynx
10.04 LTS
April 2013 (desktop), April 2015 (server)
While most releases have 18 months of support, every other year a long-term
support (LTS) version is released. The LTS releases provide three years of
Chapter 1
■
Hacking the Installation
updates for the desktop, and five years for servers. The LTS is an excellent option for systems that cannot afford to be completely replaced every
18 months.
NOTE This book focuses on the actively supported versions: Hardy Heron (8.04
LTS), Jaunty Jackalope (9.04), and Karmic Koala (9.10). Dapper Drake (6.06 LTS) is
also discussed but to a lesser degree.
Selecting the Ubuntu Version
Each Ubuntu release is designed to require only one CD-ROM for installing
the system. This reduces the need for swapping disks during the installation.
Unfortunately, one disk cannot hold everything needed for a complete environment. To resolve this issue, Ubuntu has many different types of initial
install images that address different system needs.
Desktop—This image provides a Live Desktop. This can be used to
test-drive the operating system or install a desktop or workstation system. The installation includes the Gnome graphical environment and
user-oriented tools, including office applications, multimedia players,
and games.
Alternate—Similar to the Desktop image, this image installs the desktop
version of Ubuntu, but it does not use a graphical installer. This is a very
desirable option when the graphics or mouse does not work correctly
from the Desktop installer.
Server—This minimal install image has no graphical desktop. It is ideal
for servers and headless (without monitor) systems. The image includes
server software such as a Secure Shell server, web server, and mail server,
but none is installed by default (see Chapter 13).
Netbook—Introduced with Jaunty Jackalope (9.04), the netbook edition
(also called the Ubuntu Netbook Remix) is a version customized for
portable netbook systems. (See ‘‘Using Ubuntu on a Netbook’’ in this
chapter for the differences between the netbook and desktop releases.)
TIP From the Ubuntu web site (ubuntu.com), it can be difficult to find anything
other than the Desktop and Server versions of the current and LTS releases for
download. The web sites releases.ubuntu.com and cdimage.ubuntu.com
provide easy access to all of the release images.
The names for the installation images do not exactly match the functionality.
The names were chosen to avoid confusion with previous Ubuntu releases.
7
8
Part I
■
Optimizing Your System
(If they called the Desktop CD-ROM Install, people might not realize it also
contains a Live Desktop.) Better names might be Live CD with Desktop Install,
OEM with Text Desktops, and Server with Minimal System Configuration. But
then again, these are pretty long names, so we’ll stick with Desktop, Alternate,
Server, and Netbook.
There are more installation options than these four CD-ROM images. For
example, there is an Ubuntu DVD image. The DVD contains everything found
on all of the CD-ROM images, including the live operating system. There are
also unofficial ports to other platforms. For example, installation disks for
the PowerPC, Sun UltraSPARC, IA-64, and other architectures are available
from http://cdimage.ubuntu.com/ports/releases/. While these platforms
may not receive immediate updates and first-tier support, they are community
supported.
Each installation disk has the option for a basic install as well as a few other
common options. For example, you can verify the installation media using the
check for CD defects, test your hardware with the Memory Test, and access
an installed system using the Rescue option. There are also options specific to
certain installation disks.
USING THE SMART BOOT MANAGER
One of my computers is so old that it does not support booting from
the CD-ROM drive. However, all is not lost! On all the Ubuntu installation
CD-ROMs is a small disk image: install/sbm.bin. This is the Smart Boot
Manager, one of the best-kept secrets on the installation CD-ROMs. This is an
image made for a floppy disk. To create the disk from a Linux system, use:
dd if=sbm.bin of=/dev/fd0
If you boot off of this floppy disk, you will see a menu that includes booting
from the hard drive or CD-ROM. Using this disk, you should be able to boot
off any of the installation CD-ROMs. Unfortunately, SBM does not support
booting off USB or FireWire devices.
Configuring Dual Boot
Dual-boot systems were very popular during the late 1990s and early 2000s.
Since different operating systems are incompatible, users would boot into the
appropriate system to run native applications.
Today, dual-boot systems are less common. Computers are relatively
inexpensive, so it is easier to have separate Windows and Linux computers,
and many options exist for exchanging files and data between systems (see
Chapter 7). In addition, virtual machines such as VMware and Qemu enable
you to run native applications within a window, so there is rarely a need to
dual-boot.
Chapter 1
■
Hacking the Installation
Some users still have a need for a dual-boot system. Many games, for
example, are more responsive under the native operating system and outside of
a virtual machine. If you need a dual-boot system, there are a few configuration
steps:
1. Partition the disk for multiple operating systems. The easiest way is to
just create one partition that does not use the entire disk. If you have
multiple disks, then each disk can contain a different operating system.
2. If you will be using a Windows system, install it on the allocated partition.
(You can use the Windows Partitioner to create the first partition.) Be
sure to install Windows first since Windows has a bad habit of disabling
boot loaders during its installation.
3. After you have installed the first operating system, use any of the Ubuntu
install methods to install Ubuntu.
Do not select the entire disk for installation (unless you are installing
on a separate drive).
Use the partitioner to create a new partition for Ubuntu—do not
modify the existing partition.
The Ubuntu installer is smart enough to identify other operating systems
and add them to the boot menu for dual-booting. This enables you to easily
dual-boot Ubuntu with Windows, BSD, and other operating systems. On
PowerPC systems, you can dual-boot between Ubuntu and Mac OS X without
a problem.
TIP Configuring a dual-boot system is relatively easy. However, configuring a
multi-boot computer with three or more operating systems can add complexity to
the boot menu. I recommend installing Ubuntu last, since its boot manager installation will automatically detect other operating systems and label them properly.
Using the Desktop CD-ROM
The Desktop CD-ROM installation starts a graphical Live Desktop. This can
be used for system recovery, debugging, or browsing the web.
NOTE The Desktop CD-ROM boot selection gives you 30 seconds to make a
decision before it selects the English language and boots the graphical Live
Desktop. If you want to select a different option, be sure to watch it boot (don’t
walk away) and make a menu selection. Pressing any key while on the menu will
stop the 30-second timer.
When the CD-ROM boots, you will see a graphical desktop. On the desktop
is an Install icon that can be used for installing the file system (see Figure 1-2).
The same option exists on the menu under System ➪ Administration ➪ Install.
9
10
Part I
■
Optimizing Your System
Figure 1-2: Hardy Heron’s Live Desktop and install menu
If something goes wrong during the installation, you only have a few options
for debugging the problem. After the graphical desktop appears, you can
press Ctrl+Alt+F1 through Ctrl+Alt+F4 to provide command-line terminals.
Ctrl+Alt+F7 returns to the graphical display. Otherwise, you may want to
consider using the Alternate CD-ROM image for text-based installation.
NOTE Pressing Ctrl+Alt with F1 through F4 keys takes you out of the graphical
desktop. Once out of the graphical mode, you don’t need to use Ctrl. Simply
pressing Alt+F1 through Alt+F8 will switch between terminals. This is because
Alt+F1 through Alt+F12 are keyboard signals used by the desktop; Ctrl with Alt is
used to distinguish between graphical desktop and console requests.
FAST RECOVERY
The Desktop installation CD-ROM provides a Live Desktop for exploring the
operating system without performing an installation. It can also access an
existing system in order to perform repairs or recovery. However, the Live
Desktop is not the fastest of systems. On a fast computer (for example, 2 GHz
with a 40x CD-ROM drive) it can still take three minutes to go from boot to
Live Desktop. This can seem like an eternity if you just need to fix one text file
on a critical server.
If you require a recovery system for repairs, or for using Linux without a
hard drive, consider an alternative system. Knoppix, Gnoppix, and DSL (Damn
Chapter 1
■
Hacking the Installation
FAST RECOVERY
Small Linux) are designed for speed. Each is built for a fast start time when
booting from a single CD-ROM or DVD.
Sometimes graphics are not even a concern. If you just need a command
prompt to repair a system, consider the Ubuntu Server or Alternate CD-ROM
images. Both contain a recovery option that will allow you to access the local
system and make quick fixes. And if you really need a prompt fast, select any
of the installation options on the Server or Alternate images and press Alt+F2.
This will give you a prompt where you can mount the hard drive and perform
repairs quickly.
Using the Alternate CD-ROM
The Alternate CD-ROM image enables you to install a desktop image with
graphics disabled, or an OEM-configurable system (see Figure 1-3) by highlighting the Install option, pressing F4, and selecting a different install mode.
Figure 1-3: Hardy Heron’s Alternate CD-ROM boot selection menu
Text Mode Installation
The text mode and OEM installations both create user workstations. However,
they have very different configurations. The text mode system lacks the
graphical installer, but everything else is present. This is ideal for computers
with limited resources or low RAM. It is also a very fast method to perform
the installation.
11
12
Part I
■
Optimizing Your System
OEM Installation
The OEM mode installs the graphical desktop and creates the user account
oem. This account can be used to customize the system. After the install, log
in, and run the oem-config script if you need to change any of the original
installation responses, or oem-config-prepare to remove the temporary
oem account and enable configuration prompting during the next boot (for
end-user configuration).
WARNING During the OEM installation, the Alternate CD-ROM prompts for a
password but not a username. It is not until after the installation completes that
you are told the account name for the password is oem. Both the account and
password are removed when oem-config-prepare is used.
The OEM mode is an ideal choice for installers who want to customize the
system (and remove the installation account) before the system is passed to
someone else. Original equipment manufacturers (OEM) can use this option
to install custom applications before shipping the computer to a customer.
Similarly, corporate system administrators may configure the network, applications, and other subsystems before handing the computer to a new employee.
Networkless Upgrades and Repairs
The Alternate CD-ROM contains all of the necessary packages for upgrading
a previous Ubuntu installation. This means that the CD-ROM can be used to
perform upgrades when network access is unavailable.
Unlike the Desktop CD-ROM, the Alternate CD-ROM does not run a live
graphical system. But, it does have a rescue mode for repairing a nonfunctioning operating system.
Installing an LTSP Server
Beginning with Hardy Heron (8.04 LTS), the Alternate CD-ROM includes the
option to install an LTSP server. The Linux Terminal Server Project (LTSP)
allows you to connect thin-client systems to the LTSP server.
NOTE A thin client is a minimal resource workstation. These systems generally
contain very little disk space and are designed to boot off the network, load the
operating system image from a remote server, and store files on a remote system.
The LTSP installation installs an Ubuntu server and configures it for use
with LTSP clients. You can also configure a running Ubuntu system for use as
an LTSP server:
1. Install the LTSP server packages. This will install the LTSP server, SSH
server, DHCP server, and all other required packages.
sudo apt-get install ltsp-server-standalone openssh-server
Chapter 1
■
Hacking the Installation
2. Build the thin client environment by running sudo ltsp-build-client
—arch i386 (or— arch powerpc). This command takes a while as it
identifies packages and prepares everything for the client image.
Eventually the client environment will be built. The client image files are
located in /opt/ltsp/i386/ and the compiled image is stored under /opt/
ltsp/images/. To change the image, modify the files under /opt/ltsp/i386/
and then run sudo ltsp-update-image. To update only the kernel, use sudo
ltsp-update-kernels.
LTSP clients expect the server to be located at a specific network address
and connect using Secure Shell (SSH). SSH associates cryptographic keys with
network addresses. If the server changes network addresses, then the client
image needs to be updated: sudo ltsp-update-sshkeys.
TIP To test your LTSP configuration, consider using a virtual machine as a LTSP
client. See Chapter 7 for installing the Qemu emulator. A quick script for using
Qemu as an LTSP client is installed on the LTSP server:
/usr/share/doc/ltsp-server/examples/qemu-ltsp
Using the Server CD-ROM
While the Alternate CD-ROM is focused on OEM customizations, the Server
CD-ROM only installs a basic server and a minimal system image. Everything
else needs to be installed as an add-on.
NOTE With Dapper Drake (6.06 LTS), the server image includes an option to
install LAMP: Linux, Apache, MySQL, and PHP/Perl/Python. However, LAMP is not
an option in later Ubuntu releases. To create a LAMP server, you will need to
install and configure the components separately. See Chapters 5 and 13.
Debugging problems with the Server and Alternate installations is much
easier than diagnosing problems with the Desktop CD-ROM. At any time
during the installation, you can press Alt+F4 and see the current installation’s
progress. If the system hangs, you can tell which subsystem caused the
problem. Pressing Alt+F2 provides a command prompt, and Alt+F1 returns
you to the user-friendly installation screen.
The server installation sets up a system very quickly. Although the Desktop
CD-ROM installs a graphical desktop, the installer is very slow. In contrast, the
Server CD-ROM installs a text-only operating system, but it is very quick. After
installing the text-based operating system, you can install additional packages
using apt-get (see Chapter 5). For example, you may want to install the
Gnome desktop using sudo apt-get install ubuntu-desktop. This creates
the same system as the Desktop CD-ROM but is much faster than booting the
Live Desktop and performing the graphical installation. All the necessary files
are found on the Server CD-ROM.
13
14
Part I
■
Optimizing Your System
TIP The Live Desktop is also relatively slow for installations. For a significantly
faster installation time, consider using the Alternate or Server images. Both of
these options use text-based installers.
Changing Options
The Desktop, Alternate, and Server ISO images are bootable and include a
CD-ROM tester (for making sure that the CD-ROM was created correctly) and
a memory tester. The System and Alternate CD-ROMs include recovery shells
for debugging an installed system, while the Desktop CD-ROM includes a live
system that can also be used for repairing the local host.
Depending on your computer, any of these disks may fail to run. The most
common issues concern kernel parameters that conflict with the hardware.
You can change the kernel parameters when booting the disks in order to
address any issues. Some common parameters include:
Configure a RAM disk. The default is 1 GB for the Desktop ISO and 16
MB for the Alternate and Server ISOs. For example, the Server ISO uses:
ramdisk_size=16384
Specify an alternate root disk. The default specifies the RAM disk
(/dev/ram), but for debugging a system, you can specify a hard drive
such as /dev/hda.
root=/dev/ram
or
root=/dev/hda
The Advanced Configuration and Power Interface (ACPI) support on
some hardware can cause the installer to fail. ACPI support can be
explicitly disabled using acpi=off.
Similarly to ACPI, some PCMCIA chipsets (particularly on older motherboards and some Dell systems) can cause the installer’s auto-detection
to hang. The start_pcmcia=off boot option disables PCMCIA, allowing
you to bypass this type of problem.
At the initial installation menu, you can press F6 to see the current options
and make changes. Pressing F1 shows you other kernel options that are
common remedies when the system fails to install.
Installing a Minimal System
Sometimes you want to start with a minimal configuration and add packages as
needed. This is usually the case for hardware that has limited disk space, little
Chapter 1
■
Hacking the Installation
RAM, or a slow CPU. Minimal systems are also desirable for mission-critical
and Internet-accessible servers, where unnecessary applications may consume
critical resources or add security risks.
The Server CD-ROM provides the simplest minimal installation option. The
basic configuration does not install any additional software packages and uses
less than 300 MB of disk space. The Alternate CD-ROM does provide a basic
install but does not enable many of the packages—these packages are placed
on the system but not turned on.
In both cases, unnecessary packages can be removed. For example, the Alsa
sound driver can be uninstalled, freeing 200 KB of disk space. The command
to list all installed packages is:
dpkg -l | more
If you want to see what files are included in the package, use dpkg -L
packagename. For example:
dpkg -L alsa-base | more
Many packages have dependent packages, so removals are not always
simple. To identify conflicts before removing a package use:
sudo apt-get -s remove alsa-base
The -s option says to simulate the removal of the alsa-base package—it
does all of the safety checks and lists all dependencies and conflicts without
actually doing the removal. If there are no conflicts, then you can remove the
-s and perform the actual removal. You can replace alsa-base with any of
the packages installed on the system. You can also list multiple packages on the
apt-get command line.
UNSAFE REMOVALS
The apt-get program tries to not break dependencies, so removing one package may remove a dependent package.
Be careful: if you select the wrong dependent package, you can end up
removing critical parts of the operating system. For example, the package
perl-base cannot be removed without removing the console-data package.
Removing perl-base and console-data will also automatically select and
remove cron, debconf, LVM support, python, wget, and dozens of other
system packages. Even if you have no plans to program in Perl, removing it
will cripple your system. Use the -s option before doing the removal to check
if there will be undesirable consequences.
15
16
Part I
■
Optimizing Your System
Installing over the Network
Although installing from a CD-ROM can be convenient, it does not scale
well when you need to manage dozens or hundreds of systems. In addition, systems without CD-ROM drives need an option for installing the
operating system. Ubuntu provides a bare-minimum boot image for installing
Ubuntu over the network. There are different versions of the mini-image based
on the desired architecture. For example, to install Hardy Heron (8.04 LTS) over
the network, use the installer images found at http://archive.ubuntu.com/
ubuntu/dists/hardy/main/installer-i386/current/images/netboot/.
This directory contains the Hardy Heron (8.04 LTS) mini-image for the i386.
There are similar directories for the AMD64 (install-amd64) and any other
supported platforms. Similarly, there are directories for Jaunty, Karmic, and
other Ubuntu releases. Each of the directories contains similar preconfigured
boot images.
boot.img.gz—A compressed image of a bootable installer
mini.iso—The boot.img file ready for burning to a CD-ROM
netboot.tar.gz—The boot.img contents, ready for installing over the
network
pxelinux.0—The Preboot eXecution Environment (PXE) for network
installation. This requires a DHCP and TFTP server
pxelinux.cfg—A directory required for PXE installations
ubuntu-installer—A directory required for PXE and TFTP installations
CHOOSING AN INSTALLATION METHOD
There are many different installation options. Which one to use really depends
on your environment and how many times you plan to do an installation. For
example, if you have a very slow or unreliable network connection, then you
will want to install from one of the CD-ROM or DVD images. Don’t bother with
a network install if you don’t have a good network connection.
If you want to install over the network and you only plan to install one or
two systems, then the boot.img and mini.iso options provide the most convenience and require a minimum amount of effort.
However, if you plan to install many computers and each can boot from the
network, then consider using the PXE option. While PXE takes a little effort to
configure, you can quickly install hundreds of computers over the network.
With each of the network install options, you can either use one of the
official Ubuntu servers or your own local server. Installing over the network
gives you the flexibility to use your local network or servers located across the
Internet.
Chapter 1
■
Hacking the Installation
To use the mini-images, simply copy the image onto a device. For example,
to use an external hard drive for installing Ubuntu, use the Linux command:
zcat boot.img.gz | dd of=/dev/hdb
This command uncompresses the image and copies it to the external drive
(/dev/hdb). This works for most external media.
To boot the network installer from the CD-ROM, just burn the mini.iso
image to the CD-ROM. This can be done in two ways. From the Ubuntu
desktop, you can right-click the ISO and select Write to Disc from the menu
(see Figure 1-4), or you can burn it from the command line using the cdrecord
command:
cdrecord dev=/dev/hdc blank=fast mini.iso
Figure 1-4: The Write to Disc menu option for ISO images
NOTE Other operating systems, such as Windows and Mac OS X, have their own
options for writing an ISO file to a CD-ROM.
The result of all of these different boot options is a disk (or CD-ROM or PXE
configuration) that can install Ubuntu over the network.
17
18
Part I
■
Optimizing Your System
Using a USB Drive
The ubiquitous USB flash memory drives (also called thumb drives) have
replaced floppy disks. They are smaller, less fragile, and store much more
data. For convenience, they can also be used to kick off an installation, repair
a damaged system, run a standalone operating system, or simply share files.
TIP These instructions work with any kind of removable media, including SD
Cards, Compact Flash, and even your old MP3 player that looks like a thumb drive
when you connect it to the computer. You are not strictly limited to USB thumb
drives.
Formatting a USB Drive
USB drives support two basic formats: floppy drive and hard drive. A USB
floppy drive consists of one large formatted drive. In contrast, USB hard drives
contain partition tables and one or more formatted partitions. If you purchased
a thumb drive and never formatted it, then it is most likely configured as a
USB hard drive with one large partition.
WARNING Before formatting or partitioning any device, be sure that the device
is unmounted! Use the mount command (without any parameters) to see if it is
mounted, and then use umount to unmount any partitions. For example, to
unmount /dev/sdc1 mounted at /media/usbdrive, you can use
sudo umount /dev/sdc1 or sudo umount /media/usbdrive.
Thumb drives are usually partitioned just like regular hard drives. Commands such as fdisk and cfdisk can easily modify the drive partitions, and
mkfs can be used to format a partition.
Besides capacity, speed is a significant difference between thumb drives and
hard drives. When you change the partition table on a flash drive or format a
partition, wait a few seconds before removing the drive; otherwise, some data
may be buffered and not yet transferred.
TIP When writing to a thumb drive, I usually run the sync command (sudo
sync). This flushes all cached data to the disk. When the command returns, it is
safe to remove the drive.
When you use the fdisk or cfdisk command on a thumb drive, you
configure it as a USB hard drive. However, you can also configure it as a USB
floppy drive. The difference is that floppy drives do not use partitions. For
Chapter 1
■
Hacking the Installation
example, to make an ext2-formatted USB floppy drive on my 1-GB USB thumb
drive (/dev/sdb), I can use:
$ sudo mkfs /dev/sdb
mke2fs 1.41.9 (22-Aug-2009)
/dev/sdb is entire device, not just one partition!
Proceed anyway? (y,n) y
Filesystem label=
OS type: Linux
Block size=4096 (log=2)
Fragment size=4096 (log=2)
62976 inodes, 251648 blocks
12582 blocks (5.00%) reserved for the super user
First data block=0
Maximum filesystem blocks=260046848
8 block groups
32768 blocks per group, 32768 fragments per group
7872 inodes per group
Superblock backups stored on blocks:
32768, 98304, 163840, 229376
Writing inode tables: done
Writing superblocks and filesystem accounting information: done
This filesystem will be automatically checked every 36 mounts or
180 days, whichever comes first. Use tune2fs -c or -i to override.
$ sudo sync
WARNING When you first plug in a USB hard drive, all the partitions will
appear and automatically mount. However, to create a USB floppy drive, be sure to
unmount all partitions and then format the main device (for example, /dev/sda
or /dev/sdc) and not a partition (for example, /dev/sda2 or /dev/sdc1).
You will need to disconnect and reconnect the device after you format it in
order to remove any stale device partition identifiers:
sudo sync; sudo eject /dev/sdb
Sharing Files with a USB Drive
The simplest and most common use for a USB drive is to share files between
systems. Ubuntu supports most USB drives. Simply plugging the drive into
the USB port will automatically mount the drive. From there, you can access
it as you would access any mounted partition.
19
20
Part I
■
Optimizing Your System
TIP Many thumb drives have a light to indicate that the drive is being accessed.
Even if the drive is not mounted, do not unplug the drive until the light indicates
that all activity has stopped.
Linux, Windows, Mac, and most other systems support FAT file systems.
In order to share files with other users, consider formatting the drive with
mkdosfs. For example:
1. Install the dosfstools package if mkdosfs is not already installed:
sudo apt-get install dosfstools
2. Unmount the drive (for example, /dev/sda1) if it is currently mounted:
sudo umount /dev/sda1
3. Format the drive using either FAT16 or FAT32:
mkdosfs -F 16 /dev/sda1
mkdosfs -F 32 /dev/sda1
# format FAT16
# format FAT32
TIP If you want to create a FAT-formatted USB floppy drive, then use the -I
option. For example: sudo mkdosfs -I -F 32 /dev/sda.
WARNING FAT16 supports a maximum of 2 GB per partition and no more than
512 entries per directory. If either is larger, then you must use FAT32.
If you do not mind restricting file sharing to Linux-only systems, then you
can format the drive using an ext2, ext3, or ext4 file system, using any of the
following commands:
mkfs
mkfs
mkfs
mkfs
/dev/sda1
-t ext2 /dev/sda1
-t ext3 /dev/sda1
-t ext4 /dev/sda1
mkfs.ext2 /dev/sda1
mkfs.ext3 /dev/sda1
mkfs.ext4 /dev/sda1
#
#
#
#
default format is
explicitly format
explicitly format
explicitly format
ext2
type as ext2
type as ext3
type as ext4 (Jaunty
and later)
# directly call format ext2
# directly call format ext3
# directly call format ext4 (Jaunty and later)
NOTE The ext4 file system was introduced in Jaunty Jackalope (9.04). It is a
backward-compatible extension to the ext3 journaling file systems. Ext4 includes
performance enhancements as well as support for partitions up to 1 EiB. (One
exibyte, or EiB, is 260 bytes or 1,152,921,504,606,846,976). With Karmic Koala
(9.10), ext4 is the default file system.
Chapter 1
■
Hacking the Installation
Booting from a USB Drive
Beyond file sharing, USB drives can be used as bootable devices. If your
computer supports booting from a USB drive, then this is a great option for
developing a portable operating system, creating an emergency recovery disk,
or installing the OS on other computers.
Although most systems today support USB drives, the ability to boot from a
USB thumb drive is inconsistent. Even if you create a bootable USB drive, your
BIOS may still prevent you from booting from it. It seems like every computer
has a different way to change BIOS settings. Generally, you power on the
computer and press a key before the operating system boots. The key may be
F1, F2, F10, Del, Esc, or some other key or combination of keys. It all depends
on your computer’s BIOS. When you get into the BIOS, there is usually a set
of menus, including one for the boot order. If you can boot from a USB device,
this is where you will set it. However, every computer is different, and you
may need to have the USB drive plugged in when you power on before seeing
any options for booting from it.
WARNING Making changes to your BIOS can seriously mess up your computer.
Be careful!
Different USB Devices
Even if your computer supports booting from a USB device, it may not
support all of the different USB configurations. In general, thumb drives can
be configured one of three ways:
Small USB floppy drives—Thumb drives configured as USB floppy
devices (that is, no partitions) with a capacity of 256 MB or less are widely
supported. If your computer cannot boot this configuration, then the
chances of your computer booting any configuration is very slim.
Large USB floppy drives—These are USB floppy devices with capacities
greater than 256 MB. My own tests used two different 1-GB thumb drives,
a 2-GB SD Card, and a 250-GB USB hard drive.
USB hard drives—In my experience, this is the least-supported bootable
configuration for older hardware. I only have one computer that was able
to boot from a partitioned USB hard drive. However, every laptop I tested
seems to support this configuration.
Changing between a USB hard drive and a USB floppy drive is as simple as
formatting the base device or using fdisk and formatting a partition. However,
21
22
Part I
■
Optimizing Your System
converting a large USB floppy device into a small USB floppy device cannot
be done directly.
1. Use dd to create a file that is as big as the drive you want to create. For
example, to create a 32-MB USB drive, start with a 32-MB file:
dd if=/dev/zero of=usbfloppy.img bs=32M count=1
2. Treat this file as the base device. For example, you can format it and
mount it.
mkfs usbfloppy.img
sudo mkdir /mnt/usb
sudo mount -o loop usbfloppy.img /mnt/usb
3. When you are all done configuring the USB floppy drive image, unmount
it and copy it to the real USB device (for example, /dev/sda). This will
make the real USB device appear to be a smaller USB floppy device.
sudo umount /mnt/usb
dd if=usbfloppy.img of=/dev/sda
The 10-Step Boot Configuration
Creating a bootable USB thumb drive requires 10 basic steps:
1. Unmount the drive. When you plug a USB drive into the computer,
Ubuntu immediately mounts it. You need to unmount it before you can
partition or format it.
Use the mount command to list the current mount points and identify the
USB thumb drive. Be aware that the device name will likely be different
for you. In this example, the device is /dev/sda1 and the drive label is
NEAL.
$ mount
/dev/hda1 on / type ext3 (rw,errors=remount-ro)
proc on /proc type proc (rw)
/sys on /sys type sysfs (rw)
varrun on /var/run type tmpfs (rw)
varlock on /var/lock type tmpfs (rw)
procbususb on /proc/bus/usb type usbfs (rw)
udev on /dev type tmpfs (rw)
devpts on /dev/pts type devpts (rw,gid=5,mode=620)
devshm on /dev/shm type tmpfs (rw)
lrm on /lib/modules/2.6.15-26-686/volatile type tmpfs (rw)
/dev/sda1 on /media/NEAL type vfat (rw,nodev,quiet,umask=077)
Use the unmount command to free the device:
sudo umount /dev/sda1
Chapter 1
■
Hacking the Installation
2. Initialize the USB device. This is needed because previous configurations
could leave residues that will interfere with future configurations. The
simplest way to zero a device is to use dd. Keep in mind that large drives
(even 1-GB thumb drives) may take a long time to zero. Fortunately,
you usually only need to zero the first few sectors.
dd if=/dev/zero of=/dev/sda
# format all of /dev/sda
dd if=/dev/zero of=/dev/sda count=2048 # format the first 2048
sectors
Use the sync command (sudo sync) to make sure that all data is written.
After zeroing the device, unplug it and plug it back in. This will remove
any stale device partitions. Ubuntu will not mount a blank device, but it
will create a device handle for it.
3. If you are making a USB hard drive, then partition the device:
sudo fdisk /dev/sda
4. Format the partitions. If you are making a USB floppy drive, then format
the base device (/dev/sda). For USB hard drives, format each of the
partitions (/dev/sda1, /dev/sda2, etc.).
5. Mount the partition.
6. Copy files to the partition.
7. Place the kernel and boot files on the partition.
8. Configure the boot menus and options.
9. Use the sync command (sudo sync) to make sure that all data is written
and then unmount the partition.
10. Install the boot manager.
Now the device should be bootable. The next few sections show different
ways to do these 10 steps.
Starting the Network Install from a USB Drive
USB drives can be used to simplify system installations. For example, if the
computer can boot from a USB drive, then you can use it to launch a network
installation.
NOTE The preconfigured network boot image, boot.img, is very small—only 8
MB. It should work on all USB drives.
23
24
Part I
■
Optimizing Your System
Configuring the thumb drive for use as a network installation system
requires some simple steps:
1. Plug in the USB drive. If it mounts, unmount it.
2. Download the boot image. There is a different boot image for every
platform. Be sure to retrieve the correct one for your Ubuntu release. For
example, for Hardy Heron (8.04 LTS), use:
wget http://archive.ubuntu.com/ubuntu/dists/\
hardy/main/installer-i386/current/images/netboot/boot.img.gz
3. The boot image is preconfigured as a USB floppy drive. Copy the image
onto the thumb drive. Be sure to specify the base device (for example,
/dev/sda) and not any existing partitions (for example, /dev/sda1).
zcat boot.img.gz > /dev/sda
4. Use sync to ensure that all writes complete, and then eject the thumb
drive:
sudo sync; sudo eject /dev/sda
Now you are ready to boot off the thumb drive, and the operating system
will be installed over the network.
Every PC that I tested with Boot from USB support was able to run the
default network installer: boot.img.gz. However, since USB support is not
consistent, this may not necessarily work on your hardware. If you cannot get
it to boot, then make sure your BIOS is configured to boot from the USB drive,
that it boots from the USB before booting from other devices, and that the USB
drive is connected to the system. If you have multiple USB devices connected,
remove all but the bootable thumb drive.
Using the Boot Image
The boot.img.gz image is a self-contained file system and only uses 8 MB of
disk space. If you have a bigger thumb drive (for example, 64 MB or 2 GB),
then you can copy diagnostic tools or other stuff onto the drive.
In order to create a bootable USB drive, you will need a boot loader. The
choices are GRUB or SYSLINUX. There are significant tradeoffs here. GRUB is
the default boot loader used when Ubuntu is installed. However, using GRUB
requires you to know the drive identifier, such as /dev/sda1.
TIP An alternative to the drive identifier is a universally unique identifier (UUID).
Using UUIDs to identify drives is described in Chapter 3.
Since you may plug in and remove USB devices, the identifier may change,
breaking the boot loader’s configuration. SYSLINUX does not use a static
Chapter 1
■
Hacking the Installation
drive identifier, but is limited to supporting FAT12 or FAT16 drives. Since
USB devices are expected to be portable, use SYSLINUX:
sudo apt-get install syslinux mtools
The main steps require you to format the drive as FAT16 and use syslinux
to make it bootable.
1. Start a shell with root privileges:
sudo bash
2. Unmount the USB drive, if it is already mounted.
3. Format the drive as a FAT16 USB floppy drive (in this example, /dev/sdc)
and mount it:
mkdosfs -I -F 16 /dev/sdc
sync
mkdir /mnt/usb
mount -o loop /dev/sdc /mnt/usb
4. Mount the boot.img file. You will use this to provide the boot files.
zcat boot.img.gz > boot.img
mkdir /mnt/img
mount -o loop boot.img /mnt/img
5. Copy the files over to the USB drive. This can take a few minutes.
sudo bash # become root, run these commands as root
(cd /mnt/img; tar -cf—*) | (cd /mnt/usb; tar -xvf -)
sync
6. Set up the files for a bootable disk. This is done by copying over the
SYSLINUX configuration files for an ISO image (isolinux.cfg) to a
configuration file for a FAT16 system (syslinux.cfg):
mv /mnt/usb/isolinux.cfg /mnt/usb/syslinux.cfg
rm /mnt/usb/isolinux.bin
sync
7. Unmount the drive and make it bootable by installing the boot loader:
umount /mnt/usb
syslinux /dev/sdc
sync
eject /dev/sdc
exit # leave the root shell
Now you can boot from the USB drive in order to install the operating
system.
25
26
Part I
■
Optimizing Your System
Installing a Full File System from USB
The Holy Grail for USB hacking is the ability to boot a standalone operating
system from a thumb drive. In addition, given a large enough USB drive (and
a computer that can boot from the USB port), you can configure a thumb drive
as a standalone operating system.
WARNING There are many different methods discussed in online forums for
configuring a USB drive as a bootable system. Unfortunately, most of the
instructions are either incomplete or very complicated. Even if you follow these
steps exactly, you may still be unable to boot from the USB device because of
hardware limitations.
There are two configurations for making a bootable file system: a huge USB
floppy drive or a large USB hard drive. In both of these examples, I will use
the Hardy Heron (8.04 LTS) Live Desktop CD as the bootable device.
Using the Live CD from a USB Floppy Drive
Converting the Live CD to a bootable USB floppy drive requires at least a 1-GB
thumb drive.
1. Start a shell with root privileges. This is done for convenience since nearly
every command must be done as root.
sudo bash
2. Unmount and blank the thumb drive. (See the section ‘‘The 10-Step Boot
Configuration’’ for directions.)
3. Format the disk as one big FAT16 drive. The -I parameter to mkdosfs says
to format the entire device. In this example, the USB drive is /dev/sdc.
mkdosfs -I -F 16 /dev/sdc
sync
TIP FAT16 only supports drives up to 2 GB. If you have a larger USB drive, then
you will need to use the hack found in the ‘‘Different USB Devices’’ section to
convert a large USB drive into a smaller one.
4. Mount the Live CD and the USB drive:
mkdir
mkdir
mount
mount
/mnt/usb
/mnt/iso
-o loop ubuntu-8.04.3-desktop-i386.iso /mnt/iso/
/dev/sdc /mnt/usb
5. Copy over the files. This can take 20 minutes or longer. Go watch TV
or have lunch. Also, ignore the errors about symbolic links, since FAT16
does not support them.
cp -rpx /mnt/iso/* /mnt/usb/
sync
Chapter 1
■
Hacking the Installation
NOTE FAT16 does not support symbolic links. This copy command replaces links
with the linked file contents.
6. Set up the files for a bootable disk. Since SYSLINUX does not support
subdirectories for kernel files, you need to move these to the top directory
on the USB drive.
# move the kernel files and memory tester
mv /mnt/usb/casper/vmlinuz /mnt/usb/vmlinuz
mv /mnt/usb/casper/initrd.gz /mnt/usb/initrd.gz
mv /mnt/usb/install/mt86plus /mnt/usb/mt86plus
# move boot files to top of the drive
mv /mnt/usb/isolinux/* /mnt/usb/
mv /mnt/usb/isolinux.cfg /mnt/usb/syslinux.cfg
rm /mnt/usb/isolinux.bin
# Optional: Delete Windows tools and ISO files to free space
rm -rf /mnt/usb/start.* /mnt/usb/autorun.inf
rm /mnt/usb/bin /mnt/usb/programs
rm -rf /mnt/usb/isolinux
# All done
sync
7. Edit the /mnt/usb/syslinux.cfg file and correct the kernel paths. Remove
the paths /casper/ and /install/ wherever you see them. This is because
Step 6 moved the files to the root of the USB drive. There should be eight
occurrences of /casper/ and one of /install/. After you write your
changes, run sync.
8. Unmount the drive and make it bootable:
umount /mnt/usb
syslinux /dev/sdc
sync
eject /dev/sdc
exit # leave the root shell
The USB thumb drive should now be bootable! You can run the Ubuntu Live
operating system or install the operating system from this USB thumb drive.
For customization, you can change the boot menu by editing the
/mnt/usb/syslinux.cfg file and modifying the kernels.
Using the Live CD from a USB Hard Drive
Converting the Live CD to a USB hard drive is much more complicated.
Many computers that support booting from USB devices do not support this
configuration. Even if the basic configuration is supported, there may be BIOS
restrictions on the disk’s layout. In addition, the boot loader needs to support
partitions. Finally, the USB drive’s identifier cannot change after installation.
This final issue is the main reason that I do not use GRUB or LILO as the boot
loader on USB drives.
27
28
Part I
■
Optimizing Your System
Hard drives are defined by a combination of heads, sectors, and cylinders.
Although heads and cylinders used to match physical drive heads and platters,
this is no longer the case. In general, each sector contains 512 bytes of data, each
cylinder contains multiple sectors, and there are multiple cylinders per head.
However, when booting from a USB hard drive, many BIOS manufacturers
assume the drive has 64 heads and 32 sectors per cylinder. This is the configuration used by ZIP drives. If you use a different configuration, then it may not
boot. In addition, the first partition must not be larger than 1023 cylinders.
Although the syslinux command only supports FAT12 and FAT16 file
systems, the syslinux package includes extlinux, which supports the ext2
and ext3 file systems. For this example, we will use extlinux as the boot loader
with an ext2 file system on the bootable partition.
There are 10 steps to configure a bootable operating system on the USB
drive:
1. Open a shell with root privileges:
sudo bash
2. Connect the USB drive and unmount it.
3. Use fdisk of cfdisk to partition the drive (for example, /dev/sdc). Be
sure to specify 64 heads and 32 sectors. The last cylinder of the first
partition must not be larger than 1023. If you have additional disk
space after allocating the first partition, then you can allocate additional
partitions.
# fdisk -H 64 -S 32 /dev/sdc
Command (m for help): d
No partition is defined yet!
Command (m for help): n
Command action
e
extended
p
primary partition (1-4)
p
Partition number (1-4): 1
First cylinder (1-983, default 1): 1
Last cylinder or +size or +sizeM or +sizeK (1-983, default 983): 983
Command (m for help): a
Partition number (1-4): 1
Command (m for help): p
Disk /dev/sdc: 1030 MB, 1030750208 bytes
64 heads, 32 sectors/track, 983 cylinders
Units = cylinders of 2048 * 512 = 1048576 bytes
Device Boot
Start
End
Blocks
Id System
/dev/sdc1
*
1
983
1006576
83 Linux
Command (m for help): w
The partition table has been altered!
Chapter 1
■
Hacking the Installation
WARNING The partition must be marked as ‘‘active’’; otherwise, you will not be
able to boot from it.
4. Format the partition as an ext2 file system:
mkfs.ext2 /dev/sdc1
5. Mount the Live CD and the USB drive:
mkdir
mkdir
mount
mount
/mnt/usb
/mnt/img
-o loop ubuntu-8.04.3-desktop-i386.iso /mnt/img/
/dev/sdc1 /mnt/usb
6. Copy over the files. As mentioned in the previous section, this can take
20 minutes or longer.
cp -rpx /mnt/iso/* /mnt/usb/
sync
7. Create the boot files. Unlike syslinux, the boot files for extlinux can be
located in a directory. In this case, you will reuse the casper directory,
since it already contains the kernel files.
cp /mnt/usb/isolinux/* /mnt/usb/casper/
rm /mnt/usb/casper/isolinux.bin
mv /mnt/usb/casper/isolinux.cfg /mnt/usb/casper/extlinux.conf
sync
NOTE The extension for the boot configuration file is .conf, not .cfg.
8. Do not unmount the drive yet! Making it bootable with extlinux requires
the mounted directory containing the extlinux.conf file.
extlinux -z /mnt/usb/casper
sync
9. Copy over the boot loader. There is a file missing from the syslinux
binary package, but it is available in the source package. This file is
called mbr.bin and is a master boot record containing the boot loader.
Download the source package:
apt-get source syslinux
This creates a directory, such as syslinux-3.53/. In this directory is the
missing file. Install it on the drive using:
cat mbr.bin > /dev/sdc
sync
29
30
Part I
■
Optimizing Your System
WARNING If you are configuring a file image instead of the actual drive,
then this cat command will truncate your file. Instead, use dd if=mbr.bin
of=usbdrive.img bs=1 notrunc to install the master boot record to your USB
drive image file (in this case, usbdrive.img).
10. Now, make sure all writes complete and then unmount the drive:
sync; umount /dev/sdc; eject /dev/sdc
If all goes well, you should have a working, bootable USB thumb drive. This
drive can be used as a bare-bones recovery and repair system.
As an alternative configuration, you can format the drive with FAT16 and
use syslinux to make the partition bootable. In this case, you will also need to
copy the boot files to the top of the partition and edit the syslinux.cfg file as
described in the previous section.
Booting Variations and Troubleshooting
I used a variety of computers for testing the USB boot process. Every computer
acted differently to different boot configurations.
Every computer with Boot from USB support was able to boot the original
boot.img file. They were all able to install over the network.
Most computers were able to boot the Ubuntu Live Desktop operating
system when my 1-GB thumb drive was formatted as a USB floppy drive.
However, one computer gave a generic boot error message.
Only my newer computer systems could boot the USB hard drive with
the ext2 file system. It didn’t make any difference if I used a real USB
hard drive or thumb drive. In addition, specifying the ZIP configuration
was the only way to make the hard drive configuration work on one of
the computers.
My Asus netbook had no issues booting from any of these configurations,
and it even worked from a 2-GB SD Card.
Depending on the configuration variation and hardware that you use, you
may see some well-known errors.
Blank screen—If all you see is a blank screen with a blinking cursor, then
something definitely did not work. This happens when the boot loader
fails. It could be the result of failing to install the boot loader properly,
or it could be a BIOS problem. Try rebuilding the USB drive in case you
missed a step. Also, try booting the USB drive on a different computer. If
it works on one computer and not on another, then it is a BIOS problem.
But if it fails everywhere, then it is probably the boot loader.
Chapter 1
■
Hacking the Installation
‘‘PCI: Cannot allocate resource region. . .’’—This indicates a BIOS problem. You may be able to boot using additional kernel parameters to
bypass the PCI errors, for example:
live noapic nolapic pci=noacpi acpi=off
However, you may not be able to get past this. Check if there is a BIOS
upgrade available for your computer.
Root not found—There are a variety of errors to indicate that the root
partition was not available during boot. This usually happens when the
USB drive is still initializing or transferring data, and not ready for the
root partition to be mounted. You can fix this by extracting the initrd
file (see the next section, ‘‘Tweaking the BusyBox’’) and editing the
conf/initramfs.conf file. Add in a mounting delay of 15 seconds (the
new line should say: WAIT=15). This delay gives the USB time to initialize,
configure, and transfer data.
Tweaking the BusyBox
During the text-based installation, you have the option to access a command
prompt by pressing Alt+F2. Unlike a full operating system, this prompt
contains a very minimal environment with few commands.
The minimal operating system is part of an application called BusyBox.
BusyBox is a very small executable that provides the installation environment.
The BusyBox system files are stored in the initrd archive. Depending on your
Ubuntu version, the file is named either initrd.gz or initrd.lz.
By hacking the initrd file, you can add commands to the basic installation
environment. For example, you can add an editor or diagnostic tools to the
/bin directory. Be sure to copy over any shared libraries used by commands.
For example, file /bin/nano shows a dynamically linked executable, and ldd
/bin/nano lists all of the libraries. You will be unable to use a linked executable
unless you also include all of the libraries.
$ file /bin/nano
/bin/nano: ELF 32-bit LSB executable, Intel 80386, version 1 (SYSV), for
GNU/Linux 2.6.8, dynamically linked (uses shared libs), stripped
$ ldd /bin/nano
linux-gate.so.1 => (0xb7fa1000)
libncursesw.so.5 => /lib/libncursesw.so.5 (0xb7f4e000)
libc.so.6 => /lib/tls/i686/cmov/libc.so.6 (0xb7dff000)
libdl.so.2 => /lib/tls/i686/cmov/libdl.so.2 (0xb7dfa000)
/lib/ld-linux.so.2 (0xb7fa2000)
NOTE Don’t worry about the linux-gate.so.1 library. It does not really exist.
You only need to copy over libraries that include paths, such as
/lib/libncursesw.so.5.
31
32
Part I
■
Optimizing Your System
In contrast, any executable identified as statically linked (not dynamically
linked) is good to go! There are no additional libraries required.
$ file /usr/bin/rar
/usr/bin/rar: ELF 32-bit LSB executable, Intel 80386, version 1 (SYSV),
for GNU/Linux 2.6.0, statically linked, stripped
$ ldd /usr/bin/rar
not a dynamic executable
TIP If you are compiling programs, then you can use gcc -static to generate
statically linked executables. You can also download package source code using
apt-get source. (See Chapter 5 for information on installing the compilation
environment and downloading the source for packages.)
To modify initrd:
1. Extract the archive. The initrd file is actually a compressed archive
containing all of the executables, libraries, and configuration files needed
during boot. Depending on your Ubuntu version, the file is named either
initrd.gz or initrd.lz. For example, the Hardy Heron (8.04 LTS) Live
Desktop CD uses casper/initrd.gz, while the Live CD for Karmic Koala
(9.10) uses casper/initrd.lz.
mkdir extract
cd extract
zcat /mnt/usb/casper/initrd.gz | cpio -imvd # for initrd.gz
lzma -dc -S .lz /mnt/usb/casper/initrd.lz | cpio -imvd
# for initrd.lz
2. The extracted contents look like a file system. Add or edit files in this
directory. For example, to add a binary, place the binary in ./bin/ and
any libraries in ./lib/.
3. Repackage and replace the initrd file:
find . | cpio -o -L--format=’newc’ |
gzip -9 > /mnt/usb/casper/initrd.gz
find . | cpio -o -L--format=’newc’ |
lzma -7 > /mnt/usb/casper/initrd.lz
Using Ubuntu on a Netbook
Beginning with Jaunty Jackalope (9.04), specialized version of Ubuntu has
been created for netbook systems. Netbook computers are a class of low-end
laptops. They are generally smaller, less powerful computers. Physically, they
usually have smaller keyboards, smaller screens, and no CD or DVD drive.
While you would not want to run a multi-user or high-volume web server
on a netbook, they are ideal for simple tasks when you are out of the office. For
Chapter 1
■
Hacking the Installation
example, you can check e-mail, surf the web, do some basic word processing,
and even occasionally develop software (like patching while on the road).
Netbooks are also great for watching movies on airplanes.
Installing on a Netbook
Most netbooks include multiple USB connectors and usually have a slot for an
SD Card or similar memory device. Since netbooks lack CD and DVD drives,
all include the ability to boot from USB, SD Card, or other types of removable
memory. Many also include the ability to boot from the network.
NOTE Even though the netbook release is relatively new and still undergoing
major revision changes (the Jaunty desktop looks very different from the Karmic
desktop), the installation is one of the most painless processes I have ever
experienced.
While there is a wide range of netbooks on the market, not all are supported by Ubuntu. While some work right straight out of the box, others may
need you to manually install drivers or patches, and a few have completely
unsupported hardware. Usually the issues concern sound, video camera, or
network support.
TIP Before trying to use Ubuntu on a netbook, consult the list of supported
hardware at https://wiki.ubuntu.com/HardwareSupport/Machines/
Netbooks.
Creating the Netbook Installation Media
To create the netbook installation media, you will need to download the
netbook ISO (for example, ubuntu-9.10-netbook-remix-i386.iso). If your
netbook has a CD-ROM drive, then simply burn the ISO to a disk and boot
from it.
However, most netbooks lack a CD-ROM drive. In this case, you will need
a 1-G USB thumb drive, SD Card, or other form of media that is supported by
your netbook. You will also need a computer to create the CD-ROM.
The easiest way to make a bootable netbook installation image on a USB
thumb drive or SD Card is to use usb-creator. This tool automates the
processes of putting a CD-ROM image onto other types of removable media.
Intrepid Ibex (8.10) and later—Install usb-creator using sudo apt-get
install usb-creator. The executable is called usb-creator-gtk.
Hardy Heron (9.04 LTS)—There is an ugly hack for installing
usb-creator on Hardy. Hardy and Intrepid are very similar and can run
much of the same code.
33
34
Part I
■
Optimizing Your System
1. Download Intrepid’s usb-creator package from
https://launchpad.net/ubuntu/intrepid/i386/usb-creator
The file will have a file name like usb-creator_0.1.10_all.deb.
2. Install the dependent packages:
sudo apt-get install syslinux mtools
3. Install Intrepid’s usb-creator package on Hardy:
sudo dpkg -i usb-creator_0.1.10_all_deb
4. The executable is called usb-creator.
The usb-creator program allows you to select the ISO image and destination
device. (See Figure 1-5.) When it finishes the installation, you can connect the
USB device (or SD Card) to your netbook and boot from it.
Figure 1-5: The usb-creator under Karmic Koala
If usb-creator is not an option (for example, if you are running Dapper
Drake 6.06 LTS), then follow the steps in the section ‘‘Installing a Full File
System from USB’’ to copy the netbook installation image to an SD Card or
USB device. Use the USB hard drive configuration.
Chapter 1
■
Hacking the Installation
Installing with Only a Netbook
There are two other options that work really well for installing Ubuntu on
a netbook, or any other kind of Windows system. The approach is a little
roundabout, but you can install Ubuntu using only a netbook and a USB drive
and not burn anything to CD-ROM.
Most netbooks ship with Microsoft Windows XP or Windows 7 installed.
Using Windows, download the netbook installation disk onto the netbook. At
this point, you have two options: create a bootable USB device from Windows
or use the Windows Ubuntu Installer.
To create a bootable USB drive, download unetbootin for Windows from
unetbootin.sourceforge.net. This program works like the usb-creator,
allowing you to select an ISO and install it on a USB device.
With Windows, you can also open up the ISO image. Sitting at the root of the
disk image is a program called wubi.exe. This is the Windows Ubuntu Installer.
Using Wubi, you can install Ubuntu as an application under Windows that runs
a separate operating system. Wubi works by adding itself to the Windows boot
menu. This effectively turns the Windows system into a dual-boot computer.
After installing Wubi, reboot the system. You will see Ubuntu listed in the
boot menu. If you boot Ubuntu, it will use the Windows boot manager to
run an Ubuntu environment. From Ubuntu, you can access the host Windows
system through /host and /media. More importantly, you can download the
usb-creator for Ubuntu and create a bootable USB device.
Regardless of the approach you take, you should now have a bootable USB
drive (or SD Card or other type of removable memory). Tell your netbook to
boot off the new media. For example, with an Asus 1005HA netbook, you can
press Esc after pressing the power-on button and select the SD Card or USB
drive as the boot device. At this point, you can install Ubuntu for the netbook.
HIDDEN DISK PARTITIONS
Many netbooks and laptops have a boot option to restore the operating
system. This works by accessing a separate partition on the hard drive that
contains a bootable operating system and will restore the system to factory
defaults.
During the install process, use the advanced disk partitioning option. This
will show you the name of the emergency recovery partition. (It is usually
named something like ‘‘XP recovery.’’) There may also be a small Extensible
Firmware Interface (EFI) partition used to improve boot times.
If you don’t want to accidentally press a button and overwrite your Ubuntu
netbook with Windows, then be sure to reformat the drive (or remove the XP
recovery partition) during the installation. If you remove the emergency recovery partition, then the operating system will ignore requests for recovery.
(continued)
35
36
Part I
■
Optimizing Your System
HIDDEN DISK PARTITIONS (continued)
While removing the EFI partition (fdisk partition type 0xEF) will not harm
anything, keeping the small (usually 8 MB) partition can dramatically improve
boot times.
Upgrading Ubuntu
People who already use Ubuntu have the option to upgrade rather than
reinstall. Ubuntu follows a strict upgrade path between major revisions; you
should not just upgrade straight from Dapper to Karmic. The upgrade path is
only supported for one-off and LTS releases. For example, you can upgrade
from Dapper Drake (6.06 LTS) to the next release (Edgy Eft 6.10) or to the
next LTS release (Hardy Heron 8.04 LTS). However, skipping a release, such
as upgrading from Hardy Heron to Karmic Koala (9.10) and skipping Jaunty
Jackalope (9.04), is not supported.
NOTE Although you could upgrade directly from Dapper or Hardy to Karmic, this
is likely to cause problems. Each upgrade assumes that you are upgrading from
the previous version. Skipping a version may break this assumption and cause
upgrade problems.
UPGRADE VERSUS FRESH INSTALL
Even though Dapper, Hardy, and Karmic are all versions of Ubuntu, they are all
major releases. Treat them as different operating systems. Just as the upgrade
path from Windows 2000 to Windows XP is not recommended, I don’t recommend the upgrade path between Ubuntu revisions. Instead, back up your
files, inventory the software you need, and perform a clean install. After the
install, restore your personal files and add your software. This is faster and
less painful than debugging Ubuntu after an upgrade.
WARNING The success of an upgrade depends on your system and
customizations. Upgrades do not always work.
The safest upgrade approach is to save your files off the system and perform
a clean install. However, if you still want to go through with the upgrade,
then you will need to determine your Ubuntu version and run a few upgrade
commands.
TIP Consider putting the /home directory on its own partition. This way, you can
upgrade or reinstall without losing all of your personal files.
Chapter 1
■
Hacking the Installation
Determining the Version
Upgrading gets complicated when Ubuntu users refer to the operating system
by name, while the operating system reports numeric versions. The question
becomes: How can you tell which version of Ubuntu is in use?
One approach is to use the graphical desktop. On the menu bar, System ➪
About Ubuntu displays the version number and common name. Unfortunately,
this is not an option for text-only systems such as the Ubuntu Server. This is
also not practical for automated systems.
Another approach is to look at the current /etc/apt/source.list file.
Assuming that nobody has drastically modified the file, the common name for
the operating system should be listed on the deb installation lines.
A better option is the lsb_release command. This command displays
distribution-specific information from the Linux Standard Base.
$ lsb_release -a
No LSB modules are available.
Distributor ID: Ubuntu
Description:
Ubuntu 8.04.3 LTS
Release:
8.04
Codename:
hardy
Performing the Upgrade
When you start the upgrade, there is no going back. Attempting to stop the upgrade will likely screw up the system, and a power outage during the upgrade
can be disastrous. Be sure to make a backup before beginning the upgrade.
The automated upgrade command is:
sudo apt-get install update-manager-core
sudo do-release-upgrade
Depending on your system’s state, these commands may direct you to run
additional commands. Eventually, you will be directed to reboot the system. If
all goes well, the system will come up. During the first login, the system may
be a little slow as it performs some post-upgrade configurations. After that,
you should be good to go.
Upgrading Issues with Ubuntu
Ubuntu upgrades are not always painless. (I have not yet had a simple
upgrade.) Although upgrading from a new Dapper install (with no additions)
to Edgy to Hardy works well, you are unlikely to be running a new installation
37
38
Part I
■
Optimizing Your System
of Dapper or Edgy. Customizations lead to upgrade complications. For
example:
Custom system files—Customizing files, such as /etc/gdm/gdb.conf
(see Chapter 10), will prompt you to resolve installation conflicts. You
can either overwrite or keep the old file, but you cannot merge changes.
Proprietary drivers—Binary and custom drivers, ranging from the
Macromedia Flash player to wireless network support, may break. You
will need to uninstall and reinstall the software.
Shared Libraries—Different versions of Ubuntu use different linked
libraries. For example, Jaunty uses newer libraries than Hardy. Code that
is compiled for one set of libraries may break under the new system; be
prepared to recompile as needed.
Moving files—Required system files may move between upgrades. For
example, the w32codec files (for playing multimedia files, see Chapter
6) may be located in /usr/lib/win32/, /usr/lib/codec/, or some other
directory, depending on when and how you installed it. You may even
have different versions of the same files in different directories, leading
to run-time compatibility issues.
The time required to do an upgrade is another significant issue. An upgrade
usually takes at least three times longer than a clean install. This is because the
upgrade checks files before modifying the system. While a 2-GHz computer
may install in 15 minutes and upgrade in under an hour, a slower computer
can take many hours. My 2-GHz PC upgraded over the network from Dapper
to Hardy in roughly 5 hours. The same computer completed a network install
of Hardy in less than 30 minutes.
Finally, your graphical desktop may not look like a new installation. Menus
and applications change between Ubuntu versions, but upgrades do not
receive the changes, For example, if you migrated from Hardy Heron to Jaunty
Jackalope to Karmic Koala, then you will still have the System ➪ Preferences
➪ Removable Drives and Media menu, even though the popup window no
longer describes any settings for removable drives or media. Under a clean
install of Karmic, this menu option does not exist.
WARNING Be prepared to devote time to upgrading. Because you may be
prompted occasionally to resolve conflicts, you cannot walk away and expect the
upgrade to finish without your intervention. If the upgrade takes two hours, you
should be near the computer for two hours. After the upgrade has been
completed, you may need to spend additional time fixing broken drivers and
recompiling software. (Be sure to stock up on coffee and order in for lunch.)
Chapter 1
■
Hacking the Installation
Configuring GRUB
When you first boot your Ubuntu system, there is a small text screen that
says GRUB Loading, and you have three seconds to press Esc before it boots
the default operating system. GRUB is the GRand Unified Bootloader and
determines which operating system you want to run. If you press Esc during
the boot loader screen, you can select alternate operating systems, kernels, and
kernel parameters.
If you don’t press Esc in three seconds, then GRUB will boot the default
operating system. You can change the GRUB configuration by editing
/boot/grub/menu.lst. For example, if you change the timeout value to 15
(from timeout 3 to timeout 15), then GRUB will wait 15 seconds before
booting the default operating system. This is very useful if your monitor takes
a few seconds to wake up from power-save mode or if you are just slow to
press Esc.
Similarly, menu.lst file includes the list of known kernels and operating
systems at the end of the file. The first one listed is item 0, the second is item
1, and so on. At the beginning of menu.list is a line that says Default 0. This
identifies the default operating system configuration as the first one in the list.
If you change it to Default 3, then the fourth system listed will become the
default.
Altering Boot Parameters
The /boot/grub/menu.lst file contains three main sections. The first section,
found at the top of the file, contains basic parameters such as timeout and
default.
The second section is denoted by a line that says BEGIN AUTOMAGIC KERNELS
LIST. This section contains parameters used for automatic kernel configuration.
Each of these lines begins with one or two hash signs (# or ##). Usually a hash
sign denotes a commented line. However, the automated script actively
removes the first hash in order to obtain customized kernel parameters. Real
comments have two hash signs; configuration parameters have one.
For example, one of my computers requires the kernel parameter pci=nobios
in order to boot properly. Rather than pressing Esc and manually entering it
each time I reboot, I can add it to the boot options line. It needs to have one
hash character so that it becomes a configuration parameter.
## additional options to use with the default boot option, but not with
## the alternatives
## e.g. defoptions=vga=791 resume=/dev/hda5
# defoptions=pci=nobios
39
40
Part I
■
Optimizing Your System
The final section of the file comes after the line that says End Default
Options. Do not modify anything below this line. Whenever you update the
system and install a new kernel or make changes to GRUB, this section is
regenerated. Anything manually changed after this line will be lost the next
time you install a kernel upgrade.
Updating GRUB
The boot loader does not actually reside in the Linux partition. Instead, it is
hooked into the sector containing the partition table on the hard drive. After
you make any changes to the GRUB configuration files, you need to update
the installed boot loader:
sudo update-grub
This command regenerates the /boot/grub/menu.lst file and updates the
boot loader on the hard drive.
CONFIGURING GRUB UNDER KARMIC KOALA
GRUB’s configuration was very consistent though all versions of Ubuntu . . .
until Karmic Koala (9.10) showed up. While GRUB essentially works the same
way, all of the configuration files moved.
For example, earlier Ubuntu versions use /boot/grub/menu.lst for
setting the timeout, default operating system, and associated parameters.
With Karmic, the configuration has been split. The file /etc/default/grub
contains generic settings, including the timeout (GRUB_TIMEOUT) and default
parameters (GRUB_DEFAULT and GRUB_CMDLINE_LINUX_DEFAULT).
Additional configuration scripts have been moved under /etc/grub.d/.
For example, the actual Linux boot command is stored in /etc/grub.d/10_
linux, and the memory tester is in 20_memtest86+.
The final significant change comes from the list of kernels and operating
systems. With earlier versions of GRUB, the kernel list was automatically detected from the /boot/ directory and then added to the final
automated section of the menu.lst file. The new version of GRUB still
automatically discovers all installed kernels, but the list is now stored in
/boot/grub/grub.cfg. This configuration file is completely auto-generated.
Do not edit this file. Instead, make any configuration changes to the
/etc/default/grub and /etc/grub.d/ files.
When you finish customizing GRUB, be sure to run sudo update-grub to
refresh the automatically generated files and update the boot loader.
Chapter 1
■
Hacking the Installation
Summary
The initial Ubuntu configuration determines the ease and flexibility available
when modifying the operating system. A right decision at the beginning can
make everything else easier. The questions addressed in this chapter include:
Do you upgrade or reinstall?
Do you want a desktop, server, or custom installation?
Should you install from a floppy disk, CD-ROM, USB, or across the
network?
If you upgrade, what are some problems you may run into?
Chapter 2 covers the post-installation environment and discusses options
that you might want to change after you first log in. In Chapter 3, you’ll learn
how to configure the different types of devices and peripherals that you may
want to use with your system, and Chapter 4 helps you get the most out of
your keyboard, mouse, and other manual interfaces.
41