1
Rugged, Reliable, Mobile, Secure
TM
DataPort
™
DataPortable 525 USB to IDE Installation Guide
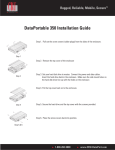
Step 1. Firmly push the rear tabs in towards the center of the enclosure. Slide
the metal cover off the back of the enclosure. If you are installing a
5.25” device remove the front bezel insert.
Step 2. Jumper the IDE device to master. Connect the power and data cables to
your IDE device.
Step 3. For 5.25” devices use the provided screws in the side mount holes to
secure it. For 3.5” devices use the provided screws in the bottom mount
holes to secure it.
Step 4. Slide the top cover onto the enclosure. Press the rear tabs out to
secure the cover.
Setting up the drive for Windows 2000/XP or Mac OS 9.x/X
Connect the DataPortable 525 to any available USB port. No new drivers are required. The hard disk drive will be found
and a window will pop up stating that new hardware has been detected. If the drive is formatted it will be accessible
through My Computer on PCs or from the desktop on Macs. For best performance connect via USB 2.0.
For PCs:
•
•
•
•
Right click on My Computer
Click on Manage
In the Storage sub-section, click on Disk Management to display a list of all the drives connected to your computer.
If you have not used the drive before you will have to partition it. Left click on Action, select All Tasks and then left
click on Create Partition.
REMEMBER, partitioning the drive will require the drive to be formatted and
formatting will result in loss of all data on the hard drive.
1-800-260-9800
www.CRU-DataPort.com
Rugged, Reliable, Mobile, Secure
TM
DataPort
™
For Macs:
• This will bring up the Create Partition Wizard
screen.
• Before you disconnect the external drive from the
Mac, close all windows and quit all applications that
are running on the DataPortable 525
• Follow the instructions and the drive will be
ready for use.
For Macs:
If the drive is not formatted, you will be asked to initialize it.
After initializing the drive, select the partition tab and select
the desired partitions, then click ok. The new disk will be
added to your desktop.
• Drag the external drive icon into the Trash to
dismount it from the desktop prior to unplugging
the drive.
Product Warranty
Removing the Hard Drive
CRU-DataPort (CRU) warrants the DataPortable 525 to be
free of significant defects in material and workmanship for a
period of one year from the original date of purchase. CRU’s
warranty is nontransferable and is limited to the original
purchaser.
For PCs:
Limitation of Liability
REMEMBER, formatting will result in loss
of all data on the hard drive.
• Quit all applications running on the external
drive then right click the green arrow icon on
the system tray.
• Select Remove/Eject.
• Highlight the USB Mass Storage Device in the
dialog box then click Stop.
• Choose the external disk drive that you want to
disconnect, then click Stop.
• Wait until the “You may safely remove this
device” message appears.
• Unplug the data cable from the computer or
remove the carrier.
WARNING: If your computer reports that the drive is busy,
you must shut down your computer and then remove the
drive. Failure to do so may result in data loss or corruption.
The warranties set forth in this agreement replace all other
warranties. CRU expressly disclaims all other warranties,
including but not limited to, the implied warranties of merchantability and fitness for a particular purpose and non-infringement of third-party rights with respect to the documentation and hardware. No CRU dealer, agent or employee is
authorized to make any modification, extension, or addition
to this warranty. In no event will CRU or its suppliers be
liable for any costs of procurement of substitute products or
services, lost profits, loss of information or data, computer
malfunction, or any other special, indirect, consequential,
or incidental damages arising in any way out of the sale of,
use of, or inability to use any CRU product or service, even
if CRU has been advised of the possibility of such damages.
In no case shall CRU’s liability exceed the actual money paid
for the products at issue. CRU reserves the right to make
modifications and additions to this product without notice or
taking on additional liability.
Register your product at www.CRU-DataPort.com and be
automatically entered to win a free prize!
A5-525-0001 Rev. 2.0
1-800-260-9800
www.CRU-DataPort.com