1
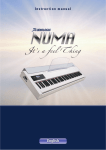
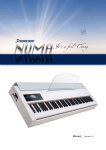
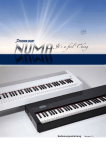
Instruction Manual I n s t r u c t i o n M a n u a l Safety Instructions Important Safety Instructions DANGER! High Voltage Risk of electric shock Do not open chassis. No user serviceable parts inside. Refer service to qualified service staff only. Mains Only use the proper adapter (click-on) for main power supply. Humidity: To reduce the risk of fire or electric shock do not expose this device to rain or moisture. Never place containers with liquid on the unit. Do not use this product near water, e. g. swimming pool, bathtub or wet basement. If this device is moved from a cold place to a warm room condensation can occur inside the unit. To avoid damage please allow the unit to reach room temperature before switching on. Installation Always use a stable rack to place the keyboard on. Take care of size and weight. Cleaning / Maintenance Never use any aggressive detergent. Surface may become stained. We recommend a slightly moist micro-fiber-cloth. Only use accessories that are specified by the manufacturer. Follow the instructions in the manual. Warranty void if unauthorized work is executed to the NUMA. Read the entire manual. There you find all the information needed for using this device. English 2 instruction manual Easy Control System Play Mode Edit Mode YouPlay Mode Interactive NUMA USB <> Computer Connections Scope of supply 4 NUMA by Studiologic® Editing is handled by the Easy Control System with a backlit LCD display and touch-sensitive pads. Play Mode gives you direct access to the most important parameters - perfect for quick changes on stage. Edit Mode offers more detailed changes to all parameters that can be saved in 65 patches (presets). What‘s really unique about the NUMA is the so called YouPlay Mode, which allows you to create your own velocity curves and save them to 15 presets. These customized curves are available to every patch then. Due to the integrated USB connection, the NUMA can communicate with a computer. It offers two modes of operation: With USB MIDI the NUMA is recognized as a „USB-AudioDevice“ by the computer. More interesting is the USB Virtual Com mode, enabling the computer to edit and store presets. Even an update of the NUMA operating system is possible. 1 x MIDI Out (DIN 5-pin) 2 x Pedal (TS-Jack) 1 x USB 1 x Power Supply (9 V– / 500 mA) NUMA Nano keyboard External power supply PS -100 Sustain pedal Perspex music stand User manual English 3 instruction manual Edit Mode Overview Edit Mode In Edit Mode you can make very detailed changes and create new patches. These are the single parameters, available for each zone: Page 8 • • Page 9 • • • • • Page 10 • • Page 11 • • • Page 12 • • Midi Selecting the right MIDI-Channel (1-16) Program Change Assigning the sounds of external Sound modules Key Range Adjusting the Zone-Area (A0 - C8) Volume Setting up the volume(s) (0-127) Transpose Adjusting the pitch (-24 bis +24) Play Mode Selecting the basic mode Shapes Setting up the dynamics envelope Wheel Control Choosing the operation of the modulation-wheel (free) Aftertouch Control Setting up the Aftertouch details Control Jack 1 Choosing the operation of Control Jack 1 Control Jack 2 Choosing the operation of Control Jack 2 Store How to save changes and creating a new patch Patch Name How to edit the patch name System Displays the system wide settings: Software Version, LCD-Contrast, sensitivity and speed of the Virtual Dial. Edit Mode is activated by touching both pads 34 simultaniously. The display now shows Edit, the respective parameter and the patch name. Selecting pages is handled by the pads34, navigation on a single site is with touching 56 , choosing the zones is with the 4 Control Keys, parameter changes are done with the Virtual Dial. All following examples and images are based on factory patch F04. Touching both 34gets you out of the Edit Mode again don‘t forget to save your changes! 8 NUMA by Studiologic® English 4 instruction manual Operation Operation of the NUMA Nano is done with 4 touch-sensitive pads, a virtual dial and the LCD display. 5 ¢ 4 Navigation right Navigation up Virtual Dial Image 1 Control Elements 3 Navigation left u v w x Control Keys 6 Navigation down While in Play ore Edit Mode, these pads select the single pages for different parameters. Touching both simultaneously activates the Edit Mode. Navigation 34 Navigation Selecting a patch in Play Mode is done with these two pads. In Edit Mode they select the sub-pages. 56 Control Keys 1-4 activate the corresponding parameter above the pad. For example Zone, Reset, Store, No or Yes. Touching both u+v simultaneously activates the YouPlay Mode. The combination of w+x initializes a reset of all MIDI data. Control Keys The Virtual Dial selects the patches in Play Mode and changes the selected parameter in Edit Mode. Virtual Dial English 5 uvwx ¢ NUMA by Studiologic® 5 instruction manual Play Mode After power-up (Image 2) the NUMA Nano automatically loads a patch in Play Mode. This patch is the last one used in a saved Edit-Mode (page 13). Image 2 Play-Mode: Possible changes Loading Patches Using the pads 5 6 (Image 3a) or the Virtual Dial ¢ (Image 3b) you can select single Patches. The sequence is in numerical order, Factory-Patches (F01 up to F05) are followed by User-Patches (001 up to 064). Only already used patches are displayed. This prevents you from searching through not used patches. Image 3a Image 3b Note: Patches are immediately active, no need for an extra confirmation! Factory-Patches cannot be erased. Zones On/Off Control Keys u-x can be used for direct access to Zone On/ Off. The corresponding state is illustrated through an active (on) or cancelled (off ) loudspeaker. Image 4 shows: • Play Mode • Factory-Patch F04 • Zone 2 off • Zone 3 off Quick-Edit of Patches (Live-Edit) The arrow pads 34 give you access to the basic parameters of a patch and the particular zones. The following parameters can be changed: • Patch Midi Choosing the MIDI-Channel (1-16) • Patch Program Choosing the Program (0-127) • Patch Volume Adjusting the volume (0-127) • Patch Transpose Adjusting the pitch (-24 bis +24) All settings are separate for each zone and are only effective for the active patch. Note: Changes made in Play-Mode are not saved! Permanent changes can only be made in Edit Mode. 6 NUMA by Studiologic® English 6 instruction manual Play Mode Example Example: Choose patch F04 with the pads 56 . Try to switch the respective zone on and off, using the Control Keys u-x. At last, leave On Zone 1 and 4 (Image 4). Now touch pad 4: The display changes the upper row to Patch Midi, the line above the zones shows the respective MIDI channel. Now touch pad x two times. The display (Image 5) shows Patch Volume in the upper row. Now you can change the volume of all zones with the Virtual Dial ¢. If you want to change the volume of zone 4 only, then you have to select it with pad x first. The display now pictures Zone Volume and zone 4 gets activated (Image 6). Volume of zone 4 can be changed with the Virtual Dial ¢ . Deselecting zone 4 results in changes to all zones at once. Image 4 Image 5 This procedure is the same for all other parameters. Feel free to try different setups (Image 7-8). Note: Do not forget that changing the patch-preset resets all currently made settings! Image 6 How to store changes >> Page 12 To get out of the Live-Edit-Mode just touch one of the pads 56. Image 7 Image 8 English 7 NUMA by Studiologic® 7 instruction manual Edit Mode Part 1 Midi This is where you can setup the right MIDI-Channel for every zone. Range is from 1 to 16. If you choose „0“, the zone gets inactive and won‘t be displayed on other pages (Image 9). Image 9 Program Change Assigning the preset of an external sound generator to a Numa zone is done with the parameters Program Change, LSB Bank Select und MSB Bank select. Three sub-pages (Image 10-11-12) can be selected with pads 56 and displayed in the top row. Values are „Off“ and „0“ up to „127“. Please check the manual of your external sound-module to find out which sound is on which preset. Image 10 Image 11 Image 12 Key Range It´s very easy to split the Numa keyboard into 4 separate Zones. Choose one zone with the corresponding Control Key u-x . Now press the first and the last key of the desired Range - done. The display gives you a feedback of your selection (Image 13). Range is from A0 up to C8. English 8 Image 13 NUMA by Studiologic® 9 instruction manual Edit Mode Part 2 Volume On this page you can adjust the Volume of each zone. The range is „0“ up to „127“ (Image 14). Note: Changing one parameter for all zones, at the same time, is not possible in Edit Mode. Image 14 Transpose/Octave: Transpose (Image 15) for changing the pitch for ± 2 octaves octave steps. Selecting a sub-page is handled via the pads . Image 15 Note: Both parameters can be combined but, the maximum change is ± 2 Octaves. Play Mode Image 16 This mode enables you to assign an individual dynamic to • each zone: Dynamic, Organ. Shapes Image 17 Play Modes (Image 17): • Dynamic Three factory presets (Soft, Medium, Hard) and 15 User-Presets are possible. • Organ Only one setting without dynamic. How to create your own dynamic curves is explained on page 14. 10 NUMA by Studiologic® English 9 instruction manual Edit Mode Part 3 Wheel Control/Polarity This page for the Modulation-Wheel is divided in two sections: Wheel Control and Polarity (Image 18-19). The selection is handled via the two pads 56, and - as always via the Virtual Dial ¢ . Wheel Control enables the following parameters: • Off Modulation wheel is out of operation • Pitch Make pitch changes with the modulation wheel • C#0-C#127 Moving the wheel generates a control change command from 0 up to 127 Image 18 Image 19 The Polarity parameter defines the direction of the changes. Pol.+ for an upward change, or Pol.- for a downward change. Note: Any changes will take place only after a full movement of the Modulation-Wheel. Aftertouch Control / Polarity Again you can find two settings here for Aftertouch control (Image 20) : • Off No Aftertouch at all • AFT This activates the standard aftertoch of the external sound module. • C#0-C#127 The changing parameter can be assigned to a control change command. Image 20 The direction of the change is controlled with Aftertouch Polarity (Image 21). Image 21 Note: The Aftertouch function is monophon. English 10 NUMA by Studiologic® 11 instruction manual Edit Mode Part 4 Jack 1&2 Conrol / Polarity / Type There are three separate pages for setting up the footswitches. Choose it with 56, change it with ¢ . Image 22 The Control parameter (Image 22) enables you to assign a distinctive controller to every zone, activated by operation. Data range is „Off“ and C#0-C#127. The Polarity (Image 23) parameter changes the action of the switch from positive (+) to negative (-). This makes it easy to use a closed switch as an open one. Image 23 Image 24 On the page Type Jack (Image 24) choose which type of switch you use: • Continuous Like a volume Pedal • Open switch Open in static condition • Closed switch Closed in static condition Store Here you can find everything you need to manage and store Patches 1-64. Image 25 This is how it works: Choose a patch with the virtual dial ¢ (Image 25) and select between Save ( u ) und Erase ( v ). Confirmation is done via touching Yes (x ) - See Image 26. Note: There‘s a security query before final save or erase (Image 27). Image 26 Image 27 12 NUMA by Studiologic® English 11 instruction manual Edit Mode Part 5 Patch Name This page (Image 28) is for renaming patches. Select the letter in the patch name you want to change with the Function Keys v and w. Then choose a New letter with the Virtual Dial. Function Key u (cap) switches between small and capital letters. When you´ve finished the entry, choose Yes (x ). Confirm the upcoming security query with Yes and that‘s it. Image 28 Note: No extra store command necessary. System Here you can adjust all common parameters to your personal needs (Image 29). LCD Contrast controls the contrast of the display in a range from -64 up to +64. The Dial Sensitivity (1-10) is for the sensitivity of the Virtual Dial ¢ . Parameter Dial Velocity (1-20) controls the speed of the Virtual Dial ¢ . Image 29 ATTENTION: Touching pad Reset u brings the whole system back to factory start. All your settings and patches are erased - irrevocably!! Touching PC starts a USB connection between the NUMA keyboard and a computer. There are two different modes: • USB Connection - Midi (Image 30) Transferring MIDI Data from the PC to the MIDI port of the NUMA • USB Connection - VCom (Image 31) This enables a communication between NUMA and PC with the software „Interactive NUMA“. Possibilities range from backup/restore to editing patches and shapes in realtime. PC Monitor and Keyboard can be used instead of the NUMA display and capacitive keys. Restore w enables a restart under factory condition without erasing user patches and shapes (Image 29). Image 30 Image 31 Touching Store x saves all your system changes to memory, including the patch that comes up when you turn the NUMA on. This is the patch you started the Edit Mode from (Image 29). English 12 NUMA by Studiologic® 13 instruction manual YouPlay Mode YouPlay With YouPlay Mode you get the exciting possibility to generate and Store your own dynamic curves. This is how it woks: Image 32 Image 33 Image 34 Press Function-Key u ¥ + v simultaneously and hold them for a little while. The display now switches to YouPlay Mode (Image 32). Now press Start u and play a melody – there is a maximum of 30 seconds. The display shows the remaining time in the upper right corner. When time is expired or you pressed Stop v , a new dynamic shape is displayed (Image 33). These shapes can be stored in 15 memories (Image 34): Choose one with the Virtual Dial ¢ . Activate name entry with touching pad 4. Function keys v and w now show the arrows for navigating in the display (Image 35). The new letter itself is chosen with the Virtual Dial ¢ . Press Yes u , if you are ready with the label. Pressing Yes again stores the shape to the selected memory (Image 36). If you are not satisfied with your entry, press Exit x . The window is closed without anything saved. Erase w enables you to erase single shapes. Image 35 Note: A good start is to generate 3 different shapes: • Fast melody with maximum dynamic • Medium speed with “normal” dynamic • Slow melody with a very soft, laid back dynamic Assign this shapes to corresponding songs and you’ll get the perfect results. Image 36 Panic Image 37 14 NUMA by Studiologic® Simultaneously touching (with a short hold) of Function Keys w + x activates Panic Mode (Image 38). All channels are releasing the following commands: • Note Off • Volume to 127 • Modulation to 0 • Pitch to 64 • Sustain to 64 English 13 instruction manual Please, visit our site for news and Operative System Update - www.numaworld.it The following pages explains the new features ( Corrections, Improvement, New features ) 1. CHANGE PATCH MODE: selecting a new patch by ^ for UP or V for DOWN or by wheel data entry, the patch is ready for the change as per below: a. after 0,5 sec. (timed) to avoid a big flux of Midi data in output b. or releasing any key if you are playing 2. Entering “EDIT MODE” with Numa Nano OS version will not send inadvertently all Midi data parameters to the “ outputs “. 3. New, “OMNI MODE” feature is only for the pedal programming section: On pedal page and selecting OMNI you can transmit through 16 midi channels at the same time with one global control all the pedal variations. 4. Volume OFF Setting: You can to assign “ OFF “ on Volume page for each zone. If you change patch, the volume not change value on zone with “ OFF Volume “ stored. 5. Fast out from Edit: When you store a patch and confirm with “Yes” the instrument go and return on PLAY MODE. 6. Fast out from Name: When you store a Name and confirm with “Yes” the instrument go and return on PLAY MODE. English 14 instruction manual Warranty Every Fatar Studiologic product has been carefully manufactured, calibrated and tested. All this enables a warranty of two years. Please register your NUMA to get full support. Damages due to incorrect transport, mounting or handling are not covered by this warranty. Warranty All this is based on general terms and condition of the local distributor / FATAR srl, Italy. Compensation of more than the price of the device is excluded. FATAR srl Zona Ind.le Squartabue 62019 Recanati MC Italy CE-Conformity declares that this product complies with the European Directives: • • • 73/23/EWG 89/336/EWG DIN EN 55103-1&2 Low Voltage Directive EMC Directive Electromagnetic compatibility of audio equipment This declaration becomes invalid by modification on the device without approval. This product is manufactured according to the 2002/95/EC directive. The purpose of this EG Directive 2003/108/EG is, as a first priority, the prevention of waste electrical and electronic equipment (WEEE), and in addition, the reuse, recycling and other forms of recovery of such wastes so as to reduce the disposal of waste. Please assist to keep our environment clean. RoHS-Conformity RoHS compliant 2002/95/EC Disposal To ensure maximum audio quality all devices of Studiologic by Fatar are always engineered to be state-of-the-art products, therefore updates, modifications and improvements are made without prior notice. Technical specification and product appearance may vary from this manual. State of the art All trademarks used in this manual belong to there respective owners. Trademarks No part of this manual may be reproduced or transmitted in any form or by any means without prior consent of the copyright owner. Copyright English 15 NUMA by Studiologic® 15