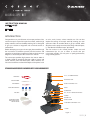
1
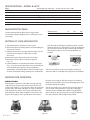
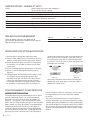
SPECIFICATIONS — MODEL # 44127
Stage
Zoom Eyepiece
Focuser
Objectives
Illuminator — Top
Illuminator — Bottom
Nosepiece
Weight/Dimensions (with batteries) Plain Stage with metal clips — 74 mm x 70 mm (2.9” x 2.8”)
Glass optics. Power continuous from 10x to 20x
Coarse focus — dual knobs
All glass optics — see magnification chart for powers
Pen light style
Uses 2AA batteries (user supplied)
Triple with click stop
17 oz. (482 g) — 5.25” x 3.13” x 9.75” (133 mm x 79 mm x 248 mm)
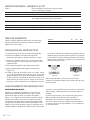
MAGNIFICATION TABLE
Objective Lens
10x on Zoom Eyepiece
20x on Zoom Eyepiece
Use the following table to determine the magnification
for the different eyepiece/objective lens combination of your
microscope.
4x
40x
80x
15x
150x
300x
30x
300x
600x
SETTING UP YOUR MICROSCOPE
1.Take the Styrofoam container out of the carton.
2.Remove the tape from the Styrofoam container holding the
various parts in place.
3.Carefully remove the microscope and other parts from the
container and set them on a table, desk, or other
flat surface.
4.Remove the plastic bag covering the microscope.
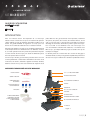
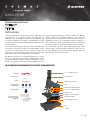
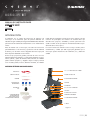
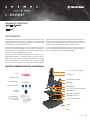
5.Remove the plastic cap from the zoom eyepiece
Fig. 1 (1).
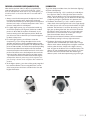
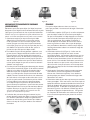
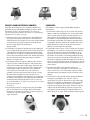
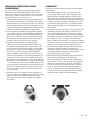
6.Install the batteries for the bottom illuminator in the base
Fig. 1 (11) of the microscope which uses two AA batteries
(user supplied). See Figure 3a, showing the battery
compartment closed at the back of the microscope. Figure
3b shows the batteries being installed in the compartment
(see the inside of the battery compartment door to locate
where the positive (+) and negative (-) ends of the batteries
go). Pull out on the door to open it while holding the base
firmly and push firmly to close it after the batteries are
installed.
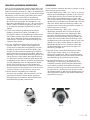
Figure 3a
Figure 3b
You are now ready to use your microscope for looking at
specimen slides or small objects through the zoom eyepiece!
MICROSCOPE OPERATION
VIEWING A SPECIMEN
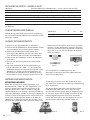
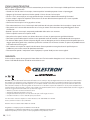
Carefully place a specimen slide under the stage clips Fig.
1 (8) and center the specimen directly over the hole in the
center of the stage Fig. 1 (7). Figure 4a shows the stage area
with the hole in the center and Figure 4b shows a specimen
slide centered over the hole in the stage. It will take some
experimenting to place slides or objects in the center of the
stage as the image you see is upside down and reversed
2 | ENGLISH
Figure 4a
but after some usage you will have an easy time centering.
Read the sections below on Focusing, Changing Power, and
Illumination before proceeding.
You are now ready to focus and view the specimen, but first
you must take some precautions so you do not damage a
specimen slide or valuable object. When using the higher
powers while you are focusing, make sure that the objective
lens does not hit the slide or object being viewed.
Figure 4b
Figure 5