1
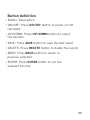
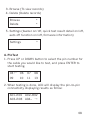
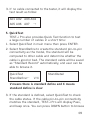
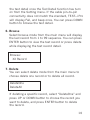
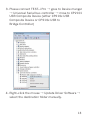
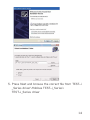
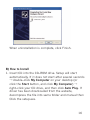
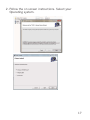
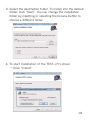
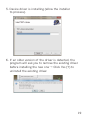
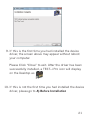
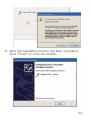
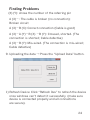
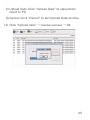
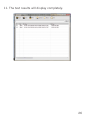
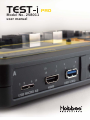
Model No. 258011
user manual
PRO
Index
Introduction
03
Features
04
Specification
05
Button definition
06
Operation Instruction
Power ON/OFF
LCD backlight
Five main functions
PinTest
QuickTest
Browse
Delete
Settings
07
07
07
07
08
09
10
10
11
Driver Installation
A) Before Installation
B) How to Install
12
12
16
Toolbar Description
Finding Problems
23
24
To Uninstall Driver
27
Warranty
29
Introduction
TEST–i Pro is the fourth generation of PC cable tester.
It is a specially designed multi function cable tester
that tests and analyzes a comprehensive range of
today’s PC connector types.
TEST–i Pro includes wire mapping function to test
each pins connection to identify cable connectivity. It
also shows pin–to–pin connectivity, and can save up
to 100 test results. The crucial data can be saved and
uploaded to a PC via USB interface for analysis.
Furthermore, it also includes built–in extension port
for user needs additional types of cable testing that is
not included in standard TEST–i Pro. With an
integrated LCD display, user can clearly determine the
cable pin wiring easily and efficiently. TEST–i Pro is an
essential and excellent tester for system integrator for
troubleshooting and perform pin–to–pin on PC cables.
03
Features
• Identify cable connectivity
• Support 17 types of PC connectors
• Extension port for additional types of cable testing
• 100 test results can be saved and transferred to PC
via USB interface
-Alphanumeric LCD display with back light function
-Includes test cable, browse and quick test function
• Low battery indicator
04
Specification
• Product: TEST–i Pro Multi–Function PC Cable Tester
• Model No.: 258011
• Hardware
• Connectors: IDC40, HDB15M/F, Audio, RJ11, RJ45,
e–SATAp, SATA, Display Port, USB3.0 (A),
USB3.0 Power B, USB Micro AB, USB Mini–B, HDMI,
Mini HDMI, Micro HDMI, IDC40 extension port
• Control Switch: On/Off, up, down, save, delete, back
and enter
• Display: LCD size, 2 rows–16 characters with backlight
• Power: DC 9V battery compartment, USB interface for
power supply
• Emission: CE, RoHS compliant
05
Button definition
• Button: Description
• ON/OFF: Press ON/OFF button to power on/off
the tester
• UP/DOWN: Press UP/DOWN button to select
the function
• SAVE: Press SAVE button to save the test result
• DELETE: Press DELETE button to delete the record
• BACK: Press BACK button to return to
previous selection
• ENTER: Press ENTER button to run the
selected function
06
Operation Instruction
1. Power ON/OFF
Push the ON/OFF button to power on the tester, a
beep sound will indicate the tester is working. The
LCD displays the following message:
Hobbes
>>>>>>>
2. LCD backlight
When tester is on, press ON/OFF button once shortly
to turn on LCD backlight. When LCD backlight is on,
press ON/OFF button once to turn off LCD backlight.
3. Five main functions
In operating status, press UP or DOWN button to
select the desired mode for your selection
1. PinTest (Pin–to–Pin cable test)
2. QuickTest (Fast Test with standard define)
PinTest←
QuickTest
*
07
3. Browse (To view records)
4. Delete (Delete records)
*
*
Browse
Delete
5. Settings (buzzer on/off, quick test result detail on/off,
auto off function on/off, firmware information)
*
Settings
4. PinTest
1. Press UP or DOWN button to select the pin number for
the cable you would like to test, and press ENTER to
start testing.
03 ← 06
09
10
07
11
08
13
2. When testing is done, LCD will display the pin–to–pin
connectivity displaying results as follow:
A01–B01 A02–B02
A03–B03 A04– →
08
3. If no cable connected to the tester, it will display the
test result as follow:
A01 A02 A03 A04
A05 A06 A07 →
5. QuickTest
TEST–i Pro also provides Quick Test function to test
a large number of cables in a short time:
1. Select QuickTest in main menu then press ENTER.
2. Select StandDefine to create the standard pin–to–pin
connectivity as the model, the standard will be
compared to other cable and determine whether the
cable is good or bad. The standard cable will be saved
as “Standard Record” automatically, and user can be
able to browse it.
QuickTest
StandDefine←
StandDetail
V/X
V means there is standard define and X means
standard define is clear
3. If the standard is defined, select QuickTest to check
the cable status. If the cable pin–to–pin connectivity
matches the standard, TEST–i Pro will display Pass,
and beep once. You can press DOWN button to browse
09
the test detail once the Test Detail function has turn
on from the Setting menu. If the cable pin–to–pin
connectivity does not match the standard, TEST–i Pro
will display Fail, and beep once. You can press DOWN
button to browse the test detail.
6. Browse
Select browse mode from the main menu will display
the last record from 1 to 99 sequence. You can press
ENTER button to view the test record or press delete
while displaying the test record detail.
Browse:
XX Record
7. Delete
You can select delete mode from the main menu to
choose delete one record or to delete all record.
DeleteOne
DeleteAll
If deleting a specific record, select “DeleteOne” and
press UP or DOWN button to choose the record you
want to delete, and press ENTER button to delete
the record.
10
To upload test record to TEST–i Pro software, you
must connect TEST–i Pro to computer via USB cable.
You must connect USB cable to upload port.
8. Settings
In Settings menu, you can choose to turn on/off the
buzzer, test detail or auto off function.
Buzzer
TestDetail
V/X
Buzzer
TestDetail
V/X
V means on, X means off
You can also see the firmware information from
About mode
About:
XXXXXX
11
Driver Installation
A) Before Installation
1. Uninstall any previous TEST–i_Series driver first prior
to installation from control panel → Add or Remove
program (refer to D) to uninstall driver).
2. But If an older version, v2.0, has been installed, the
user is not able to uninstall driver automatically.
Please uninstall manually as follows steps in advance.
(normally happens to Windows XP)
12
3. Please connect TEST–i Pro → goes to Device manger
→ Universal Serial bus controller → move to CP2101
USB Composite Device (either CP210x USB
Composite Device or CP210x USB to
Bridge Controller)
4. Right–click the mouse → Update Driver Software →
select the destination folder manually.
13
5. Press Next and browse the correct file from TEST–i
_Series driver\Hobbes TEST–i_Series\
TEST–i_Series driver
14
6. When an unsigned driver installation warning is
displayed, ignore and presses continue anyway →
completing the Found New Hardware Wizard.
15
When uninstallation is complete, click Finish.
B) How to Install
1. Insert CD into the CD–ROM drive. Setup will start
automatically. If it does not start after several seconds
→ double–click My Computer on your desktop (or
click the Start button, and click My Computer) →
right–click your CD drive, and then click Auto Play. If
driver has been downloaded from the website,
decompress the file into same folder and manual then
Click the setup.exe.
16
2. Follow the on screen instructions. Select your
Operating system.
17
3. Select the destination folder: To install into the default
folder, click “Next”. You can change the installation
folder by inputting or selecting the browse button to
choose a different folder.
4. To start Installation of the TEST–i Pro driver
→ Click “Install”
18
5. Device driver is installing (allow the installer
to process).
6. If an older version of the driver is detected, the
program will ask you to remove the existing driver
before installing the new one → Click Yes (Y) to
uninstall the existing driver.
19
7. When an unsigned driver installation warning is
displayed, ignore and press Continue (C)
8. After the new driver has been installed, the program
will ask you to reboot the system in order to complete
the whole installation process. Press Yes (Y)
to continue.
20
9. If this is the first time you had installed the device
driver, the screen above may appear without reboot
your computer.
Please Click “Close” to exit. After the driver has been
ed, a TEST–i Pro icon will display
successfully installed,
on the Desktop as
10. If this is not the first time you had installed the device
driver, please go to A) Before Installation
21
11. After the installation process has been completed.
Click “Finish” to close the window.
22
12. Connect TEST–i Pro into computer via USB cable
and Click TEST–i Pro icon on the Desktop.
13. TEST–i_Series table will pop up. Toolbar includes
Open, Save, Print, Upload, About and Exit. TEST
results includes ID, Pin and Pin State.
Toolbar Description
1) Open: Open the file that has been saved.
2) Save: Saving test result.
3) Print: Print test result.
4) Upload: Upload the data that has been saved on
TEST–i_Series.
23
Finding Problems
(X) (Y): shows the number of the referring pin
A (X)-: The cable is broken (no connection);
Broken circuit
A (X)-B (X): Correct connection (Cable is good)
A (X)-A (Y)-B (X) -B (Y): Crossed, shorted. (The
connection is shorted; Cable defective)
A (X)-B (Y): Mis–wired. (The connection is mis–wired;
Cable defective)
9. Uploading the data → Press the “Upload Data” button.
1) Refresh Device: Click “Refresh Dev” to refresh the device
once windows can’t detect it successfully (make sure
device is connected properly and all connections
are secure).
24
2) Upload Data: Click “Upload Data” to upload test
result to PC.
3) Cancel: Click “Cancel” to exit Upload Data window.
10. Click “Upload data” → receive success → Ok.
25
11. The test results will display completely.
26
To Uninstall Driver
1. Go to control panel → Add or Remove Programs.
2. Remove TEST–i_Series
3. Uninstall the TEST–i_Series driver.
27
4. Restart the computer after uninstall process →
uninstalled completely.
28
Warranty
The device is guaranteed for two years after
completing the registration procedure from the date
of original sale in Hobbes Group web site.
The manufacturer will repair the device free of charge
if manufacturer determines the product failed due to
manufacture defect. This warranty is only valid if the
device is used for its intended purposes only.
Consumables such as connector can not be repaired
under warranty.
Manufacturers warranty is voided if the product has
been tampered and damaged from misused.
29