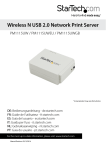
1
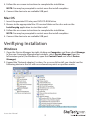
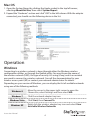
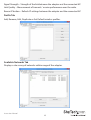
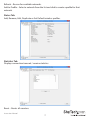
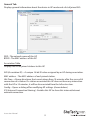
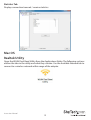
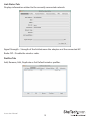
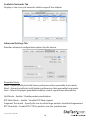
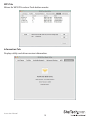
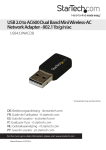
USB 2.0 802.11b/g/n 300Mbps 2T2R
Mini Wireless Network Adapter
USB300WN2X2C
*actual product may vary from photos
DE: Bedienungsanleitung - de.startech.com
FR: Guide de l'utilisateur - fr.startech.com
ES: Guía del usuario - es.startech.com
IT: Guida per l'uso - it.startech.com
NL: Gebruiksaanwijzing - nl.startech.com
PT: Guia do usuário - pt.startech.com
For the most up-to-date information, please visit: www.startech.com
Manual Revision: 08/05/2014
FCC Compliance Statement
This equipment has been tested and found to comply with the limits for a Class B digital
device, pursuant to part 15 of the FCC Rules. These limits are designed to provide reasonable
protection against harmful interference in a residential installation. This equipment
generates, uses and can radiate radio frequency energy and, if not installed and used in
accordance with the instructions, may cause harmful interference to radio communications.
However, there is no guarantee that interference will not occur in a particular installation. If
this equipment does cause harmful interference to radio or television reception, which can
be determined by turning the equipment off and on, the user is encouraged to try to correct
the interference by one or more of the following measures:
• Reorient or relocate the receiving antenna.
• Increase the separation between the equipment and receiver.
• Connect the equipment into an outlet on a circuit different from that to which the receiver
is connected.
• Consult the dealer or an experienced radio/TV technician for help
This device complies with part 15 of the FCC Rules. Operation is subject to the following
two conditions: (1) This device may not cause harmful interference, and (2) this device must
accept any interference received, including interference that may cause undesired operation.
Changes or modifications not expressly approved by StarTech.com could void the user’s
authority to operate the equipment
Industry Canada Statement
This Class B digital apparatus complies with Canadian ICES-003. Cet appareil numérique de
la classe [B] est conforme à la norme NMB-003 du Canada. This device complies with Industry
Canada licence-exempt RSS standard(s). Operation is subject to the following two conditions:
(1) This device may not cause interference, and (2) This device must accept any interference,
including interference that may cause undesired operation of the device.Le présent appareil
est conforme aux CNR d’Industrie Canada applicables aux appareils radio exempts de licence.
L’exploitation est autorisée aux deux conditions suivantes: (1) l’appareil ne doit pas produire
de brouillage, et (2) l’utilisateur de l’appareil doit accepter tout brouillage radioélectrique
subi, même si le brouillage est susceptible d’en compromettre le fonctionnement.
IC Radiation Exposure Statement:
This equipment complies with IC RSS-102 radiation exposure limit set forth for an
uncontrolled environment. This equipment should be installed and operated with minimum
distance 20cm between the radiator and your body.
Déclaration d’exposition à la radiation:
Cet équipement respecte les limites d’exposition aux rayonnements IC définies pour un
environnement non contrôlé. Cet équipement doit être installé et mis en marche à une
distance minimale de 20 cm qui sépare l’élément rayonnant de votre corps. L’émetteur ne
doit ni être utilisé avec une autre antenne ou un autre émetteur ni se trouver à leur proximité.
FCC ID: 2AAD8-WU331
IC: 11232A-SB300WN2X2C
Instruction Manual
Use of Trademarks, Registered Trademarks, and other Protected Names and Symbols
This manual may make reference to trademarks, registered trademarks, and other
protected names and/or symbols of third-party companies not related in any way to
StarTech.com. Where they occur these references are for illustrative purposes only and do not
represent an endorsement of a product or service by StarTech.com, or an endorsement of the
product(s) to which this manual applies by the third-party company in question. Regardless
of any direct acknowledgement elsewhere in the body of this document, StarTech.com hereby
acknowledges that all trademarks, registered trademarks, service marks, and other protected
names and/or symbols contained in this manual and related documents are the property of
their respective holders.
Instruction Manual
Table of Contents
Introduction.............................................................................................1
Packaging Contents.................................................................................................................................. 1
System Requirements............................................................................................................................... 1
Product Overview...................................................................................1
LED Indicator............................................................................................................................................... 1
Installation...............................................................................................2
Windows........................................................................................................................................................ 2
Mac OS........................................................................................................................................................... 3
Veriftying Installation............................................................................3
Windows........................................................................................................................................................ 3
Mac OS........................................................................................................................................................... 4
Operation.................................................................................................4
Windows........................................................................................................................................................ 4
Realtek Utility.............................................................................................................................................. 5
Access Point Mode..................................................................................................................................... 8
Mac OS........................................................................................................................................................... 12
Realtek Utility.............................................................................................................................................. 12
Specifications...........................................................................................16
Technical Support...................................................................................17
Warranty Information.............................................................................17
Instruction Manual
Introduction
Packaging Contents
• 1 x USB Wireless N Adapter
• 1 x Driver CD
• 1 x Instruction Manual
System Requirements
• Available USB port
• Windows® 8 / 8.1 (32/64bit), 7 (32/64), Vista(32/64), XP(32/64), Windows Server®
2012, 2008 R2, 2003(32/64 ), Mac OS® 10.6 and up (Tested up to 10.9), Linux kernel
2.6.18 – 2.6.38
Product Overview
Link/Activity LED
USB 2.0
LED Indicator
Slow Flash - Waiting for connection
Quick Flash - Link established / Activity
Instruction Manual
1
Installation
Windows
1. Insert the provided CD into your DVD/CD-ROM drive.
2. Select Autorun.exe from the Autoplay menu. If Autoplay is disabled on your system,
browse to your CD/DVD drive and run the application.
3. Select the Driver Installation option.
Instruction Manual
2
4. Follow the on-screen instructions to complete the installation.
NOTE: You may be prompted to restart once the install completes.
5. Connect the device to an available USB port.
Mac OS
1. Insert the provided CD into your DVD/CD-ROM drive.
2. Browse to the appropriate Mac OS version folder on the disc and run the
Installer.pkg application to start the install.
3. Follow the on-screen instructions to complete the installation.
NOTE: You may be prompted to restart once the install completes.
4. Connect the device to an available USB port.
Veriftying Installation
Windows
1. Open the Device Manager by right-clicking on Computer, and then select Manage.
In the new Computer Management window, select Device Manager from the
left window panel (For Windows 8, open the Control Panel and select Device
Manager).
2. Expand the “Network adapters” section. On a successful install, you should see the
following device in the list with no exclamation points or question marks.
Instruction Manual
3
Mac OS
1. Open the System Report by clicking the Apple symbol in the top left corner,
selecting About this Mac, then select System Report.
2. Expand the “Hardware” section and click “USB” in the left column. With the adapter
connected, you should see the following device in the list.
Operation
Windows
Connecting to a wireless network is done through either the Windows wireless
configuration utilities, or through the Realtek utility. You must know the name of
the wireless network (SSID), the type of security it is using (if any) and its associated
password to connect to a wireless network. Consult the documentation for your
wireless access point (AP) or contact your network administrator for details.
Depending on your version of Windows, you can display the list of available networks
using one of the following methods:
Windows 8
Move the cursor to the upper right corner to open the
Charms Bar, select Settings and then select Wifi
Windows 7
Click the network adapter tray icon
Windows Vista
Windows XP
Instruction Manual
Click Start, then Connect To
Right-click the wireless adapter tray icon and select View
Available Wireless Networks
4
Realtek Utility
Tray Icon
The tray icon will display one of the following three statuses:
Utility running, but no WLAN
adapter detected
WLAN adapter detected, not
connected to a wireless network
WLAN adapter detected and
connected to a network
Client Mode
Click on the tray icon to open the configuration window. The following sections
outline the tabs in the utility and what they contain. Use the Available Network tab to
connect to a wireless network within range of the adapter.
Some basic device controls are shown at the bottom of the interface:
Show Tray Icon – Show / Hide the tray icon.
Radio Off – Disable the wireless radio.
Disable Adapter – Disable the device.
General Tab
Displays information related to the currently connected network.
Instruction Manual
5
Signal Strength – Strength of the link between the adapter and the connected AP.
Link Quality – Measurement of transmit / receive performance over the radio.
Renew IP button – Refresh IP settings between the adapter and the connected AP
Profile Tab
Add, Remove, Edit, Duplicate or Set Default wireless profiles.
Available Networks Tab
Displays a site survey of networks within range of the adapter.
Instruction Manual
6
Refresh – Rescan for available networks.
Add to Profile – Select a network from the list and click to create a profile for that
network.
Status Tab
Add, Remove, Edit, Duplicate or Set Default wireless profiles.
Statistics Tab
Displays connection transmit / receive statistics.
Reset – Resets all counters.
Instruction Manual
7
WPS Setup Tab
Allows for WPS PIN code and Push Button activation.
Access Point Mode
The device can also act as a Wireless Access Point, allowing other devices to connect
and gain Internet access through it.
Switch modes using the Mode menu at the top of the interface:
Instruction Manual
8
General Tab
Displays general information about the device in AP mode and a list of joined APs.
SSID - The network name of this AP.
BSSID - The MAC address of this AP.
Association Table
Displays the list of joined stations to this AP.
AID (Association ID) – A unique 16-bit ID value assigned by an AP during association.
MAC address - The MAC address of each joined station.
Life Time – A keep alive timer that counts down from 10 minutes after the successful
connection of a station. If a station associated this AP does not have any interaction
with the AP in 10 minutes, it will be disassociated from the Infra-structure.
Config – Opens a dialog of for modifying AP settings (shown below).
ICS (Internet Connection Sharing) - Enables this AP to share this internet/intranet
network connection.
Instruction Manual
9
Network Name (SSID) - The network name of the AP, searchable by other wireless
nodes. The length of SSID should be shorter than 32 characters.
Channel - Select your preferred wireless channel.
Network Authentication & Data Encryption – Choose your desired Authentication
type and Encryption method from: Open System, Shared Key + WEP, WPA-PSK + TKIP &
WPA2-PSK + TKIP (recommended).
ASCII - Provide either 5 or 13 ASCII characters in the Network key field.
PASSPHRASE - Input a sequence of words as the network key.
Key index (advanced) (1 ~4) - At most four key index to represent the opposite
network key.
Instruction Manual
10
Advanced Tab
Provides advanced configuration options for the AP.
Beacon Interval – The frequency at which the beacon packet is sent, In TU unit (1024
micro-seconds).
DTIM Period - The number of Beacon intervals between successive DTIMs.
Preamble Mode:
Long - Higher quality but with lower performance than preamble short mode.
Short - Normal quality but with higher performance then preamble long mode.
Auto - Select the proper preamble mode by current signal frame information.
Instruction Manual
11
Statistics Tab
Displays connection transmit / receive statistics.
Mac OS
Realtek Utility
Open the WLAN Dual Band Utility from the Applications folder. The following sections
outline the tabs in the utility and what they contain. Use the Available Network tab to
connect to a wireless network within range of the adapter.
Instruction Manual
12
Link Status Tab
Displays information related to the currently connected network.
Signal Strength – Strength of the link between the adapter and the connected AP.
Radio Off – Disable the wireless radio.
Profiles Tab
Add, Remove, Edit, Duplicate or Set Default wireless profiles.
Instruction Manual
13
Available Networks Tab
Displays a site survey of networks within range of the adapter
Advanced Settings Tab
Provides advanced configuration options for the device.
Preamble Mode:
Long - Higher quality but with lower performance than preamble short mode.
Short - Normal quality but with higher performance then preamble long mode.
Auto - Select the proper preamble mode by current signal frame information.
QoS Mode – Enable / Disable packet prioritization.
PSP Xlink Mode – Enable / Disable PSP Xlink support.
Fragment Threshold – Specify the size at which large packets should be fragmented.
RTS Threshold – Enable RTS/CTS for packets over the specified size.
Instruction Manual
14
WPS Tab
Allows for WPS PIN code or Push-button modes.
Information Tab
Displays utility and driver version information.
Instruction Manual
15
Specifications
Host Interface
USB 2.0
Chipset
Realtek - RTL8192EU
External Connectors
1 x USB A Male
Supported Standards
IEEE 802.11b, IEEE 802.11g, IEEE 802.11n
Antenna Configuration
2x2:2 (TxR:S)
Wireless Frequencies
2.400GHz ~ 2.484GHz
Supported Security Schemes
64/128 bit WEP, WPA, WPA2 (TKIP/AES)
Operating Temperature
0°C ~ 40°C (32°F ~ 104°F)
Storage Temperature
-40°C ~ 70°C (-40°F ~ 158°F)
Humidity
10% ~ 90% RH (Non-condensing)
Dimensions
22 x 16 x 8mm
Weight
2.5g
Compatible Operating Systems
Windows® 8 / 8.1 (32/64bit), 7 (32/64),
Vista(32/64), XP(32/64)
Windows Server® 2012, 2008 R2,
2003(32/64)
Mac OS® 10.4 and up (Tested up to 10.9)
Linux kernel 2.6.18 – 2.6.38
Instruction Manual
16
Technical Support
StarTech.com’s lifetime technical support is an integral part of our commitment to
provide industry-leading solutions. If you ever need help with your product, visit
www.startech.com/support and access our comprehensive selection of online tools,
documentation, and downloads.
For the latest drivers/software, please visit www.startech.com/downloads
Warranty Information
This product is backed by a two year warranty.
In addition, StarTech.com warrants its products against defects in materials
and workmanship for the periods noted, following the initial date of purchase.
During this period, the products may be returned for repair, or replacement with
equivalent products at our discretion. The warranty covers parts and labor costs only.
StarTech.com does not warrant its products from defects or damages arising from
misuse, abuse, alteration, or normal wear and tear.
Limitation of Liability
In no event shall the liability of StarTech.com Ltd. and StarTech.com USA LLP (or their
officers, directors, employees or agents) for any damages (whether direct or indirect,
special, punitive, incidental, consequential, or otherwise), loss of profits, loss of business,
or any pecuniary loss, arising out of or related to the use of the product exceed the
actual price paid for the product. Some states do not allow the exclusion or limitation
of incidental or consequential damages. If such laws apply, the limitations or exclusions
contained in this statement may not apply to you.
Instruction Manual
17
Hard-to-find made easy. At StarTech.com, that isn’t a slogan. It’s a promise.
StarTech.com is your one-stop source for every connectivity part you need. From
the latest technology to legacy products — and all the parts that bridge the old and
new — we can help you find the parts that connect your solutions.
We make it easy to locate the parts, and we quickly deliver them wherever they need
to go. Just talk to one of our tech advisors or visit our website. You’ll be connected to
the products you need in no time.
Visit www.startech.com for complete information on all StarTech.com products and
to access exclusive resources and time-saving tools.
StarTech.com is an ISO 9001 Registered manufacturer of connectivity and technology
parts. StarTech.com was founded in 1985 and has operations in the United States,
Canada, the United Kingdom and Taiwan servicing a worldwide market.