1
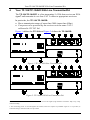
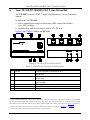
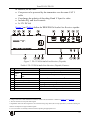
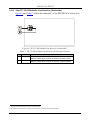
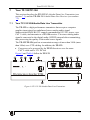
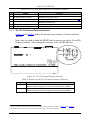
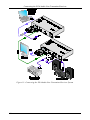
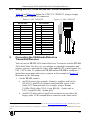
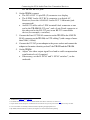
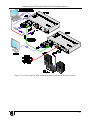
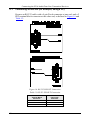
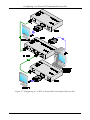
Configuring a 1:4 XGA to TP Transmitter/Receiver/DA 10 Configuring a 1:4 XGA to TP Transmitter/Receiver/DA You can use the TP-104 XGA Line Transmitter/DA with the TP-120 XGA Line Receiver 1 to configure a 1:4 XGA-to-Twisted Pair DA system. To connect the TP-104 to four TP-120 units, as the example in Figure 17 illustrates, do the following: 1. On the TP-104, connect the XGA source (for example, a computer graphics source) to the XGA INPUT 15-pin HD (F) connector, and connect the line output RJ-45 connector 2: OUT 1 to the LINE IN RJ-45 connector on the TP-120 Unit I OUT 2 to the LINE IN RJ-45 connector on the TP-120 Unit II OUT 3 to the LINE IN RJ-45 connector on the TP-120 Unit III OUT 4 to the LINE IN RJ-45 connector on the TP-120 Unit IV 2. On the four TP-120 units, connect the: XGA OUT 15-pin HD (F) connector of Unit I to the XGA acceptor (for example, Display 1) XGA OUT 15-pin HD (F) connector of Unit II to the XGA acceptor (for example, Display 2) XGA OUT 15-pin HD (F) connector of Unit III to the XGA acceptor (for example, Display 3) XGA OUT 15-pin HD (F) connector of Unit IV to the XGA acceptor (for example, Display 4) 3. On each of the five Kramer TOOLS, connect the 12V DC power adapter to the power socket and connect the adapter to the mains electricity. The signal from the XGA source is transmitted via the four CAT 5 cables, decoded and converted at the each of the XGA OUT 15-pin HD (F) connectors to the XGA acceptors. 4. On each of the five Kramer TOOLS: Adjust 3 the video output signal level and/or cable compensation equalization level, if required If necessary, on the TP-120 units, set the H SYNC and V SYNC switches 4, on the underside 1 Refer to the separate user manual: PT-110, WP-110, PT-120, TP-120, which can be downloaded at http://www.kramerelectronics.com 2 Via UTP cabling (with a range of more than 300ft (>100m)). For details of how to wire a CAT 5 LINE IN/LINE OUT RJ-45 connector, see section 8.1 3 Use a screwdriver to carefully rotate the trimmer, adjusting the appropriate level 4 By default, both switches are set down (for negative V SYNC and H SYNC polarity) 23