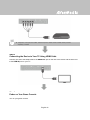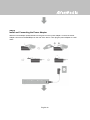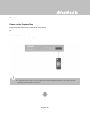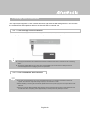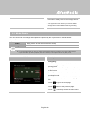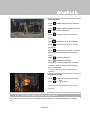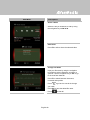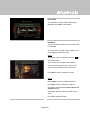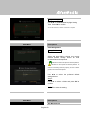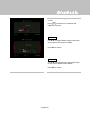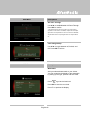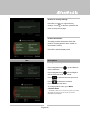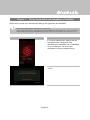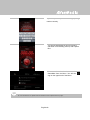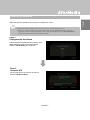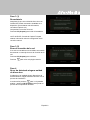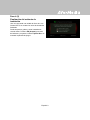
1
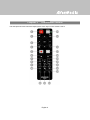
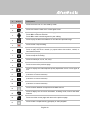
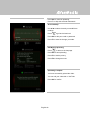
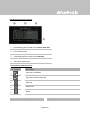
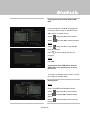
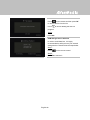
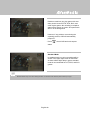
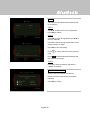
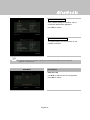
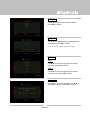
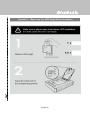
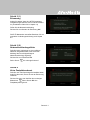
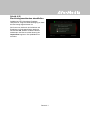
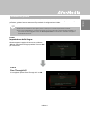
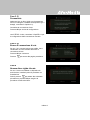
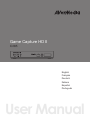
Italiano Game Capture HD II C285 English Français Deutsch Italiano Español Português User Manual European Community Compliance Statement Class B This product is herewith confirmed to comply with the requirements set out in the Council Directives on the approximation of the laws of the Member States relating to Electromagnetic Compatibility Directive (EMC) 2004/ 108/ EC, Low Voltage Directive (LVD) 2006/95/EC and Energy-related Products Directive (ErP) 2009/ 125/ EC. Responsible manufacturer: AVerMedia Technologies, Inc. No. 135, Jian 1st Rd.,Zhonghe Dist., New Taipei City 23585, Taiwan TEL: +886-2-2226-3630 European Community contact: AVerMedia Technologies Europe B.V. Kwartsweg 50, 2665 NN, Bleiswijk, The Netherlands Technical Support: http://www.avermedia.com/avertv/Support/ FCC Compliance Statement (United States) FCC NOTICE This device complies with Part 15 of the FCC Rules. Operation is subject to the following two conditions: (1) this device may not cause harmful interference, and (2) this device must accept any interference received, including interference that may cause undesired operation. Federal Communications Commission Statement NOTE- This equipment has been tested and found to comply with the limits for a Class B digital device, pursuant to Part 15 of the FCC Rules. These limits are designed to provide reasonable protection against harmful interference in a residential installation. This equipment generates uses and can radiate radio frequency energy and, if not installed and used in accordance with the instructions, may cause harmful interference to radio communications. However, there is no guarantee that interference will not occur in a particular installation. If this equipment does cause harmful interference to radio or television reception, which can be determined by tuning the equipment off and on, the user is encouraged to try to correct the interference by one or more of the following measures: Reorient or relocate the receiving antenna. Increase the separation between the equipment and receiver. Connect the equipment into an outlet on a circuit different from that to which the receiver is connected. Consult the dealer or an experienced radio/television technician for help. CAUTION ON MODIFICATIONS To comply with the limits for the Class B digital device, pursuant to Part 15 of the FCC Rules, this device must be installed in computer equipment certified to comply with the Class B limits. All cables used to connect the computer and peripherals must be shielded and grounded. Operation with non-certified computers or non-shielded cables may result in interference to radio or television reception. Changes and modifications not expressly approved by the manufacturer or registrant of the equipment can void your authority to operate the equipment under Federal Communications Commission rules. i Responsible manufacturer: AVerMedia Technologies, Inc. No. 135, Jian 1st Rd.,Zhonghe Dist., New Taipei City 23585, Taiwan TEL: +886-2-2226-3630 USA Office contact: AVerMedia Technologies U.S.A. 47358 Fremont Blvd., Fremont, CA 94538 Technical Support: http://www.avermedia.com/avertv/Support/ WASTE ELECTRICAL AND ELECTRONIC EQUIPMENT (WEEE) The mark of Crossed-out wheeled bin indicates that this product must not be disposed of with your other household waste. Instead, you need to dispose of the waste equipment by handing it over to a designated collection point for the recycling of waste electrical and electronic equipment. For more information about where to drop off your waste equipment for recycling, please contact your household waste disposal service or the shop where you purchased the product. Battery Safety Information Use of carbon-zinc battery for remote control is strongly recommended. Use of other types of batteries, such as alkaline or rechargeable (nickel-cadmium), may cause battery current overload or battery leakage and corrosion which can damage the remote control. Store the batteries in a cool dry place. Do not dispose of used batteries in domestic waste. Dispose of batteries at special collection points or return to point of sale if applies. Remove the batteries during long periods of non-use. Always remove exhausted batteries from the remote control. Battery leakage and corrosion can damage this remote control, dispose of batteries safely. Do not mix old and new batteries. Do not mix different types of batteries: alkaline, standard (carbon-zinc) or rechargeable (nickel-cadmium). Do not dispose of batteries in a fire. The batteries may explode or leak. Never short circuit the battery terminals. ICES-003 (Canada) CES-003 Issue 5 Class B: C285 GOST-R Certification (Russia) № РОСС TW. AГ98.B06472 Срок действия с AГ98 14.02.2013 г по 13.02.2015 г Москва ii Disclaimer & Copyright © 2013 by AVerMedia Technologies, Inc. All rights reserved. No part of this document may be reproduced or transmitted in any form, or by any means (Electronic, mechanical, photocopy, recording, or otherwise) without prior written permission of AVerMedia Technologies, Inc. Information in this document is subject to change without notice. AVerMedia Technologies, Inc. reserves the right to modify, change, improve or enhance its products and to make changes in the content without obligation to notify any person or organization of such changes. Please visit avermedia.com to get the updates of the operation and use of AVerMedia products. "AVerMedia" is trademark and logo of AVerMedia Technologies, Inc. Apple, the Apple logo, iPod, iPhone, iPad and Apple TV are trademarks and/or registered trademark of Apple Inc., registered in the U.S. and other countries. Other trademarks used herein for description purpose only belong to each of their companies. Picture shown may vary from actual product. This product uses Arphic Font. This software uses libraries from the Libav project under the LGPLv2.1. International Headquarter Office Address No.135, Jian 1st Rd., Zhonghe Dist., New Taipei City 23585, Taiwan (R.O.C.) Website www.avermedia.com/ Tel +886-2-2226-3630 Specifications Product Name Capture Box Model No. C285 Power Input Rating 12V Power Consumption < 7W (power consumption of hard drive not included) Standby Power Consumption < 0.5W (Without Pass Through) Adapter Rating Input: 100-240V~, 50-60Hz 0.5A Max. Output: 12V 1.5A Dimension Size 190 mm(W) x33.5 mm (H)x 152.5 mm (D) Weight 421 g Environmental Condition Operating Temperature 0~40℃ System Requirements TV/monitor with component video (YPrPb) input TV/monitor with 720p or 1080p resolution (recommended) Game console/video device with component video (YPrPb) output NTFS-formatted hard drive with capacity greater than 500 GB is recommended (The supported maximum storage capacity of the hard drive is 2TB.) Hard drive is highly preferred over flash drive to minimize the risk of recording failure iii 1.5A Table of Content Chapter 1 1.1 Chapter 2 2.1 2.2 2.3 2.4 Package Contents ................................................................... 2 Other Items You Need ......................................................................... 4 The Unit Parts .......................................................................... 5 Front Panel .......................................................................................... 5 Infrared Sensor .................................................................................... 5 LED Indicator ....................................................................................... 6 Connection Ports ................................................................................. 7 2.4.1 Front View ...................................................................................................... 7 2.4.2 Rear View ...................................................................................................... 8 Chapter 3 Chapter 4 4.1 4.2 4.3 The Remote Control ................................................................ 9 Installation & First Time Setup ............................................ 12 Supported Resolutions ...................................................................... 12 Hardware Installation ......................................................................... 14 Storage Device Installation ................................................................ 20 4.3.1 USB Storage Device Insertion .................................................................. 20 4.3.2 HDD Installation and Removal .................................................................. 20 4.4 4.5 Setup Wizard ..................................................................................... 25 Video Output Settings for Game Consoles ........................................ 28 4.5.1 Video Output Settings for PlayStation 3 .................................................. 28 4.5.2 Video Output Settings for Xbox 360 ......................................................... 29 Chapter 5 5.1 5.2 Chapter 6 Basic Operation ..................................................................... 31 Record and Capture .......................................................................... 31 Adding Commentary .......................................................................... 33 OSD Menu .............................................................................. 35 6.1 Media Studio ...................................................................................... 36 6.1.1 Post- Edit Capture Box Recorded Videos ............................................ 37 6.2 File Management ............................................................................... 43 6.3 Settings .............................................................................................. 47 Chapter 7 Appendix A Appendix B Appendix C Pairing Capture Box and GameMate by AVerMedia ......... 61 How to Set Your Gameplay Snapshot as PS3 Wallpaper63 Troubleshooting ................................................................. 65 Measuring Your HDD Height Before Installation ............ 70 English-1 Introduction The Capture Box, a stand-alone video capture box specially designed for TV gamers, allows you to ® capture HD content up to 1080p from various video game consoles, such as PlayStation 3, Xbox 360 and Wii U. The Capture Box records HD gameplays directly to your hard disk drive (HDD) for later viewing and further editing, eschewing the hassle of setting up a PC nearby your TV set. Most attractively, the one-press capture button allows you to instantly grab high score screen and record your exciting gameplay footage with nearly no effort. The Capture Box can record from either HDMI (without HDCP protection) or Component Video at up to 1080p. Other than that, the Capture Box can pair up with the dedicated app GameMate, which turns your smartphone into a second screen remote controller. You can view capture and uploading status on the screen of your smartphone. Chapter 1 Package Contents Please confirm that the package contains the following items. If any of the package contents are missing or damaged, please contact the distributor immediately. Game Capture HD II Power Adapter Power Adapter Outlet Module English-2 English Thank you for purchasing the Capture Box. Please read this user manual carefully to ensure proper use of this product. We recommend you to keep it for future reference. HDMI Cable User Manual Quick Guide Remote Control (Batteries Included) The accessories that come with the package may slightly vary depending on different sales regions. The Capture Box is made for record and capture media materials that are legally owned or licensed by the user only. Any violation of copyrights or other intellectual property rights is not allowed. AVerMedia regularly releases the latest version of firmware for the Capture Box. Having the latest firmware enhances the functionality of the Capture Box. To download the latest firmware file, please go to /www.avermedia.com and then enter the model name in Product Search field. Firmware file is available on the product information page (See Chapter 6 for details). If problems are encountered, refer to FAQ section at www.avermedia.com for further troubleshooting. English-3 1.1 Other Items You Need In order to fully enjoy the recording, the capturing functions of the Capture Box and the dedicated iPhone application, you will need to have the following items prepared: Item You need the item to… Storage Device Save recordings and snapshots. Play Station 3 AV Component Cable Connect with PS3 console. Router (DHCP IP Network Recommended) Pair up with GameMate. iPhone 4/ 5, 4s Use GameMate. Headset / Microphone Record live commentary. RJ45 Cable To upload captured content Other than iPhone, 4, iPhone 4s, iPhone 5, GameMate also supports iPad and iPod touch. For further smartphone support, refer to www.avermedia.com for latest update. English-4 Chapter 2 The Unit Parts 2.1 Front Panel The button panel found on the front of the unit provides quick access to commonly used functions. # Buttons Descriptions Record Press to start / stop recording. 1 Hold down the button for 4 seconds to force shut down the Capture Box Power 2 Press to turn the unit on 2.2 Infrared Sensor When using the remote control, aim it at the infrared (IR) sensor located at the front panel of the unit. The remote control must be held at an angle within 30 degrees perpendicular to the IR sensor to function correctly. The distance between the remote control and the sensor should not exceed 6 meters (20 feet). English-5 2.3 LED Indicator The LED indicators on the front of the unit show the device’s status. 1 HDMI source LED indicator 2 YPbPr source LED indicator 3 Record status LED indicator 4 Power status LED indicator Condition Source Record Power Glows solid green Powered on Ready to record/snapshot Solid green Recording Solid green Breathing Solid green Take a snapshot Flashes red once Flashes red once Flashes red once Unable to record/snapshot Solid green Solid green Flashes green continuously Flashes green continuously No source Source is available Power off in progress Pass through ON Glows solid green Solid green Flashes green continuously Solid orange When powering off Pause recording Solid red Solid red Solid red Record finish in progress Solid green Flashes red continuously Solid green English-6 Condition Storage space is low Source Record Power Solid green Glows at a slowly pace Solid green Flashes green continuously Device is not ready Problems like no storage/ no signal/ protected content Flashes green continuously Accepting a remote control command Flashes green once Press [F1] to obtain LED light indicator status. 2.4 Connection Ports 2.4.1 Front View 1 USB slot 2 MIC input 3 Headphone output USB slot is for external HDD storage device connection as well as for firmware upgrade via storage device. USB hub is not supported. There will be no function or reply when connecting the Capture Box to the computer via USB. English-7 2.4.2 Rear View 1 Component video input 4 HDMI output 2 Audio L/R input 5 LAN port 3 HDMI input 6 DC-IN English-8 Chapter 3 The Remote Control The descriptions below show the deployment of the keys on the remote control. English-9 # 1 2 3 4 5 Buttons Descriptions Press to turn the unit on / into stand-by mode. Press to access the main menu. Press again to exit. Press the navigation keys to move among options. Press OK to confirm a selection. Press OK to mark/ unmark segment in post- editing. Press to play the latest recorded file or view the last captured image. Press to start / stop recording. 6 Press to start playing the selected file. Press to play the file at normal (1x) speed when slow motion, rewind, or fast-forward is active. 7 Press to stop the playback. Press to stop the recording. 8 9 Press to rewind (2x, 4x, 8x, 16x, 32x). Press to return to the previous page. 10 Press to display the video/snapshot quality adjustment screen. Press again to exit. 11 Press to safely remove external hard disk in Menu (Follow the on-screen instruction) 12 13 14 15 16 17 (Follow the on-screen instruction) (Follow the on-screen instruction) Press to switch between Component and HDMI sources. Press to display the on-screen information, including mode, source and audio sources. Press to exit the current page and return to the previous page. Press to take a snapshot during gameplay or video playback. English-10 18 Press to pause the playback. Press OK or Press to pause the recording. 19 Press to play the video in slow motion (1/2x). Press again to enter frame- by- frame mode (See Chapter 5 for details). 20 21 22 23 to resume playback. Press to fast-forward (2x, 4x, 8x, 16x, 32x). Press to go to the next page. Press to delete the selected files. Press to display the disk information. Press again to hide it. English-11 Chapter 4 Installation & First Time Setup 4.1 Supported Resolutions The Game Capture HD II supports Component (YPbPr) and HDMI input resolution as follows: HDMI / Component (YPbPr) 480i/576i 480p/576p 720p (50 & 60Hz) 1080i (50 & 60Hz) 1080p (50 & 60Hz) The Game Capture HD II records the exact display resolution under most circumstances. Exceptions can only be found when the input resolution is set as 1080p: Source Resolution Display Resolution Recorded Resolution 1080p (60fps) 1080i (60fps) 1080p (30fps) 1080p (50fps) 1080i (50fps) 1080p (25fps) English-12 Estimated recording duration for different video quality settings: HD 1080p Video Quality Optimal (20 Mbps) Good (18 Mbps) Maximum Recording Length (15 Mbps) 1TB 100 hrs 110 hrs 125 hrs 2TB 200 hrs 220hrs 250hrs Optimal (20 Mbps) Good (15 Mbps) Maximum Recording Length (10 Mbps) 1TB 100 hrs 125hrs 200 hrs 2TB 200 hrs 250 hrs 400hrs Optimal (15 Mbps) Good (12 Mbps) Maximum Recording Length (10 Mbps) 1TB 125 hrs 150 hrs 200 hrs 2TB 250 hrs 300 hrs 400 hrs Optimal (7.5 Mbps) Good (5 Mbps) Maximum Recording Length (3 Mbps) 1TB 250 hrs 400 hrs 650 hrs 2TB 500 hrs 800 hrs 1300 hrs Storage Capacity HD 720P Video Quality Storage Capacity HD 1080i Video Quality Storage Capacity SD 480i(576i)/480P(576P) Video Quality Storage Capacity *Recording with higher video quality takes up more disk space. English-13 4.2 Hardware Installation Please follow the steps below to properly connect the Capture Box and your TV/ video game consoles. If you would like to install internal hard drive, install it before turning on the Capture Box. Make sure that the cables are firmly connected and that neither of the cables is loose. If any of the cables are loose or disconnected, there may be a loss of signal or screen color problems. Step 1 Check the Connection of Your Game Consoles and TV Make sure all cables connecting the Capture Box to your game consoles and TV are well-connected. Doing so will save you a lot of time from locating problems later. First, please check the connection of your game consoles. Second, make sure that the connection to TV is good. Step 2 Connect the Device to Your Wii U / Xbox 360 Using HDMI Cable Connect one end of the HDMI cable to the HDMI IN port on the rear of the device and the other end to the HDMI OUT port on your Xbox 360/ Wii U. Connect the Device to Your PlayStation 3 / Wii Using Component AV Cable Plug the green, blue, red connectors into the COMPONENT VIDEO IN port and white and red connectors into the AUDIO IN port on the rear of the device. Then, plug the other end to your game console. English-14 “PlayStation 3 Component AV Cable” and Wii Component Cable is NOT Included. Please purchase separately if needed. Step 3 Connecting the Device to Your TV Using HDMI Cable Connect one end of the HDMI cable to the HDMI OUT port on the rear of the device and the other end to the HDMI IN port on your TV. Step 4 Power on Your Game Console Turn on your game console. English-15 Step 5 Install and Connecting the Power Adapter Slide the Power Adapter Outlet Module into the groove on the Power Adapter. Connect the Power Adapter connector to the DC-IN port on the rear of the device. Then plug the power adapter to a wall outlet. English-16 Step 6 Connecting to the Network To automatically obtain time and other information, you need to connect the Capture Box to an Ethernet LAN. Make sure the LAN wire is well-connected before you continue to the next step. Meanwhile, a router which supports DHCP IP network is recommended for you to pair up the Game Capture HD II with your iPhone. It is recommended that you connect the Capture Box before running first time setup. Step 7 Plug in USB Hard Drive/ HDD Connect your portable USB hard drive or hard disk drive (HDD) to the USB port on the front of the Capture Box. Please make sure you use an NTFS format USB hard drive or hard disk drive (HDD). Under the condition that no hard drive is connected to the device, the power light will continue to flash. Therefore, it is advised that you plug in USB hard drive or hard disk drive (HDD). Please see Chapter 4.3.2 for further details about installing an internal hard drive. English-17 Step 8 Power on the Capture Box Press the power button on the front panel of the device. Or Use the power button on the remote control. The POWER LED indicator lights up green, when that the device is power-on. It is important that you power on/ off the Capture Box following suggested procedure . Fail to do so may lead to damage of the Capture Box or data loss English-18 Step 9 Check Video on TV screen Make sure that there is game console video content displayed on TV screen. If your TV is not displaying video properly, please check the followings: Supported resolutions vary depending on the TV in use. For details, please refer to the documentation that comes with your TV. Power off Capture Box and then make sure that the device is connected properly and with the proper cables. If there is still no video signal on TV, refer to FAQ section at www.avermedia.com for further troubleshooting. Connecting the Device to Your Microphone and Headset Plug in the microphone connector into the MIC Input port on the front panel of the device. Same as microphone, plug in the headset connectors into the headphone and microphone ports on the front panel of the device. This procedure is only needed when you intend to add commentary to your gameplay video. Please refer to Chapter 6 for details. When headphone is connected to the Capture Box, the gameplay will be muted as sound will come out from the headphone. Hereafter a headset refers to the device you use to record while headphone refers to the headphone port on the front panel of the Capture Box. English-19 4.3 Storage Device Installation The Capture Box supports 2.5 inch internal hard drive and external USB storage device. You can save the recorded files and snapshots either to the internal HDD or external one. 4.3.1 USB Storage Device Insertion Connect your portable USB hard drive to the USB port on the front of the Capture Box It is highly recommended to use a NTFS format hard drive instead of a flash drive to minimize the risk of recording failure. To avoid any possible data loss, go to main menu and press [F1] of your remote control to safely remove the external storage disk before unplugging it from the Capture Box. 4.3.2 HDD Installation and Removal It is highly recommended to use a new unformatted hard drive or a hard drive formatted as NTFS file system. The maximum supported storage capacity of the hard drive is 2TB. Before installing or removing the internal HDD, please disconnect the power supply from the Capture Box to avoid data loss. Removing internal HDD immediately after powering-off may cause personal injury due to heat. Please wait until the HDD cools down completely (it takes approximately 10 minutes) before any attempt to remove it. English-20 To install the internal HDD: Step 1 Remove the HDD Lid Open the HDD lid on the bottom of the Capture Box. Step 2 Before Installing Internal HDD Use the measuring card to measure the height of your HDD (7mm or 9.5mm). Please refer to the Appendix C for the measuring card. English-21 Adjust the rotary knob attached to the inner side of the lid to fit the height of your HDD. The default position of the rotary knob fits HDD with 9.5mm height. If you use HDD with 7mm/ 9.5mm height, rotate the rotary knob to the other direction. Using a 9.5mm HDD: Using a 7mm HDD: Step 3 Inserting the HDD Place the HDD on the slot with the sticker-side facing up and the HDD connector end facing to the left. Align and insert the HDD connectors all the way into the SATA connector. Push in firmly to secure them. English-22 Step 4 Replace the HDD Lid Place the HDD lid back and snap it into place. To remove the internal HDD: Step 1 Remove the HDD Lid Please wait until the HDD cools down completely (it takes approximately 10 minutes) before any attempt to remove it. Use your fingertip to flip open the HDD lid, located on the bottom of the Capture Box. English-23 Lift off the lid and set it aside. Step 2 Removing the HDD Pull the HDD out in the direction of the arrow. Then lift the HDD out of the slot. Step 3 Replacing the HDD Lid Place the HDD lid back and snap it into place. English-24 It is typical that after a hard drive is formatted, the actual disk space of the drive would be slightly less than its unformatted capacity. 4.4 Setup Wizard When the first time you power on the Capture Box unit, the setup wizard appears. The following steps guide you through the initial configuration process. Make sure to install a hard drive (internal or external) and to connect to the internet beforehand. For the first-time initialization, a short duration of black screen (approximately 20 seconds) is followed by AVerMedia logo. The blinking green status light indicates that the Game Capture HD II is starting up. Please wait until the welcome screen appears. Step 1 Setting up Language When the welcome page appears, use ▲/▼ to select your preferred language. Press OK to confirm. English-25 Step 2 A/V Pass Thru. It is suggested that A/V Pass Through to be turned ON. Step 3 (1) Reminder Make sure a NTFS-formatted hard drive is connected or installed to the device. (For details, see Chapter 4.2) Check the connection of network. Press OK to start setup. A router which supports DHCP IP network is recommended. Also, refer to Ch. 6.2 for Manual connection setup. Step 3 (2) Network Connection Failure If you have not connected to a valid network, a short result of failed network connection will be shown. Press OK to continue. Press to go back to the previous page. English-26 Step 4 (1) No Hard Drive Detected If you have not yet installed any storage device, install it before continuing the setup process. Then press to go to the previous screen and press OK to run disk checking process. Step 4 (2) Finishing Setup Wizard Once a NTFS-formatted hard drive is connected, a Settings Complete notice will be shown. You can start to record and take snapshot right away. Press OK to exit the wizard and start using Capture Box. The game screen then appears. Unplug the Capture Box from the power supply before installing an internal HDD. Sometimes the connection test in Wizard will appear to be failed even though you have connected the RJ45 cable to the Capture Box. Go to Menu> Network> Network Settings> Manually Setup to set the network manually. English-27 4.5 Video Output Settings for Game Consoles The Capture Box supports YPbPr / HDMI input resolution up to 1080p. 4.5.1 Video Output Settings for PlayStation 3 Step 1 Power on your PlayStation 3 console. On your console, go to Settings > Display Settings > Video Output Settings. Step 2 Select Component/D-terminal and confirm the selection. Then your TV screen goes blank immediately. Now use your TV remote to switch the TV input source to Component (YPbPr). The screen then comes back on again. English-28 Step 3 Check ALL the resolutions. Confirm the setting. Step 4 Select Set Audio Output Settings. Select Audio Input Connector/SCART/ AV MULTI as audio output. Confirm the setting. 4.5.2 Video Output Settings for Xbox 360 Before resetting video output for XBox 360, make sure to properly connect the Capture Box with your Xbox 360. Make sure to power off both the Capture Box and your Xbox beforehand. Supported resolutions vary depending on the TV in use. For details, please refer to the documentation that comes with your TV. English-29 Power on your Xbox console. On your console, go to My Xbox on the dashboard and scroll all the way to the right to System Settings. Then select Console Settings > Display > HDTV Settings. Please set the audio output of all game consoles as auto. Although the Capture Box do not support DOLBY 5.1 and 24p resolution video/ audio format, you can still pass through these format while the Capture Box is off. English-30 Chapter 5 Basic Operation This chapter guides you to record gameplay, capture images, add voice commentary to videos, and instantly play files. All the recorded files or snapshots will be saved to the default hard drive destination automatically. Please see Chapter 6 for details. 5.1 Record and Capture The Capture Box lets you record, capture and adds voice commentary to the videos. Instructions are given as follows. The Capture Box displays gameplay in real-time and standard mode. You can change the default real-time mode to standard mode. Go to Menu> Settings> Display Mode. (Refer to Chapter 6.2 for details.) OSD Menu Descriptions Instant Recording During Gameplay - Press to activate instant recording. - Press again or to stop recording. Pause and resume recording You can skip unwanted footages and resume recording. Only the footages you recorded will be saved and those skipped clips will be deleted automatically. - Press to pause recording. - Press or English-31 to continue recording. Quick Snapshot During Gameplay - Press to capture current image. Long Press to activate continuous capture mode. The Capture Box will take 5 snapshots at one time. Instant Playback - Press to play the latest recorded file or view the last captured image. - Press to stop the playback. - Press ►to skip forward 30 seconds. - Press ◄ to skip backward 10 seconds. Image Capture During Video Playback Way 1: - Press to capture current image. Way 2: Step 1: - Press to play the video in slow motion (1/2x). Press again to view the video frame by frame. or - Press to pause the playback. Press to go to previous frame; press to go to next frame. Step 2: - Press English-32 to capture your desired image. Disk Information Press then press OK to display the disk information. Press again to hide it. 5.2 Adding Commentary This section shows you how voice commentary is added to your video recording. Requirements for headset/microphone: Headset Connector: 3.5mm jack Microphone Frequency Response : 20-16kHz Impedance: 2.0 KΩ Working Voltage: 3V Connector: 3.5mm jack OSD Menu Descriptions Microphone On An OSD will be shown if you connected microphone/ to the Capture Box. Your commentary will only be recorded when you press . - Press to record your gameplay with commentary. - Press English-33 or to stop recording. If headset or microphone is plugged in during the Wizard Setup, the sound can only be heard from your headphone and instructions on voice commentary will not be displayed. Therefore, plug in headset or microphone after you complete Wizard setup so as to follow the headphone/ microphone instructions. All commentary added will be mixed with the gameplay sound. Also, as long as the headphone is connected to the device, all your commentary and background sound will be recorded. Therefore, remember to stop recording and remove the headphone when no commentary is needed. If the microphone is disconnected/ connected to the Capture Box during recording, the sound will also be recorded. To make sure the Please avoid plugging off the microphone during recording process. The volume you hear in the commentary test may be slightly different from the actual recording. It is recommended that you run an mock test beforehand to be familiar with the recorded volume. It is normal to hear your own voice when recording with HDMI input source. No OSD will be shown when you connect only the headphone to the Capture Box. English-34 Chapter 6 OSD Menu Under the menu, you can check and manage both your recorded files and snapshots, and customize your preferences. 1 Remaining Time for Recording 3 Network Connection 2 Connecting to GameMate 4 Current Time OSD Menu Descriptions Basic Operation - Press to bring up the menu. - Press or to return to the game screen. - Use ▲/▼ to make selection on the menu and OK to enter a submenu. - In the submenu, use ▲/▼ to make selection and OK to confirm. Press previous page. English-35 to return to the Press F1 to safely remove the storage device.. - *The upper left corner shows your current default storage device and available remaining recording 6.1 Media Studio You can check both recordings and snapshots captured by the Capture Box in “Media Studio”. Capture Format: Video MP4 (Codec: H.264 format with AAC audio) Image JPEG It is recommended that you view only videos and snapshots that are recorded by the Capture Box. Attempt to open files taken by other equipment (such as a camera) on the Capture Box is very likely to fail. OSD Menu Descriptions Navigating - Use the navigation keys ◄/►/▲/▼ to select among items. - Press F1 to sort the files by file name, file size, or file format. - Press F2 to switch between list mode and thumbnail mode. - Press F3 to rename, edit, share the highlighted file. - Press to go to the next page. - Press return to the previous page. - Press English-36 to directly access the main menu. Video Playback - Press or OK to start playing the selected video. - Press or OK to pause the playback. Press or OK to resume playback. - Press to play the video in slow motion (1/2x). - Press to rewind at 2x, 4x, 8x, 16x, 32x speed. - Press to fast forward at 2x, 4x, 8x, 16x, 32x speed. - Press to play the file at normal (1x) speed when slow motion, rewind, or fast-forward is active. - Press to stop the playback. - Press to display the playback information, including storage disk, recording resolution, duration, elapsed and remaining time, and file name. * Only video files captured by the Capture Box are supported. Snapshots Viewing - Press Press or OK to view the selected image. or to return. * Only image files captured by the Capture Box are supported. 6.1.1 Post- Edit Capture Box Recorded Videos This section shows you how to cut, recombine and share videos on YouTube recorded by the Capture Box. English-37 OSD Menu Descriptions Select a Video - Select the file you would like to edit by using the navigation keys ◄/►/▲/▼. Edit/ Share Press F3 to edit or share the selected video. Change File Name Input your file name by using the navigation keys ▲/▼ to select characters, numerals or symbols. Use the navigations keys ◄/► to go to the next/ last character. Press F1 to switch between characters, numerals and symbols. - Press to go back to cancel the change you made. - Press OK to save the edited file name. - Press English-38 to clear all. How to Edit An instruction on how to edit a video will be displayed, press OK to start editing. Edit Mode You can cut and recombine your selected video in Edit Mode. - To cut the video, you will need to create one or more segments within the video. - Step 1: - To locate a scene, use direction keys or to search the scene. You can also use navigation keys ▲/▼ to search scene by specific hour, minute, and second on the left hand side of the screen. - Press OK to mark or unmark the scene. Step 2: Repeat Step 1 so as to create a segment. Press OK to keep or delete the segment. Press F1 to switch between Search Scene and Segment search. Press F2 to clear all marks you made on the video. Press F3 to export the video. English-39 Preview - The Capture Box automatically recombines the segments you choose to keep during editing. Export - The estimated time varies by different storage disks. Refer export time to the actual use of your storage disk. - Press OK to export the video. - Press OSD Menu to continue editing. Descriptions Exporting… The bar in the middle shows the progress of video exporting and estimated time. - Click on to cancel exporting. - Click on to hide the exporting information. English-40 Exit Press OK to exit from the editing mode. - Press to exit Press F1 to continue editing. OSD Menu Descriptions Share Videos on YouTube Use ▲/▼ to select the task you would like to undergo. Select ‘Share on YouTube’ to share your videos. Share On YouTube Before you share your recorded videos on YouTube, make sure you: 1. Built a YouTube account and also a personal channel. 2. Have your PC/ NB next to you if you activate two- step verification of your YouTube account. To ensure the stability of uploading, upload videos that are within one hour. Make sure the YouTube account is verified to upload videos that are longer than 15 minutes. - Press English-41 to continue editing. - Press OK to continue uploading. - Press F1 to skip this reminder afterwards. Account Setup - Use ▲/▼ to select the task you would like to undergo. Press to go back to last level. Press OK to edit your email or password. Press F1 to save the change you made. - Edit Before Uploading - Press o return to the last page. - Press OK to start uploading. - Press F1 to set the privacy. Press F2 to change account. Uploading Complete You have successfully upload the video. You can edit your video title on YouTube. Press OK to confirm. English-42 The recommended length of each video should be less than 1 hour. The Capture Box is made for record and capture media materials that are legally owned or licensed by the user only. Uploading videos that are protected by copyright and other laws is not allowed. YouTube may shut down the account for copyright protection reason. YouTube account verification is required when you upload video that are longer than 15 minutes. Refer to YouTube website for further details. Occasionally, it takes two to three days for your videos to be shown on YouTube. Please wait for a few days if you did not see the uploaded videos online. 6.2 File Management “File Management” lets you manage videos and snapshots captured by the Capture Box. You can copy files between internal hard drive and external USB storage device, and delete unwanted files. Before entering this submenu, insert your storage device first (USB 2.0/ 3.0 storage device / 2.5” HDD in NTFS format). OSD Menu Descriptions Select Partition - Use the navigation keys ◄/►/▲/▼ to select the partition. - Press to playback the video. - Press F1 to change the file sorting rule. English-43 File Management User Interface: 1 A list displaying files located on the internal hard disk 2 A set of editing tools 3 A list displaying files located on the USB disk 4 Information display area Descriptions on Editing Tools: # 1 2 3 4 5 Buttons Descriptions Copy files to USB disk Copy files to internal hard disk Select all Deselect all Delete OSD Menu Descriptions English-44 Copying Files from Internal HDD to USB Disk Step 1: - On the left-side list, use ▲/▼ to highlight the file that you want to copy to USB disk. Press OK to select / unselect an item. - Select and press OK to select all files. - Select and press OK to deselect all files. Step 2: - Select and press OK to copy selected file(s) to USB disk. - Press to cancel copying the files in a progress. Step 3: - Press OK. Copying Files from USB Disk to Internal HDD works in the opposite way as above mentioned. *If the file is comparably large, press F1 to hide the copying or deleting status. Deleting Files Step 1: - Use ▲/▼ to highlight the file(s) that you want to delete. Press OK to select/unselect an item. - Select and press OK to select all files. - Select and press OK to deselect all files. Step 2: - Select from the list. English-45 and press OK to remove the file or Press on the remote and then press OK to remove the file from the list. - Press to cancel deleting the files in a progress. Step 3: - Press OK. USB Storage Device Removal In order to avoid data loss, it is highly recommended to safely remove your external storage device. Please follow the steps below: Step 1: Press on the remote control. Step 2: Press F2 to remove it. English-46 6.3 Settings You can customize your preferences in “Settings”. OSD Menu Descriptions Basic Operation - Use ▲/▼ to select a preferred category. Press OK to make a selection. - Press Press to return to the previous page. to directly access the main menu. - Press F1 to safely remove the storage device. OSD Menu Descriptions Language Use ▲/▼ to select your preferred language. Press OK to confirm. OSD Menu Descriptions Display Mode The default mode is set as real-time mode. - Use ▲/▼ to switch between real-time and standard mode. English-47 Real-Time Mode Real-time mode lets you play games with zero delay. And it is best for FTG, STG, RAC, and other rhythm games. No recording or snapshot status will be shown on screen. All capture work will run in the background. However, if any problem occurs during the capturing process, OSD will automatically jumps out. - Press to check OSD and track capture status. Standard Mode In standard mode, on-going recordings will be shown in the upper right corner of the screen. As there will be slight delay in game, standard mode is recommended for ACT, RPG, and SLG games. Black screen may occur when calling for Menu in real-time mode. And the pause varies by TV type. English-48 OSD Menu Descriptions Network Settings Use ▲/▼ to move among options. Press OK to confirm. Before setup, please make sure the Ethernet cable is well connected. Auto Setup (Recommended) : It is recommended to use Auto Setup to automatically obtain IP and DNS addresses. Manual Setup : Use Manual Setup to manually configure IP and DNS addresses. STEP 1: Use ▲/▼ to select an item for configuration. Press OK to confirm. STEP 2: Use ◄/► to move among options and ▲/▼ to select a number. Press OK to confirm. Press OK to save the setting. - Press to cancel and return to the previous page. STEP 3: Press F1 to save the settings and test the network connectivity. English-49 PPPoE : Use username and password provided by ISP for connection. STEP 1: Use ▲/▼ to select an item for configuration. Press OK to confirm. STEP 2: Use ◄/► to move among options and ▲/▼ to select a character. Press F1 to switch among capital letters, lower cases, numbers, or signs. Press OK to save the setting. - Press to cancel and return to the previous page. Press to delete selected characters and the character to the right. STEP 3: Press F1 to save the settings and test the network connectivity. Network Connectivity Test Select to test your network connectivity. Please check the result and fix the problem indicated. Press OK to confirm. English-50 Network Connectivity Test Once network setting is completed, a list of connection details will be displayed. Press OK to confirm. Current Network Information This page displays the current status of your network connection. If network is temporarily inaccessible, manually set up the time zone settings so that the videos and snapshots is named correctly. OSD Menu Descriptions Date and Time Use ▲/▼ to select an item for configuration. Press OK to confirm. English-51 Date Format : Use ▲/▼ to select a preferred date format. Press OK to confirm. Auto Update : Use ▲/▼ to enable/disable automatic date and time update. Press OK to confirm. *To use this function, a network connection is required. Time Zone : STEP 1: Use ▲/▼ to move among options and select your area. Press OK to confirm. STEP 2: Use ▲/▼ to move among options and select your time zone. Press OK to confirm. Time Setup : Use ◄/► to move among options and ▲/▼ to adjust date and time. Press OK to confirm. English-52 Daylight Saving Time : Use ▲/▼ to enable/disable Daylight Saving Time. Press OK to confirm. *To use this function, a network connection is required. OSD Menu Descriptions Disk Management Storage Destination Step 1: Select and press OK to change your current desired default storage device for both recorded files and snapshots. * indicates normal write speed of selected partition; indicates low write speed of selected partition. To make sure recording functions properly, be sure to select partition with normal write speed. Step 2: Use ▲/▼ to select the preferred default storage device. Step 3: Use ▲/▼ to select a folder and press OK to confirm. Step 4: Press F1 to save the setting. OSD Menu Descriptions A/V Management English-53 Use ▲/▼ to move among options. Press OK to confirm. Press to switch from component and HDMI input sources. Video Input: Use ▲/▼ to toggle between various video input source options (Component / HDMI). / Press OK to confirm. Audio Input: Use ▲/▼ to toggle between various audio input source options (Stereo Audio/ HDMI). Press OK to confirm. English-54 OSD Menu Descriptions A/V Pass Through: Use ▲/▼ to enable/disable A/V Pass Through. Press OK to confirm. *The default setting is set Off to yield to the power-saving regulation. If this function is enabled, Capture Box still output signal when the Capture Box is off. If this function is disabled, Capture Box does not output signal when the Capture Box is off. Color Range Setup Use ▲/▼ to toggle between off, limited, and full. Press OK to confirm. OSD Menu Descriptions Watermark Add your selected watermark to your videos. You can customize the display of the watermark by setting up the type, position and also scale. - Press to go back to last level. Press OK to enter the next level. Press F1 to preview the display. English-55 Watermark Type: Use to ▲/▼ select from the listed watermark types. Press OK to save the change. - Press to go back to last level. Position: Use ▲/▼ to select from the listed watermark positions. Press OK to save the change. - Press to go back to last level. Display Scale: Use ▲/▼ to select the display scale. Press OK to save the change. - Press English-56 to go back to last level. OSD Menu Descriptions Auto Save Use ▲/▼ to switch from enable or disable the Auto Save function. Recording/ Snapshot Video Quality: Use ▲/▼ to toggle among various video quality options (Optimal/ Good/ Maximum recording length). Press OK to confirm. Snapshot Quality: Use ▲/▼ to toggle among various snapshot quality options (Best /Better / Good). Press OK to confirm. English-57 Live Commentary A short demonstration will be played in this section. Press OK to continue. Volume: Use ▲/▼ to move among options and ◄/► to adjust the volume. Press OK to save the setting. Press F1 to restore to the default setting. Sound Mode: Use ▲/▼ to select a preferred mode for mic recording. Press OK to confirm. Gameplayer Mode will automatically switch game sound output to your headphone. To ensure the optimal quality, please use both microphone and headphone for voice commentary recording. Commentator Mode will record both game sound and voice commentary or voice chat from microphone during gameplay. It is recommended to use an omni-directional or high-sensitive microphone. English-58 OSD Menu Descriptions Firmware Upgrade Follow the steps below to upgrade the firmware via USB storage device: Step 1: To download the latest firmware binary package, please go to www.avermedia.com, and then enter the model name in Product Search field. Firmware file is available on the product information page. Step 2: Extract the files by unzipping the package. Copy the firmware files to the root directory of your USB storage device, and then connect it to the Capture Box. Step 3: Press F1 to start the firmware upgrade process. Press to abort the operation and return to the previous page. Step 4: The Capture Box automatically detects whether a different version of firmware is available for upgrade or rollback. Once the firmware upgrade process has completed, press OK to restart the Capture Box. The firmware upgrade process takes up approximately 10-14 minutes. Firmware upgrade requires at least 256MB free space of the storage device (USB/HDD). If problems encountered during firmware upgrade, please clear all the data stored on your USB storage device and repeat the process above. NEVER power off the device or unplug the power supply or remove the USB storage device during the firmware upgrade process. If the firmware upgrade is interrupted for any reason, the device may crash. English-59 Restore to Factory Settings Press F1 to restore to original factory settings. Press to abort the operation and return to the previous page. Product Information This page provides information about this product, including product name, model no., and firmware version. Press F1 to edit the display name. OSD Descriptions Name your own Capture Box. Press navigation keys select characters. Up and Down to Press navigation keys Left and Right to shift to the former or later character. Press to switch to the next input menu. Press to delete the character. Press OK to save the name. To change product name, go to Menu >Product Name. * The display name will not only show up when you enable watermark function but also on the pair up list with GameMate by AVerMedia. English-60 Chapter 7 Pairing Capture Box and GameMate by AVerMedia GameMate by AVerMedia is the dedicated app for smart phones. It allows you to use your smart phone as remote control. You are only a few steps from pairing up the Capture Box with GameMate. Please download GameMate by AVerMedia from app store first. To pair up successfully, make sure the Capture Box and GameMate share the same network. To do so, you will also need a wireless access point for GameMate. Make sure the LAN is well -connected and you are ready to pair up! OSD Descriptions It is recommended that the Capture Box and GameMate share a wireless AP. After downloading the GameMate; tap on GameMate on your smartphone. You will see that GameMate is searching available device. A set of pairing number will be shown on TV screen. English-61 Tap to input the provided four-digit pairing number correctly. You will see GameMate as shown left hand side when it successfully pairs up with Capture Box. You can also check the connection GameMate from the Menu. You will see sign on the upper level of the Menu. If the connection is lost, please restart the wireless AP or the Capture Box and try again. English-62 of Appendix A How to Set Your Gameplay Snapshot as PS3 Wallpaper Start to give your PS3 menu screen a fresh and personalized look to show how cool you are! Please follow the steps below to set the image captured by the Capture Box as your PS3 background wallpaper. Step 1 Remove your USB storage device from the Capture Box, and then plug it into your PS3 console via USB port. Power on your PS3 console. Step 2 On your console, go to Photo > USB Device. Press the triangle button on your PS3 controller and select “Display All”. Step 3 Select the image that you wish to use. Press the Triangle button on your PS3 controller to bring up control panel. Then scroll to the right and select “Set as Wallpaper”. English-63 Step 4 Use the right joystick to zoom in/out and left joystick to frame the image. When it is the proper size, press (Enter). Confirm with (Enter) if you are prompted to overwrite your current wallpaper. ○ ○ Step 5 Done! The snapshot that you have chosen is now set as your PS3 wallpaper. On your PS3 console, you can go to Settings > Theme Settings > Background to turn wallpaper on or off. English-64 Appendix B Troubleshooting To download the latest firmware for the Capture Box: Go to www.avermedia.com. Enter the model no. (C285) in Product Search field. The latest firmware file is available on the “AP & Driver” section on the product information page. Hard Drive Problem Hard drive not detected Actions Make sure that the storage destination is properly set up. Go to Menu Settings Disk Management Storage Destination to set storage destination. Make sure the hard drive is connected / installed and restart the Capture Box. Make sure the Capture Box has stable power supply while recording or the recording mail fail. Failure of recording may stop the Capture Box from detecting hard disk. Format current drive to NTFS file system. It is likely that the hard drive is not set to NTFS format. You can check the hard drive and reformat it by downloading HP USB Disk Storage Format Tool. The Capture Box will automatically generate files that help boost the operation. Files that have file name extension like ‘.avm_chk_tmp’, ‘.avm_speed_test’, ‘.hd_keepalive’aim at preserving hard disk speed as well as other crucial record. Please don’t remove them. Unknown files are found on my hard disk after connecting to the Capture Box Video Display Problems “No input signal” message appears on screen Actions Make sure that all the cables are firmly connected. Power off the Capture Box and then make English-65 sure that the device is connected with the proper cables (See 3.1 Hardware Installation in user manual for details). Green screen color with buzzing noise: Screen color appears abnormal using component input Unsuccessful recording of HDMI-input-videos Blacken screen using HDMI input The recording is fast-forwarded or stopped when recording complicated gameplay frames in HD resolution (720p or above)? Make sure that the red and blue connectors do not come loose. Mono screen color: Make sure that the red and blue connectors do not come loose. The Capture Box supports all HDMI input except those in HDCP (protected video) form. If screen is blacken when using HDMI input, please try: 1. Reconnect the HDMI cable from the input source device and also the Capture Box. Also, connect to HDMI port 1 of your TV at all times. 2. Change HDMI cable and try again. When recording gameplay in HD resolution (720p or above), fast-forward may be found due to the complicated video content. Follow the tips below to ensure good recording quality: 1. Install a format tool. It is recommended that you format hard disk into NTFS format using HP USB Disk Storage Format Tool. Please find the link: http://download.cnet.com/HP-USB-Storage- Tool/3000-2094_4-1 Be sure to backup your data before start formatting. All data will be erased once the formatting process begins. 2. Lower gameplay output resolution. Details can be found in C285 user manual. Please refer to PS3/ Xbox 360 video output setting. 3. Lower C285 video quality at Menu> Settings> Edit/ Share 4. Use another high- performance storage disk (For example, another NTFS hard disk). Playback Problems Actions English-66 Poor quality of captured video Check video output settings of your game console. For PS3, set 1080p, 1080i and 720p as video output resolutions. If you only select 1080i, the screen resolution automatically goes to 480i when you play a game that supports 720p. (See 3.5 Video Output Settings for Game Consoles in user manual for details). Enable the “De-interlace” function of your media player before playback. Some media players cannot process the interlaced video (1080i / 576i /480i) well. This problem does not persist after video uploaded to YouTube. Try recording video again using another NTFS-formatted hard drive. When this problem occurs, it is recommended to play the videos on PC. Alternatively, you can record at a lower bit rate to solve this problem. This problem does not persist after video uploaded to YouTube. Turn on Microphone volume via Menu. Turn down game console input volume. Adjust volume via in-game setting. Gain Microphone amplifier. Make sure that your TV supports 1080p. Turn on A/V Pass through via Setting. Jittery/Jerky video playback on PC Stuttering local video playback Microphone volume not loud enough No A/V Pass Through when game console and TV ON File Management Problems Actions Difficulty in locating files All files are named after the date and time they are recorded. In the file management, you can sort files out by its name, the time recorded, and the file size. Make sure the time zone is set correctly or manually setup to obtain correct file name. For example, a video which recorded at 9:30 a.m., 15 of April, 2013 will be named as: English-67 130415-0930 A recorded videos with commentary will be called: 130415-0930 (Mic) An edited recorded video will be named as : 130415-0930 (Edit-1) A videos that has been edited for the second time will be named as : 130415-0930 (Edit-2) An edited video with commentary will be named as : 130415-0930 (Mic-Edit-1) The Game Capture HD II detects all kinds of folder that built in your hard drive; as a result, it is likely that the destination is set to a non-standard folder, for example, a hidden folder. Difficulty in locating the folder on your PC/ laptop If you cannot locate the folder that saves the recordings and snapshots, please check if: 1. You have set the destination of recordings and snapshots to a standard folder, making sure that it is not hidden, locked, etc.. 2. You load the folder with a Microsoft Windows system. A Linux system does not read non-standard folder like a hidden folder. English-68 Other Problems Actions Solutions are as follows: A. Power off the Capture Box if an internal storage disk is installed. Remove internal storage disk and power on the Capture Box. Connect the USB to your Capture Box to undergo FW upgrade. (*If you are using a SATA storage disk or the temperature of the hard disk appears high; please wait for 10 minutes for the hard disk to cool down.) B. Save the unzipped firmware file to the file root of your USB. C. To enable firmware upgrade, make sure a minimum space of 256MB on your USB. D. The detection of firmware file may be disrupted by other files on your USB. It is recommended that you wipe the USB or reformat it to NTFS format. Reformat your USB by using HP USB Storage Format Tool: 1. Disconnect your USB from the Capture Box. Connect it to a computer. 2. Download HP USB Storage Format Tool at the following link: http://download.cnet.com/HP-USB-Disk-Stor age-Format-Tool/3000-2094_4-10974082.ht ml 3. Undergo HP USB Storage Format Tool. Select your USB and format it to NTFS format. Save the firmware file into the NTFS USB and reconnect it to the Capture Box to Firmware upgrade turns out unsuccessful upgrade firmware. If the problem still persists, refer to FAQ at www.avermedia.com for further troubleshooting. English-69 Appendix C Measuring Your HDD Height Before Installation English-70 Open Source Code Notice The following GPL executables and LGPL, MPL libraries used in this product are subject to the BSD/FreeBSD/ GPL/GPLv2/GPLv2+/GPLv3 with GCC/ RLE/jpeg/LGPLv2/LGPLv2.1/LGPLv2.1/ GPLv2/LGPLv2.1+/LGPLv2+/ libpng/MIT/NewBSD/OPENSSL/PD/zlib License Agreements: BSD cppstub/db/libpcre0/JSONKit FreeBSD thttpd GPL makedevs GPLv2 busybox/dbus/dbus-x11/devmem2/dosfstools/fbset/i2c-tools/iproute2/libblkid1/libdbus-1-3/libfreetype6/libpam/ libuuid1/linux-kernel/module-init-tools/module-init-tools-depmod/mtd-utils/netbase/u-boot/update-modules/ usbutils/util-linux-ng GPLv2+ iptables/sysvinit/tinylogin/udev/update-rc.d GPLv3 with GCC RLE libgcc1/libstdc++6 jpeg libjpeg8/libjpeg-tools LGPLv2 Libjson/libts-1.0-0/tslib LGPLv2.1 libav/libmicrohttpd/libusb-1.0-0 LGPLv2.1/GPLv2 alsa English-71 LGPLv2.1+ ldd/libc6/libthread-db1 LGPLv2+ libglib-2.0-0 libpng libpng12-0 MIT cocos2d-x/curl/e2fsprogs/fbset-modes/graphmagic/libcom-err2/libcurl4/libe2p2/libexpat1/libext2fs2/libformw/ libmenuw/libpanelw5/libss2/libtic5/libtinfo5/libxml2/ncurses/pointercal New BSD iperf OPENSSL openssl PD modutils-initscripts zlib libz1 AVerMedia Technologies Inc. offers to provide source code to you for a charge covering the cost of performing such distribution, such as the cost of media, shipping and handling upon e-mail request to AVerMedia Technologies Inc. at http://www.avermedia.com For more information, please visit our website: http://www.avermedia.com English-72 Lorsque vous branchez votre Boîtier d’Acquisition pour la première fois, l’assistant d’installation apparaît. Les étapes suivantes vous guident tout au long de la procédure de configuration initiale. Assurez-vous que vous avez installé un disque dur (interne ou externe) et connecté le boîtier à Internet avant de démarrer la procédure. Pour la première initialisation, vous aurez un écran noir pendant une courte période (environ 20 secondes), suivi par le logo AVerMedia. La lumiére verte qui clignote indique le Game Capture HD II est en train de démarrer. Attendez ensuite l’apparition de l’écran de bienvenue. Etape 1 Réglage de la Langue Lorsque la page apparaît, utilisez ▲/▼ pour choisir la langue de votre choix. Appuyez ensuite sur OK pour confirmer. Etape 2 Passerelle Audio/Vidéo (Pass-Thru) Sélectionnez ON pour la passerelle A/V. Français -1 Français Assistant d’installation Etape 3 (1) Rappel Assurez-vous que le disque dur branché ou installé sur le boîtier est bien formaté en NTFS. (Pour plus de détails, reportez-vous au Chapitre 4.2) Vérifiez la connexion au réseau. Appuyez ensuite sur OK pour démarrer la configuration. Nous vous recommandons d’utiliser un routeur qui supporte les réseaux IP DHCP. Veuillez vous référer au Chapitre Ch. 6.2 pour un réglage manuel de la connexion. Etape 3 (2) Echec de la Connexion Réseau Si vous n’avez pas réussi à vous connecter à un réseau valide, un message d’échec de connexion réseau apparaîtra. Appuyez sur OK pour continuer. Appuyez sur précédente. pour revenir à la page Etape 4 Aucun Disque Dur Détecté Si vous n’avez pas encore installé de support de stockage, faîtes-le avant de continuer le processus d’installation. Appuyez ensuite sur pour vous rendre à l’écran précédent et appuyez sur OK pour lancer le processus de verification du disque. Français -2 Etape 4 (2) Fin du Processus d’Installation Une fois qu’un disque dur formaté en NTS est connecté au boîtier, un message de fin d’installation s’affiche. Vous pouvez commencer à enregistrer et You can start to record and take snapshot right away. Press OK to exit the wizard and start using Capture Box. The game screen then appears. Français -3 Wenn Sie die Capture Box das erste Mal einschalten, erscheint der Einrichtungsassistent. Folgende Schritte führen Sie durch die Erstkonfiguration. Denken Sie daran, zuvor eine Festplatte (intern oder extern) zu installieren und eine Verbindung zum Internet herzustellen. Bei der erstmaligen Initialisierung folgt nach kurzfristiger Anzeige eines schwarzen Bildschirms (circa 20 Sekunden) das AVerMedia-Logo. Die blinkende grüne Statusleuchte zeigt an, dass der Game Capture HD II startet. Bitte warten Sie, bis der Willkommensbildschirm erscheint. Schritt 1 Sprache einstellen Wenn die Willkommensseite erscheint, verwenden Sie zur Auswahl Ihrer bevorzugten Sprache ▲/▼. Drücken Sie zum Bestätigen OK. Schritt 2 A/V-Durchschleifen Es wird empfohlen, A/V-Durchschleifen auf Ein einzustellen. Deutsch -1 Deutsch Einrichtungsassistent Schritt 3 (1) Erinnerung Achten Sie darauf, dass eine NTFS-formatierte Festplatte angeschlossen oder im Gerät installiert ist. (Einzelheiten finden Sie in Kapitel 4.2) Prüfen Sie die Netzwerkverbindung. Drücken Sie zum Starten der Einrichtung OK. Wir empfehlen einen Router, der DHCP-IP-Netzwerke unterstützt. Beachten Sie zur manuellen Verbindungseinrichtung auch Kapitel 6.2. Schritt 3 (2) Netzwerkverbindungsfehler Falls Sie keine Verbindung zu einem gültigen Netzwerk hergestellt haben, wird eine kurze Meldung über eine fehlgeschlagene Netzwerkverbindung angezeigt. Drücken Sie zum Fortfahren OK. Rufen Sie mit die vorherige Seite auf. Schritt 4 Keine Festplatte erkannt Falls Sie noch kein Speichergerät installiert haben, holen Sie dies nach, bevor Sie mit der Einrichtung fortfahren. Drücken Sie dann zum Aufrufen des vorherigen Bildschirms , führen Sie mit OK eine Festplattenprüfung durch. Deutsch -2 Schritt 4 (2) Einrichtungsassistenten abschließ en Sobald eine NTFS-formatierte Festplatte verbunden ist, zeigt eine Benachrichtigung an, dass die Einrichtung abgeschlossen ist. Sie können nun direkt mit der Aufnahme und Erstellung von Schnappschüssen beginnen. Drücken Sie OK; dadurch verlassen Sie den Assistenten und können mit der Nutzung der Capture Box beginnen. Der Spielbildschirm erscheint. Deutsch -3 La prima volta che si accende l'unità Capture Box, viene visualizzata l'installazione guidata. Le seguenti procedure guidano l'utente attraverso la procedura di configurazione iniziale. Assicurarsi di installare un disco rigido (interno o esterno) e di connettersi previamente a Internet. Per la prima inizializzazione, una breve schermata nera (circa 20 secondi) è seguita dal logo AVerMedia. La spia di stato verde lampeggiante indica che Game Capture HD II è in fase di avvio. Attendere che appaia la schermata di benvenuto. Fase 1 Impostazione della lingua Quando appare la pagina di benvenuto, utilizzare ▲/▼ per selezionare la lingua preferita. Premere OK per confermare. Fase 2 Pass Through A/V. Si consiglia di portare Pass Through A/V su ON. Italiano-1 Italiano Installazione guidata Fase 3 (1) Promemoria Assicurarsi che un disco rigido con formattazione NTFS sia collegato o installato sul dispositivo (per i dettagli, consultare il Capitolo 4.2). Controllare la connessione di rete. Premere OK per avviare la configurazione. Si consiglia di utilizzare un router che supporti la rete IP DHCP. Inoltre, consultare il Capitolo 6.2 per la configurazione della connessione manuale. Fase 3 (2) Errore di connessione di rete Se non ci si è connessi ad una rete valida, viene visualizzato un breve risultato dell'errore di connessione di rete. Premere OK per continuare. Premere per tornare alla pagina precedente. Fase 4 Nessun disco rigido rilevato Se non si è ancora installato un dispositivo di archiviazione, installarlo prima di procedere con l'installazione. Quindi, premere per andare alla schermata precedente e premere OK per eseguire la procedura di verifica del disco. Italiano-2 Fase 4 (2) Termine dell'installazione guidata Una volta collegato un disco rigido con formattazione NTFS, viene visualizzato un avviso di impostazioni completate. È possibile avviare la registrazione e scattare immediatamente istantanee. Premere OK per uscire dalla procedura guidata e iniziare ad usare Capture Box. Viene quindi visualizzata la schermata del gioco. Italiano-3 La primera vez que encienda la unidad Capture Box, se mostrará el asistente de instalación. Los siguientes pasos le guiarán en el proceso de configuración inicial. Asegúrese de instalar una unidad de disco duro (interna o externa) y conectarla a Internet previamente. La primera vez que inicie la unidad, aparecerá una pantalla con fondo negro (aproximadamente durante 20 segundos) y, a continuación, se mostrará el logotipo de AVerMedia. La luz de estado verde parpadeante indica que Game Capture HD II se está iniciando. Espere hasta que aparezca la pantalla de bienvenida. Paso 1 Configuració n del idioma Cuando aparezca la página de bienvenida, utilice ▲/▼ para seleccionar el idioma que desee. Presione OK (Aceptar) para confirmar. Paso 2 Conector A/V Se recomienda que el conector A/V esté en posición ON (Encendido). Español-1 Español Asistente de instalació n Paso 3 (1) Recordatorio Asegúrese de que una unidad de disco duro con formato NTFS está conectada o instalada en el dispositivo. (Para obtener más información, consulte el Capítulo 4.2) Compruebe la conexión de la red. Presione OK (Aceptar) para iniciar la instalación. Se recomienda utilizar un enrutador que admita la red IP de DHCP. Consulte el Capítulo 6.2 para obtener información sobre la configuración de la conexión manual. Paso 3 (2) Error de conexió n de la red Si no se ha conectado a una red válida, se mostrará brevemente un mensaje de error de conexión de la red. Presione OK (Aceptar) para continuar. Presione para volver a la página anterior. Paso 4 No se ha detectado ninguna unidad de disco duro Si todavía no ha instalado ningún dispositivo de almacenamiento, hágalo antes de continuar con el proceso de instalación. A continuación presione para ir a la pantalla anterior y presione OK (Aceptar) para ejecutar el proceso de comprobación de disco. Español-2 Paso 4 (2) Finalizació n del asistente de instalació n Una vez conectada una unidad de disco duro con formato NTFS, se mostrará un aviso de instalación finalizada. Puede empezar a grabar y tomar instantáneas cuando desee. Presione OK (Aceptar) para salir del asistente y empezar a utilizar Capture Box. Se mostrará la pantalla de juegos. Español-3 Quando for a primeira vez que você ligar a unidade placa de captura, aparecerá o assistente de configuração. Os passos a seguir irão guiá-lo através do processo de configuração inicial. Certifique-se de instalar um disco rígido (interno ou externo) e para se conectar à internet com antecedência. Para a inicialização pela primeira vez, um curto período de tela preta (aproximad amente 20 segundos) é seguido pelo logotipo da AVerMedia. A luz de status verde piscando indica que a GAME CAPTURE HD II está iniciando. Por favor, aguarde até que a tela de boas vindas aparece. Passo 1 Configurando o Idioma Quando a página de boas-vindas abrir, use ▲ / ▼ para selecionar o idioma preferido. Pressione OK para confirmar. Passo 2 A/V Pass Thru. Sugere-se que o A / V Pass Thru esteja ligado. Português do Brasil -1 Português do Brasil Setup Wizard Passo 3 (1) Lembre - se Certifique-se de um disco rígido formatado com NTFS está ligado ou instalado no aparelho. (Para mais detalhes, consulte o Capítulo 4.2) Verifique a conexão de rede. Pressione OK para iniciar a instalação. Um roteador que suporta a rede IP DHCP é recomendado. Além disso, consulte Ch. 6.2 para a configuração da conexão Manual. Passo 3 (2) Falha de conexão de rede Se você não tiver conectado a uma rede válida, a uma curta resultado da conexão de rede não serão mostrados. Pressione OK para continuar. Pressione para voltar à página anterior. Passo 4 Nenhum disco rígido conectado Se você ainda não tiver instalado qualquer dispositivo de armazenamento, instale-o antes de continuar o processo de configuração. Em seguida, pressione para ir para a tela anterior e pressione OK para executar o processo de verificação de disco. Passo 4 (2) Finalizando a configuração Uma vez que um disco rígido formatado com NTFS estiver conectado, um aviso Configurações completa será mostrada. Você pode começar a gravar e tirar foto imediatamente. Pressione OK para sair do assistente e começar a usar a placa de captura. A tela do jogo, então aparece. Português do Brasil -2 Model No. C285 P/N 300AC285-D25 M a d e i n Ta i w a n