1
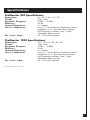
ProMonitor 800
ProMonitor 1000
™
™
Loudspeaker System
Owner’s Manual
Congratulations
Congratulations on your purchase of the Definitive
Technology ProMonitor Loudspeaker System.
This revolutionary loudspeaker utilizes state-of-the-art
components (cast basket homopolymer-coned
bass-midrange drivers, moving coil ferrofluid-cooled
pure aluminum dome high frequency radiators, uniphase
crossover networks, etc.), a non-resonant PolyStone™
cabinet and low diffraction construction in order to
achieve the most lifelike sound possible in your listening
room for many years to come.
Your ProMonitor is a unique speaker which may be
used by itself as a full-range system or as a satellite
with a Definitive ProSub to create a three-piece system.
This three-piece system can then be combined with
the ProCenter as a four-piece home theater system
and then with two additional ProMonitors to create
a complete Dolby Digital AC-3-ready ProCinema®
home theater system.
Please Inspect For Shipping Damage
Each loudspeaker leaves our plant in perfect condition. Any visible or concealed
damage most likely occurred in handling after it left our plant and should be
reported at once to your Definitive dealer or the shipping company which delivered your loudspeaker.
Connecting Your Loudspeakers
It is critical for proper performance that both speakers (left and right) be connected in proper phase. Note that one terminal on each speaker (the +) is colored red and
the other (the -) is colored black. Please make certain that you connect the red (+)
terminal on each speaker to the red (+) terminal of its channel on your amplifier or
receiver and the black (-) terminal to the black (-) terminal. It is essential that both
speakers be connected in the same way to the amplifier (in phase). If you experience
a great lack of bass, it is likely that one speaker is out of phase with the other.
Usually if distortion is heard when the speakers are being driven at
loud levels, it is caused by driving (turning up) the amplifier too loud and
not driving the speakers with more power than they can handle. Remember,
most amplifiers put out their full rated power well before the volume control
is turned all the way up! (Often, turning the dial half way up is actually full
power.) If your speakers distort when you play them loud, turn down the
amplifier or get a bigger one.
Using the ProMonitor
in Conjunction with a ProSub
When a pair of ProMonitors is used in conjunction with a ProSub, they may be
connected either directly to the left and right channels of your amplifier or
receiver, or to the left and right speaker level outputs on a ProSub (when the
ProSub is connected via the high-level speaker wire inputs to the left and right
channel speaker outputs on your receiver). Connecting the ProMonitor to a ProSub
(which includes a built-in high-pass crossover for the ProMonitors) will result in
greater dynamic range (the system can be played louder without over driving the
satellites) and is recommended for most installations especially when the system is
being used for home theater. Because this is the most common set-up, the following
instructions relate to wiring the ProMonitors to a ProSub.
Wiring 2 ProMonitors and 1 ProSub
for Stereo (2-Channel) Use
1. First, wire the red (+) terminal of the left channel speaker wire output of your
receiver or amplifier to the red (+) terminal of the left channel speaker wire (high
level) input of your ProSub.
2. Next, wire the black (-) terminal of the left channel speaker wire output of your
receiver or amplifier to the black (-) terminal of the left channel speaker wire
(high level) input of the ProSub.
3. Repeat Steps 1 and 2 for the right channel.
4. Wire the red (+) terminal of the left ProMonitor to the left channel red (+)
speaker wire (high level) out on the back of the ProSub.
2
5. Wire the black (-) terminal of the left ProMonitor to the left channel black (-)
speaker wire (high level) out on the back of the ProSub.
6. Repeat steps 4 & 5 for the right ProMonitor.
7. Set the low frequency filter control on the back of the ProSub to the setting described
in a ProSub Owner’s Manual. Please note that the exact frequency will depend on
many factors including specific positions of the speakers in the room, so you might
experiment with a slightly higher or lower setting to achieve ideal blending between
the sub and the satellites for your particular set-up. Listen to a wide variety of music
to determine the correct setting for this in your system.
8. Set the subwoofer level control to the setting described in a ProSub Owner’s Manual.
Please note that the exact level depends on many factors including your room size,
position of the speakers, etc. as well as your personal listening taste, so you might
experiment with the subwoofer level while listening to a wide variety of music until
you achieve the ideal setting for your system.
9. If your receiver allows you to choose whether or not the main speakers are to receive
a full-range signal, choose full range (or “Large” Left and Right Main Speakers).
Using ProMonitors with a ProSub
in Home Theater
There are many different variations of the basic Dolby ProLogic and Dolby
Digital AC-3 formats and features, as well as a multiplicity of ways in which the
speakers can be hooked up to these systems. We will discuss the simplest and most
effective hookups and adjustments. If you have a particular question regarding your
set-up, please call us.
For Dolby ProLogic Systems
Follow Steps 1-9 provided earlier. The subwoofer will receive its low frequency
signal through the full-range speaker level outputs. If, however, your system has
a separate subwoofer RCA low level output which has a remote control level
adjustment, you might also want to hook this up using an RCA-to-RCA low level
cable to the LFE/subwoofer-in low level input (the lower RCA input) on a ProSub.
Then use your remote control sub level adjustment to fine-tune the low frequency
level for different types of program material. (You might find you want a higher
level for some music or for movies).
For Dolby Digital AC-3 5.1 Systems
Please note that Dolby Digital decoders have bass management systems (systems
which direct the bass to the various channels) which vary from unit to unit.
Simplest Hook-Up
The simplest way to hook up and use your ProCinema System with Dolby Digital
5.1 Systems is to hook a ProMonitor to each of the front (main) left, front (main) right,
rear (surround) left and rear (surround) right channels and a ProCenter to the front
center channel outputs of your receiver or power amplifier making sure that the red (+)
terminal of each speaker is hooked up to the red (+) terminal of its proper channel output and the black (-) terminal is connected to the black (-) terminal of its proper channel output. Then connect the LFE RCA output on your receiver or decoder to the LFE
input on your Definitive ProSub subwoofer.
3
Set the bass management settings of your receiver or decoder (see your receiver or decoder manual) for “Small” left front (main), right front (main), center
front, left rear (surround) and right rear (surround) to “Small,” and Subwoofer to
“Yes.” If your receiver/decoder allows you to choose the crossover frequency of
or between your subwoofer and satellites, choose the highest possible (up to 100
Hz for the ProMonitor 1000 and 120 Hz for the ProMonitor 800) Turn the low
pass filter control on the ProSub all the way up in a clockwise direction. Adjust
the relative levels of all five channels and the subwoofer according to the
channel balancing procedure outlined in your receiver or decoder manual.
THIS IS VERY CRITICAL.
Optional Hook-Up One
Hook up the left and right front ProMonitors and ProSub as described in Steps
1 thru 9 earlier. Wire your center channel to the center channel out on your
receiver (or center channel amplifier) and your left and right rear surround speakers to the rear channel outputs on your receiver or rear channel amplifier, taking
care that all speakers are in phase, i.e. red (+) to red (+) and black (-) to black (-).
Set the bass management system of your receiver or decoder for “Large” Left and
Right Main Speakers, “Small” Center and Rear Surround Speakers and “No”
Subwoofer. All the bass information including the .1 channel LFE signal will be
directed to the main left and right channels and into the subwoofer giving you all
the benefits of Dolby Digital AC-3 5.1.
Optional Hook-Up Two
An option on this hook-up (if your decoder will allow you to select “Large”
Left and Right Main Speakers and “Yes” Subwoofer), in addition to the hook-up
as described above, is to use an RCA-to-RCA low level cable to connect the LFE
sub-out on your receiver to the low-level LFE/sub-in (the lower RCA input) on a
ProSub. Tell your bass management system that you have “Large” Left and Right
Main Speakers, “Small” Center and Surrounds, and “Yes” Subwoofer. You will
then be able to raise the LFE .1 channel level being fed to the subwoofer by either
using the LFE/sub remote level adjustment on your decoder (if it has one) or the
LFE .1 channel level control on your Dolby Digital channel balancing procedure.
This set-up has the advantage of allowing you to set the low frequency level on
the a ProSub for smooth balance with music while also allowing you to “juice
up the bass” for movies with the controls on your decoder. It should also sound
somewhat better.
Variation on the Optional Hook-up
One variation on the optional hook-up is to hook up and adjust the system as
described under “Optional Hook-Up” except select “Small” Left and Right Main
Speakers and “Yes” Subwoofer on the bass management system (along with
“Small” Center and “Small” Rear Surrounds). The advantage of this over the
Optional Hook-Up will be somewhat greater dynamic range (i.e., you can play
the system louder). However, depending on the specific characteristics of the
crossovers designed into your bass management system, the transition and
blending between the satellites and subwoofer may not be quite as smooth and
continuous as the Optional Hook-Up, or with the basic hook-up detailed above
in Steps 1-9. However, if you wish to play the system louder, you can experiment
with this variation. In addition, this variation is also one which can be used if
your decoder bass management system does not allow a “Large” Left and
Right Main Speakers and “Yes” Subwoofer setting.
4
We encourage you to experiment with the various settings on your subwoofer,
settings on your decoder, and hook-up options as described until you find the best
combination for you.
Using ProMonitors with a ProSub for Rear
Channel Surround Use
Since Dolby Digital is capable of delivering a full-range bass signal to the
rear channels, some more elaborate systems will include an additional ProSub
for the rear channels. In this case, simply wire the ProMonitors to the ProSub as
described in 1 thru 8 earlier, except wire to the rear surround outputs. Set the bass
management system for “Large” Rear Speakers.
Using ProMonitors with Separate Left and
Right Channel ProSubs
You may also use a separate ProSub for the Front Left and Front Right channels.
Simply follow all previous instructions except use only the left channel inputs and
outputs on the left ProSub and the right channel inputs and outputs on the right
ProSub.
Speaker Break-In
Your ProMonitors should sound good right out of the box; however, an
extended break-in period of 20-40 hours or more of playing is required to reach
full performance capability. Break-in allows the suspensions to work in and results
in fuller bass, a more open “blossoming” midrange and smoother high frequency
reproduction.
Positioning the ProMonitor in Your Room
It is important that some simple set-up recommendations be followed in order
to assure optimum performance in your room. Please remember that although these
recommendations are usually valid, all rooms and listening set-ups are somewhat
unique, so do not be afraid to experiment with the speakers. Remember, whatever
sounds best to you is correct.
The ProMonitor Loudspeakers may be placed on a stand or shelf or mounted on
the wall or ceiling. Placement close to the wall will increase the bass output while
placement further from the rear wall will decrease the bass output.
When used as fronts, the speakers should usually be placed 6 to 8 feet apart
and kept away from the side walls and corners. A good rule of thumb is to place
the speakers separated by one half the length of the wall they are positioned along,
and each speaker one quarter the length of the wall behind them away from the side
wall. When used as rear speakers, take care never to locate the speakers forward of
the listeners.
Speakers may be angled in towards the listening position or left parallel with
the rear wall according to your personal listening taste. Normally, angling the
speakers in so that they point directly at the listeners will result in more detail
and greater clarity.
5
Wall Mounting the ProMonitors
The ProMonitors can be wall-mounted using the optional ProMount 80, which
should be available from your Definitive dealer. Your ProMonitor also has a built-in
keyhole wall-mount on the back. Use toggle bolts or other similar anchored fasteners to fasten the ProMount 80 to the wall or to hold the keyhole mount. Do not use
an unanchored screw in the wall.
Please note that if you wall-mount the speaker, there is an optional plug included
which covers the hole in the bottom of the speaker which you will see after you
remove the built-in stand.
Technical Assistance
It is our pleasure to offer assistance if you have any questions regarding your
ProMonitor or its set-up. Please contact your nearest Definitive Technology
dealer or contact us directly at 410-363-7148.
Service
Service and warranty work on your Definitive loudspeakers will normally be performed by your local Definitive Technology dealer. If, however, you wish to return
the speaker to us, please contact us first, describing the problem and requesting
authorization as well as the locations of the nearest factory service center. Please
note that the address given in this booklet is the address of our offices
only. Under no circumstances should loudspeakers be shipped to our
offices or returned without contacting us first and obtaining return
authorization.
Definitive Technology Offices
11433 Cronridge Drive, Suite K
Owings Mills, Maryland 21117
phone: 410-363-7148
Visit us at www.definitivetech.com
and learn about all our exciting products.
6
Specifications
ProMonitor 800 Specifications
Dimensions:
Weight:
Frequency Response:
Efficiency:
Nominal Impedance:
Driver Complement:
Rec. Assoc. Ampl.:
83/8" H x 5" D x 143/4" W
4 lbs. each
57 Hz – 30 kHz
89 db
4 – 8 ohms
One 41/2" cast basket bass/midrange driver
coupled to a 41/2" pressure-driven planar
low-frequency radiator. One 1" pure
aluminum dome tweeter.
10 – 150 watts/channel
ProMonitor 1000 Specifications
Dimensions:
Weight:
Frequency Response:
Efficiency:
Nominal Impedance:
Driver Complement:
Rec. Assoc. Ampl.:
107/8" W x 61/2" W x 61/4" H
7 lbs. each
47 Hz – 30 kHz
90 db
4 – 8 ohms
One 51/4" cast basket bass/midrange driver
coupled to a 51/4" pressure-driven planar
low-frequency radiator. One 1" pure
aluminum dome tweeter.
10 – 200 watts/channel
Specifications subject to change
7
Limited Warranty:
5-Years for Drivers and Cabinets,
3-Years for Electronic Components
Definitive Technology warrants to the original retail purchaser only that this Definitive
Technology Loudspeaker Product (the “Product”) will be free from defects in materials and
workmanship for a period of five (5) years covering the drivers and cabinets, and three (3) years
for the electronic components from the date of the original purchase from a Definitive
Technology Authorized Dealer. However, this warranty will automatically terminate prior to
the expiration of five (5) years for the drivers and cabinets and three (3) years for the electronic
components if the original retail purchaser sells or otherwise transfers the Product to any other
party. The original retail purchaser shall hereinafter be referred to as “you.” Defective Products
must be shipped, together with proof of date of purchase, prepaid insured to the Authorized
Dealer from whom you purchased the Product, or to the nearest factory service center.
Product(s) must be shipped in the original shipping container or its equivalent; in any case the
risk of loss or damage in transit is to be borne by you. If, upon examination at the Factory or a
Definitive Technology Authorized Dealer, it is determined that the unit was defective in
materials or workmanship at any time during this Warranty period, Definitive Technology or
the Definitive Technology Authorized Dealer will, at its option, repair or replace this Product at
no additional charge, except as set forth below. All replaced parts and Product(s) become the
property of Definitive Technology. Product(s) replaced or repaired under this Warranty will be
returned to you, within a reasonable time, freight collect.
This Warranty does not include service or parts to repair damage caused by accident, misuse, abuse, negligence, inadequate packing or shipping procedures, commercial use, voltage in
excess of the rated maximum of the unit, cosmetic appearance of cabinetry not directly
attributable to defects in materials or workmanship, or service, or repair or modification of the
Product which has not been authorized by Definitive Technology. Definitive Technology makes
no Warranty with respect to its Products purchased from dealers or outlets other than
Definitive Technology Authorized Dealers. This Warranty is in lieu of all other expressed
Warranties. If this Product is defective in material or workmanship as warranted above, your
sole remedy shall be repair or replacement as provided above. In no event will Definitive
Technology be liable to you for any incidental or consequential damages arising out of the use
or inability to use the Product, even if Definitive Technology or a Definitive Technology
Authorized Dealer has been advised of the possibility of such damages, or for any claim by any
other party. Some states do not allow the exclusion or limitation of consequential damages, so
the above limitation may not apply to you.
All implied warranties on the Product are limited to the duration of this expressed
Warranty. Some states do not allow limitation on how long an implied Warranty lasts, so the
above limitations may not apply to you. This Warranty gives you specific legal rights, and you
also may have other rights which vary from state to state.
This product complies with the essential requirements of
EMC directives 89/336/EEC and 73/23/EEC (inclusive of
93/68/EEC) and carries the CE mark accordingly.
CTAT012909