1
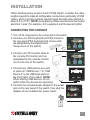
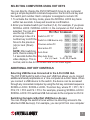
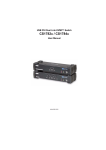
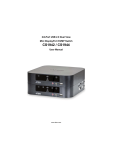
DVI
KVM
Switch
user
manual
Model 156066
INT-156066-UM-0808-01
introduction
Thank you for purchasing the INTELLINET NETWORK SOLUTIONS™
DVI KVM Switch, Model 156066.
This convenient device lets you control up to four USB computers with
one PS/2 keyboard, PS/2 mouse and DVI-I video monitor. Easy switching
can be done using hot keys or logically designed push-button selectors,
and setup is relatively simple since no software needs to be installed.
Follow the steps in this user manual and you’ll also soon be enjoying
the benefits of these additional features:
• Flash upgradeable for firmware compatibility
• Built-in microphone and speaker jacks for multimedia environments
• LEDs for easy monitoring of selected computers
• AutoScan mode for monitoring computers
• Supports digital video resolutions of up to 1600 x 1200
• Supports Windows 98/2000/Me/XP/Vista, Free BSD, Linux
• Lifetime Warranty
FCC Warning
This equipment has been tested and found to comply with the limits for
a Class B digital device, pursuant to Part 15 of the FCC Rules. These
limits are designed to provide reasonable protection against harmful
interference in a residential installation. This equipment generates uses
and can radiate radio frequency energy and, if not installed and used in
accordance with the instructions, may cause harmful interference to
radio communications. However, there is no guarantee that interference
will not occur in a particular installation. If this equipment does cause
harmful interference to radio or television reception, which can be
determined by turning the equipment off and on, the user is encouraged
to try to correct the interference by one or more of the following measures:
• Reorient or relocate the receiving antenna.
• Increase the separation between the equipment and receiver.
• Connect the equipment to an outlet on a circuit different from the
receiver’s.
• Consult the dealer or an experienced radio/TV technician for help.
3
Operation is also subject to these two conditions: 1) This device may not
cause harmful interference; and 2) This device must accept any interference
received, including interference that may cause undesired operation.
Shielded interface cables must be used to comply with emission limits, and
changes or modifications not expressly approved by the party responsible
for compliance could void your authority to operate the equipment.
CE Mark Warning
This is a Class B product. In a domestic environment, this product may
cause radio interference, in which case the user may be required to
take adequate measures.
connectors & indicators
Front Panel
Port
LEDs (4)
Headphone
jack
Microphone
jack
USB input
ports (2)
LEDs (1–4) — Red indicates the corresponding connected computer is
on; green indicates it’s currently selected by the switch.
rear Panel
Console
audio
jack
4
Console
PS/2 keyboard
& mouse ports
Console DVI-I port
Computer
audio/mic
ports (4 pr.)
Computer DVI-I ports (4)
Computer
USB keyboard
& mouse ports (4)
Power jack
Flash
upgrade
port
installation
When deciding where to place the DVI KVM Switch, consider the cable
lengths required to make all configuration connections, particularly of USB
cables, which typically maintain optimal signal strength when limited to
about 4.5 m (15 ft.). NOTE: Avoid placing cables near devices that output
electrical “noise” (for example, A/C equipment and fluorescent lights).
Connecting the console
1.Turn off all computers to be connected to the switch.
2.Connect your PS/2 keyboard and PS/2 mouse to
the rear-panel PS/2 keyboard and mouse ports
(as designated by the keyboard and
mouse icons on the switch).
3.Connect your DVI monitor cable to
the console DVI monitor port (as
designated by the console monitor
icon on the rear of the switch).
4.Connect any USB devices you wish
to share as “USB Device 1” or “USB
Device 2” to the USB input ports on
the front panel of the switch. Note:
When sharing USB devices, do not
switch while the devices are operating.
5.Connect the included power adapter to the power
jack on the rear panel of the switch, then plug the
adapter into an available AC power outlet.
5
Connecting optional components
1.If desired, connect your speakers (3.5mm rear panel jack) and headphones/microphone (3.5mm
front-panel jacks) as designated
by the speaker, headphone and
microphone symbols. Note: The
switch’s front speaker and audio port
or the rear panel console speaker and
audio port can be used, but using both
front and rear speaker / audio ports
simultaneously will result in loss of audio.
Connecting the computers
1.Using a USB cable, connect the
computer’s USB port to the USB
port on the switch. Using a DVI
cable, connect one male end to the
DVI port on the computer and the other
male end to the PC1 DVI port on the switch.
OPTIONAL: Using audio cable, connect the speaker
jack on the computer to the audio jack on the switch,
and do the same for the microphone. NOTE: Audio and microphone
support is designed on a one-computer-at-a-time basis.
2.Repeat Step 1 for all computers in the configuration.
3. Turn on the computers.
operation
Once all cables have been connected and all computers have been
turned on, the switch emulates mouse and keyboard signals on each
port, allowing your computer to boot normally.
Accessing and controlling the computer(s) can now be done by using
either the front-panel port buttons (selectors) or keyboard hot keys.
6
Selecting computers using hot keys
You can directly change the DVI KVM Switch focus to any computer
using a simple keyboard command sequence: the Scroll Lock key and
the switch port number. Each computer is assigned a numeric ID.
1.To activate the Hot Key mode, press the SCROLL LOCK key twice
within two seconds. A beep will sound as confirmation.
2.Enter your desired switch port number (1-4). For example, if you press
SCROLL LOCK / SCROLL LOCK / 2, the computer on Port 2 will be
selected. You can also
Hot Key Commands
use the Up or Down
Switch
to
PC
“X”
arrow keys in lieu of a
number key to shift the Switch to USB device only
focus to the previous
Previous active PC
(Up) or next (Down)
port.
Next active PC
NOTE: After switching Auto Scan
ports, there’s a delay of
Any key
1-2 seconds before the Stop Auto Scan
X
=
1,
2,
3
or
4
Y
=
F1,
F2, F3 or F4
video displays. This is
normal, and is due to the refresh rate of the video signal.
additional hot key controls
Selecting USB Devices Connected to the 2-Port USB Hub
The DVI KVM Switch’s built-in two-port USB hub allows you to connect
additional shared peripherals on a “one-computer-at-a-time” basis. When
you connect a USB device to the switch, the device can be accessed
through any connected computer by using the hot key command sequence
SCROLL LOCK / SCROLL LOCK / Function Key, where F1 = PC1, F2 =
PC2, F3 = PC3 and F4 = PC4. For example, pressing SCROLL LOCK /
SCROLL LOCK / F2 switches USB hub access to the computer on Port 2.
Switching Computers But Not USB Device Access
You can change the switch’s focus without re-directing access to the
attached USB device(s). For example, you can print from one computer
7
and change the switch’s focus to another computer at the same time.
Just use the SCROLL LOCK / SCROLL LOCK / X sequence as explained
above to switch ports: The selected USB device will remain as it was.
NOTE: Not all USB storage devices are suitable for such dynamic portswitching applications.
AutoScan Mode
The AutoScan feature allows you to monitor the activity of the connected
computers at regular 10-second intervals so that you can monitor the
computers’ activity without actually switching to them. NOTE: This time
interval cannot be changed.
The AutoScan hot key command sequence is SCROLL LOCK / SCROLL
LOCK / 0 (zero). NOTE: The interval between pressing these keys should
be no more than a half second. Once scanning begins, it continues until
you press any key to exit the AutoScan mode.
Flash Upgrade
With Internet flash-upgrade capability, you can update your DVI KVM
Switch with the latest firmware upgrades via a parallel connection. To do
so, you would need:
• A separate computer (not connected to the DVI KVM Switch) running
Windows 95, 98, ME, 2000, XP or Vista.
• An available parallel port on the computer.
• A custom flash cable (mini USB B-type to USB A-type).
8
specifications
General
• Computer connections: 4
• Selection buttons with 2-color LEDs: 4
• Port selection: hot key / push button
• Resolution: 1600 x 1200
• Flash upgrade port: mini USB A-type
Computer Ports
• VGA: 4 sets, DVI-I 29-pin female
• Keyboard & mouse: 4 sets, USB 1.1 B-type
• Speaker: 4 sets, 3.5 mm audio jack
• Microphone: 4 sets, 3.5 mm audio jack
Console Ports
• Monitor: 1 set, DVI-I 29-pin female
• Keyboard: 1 set, PS/2 mini-DIN 6
• Mouse: 1 set, PS/2 mini-DIN 6
• Device: 2 sets, USB 1.1 A-type
• Speaker: 1 set, 3.5 mm audio jack
• Microphone: 1 set, 3.5 mm audio jack
• Headset: 1 set, 3.5 mm audio jack
Environmental
• Power supply: 9 V DC, 600 mA adapter
• Dimensions (W x D x H): 235 x 133 x 44.5 mm (9.25 x 5.23 x 1.75 in.)
• Weight: 1 kg (2.2 lbs.)
• Enclosure: metal, with plastic front panel
• Operating temperature: 0 – 40˚C (32 – 104˚F)
• Storage temperature: -20 – 60˚C (-4 – 140˚F)
• Humidity: 0 – 80% RH, non-condensing
Package Contents
• 4-Port DVI KVM Switch
• DC power adapter
• Four 3-in-1 spider cables (1.8 m x 6 ft.)
• User manual
9
NOTES
10
INTELLINET NETWORK SOLUTIONS™ offers a complete line
of active and passive networking products.
Ask your local computer dealer for more information or visit
www.intellinet-network.com.
Copyright © INTELLINET NETWORK SOLUTIONS
All products mentioned are trademarks or registered trademarks of their respective owners.