1
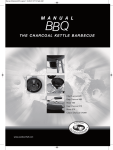
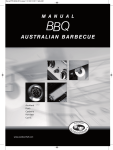
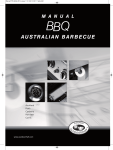
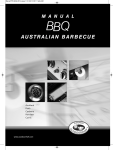
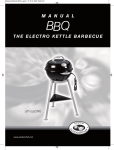
Manual RTG Grills 2013_Layout 1 31.08.12 09:11 Seite UG1
M A N U A L
BBQ
AUSTRALIAN BARBECUE
Auckland
Perth
Canberra
Hamilton
Cairns
www.outdoorchef.com
Manual RTG Grills 2013_Layout 1 31.08.12 09:11 Seite UG2
Item #: 14.112.35
Item #: 14.112.36
Item #: 14.112.18
Item #: 18.211.34
Item #: 14.421.12
Item #: 14.421.13
Item #: 14.421.10
Item #: 14.112.23
Item #: 14.491.10
Item #: 18.211.52
Item #: 14.491.16
Item #: 14.112.24
Item #: 14.211.16
Item #: 14.331.05
Item #: 14.421.16
c/o DKB Household Switzerland AG, Eggbühlstrasse 28 / Postfach, 8052 Zürich
www.outdoorchef.com • [email protected]
Manual RTG Grills 2013_Layout 1 31.08.12 09:11 Seite 9
Safety Instructions
AUSTRALIAN BARBECUE
User Manual
IMPORTANT:
0063 2013
Typ:
X00X00--/00/00/00000
please make a note Article No.:
of your Australian
barbecue's
serial
30/37 mbar
number of the back
page of this manual straight away. Depending on
the model the serial number can be found on the
data sticker which is either on the frame or on the
base plate. The serial number is important to
ensure queries, spare parts orders and warranty
claims can be dealt with easily.
PIN 0063 BP 3505
DKB Household Switzerland AG
Eggbühlstrasse 28 8052 Zürich
Serial No.:
Kettle: large burner Qn=8.50kW(612g/h) small burner Qn=1.20kW(90g/h) Total rate ∑Qn=9.70kW(702g/h)
Side burner: Qn=3.80kW(276g/h)
IT CH PT CZ RO
Butane / Propane
Cat.I
GB FR BE ES
G30 / G31
Cat.I3 B/P
DK NO NL SE LU
3+
FI PL
=28-30/37mbar
=30mbar
Made in China
Keep the user guide in a safe place. It contains important information about safety, operation and maintenance of your gas barbecue.
For Your Safety
Every person using this barbecue must understand
and exactly follow the ignition instructions. Do not let
children operate the barbecue. The user is responsible for the correct assembly, handling and maintenance of the barbecue. Disregard can cause accidents.
Keep flammable liquids, materials and spare gas bottles away from the barbecue. Do not store or use the
barbecue or a spare gas bottle indoors.
Before starting up your «Australian Gas Barbecue»,
please read, understand and observe the following
instructions!
The barbecue is for outdoor use only. Keep it at a safe
distance of at least 1 meter from flammable objects
(i.e. walls, projecting roofs, fences etc).
Gas Bottles
Gas bottles may have a maximum weight of 7.5 kg
when placed on the base plate. Position the bottle on
the designated spot, see assembly instructions.
Please make sure that the gas regulator and all other
connections are tightened. Conduct a «Leak Test»
before starting up the barbecue and after every
time you exchange a the gas bottle. Gas bottles
must not be exposed to temperatures higher than
50°C, or stored in closed areas or in basements. Follow the safety instructions mentioned on the gas
bottle.
Operate the barbecue following the «Lighting and
Operating Instructions».
• The gas barbecue is for outdoor use only.
• Keep the barbecue a safe distance of at least 1
meter away from flammable objects (i.e. walls, projecting roofs, fences etc).
• Never leave the barbecue unattended while in use.
• WARNING: Some parts become very hot during
use, keep the barbecue out of the reach of children.
• Keep flammable material a safe distance away
from the barbecue.
• Do not push appliances, which are fitted with castors, over uneven surfaces or ledges!
• Ensure that the fat drip pan is always completely
closed and locked into place while in use.
• Do not move the barbecue when in use.
• Wear protective gloves or a long sleeved barbecue
safety mitt when operating the barbecue.
• After use turn off the gas supply on the barbecue
first and then turn off the gas cylinder.
• When changing the gas cylinder, ensure that the
gas supply is turned off both at the barbecue and
at the gas cylinder and make sure there are no
combustible materials nearby.
• After every gas cylinder replacement, carry out the
leak test to ensure that there are no leakages.
• If you think there is a gas leak, turn off the barbecue and gas cylinder immediately and have the fittings checked by your local gas distributor.
• If the tube is damaged or worn out, replace the
tube and regulator immediately. The tube must be
kept straight at all times. Ensure that it does not
bend or twist. Remember to turn off the gas supply
on the barbecue and gas cylinder before removing
the tube.
• OUTDOORCHEF recommends that the gas tube
and gas regulator be changed every two to three
years.
• Ensure that the air vents in the barbecue lid and
base remain clear at all times.
• Important: Ensure that the gas tube is routed away
from the hot barbecue surfaces and that it is not
bent or twisted.
• Do not change or alter any of the barbecue components or settings.
• IMPORTANT: Ensure the correct regulator is used:
28 mbar butane (not supplied but available
locally), 37 mbar fixed (not adjustable) propane
(not supplied but available locally).
• If the barbecue is not working at full capacity or if
there is suspicion of a blocked gas supply, consult
your local gas distributer.
• Only use the barbecue on firm, safe, non-flammable surfaces.
• Avoid temperature shocks on appliances with
granite surfaces.
11
Manual RTG Grills 2013_Layout 1 31.08.12 09:11 Seite 10
•
•
•
Never store the barbecue near flammable liquids
or flammable materials.
The gas cylinder must be stored in an open, well
ventilated area out of the reach of children.
Never store a gas cylinder (full or empty) indoors.
Leak Test
WARNING: Do not permit sources of ignition in the
area while performing the leak test - this includes
smoking! Never test for gas leaks with a lit match or
open flame! Always check for leaks outdoors.
1. Check that the control knob is turned to the «OFF»
position.
2. Open the gas supply on the gas tank by turning
the knob counter clockwise.
3. Check all gas connections by brushing a 50/50
solution of liquid soap and water onto all connections.
4. Look for bubbles in the soap solution which indicates that there is a leak. IMPORTANT! The barbecue must not be used until the leak is eliminated. Close the gas bottle. The leak(s) must be
stopped by tightening the connections if possible,
or by replacing the defective parts as recommended by the barbecue distributor.
5. Repeat steps 1 and 2.
6. Consult your local gas distributor if leaks persist.
NOTE: Conduct a leak test each time the gas supply is
connected or replaced and every year when using your
barbecue for the first time in the barbecue season.
2. Open the lid. Never light the burner with a closed lid.
3. Open the gas supply on the gas tank by turning
the knob counter clockwise.
4. Turn the left gas knob to the «ON» position.
5. Push the ignition knob repeatedly until the gas is
lit.
6. If the gas does not ignite after 3 seconds, turn gas
control knob to «OFF». Wait for 2 minutes for the
unburnt gas to evaporate. Then repeat steps 3, 4
and 5.
7. If the barbecue does not start up after 3 attempts,
please refer to chapter «Troubleshooting» to find
the problem and correct it.
8. Always start lighting the burners from left to right.
Igniting the side burners
Auckland, Hamilton, Perth
1. Ensure that the gas regulator and all other connections are tightened. Please refer to the instructions
given under «Leak Test».
2. Remove the granite cover from the shelf on the
left and place it under the right one, into the
holder provided. IMPORTANT! Never ignite the
barbecue when the granite cover is closed.
3. Open the gas supply on the gas tank by turning
the knob counter clockwise.
4. Set the small gas regulator marked «SIDE
BURNER» to «ON».
5. Push the ignition button repeatedly until the gas is lit.
6. If the gas does not ignite after 3 seconds, turn gas
control knob to «OFF». Wait for 2 minutes for the
unburnt gas to evaporate. Then repeat steps 3, 4
and 5.
7. If the barbecue does not start up after 3 attempts,
please see refer to chapter «Troubleshooting» to
find the problem and correct it.
Before the first use
1. Wash all parts that come in contact with food.
2. Conduct a leak test on all gas piping parts as
described under chapter «Leak Test».
3. Fire the «Australian Barbecue» for approximately
20–25 minutes on the highest level.
4. Ensure that the fat drip pan is locked into position.
This also applies to normal grilling.
Lighting Instructions
NOTE: It is not always necessary to use all burners at
once. This depends on the type of cooking and the
amount desired.
Igniting the main burners
Auckland, Cairns, Canberra, Hamilton, Perth
1. Ensure that the gas regulator and all other connections are tightened. Please refer to the instructions
given under «Leak Test».
12
Igniting the infrared burner
(power burner)
Caution: Never use the infrared burner when the
cover is closed.
Auckland
1. Ensure that all connections between the gas tube,
the gas pressure regulator, and the gas tank are
tightened. (Follow the instructions given in chapter «checking tightness».)
2. Open the barbecue cover. IMPORTANT! Never
ignite the barbecue when the granite cover is
closed.
3. Turn on the gas flow on the gas tank.
4. Set the right gas regulator marked «POWER
BURNER» to «ON».
5. Press the ignition button and hold it down until the
sparks ignite the gas.
6. If the gas does not ignite within 3 seconds, set the
gas regulator to «OFF». Wait for 2 minutes for the
Manual RTG Grills 2013_Layout 1 31.08.12 09:11 Seite 11
unburnt gas to evaporate.
Then repeat steps 3 to 5.
7. If the barbecue does not ignite after 3 attempts,
refer to the «Troubleshooting» section to find the
problem and correct it.
oughly while still warm. Leave to set for 15–30 minutes. Spray soiled surfaces again, vigorously rinse with
water, and then dry.
Maintenance
Caution: Never use the infrared burners with the
cover closed and never place the grill surface on top
of the infrared burner. This could discolour the cover
or deform the grill surface.
Regular care of your barbecue will help keep it operating properly. Inspect the gas supply parts at least
twice a year and always after long periods of storage.
Spider webs and other insect nests can cause blockages of the gas flow from the valve(s) to the burner(s).
Remove all obstructions. Occasionally inspect and
tighten all hardware as this may become loose if the
barbecue is moved over rough or hard ground.
After a period of non-use you should perform a leak
test before using the barbecue. If you are in any
doubt, contact your local gas supplier or the who sold
the barbecue. Before storing your barbecue for the
winter, lightly grease all exposed metal parts to prevent corrosion. After winter storage and AT LEAST
once during the season check the tubes for cracking,
chafing, twisting or any other damage. A damaged
tube MUST be replaced immediately as described in
this manual.
For an extension of the lifespan of your barbecue, we
recommend covering the barbecue with an OUTDOORCHEF barbecue cover after it has cooled off
completely, to protect it from the elements. To avoid
the accumulation of humidity, remove the barbecue
cover after rain.
After Cooking
Troubleshooting
1. Switch the gas knob to the «OFF» position.
2. Close the gas supply on the gas bottle (clockwise).
3. Leave barbecue to cool down completely before
cleaning it.
4. Put the barbecue cover on the barbecue.
Gas does not light
Grilling with Cast-Iron Burners
1. Pre-heat the barbecue for about 15 minutes with
the lid closed before cooking food.
2. Then place the food on the barbecue and turn the
gas knob to reduce the heat to the required temperature.
3. To save gas, we recommend switching off the
unused burners when cooking only a small amount
of food.
Grilling with Infrared Burners
(power burners)
Heat the barbecue at full power («HI») for approx. 5
minutes with the lid open. Put the food you want to
grill onto the cooking grid. The infrared burner is best
suited for quick grilling.
• Check if the gas bottle valve is open.
• Make sure there is enough gas in the bottle
• Make sure that a spark is jumping from the electrode to the burner.
Cleaning
No spark
Very little cleaning is required between uses as most
of the fat either evaporates or drains into the drip pan.
Use a brass bristle barbecue brush (not a steel brush)
to clean the cooking grid and the grill surface.
Remove the cooking grid and the grill surface and
scrape any built up greasy deposits from the cast-iron
burner. The infrared burner never needs to be cleaned
because it burns off the grease immediately while
cooking. Carefully pull out the drip pan to clean with
the OUTDOORCHEF BBQ Cleaner. IMPORTANT: You
can also use oven cleaner. After rinsing off the cleaner,
dry the barbecue completely by heating the unit on
the highest temperature.
OUTDOORCHEF BBQ Cleaner – Use:
For the sake of your hands, wear gloves and even
glasses. Spray the barbecue or the accessories thor-
• Make sure the cables at the electronic ignition box
and the electrode are plugged in and fit tightly at
both connection points.
• Ensure that the battery is inserted properly (barbecues with electric ignition).
• Insert a new battery in the electric ignition type AA,
(LR02) 1,5 Volt. Minus pole (-) inserted first (barbecues with electric ignition).
If you cannot start the barbecue after above mentioned
troubleshooting, please contact your local dealer.
Warranty
1. Warranty
On purchasing this OUTDOORCHEF product from an
authorised dealer, you have not only acquired the product but also a manufacturer warranty of up to three
13
Manual RTG Grills 2013_Layout 1 31.08.12 09:11 Seite 12
years from DKB Household Switzerland AG (‘DKB’)
subject to the following conditions.
This warranty shall solely apply to the rectification of
defects that arise during proper use and are demonstrably attributable to material and/or manufacturing
defects.
2. Procedure
On receipt of the product, immediately check that it is
fully functional and for any defects. If the product purchased has an unexpected defect, please follow the
procedure below (bring-in warranty):
• Please contact the dealer* from whom you purchased the product within 30 days of discovering the
defect with the product/component, receipt, serial
number and product number**
• Explain the situation by presenting the defective
product/component or a photograph
• Once the dealer or DKB has inspected the defect,
the free warranty shall enter into force pursuant to
number 3 (subject to the reservation that the transport and dispatch costs shall be borne by the private original purchaser).
3. Scope of the warranty
The DKB manufacturer warranty is valid from the date
of purchase for the private original purchaser. Warranty claims may only be made upon presentation of
the original sales receipt.
The warranty services shall be provided at DKB’s
discretion by means of maintenance, the replacement
of defective parts, the replacement of the product or,
if the operation of the appliance is not impaired,
through a price reduction. There shall be no entitlement to rescind from the sales agreement due to warranty claims. There shall be no entitlement to a replacement product during repairs.
The provision of warranty services shall neither extend
nor re-start the warranty period. Replaced parts shall
become the property of DKB. If the product is replaced, the warranty period shall re-start.
The warranty periods are:
• 3 years on the enamelled kettle (base and lid)
against corrosion
• 3 years on the enamelled cooking grid against corrosion or burning through
• 3 years on all stainless steel parts against corrosion
or burning through
• 2 years on all other manufacturing/material defects
• Any claim for damage to the enamel finish must be
submitted within 30 days of purchase to be
covered by the warranty. The warranty is only valid
for new appliances which have not yet been used.
4. Exclusions
No defect, meaning no material or manufacturing
defect as defined by these conditions, shall be dee14
med to exist and no warranty claims shall be validated
under the following circumstances:
• Normal wear and tear arising from the intended
use.
• Defects and/or damage caused by the incorrect,
improper or unintended use or improper installation, assembly and repair attempts by non-authorised persons.
• Defects and/or damage caused by non-compliance with the user guide or the operating/maintenance instructions (e.g. damage caused by the
improper assembly or cleaning of the enamelled
surfaces of the funnel or cooking grid, non-conductance of the leak test etc.).
• Unevenness, colour variations in the enamelling
and minor imperfections (e.g. production-related
support points on the lower edge of the lid or suspension points).
• Discolouration and damage to the product (e.g.
finish colour) as a result of the weather (incl. hail),
the improper (non-weather-protected) storage of
the product or the improper use of chemicals.
• The formation of corrosion and rust as a result of
the weather or the improper use of chemicals.
• Defects that do not notably impair the intended
use or the benefits of the product.
• In general for wear-and-tear parts such as the cooking grid, funnel, burners, thermometer, ignition,
electrodes, ignition cable, gas tube, gas pressure
regulator, battery, heating element, reflector, aluminium protective foil and charcoal grid.
• Defects and/or damage resulting from modifications, using the product for purposes other than
those intended or wilful damage.
• Defects and/or damage resulting from improper
maintenance or repairs.
• Defects and/or damage resulting from the nonconductance of routine maintenance.
• Defects and/or damage that occurred in the original transit.
• Defects and/or damage resulting from force
majeure.
• Defects and/or damage resulting from wear and
tear during professional use (in hotels or restaurants, at events etc.).
DKB excludes all customer claims not expressly listed
in these warranty conditions provided it is not subject
to a mandatory legal obligation or liability. This shall
also, and in particular, apply to claims for compensation due to non-fulfilment, the reimbursement of consequential damages arising from the defect, lost profit and transport damage not reported to the dealer
within 30 days of the product being received.
OUTDOORCHEF operates a policy of continuous product development and improvement. As such we
reserve the right to alter the products without prior
notice.
Manual RTG Grills 2013_Layout 1 31.08.12 09:11 Seite 13
The registered trademark OUTDOORCHEF is represented by the following company:
DKB Household Switzerland AG
Eggbühlstrasse 28
Postfach
8052 Zürich – Switzerland
www.dkbrands.com
* A list of dealers can be found on our website at www.outdoorchef.com.
OUTDOORCHEF operates a policy of continuous
product development and improvement. As such we
reserve the right to alter product design and / or specification without prior notice
THIS USER GUIDE SHOULD BE KEPT AND STORED
IN A PLACE THAT IS ACCESSIBLE AT ALL TIMES.
Manual Australian Gas Barbecues 2013_article number 19.120.09
** The serial number and product number can be found on your barbecue’s
data sticker (see the product user manual)
Technical Information
Canberra / Perth
CE
Gas
Heat Input max
Gas consumption
Injector 28-30/37mbar
Injector (50mbar)
0063
Propane/Butane 30/31
12.80 KW
932 g/h
0.86 mm / marking: BE
0.74 mm / marking: AE
Auckland
CE
Gas
Heat Input max
Gas consumption
Injector 28-30/37mbar
Injector (50mbar)
0063
Propane/Butane 30/31
9.60 KW
699 g/h
0.86 mm / marking: BE
0.74 mm / marking: AE
Infrared Brenner (available on the Auckland model)
CE
Gas
Heat Input max
Gas consumption
Injector 28-30/37mbar
Injector (50mbar)
0063
Propane/Butane 30/31
6.20 KW
451 g/h
1.16 mm / marking: BP
1.00 mm / marking: AP
Side burner (available on the Auckland, Perth and Hamilton)
CE
Gas
Heat Input max
Gas consumption
Injector 28-30/37mbar
Injector (50mbar)
0063
Propane/Butane 30/31
3.80 KW
276 g/h
0.98 mm / marking: BK
0.85 mm / marking: AG
Cairns / Hamilton
CE
Gas
Heat Input max
Gas consumption
Injector 28-30/37mbar
Injector (50mbar)
0063
Propane/Butane 30/31
7.50 KW
546 g/h
0.78 mm / marking: BD
0.68 mm / marking: AD
Categories
I3B/P (30 mbar)
I3B/P (50 mbar)
I3+ (28/30/37 mbar)
DK, FI, NL, NO, SE, LU, PL
CH, AT, DE
BE, CH, ES, FR, GB, IT, PT, CZ, RO
Electronic ignition
Auckland, Cairns, Canberra, Hamilton, Perth
Use type AA 1,5 Volt batteries for the electronic ignition.
Information for temperature indicator:
A tolerance of +/– 10 % is possible.
15
Manual RTG Grills 2013_Layout 1 31.08.12 09:12 Seite 80
Note:
82
Manual RTG Grills 2013_Layout 1 31.08.12 09:12 Seite 81
Note:
83
Manual RTG Grills 2013_Layout 1 31.08.12 09:12 Seite 82
Distribution:
OUTDOORCHEF
c/o DKB Household Switzerland AG
Eggbühlstrasse 28
CH-8052 Zürich
E-Mail: [email protected]
Internet: www.outdoorchef.ch
(ART.No:19.120.09) RTG-MANUAL/8.2012
Serial number