1
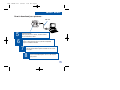
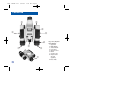
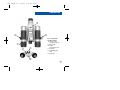
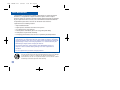
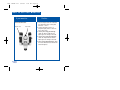
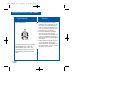
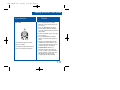
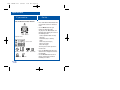
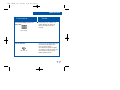
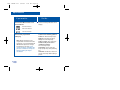
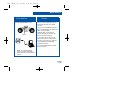
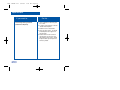
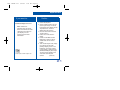
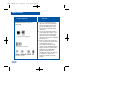
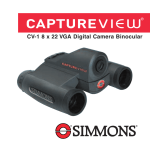
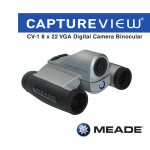
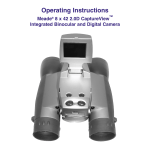
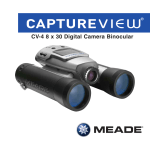
8x22
Meade 3.07
5/10/07
9:21 AM
Page 1
®
8 x 22 VGA Digital Camera Binocular
8x22
Meade 3.07
5/10/07
9:21 AM
Page 2
8x22
Meade 3.07
5/10/07
9:21 AM
Page 3
Contents
Quick Start ................................................................................ 4
Features.................................................................................... 6
Introduction .............................................................................. 8
How to Use Your Binocular ...................................................... 9
Adjust Eye Relief .................................................................. 9
Adjust the Barrels .................................................................. 9
Focus the Binocular ..............................................................10
How to Use Your Camera ........................................................11
Insert Batteries ......................................................................11
Select an Operation ..............................................................11
Taking Pictures and Video ........................................................12
Take a Still Picture ................................................................12
Capture Video........................................................................13
Operations ................................................................................14
Use the Mode and Shutter Button ........................................14
Use the Camera Mode ..........................................................15
Change the Camera Resolution ............................................15
Use the Video Mode ..............................................................16
Erase (Delete) Pictures or Video ..........................................16
Find Out How Many Pictures You’ve Taken ..........................17
Use the Self-Timer ................................................................17
Find Out How Much Power is Left in the Battery ..................18
Find Out Why CaptureView is Beeping ................................19
Download Pictures ................................................................19
Install Image Editing Software ..............................................20
Download Images to Your PC ..............................................21
Capture Live (Webcam) Video/Take a Snapshot ................22
Other Software and System Requirements ..............................24
Maintenance and Troubleshooting............................................25
Specifications............................................................................26
3
8x22
Meade 3.07
5/10/07
9:21 AM
Page 4
Quick Start
How to start taking pictures...
1
Install 2 AAA batteries
(not included).
2
Turn on camera.
Press and hold down
Mode for 3 seconds.
3
Point at something
interesting.
4
4
Press the Shutter.
You’ve taken a picture!
8x22
Meade 3.07
5/10/07
9:21 AM
Page 5
Quick Start
How to download your pictures...
USB Cable
5
6
Install the drivers.
Before you plug in the camera, install the drivers
from the included CD-Rom.
Plug in.
Connect CaptureView to your PC (not Mac compatible)
using the included USB cable.
7
Install Ulead Photo Explorer.
Click on Ulead Photo Explorer and follow the on-screen
instructions.
8
Enjoy your photos.
Open Ulead Photo Explorer to view, edit and print
your pictures.
5
8x22
Meade 3.07
5/10/07
9:21 AM
Page 6
Features
f
f
e
g
g
c
d
i
j
b
b
h
6
Fig. 1 & 2 (Top and
Front Views):
1. Eyepieces
2. Mode Button
3. Shutter Button
4. LCD Panel
5. Objective Lens
6. Barrel
7. Camera Lens
8. Diopter Scale
(on right
eyepiece)
9. Focus knob
8x22
Meade 3.07
5/10/07
9:21 AM
Page 7
Features
1@
1#
1#
1)
i
1!
j
Fig. 3 & 4 (Bottom
and Rear Views):
8. Diopter Scale
(on right eyepiece)
9. Focus knob
10. Battery
Compartment Lid
11. USB Port
12. Tripod Mounting
hole
13. Strap clips
1)
7
8x22
Meade 3.07
5/10/07
9:21 AM
Page 8
Introduction
Congratulations on purchasing the Meade® CaptureView® 8 x 22mm full-featured
binocular. It is integrated with a digital camera that requires no film to capture
pictures or video. This manual is designed to quickly guide you through the operation
of your CaptureView. For best results, take a few moments to become familiar with
the operation of your device, and save the manual for future reference.
CaptureView has the following features:
•
•
•
•
•
•
Fully functional binocular.
Capture pictures and video, and view them on your PC.
Use CaptureView as an 8x webcam
Transfer pictures and video to your PC for easy printing and editing.
E-mail pictures to your friends and family.
LCD display panel indicates status for ease in performing desired operations.
Important Note: Images in the camera will be lost if the batteries are depleted or
if the batteries are removed for more than 180 seconds (3 minutes). Accordingly,
change the batteries when they run low. Images will be maintained in memory for
approximately 3 minutes when changing batteries. It is recommended that you
download your images before changing the batteries.
To conserve battery life, remove batteries after downloading images to a
computer. There is continual battery drainage even when CaptureView is
turned off.
Be sure CaptureView is off before changing batteries.
WARNING! Never use a Meade binocular to look at the Sun! Looking at or
near the Sun will cause instant and irreversible damage to your eye. Eye damage
is often painless, so there is no warning to the observer that damage has
occurred until it is too late. Do not point the binocular at or near the Sun. Children
should always have adult supervision while observing.
8
8x22
Meade 3.07
5/10/07
9:21 AM
Page 9
How to Use Your Binocular
If you want to...
Do this...
Adjust Eye Relief
If you wear eyeglasses, fold down the
rubber eyecups and hold the
eyepieces up against your glasses.
Fold down
Adjust the Barrels
You need to adjust the barrels, as the
distance between your eyes is usually
different than the distance between
another person’s eyes.
Barrel
1. Hold CaptureView up to your eyes in
the normal viewing position. Use
both hands to hold each barrel firmly.
2. Pull the barrels apart or push the
barrels together until you see a
single circular field with both of
your eyes.
Barrel
9
8x22
Meade 3.07
5/10/07
9:21 AM
Page 10
How to Use Your Binocular
If you want to...
Focus the Binocular
Diopter scale
10
Focus knob
Do this...
1. Set the Diopter Scale on underside
of CaptureView at its center point
between “+” and “-.”
2. Choose an object (such as a
telephone pole) that is at least 50
feet (15m.) away.
3. Looking with only your left eye,
rotate the Focus Knob until the
object you are viewing is focused.
4. Looking with only your right eye,
rotate the Diopter Scale until the
object you are viewing is focused.
5. Now, looking with both eyes, rotate
the Focus Knob to focus on both far
and near objects.
8x22
Meade 3.07
5/10/07
9:21 AM
Page 11
How to Use Your Camera
CaptureView performs best under good lighting conditions. Take some time to
practice capturing still pictures and video. Depending on the available light and your
distance from the object, captured images may not appear as bright or centered as
viewed through the binoculars. CaptureView has a fixed focus (you cannot focus the
camera manually) and takes focused pictures even if the image in the binoculars is
out-of-focus.
If you want to...
Insert Batteries
Battery
compartment
Select an Operation
Do this...
1. Make sure camera is off before
changing batteries.
2. Push the battery compartment lid
forward and lift to open.
3. Insert 2 AAA 1.5v (user-supplied)
batteries into the compartment,
noting the correct polarity as
illustrated inside the compartment.
• Press and hold the Mode button
for 3 to 5 seconds to turn on
the camera.
• Press the Mode button to display and
cycle through the operation icons on
the LCD.
• Press the Shutter button when the
desired icon is displayed to select
an operation.
Mode Shutter
11
8x22
Meade 3.07
5/10/07
9:21 AM
Page 12
Taking Pictures and Video
If you want to...
Take a Still Picture
Mode Shutter
The amount of pictures you can take:
High Resolution (640 x 480): 80
Low Resolution (320 x 240): 300
The number of photos you may take
will decrease if you have also taken
video.
12
Do this...
1. Press and hold down the Mode
button for 3 to 5 seconds to turn on
the camera. The camera will beep
and the camera icon displays on the
LCD. The counter, battery life and
resolution icons also display.
2. Point the binoculars at an object.
You may use the focus knob to
focus the image in the binocular, but
keep in mind that the camera has a
fixed focus and is not affected by the
focus knob.
3. Hold CaptureView steady and press
the Shutter button. Note that the
counter advances. For example, if
the counter reads “016,” this means
that this is your sixteenth
8x22
Meade 3.07
5/10/07
9:21 AM
Page 13
Taking Pictures and Video
If you want to...
Take Video
Mode Shutter
The maximum length of a video:
Up to 30 seconds.
The length of video will decrease if
you have also taken still pictures.
Do this...
1. Press and hold down the Mode
button for 3 to 5 seconds to turn on
the camera.
2. Press the Mode button four times
and the Video mode icon displays.
Press the shutter button to select the
video mode.
3. Point the binoculars at the scene you
wish to capture.
4. Press and hold down the Shutter
button. The camera now captures a
movie.
5 Release the Shutter button to stop
recording the movie. Note that the
number of pictures advances by one
(a movie counts as one object).
Important Note: Video has a
maximum length of 30 seconds in
the low-res mode. If you exceed the
memory capacity, a "Full" message
will appear on the display and
CaptureView will stop recording.
13
8x22
Meade 3.07
5/10/07
9:21 AM
Page 14
Operations
If you want to...
Do this...
Use the Mode and Shutter Buttons
Mode Shutter
Operation Icons
Icons on LCD
Self-Timer Lo Res.
Erase Last
14
Video
Erase All
Frame Rate
• Press and hold the Mode button for 3
to 5 seconds to turn the camera on
or off.
• Use the Mode button to cycle
through the operation icons.
As you press the Mode button, the
operation icons display on-screen in
the following order:
Camera (default mode, no icon)
Self-timer
Resolution (High is default,)
Video
Frame rate (50 or 60 fps)
Erase Last Image
Erase All Images
The next press returns you to the
Camera icon.
• Press the Shutter button when the
desired icon is displayed to activate
the operation.
• Use the Shutter button to take a
picture, and to begin or end the
recording of a movie.
8x22
Meade 3.07
5/10/07
9:21 AM
Page 15
Operations
If you want to...
Use the Camera Mode
Change the Camera Resolution
Lo Res.
H: High Resolution mode (640 x 480).
L: Low Resolution mode (320 x 240).
(The default setting is High Resolution;
no icon.)
Do this...
• The camera mode is the default
setting. Press the Shutter button to
take a still picture.
• High resolution is the default setting.
1. The first time you turn on the
camera, it defaults to High
Resolution. This is the
default setting.
2. To change the resolution, keep
pressing the Mode button until the
Low Resolution (LO) icon displays.
Then press the Shutter button to
select Low Resolution. Low
resolution allows you to capture
more images with your camera.
15
8x22
Meade 3.07
5/10/07
9:21 AM
Page 16
Operations
If you want to...
Use the Video Mode
Video Icon
Note: The length of a video
depends on how much memory you
have available. Audio recording is
not available with this camera.
Erase (delete) Pictures or Video
Erase Last Icon
Erase All Icon
16
Do this...
• Keep pressing the Mode button until
the Video icon displays. Press the
shutter button to select the video
mode.
Then press and hold down the
Shutter button to begin recording a
movie. Release the Shutter button
again to stop recording.
• Erase Last. Keep pressing the
Mode button until the Erase Last
Image icon flashes. Press the
Shutter button twice to erase the last
captured image or movie.
• Erase All. Keep pressing the Mode
button until the Erase All Image
flashing icon displays and then press
the Shutter button. The number of
pictures will flash between 0 and the
current number on the camera.
Press and hold the shutter button to
erase the images, You will hear a
long beep followed by a loud beep.
8x22
Meade 3.07
5/10/07
9:21 AM
Page 17
Operations
If you want to...
Find Out How Many Pictures You
Have Taken
Do this...
• Check out the LCD Counter. The
counter displays the number of
pictures or videos taken, from
0 to 999.
Counter Display
Use the Self-timer
Self-Timer Icon
• Keep pressing the Mode button until
the Self-timer icon displays and
press the Shutter button.
The camera then pauses for about
10 seconds: It sends out 5 slow and
then several fast warning beeps
before taking the picture.
17
8x22
Meade 3.07
5/10/07
9:21 AM
Page 18
Operations
If you want to...
Find Out How Much Power is Left
in the Batteries
Do this...
• Check the battery indicators on the
display.
Full Power Indicator
Half Power Indicator
Low Power Indicator
Find Out Why CaptureView
is Beeping
Note: When the battery is low,
CaptureView sends out three short
high beeps. It is recommended you
download the pictures or change
the batteries at this time. If you
change the battery, remember that
you have 3 minutes to change the
batteries before your images
are deleted.
18
Listen for the following patterns:
Power on: Two short high beeps.
Wake up: One long high beep.
Sleep: One short high beep.
Takes a picture: One short beep.
Failed to take picture due to
insufficient memory:
Five short high beeps
Low battery: Three short high
beeps (beeps only when powering
on).
Self-timer: Sends out 5 slow, then
several fast beeps before taking a
picture.
8x22
Meade 3.07
5/10/07
9:21 AM
Page 19
Operations
If you want to...
Connect CaptureView to a PC
Do this...
Drivers must be installed on your PC
and can be found on the included
CD-Rom.
1) Insert the CD-ROM and install the
driver for downloading your pictures or
video. (See next page.)
USB Port
Important Note: Do not plug the
camera into your PC until after the
drivers have been installed.
2) Just attach one end of the USB
cable to the camera's USB port and
the other end to your PC's USB port.
Your computer will automatically
recognize the device.
Use Ulead Photo Explorer to import
Photos to your PC.
Note: See “Troubleshooting,”
page 25, for more information
about connecting CaptureView to
your PC.
19
8x22
Meade 3.07
5/10/07
9:21 AM
Page 20
Operations
If you want to...
Install Image Editing Software
(Ulead Photo Explorer)
20
Do this...
1. Insert supplied CD Rom into your
PC’s drive.
2. A splash screen displays. Click on
“Ulead Photo Explorer.”
3. Follow on-screen instructions.
4. After you click “Finish,” the Ulead
Photo Explorer icon appears on
your desktop.
5. Double-click the icon to launch
the program. You can now view,
edit and print your images. Photo
Explorer allows you to import the
camera's photos.
8x22
Meade 3.07
5/10/07
9:21 AM
Page 21
Operations
If you want to...
Download Images to Your PC...
Note: Perform this
procedure after you install
drivers and connect the USB
cable from your camera to
your display. See the
previous page for more
information.
Photo Express Twain Acquire icon.
Do this...
1. Start Photo Explorer.
2. Select a folder to which you can
transfer your images. In the left
hand column, first double click on
"My Documents," and then
double-click "My Pictures."
3. Go to the File menu and select
"Twain Acquire."
4. Choose the "Select Source"
option.
5. Choose "Dual Mode Camera
8008 VGA+" from the Source
window and click the Select
button.
6. Click "Twain Acquire" icon (image
of a scanner with an arrow
pointing a display screen in the
button bar). The image capture
screen displays. Photos that you
download will display on the right.
The large screen displays a live
"web-cam" feed from your
(Continued...)
camera.
21
8x22
Meade 3.07
5/10/07
9:21 AM
Page 22
Operations
If you want to...
Download Pictures to your PC..
(continued)
Photo Express Download icon.
Photo Express Arrow icons.
Photo Express icons.
22
Do this...
7. Click on the download icon, the
right-most icon on the bottom of
the image capture screen. Your
images will download as small
images on the righthand side of
the screen.
8. Use the Up and Down Arrows to
scroll through your images. Click
Erase All to erase all the photos
from the camera. Scroll through
the images and select an individual
photo to erase.
9. Click the Transfer All or Transfer
icons to transfer your photos to the
Photo Explorer program.
Select Exit to leave the image
capture screen. Thumbnails of the
images you have transferred will
display in the Photo Explorer
program. Double-click on a
thumbnail to enlarge the image to
its original size. Use Photo
Explorer's settings to edit your
images.
8x22
Meade 3.07
5/10/07
9:21 AM
Page 23
Operations
If you want to...
To Capture Video Using the Live
Feed (Webcam) Feature :
Photo Express Snapshot icon.
To Take a Snapshot Using the
Live Feed (Webcam) Feature:
With a live image displaying on the
image capture screen, click the
"Snapshot" icon. The image
immediately display as the top
small image on the right side of the
screen. You may now use the
transfer icon to transfer the image
to Explorer or use the Erase icon
to delete the image.
Do this...
With a live image displaying on the
image capture screen, click the
video capture (movie reel) icon.
You will be prompted to name the
video and to select a folder in
which to save the video.
Click start to begin capturing the
video and click the video capture
icon again to end the capture.
You may also enter a time limit for
video capturing. Enter the time
limit and click start. CaptureView
will capture video for the length of
time that you set.
To download a video you have
previously captured with the
CaptureView, click transfer—you
will be prompted to name and
select a location for your video.
Photo Express icons.
23
8x22
Meade 3.07
5/10/07
9:21 AM
Page 24
Operations
Software
The included CD ROM contains Ulead Photo Explorer that will assist you in editing
your images, allow you to transfer images to email, and provide you with other useful
functions. Ulead Photo Explorer is a proprietary program and may not be sold,
licensed or distributed without the express written consent of Ulead. For more
information about Ulead Photo Explorer, visit the Ulead website at www.ulead.com/pex.
Click on the "Product Documents" link in the Download section of their homepage to find
a link for the Photo Explorer manual.
System Requirements
•
•
•
•
•
•
•
Windows 98SE/Win Me/Win 2000/Win XP
366MHz (or equivalent) processor or faster.
128MB of RAM free over System requirements
Video (VGA) card with 16MB of RAM minimum, High Color display.
4x CD-ROM drive.
USB port (1.1).
600MB of free hard drive space.
If you have questions regarding your PC system specifications, please contact your
PC manufacturer.
24
8x22
Meade 3.07
5/10/07
9:21 AM
Page 25
Maintenance
Care of your CaptureView
1. Never immerse CaptureView in liquid. Remove dust or stains with a soft cloth
dampened with water or neutral detergent. Keep in a dry, cool dust-free
environment or a container when it is not being used.
Do not spray liquid cleaners directly onto LCD. Using only gentle pressure, wipe
the LCD with a slightly dampened cleaning cloth.
2. Important Note: Images in the camera will be lost if the batteries are depleted or
if the batteries are removed for more than 3 minutes. Accordingly, change the
batteries when they run low. Images will be maintained in memory for
approximately 3 minutes when changing batteries.
To conserve battery life, remove batteries after downloading images to a
computer. There is continual battery drainage even when CaptureView is
turned off.
Be sure CaptureView is off before changing batteries.
3. Avoid dropping CaptureView. Do not disassemble CaptureView.
Troubleshooting
It is very important to use the following connection and disconnection
procedures to download pictures.
1. Only connect CaptureView to your PC when the PC is on and Windows has
completed loading.
2. Your CaptureView camera and PC must be connected before importing photos.
3. Avoid physically connecting, disconnecting and reconnecting the camera during a
download session. Instead, disconnect the camera using Windows software:
Right-click the USB on-screen icon and select disconnect (or connect to
reconnect).
4. Always disconnect CaptureView before shutting down the PC.
25
8x22
Meade 3.07
5/10/07
9:21 AM
Page 26
Specifications
Binocular power
Binocular objective lens diameter
Binocular optical design
Binocular close focus
Field of view (diagonal)
Binocular field of view
Image capture resolution
Maximum length of movie
Camera aperture
Optimum camera range
Memory
Storage capacity at each resolution
Operating system requirements
Operating environment
Interface type
Display
Weight
Product dimensions
Batteries (user supplied)
Accessories (included)
26
8X
22mm
Folding roof prism
16 ft.
7.0°
242 ft. at 1000 yds.
640 x 480, 320 x 240
Up to 29 seconds
f/4.0; fixed lens
32 ft. to infinity
8MB SDRAM
640 x 480: 80 images
320 x 240: 300 images
Windows 98SE/2000/Me/XP
(not Mac compatible)
41° to 104° F (5° to 40° C). 20%-85%
relative humidity, non-condensing
USB
Icon LCD
9.7 oz. (276g)
4.75" W x 1.4" H x 4.25" D
Two x AAA 1.5V alkaline
USB cable, instructions, neck strap,
cleaning cloth, carry case, CD ROM with
image editing software
8x22
Meade 3.07
5/10/07
9:21 AM
Page 27
BINOCULAR/DIGITAL CAMERA LIMITED WARRANTY
Every Meade binocular/digital camera is warranted by Meade Instruments (“Meade”) to be free of defects in
materials and workmanship for a period of ONE YEAR from the date of original purchase in the U.S.A. and
Canada. At its option, Meade will repair or replace the product, or part thereof, found upon inspection by Meade
to be defective, provided the defective part or product is returned to Meade, as explained below. This warranty
applies to the original purchaser only and is non-transferable. Meade products purchased outside North America
are not included in this warranty, but are covered under separate warranties issued by Meade International
Distributors.
RGA Number Required: Prior to the return of any product or part, a Return Goods Authorization (RGA) number
must be obtained from Meade by writing to the address below, or by calling (800) 626-3233. Each returned part
or product must include a written statement detailing the nature of the claimed defect, as well as the owner’s
name, address, and phone number.
This warranty is not valid in cases where the product has been abused or mishandled, where unauthorized
repairs have been attempted or performed, or where depreciation of the product is due to normal wear-and tear.
Meade specifically disclaims special, indirect, or consequential damages or lost profit, which may result from a
breach of this warranty. Any implied warranties which cannot be disclaimed are hereby limited to a term of one
year from the date of original retail purchase.
This warranty gives you specific rights. You may have other rights which vary from state to state. Meade reserves
the right to change product specifications or to discontinue productions without prior notice. This
warranty supersedes all previous Meade binocular warranties.
Any return made in the U.S.A. under this limited warranty must follow this procedure:
Packaging:
If possible, ship the product in its original packaging. Please be sure to wrap the package securely and use
filament strapping tape on the outside of the package. Send only the product to be repaired. Please do not send
accessory items, such as dust caps, carrying case, etc.
What to Include with Your Product:
• A short note explaining the reasons you are sending the product in for repair.
•
Your daytime phone number.
•
The RGA Number
• An address for returning your product to you. (No PO boxes, please).
• A check or money order in the amount of $10 to cover shipping and handling fees.
Shipping:
We recommend that you ship your product to us by a traceable parcel service. We also recommend that you
insure your shipment against loss. Many carriers automatically insure packages up to a certain nominal amount,
typically $100. Please check to see if the insurance provided by the carrier is adequate to cover the replacement
value of your product. If you live in the United states, your product should be sent, freight prepaid, to:
Meade Instruments,
Attn: Binocular/Digital Repair
6001 Oak Canyon
Irvine, CA 92618
® The name “Meade,” and the Meade logo, are trademarks registered with the U.S. Patent Office and in principal
countries throughout the world. All rights reserved. Specifications subject to change without notice.
© 2007 Meade Instruments
27
8x22
Meade 3.07
5/10/07
9:21 AM
Page 28
03/07
(800) 626-3233
www.meade.com