1
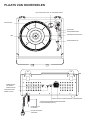
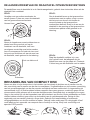
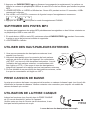
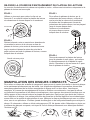
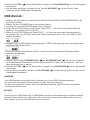
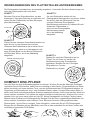
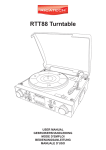
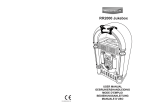
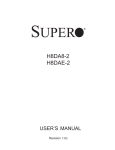
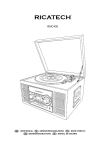
Re-attaching the turntable drive belt
The turntable drive belt is factory fitted - use these instructions only if the turntable fails to revolve ….
STEP 1
Use a screwdriver to remove the black
iron C-clipand lift the turntable off the
phonograph mechanism.
lron binder
STEP 2
Retrieve the dropped black rubberband
and replace it around the column on the
bottom of the turntable, then pull it out
gently without overstretching and book
the band around the small column point
at the edge of the turntable, as shown
in the diagram.
Small column point
STEP 3
To fix the turntable back onto the phonograph
mechanism, make sure the column point is
positioned over the correct place on the
phonograph mechanism, while placing the
axis of the turntable in the hole on the
phonograph mechanism, asshown in the
diagram.
STEP 4
Gently turn the turntable until a ‘plop’-sound
is heard, which indicates the repositioning of
the rubber band. Replace the C-clip to
secure the turntable.
Rubber band
Compact disc care
To remove a disc from its storage case, press down on the centre of the case and lift the disc out,
holding it carefully by the edges. Fingerprints and dust should be carefully wiped off the disc’s
recorded surface with a soft cloth. Unlike conventional vinyl or Shellac records, compact discs have
no grooves to collect dust and microscopic debris, so a gentle wipe with a soft clean cloth should
remove most particles. Wipe in a straight line from the inside to the outside of the disc. Small dust
particles and light stains will have absolutely no effect on sound reproduction quality. Clean the disc
periodically with a soft, lint-free, dry cloth. Never use detergents or abrasive cleaners to clean the
disc. If necessary, use a CD cleaning kit. Never affix labels to the surface of compact discs or write on
them, except very gently with specialist CD-R Pens.