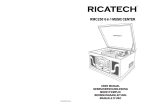
1
RTT88 Turntable
USER MANUAL
GEBRUIKERSHANDLEIDING
MODE D’EMPLOI
BEDIENUNGSANLEITUNG
MANUALE D’USO
English
WARNING :
TO PREVENT FIRE OR SHOCK HAZARD, DO NOT EXPOSE THIS
APPLIANCE TO RAIN OR MOISTURE. DO NOT REMOVE COVER.
PILOT LAMPS SOLDERED IN PLACE. NO USER SERVICEABLE
PARTS INSIDE. REFER SERVICING TO QUALIFIED SERVICE
PERSONNEL.
CAUTION
RISK OF ELECTRIC SHOCK
DO NOT OPEN
The lighting flash with arrowhead symbol, within an
equilateral triangle, is intended to alert user to the presence of uninsulated
“dangerous voltage” within the
product’s enclosure that may
be of sufficient magnitude to
constitute risk of electric
shock to persons.
CAUTION: TO REDUCE THE RISK OF
ELECTRIC SHOCK, DO NOT REMOVE
COVER (OR BACK). NO USER SERVICEABLE PARTS INSIDE. REFER
SERVICING TO QUALIFIED SERVICE
PERSONNEL.
The exclamation point within
an equilateral triangle is intended to alert user to the
presence of important
operating and maintenance
(servicing) instruction in the
literature accompanying
the appliance.
“Ventilation not being impeded.”
“Do not exposed to dripping or splashing and that no objects filled with liquids, such
as vases, shall be placed on the apparatus.”
Specification
FREQUENCY
USB Port 2.0
POWER SOURCE
ANTENNA
POWER CONSUMPTION
SPEAKER SIZE
SPEAKER OHM
SPEAKER WATT
POWER OUTPUT
: FM 88 -108 MHz
AM 530 - 1600 KHz
: Full Speed 512MB - 4GB (Support FAT16, FAT32)
: AC230V/50Hz
: External antenna for FM
Built-in ferrite bar for AM
: 15W
: 2” x 3” Dynamic type x 2
: 4 ohm
: 3-5W
: 1.2W x 2
* DESIGN AND SPECIFICATIONS SUBJECT TO CHANGE WITHOUT NOTICE.
IMPORTANT SAFEGUARDS FOR AUDIO PRODUCTS
PLEASE READ CAREFULLY THE FOLLOWING IMPORTANT SAFEGUARDS THAT ARE
APPLICABLE TO YOUR EQUIPMENT.
1. Read Instructions - All the safety and operating instructions should be read before
the appliance is operated.
2. Retain Instructions - The safety and operating instructions should be retained for
future reference.
3. Heed Warnings - All warnings on the appliance and in the operating instructions
should be adhered to.
4. Follow Instructions - All operating and use instructions should be followed.
5. Water and Moisture - The appliance should not be used near water-for example, near
a bathtub,washbowl,kitchen sink,laundry tub, in a wet basement, or near a
swim ming pool and the like.
6. Carts and Stands - The appliance should be used only with a cart or stand that is
recommended by the manufacturer.
6A.An appliance and cart combination should be moved with care. Quick stops,
excessive force, and uneven surfaces may cause the appliance and cart
combination to overturn.
7. Wall or Ceiling Mounting - The appliance should be mounted to a wall or ceiling
only as recommended by the manufacturer.
8. Ventilation - The appliance should be situated so that its location or position does
not interfere with-its proper ventilation.For example, the appliance should not be
situated on a bed, sofa, rug,or similar surface that may block the ventilation
openings or, placed in a built-in installation, such as a bookcase or cabinet that may
impede the flow of air through the ventilation openings.
9. Heat - The appliance should be situated away from heat sources such as
radiators,heat registers, stoves,or other appliances (including amplifiers) that
produce heat.
10.Power Sources - The appliance should be connected to a power supply only of the
type described in the operating instructions or as marked on the appliance.
11.Grounding or Polarization - Precautions should be taken so that the grounding or
polarization means of an appliance is not impeded.
12.Power - Cord Protection - Power-supply cords should be routed so that they are not
likely to be walked on or pinched by items placed upon or against them, paying
particular attention to cords at plugs, and the point where they exit from the
appliance.
13.Cleaning - The appliance should be cleaned only as recommended by the
manufacturer.
14.Antenna -This product is designed for use with the antenna attached and should not
be connected to any other external antennas.
15.Non-use Periods - The power cord of the appliance should be unplugged from the
outlet when left unused for a long period of time.
16.Object and Liquid Entry - Care should be taken so objects do not fall and liquids
are not spilled into the enclosure through openings
17.Damage Requiring Service - The appliance should be serviced by qualified service
personnel when:
A. The power-supply cord of the plug has been damaged;or
B. Objects have fallen, or liquid has been spilled into the appliance;or
C. The appliance has been exposed to rain, or
D. The appliance does not appear to operate normally or exhibits a marked change inperformance, or
E. The appliance has been dropped, or the enclosure damaged.
18.Servicing - The user should not attempt to service the appliance beyond that described
in the operating instructions. All other servicing should be referred to qualified service personnel.
LOCATION OF PARTS
FM.ST INDICATOR
PROGRAM PLAY/
LCD DISPLAY
STOP/ PAUSE
POWER
REPEAT
SD/USB
INDICATOR
FORWARD SKIP
BACKWARD SKIP REC/ERASE
X-BASS
ON/OFF
SPEAKER
VOLUME
ON/OFF
KNOB
RADIO\
SD/USB\
PHONO
SWITCH
SENSOR
EARPHONE JACK
SD CARD
USB PORT
DIAL SCALE
AM\FM\
FM.ST
SWITCH
TUNING KNOB
SPEAKER
LINE IN JACK
EXTERNAL
FM ANTENNA
LINE OUT
JACK
LINE IN SWITCH
AC POWER PLUG
LOCATION OF PARTS
STOP/SD/USB
PLAY/PAUSE
SD/USB
PROG
BACKWARD SKIP
FORWARD SKIP
0-9
REC/ERASE
PROGRAM
12
3
45
6
7
8
9
REC/
ERASE
0
REPEAT
REPEAT
SPEED CONTROL SWITCH
TONE
ARM
REST
TONE ARM
ADAPTER FOR 45 RPM RECORDS
SPINDLE
TURNTABLE
Unpacking
1 packing materials from unit.
Note: Save all packing materials.
2 Remove plastic bag covering radio.
3 Remove tie from A/C cord and untie antenna wire on back of radio.
4 Open lid and remove styrofoam shipping material from turntable.
5 Remove black tie-wrap from under the tone arm.
6 Remove white protective needle cover by gently pulling towards the front of the unit.
Remarks:
a) ESD remark: In case of malfunction due to electrostatic discharge, just reset the product
(reconnect of power source may be required) to resume normal operation.
b) Electrical Fast Transient (Burst) Remark (I2): In case of malfunction due to electrical fast transient
(Burst), just reset the product. (reconnect of power source may be required) to resume normal
operation.
SETUP
1. Unwind the AC POWER CORD at the back of unit.
2. Untie the FM antenna and allow it to hang down in a straight line for optimum FM reception. If you
have trouble tuning a FM station, move the external FM antenna for best reception. Do not connect
FM antenna to outside antenna.
Power Source
1. Plug the A/C cord into appropriate outlet.
Radio Operation
1. Set the Function switch to RADIO.
2. Switch the unit ON by turning the VOLUME knob to the on Position.
3. Turn the VOLUME control in mid-range position.
4. Slide the Band switch to the desired band (AM or FM or FM.ST).
5. Select the desired radio station by rotating Tuning Knob
6. Adjust the Volume Knob to the desired sound level.
Antenna
Antenna: for FM reception, the unit is provided with a FM WIRE ANTENNA, move the wire until the
reception is clear and with no interferences. For AM reception, the unit is provided with a directional
build-in ferrite antenna. Rotate the set to find the position in which the best reception is obtained.
Do not connect the EXTERNAL FM ANTENNA to any outside antenna.
USB & SD-CARD OPERATION
SD-Card operation:
1. Slide THE FUNCTION Switch to SD/USB mode.
2. Switch the unit ON by turning the VOLUME knob to the on Position. If no Card has been detected,
”Read”*’3f”No Card” will be show on the display.
CARD
CARD
3. Turn the VOLUME control in mid-range position.
4. Insert SD-Card into the card slot. “READ” is displayed as the system scans the contents of SD
card.
5. Track no. 1 of root folder (Folder 1) will be displayed after reading SD card contents.
Press PLAY/PAUSE /
to start music.
6. Press the FORWARD SKIP /
/ BACKWARD SKIP /
once or repeatedly until the desired
track number appears on the display. Release the button – the track will start playing automatically.
7. Press STOP /
to stop playback.
8. To pause the music, press PLAY/PAUSE /
, press it again to resume play.
USB operation:
1. Slide the FUNCTION Switch to SD/USB mode.
2. Switch the unit ON by turning the VOLUME knob to the on Position.
3. Turn the VOLUME control in mid-range position.
4. In stop mode Press STOP /
and hold key over 2 seconds will switch SD->USB.
If no USB has been detected, “ NO USB” will show on the Display.
USB
5. Plug-in USB mass storage device. READ is displayed as the system scans the contents of USB
device.
USB
6. Track no. 1 of root folder (Folder 1) will be displayed after reading USB device contents.
Press PLAY/PAUSE /
to start music.
USB
MP3
7. Press the FORWARD SKIP /
/ BACKWARD SKIP /
once or repeatedly until the
desired track number appears on the display. Release the button – the track will start playing
automatically.
8. Press STOP /
to stop playback.
9. To pause the music, press PLAY/PAUSE /
, press it again to resume play.
Remarks:
1. USB connector does not support connection with USB extension cable is not designed for
communication with computer directly.
2. It is not guarantee that all USB memory devices and SD cards will work on this audio system
IMPORTANT:
Do not disconnect the USB device SD card during USB/SD card mode, as this may damage
the external device or its files. Please power off first or press another Mode before safely
disconnecting the USB device /SD card.
USB Specification:
Interface
- USB 2.0 Full speed, HOST (USB HUB is not supported) Corresponding Flash memory
- Compatible with MPEG Audio 1, 2, 2.5
- Compatible with Layer 1, 2, 3
- Compatible with Bit rate: 128 – 320 Kbps
- Subfolder nest : 8 levels
- Number of track / titles max 999
- Support ID3 tag V2.0
TURNTABLE
PREPARING TO USE THE TURNTABLE
1. Lift up lid and remove black tie-wrap by untwisting and gently sliding out from TONE ARM
2. Remove cardboard shipper.
3. Remove white protective needle cover by gently pulling towards front of unit.
4. Release TONE ARM and hold-down clip by gently pushing to the right.
This will unlock tone arm from its ARM REST. Re-lock the hold-down clip when moving the unit
to another location.
TURNTABLE OPERATION
1. Slide the FUNCTION Switch to PHONO mode.
2. Switch the unit ON by turning the POWER switch to the on Position.
3. Turn the VOLUME control in mid-range position.
4. Set the SPEED CONTROL SWITCH to the correct speed (33 1/3, 45 or 78 rpm) for the selected
record.
5. Move the tone arm over the record and lower it to the point you want the record to start.
6. At the end of the record, the TONE ARM will stop automatically. You must return it to the TONE
ARM REST by hand.
ACCESSORY SUPPLIED :
Adaptor for 45 rpm records
To play a 45 rpm record, remove the adaptor by placing thumb &
forefinger in recesses and pulling it upwards.
Then placing it on the SPINDLE. The record can then be placed on the turntable.
PROGRAMMING TRACKS
You may store up to 20 tracks in the desired sequence.
1. In the stop position, press PROGRAM /
P
to start programming. Icon “P” and P0-01 start flashing.
CD
2. Press the FORWARD SKIP/
/ BACKWARD SKIP/
once or repeatedly until the desired track
number appears in the display.
3. Press PROGRAM /
to confirm, display shown stored track no. and next store position.
P
CD
4. Repeat step 2-3 to select and store all desired tracks. FULL is displayed if you attempt to program
more than 20 tracks
P
CD
5. Press PLAY/PAUSE/
to play the program.
Erasing the programme
You can erase the contents of the memory by :
- once if in stop position, twice during playback
- Press POWER
- Select another sound source
Play mode
1. Press REPEAT /
on remote at Play mode.
2. Default Play Mode function is OFF.
3. REPEAT 1 / REPEAT FOLDER / REPEAT ALL . THREE kinds of Play Mode can be chosen in
MP3 type.
X-BASS
Press the X-BASS ON/OFF to ON or OFF the X-BASS effect(Adjust the volume level to mid to maximize the X-BASS effect).
Line Out Outputs
1. You can connect this unit to different sources using the auxiliary output jacks.
2. Connect the auxiliary cables (not supplied) to the LINE OUT JACK and to the auxiliary inputs of the
desired component. See the owner’s manual for the operating instructions for the desired
component. The LINE OUT JACK only output a signal and will not run external speakers without
using a separate amplified source.
Auxiliary Input
1 You can connect external components to your unit by using the Auxiliary Input.
2 Plug Auxiliary cable into the LINE IN JACK on the back of your unit.
3 Switch the LINE IN SWITCH to the ON position.
4 Plug the other end of the Auxililary cable into the output jack on your desired external component.
5 Check the volume level of your external component.
6 See operators manual for correct operation of the external component.
NOTE: When not using the Auxiliary Input, make sure the LINE IN SWITCH is in the OFF position.
MP3 copying
1. In USB or SD card playback, Press REC/ERASE/
to start Mp3 copying from USB to SD card or
SD card to USB.Playback will be stopped and system will scan the contents of USB/SD card and
create folder to store MP3 track.
2. icon “ REC “ displayed
3. Message COPY will be displayed.
4. The target device icon “USB” or “CARD” start flashing, MP3 copying start, the process will stop as
copy finished.
5. Current MP3 will be playback from beginning
6. You can copy Mp3 from USB to SD card or SD card to USB at Stop Mode press REC/ERASE /
It may not to copy all MP3 depending on the MP3 file, USB device and SD card
From Phono to SD / USB
The system is capable of converting audio signal from PHONO input to MP3 format and store in USB
mass storage device or SD card (default USB if both devices are detected)
1. Slide the FUNCTION button to PHONO mode.
2. Press REC/ERASE /
to start ripping, the system will scan the contents of USB/SD card and
create folder to store MP3 tracks.
3. Icon “ REC ” and message “ TO” are displayed of about 15 seconds, icon “ USB “ start flashing.
4. The target device icon “ USB ” or “ CARD ” start flashing as REC begins.
5. Press STOP /
to exit PHONO Rec
Delete MP3 tracks
The system support deleting previous recorded MP3 or existing files.
1. In USB or SD card playback mode, press and hold REC/ERASE /
playback track is stopped and will be deleted.
2. Message “ delete “ is displayed
for 2 seconds, current
Auxiliary Output
1 You can connect your radio to different sources using the auxiliary output.
2 Plug Auxiliary cables (not supplied) into the LINE OUT JACK.
3 Connect the other end of the Auxiliary cables into the input on your desired component.
4 See the owners’ manual for the component for correction operation.
NOTE: The Auxiliary Output is a passive signal level output only and will not power speakers.
Auxiliary Input
1 You can connect external components to your unit by using the Auxiliary Input.
2 Plug Auxiliary cable into the LINE IN JACK on the back of your unit.
3 Set the FUNCTION SWITCH to LINE IN mode
4 Plug the other end of the Auxiliary cable into the output jack on your desired external componet
5 Check the volume level of your external component.
6 See operator’s manual for correct operation of the external component.
Headphone Jack Operation
1 Connect headphones to the Headphone Jack
2 Adjust volume to the desired listening level.
NOTE: When using headphones, the sound to
the unit speakers will be cut off.
NOTE: Headphones not included with unit.
Headphone jack
The sound from all speakers is cut off
Troubleshooting
There is no Power
1 The AC Power plug is not well connected.
2 Check to see that the ON/OFF volume knob is in the on position.
There is no Sound
1 Check the volume level by turning the volume knob.
2 Make sure the LINE IN SWITCH is in the OFF position if the LINE IN JACK is not being used.
Turntable will not work
1 Make sure the function switch is set to phono.
2 Try moving the tone arm to the right until you hear a click.
3 Make sure the protective needle cover is removed.
Recycling
This crossed bin symbol on the appliance indicates that the product, at the end of
its life must be disposed of seperatly from domestic waste, either by taking it to a
seperate waste disposal site for electric and electronic appliance or by returning it
to your dealer when you buy another similar. The user responsible for taking the
appliance to a special waste disposal site at the end of its life. If the disused
appliance is collected correctly as separate waste, it can be recycled, treated and
disposed of ecologically,this avoids a negative impact on both the enviroment and health, and
contributed toward the recycling of the product’s materials. For further information regarding the
waste disposal service available, contact your local waste disposal agency or the place of purchase.
CUSTOMER SUPPORT
You can contact the Ricatech customer service when you have a question or a problem with your
Ricatech product. You can contact us by telephone and email.
Email
For customer support by email, please sent a email to
[email protected] Please make sure that you mention the model number and serial number of
the product, mention your name & address and describe your question or problem clearly.
Telephone
For customer support by telephone, please dial +32 3 3265694. One of our service staff will be ready
to serve you. For full procedure please visit the website of Ricatech at: www.ricatech.com
Hereby, Ricatech B.V. declares that this turntable is in compliance with the essential
requirements and other relevant provisions of Directive 1999/5/EC.
Ricatech B.V.
Cornusbaan 1
2908 KB Capelle a/d IJssel
The Netherlands
Nederlands
WAARSCHUWING :
STEL HET APPARAAT NIET BLOOT AAN REGEN OF VOCHT OM GEVAAR VOOR BRAND
OF EEN ELEKTRISCHE SCHOK TE VOORKOMEN. DE BEHUIZING NIET VERWIJDEREN.
CONTROLELAMPJES ZIJN OP HET APPARAAT GESOLDEERD. GEEN DOOR DE
GEBRUIKER TE ONDERHOUDEN ONDERDELEN AAN DE BINNENKANT. LAAT
ONDERHOUD OVER AAN GEKWALIFICEERD ONDERHOUDS PERSONEEL.
CAUTION
RISK OF ELECTRIC SHOCK
DO NOT OPEN
Het symbool van de bliksemflits
met pijlkop, in een gelijk
zijdige driehoek, is bedoeld om
de gebruiker attent te maken op
de aanwezigheid van niet-geïsoleerde “gevaarlijke spanning” in
de behuizing van het product die
zo hoog kan zijn dat ze gevaar
voor een elektrische schok
betekent voor personen.
OPGELET: OM HET GEVAAR VOOR
EEN ELEKTRISCHE SCHOK TE
VERMINDEREN, BEHUIZING (OF
ACHTERKANT) NIET VERWIJDEREN.
GEEN DOOR DE GEBRUIKER TE
ONDERHOUDEN ONDERDELEN AAN
DE BINNENKANT. LAAT ONDERHOUD
OVER AAN GEKWALIFICEERD
ONDERHOUDS- PERSONEEL.
Het uitroepteken in een
gelijkzijdige driehoek is bedoeld om de gebruiker attent
te maken op de aanwezigheid
van een belangrijke instructie
voor bediening en onderhoud
(service) in de documentatie
bij het apparaat.
“Ventilatie niet belemmeren.”
“Niet blootstellen aan druipende of spattende vloeistoffen en geen voorwerpen met
vloeistoffen, zoals vazen, op het apparaat plaatsen.”
Specification
FREQUENTIE
USB Port 2.0
VOEDINGSBRON
ANTENNE
STROOMVERBRUIK
AFMETINGEN LUIDSPREKER
OHM LUIDSPREKER
WATTAGE
UITGANGSVERMOGEN
: FM 88 -108 MHz
AM 530 - 1600 KHz
: Full Speed 512MB - 4GB (Support FAT16, FAT32)
: AC230V/50Hz
: Externe antenne voor FM
Ingebouwde ferrietstaaf voor AM
: 15W
: 2” x 3”, dynamisch type x 2
: 4 ohm
: 3-5W
: 1.2W x 2
*SPECIFICATIES EN UITERLIJK KUNNEN WORDEN GEWIJZIGD ZONDER
KENNISGEVING.
BELANGRIJKE VOORZORGSMAATREGELEN VOOR AUDIOPRODUCTEN
LEES AANDACHTIG DE VOLGENDE BELANGRIJKE VOORZORGSMAATREGELEN DIE VAN
TOEPASSING ZIJN OP UW APPARATUUR.
1. Instructies lezen - Alle veiligheids - en bedieningsinstructies moeten worden gelezen voordat het
apparaat wordt gebruikt.
2. Instructies bewaren - De veiligheids- en bedieningsinstructies moeten worden
bewaard voor raadpleging in de toekomst.
3. Aandacht besteden aan waarschuwingen - Alle waarschuwingen op het apparaat
en in de bedieningsinstructies moeten in acht worden genomen.
4. Instructies opvolgen - Alle bedienings- en gebruiksinstructies moeten worden
opgevolgd.
5. Water en vocht - Het apparaat mag niet worden gebruikt in de buurt van water, bijvoorbeeld nabij
een badkuip, wasbak, gootsteen, wastobbe, in een vochtige kelder of nabij een zwembad en
dergelijke.
6A. Karretjes en staanders - Het apparaat mag alleen worden gebruikt met een karretje of staander
aanbevolen door de fabrikant.
6A.Een apparaat op een karretje moet voorzichtig worden verplaatst. Bruusk stoppen, overmatige
kracht en oneffen oppervlakken kunnen het karretje met apparaat doen omkantelen.
7. Wand- of plafondbevestiging - Het apparaat mag aan een wand of plafond alleen worden
bevestigd volgens de aanbevelingen van de fabrikant.
8. Ventilatie - De plaats en de stand van het apparaat mogen correcte ventilatie niet belemmeren.
Het apparaat mag bijvoorbeeld niet op een bed, sofa, vloerkleed of dergelijk oppervlak worden
geplaatst aangezien de ventilatieopeningen kunnen worden geblokkeerd; en evenmin in een
ingebouwde installatie zoals een boekenrek of kast aangezien de luchtstroom door de
ventilatieopeningen kan worden belemmerd.
9. Warmte - Het apparaat moet verwijderd zijn van warmtebronnen zoals radiators, warmteregisters,
kachels of andere toestellen (inclusief versterkers) die warmte produceren.
10. Voedingsbronnen - Het apparaat mag alleen worden aangesloten op een voeding van het type
beschreven in de bedieningsinstructies of aangegeven op het apparaat.
11. Aarding of polarisatie - Er moeten voorzorgsmaatregelen worden genomen zodat de middelen
voor aarding of polarisatie van een apparaat niet worden belemmerd.
12. Voeding - Netsnoerbescherming – Netsnoeren moeten zodanig worden geleid dat de kans om
erop te trappen of ze te knellen met voorwerpen die erop of ertegen staan minimaal is, met
bijzondere aandacht voor netsnoeren aan stekkers en op de plaats waar ze het apparaat verlaten.
13. Reiniging - Het apparaat mag alleen worden gereinigd volgens de aanbevelingen van de
fabrikant.
14. Dit product is ontworpen voor gebruik met de bevestigde antenne en mag niet worden
aangesloten op andere externe antennes.
15. Perioden van niet gebruik - Het netsnoer van het apparaat moet uit het stopcontact worden
getrokken wanneer het apparaat lange tijd niet wordt gebruikt.
16. Voorwerpen en vloeistoffen in het apparaat - U dient voorzichtig te zijn dan er geen
voorwerpen vallen of vloeistoffen worden gemorst in de behuizing via openingen
17. Schade die onderhoud vereist - Het apparaat moet door gekwalificeerd onderhoudspersoneel
worden onderhouden wanneer:
A. Het netsnoer van de stekker beschadigd is; of
B. Voorwerpen zijn gevallen of vloeistoffen zijn gemorst in het apparaat; of
C. Het apparaat werd blootgesteld aan regen; of
D. Het apparaat niet normaal lijkt te werken of de prestaties opvallend zijn gewijzigd; of
E. Het apparaat is gevallen, of de behuizing beschadigd is.
18.Onderhoud - De gebruiker mag niet proberen onderhoud van het apparaat uit te voeren behalve
het onderhoud beschreven in de bedieningsinstructies. Alle andere onderhoudswerkzaamheden
moeten worden uitgevoerd door gekwalificeerd onderhoudspersoneel.
PLAATS VAN ONDERDELEN
VOORUITSPOELEN
TERUGSPOELEN
LCD-SCHERM FM.ST-INDICATOR
OPNEMEN/WISSEN
PROGRAMMEREN
AFSPELEN / PAUZE
X-BASS AAN/UIT
LUIDSPREKER
VOLUME AAN/
UIT-KNOP
VOEDINGS
INDICATOR
SD/USB
USB POORT
RADIO/SD/
AM/FM/ SCHAKELAAR
USB/PHONO- SENSOR
SCHAKEAM/FM/AF
LAAR
STEMSCHAAL
HERHALEN
LUIDSPREKER
AFSTEMKNOP
OORTELEFOON AANSLUITING
SD KAART AANSLUITING
LINE IN
AANSLUITING
LINE OUT-AANSLUITING
EXTERNE FM-ANTENNE
LINE IN-SCHAKELAAR
WISSELSTROOMSTEKKER
PLAATS VAN ONDERDELEN
STOP/SD/USB
AFSPELEN/PAUZEREN
SD/USB
PROG
TERUGSPOELEN
0-9
OPNEMEN/WISSEN
PROGRAMMEREN
VOORUITSPOELEN
12
3
45
6
7
8
9
REC/
ERASE
0
REPEAT
HERHALEN
TOERENTALREGELAAR
TOONARM
STEUN
TOONARM
ADAPTER VOOR 45-TOERENPLATEN
SPIL
DRAAITAFEL
Uitpakken
1 Verwijder het verpakkingsmateriaal van het apparaat.
Opmerking: bewaar al het verpakkingsmateriaal.
2 Neem de radio uit de plastic zak.
3 Verwijder de kabelbinder van het wisselstroomsnoer en maak de draadantenne
op de achterzijde van de radio los.
4 Open het deksel en verwijder het piepschuimen transportmateriaal van de draaitafel.
5 Verwijder de zwarte tie-wrap onder de toonarm.
6 Verwijder de witte naaldbescherming door ze voorzichtig naar de voorzijde van het apparaat te
trekken.
Opmerkingen:
a) Opmerking over ESD: in geval van storing wegens elektrostatische ontlading reset u het product
(mogelijk moet u de voedingsbron opnieuw aansluiten) om de normale bediening te hervatten.
b) Opmerking over elektrische snelle transiënt (Burst) (I2): in geval van storing wegens elektrische
snelle transiënt (Burst) reset u het product. (mogelijk moet u de voedingsbron opnieuw aansluiten)
om de normale bediening te hervatten.
OPSTELLING
Wikkel het WISSELSTROOMSNOER aan de achterzijde van het apparaat af.
2 Maak de FM-antenne los en laat ze neerhangen in een rechte lijn voor optimale FM-ontvangst. Als
u moeilijk kunt afstemmen op een FM-zender, verplaatst u de externe FM-antenne voor een betere
ontvangst. Sluit de FM-antenne niet aan op een buitenantenne.
Voedingsbron
1. Sluit het wisselstroomsnoer aan op een geschikt stopcontact.
Bediening van de radio
1 Zet de functieschakelaar op RADIO.
2 Schakel het apparaat in door de VOLUME-knop naar de stand AAN te draaien.
Zet de VOLUME-regelaar in de middelste stand.
3 Schuif de golfbandschakelaar naar de gewenste golfband (AM of FM of FM.ST).
4 Selecteer de gewenste radiozender door aan de afstemknop te draaien
5 Stel de volumeknop in op het gewenste geluidsniveau.
Antenne
Antenne : voor FM-ontvangst is het apparaat uitgerust met een FM-DRAADANTENNE, verplaats de
draad tot de ontvangst zuiver en zonder storingen is. Voor Am-ontvangst is het apparaat uitgerust
met een ingebouwde ferrietstaaf-richtingsantenne. Draai het toestel om de positie met optimale
ontvangst te vinden. Sluit de EXTERNE FM-ANTENNE niet aan op een buitenantenne.
USB & SD-KAART GEBRUIKEN
SD-kaart gebruiken :
1 Schuif de FUNCTIE-schakelaar naar SD/USB-modus.
2 Schakel het apparaat in door de VOLUME-knop naar de stand AAN te draaien.
Als geen kaart wordt gedetecteerd, wordt “Read”*’3f’No Card” in het display getoond.
CARD
CARD
3 Zet de VOLUME-regelaar in de middelste stand.
4 Plaats de SD-kaart in de kaartsleuf. “READ” wordt weergegeven terwijl het systeem de inhoud
van de SD-kaart scant.
5 Track nr. 1 van de hoofdmap (Map 1) wordt weergegeven nadat de inhoud van de SD-kaart is
gelezen. Druk op AFSPELEN/PAUZEREN /
de muziek te starten.
6 Druk eenmaal of herhaaldelijk op VOORUITSPOELEN /
/ TERUGSPOELEN /
tot het
gewenste tracknummer in het display verschijnt. Laat de knop los - het afspelen van de track start
automatisch.
7 Druk op STOP /
om het afspelen te stoppen.
8 Om de muziek te onderbreken, drukt u op AFSPELEN/PAUZEREN /
, druk opnieuw om het
afspelen te hervatten.
USB gebruiken :
1 Schuif de FUNCTIE schakelaar naar SD/USB modus.
2 Schakel het apparaat in door de VOLUME knop naar de stand AAN te draaien.
3 Zet de VOLUME regelaar in de middelste stand.
4 Druk in de stopmodus op STOP
en houd de toets langer dan 2 seconden ingedrukt voor
omschakeling van SD->USB.
USB
Als geen USB wordt gedetecteerd, wordt “NO USB” getoond in het display.
5 Sluit het USB-massaopslagapparaat aan. READ wordt weergegeven terwijl het systeem de inhoud
van het USB-apparaat scant.
USB
6 Track nr. 1 van de hoofdmap (Map 1) wordt weergegeven nadat de inhoud van het USB-apparaat is
gelezen. Druk op AFSPELEN/PAUZEREN /
om de muziek te starten.
USB
MP3
7. Druk eenmaal of herhaaldelijk op VOORUITSPOELEN /
/ TERUGSPOELEN /
tot het gewenste tracknummer in het display verschijnt. Laat de knop los - het afspelen van de
track start automatisch.
8 Druk op STOP /
om het afspelen te stoppen.
9 Om de muziek te onderbreken, drukt u op AFSPELEN/PAUZEREN /
, druk opnieuw om het
afspelen te hervatten.
Opmerkingen :
1 Gebruik van de USB aansluiting met een USB verlengsnoer wordt niet ondersteund en het
apparaat is niet ontworpen voor directe communicatie met een computer.
2 Er wordt niet gegarandeerd dat alle USB geheugenapparaten en SD kaarten werken op dit audio
systeem
BELANGRIJK :
Verwijder het USB-apparaat en de SD-kaart niet tijdens de USB/SD-modus, dit kan het externe
apparaat of de bestanden ervan beschadigen. Schakel het apparaat eerst uit of selecteer een andere
modus alvorens het USB-apparaat /de SD-kaart veilig te verwijderen.
Specificaties van USB: Interface
- USB 2.0 Full Speed, flashgeheugen via HOST (USB HUB wordt niet ondersteund)
- Compatibel met MPEG Audio 1, 2, 2.5
- Compatibel met Layer 1, 2, 3
- Compatibel met bitsnelheid: 128 - 320 Kbps
- Submappen nesten: 8 niveaus
- Aantal tracks / titels max 999
- Ondersteunt ID3 tag V2.0
DRAAITAFEL
DE DRAAITAFEL KLAARMAKEN VOOR GEBRUIK
1 Til het deksel op en verwijder de zwarte tie-wrap door deze los te draaien en voorzichtig van de
TOONARM te schuiven
2 Verwijder het kartonnen transportmateriaal.
3 Verwijder de witte naaldbescherming door ze voorzichtig naar de voorzijde van het apparaat te
trekken.
4 Maak de TOONARM en neerdrukker los door zachtjes naar rechts te drukken. Hierdoor wordt de
toonarm losgemaakt van de ARMSTEUN. Vergrendel de neerdrukker opnieuw wanneer u het
apparaat naar een andere locatie brengt.
BEDIENING VAN DE DRAAITAFEL
1 Schuif de FUNCTIE-schakelaar naar PHONO-modus.
2 Schakel het apparaat in door de VOEDING-schakelaar naar de stand AAN te draaien.
3 Zet de VOLUME-regelaar in de middelste stand.
4 Zet de TOERENTALREGELAAR op het correcte toerental (33 1/3, 45 of 78 toeren) voor de
geselecteerde plaat.
5 Breng de toonarm boven de plaat en laat hem neer op het punt waar u het afspelen van de plaat
wilt starten.
6 Aan het einde van de plaat stopt de TOONARM automatisch. U moet hem handmatig terugplaatsen
in de TOONARMSTEUN.
MEEGELEVERD ACCESSOIRE :
Adapter voor 45-toerenplaten
Voor het afspelen van een 45-toerenplaat verwijdert u de adapter door
duim & wijsvinger in de uitsparingen te plaatsen en de adapter omhoog
te trekken. Plaats hem vervolgens op de SPIL. Daarna kunt u de plaat
op de draaitafel plaatsen.
TRACKS PROGRAMMEREN
U kunt maximaal 20 tracks opslaan in de gewenste volgorde.
1. Druk in de stopstand op PROGRAM /
om het programmeren te starten.
Het pictogram “P” en P0-01 beginnen te knipperen.
P
CD
2. Druk eenmaal of herhaaldelijk op VOORUITSPOELEN/
TERUGSPOELEN/
tot het
gewenste tracknummer in het display verschijnt.
3. Druk op PROGRAM /
om te bevestigen, het display toont het opgeslagen tracknummer en de
volgende opslagpositie.
P
CD
4. Herhaal stap 2-3 om alle gewenste tracks te selecteren en op te slaan.
FULL wordt weergegeven als u meer dan 20 tracks probeert te programmeren
P
CD
5. Druk op AFSPELEN/PAUZEREN/
om het programma af te spelen.
Het programma wissen
U kunt de inhoud van het geheugen wissen als volgt :
- eenmaal in de stopstand, tweemaal tijdens het afspelen
- Drukken op POWER
- Een andere geluidsbron selecteren
Afspeelmodus
1 Druk op REPEAT /
op de afstandsbediening in de afspeelmodus.
2 De standaardfunctie van de afspeelmodus staat UIT.
3 1 HERHALEN / MAP HERHALEN / ALLES HERHALEN .
DRIE verschillende afspeelmodi kunnen worden gekozen in MP3-type.
X-BASS
Druk op X-BASS ON/OFF om de X-BASS-effecten in of uit te schakelen
(zet het volumeniveau in het midden voor maximale X-BASS-effecten).
Line Out-uitgangen
1 U kunt dit apparaat aansluiten op verschillende bronnen via de hulpuitgangsaansluitingen.
2 Sluit de hulpkabels (niet meegeleverd) aan op de LINE OUT-AANSLUITING en op de
hulpingangen van de gewenste component. Zie de gebruikershandleiding voor de
bedieningsinstructies voor de gewenste component. De LINE OUT-AANSLUITING voert alleen een
signaal uit en stuurt geen externe luidsprekers aan zonder het gebruik van een afzonderlijke
versterkte bron.
Hulpingang
1 U kunt externe componenten aansluiten op uw apparaat via de hulpingang.
2 Sluit een hulpkabel aan op de LINE IN-AANSLUITING op de achterzijde van uw apparaat.
3 Zet de LINE IN-SCHAKELAAR in de stand AAN.
4 Sluit het andere uiteinde van de hulpkabel aan op de uitgangsaansluiting op de gewenste externe
component.
5 Controleer het volumeniveau van de externe component.
6 Zie de gebruikershandleiding voor correcte bediening van de externe component.
OPMERKING : als u de hulpingang niet gebruikt, zorg dan dat de LINE IN-SCHAKELAAR in de
stand UIT staat.
MP3 kopiëren
1 Druk in de afspeelmodus voor USB of SD-kaart op REC/ERASE om te starten met het kopiëren
van MP3 van USB naar SD-kaart of van SD-kaart naar USB. Het afspelen stopt en het systeem
scant de inhoud van USB/SD-kaart en maakt een map om de MP3-track op te slaan.
2 Het pictogram “ REC “ wordt weergegeven
3 Het bericht COPY wordt weergegeven.
4 Het pictogram van het doelapparaat “USB” of “CARD” begint te knipperen, het kopiëren van MP3
start, het proces stopt nadat het kopiëren is voltooid.
5 De huidige MP3 wordt afgespeeld van bij het begin
6 U kunt MP3 kopiëren van USB naar SD-kaart of van SD-kaart naar USB, druk in de stopmodus op
REC/ERASE / . Mogelijk worden niet alle MP3-tracks gekopieerd afhankelijk van het MP3
bestand, het USB-apparaat en de SD-kaart (stoppen vóór voltooiing is niet mogelijk).
Van Phono naar SD / USB
Met dit systeem kunt u een audiosignaal vanaf de PHONO ingang omzetten in MP3 formaat en
opslaan op een USB-massaopslagapparaat of SD-kaart
(USB wordt standaard geselecteerd als beide apparaten worden gedetecteerd).
1. Schuif de FUNCTIE-knop naar PHONO-modus.
2 Druk op REC/ERASE /
om het rippen te starten, het systeem scant de inhoud van USB/SDkaart en maakt een map om de MP3-tracks op te slaan.
3 Het pictogram “ REC “ en het bericht “ TO” worden ongeveer 15 seconden weergegeven,
het pictogram “ USB “ begint te knipperen.
4 Het pictogram van het doelapparaat “ USB “ of “ CARD “ begint te knipperen wanneer REC start.
5 Druk op STOP /
om het opnemen van PHONO af te sluiten
MP3-tracks verwijderen
Het systeem ondersteunt het verwijderen van eerder opgenomen MP3-tracks of bestaande
bestanden.
1 Houd in de afspeelmodus voor USB of SD-kaart REC/ERASE / ---\ 2 seconden ingedrukt, de
momenteel stopt en wordt verwijderd.
2 Het bericht “ delete “ wordt weergegeven
De hoofdtelefoon aansluiting gebruiken
Sluit de oortelefoon (niet meegeleverd) aan op de OORTELEFOONAANSLUITING.
Houd er rekening mee dat het geluid via de luidsprekers wordt onderbroken wanneer u muziek
beluistert via de oortelefoon. Muziek beluisteren via oortelefoon / hoofdtelefoon (niet inbegrepen)
Problemen oplossen
Er is geen stroomtoevoer
1 De wisselstroomstekker is niet goed aangesloten.
2 Controleer of de AAN/UIT-volumeknop in de stand AAN staat.
Er is geen geluid
1 Controleer het volumeniveau door aan de volumeknop te draaien.
2 Controleer of de LINE IN-SCHAKELAAR in de stand UIT staat als de LINE IN-AANSLUITING niet
wordt gebruikt.
Draaitafel werkt niet
1 Controleer of de functieschakelaar op Phono staat.
2 Beweeg de toonarm naar rechts tot u een klik hoort.
3 Controleer of de naaldbescherming verwijderd is.
KLANTENONDERSTEUNING
U kunt contact opnemen met Ricatech klantenservice als u een vraag of een probleem heeft met uw
Ricatech product. U kunt contact met ons opnemen per telefoon en e-mail.
E-mail
Voor klantenondersteuning per e-mail, gelieve een e-mail te sturen naar [email protected]. Zorg
ervoor dat u het modelnummer en het serienummer van het product vermeldt, onder vermelding van
uw naam & adres en een duidelijke omschrijving van uw vraag of probleem.
Telefoon
Voor telefonische klantenondersteuning belt u naar
+32 3 3265694. Een van onze servicemedewerkers zal u dan te woord staan. Voor de volledige
procedure kunt u terecht op de website van Ricatech: www.ricatech.com
Hereby, Ricatech B.V. declares that this turntable is in compliance with the essential
requirements and other relevant provisions of Directive 1999/5/EC.
Ricatech B.V.
Cornusbaan 1
2908 KB Capelle a/d IJssel
The Netherlands
FRANÇAIS
AVERTISSEMENT:
POUR RÉDUIRE LES RISQUES DE CHOC ÉLECTRIQUE, N’EXPOSEZ PAS CET
APPAREIL À LA PLUIE NI À L’HUMIDITÉ. N’ENLEVEZ PAS LE COUVERCLE. LES
VOYANTS SONT SOUDÉS SUR PLACE. L’INTÉRIEUR NE CONTIENT AUCUN
COMPOSANT À RÉPARER PAR L’UTILISATEUR. CONFIEZ VOTRE APPAREIL
SEULEMENT AU PERSO DE SERVICE QUALIFIÉ.
CAUTION
RISK OF ELECTRIC SHOCK
DO NOT OPEN
Le symbole de l’éclair avec
la pointe de flèche à l’intérieur
d’un triangle équilatéral a pour
but d’alerter l’utilisateur de la
présence de «voltage dangereux» non isolé à l’intérieur
du coffret du produit qui est
suffisamment grave pour
causer un risque de choc
électrique aux personnes.
AVERTISSEMENT:POUR RÉDUIRE
LES RISQUES DE CHOC ÉLECTRIQUE,
N’ENLEVEZ PAS LE COUVERCLE (OU
LE DOS). L’INTÉRIEUR NE CONTIENT
AUCUN COMPOSANT À RÉPARER PAR
L’UTILISATEUR. CONFIEZ VOTRE
APPAREIL SEULEMENT AU
PERSONNELDE SERVICE QUALIFIÉ
Le point d’exclamation à
l’intérieur d’un triangle
équilatéral a pour but
d’alerter l’utilisateur de la
présence d’instructions
importantes sur l’opération
et l’entretien dans le
manuel de l’utilisateur livré
avec l’appareil.
Spécifications techniques
Gammes des Fréquences
Porte USB 2.0
Source d’alimentation
Consommation
Antennes
Vitesses
Haut-parleur taille
Haut-parleur impédance
Haut-parleur consommation
Puissance Sortie
: FM (GO) 88 - 108 MHz
: AM (PO) 530 - 1600 KHz
: Pleine Vitesse 512MB - 4GB
(Support FAT16, FAT32)
: AC230V/50Hz
: 15W
: Antenne FM (GO) externe
: Antenne AM (PO) Incorporée – Barre ferrite
: 33 1/3, 45, 78 Tours
: 2 x 3 po Type dynamique x 2
: 4 ohms
: 3-5W
: 1,2 W x 2
*LE FABRICANT RÉSERVE LE DROIT DE CHANGER LA CONCEPTION ET LES
SPÉCIFICATIONS SANS PRÉAVIS.
INSTRUCTIONS DE SECURITE IMPORTANTES POUR PRODUITS AUDIO
VEUILLEZ LIRE ATTENTIVEMENT LES INSTRUCTIONS SUIVANTES APPLICABLES
A VOTRE EQUIPEMENT
1. Lisez les instructions – Lisez toutes les instructions de sécurité et d’utilisation avant de
vous servir de l’appareil.
2. Conservez les instructions – Conservez les instructions de sécurité et d’utilisation pour
vous y référer ultérieurement.
3. Tenez compte des avertissements – Suivez tous les avertissements et instructions d’utilisation
de l’appareil.
4. Suivez les instructions – Suivez toutes les instructions de fonctionnement et utilisation.
5. Eau et humidité – Cet appareil ne doit pas être utilisé à proximité de
pointsd’eau, comme par exemple près de baignoires, lavabos, éviers
ou lavoirs, sur surfaces mouillées ou près d’une piscine.
6. Chariots et supports – Utilisez cet appareil uniquement avec des
chariots ou supports recommandés par le fabricant.
6A.Déplacez avec précaution l’ensemble chariot et appareil. Les arrêts rapides,
l’excès de force ou les surfaces irrégulières peuvent renverser le chariot.
7. Support mural ou de plafond – Placez cet appareil uniquement sur les supports muraux ou de
plafond recommandés par le fabricant.
8. Ventilation – Cet appareil doit être placé de façon à ne pas compromettre une bonne ventilation.
Par exemple, il ne doit pas être placé sur un lit, un divan, tapis ou surface semblable, qui puisse
bloquer les ouvertures de ventilation. Ne le placez pas non plus dans des placards, sur des
étagères ou armoires, qui puissent empêcher l’air de circuler par les ouvertures de ventilation.
9. Chaleur – Cet appareil doit être situé loin de sources de chaleur, telles que radiateurs,
chauffe-eaux, convecteurs ou autres appareils qui dégagent de la chaleur (y compris
les amplificateurs).
10.Courant – Cet appareil doit être branché uniquement au courant décrit dans le mode
d’emploi ou à celui décrit sur l’appareil lui-même.
11.Prise de terre ou polarisation – On doit prendre des précautions pour s’assurer que la prise de
terre ou la polarisation de l’appareil ne soient pas perturbées.
12.Protection du câble électrique – Les câbles électriques doivent être correctement placés pour
ne pas être piétinés ni aplatis avec des objets placés dessus ou contre ceux-ci. On doit prêter une
attention tout spéciale à la partie du câble proche de la prise et au connecteur de l’appareil.
13.Nettoyage – Vous devez nettoyer cet appareil uniquement comme le recommande le fabricant.
14.Ce produit a été conçu pour être utilisé avec une antenne intégrée et ne doit être connecté à
aucune autre antenne extérieure.
15.Périodes sans utilisation – Lorsque vous ne devez pas utiliser cet appareil pendant de longues
périodes, débranchez-le de la prise de courant.
16.Entrée d’objets et de liquides – Evitez que des objets ou liquides ne tombent à travers
les ouvertures du boîtier.
17.Dommages qui nécessitent réparation – Cet appareil doivent être apportés au service
technique si :
A.Le câble électrique ou la fiche sont endommagés.
B.Des objets ou liquides sont tombés à l’intérieur de l’appareil.
C.L’appareil a été exposé à la pluie.
D.L’appareil ne fonctionne pas normalement ou montre un changement dans son fonctionnement.
E.L’appareil est tombé ou le boîtier est endommagé.
18. Réparations — L’usager ne doit pas tenter de réparer l’appareil au-delà de ce qui est décrit dans
le présent manuel. Tout le reste doit être réalisé par un personnel d’entretien compétent.
Control Locators
RECHERCHER EN AVANT
RECHERCHER EN ARRIÈRE
TEMOIN STATION FM EN STÉRÉO
ENREGISTRER/EFFACER
PROGRAMMER
ÉCRAN LCD
X-BASS MARCHE/ARRÊT
HAUT-PARLEUR
TEMOIN SOUS
TENSION
JOUER/
ARRÊT/ PAUSER
SD/USB
REPÉTÉR
SÉLECTEUR
PORTE USB
CAPTEUR IR
DE FONCTION
PRISE CASQUE/
INDICATEUR DE
SÉLECTEUR
ÉCOUTEURS
STATIONS
AM\FM\FM
STÉRÉO
BOUTON VOLUME MARCHE/ARRÊT
FENTE CARTE SD
PRISE ENTRÉE
ANTENNE FM
EXTERNE
PRISE SORTIE
COMMUTATEUR ENTREE
CABLE ELECTRIQUE
HAUT-PARLEUR
SÉLECTEUR
DE STATIONS
Control Locators
ARRÊT/SD/USB
JOUER/PAUSE
SD/USB
PROG
RECHERCHER EN ARRIÈRE
0-9
ENREGISTRER/EFFACER
PROGRAMMER
RECHERCHER
EN AVANT
12
3
45
6
7
8
9
REC/
ERASE
0
REPEAT
RÉPÉTER
SÉLECTEUR DE VITESSE
REPOSE
BRAS DE
LECTURE
BRAS DE
LECTURE
ADAPTATEUR POUR DISQUES 45 TOURS
AXE
PLATINE
Déballage
1 Enlevez les matériaux d’emballage de l’appareil.
NB: Gardez tous les matériaux d’emballage.
2 Enlevez la housse en plastique de l’appareil.
3 Enlevez l’Adaptateur Alimentation CA de l’emballage.
4 Ouvrez le couvercle et enlever l’emballage de transport en styrofoam
du tourne-disque.
5 Enlevez l’attache noire du dessous du bras de lecture.
6 Enlevez la bande et la protection blanche de la têtede lecture en la tirant vers le devant de
l’appareil.
7 Lâchez le clip de retenue du bras de lecture en le poussant légèrement à droite. Ceci débloque le
bras de lecteur de son repose-bras. Rebloquez le clip de retenue lors du transport de l’appareil à
un autre endroit.
8 Installez le couvercle sur l’appareil.
Configuration
1 Déroulez le câble électrique AC
2 Détachez l’antenne FM et laissez-la pendre en ligne droite pour une réception optimale de FM. Si
vous avez des problèmes en réglant une station FM, bougez l’antenne externe FM pour une
meilleure réception. Ne branchez pas l’antenne FM à une antenne externe.
Opération du Tourne-Disque
Mettez l’appareil sous tension en tournant le SÉLECTEUR DE VOLUME MARCHE/ARRÊT situé au
devant en position MARCHE.
1 Réglez le SÉLECTEUR DE FONCTION au mode Tourne-disque [Phono].
2 Mettez le SÉLECTEUR DE VITESSE à la vitesse souhaitée (33-1/3, 45 ou 78 tours).
Placez votre disque sur la platine.
3 Faites déplacer le bras de lecture légèrement vers le côté droit jusqu’à ce que vous entendiez un
clic pour activer la platine.
4 Faites déplacer le bras de lecture par-dessus le disque au point où vous voulez faire démarrer le
disque. Réglez le BOUTON DE VOLUME - MARCHE/ARRÊT au volume souhaité.
5 À la fin du disque, le bras de lecture va s’arrêter automatiquement. Il vous faut faire retourner le
bras de lecture à son repose-bras manuellement.
Accessoire: Adaptateur pour disques 45 tours
Cet adaptateur vous permet de jouer des disques 45 tours.
1 Mettez l’adaptateur sur l’axe.
2 Placez votre disque 45 tours doucement sur la platine.
3 Suivez les instructions dans la section opération du tourne-disque
pour jouer votre disque.
Opération de la Radio
1 Réglez le SÉLECTEUR DE FONCTION au mode Tuner
2 Réglez le SÉLECTEUR MODULATION pour sélectionner la bande souhaitée
(AM/FM/FM STÉRÉO).
3 Sélectionnez la station de radio souhaitée en tournant le SÉLECTEUR DE STATIONS.
4 Réglez le BOUTON VOLUME MARCHE/ARRÊT au niveau du volume souhaité.
Antenne
Antenne. Pour la réception FM, l’appareil est équipé d’une ANTENNE FM EN FIL .
Orientez le fil jusqu’à obtenir une réception nette sans parasites. Pour la réception AM, l’appareil est
équipé d’une antenne ferrite directionnelle incorporée. Orientez l’appareil pour trouver la position
où on reçoit la meilleure réception. Ne branchez pas l’ANTENNE FM EXTERNE sur une antenne à
l’extérieur.
Opération de base
Opération Carte SD
1 Faites glisser le SÉLECTEUR DE FONCTION au mode SD/USB.
2 Mettez l’appareil sous tension en tournant le BOUTON VOLUME – MARCHE / ARRÊT en position
MARCHE. Au cas où l’appareil n’aurait pas détecté de carte SD, l’écran va afficher “Read” “No
Card” [Lecture – pas de carte].
CARD
CARD
3 Réglez le volume à mi-chemin.
4 Mettez la Carte SD dans la fente de carte. L’écran va afficher “READ” pendant que le système lit le
contenu de la carte SD.
5 La piste no. 1 du répertoire racine (Répertoire 1) va s’afficher après lecture du contenu de la carte
SD. Poussez la touche PLAY/PAUSE /
pour lancer la musique.
6 Poussez RECHERCHER EN AVANT /
/ RECHERCHER EN ARRIÈRE /
une ou plusieurs
fois jusqu’à ce que le numéro de la piste souhaitée apparaisse à l’écran. La musique commencera
à jouer automatiquement.
7 Poussez la touche STOP /
pour arrêter la musique.
8 Pour pauser la musique, poussez la touche PLAY/PAUSE /
. Poussez-la une deuxième fois
pour relancer la musique.
Opération USB
1 Faites glisser le SÉLECTEUR DE FONCTION au mode SD/USB.
2 Mettez l’appareil sous tension en tournant le BOUTON VOLUME – MARCHE / ARRÊT en position
MARCHE.
3 Réglez le volume à mi-chemin.
4 Poussez et maintenez la touche STOP /
pendant 2 secondes. L’écran va changer de « SD » au
« USB ». Au cas où l’appareil n’aurait pas détecté d’unité USB, l’écran va afficher “No USB”
[Pas d’unité USB].
USB
5 Mettez l’unité USB dans la fente. L’écran va afficher “READ” pendant que le système lit le contenu
de l’unité USB.
USB
6 La piste no. 1 du répertoire racine (Répertoire 1) va s’afficher après lecture du contenu de l’unité
USB. Poussez la touche PLAY/PAUSE /
pour lancer la musique.
USB
MP3
7 Poussez RECHERCHER EN AVANT /
/ RECHERCHER EN ARRIÈRE /
une ou plusieurs
fois jusqu’à ce que le numéro de la piste souhaitée apparaisse à l’écran. La musique commencera
à jouer automatiquement.
8 Poussez la touche STOP /
pour arrêter la musique.
9 Pour pauser la musique, poussez la touche PLAY/PAUSE /
. Poussez-la une deuxième fois pour
relancer la musique.
NB:
1 La facilité USB ne supporte pas la connexion moyenant une rallonge USB et n’est pas conçue pour
communiquer directement avec un ordinateur.
2 Touts les Flash Drives USB et toutes les cartes SD ne seront pas forcemment compatibles avec cet
appareil.
AVIS IMPORTANT:
Il ne faut pas débrancher l’unité USB ou la carte SD pendant le mode d’opération USB/SD, car
ceci risque d’endommager l’unité de mémoire externe ou les fichiers. Veuillez d’abord couper
l’alimentation ou changer à un autre mode d‘opération avant de débrancher l’unité USB ou la carte
SD.
Phono au USB/SD
Cet appareil vous permet d’enregistrer vos disques au format MP3 sur unité de mémoire USB Flash
Drive ou carte SD. Pour enregistrer vos disques, suivez les instructions ci-après.
1 Faites glisser le SÉLECTEUR DE FONCTION au mode PHONO [TOURNE-DISQUE].
2 Lancez le disque au point où vous voulez faire commencer l’enregistrement. (Voyez la section sur
l’Opération du Tourne-disque à la page 20 pour plus d’information sur comment jouer vos disques).
3 Poussez la touche REC/ERASE / pour démarrer l’enregistrement. L’écran va afficher “ REC ”.
4 La media à laquelle vous enregistrez (soit USB ou SD) va commencer à clignoter à l’écran
lorsque l’enregistrement commence.
5 Poussez la touche STOP /
Copier les MP3
pour arrêter le processus d’enregistrement.
Copier les MP3
1. Pour copier une chanson individuelle d’une USB sur une SD ou d’une SD sur une USB, poussez la
touche REC/ERASE /
pendant la lecture de la chanson que vous voulez enregistrer pour lancer
l’opération de copier. La lecture s’arrêtera et le système lira le contenu et se préparera à copier la
chanson.
2. L’écran va afficher l’icône “ REC “.
3. L’écran va afficher “COPY” lorsque l’opération de copier commence.
4. L’écran va afficher l’icône pour l’unité sur laquelle vous êtes en train d’enregistrer la copie. “USB”
ou “CARD” va commencer à clignoter et s’arrêtera une fois que l’opération de copier est terminée.
5. La source d’origine, USB ou SD commencera à jouer dès le commencement une fois que
l’opération de copier est terminée.
6. Vous pouvez aussi copier toutes les chansons en même temps d’une USB sur une SD ou d’une
SD sur une USB. En mode USB ou SD et avec la lecture arrêtée, poussez la touche
REC/ERASE /
. L’appareil va copier toutes les chansons de la USB à la SD ou de la SD à la
USB. Il n’est pas possible d’arrêter le processus de copier jusqu’à la fin du processus.
Effacer les Pistes MP3
Cet appareil vous permet d’effacer des chansons individuelles de votre carte SD ou de votre unité de
mémoire USB Flash Drive. Afin d’effacer une chanson spécifique, il faut que cette chanson soit en
train de jouer.
1 En mode SD/USB, sélectionnez la chanson que vous voulez effacer et commencez la lecture.
2 Une fois que la chanson est en train de jouer,poussez et maintenez la touche REC/ERASE /
pendant approximativement 2 secondes. La chanson va arrêter de jouer et sera effacée.
3 Le mot “delete” [effacer] va s’afficher brièvement à l’écran.
NB:Vous pouvez effacer seulement une chanson à la fois. Il n’est pas possible d’effacer toute la
carte. SD ou toute l’unité de mémoire USB d’un coup.
Lecture programmée
On peut programmer jusqu’à 20 pistes d’un CD, d’une unité de mémoire USB ou d’une carte SD à
jouer dans la séquence de votre choix.
1. Pendant que la lecture de la musique est arrêtée, poussez la touche PROGRAMMER /
pour
commencer la programmation. L’écran va afficher “P” et P0-01 en clignotant pour indiquer que
vous êtes en mode de Programmation.
P
CD
2. Poussez la touche RECHERCHER EN AVANT/
ou RECHERCHER EN ARRIÈRE /
une ou pluisieurs fois jusqu’à ce que le numéro de la piste apparaisse à l’écran.
3. Poussez PROGRAMMER /
pour confirmer. L’écran affiche le numéro de la piste mise en mé
moire et la position suivante de stockage.
P
CD
4. Répétez les étapes 2-3 pour sélectionner et mettre en mémoire toutes les pistes souhaitées.
L’écran va afficher “FULL“ [PLEIN] au cas où vous tentez de programmer plus de 20 pistes.
P
CD
5. Poussez la touche PLAY/PAUSE /
pour jouer les pistes programmées.
6. Pour effacer les pistes programmées, poussez la touche STOP /
deux fois. Les pistes seront
effacées quand vous coupez le courant ou si vous sélectionnez une fonction différente.
Mode Jouer
1 Poussez la touche REPEAT /
sur la télécommande au mode Jouer.
2 La fonction par défaut du Mode Jouer est ARRÊT.
3 Il y TROIS types de Mode Jouer que l’on peut choisir pour les sélections MP3: RÉPÉTER 1 /
RÉPÉTER RÉPERTOIRE / RÉPÉTER TOUTES
X-BASS
Poussez la touche X-BASS MARCHE/ARRÊT pour activer ou désactiver l’effet X-Bass. L’activation
de la capacité X-Bass ajoute un ton plus riche et sonore.
Sortie Auxiliaire
1 Vous pouvez brancher votre appareil sur des sources différentes en vous servant de la sortie
auxiliaire.
2 Branchez les câbles auxiliaires (non fournis) sur la prise (jack) sortie.
3 L’autre bout du câble doit se brancher sur la prise (Jack) Entrée de l’appareil que vous avez choisi.
4 Pour plus de renseignements sur comment brancher votre appareil sur un composant externe,
veuillez vous rapporter au manuel d’utilisateur pour ce composant.
NB : La Sortie Auxiliaire correspond à un niveau de signal passif de sortie seulement et n’a pas de
puissance suffisante pour alimenter les haut-parleurs.
Auxiliary Input
1 L’emploi de l’Entrée Auxiliaire vous permet de brancher des composants externes à votre appareil.
2 Branchez le câble auxiliaire (non fourni) sur la prise (jack) entrée au dos de votre appareil.
3 Réglez le COMMUTATEUR D’ENTRÉE en position MARCHE.
4 L’autre bout du câble doit se brancher sur la prise (Jack) Sortie Audio du composant externe.
5 Verifiez le niveau de volume du composant externe.
6 Pour plus de renseignements sur l’opération du composant externe, veuillez vous rapporter au
manuel d’utilisateur pour ce composant.
NB :Lorsque vous ne vous servez pas de l’Entrée Auxiliaire, vérfiez que le COMMUTATEUR
D’ENTRÉE est réglé en position ARRÊT.
Opération de la Prise Casque
1 Branchez les écouteurs sur la prise écouteurs.
2 Réglez le volume au niveau d’écoute désiré.
NB : Lorsque l’on se sert des écouteurs, le son
est coupé aux haut-parleurs de l’appareil.
Prise (Jack) Casque/Écouteurs
Headphone jack
Le son est coupé à tous les haut-parleurs.
NB: Les écouteurs ne sont pas fournis avec l’appareil.
Généralités
Guide pour résoudre les problèmes
Il n’y a pas d’alimentation
1 Vérifiez que l’appareil est branché correctement.
2 Vérifiez que l’appareil est sous tension: Tournez le BOUTON VOLUME – MARCHE/ARRÊT au delà
de la position « clic » pour mettre l’appareil sous tension.
Il n’y a pas de son
1 Vérifiez le COMMUTATEUR D’ENTRÉE au dos de l’appareil pour confirmer qu’il est réglé en
position ARRÊT.
2 Vérifiez le niveau du volume en tourant le BOUTON VOLUME – MARCHE/ARRÊT.
3 Vérifiez que les écouteurs ne sont pas branchés sur l’appareil.
4 Vérifiez la position du SÉLECTEUR DE FONCTION.
Le Tourne-disque ne marche pas
1 Vérifiez que le SÉLECTEUR DE FONCTION est réglé en position phono.
2 Essayez de déplacer le bras de lecture vers la droite jusqu’à ce vous entendiez un « clic ».
3 Vérifiez que la protection a été enlevée de la tête de lecture.
La télécommande ne fonctionne pas
1 Remplacez la pile. Voyez les Spécifications Techniques pour le type de pile requise.
2 Soyez sûr de viser la cellule de réception de l’appareil lorsque vous utilisez la télécommande.
3 Enlevez tous les obstacles du chemin de la télécommande IR et le capteur ID qui est situé à côté
de l’écran LCD sur l’appareil afin de donner une ligne droite au signal de la télécommande vers
l’appareil.
SERVICE CONSOMMATEUR
Vous pouvez contacter le service consommateur de Ricatech si vous avez une question ou un
problème avec votre produit Ricatech. Vous pouvez nous contacter par téléphone ou par email.
Email
Pour une assistance par email, veuillez nous écrire à l’adresse [email protected].
Assurez-vous de bien nous communiquer le numéro de modèle et le numéro de série du produit,
vos nom et adresse ainsi qu’une description claire de votre problème ou votre question.
Téléphone
Pour contacter le service consommateur par téléphone,
composez le +32 3 3265694. Un membre de notre personnel se tiendra à votre service.
Pour toutes les procédures, rendez vous sur le site web de
Ricatech : www.ricatech.com
Hereby, Ricatech B.V. declares that this turntable is in compliance with the essential
requirements and other relevant provisions of Directive 1999/5/EC.
Ricatech B.V.
Cornusbaan 1
2908 KB Capelle a/d IJssel
The Netherlands
WARNUNG:
UM FEUER ODER STROMSCHLAG ZU VERMEIDEN, SETZEN SIE DIESES GERÄT NIE
REGEN ODER FEUCHTIGKEIT AUS. ENTFERNEN SIE NICHT DIE ABDECKUNG. DIE
KONTROLLLEUCHTEN SIND VERLÖTET. IM GERÄT BEFINDEN SICH KEINE VOM
BENUTZER ZU WARTENDEN TEILE. ÜBERLASSEN SIE DIE WARTUNG
QUALIFIZIERTEM KUNDENDIENST PERSONAL.
CAUTION
RISK OF ELECTRIC SHOCK
DO NOT OPEN
Das Symbol eines Blitzes mit
Pfeilspitze in einem gleichseitigen
Dreieck soll den Benutzer auf
die im Gehäuse des Produkts
vorhandene, nicht isolierte
“gefährliche Spannung” hinweisen, welche so stark sein
kann, dass sie eine Gefahr für
Personen darstellt.
VORSICHT: UM DAS RISIKO EINES
STROMSCHLAGS ZU VERMEIDEN,
ENTFERNEN SIE NICHT DIE ABDECKUNG (ODER DIE RÜCKVERKLEIDUNG).
IM GERÄT BEFINDEN SICH KEINE VOM
BENUTZER ZU WARTENDEN TEILE.
ÜBERLASSEN SIE DIE WARTUNG
QUALIFIZIERTEM KUNDEN
DIENSTPERSONAL.
Das Ausrufezeichen in einem
gleichseitigen Dreieck soll den
Benutzer auf das Vorhandensein von wichtigen Betriebsund Wartungshinweisen in
der dem Gerät beiliegenden
Unterlagen aufmerksam
machen.
“Die Belüftung darf nicht behindert werden”. „Halten Sie das Gerät von tropfenden oder
spritzenden Dingen fern und achten Sie darauf, dass keine Gegenstände, die mit
Flüssigkeiten gefüllt sind, wie z.B. Vasen, auf dem Gerät platziert werden.“
Spezifikation
FREQUENZ
USB 2.0-Anschluss
STROMQUELLE ANTENNE
STROMVERBRAUCH
LAUTSPRECHERGRÖSSE
LAUTSPRECHERWIDERSTAND
LAUTSPRECHERLEISTUNG
AUSGANGSLEISTUNG
: UKW 88 -108 MHz
MW 530 - 1600 KHz
: Full Speed 512 MB – 4 GB
(Unterstützt FAT16, FAT32)
: AC230V/50Hz
: Externe Antenne für UKW
Eingebaute Ferritstange für MW
: 15 W
: 2” x 3” Dynamischer Typ x 2
: 4 Ohm
: 3-5 W
: 1,2 W x 2
*DESIGN UND SPEZIFIKATIONEN KÖNNEN SICH OHNE VORHERIGE ANKÜNDIGUNG ÄNDERN.
WICHTIGE SICHERHEITSHINWEISE FÜR AUDIOGERÄTE
BITTE LESEN SIE SORGFÄLTIG DIE FOLGENDEN WICHTIGEN SICHERHEITSHINWEISE,
DIE FÜR IHRE GERÄTE GELTEN.
1 Lesen Sie die Anleitungen - Alle Sicherheits- und Bedienungsanleitungen sollten gelesen
werden, bevor das Gerät betrieben wird.
2 Bewahren Sie die Anleitungen auf - Die Sicherheits-und Bedienungsanleitungen
sollten für zukünftige Fragen aufbewahrt werden.
3 Beachten Sie die Warnungen - Alle Warnhinweise auf dem Gerät und in der
Bedienungsanleitung sollten beachtet werden.
4 Befolgen Sie die Anweisungen - Alle Bedienungs-und Gebrauchsanleitungen
sollten befolgt werden.
5 Wasser und Feuchtigkeit - Das Gerät sollte nicht in der Nähe von Wasser verwendet werden- wie
z.B. in der Nähe einer Badewanne, Wasch- und Spülbecken, Waschmaschine, in einem feuchten
Keller oder in der Nähe eines Schwimmbad und dergleichen.
6 Wagen und Gestelle - Das Gerät sollten nur mit einem Wagen oder Gestell benutzt werden, die
vom Hersteller empfohlen werden.
6A Ein Gerät auf einem Wagen sollte mit Vorsicht bewegt werden. Schnelles Anhalten, übermäßige Krafteinwirkung und unebene Oberflächen können zum Umkippen des Geräts und dem Wagen
führen.
7 Wand-oder Deckenmontage - Das Gerät sollte an einer Wand oder Decke nur so montiert
werden, wie vom Hersteller empfohlen.
8 Belüftung - Das Gerät muss so aufgestellt werden, dass der Standort oder die Position nicht die
einwandfreie Belüftung verhindert. Zum Beispiel sollte das Gerät nicht auf einem Bett, Sofa,
Teppich oder einer ähnlichen Oberfläche, die die Lüftungsöffnungen blockieren könnte, platziert
oder in eine fest eingebaute Vorrichtung, z.B. einem Bücherregal oder Schrank, wo der Luftstrom
durch die Lüftungsöffnungen behindert werden könnten, gestellt werden.
9 Wärme - Das Gerät sollte von Wärmequellen, wie Heizkörpern, Wärmespeichern, Öfen oder
anderen Geräten (einschließlich Verstärkern), die Wärme erzeugen, entfernt liegen.
10 Stromquellen - Das Gerät sollte nur an eine solche Stromversorgung angeschlossen werden,
wie sie in der Bedienungsanleitung beschrieben oder auf dem Gerät markiert ist.
11 Erdung oder Polarisation - Vorsichtsmaßnahmen sollten ergriffen werden, damit die Erdung oder
Polarisation eines Geräts nicht behindert wird.
12 Strom - Kabelschutz - Stromkabel sollten so gelegt werden, dass man nicht auf sie tritt oder sie
von Gegenständen, die auf ihnen abgestellt sind, zusammengedrückt werden. Besonderes
Augenmerk gilt den Kabelstücken an der Steckdose und am Gerät selbst.
13 Reinigung - Das Gerät sollte nur wie vom Hersteller empfohlen gereinigt werden.
14 Dieses Produkt ist für den Gebrauch mit der beigefügten Antenne konzipiert und sollten nicht´an
externe Antennen angeschlossen werden.
15 Nicht-Verwendungs - Perioden – Das Netzkabel des Geräts sollte aus der Steckdose gezogen
werden,wenn das Gerät für eine längere Zeit ungenutzt bleibt.
16 Eindringen von Gegenständen oder Flüssigkeiten - Achten Sie darauf, dass keine
Gegenstände und keine Flüssigkeiten durch die Öffnungen des Geräts in das Gerät gelangen.
17 Schäden die Reparatur erfordern - Das Gerät sollte von qualifiziertem Fachpersonal gewartet werden, wenn:
A. Das Netzkabel des Steckers beschädigt wurde; oder
B. Gegenstände oder Flüssigkeiten in das Geräteinnere gelangt sind; oder
C. Das Gerät Regen ausgesetzt wurde; oder
D. Das Gerät scheinbar nicht ordnungsgemäß funktioniert oder sich in seiner Leistung deutlich
verändert hat; oder
E. Das Gerät fallengelassen wurde oder das Gehäuse beschädigt wurde.
18 Wartung - Der Benutzer sollte nicht versuchen, das Gerät, über die in den
Bedienungsanleitungen beschriebenen Hinweise hinaus, zu warten. Jede weitere Wartung sollte
von qualifiziertem Fachpersonal durchgeführt werden.
BEDIENELEMENTE
VORWÄRTS SPRINGEN
ZURÜCK SPRINGEN
AUFNAHME/LÖSCHEN
X-BASS AN/AUS
LAUTSPRECHER
LAUTSTÄRKE AN/
AUS-REGLER
LCD-DISPLAY UKW.ST-ANZEIGE
PROGRAMMIERUNG
STOP /
SD/USB
POWERANZEIGE
WIEDERGABE / PAUSE
WIEDERHOLEN
USB-ANSCHLUSS
RADIO/SD/
MW\UKW\UKW.ST-SCHALTER
LAUTSPRECHER
USB/PHONO- SENSOR
SCHALTER
EINSTELLSKALA
EINSTELLKNOPF
KOPFHÖRERBUCHSE
SD-KARTE
LINE-INBUCHSE
LINE-OUT-BUCHSE
EXTERN UKW-ANTENNE
Line-IN-SCHALTER
NETZSTECKER
BEDIENELEMENTE
STOP/SD/USB
WIEDERGABE/PAUSE
SD/USB
PROG
ZURÜCK SPRINGEN
0-9
AUFNAHME/LÖSCHEN
PROGRAMMIERUNG
VORWÄRTS SPRINGEN
12
3
45
6
7
8
9
REC/
ERASE
0
REPEAT
WIEDERHOLEN
DREHZAHLREGLER-SCHALTER
TONARMABLAGE
TONARM
ADAPTER FÜR SCHALLPLATTEN MIT 45 U/MIN
SPINDEL
PLATTENSPIELER
Auspacken
1 des Geräts aus den Verpackungsmaterialien.
Hinweis: Bewahren Sie alle Verpackungsmaterialien auf.
Entfernen Sie die Plastikhülle, die das Radio bedeckt.
1. Entfernen Sie den Kabelbinder vom Netzkabel und lösen Sie den Antennendraht
auf der Rückseite des Radios.
2. Öffnen Sie den Deckel und entfernen Sie das Styropor-Füllmaterial vom Plattenteller.
3. Entfernen Sie den schwarzen Kabelbinder unter dem Tonarm..
4. Entfernen Sie den weißen Nadelschutz, indem Sie ihn vorsichtig Richtung Vorderseite des Geräts
ziehen.
Anmerkungen :
a) Anmerkung zur elektrostatischen Entladung: Im Falle einer Fehlfunktion aufgrund von
elektrostatischer Entladung, setzten Sie das Produkt zurück (Trennen und Neu-Verbinden der
Stromzufuhr kann erforderlich sein), um den normalen Betrieb wieder aufnehmen.
b) Anmerkung (I2) zu elektrischen, schnellen Störimpulsen (Burst): Im Falle einer Fehlfunktion
aufgrund von elektrischen, schnellen Störimpulsen (Burst), setzen Sie das Produkt nur zurück.
(Trennen und Neu-Verbinden der Stromzufuhr kann erforderlich sein), um den normalen Betrieb
wieder aufnehmen.
EINRICHTUNG
1. Entrollen Sie das NETZKABEL auf der Rückseite des Gerätes.
2. Lösen Sie die UKW-Antenne und lassen Sie sie gerade nach unten hängen, um optimalen
UKW-Empfang zu erzielen. Wenn Sie Probleme beim Einstellen eines UKW-Senders haben,
verschieben Sie die externe UKW-Antenne für den besten Empfang. Schließen Sie die
UKW Antenne nicht an Außenantennen an.
Stromquelle
1. Stecken Sie das Netzkabel in eine passende Steckdose.
Radiobetrieb
1. Stellen Sie den Funktionsschalter auf RADIO.
2. Schalten Sie das Gerät ein, indem Sie den VOLUME-Drehknopf in die AN-Position schalten.
3. Drehen Sie den VOLUME-Regler in die mittlere Position.
4. Stellen Sie den Bandumschalter auf das gewünschte Band (MW oder UKW oder UKW.ST).
5. Wählen Sie die gewünschte Radiostation durch Drehen des Einstellknopfes aus.
6. Stellen Sie den Lautstärkeregler auf den gewünschten Lautstärkepegel.
Antenne
Antenne : Für den UKW-Empfang ist das Gerät mit einer UKW-DRAHTANTENNE ausgestattet.
Bewegen Sie den Draht, bis der Empfang klar und ohne Störungen ist. Für MW -Empfang ist das
Gerät mit einer eingebauten Richtungs-Ferritantenne ausgestattet. Drehen Sie das Gerät, um die
Position zu finden, in der der beste Empfang zu erreichen ist. Schließen Sie die EXTERNE
UKW-ANTENNE nicht an Außenantennen an.
USB- &und SD-KARTENBETRIEB
SD-Kartenbetrieb :
1. Schieben Sie den FUNCTION-Schalter zum SD/USB-Modus.
2. Schalten Sie das Gerät ein, indem Sie den VOLUME-Drehknopf in die AN-Position schalten.
Wenn keine Karte erkannt wurde, wird die Meldung “Read”*’3f’No Card” auf dem Display angezeigt.
CARD
CARD
3. Drehen Sie den VOLUME-Regler in die mittlere Position.
4. Legen Sie die SD-Karte in den Kartensteckplatz. “READ” wird angezeigt, wenn das System den
Inhalt der SD-Karte scannt.
5. Der erste Titel des Root-Ordners (Ordner 1) wird nach dem Auslesen des SD-Karteninhalts
angezeigt. Drücken Sie PLAY/PAUSE /
, um die Musik zu starten.
6. Drücken Sie die Taste FORWARD SKIP /
/ BACKWARD SKIP /
einmal oder mehrmals, bis
die gewünschte Titelnummer auf dem Display erscheint. Lassen Sie die Taste los – der Titel fängt
automatisch an zu spielen.
7. Drücken Sie STOP/
, um die Wiedergabe anzuhalten.
8. Um die Musik anzuhalten, drücken Sie PLAY/PAUSE / . Drücken Sie die Taste erneut, um die
wiedergabe fortzusetzen.
USB-Betrieb :
1. Schieben Sie den FUNCTION Schalter zum SD/USB Modus.
2. Schalten Sie das Gerät ein, indem Sie den VOLUME Drehknopf in die AN-Position schalten.
3. Drehen Sie den VOLUME-Regler in die mittlere Position.
4. Drücken Sie im Stopp-Modus STOP/
und halten der Taste für mindestens 2 Sekunden, um von
SD->USB zu wechseln. Wenn kein USB-Gerät erkannt wurde, wird “NO USB” auf dem Display
angezeigt.
USB
5. Schließen Sie ein USB-Massenspeichergerät an. READ wird angezeigt, wenn das System den
Inhalt des USB-Geräts scannt.
USB
6. Der erste Titel des Root-Ordners (Ordner 1) wird nach dem Auslesen des Inhalts des USB-Geräts
angezeigt. Drücken Sie PLAY/PAUSE /
, um die Musik zu starten.
USB
MP3
7. Drücken Sie die Taste FORWARD SKIP /
/ BACKWARD SKIP /
einmal oder wiederholt, bis
die gewünschte Titelnummer auf dem Display erscheint. Lassen Sie die Taste los der Titel
fängtautomatisch an zu spielen.
8. Drücken Sie STOP /
, um die Wiedergabe anzuhalten.
9. Um die Musik anzuhalten, drücken Sie PLAY/PAUSE /
. Drücken Sie die Taste nochmals, um
mit der Wiedergabe fortzufahren.
Anmerkungen :
1. Der USB-Anschluss unterstützt keine Verbindung mit einem USB-Verlängerungskabel und er ist
nicht für eine direkte Kommunikation mit dem Computer geeignet.
2. Es kann nicht garantiert werden, dass alle USB-Speichergeräte und SD-Karten auf diesem Audio
system funktionieren.
WICHTIG :
Trennen Sie das USB-Gerät oder die SD-Karten nicht im USB/SD-Kartenmodus, da dies zur
Beschädigung des externen Gerätes oder der Dateien führen kann. Bitte stellen Sie das Gerät
erst aus oder wechseln Sie in einen anderen Modus, bevor Sie das USB-Gerät bzw. die
SD-Karte sicher entfernen.
USB-Spezifikation : Schnittstelle
- USB 2.0 Full speed, HOST (USB-HUB wird nicht unterstützt) entsprechender Flash-Speicher
- Kompatibel mit MPEG Audio 1, 2, 2.5
- Kompatibel mit Layer 1, 2, 3
- Kompatibel mit folgenden Bitraten: 128 – 320 Kbps
- Unterordnerstruktur: 8 Ebenen
- Maximal 999 Tracks oder Titel
- Unterstützt ID3 Tags V2.0
PLATTENSPIELER
VORBEREITUNGEN ZUR NUTZUNG DES PLATTENSPIELERS
1. Öffnen Sie den Deckel und entfernen Sie den schwarzen Kabelbinder, indem Sie ihn aufdrehen
und langsam vom TONARM herunterziehen.
2. Entfernen Sie die Kartonverpackung.
3. Entfernen Sie den weißen Nadelschutz, indem Sie ihn vorsichtig Richtung Vorderseite des Geräts
ziehen.
4. Lösen Sie den TONARM und den Festhaltebügel, indem Sie ihn vorsichtig nach rechts drücken.
Dies wird den Tonarm von der ARMABLAGE lösen. Befestigen Sie den Festhaltebügel wieder,
wenn Sie das Gerät an einen anderen Ort transportieren.
PLATTENSPIELERBETRIEB
1. Schieben Sie den FUNCTION-Schalter zum PHONO-Modus.
2. Schalten Sie das Gerät ein, indem Sie den POWER-Schalter in die AN-Position schalten.
3. Drehen Sie den VOLUME-Regler in die mittlere Position.
4. Setzen Sie den DREHZAHLREGLER-SCHALTER auf die gewünschte Geschwindigkeit (33 1/3, 45
oder 78 Umdrehungen pro Minute).
5. Bewegen Sie den Tonarm über die Schallplatte und senken Sie ihn an der Stelle ab, an der Sie die
Schallplatte starten möchten.
6. Am Ende der Schallplatte wird der TONARM automatisch stoppen. Sie müssen den Tonarm per
Hand zur TONARMABLAGE zurücksetzen.
MITGELIEFERTES ZUBEHÖR :
Adapter für Schallplatten mit 45 U/min .
Um eine Schallplatten mit 45 U/min abzuspielen, entfernen Sie den Adapter,
indem Sie Daumen & und Zeigefinger in die Nischen drücken und den Adapter
hochziehen. Platzieren Sie ihn auf der SPINDEL. Nun kann die Schallplatte auf
den Drehteller gelegt werden.
TITELPROGRAMMIERUNG
Sie können bis zu 20 Titel in der gewünschten Reihenfolge speichern.
1. Drücken Sie in der Stopp-Position auf PROGRAM /
, um mit der Programmierung zu beginnen.
Das Symbol “P” und P0-01 fangen an zu blinken.
P
CD
2. Drücken Sie die Taste FORWARD SKIP/
/ BACKWARD SKIP/
einmal oder wiederholt, bis
die gewünschte Titelnummer im Display angezeigt wird
3. Drücken Sie auf PROGRAM /
zur Bestätigung, es wird die gespeicherte Titelnummer und die
nächste Speicherposition angezeigt.
4. Wiederholen Sie die Schritte 2 bis 3, um alle gewünschten Titel auszuwählen und zu speichern.
FULL wird angezeigt, wenn Sie versuchen mehr als 20 Titel zu programmieren.
P
CD
5. Drücken Sie auf PLAY/PAUSE/
, um das Programm abzuspielen.
Das Programm löschen
Sie können den Inhalt des Speichers löschen, indem Sie Folgendes tun :
- Einmal in Stopp Position, zweimal während der Wiedergabe
- Drücken Sie die Taste POWER
- Wählen Sie eine andere Tonquelle aus
WIEDERGABEMODUS
1. Drücken Sie im Wiedergabemodus REPEAT /
auf der Fernbedienung.
2. Der Standardzustand im Wiedergabemodus ist AUS.
3. WIEDERHOLEN 1 / ORDNER WIEDERHOLEN / ALLE WIEDERHOLEN. DREI verschiedene
Wiedergabemodi können bei MP3 ausgewählt werden.
X-BASS
Drücken Sie den X-BASS ON/OFF-Knopf, um den X-BASS-Effekt ein- oder auszuschalten
(Stellen Sie die Lautstärke auf den mittleren Bereich, um den X-BASS-Effekt zu maximieren).
Line Out Ausgänge
1. Sie können dieses Gerät an verschiedene Quellen anschließen, indem Sie die AUX
Ausgangsbuchsen verwenden.
2. Verbinden Sie die AUX-Kabel (nicht mitgeliefert) mit der LINE-OUT-BUCHSE und den
AUX-Eingängen der gewünschten Komponente. Schauen Sie für Bedienungsanweisungen in die
Bedienungsanleitung der gewünschten Komponente. Die LINE-OUT-BUCHSE gibt nur ein Signal
aus und kann daher nicht für externe Lautsprecher ohne eine separate Verstärkerquelle verwendet
werden.
AUX-Eingang
1. Sie können das Gerät mit externen Komponenten verbinden, indem Sie den AUX-Eingang
verwenden.
2. Stecken Sie das AUX-Kabel in die LINE-IN-BUCHSE auf der Rückseite des Geräts ein.
3. Schalten sie den LINE-IN-SCHALTER auf die AN-Position.
4. Stecken Sie das andere Ende des AUX-Kabels in die Ausgangsbuchse Ihrer gewünschten
externen Komponente.
5. Überprüfen Sie die Lautstärke der externen Komponente.
6. Schauen Sie in das Benutzerhandbuch der externen Komponente, um einen korrekten Betrieb zu
gewährleisten.
Hinweis : Stellen Sie sicher, dass sich der LINE-IN-SCHALTER in der AUS-Position befindet, wenn
Sie den AUX-Eingang nicht verwenden.
MP3-Kopiervorgang
1. Drücken Sie während der Wiedergabe vom USB-Gerät oder von der SD-Karte die Taste
REC/ERASE, um den MP3-Kopiervorgang vom USB-Gerät auf die SD-Karte bzw. von der
SD-Karte auf das USB-Gerät zu starten. Die Wiedergabe wird angehalten und das System scannt
die Inhalte des USB-Geräts/der SD-Karte und erstellt einen Ordner zur Speicherung des
MP3-Titels.
2. Das Symbol “REC” wird angezeigt.
3. Die Meldung COPY wird angezeigt.
4. Das Zielgeräte-Symbol “USB” bzw. “CARD” blinkt, der MP3-Kopiervorgang startet, der Vorgang
endet, sobald Kopiervorgang abgeschlossen ist.
5. Die aktuelle MP3-Datei wird vom Anfang wiedergegeben
6. Sie können im Stopp-Modus eine MP3-Datei vom USB-Gerät auf die SD-Karte oder von der
SD-Karte auf ein USB-Gerät kopieren, indem Sie REC/ERASE /
drücken. Unter Umständen
kann es sein, dass nicht alle MP3-Titel kopiert werden, abhängig von der MP3-Datei, dem
USB-Gerät und der SD-Karte
(Der Vorgang kann nicht gestoppt werden, bevor er abgeschlossen ist).
Von Phono zu SD / USB
Das Gerät ist in der Lage ein Audiosignal vom PHONO-Eingang in das MP3-Format umzuwandeln
und auf einem USB-Massenspeichergerät oder einer SD-Karte zu speichern (Standardmäßig USB,
wenn beide Geräte erkannt werden)
1. Stellen Sie die FUNCTION Taste auf den PHONO-Modus ein.
2. Drücken Sie REC/ERASE / , um mit dem Kopiervorgang zu beginnen, das Gerät scannt die
Inhalte von dem USB-Gerät/der SD-Karte und erstellt einen Ordner zur Speicherung der MP3-Titel.
3. Das Symbol “REC” und die Meldung “TO” werden für etwa 15 Sekunden angezeigt, das Symbol
“USB” fängt an zu blinken.
4 Das Zielgeräte-Symbol “USB” oder “CARD” fängt an zu blinken, sobald die Aufnahme beginnt.
5.Drücken Sie auf STOP / , um die PHONO Aufnahme zu beenden.
MP3-Titel löschen
Das System ermöglicht es, zuvor aufgenommene MP3-Titel oder bereits existierende Dateien zu
löschen.
1. Halten Sie im USB- oder SD-Karten-Wiedergabemodus die Taste REC/ERASE / für 2
Sekunden, der aktuelle Wiedergabetitel gedrückt wird unterbrochen und der Titel gelöscht.
2.Die Meldung “delete” wird angezeigt
KOPFHÖRERBUCHSEN-BETRIEB
Stecken Sie die Kopfhörer (nicht mitgeliefert) in die KOPFHÖRERBUCHSE.
Bitte beachten Sie, dass während der Kopfhörer-Nutzung die Lautsprecher ausgeschaltet sind.
Hören über Ohrhörer / Kopfhörer (nicht mitgeliefert)
Fehlersuche :
Es gibt keine Stromzufuhr
1 Der Netzstecker ist nicht richtig angeschlossen.
2 Überprüfen Sie, ob sich der ON/OFF-Lautstärkeregler in der AN-Position befindet.
Es gibt keinen Ton
1 Überprüfen Sie die Lautstärke durch Drehen des Lautstärkereglers.
2 Stellen Sie sicher, dass sich der LINE-IN-SCHALTER in der AUS-Position befindet, wenn die LINEIN-BUCHSE nicht benutzt wird.
Der Plattenspieler funktioniert nicht
1 Vergewissern Sie sich, dass der Funktionsschalter auf Phono gestellt ist.
2 Versuchen Sie den Tonarm nach rechts zu bewegen, bis Sie ein Klicken hören.
3 Vergewissern Sie sich, dass die schützende Nadelabdeckung entfernt ist.
KUNDENBETREUUNG
Sollten Sie eine Frage haben oder ein Problem mit Ihrem Ricatech-Produkt auftauchen, können Sie
den Ricatech-Kundenservice kontaktieren. Sie können uns per Telefon und E-Mail erreichen.
E-Mail
Senden Sie uns für die Kundenbetreuung per E-Mail bitte eine E-Mail an [email protected].
Achten Sie bitte darauf, dass Sie Ihre Modellnummer und die Seriennummer des Produkts angeben,
teilen Sie uns außerdem Ihren Namen & Ihre Adresse mit und beschreiben Sie Ihre Frage oder
problem deutlich.
Telefon
Für Kundenbetreuung per Telefon wählen Sie bitte
+32 3 3265694. Ein Mitarbeiter aus unserem Serviceteam wird Ihnen gern behilflich sein.
Besuchen Sie für ein vollständiges Verfahren die Webseite von Ricatech unter: www.ricatech.com
Hereby, Ricatech B.V. declares that this turntable is in compliance with the essential
requirements and other relevant provisions of Directive 1999/5/EC.
Ricatech B.V.
Cornusbaan 1
2908 KB Capelle a/d IJssel
The Netherlands
ESPAÑOL
ATENCIÓN :
PARA RÉDUCIR LOS RIESGOS DE CHOQUE ELÉCTRICO, NO EXPONGA
ESTE APARATO À LA LLUVIA NI A LA HUMEDAD. NO QUITE LA TAPA. LOS
PILOTOS SON SOLDADOS EN LUGAR. EL INTERIOR NO CUENTA CON
COMPONENTES A REPARAR POR EL USUARIO. CONFÍE SU APARATO
SOLAMENTE AL PERSONAL DE SERVICIO CALIFICADO.
CAUTION
RISK OF ELECTRIC SHOCK
DO NOT OPEN
El símbolo de rayo con punto
de flecha al interior del triángulo
equilateral lleva el propósito de
poner al usuario sobre aviso de
la presencia de «voltaje
peligroso» no aislado al
interior de la caja del aparato
que es suficientemente
grave para causar un riesgo
de choque eléctrico a las
personas.
ATENCIÓN ! PARA REDUCIR LOS
RIESGOS DE CHOQUE ELÉCTRICO,
NO QUITE LA TAPA (Ó LA PARTE DE
ATRÁS). EL INTERIOR NO CUENTA
CON NINGÚN COMPONENTE A
REPARAR POR EL USUARIO.
CONFÍE SU APARATO SOLAMENTE
AL PERSONAL DE SERVICIO
CALIFICADO.
El signo de admiración al
interior del triángulo equilateral lleva el propósito
de poner al usuario sobre
aviso de la presencia de
instrucciones importantes
concernientes a la operación
y al mantenimiento que se
encuentran en el manual
del usuario librado con el
aparato.
Especificaciones técnicas
Gama de Frecuencias
Puerta USB 2.0
Fuente de energía
Consumo
Antenas
Velocidades
Parlantes
Tamaño
Impedancia
Consumo
Potencial de salida
: AM (PO) 530 - 1600 KHz
: FM (GO) 88 – 108 MHz
: Toda Velocidad 512 MIB - 4GB
(Soporte FAT16, FAT32)
: AC230V/50Hz
: 15W
: Antena FM (GO) externa
: Antena AM (PO) Incorporada – Barra ferrita
: 33-1/3, 45, 78 rpm
: 2 x 3 pulgadas – tipo dinámico x 2
: 4 ohms
: 3-5W
: 1,2 W x 2
* EL FABRICANTE SE RESERVA EL DERECHO DE CAMBIAR LA CONCEPCIÓN Y LAS
ESPECIFICACIONES SIN PREAVISO.
INSTRUCCIONES DE SEGURIDAD IMPORTANTES PARA
PRODUCTOS DE AUDIO
POR FAVOR LEA CON ATENCIÓN LAS SIGUIENTES INSTRUCCIONES DE SEGURIDAD
APLICABLES A SU EQUIPO.
1. Lea las instrucciones – Lea todas las instrucciones de seguridad y uso antes de
utilizar el aparato.
2. Guarde las instrucciones – Guarde las instrucciones de seguridad y uso para
futuras referencias.
3. Tenga en cuenta las advertencias – Siga todas las advertencias e instrucciones
de uso del aparato.
4. Siga las instrucciones – Siga todas las instrucciones de funcionamiento y uso.
5. Agua y humedad – Este aparato no debe usarse cerca del agua, por ejemplo cerca de bañeras,
lavabos, fregaderos o pilas, en superficies mojadas o cerca de una piscina.
6. Carritos y soportes – Utilice este aparato sólo con carritos o soportes recomendados por el
fabricante.
6A.Desplace el conjunto de carrito y aparato con cuidado. Las paradas rápidas, el exceso de fuerza
o las superficies irregulares pueden hacer que el carrito vuelque.
7. Soporte de pared o techo – Coloque este aparato únicamente sobre soportes de pared o techo
recomendados por el fabricante.
8. Ventilación – Este aparato debe colocarse de forma que su posición no interfiera en una
ventilación adecuada. Por ejemplo, no debe colocarse sobre una cama, sofá, alfombra o superficie
similar, que pueda bloquear las aberturas de ventilación; tampoco lo coloque en lugares
empotrados, como estanterías o armarios, que puedan impedir que el aire fluya por las aberturas
de ventilación
9. Calor – Este aparato debe situarse lejos de fuentes de calor, como radiadores, calentadores,
estufas o demás aparatos (incluidos amplificadores) que desprendan calor.
10.Corriente – Este aparato debe conectarse sólo a la corriente descrita en las instrucciones
de funcionamiento o a la que se describe en el propio aparato.
11. Toma de tierra o polarización – Deben tomarse precauciones para asegurarse de que
la toma de tierra o la polarización del aparato no se impiden.
12.Protección del cable de corriente – Los cables de la corriente deben estar correctamente
colocados para que no se pisen ni se aplasten con objetos colocados sobre o contra ellos.
Se debe prestar especial atención a la parte del cable cercana al enchufe y al conector del
aparato.
13.Limpieza – Debe limpiar este aparato solamente como recomienda el fabricante.
14.Este producto está diseñado para usarse con la antena acoplada y no debe conectarse ninguna
otra antena exterior.
15.Periodos sin uso – Cuando no vaya a utilizar este aparato durante periodos de tiempo
prolongados, desenchúfelo de la corriente.
16.Entrada de objetos y líquidos – Tenga cuidado de que no caigan objetos ni líquidos a través de
las aberturas de la carcasa.
17.Daños que precisan reparaciones – Este aparato debe llevarse al servicio técnico cuando:
A. El cable de la corriente o la clavija estén dañados.
B. Hayan caído objetos o líquidos dentro del aparato.
C. El aparato se haya expuesto a la lluvia.
D. El aparato no funcione normalmente o muestre algún cambio en su funcionamiento.
E. El aparato se haya caído o la carcasa esté dañada.
18. Reparaciones — El usuario no debe intentar reparar el aparato más allá de lo descrito
en el presente manual. Todo lo demás debe realizarlo personal de mantenimiento cualificado.
Ubicación de los Mandos
BUSCAR
PARA ADELANTE
INDICADOR
ESTACIÓN
FM ESTÉREO
GRABAR/BORRAR
BUSCAR
PROGRAMAR/
PARA ATRÁS
PANTALLA LCD REPETIR
TOCAR/
X-BASS
PARO/ PAUSAR
LUZ
DE
MARCHA/
SD/USB
REPETIR
ENCENDIDO
PARO
SELECTOR CÉLULA DE
PUERTA USB
BOTÓN
DE FUNCIÓN RECEPCIÓN IR
PARLANTE VOLÚMEN PARLANTE
MARCHA/PARO
SELECTOR DE
INDICADOR
ESTACIONES
DE ESTACIONES
ENCHUFE
AUDÍFONOS/ HENDIDURA PARA
SELECTOR
AURÍCULARES TARJETA SD
AM\FM\FM
ESTÉREO
INTERRUPTOR
ENTRADA
ANTENA FM
EXTERNA
ENCHUFE SALIDA
COMMUTATEUR ENTREE
CABLE DE CORRIENTE
Ubicación de los Mandos
PARO/SD/USB
TOCAR/PAUSAR
SD/USB
PROG
BUSCAR PARA ATRÁS
0-9
GRABAR/BORRAR
PROGRAMAR
BUSCAR PARA
ADELANTE
12
3
45
6
7
8
9
REC/
ERASE
0
REPEAT
REPETIR
SELECTOR DE VELOCIDAD
SOPORTE
BRAZO
ACÚSTICO
BRAZO
ACÚSTICO
ADAPTADOR PARA DISCOS 45 RPM
EJE
TOCADISCOS
Desempacar
1 Quite los materiales de embalaje del aparato.
NB. Guarde todos los materiales de embalaje para el caso de mudanza
ó devolución del aparato.
2 Quite la funda de plástico del aparato.
3 Quite el Adaptador de Energía CA del embalaje.
4 Abra la tapa y quite el embalaje de transporte de styrofoam del tocadiscos.
5 Quite la atadura negra por debajo del brazo.
6 Quite la tapa de protección blanca de la aguja con jalar hacia el frente del aparato.
7 Quite el clip de retención del brazo acústico con empujarlo lijeramente a la derecha.
Esto desbloquea el brazo acústico del soporte. Hay que bloquear el clip de retención para el
transporte del aparato a otro lugar.
8 Ponga la tapa en el aparato.
CONFIGURACIÓN
1 Desenrolle el cable de corriente AC
2 Desate la antena FM y déjela colgada en línea recta para una óptima recepción de FM. Si tiene
problemas al sintonizar una emisora de FM, mueva la antena externa de FM para una mejor
recepción. No conecte la antena FM a una antena externa.
Operación de Base
Operación del Tocadiscos
Encienda el aparato con girar el SELECTOR DE VOLÚMEN MARCHA/PARO ubicado en la parte
delantera a la posición MARCHA.
1 Regule el SELECTOR DE FUNCIÓN al modo Tocadiscos [Phono].
2 Ponga el SELECTOR DE VELOCIDAD a la velocidad deseada (33-1/3, 45 ó 78 rpm).Coloque su
disco en el tocadiscos.
3 Mueva el braZO ACÚSTICO lijeramente hacia la derecha hasta que Usted escuche un clic para
activar el tocadiscos.
4 Ponga el brAZO ACÚSTICO por encima del disco al punto donde Usted quiere que comience la
música. Regule el BOTÓN DE VOLÚMEN MARCHA/PARO al volúmen deseado.
5 Al fin del disco, el brazo acústico va a parar automáticamente. Hay que regresar el braZO
aCÚSTICO a su soporte manualmente.
Accesorio: Adaptador para discos 45 RPM
Este adaptador le permite tocar los discos 45 rpm.
1. Ponga el ADAPTADOR (44) en el eje.
2. Coloque su disco 45 rpm suavemente en el tocadiscos.
3. Siga las instrucciones en la sección operación del tocadiscos
para tocar su disco.
Operación de la Radio
1 Regule el SELECTOR DE FUNCIÓN al modo Tuner
2 Regule le SELECTOR MODULACIÓN para seleccionar la banda deseada (AM/FM).
3 Selectione la estación de radio deseada con girar el SELECTOR DE ESTACIONES.
4 Regule el BOTÓN DE VOLÚMEN - MARCHA/PARO al volumen deseado.
Antena
Antena. Para la recepción FM, el aparato está equipado con una ANTENA FM EN ALAMBRE.
Oriente el alambre hasta obtener una recepción nítida sin interferencia. Para la recepción AM, el
aparato está equipado con una antena ferrita direccional incorporada. Oriente el aparato para hallar
la posición donde se recibe la mejor recepción. No hay que conectar la ANTENA FM EXTERNA a
una antena al exterior.
Operación de Base
Operación Tarjeta SD
1. Deslice el SELECTOR DE FUNCIÓN al modo SD/USB.
2. Encienda el aparato con girar el SELECTOR DE VOLUMEN -MARCHA/PARO a la posición
MARCHA. En el caso que el aparato no detecta una tarjeta, la pantalla va a mostrar “Read” “No
Card” [“Lectura” - “No hay tarjeta”].
CARD
CARD
3. Regule el volumen a medio camino.
4. Introduzca la Tarjeta SD en la hendidura de tarjeta. La pantalla va a mostrar “READ” [“Lectura”]
mientras el sistema lee el contenido de la tarjeta SD.
5. La pista número1 de la carpeta raíz (Carpeta 1) va a aparecer en la pantalla después que el
sistema ha leído el contenido de la tarjeta SD. Presione la tecla PLAY/PAUSE /
para comenzar
la música.
6. Presione la tecla BUSCAR PARA ADELANTE /
ó la tecla BUSCAR PARA ATRÁS /
una ó
varias veces hasta que el número de la pista aparezca en la pantalla. La música comenzará a
tocar automáticamente.
7. Presione la tecla STOP /
para parar la música.
8. Para pausar la música, presione la tecla PLAY/PAUSE /
. Presione la tecla una segunda vez
para recomenzar la música.
Operación USB
1. Deslice el SELECTOR DE FUNCIÓN al modo SD/USB.
2. Encienda el aparato con girar el SELECTOR DE VOLUMEN - MARCHA/PARO a la posición
MARCHA..
3. Regule el volumen a medio camino.
4. Presione y mantenga la tecla STOP /
durante 2 segundos. El aparato va a cambiar del modo
SD al modo USB.En el caso que el aparato no detecta una unidad USB,la pantalla va a mostrar
“NO USB”.
USB
5. Introduzca la unidad de memoria USB. La pantalla va a mostrar “READ” [LECTURA] mientras el
sistema lee el contenido de la unidad USB.
USB
6. La pista número1 de la carpeta raíz (Carpeta 1)
va a aparecer en la pantalla después que el sistema ha leído el contenido de la unidad USB.
Presione la tecla PLAY/PAUSE / para comenzar la música.
USB
MP3
7. Presione la tecla BUSCAR PARA ADELANTE /
ó la tecla BUSCAR PARA ATRÁS /
una ó
varias veces hasta que el número de la pista aparezca en la pantalla. La música comenzará a
tocar automáticamente.
8. Presione la tecla STOP /
para parar la música.
9. Para pausar la música, presione la tecla PLAY/ PAUSE /
.Presione la tecla una segunda vez
para recomenzar la música.
NB:
1. La facilidad USB no soporta la conexión por medio de un alargador USB y no está diseñada para
comunicar directamente con una computadora.
2. Todos los Flash Drives USB y todas las tarjetas SD no son necesariamente compatibles con este
aparato.
AVISO IMPORTANTE :
No hay que desconectar la unidad USB ó la tarjeta SD durante el mode de operación USB/SD,
puesto que al hacer esto Usted corre el riesgo de dañar la unidad de memoria externa ó los ficheros. Haga el favor de cortar la energía previamente ó cambiar a otro modo de operación antes de
desconectar la unidad USB ó la tarjeta SD.
Phono al USB/SD
Este aparato le permite grabar sus discos al formato MP3 en una unidad de memoria USB Flash
Drive ó en una tarjeta SD. Para grabar sus discos, siga las instrucciones a continuación.
1. Deslice el SELECTOR DE FUNCIÓN al modo PHONO [TOCADISCOS].
2. Comience el disco al punto donde Usted quiere comenzar la grabación. (Véa la sección sobre la
Operación del Tocadiscos en la página 33 para más información sobre cómo tocar sus discos).
3. Presione la tecla REC/ERASE /
[ GRABAR/BORRAR ] para comenzar la grabación.
La pantalla va a mostrar “ REC ”.
4. La media en la cual Usted graba (sea USB ó SD) va a comenzar a parpadear en la pantalla
cuando comienza la grabación.
5. Presione la tecla STOP /
para parar el proceso de grabación.
Copiar los MP3
1. Para copiar una canción individual de una USB en una SD ó de una SD en una USB, presione la
tecla REC/ERASE /
[GRABAR/BORRAR] durante la lectura de la canción que Usted quiere
gra bar para comenzar la operación de copiar. La lectura se parará y el sistema leerá el contenido
y se preparará a copiar la canción.
2. La pantalla va a mostrar el icono “ REC “.
3. La pantalla va a mostrar “COPY” [COPIAR] tan pronto como comienza la operación de copiar.
4. La pantalla va a mostrar el icono para la unidad en la cual Usted está grabando la copia.
“USB” ó “CARD” va a comenzar a parpadear y se parará una vez que la operación de copiar ha
terminado.
5. La fuente de orígin, USB ó SD comenzará a tocar desde el comienzo una vez que la operación de
copiar ha terminado.
6. Usted puede también copiar todas las canciones al mismo tiempo de una USB en una SD ó de
una SD en una USB. Al modo USB ó SD y con la lectura parada, presione la tecla
REC/ERASE /
. [GRABAR/BORRAR]
El aparato va a copiar todas las canciones de la USB a la SD ó de la SD a la USB. No se puede
parar el proceso de copiar hasta que el proceso llegue al fin.
Borrar las Pistas MP3
Este aparato le permite borrar canciones individuales de su tarjeta SD ó de su unidad de
memoria USB Flash Drive. Afin de borrar una canción específica, es necesario que esta canción ésté
en camino de tocar.
1 Al modo SD/USB, seleccione la canción que Usted quiere borrar y comience la lectura.
2 Una vez que la canción está en camino de tocar, presione y mantenga la tecla REC/ERASE /
[GRABAR/BORRAR] durante 2 segundos aproximadamente. La canción va a parar de tocar y será
borrada.
3 La palabra “delete” [borrar] va a mostrarse en la pantalla brevamente.
NB:Se puede borrar solamente una canción a la vez. No es posible borrar toda la tarjeta SD ó toda
la unidad de memoria USB de una vez.
Lectura programada
Usted puede programar hasta 20 pistas de un CD, de una unidad de memoria USB ó de una tarjeta
SD para tocar en la secuencía que Usted ha escogido. Siga las instrucciones abajo para programar
las pistas.
1. Con el aparato al modo CD, USB ó SD, verifique que la lectura de la música está parada.
Presione la tecla PROGRAMAR /
para comenzar la programación.La pantalla va a mostrar “P” y
P0-01 en parpadeando para indicar que Usted está en modo de Programación.
P
CD
2. Presione la tecla BUSCAR PARA ADELANTE/
ó la tecla BUSCAR PARA ATRÁS /
varias veces hasta que el número de la pista aparezca en la pantalla.
P
una ó
CD
3. Presione PROGRAMAR /
para confirmar su selección. La pantalla muestra el número de la
pista entrada en memoria y la posición siguiente de almancenaje.
P
CD
4. Repita las etapas 2-3 para seleccionar y poner en memoria todas las pistas deseadas.
La pantalla va a mostrar “FULL“ [LLENO] en el caso que Usted intenta programar más de 20
pistas.
5. Presione la tecla PLAY/PAUSE /
para tocar las pistas programadas.
6. Presione la tecla STOP /
dos veces para borrar las selecciones programadas. Las selecciones
programadas serán borradas también cuando se apaga el aparato ó cuando se selecciona una
fonción diferente.
Modo Tocar
1 Presione la tecla REPEAT /
en el control remoto en el modo Tocar.
2 La función del Modo Tocar por defecto es PARO.
3 Se puede escoger entre 3 tipos de Modo Tocar para los MP3: REPETIR 1 / REPETIR CARPETA /
REPETIR TODAS.
X-BASS
Presione la tecla X-BASS MARCHA/PARO para activar ó desactivar el efecto X-Bass. La activación
de la capacidad X-Bass añade un tono más rico y sonoro.
Salida Auxiliar
1 Usted puede conectar su aparato a fuentes diferentes por medio de la salida auxiliar.
2 Conecte el cable auxiliar (no incluído) en el enchufe (jack) salida.
3 El otro cabo del cable debe conectarse al enchufe (Jack) entrada del aparato que Usted ha
escogido.
4 Para más información sobre cómo conectar su aparato a un componente exterior, haga el favor de
consultar el manual del usuario para este aparato.
NB:La Salida Auxiliar corresponde a un nivel de señal pasivo de salida solamente y no tiene poder
suficiente para hacer funcionar los parlantes.
Entrada Auxiliar
1 El uso de la Entrada Auxiliar le permite conectar los componentes externos a su aparato.
2 Conecte el cable auxiliar (no incluído) al enchufe (jack) entrada en la parte de atrás de su aparato.
3 Regule el INTERRUPTOR DE ENTRADA en la posición MARCHA.
4 El otro cabo del cable debe conectarse al enchufe (Jack) Salida Audio del componente externo.
5 Verifique el nivel del volúmen del componente externo.
6 Para más información sobre cómo la operación del componente exterior, haga el favor de consultar
el manual del usuario para este aparato.
NB:Cuando Usted no quiere usar la Entrada Auxiliar, verfique que el INTERRUPTOR DE
ENTRADA está regulado a la posición PARO.
Operación del Enchufe Audífonos
1 Conecte los audífonos en el enchufe audífonos.
2 Regule el volúmen al nivel de escucha deseado.
NB: Cuando se usa los audífonos, el sonido está cortado a los parlantes del aparato.
Enchufe (Jack) Audífonos/Auriculares
El sonido está cortado a todos los parlantes.
NB: Los audífonos no son incluídos con el aparato.
Repetir la Selección
Para repetir una canción ó para repetir todas las canciones de un CD, de una unidad de memoria
USB ó de una tarjeta SD, siga las instrucciones a continuación.
1 Mientras que toca la música de un CD, de una unidad de memoria USB ó de una tarjeta SD,
presione la tecla REPEAT /
en el control remoto.
2 Al modo CD ordinario, presione la tecla REPEAT /
hasta que la pantalla muestre “REPEAT 1”
para repetir la canción que está tocando una vez que llegue al fin. Presione la tecla REPEAT /
hasta que la pantalla muestre “REPEAT ALL” [REPETIR TODAS] para repetir el CD todo entero
desde el comienzo tan pronto que termine.
3 Cuando Usted escucha los ficheros MP3 en CD, en unidad de memoria USB ó en tarjeta SD, hay
tres opciones de escucha: “REPEAT 1”, “REPEAT FOLDER” y “REPEAT ALL”. [REPETIR UNA,
REPETIR FICHERO y REPETIR TODAS]. Presione la tecla REPEAT / hasta que la pantalla
muestre el modo de escucha que Usted quiere.
NB: El reglaje por defecto para el Modo de Escucha es parado.
Generalidades
Guía para resolver los problemas
¿No hay corriente?
1 Verifique que el aparato está conectado correctamente.
2 Verifique que el aparato está encendido. Gire el BOTÓN VOLUMEN – MARCHA/PARO más allá de
la posición “clic” para encender el aparato.
¿No hay sonido?
1 Verifique el INTERRUPTOR DE ENTRADA en la parte de atrás del aparato para confirmar
que está en la posición PARO.
2 Verifique el nivel del sonido con girar el BOTÓN VOLUMEN – MARCHA/PARO.
3 Verifique que los aurículares no están conectados al aparato.
4 Verifique la posición del SELECTOR DE FUNCIÓN.
¿El Tocadiscos no funciona?
1 Verifique que el SELECTOR DE FUNCIÓN está regulado a la posición phono [tocadiscos].
2 Trate de mover el brazo acústico hacia la derecha hasta que Usted ecuche un “clic”.
3 Verifique que se ha quitado la tapa de protección blanca de la aguja.
Unidad de Memoria USB /Tarjeta SD – no hay música cuando se presione la tecla PLAY/
PAUSE.
1 Verifique que hay ficheros de música MP3 almacenados en la unidad de memoria USB Flash Drive
/ Tarjeta SD.
2 Verifique que la capacidad de la unidad de memoria USB Flash Drive / Tarjeta SD no excede los
4GB puesto que el límite de este aparato es 4GB como máximo.
3 Trate de remeter la unidad de memoria USB a cero con apagar y volver a encender la energía al
aparato.
4 Verifique a ver si los ficheros de la unidad de memoria/tarjeta son tal vez en formato WMA. Este
aparato no toca el formato WMA, sólo el formato MP3.
5 Todas las marcas de unidad de memoria USB/ tarjeta SD no son compatibles con este
aparato esto no es funcionamiento erróneo del aparato.
No se puede grabar música en la unidad de memoria USB/ Tarjeta SD
1 Verifique que la unidad de memoria USB / Tarjeta SD no está completamente cargada.
2 Verifique que el cerrojo en la tarjeta SD se halla en posición descorrido.
3 Es posible que la unidad de memoria/tarjeta no es compatible ó no tiene la capacidad correcta
(hasta 4GB como máximo) – todas las unidades de memoria en el mercado no son garantizadas a
funcionar con este aparato en razón de sus parametros de fabricación.
El control remoto no funciona
1 Ponga nueva batería. Véanse las Especificaciones Técnicas para el tipo de batería requerida.
2 Estese seguro de apuntar bien la célula de recepción IR del aparato cuando Usted utiliza el control
remoto.
3 Quite todos los obstáculos del camino entre el control remoto y el sensor IR del aparato afin de
dejar un camino derecho a la señal del control remoto hacia el aparato.
ATENCIÓN AL CLIENTE
En caso de dudas o problemas con su producto Ricatech, puede contactar con el servicio de
atención al cliente de Ricatech. Puede ponerse en contacto con nosotros por teléfono o correo
electrónico.
Correo electrónico
Para recibir asistencia técnica por correo electrónico, escriba a [email protected]. Asegúrese
de mencionar el nombre del modelo y número de serie del producto. Mencione asimismo su nombre
y dirección y describa claramente su pregunta o problema.
Teléfono
Para ponerse en contacto con el servicio de atención al cliente por teléfono, marque +32 3 3265694.
Uno de los miembros de nuestro personal se pondrá a su disposición. Para más información sobre el
procedimiento completo, visite el sitio web de Ricatech en: www.ricatech.com
Hereby, Ricatech B.V. declares that this turntable is in compliance with the essential
requirements and other relevant provisions of Directive 1999/5/EC.
Ricatech B.V.
Cornusbaan 1
2908 KB Capelle a/d IJssel
The Netherlands