1
Installation Instructions
PXR
8.
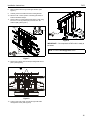
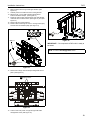
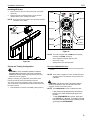
Mark the pilot holes through PXR upper bracket. (See
Figure 7)
9.
Carefully remove the PXR from the mounting bracket.
10. Drill two 7/32" x 2-3/4" (5.5mm x 69.9mm) pilot holes at
locations marked in Step 9.
11. Return PXR to mounting bracket and fasten to wall using
two 5/16 x 2-1/2" lag screws (RC) and two 5/16" flat
washers (RB). (See Figure 7)
(RB) x 2
8
10
x2
13
(Z)
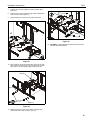
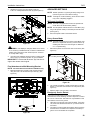
Figure 9
IMPORTANT ! : Do not power the PXR until it is ready to
be tested.
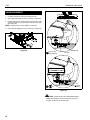
NOTE: Proceed to Arm Engagement section.
11
(RC) x 2
Figure 7
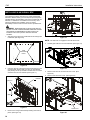
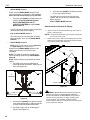
12. Remove two orange Velcro® straps holding PXR arms in
place. (See Figure 8)
12 Strap locations
Figure 8
13. Connect and route power cord (Z) through PXR cable
management areas. (See Figure 9)
11