Transcript
INSTALLATION INSTRUCTIONS
PSB-2024 & PSB-2025
PLASMA DISPLAY MOUNTING BRACKET
Prior to assembly, unpack carton completely and verify contents.
If you are missing any of the following components, please contact Customer Service at 1-800/582-6480
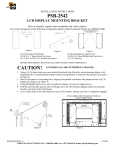
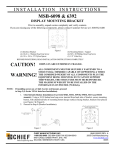
Figure 2
Figure 1
Figure 3
(1) Plasma Bracket
(4) 10-24 Nylock Nuts
(4) .74” OD X .39” ID X 1.00” White Nylon Spacer
(4) 10-24 x7/8” Button Head Cap Screw
(4) Mounting Buttons-Green
(1) 1/8” Allen Key
(4) M8-1.25 x 50mm BHCS
(1) 5mm Allen Key
(4) .375 x .330 x .375 Nylon Spacer
(4) M8-1.25 x 60mm Button Head Cap Screw
BEFORE PROCEEDING, READ INSTALLATION INSTRUCTIONS COMPLETELY
CAUTION!
PLASMA DISPLAYS ARE EXTREMELY FRAGILE.
1. Using a 10-24 button head cap screw inserted from back side of bracket through circular holes, secure
mounting button, with chamfered hole of mounting button (larger surface) facing bracket, to bracket
(four places) using the enclosed Nylock nuts (see Figure 2 & Figure 3).
2. Place Nylon spacers on mounting holes and align hole pattern on brackets with pattern on back of
your display (see Figure 4 & Figure 5). Attach bracket using the M8 button head screws.
3. With the aid of another person, lift your display up to the Chief Mount, aligning buttons of mounting
brackets with slots in the Chief Mount.
4. Lower safety catch on the Chief Mount to secure your display, making sure latch is completely
engaged.
Note: Use extra spacers and longer bolts as necessary.
Figure 5
Figure 4
8804-000129 RevB
CHIEF MANUFACTURING INC. 1-800-582-6480, Fax: 1-877-894-6918, Email: [email protected]
01/23/08