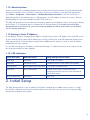
1
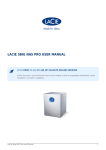
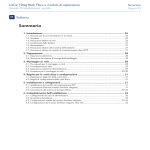
5big Storage Server DESIGN BY NEIL POULTON Quick Start Guide Table of Contents 1. Introduction4 1.1. Health and Safety Precautions................................................................... 4 1.2. General Use Precautions.......................................................................... 4 1.3 Box Content............................................................................................. 5 1.4. Windows Storage Server 2008.................................................................. 5 1.5. Network Connection and Names.............................................................. 5 1.5.1. Minimum Network and Workstation Requirements.......................... 6 1.5.2. Default Name and Login............................................................... 7 1.5.3. Wireless Support........................................................................... 7. 1.5.4. Network and Server Recommendations.......................................... 7 1.6. Keyboard, Mouse, and Monitor for Troubleshooting................................... 7. 1.7. Views of the 5big Storage Server............................................................... 8. 1.7.1. Front View.................................................................................... 8. 1.7.2. Rear View..................................................................................... 8 1.7.3 5big Enclosure Numbered Slots and Disk Trays...............................9 1.8. Removing and Installing Disks.................................................................. 9 1.9. Fastening a non-LaCie Hard Disk to a 5big Enclosure Drive Tray...............11 1.10. Ethernet Cable....................................................................................... 13. 1.11. Connecting the Power Cable................................................................... 14. 1.12. Connecting the Ethernet Cable............................................................... 14. 1.13. Administration....................................................................................... 15. 1.14 Setting a Static IP Address.......................................................................15 1.15. LED Indicators........................................................................................15 2. Initial Setup15 2.1. RAID Configuration.................................................................................. 16. 2.2. Startup and Login.................................................................................... 16 3 1. Introduction 1.1. Health and Safety Precautions • Only qualified persons are authorized to carry out maintenance on this device. • Read this Quick Start Guide carefully and follow the correct procedures when setting up the device. • Do not open your LaCie 5big Storage Server or attempt to disassemble or modify it. Never insert any metallic object into the device or one of its drives to avoid any risk of electrical shock, fire, shortcircuiting, or dangerous emissions. Your LaCie 5big Storage Server contains no user-serviceable parts. If it appears to be malfunctioning, have it inspected by a qualified LaCie Technical Support representative. • Never expose your device to rain, or use it near water, or in damp or wet conditions. Never place objects containing liquids on the LaCie 5big Storage Server, as they may spill into its openings. Doing so increases the risk of electrical shock, short-circuiting, fire, or personal injury. • Power requirements 100-240 V~, 1.44 A, 50-60 Hz, (supply voltage fluctuations not exceeding ± 10% of the nominal and transient over-voltages according to over-voltage category II). 1.2. General Use Precautions • Do not expose your device to temperatures outside the range of 5° C to 35° C (41° F to 95° F); or to operational humidity beyond 5-80%, non-condensing, or non-operating humidity beyond 10-90%, non-condensing. Doing so may damage it or disfigure its casing. Avoid placing your device near a source of heat or exposing it to sunlight (even through a window). Additionally, placing your device in an environment that is too cold or humid may damage the unit. • Always unplug the device from the electrical outlet if there is a risk of lightning or if it will be unused for an extended period of time. Otherwise, there is an increased risk of electrical shock, short-circuiting, or fire. • Use only the power supply shipped with the device. • Do not use the device near other electrical appliances such as televisions or radios. Doing so may cause interference which will adversely affect the operation of the other products. • Do not place the device near sources of magnetic interference, such as computer displays, televisions, or speakers. Magnetic interference can affect the operation and stability of your device. • Never use excessive force on your device. NOTES: (1) Any loss, corruption, or destruction of data while using a LaCie drive or drive system is the sole responsibility of the user, and under no circumstances will LaCie be held liable for the recovery or restoration of this data. To help prevent the loss of your data, LaCie highly recommends that you keep TWO copies of your data; one copy on your external hard disks or hard disk system, for instance, and a second copy either on your internal hard disk, another external hard disk, or some other form of removable storage media. (2) 1GB = 1,000,000,000 bytes. 1TB = 1,000,000,000,000 bytes. Once formatted, the actual available storage capacity varies depending upon the operating environment (typically 10-15% less). (3) Your 5big Storage Server must be kept in a location that is easily accessible and well ventilated. As well, the location you choose must have an available Ethernet connection to the network for the 5big Storage Server. 4 1.3. Box Content Your LaCie 5big Storage Server package contains the items below: 1. LaCie 5big Storage Server 2. Cat 5E Ethernet cable 3. Power supply 4. 5big Storage Server CD (documentation and language packs) 5. 5big Storage Server Recovery DVD 6. Quick Start Guide 7. Drive lock tool 8. Packet of drive tray screws (Single-disk version only. Please keep unused drive tray screws in a safe location for future use. Do not use alternative screws when fastening a drive to a 5big enclosure drive tray.) NOTE: Please save the 5big Storage Server packaging. (1) In the event that it should require repair or service, the 5big Storage Server must be returned in its original packaging. (2) When sending the 5big Storage Server for service, make certain to return all items in the original packaging. (3) If you purchased a single disk 5big Storage Server, please remove the non-LaCie disks before sending the server for service. (4) Before sending the 5big Storage Server, please backup all data stored on its disk drives. LaCie cannot guarantee that your data will be preserved. 1.4. Windows Storage Server 2008 Your 5big Storage Server is shipped with Windows Storage Server 2008 pre-installed. By following the proper steps for connecting and powering on the 5big Storage Server, you can begin configuring the device to meet the needs of the network. 5 1.5. Network Connection and Names 1.5.1. Minimum Network and Workstation Requirements To successfully use the 5big Storage Server, your network must meet the following requirements: Network Minimum Requirements Server connection 100 Mbps Ethernet wired connection. LaCie highly recommends using 1 Gb/s for better performance. Router/Firewall device A switch with wired Ethernet connectivity for the workstations to communicate with the 5big Storage Server. LaCie highly recommends using 1 Gb/s for better performance. IP address The 5big Storage Server assumes that network devices receive their IP addresses from a DHCP server. For a static IP configuration, see 1.14. Setting a Static IP Address. Internet access The 5big Storage Server must have access to the Internet for critical updates to Windows Storage Server 2008. 6 Minimum Operating System Requirements for Workstations on the Network The latest versions of Windows XP, Windows Vista, and Windows 7 The latest versions of Mac OS X 10.5 and 10.6 Linux 2.6 1.5.2. Default Name and Login Username - Administrator Password - LaCie5big (case sensitive) Server name - 5bigstorage 1.5.3. Wireless Support • The 5big Storage Server requires an Ethernet cable to connect to your network. • Computers that are attached to the network wirelessly may access 5big Storage Server data when given the proper rights. 1.5.4. Network and Server Recommendations • For optimal performance, use a Gigabit Ethernet router or switch and a Gigabit Ethernet board in your client computer(s). • For improved network performance and reliability, LaCie recommends the use of both Ethernet ports on the back of the 5big Storage Server. This is commonly referred to as “Teaming”. See the LaCie Technical Brief on Teaming at www.lacie.com/technologies for further information. • While changing the username is optional, LaCie recommends that administrators update the password as soon as possible. • Make certain to maintain the health of all the systems and hardware on the network. The 5big Storage Server’s performance can be affected by such external forces as network activity, hardware, distance, and setup. 1.6. Keyboard, Mouse, and Monitor for Troubleshooting The 5big Storage Server has a VGA connection and three USB 2.0 ports (see 1.7.2. Rear View) that may be used for connecting a keyboard, mouse, and monitor. Under normal operation, the 5big Storage Server may be accessed using Remote Desktop Connection for administration. When troubleshooting a problem related to the 5big Storage Server, LaCie recommends connecting a keyboard, mouse, and monitor directly to the server in order to rule out conflicts, such as problems with the network. Please attach a keyboard, mouse, and monitor to the 5big Storage Server the first time it is connected to your network and powered on. See 2.2 Startup and Login. 7 1.7. Views of the 5big Storage Server 1.7.1. Front View – On/Off Button with Status LED (Fig. 01) 1. On/Off power switch - The blue button on the front of the 5big Storage Server turns the unit on or off. The LED remains lit to show that the device is on. 1 NOTE: Pushing the front LED button while the 5big Storage Server is running will shut the system off. This is true even if the 5big Storage Server is in use. Please keep the unit in a location that will prevent accidentally pushing the front LED button while the 5big Storage Server is active. Select Start > Shut Down from Windows Storage Server 2008 to turn off the 5big Storage Server. Fig. 01 1.7.2. Rear View – (Fig. 02) 2. Ethernet ports (2) DESIGNED BY NEIL POULTON 10 3. USB 2.0 expansion ports (3) 4. eSATA expansion port 9 5. VGA Monitor 8 6. Reset button* 7. Power input connection 2 LAN 1 9. Drive tray handle 10. Drive LED LAN 2 USB USB VGA POWER 7 8. Drive tray lock eSATA eSATA 6 3 4 5 Fig. 02 - Rear view with disk trays *EMERGENCY RESET ONLY. Use the pointed end of the drive lock tool to push the reset button (Fig. 02 - 6). Please make certain that users are not accessing the system since the 5big Storage Server will reboot upon pressing the button. In the event of an emergency reset, please check the health of the RAID in Windows Disk Management. In most cases, using the reset button will cause the software RAID to rebuild. Generally, the software RAID rebuild is non-destructive and will maintain the integrity of the data, though there may be instances where data is lost. 8 1.7.3. 5big Enclosure Numbered Slots and Disk Trays – (Fig. 03) For convenience when adding or removing disks, the 5big enclosure drive slots and trays have matching numbers. 1.8. Removing and Installing Disks NOTE: In the event that an individual hard disk fails in the LaCie 5big Storage Server, contact your LaCie reseller or LaCie Customer Support for technical assistance. If the problem drive was purchased from LaCie and it is within the warranty period, please replace it with a hard drive provided by LaCie. LaCie will not replace a nonLaCie hard drive or any hard drive not purchased from LaCie. Fig. 03 - Rear view without disk trays • If you are replacing a disk, make certain to choose the slot with the problem drive. • If you are adding a new drive to an empty slot, consider a LaCie 5big Drive. LaCie 5big Drives are specially prepared and optimized for use with the 5big Storage Server. Please go to www.lacie.com for further information on new LaCie 5big Drives. • LaCie recommends selecting drives that are equal in storage capacity with RAID 5 configurations. For example, fill all empty slots with 1 TB drives if the first drive is 1 TB. See the Technical Brief on RAID for further information. • If you are installing non-LaCie disks into the 5big Storage Server, please go to www.lacie.com to see the list of supported hard drives. LaCie cannot guarantee performance or functionality when using unsupported drives. • When adding a new drive, choose a drive tray that does not hold a drive. LaCie recommends inserting new drives in the order of the numbered slots, from left to right. For example, if the first slot on the left (Slot 1) contains the sole drive in the enclosure, choose the second slot from the left (Slot 2) for the next drive. See 1.9 Fastening a non-LaCie Hard Disk to a 5big Enclosure Drive Tray once you have removed an empty drive tray (Fig. 03 - Rear view without disk trays). 9 Remove a 5big enclosure drive tray: CAUTION: After continuous use, the 5big Storage Server drives may be hot. Use caution when removing a a drive tray with a disk. 1. Use the included drive lock tool to unlock the drive tray. Turn the lock until it is vertical. (Fig. 04) 2. Place your index finger into the space behind the handle. (Fig. 05) 3. Draw out the drive tray handle and carefully extract it (Fig. 06). Please use caution when removing the drive tray. Fig. 04 See 1.9 Fastening a non-LaCie Hard Disk to a 5big Enclosure Drive Tray if you are adding a non-LaCie drive. Install a disk into the 5big enclosure: 1. Make certain that the replacement or new drive is securely fastened to a drive tray. 2. Carefully insert the drive tray into the empty drive slot. You will feel resistance when the drive tray is most of the way in the bay. Gently push the drive tray handle firmly until you feel it snap into place. The drive tray handle should be flush with the back of the 5big enclosure. Fig. 05 3. Use the drive lock tool to lock the drive in place. Fig. 06 10 1.9. Fastening a non-LaCie Hard Disk to a 5big Enclosure Drive Tray NOTE: Drives sold by LaCie are the preferred choice when using your 5big Storage Server. LaCie disks specially prepared for the 5big enclosure are tested and shipped in a drive tray for easy installation. Additionally, all 5big Drives include a 3-year warranty. Visit www.lacie.com for more information on purchasing a 5big Drive. Please note the following before fastening your non-LaCie hard drive to the drive tray: • Only 3.5” SATA II drives may be used in the 5big enclosure. Please visit the Support page at www. lacie.com for a list of drives that have been tested by LaCie. LaCie cannot guarantee performance or functionality when using non-LaCie drives that have not been tested with the 5big Storage Server. Fig. 07 - 5big Drive Tray and Four Screws • Use only the screws supplied in your packaging when fastening the non-LaCie hard drive to the drive tray (Fig. 07) • To avoid potential problems caused by electrostatic discharge (ESD), it is recommended that you do not touch the hard drive’s printed circuit board (Fig. 08). As a further precaution against ESD, please use an anti-static wristband or an anti-static mat to ground yourself when handling the hard drive. Fig. 08 - To avoid ESD, do not touch the hard drive printed circuit board. 11 6. Go to 1.8 Removing and Installing Disks for details on inserting the disk tray into the 5big enclosure. Once you have completed the steps in 2. Initial Setup, review the Technical Brief on RAID for instructions on configuring disks using Windows Storage Server 2008. Fig. 11 12 ©2010, LaCie. The LaCie logo is a trademark of LaCie. Other product and brand names mentioned herein may be trademarks or registered trademarks of their respective owners. Specifications and appearance are given as guidelines and are subject to change without notice. Use of this device to make unauthorized copies may require the permission of the copyright owner. LaCie cannot be held responsible for the unlawful use of this drive. www.lacie.com 5. Using the Phillips head screwdriver, carefully fasten all four screws into their slots. Do not overly tighten the screws. Doing so may negatively affect the integrity of the screw holes on the drive as well as the threads on the screws (Fig. 11). * 1TB (Terabyte) = 1000GB. 1GB = 1,000,000,000 bytes EN Total accessible capacity varies depending upon operating environment (typically 5–10% less). FR La capacité totale disponible varie en fonction de l’environnement d’exploitation (5 à 10 % de moins, en général). IT La capacità accessibile totale varia a seconda dell’ambiente operativo ed è generalmente pari al 5-10% in meno. DE Der insgesamt verfügbare Speicher ist von der Betriebsumgebung abhängig (in der Regel 5 bis 10 % weniger). ES La capacidad total accesible varía en función del entorno operativo (normalmente entre un 5 -10% menos). NL De totale bruikbare capaciteit varieert afhankelijk van de gebruiksomgeving (gewoonlijk 5 à 10% minder).**For optimal performance, the drive must be connected to a USB 3.0 host port. ***Calculations are based on approximately 15GB HD video, 700MB MPEG-4 video, 3.6MB music file and 3MB JPEG photo. Cannot be combined with any other Wuala offer. Full terms and conditions available at www.wuala.com/lacie ©2010, LaCie. The LaCie logo is a trademark of LaCie. Other product and brand names mentioned herein may be trademarks or registered trademarks of their respective owners. Specifications and appearance are given as guidelines and are subject to change without notice. Use of this device to make unauthorized copies may require the permission of the copyright owner. LaCie cannot be held responsible for the unlawful use of this drive. www.lacie.com * 1TB (Terabyte) = 1000GB. 1GB = 1,000,000,000 bytes EN Total accessible capacity varies depending upon operating environment (typically 5–10% less). FR La capacité totale disponible varie en fonction de l’environnement d’exploitation (5 à 10 % de moins, en général). IT La capacità accessibile totale varia a seconda dell’ambiente operativo ed è generalmente pari al 5-10% in meno. DE Der insgesamt verfügbare Speicher ist von der Betriebsumgebung abhängig (in der Regel 5 bis 10 % weniger). ES La capacidad total accesible varía en función del entorno operativo (normalmente entre un 5 -10% menos). NL De totale bruikbare capaciteit varieert afhankelijk van de gebruiksomgeving (gewoonlijk 5 à 10% minder).**For optimal performance, the drive must be connected to a USB 3.0 host port. ***Calculations are based on approximately 15GB HD video, 700MB MPEG-4 video, 3.6MB music file and 3MB JPEG photo. Cannot be combined with any other Wuala offer. Full terms and conditions available at www.wuala.com/lacie LaCie U.S. • 22985 NW Evergreen Parkway, Hillsboro, OR 97124 USA LaCie S.A. • 17, rue Ampère 91349 Massy Cedex France Lorem ipsum dolor sit amet, consectetur adipiscing elit. Ut porttitor, nibh nec aliquet imperdiet, libero ipsum tristique tortor, a aliquet elit enim placerat nisi. Sed quis neque nulla, ac congue tortor. Suspendisse et nibh tellus. Etiam eu rhoncus ante. Cras neque eros, posuere sed pulvinar nec, auctor nec justo. 4. Many disks have a label on one side and the printed circuit board on the opposite side. With its label side facing up, gently place the hard disk within the drive tray (Fig. 10). Keep the side with the printed circuit board on the work space and the SATA connector facing to the right. The four tray screw slots should align with the disk’s four screw holes. LaCie U.S. • 22985 NW Evergreen Parkway, Hillsboro, OR 97124 USA LaCie S.A. • 17, rue Ampère 91349 Massy Cedex France 2. Locate the empty 5big drive tray and four drive tray screws included in your packaging. Do not fasten a disk to a 5big enclosure drive tray with alternative screws. Doing so may damage the drive tray as well as your non-LaCie disk. Make certain that your non-LaCie 3.5” SATA II disk and a Phillips head screwdriver are within reach as well. Please confirm that the head of the screwdriver is the proper size for the drive tray screws provided by LaCie. Lorem ipsum dolor sit amet, consectetur adipiscing elit. Ut porttitor, nibh nec aliquet imperdiet, libero ipsum tristique tortor, a aliquet elit enim placerat nisi. Sed quis neque nulla, ac congue tortor. Suspendisse et nibh tellus. Etiam eu rhoncus ante. Cras neque eros, posuere sed pulvinar nec, auctor nec justo. Fastening a disk to the drive tray: 1. Find a suitable work area with adequate space and a flat, even surface. Fig. 09 - 5big Enclosure drive tray 3. Place the empty drive tray onto the flat work area. The handle should be on the bottom left, with the lock icon pointing away from you (Fig. 09). Fig. 10 - Drive tray with a hard drive 1.10. Ethernet Cable Gigabit Ethernet Cables and Connectors The cable used to attach Gigabit Ethernet devices is shown in Fig. 12 - Ethernet Cable Ends. NOTE: LaCie recommends Cat 5E or Cat 6 cables. Both support Gigabit Ethernet. Fig. 12 - Ethernet Cable Ends 5big Storage Server Desktop PCs and Macs (via Ethernet) 2big Quadra (for backup) (via Ethernet) Ethernet Switch Server Laptops (via Wi-Fi) Fig. 13 - Network Configuration 13 1.11. Connecting the Power Cable The power supply kit is composed of two cables: one cable (A) connects to the LaCie server; and the other cable (B) connects to a power source, such as a wall outlet or a surge protector (Fig. 14). DESIGNED BY NEIL POULTON B 1. Connect Cable A to the 5big Storage Server. LAN 2 LAN 1 2. Connect Cable B to the power supply brick (C). USB USB VGA POWER eSATA eSATA 3. Connect Cable B to a surge protector or wall outlet. CAUTION: (1) Only use the AC adapter supplied with your specific LaCie device. Since each product is unique, do not substitute a power supply from another LaCie device or another manufacturer for the LaCie 5big Storage Server. C A Fig. 14 (2) Please note that the AC adapter provided with your LaCie device includes connectors for electrical outlets in multiple regions. Thanks to its 100-240 Volt power supply, you may use your device in a foreign country. However, LaCie accepts no responsibility for any damage to the drive resulting from the use of an inappropriate adapter. Further your warranty will be void if you: • Use a power cable, power supply, or power adapter other than one that has been authorized by LaCie. • Do not remove your AC adapter when transporting your LaCie device. Neglecting to do so may damage your 5big Storage Server. DESIGNED BY NEIL POULTON LAN 1 LAN 2 USB USB VGA POWER eSATA eSATA Fig. 15 1.12. Connecting the Ethernet Cable (Fig. 13 - Network Configuration). 1. Connect an Ethernet cable to one of the Ethernet ports on the back of the LaCie 5big Storage Server (Fig. 15). Please note that both ports may be used for greater performance and reliability. See the Technical Brief on Teaming at www.lacie.com/technologies. 2. Connect the other end of the Ethernet cable(s) into an available Ethernet port (or ports) on your router or switch (Fig. 15). 14 1.13. Administration Similar to most servers, the 5big Storage Server may be administered remotely using Windows Remote Desktop Connection. From a Windows workstation on the same network as the 5big Storage Server, go to Start > Programs > Accessories > Remote Desktop Connection. Enter the name of the 5big Storage Server (the default name is “5bigstorage”) or its IP address to access the system. Remote Desktop programs are also available for Mac OS X and Linux. The 5big Storage Server can also be administered by attaching a keyboard, mouse, and monitor directly to the system (1.6. Keyboard, Mouse, and Monitor for Troubleshooting). To install your LaCie 5big Storage Server for the first time, you must connect a keyboard, mouse, and monitor to the device. See 2.2 Startup and Login. 1.14 Setting a Static IP Address As the default, Windows Storage Server 2008 is configured to receive its IP address from a DHCP server. To set a static IP, LaCie recommends attaching a monitor, USB mouse, and USB keyboard directly to the 5big Storage Server. Go to Windows Storage Server 2008 network settings to enter a static IP address compatible with your network. It is possible to change the IP address via Remote Desktop (1.14 Administration) but connection will be lost once the change has been applied. 1.15. LED Indicators Front LED Color Rear LED Color 5big Storage Server State Solid Blue Solid Blue The system is healthy. Solid Red Solid Blue or off Hardware error or the system cannot boot. Blinking Blue Blinking Blue then Solid Blue The system is powering on. Solid Blue Blinking Red/Blue SMART disk error(s). Launch the LaCie Hardware Monitor from the server desktop to check disk health. Blinking Red/Blue Solid Blue Fan error. 2. Initial Setup The 5big Storage Server is pre-installed with Windows Storage Server 2008, meaning that it is ready for network integration out of the box. Please take time to consider how you wish to manage the 5big Storage Server before storing data. 15 2.1. RAID Configurations The 5big Storage Server offers software RAID managed by Windows Storage Server 2008. Levels of RAID include 0, 1, 5, and Spanned. The default RAID configuration for a 5big Storage Server shipped with five disks is: • System: RAID 1 (Mirrored) • Swap: RAID 5 • Data: RAID 5 Single Disk 5big Storage Server Only: The single disk 5big Storage Server cannot be shipped with a RAID configuration. Only the operating system, Windows Storage Server 2008, is stored on the included disk. Please note that mirroring requires two disks while RAID 5 must have at least three hard drives. For more information on configuring RAID in Windows Storage Server 2008, please see the Technical Brief on RAID at www.lacie.com/technologies. NOTES: (1) Since changing the level of RAID deletes all data, LaCie highly recommends that you configure the preferred RAID(s) when first installing the 5big Storage Server. (2) LaCie recommends RAID levels 1 and 5 since they offer data protection in the event of a single disk failure. Using RAID 0 and/or Spanned configurations could lead to unrecoverable data loss. 2.2. Startup and Login To install your LaCie 5big Storage Server for the first time, you must connect a keyboard, mouse, and monitor to the server. Use the USB 2.0 and VGA ports on the back of the server (1.6. Keyboard, Mouse, and Monitor for Troubleshooting). Remote Desktop Connection will not be available from a workstation on the network when first installing the 5big Storage Server. Turn on the server by pushing the front LED (1.7.1. Front View – On/Off Button with Status LED). Allow a few minutes for the 5big Storage Server to start. 1. Upon initial boot, follow the steps in the Setup Windows Wizard (Language, time zone, etc.) 2. The 5big Storage Server will reboot once you have completed the Setup Windows Wizard. 3. Log into the 5big Storage Server when prompted. 4. The 5big Storage Server will reboot on its own after the login. This is normal behavior. 5. Log into the 5big Storage Server when prompted. Once the setup is complete and the system has restarted, you may manage the server from workstations on the network using Remote Desktop Connection (See 1.13 Administration). When logging in, enter the username, password, and server name for the 5big Storage Server. The defaults are: Username: Administrator Password: LaCie5big Server name: 5bigstorage 16 The configuration window will launch when first logging into the 5big Storage Server. There are many features that are easily accessible in this window, including network configuration, scheduling updates, and firewall configuration. The 5big Storage Server has shortcuts on the desktop for registering your LaCie product and launching the Server Manager or the Hardware Monitor. The Server Manager provides access to all the management functions of the 5big Storage Server, including Disk Management for RAID and Provision Sharing to set up volume and file sharing. The Hardware Monitor lists environmental, disk, and power management information. 17 To administer Mac clients, go to Start > EZ-IP administrator. For additional information see the GroupLogic guide on the included CD. Contact Us LaCie Asia 25/F Winsan Tower 98 Thomson Road Wanchai, Hong-Kong, China [email protected] LaCie Australia 458 Gardeners Road Alexandria, NSW 2015 [email protected] LaCie Benelux Vorstlaan / 165 Bld du Souverain B-1160 Brussels, Belgium [email protected] LaCie Germany Am Kesselhaus 5 D-79576 Weil Am Rhein [email protected] LaCie Switzerland Davidsbodenstrasse 15A 4004 Basel [email protected] LaCie Italy Milano Business Park Edificio B1 Via dei Missaglia 97 20142 Milano [email protected] LaCie United Kingdom and Ireland LaCie Ltd, Power Road Studios 114 Power Road Chiswick, London, UK W4 5PY UK: [email protected] Ireland: [email protected] Elecom – Japan http://www.lacie.jp/support/ LaCie Canada 235 Dufferin St. Toronto, Ontario M6K 1Z5 [email protected] LaCie Nordic (Sweden, Denmark, Norway, Finland) Sveavägen 90, 5tr 113 59 Stockholm, Sweden [email protected] LaCie France 17, rue Ampère 91349 Massy Cedex [email protected] LaCie Spain C/ Núñez Morgado, 3, 5a pl. 28036 Madrid [email protected] Visit www.lacie.com for more information on LaCie products. Copyright © 2010, LaCie 715268 101203 LaCie USA 22985 NW Evergreen Pkwy Hillsboro, OR 97124 [email protected] LaCie Worldwide Export 17, rue Ampère 91349 Massy Cedex, France [email protected] [email protected]