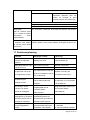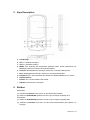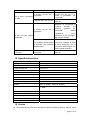
1
Voorzorgsmaatregelen z Laat het apparaat nergens tegenaan botsen of laat het vanaf een hoge positie vallen. z Gebruik de speler nooit op extreem hete of koude, stoffige of vochtige plaatsen. Stel het niet bloot aan direct zonlicht. z Maak regelmatig een back-up om ongewenst gegevensverlies te voorkomen. z Gebruik de speler niet in een sterk magnetisch veld. z Houd het apparaat uit de buurt van water of andere vloeistoffen. Mocht water of een ander vloeistof het toestel binnendringen, schakel de speler onmiddellijk uit en maak het schoon. z Gebruik geen chemische oplosmiddelen om het apparaat te reinigen om corrosie te voorkomen. Maak het schoon met een droge doek. z Wij zijn niet verantwoordelijk voor beschadiging of gegevensverlies wegens defecten, ongepast gebruik, reparatie van het apparaat of vervanging van de batterij. z Probeer het product niet te demonteren, repareren of modificeren. Dit verklaart de garantie ongeldig. z Het ontwerp van de speler of de daadwerkelijke display kan verschillen van wat deze handleiding illustreert. In dit geval overheersen de daadwerkelijke display en het ontwerp. Pagina 1 van 13 1 2 Hoofdeigenschappen z z z MP3&WMA-Speler MTV Videospeler JPEG-imageviewer z Geheugenkaartlezer z Mapnavigatie z Voice Recorder z StereoFM-radio (optioneel) z FM-encodering (optioneel) z Verwijderbaar opslagapparaat z Leuke spellen z Ingebouwde oplaadbare lithium-ion batterij z Persoonlijke instellingen Systeemvereisten z z 3 Hardware: IBM PC & Compatibele PC, Notebook met USB interface Besturingssysteem: Windows98/SE, Windows Me, Windows2000/XP Inhoud van de Verpakking Controleer a.u.b. of de verpakking de volgende artikelen bevat. Neem a.u.b. contact op met uw verkoopadres als één van hen ontbreekt: 4 z Hoofdapparaat z Stereo oortelefoon z USB kabel z Gebruikshandleiding z Driver-CD Vóór Gebruik 4.1 Aansluiting op een PC en audiofiles downloaden Deze speler is “plug&play” voor WIN2000/XP/ME OS. Voor Windows98/SE dient u echter een driver te installeren vóór aansluiting (Zie paragraaf “Driver Installatie” voor meer informatie). Aansluiten op een PC voor fileoverdracht: (1) Steek het bredere uiteinde van de USB kabel in de USB poort van de PC en het smallere uiteinde in de USB poort van de speler. (2) Dubbelklik op “My Computer” op het bureaublad wanneer het icoontje “ ” rechtsonder op het PC scherm verschijnt en u zult een verwijderbare disk zien welke de speler aangeeft. Gebruik de verwijderbare disk op dezelfde manier als een normale lokale disk; kopieer de files er naartoe of er vanaf. 4.2 De speler veilig van de PC loskoppelen Voor Windows2000/XP: (1) Linksklik op het icoontje “ ” rechtsonder op de taakbalk. (2) Klik op het minivenster dat verschijnt met de melding “Stop the USB Mass Storage Device – Drive (X)”. (3) Trek de speler eruit wanneer u gevraagd wordt het apparaat te verwijderen. Voor Win98, zorg ervoor dat de data transfer complete is voordat u de stekker uit de MP3 Pagina 2 van 13 speler trekt. 4.3 Wijzig de batterij Het apparaat heeft een ingebouwde lithium-ikoon oplaadbare batterij. Het wordt opgeladen via een USB verbinding. U bent verplicht om het op te laden wanneer u het voor de eerste keer gebruikt. Het duurt ongeveer 3 uur om de batterij volledig op te laden. Verbindt de groter gedeelte van de USB kabel met de USB interface van de PC, en verbindt het andere kleinere gedeelte van de USB kabel met de USB interface van deze speler. Het apparaat is verbonden met de PC en wordt geladen. Opmerking:Voor optimale prestatie dienen lithium-ion batterijen vaak gebruikt te worden. Indien u het apparaat niet regelmatig gebruikt, zorg er dan voor de batterij minstens eens per maand op te laden. 4.4 Geheugenkaarten gebruiken Het apparaat kan een ingang voor geheugenkaarten hebben om gegevens van een Micro-SD kaart te lezen. Voor gebruik van een geheugenkaart: (1) Steek een Micro-SD kaart in de kaartingang op het apparaat. (2) Houd de toets MENU ingedrukt om het hoofdmenu op te roepen. (3) Selecteer “Explorer” en druk op de toets MENU om de folder browsermodus te openen. (4) In de folder blader mode, ziet u twee folders genaamd “Internal memory” en “SD Card”. Om de audio of video bestanden op de geheugen kaart af te spelen, ga naar de “SD Card” folder. Pagina 3 van 13 5 Keys Description A. LCD Display B. VOL-: Zet de volume zachter. C. VOL+: Zet de volume harder. D. MENU: Hou het een tijdje ingedrukt om het hoofd menu in te gaan. Klik heel even om de selectie te bevestigen of klik op de mapnavigatiemodus. E. Previous:Speel de vorige track. Ga ook naar boven. F. Next: Speel de volgende track. Ga ook naar beneden. G. Play/Pause: Zet het apparaat aan of uit. Speel ook audio af of pauzeer deze. H. Hoofdtelefoon I. Schakelaar: Schakel het apparaat in of uit.. J. USB Poort: Aansluitien op een computer. 6 Electriciteit Aan/Uit Om de electriciteit aan te zetten, (1) Schuif de Schakelaar naar de rechterkant om de electriciteit aan te zetten. (2) Klik en hou de PLAY/PAUSE knop ingeklikt totdat u een verwijzing ziet op de display. Om de electriciteit uit te zetten, (1) Klik en hou de PLAY/PAUSE knop ingeklikt totdat u een verwijzing ziet op de display. (2) Schuif de Schakelaar naar de linkerkant om de electriciteit uit te zetten. (Zorg ervoor dat u deze stap voltooid om batterijen te sparen.) Opmerking: Deze speeler heeft een electriciteit-besparing kenmer welke het apparaat in Pagina 4 van 13 staat stelt om de electriciteit automatisch uit te zetten wanneer het niet wordt gebruikt voor ongeveer 3 minuten. 7 Basis operatie Functie Operatie Afspelen/Pauze Klik op de PLAY/PAUSE knop om aftespelen of te pauzeren. Volume aanpassen Klik even de VOL+/VOL- knop om het volume harder of zachter te zetten. Vorige Track Druk kort op de toets PREVIOUS. Volgende Track Druk kort op de toets NEXT. Fast Forward Houd de toets NEXT ingedrukt. Rewind Houd de toets PREVIOUS ingedrukt. A-B Herhalen Om een gespecificeerde sectie van een track te herhalen, (3) Houd tijdens het afspelen de VOL+ knop ingedrukt om het startpunt van de herhaling te selecteren. (4) Klik en hou de VOL+ knop opnieuw ingedrukt om het eindpunt e te selecteren. De muzieksectie tussen het start- en eindpunt wordt herhaald. (5) Houd om A-B herhaling te stoppen, de VOL+ knop ingedrukt. Lock/Unlock Om de knoppen te beschermen tegen het per ongeluk indrukken of buttons om de knoppen te deblokkeren, hou de MENU knop en de VOLtegelijkertijd ingedrukt. 8 Muziek afspelen 8.1 Vul de muziek mode in Klik en hou de MENU knop ingeklikt om het hoofdmenu te tonen. Gebruik de VORIGE/VOLGENDE knop om het “Music” menu te selecteren, en klik de MENU knop om de selectie te bevestigen. Nu bent u in de MUZIEK mode, verwijs muziek afspelen naar de basis operaties. 8.2 Folder navigatie Om door folders te navigeren: (1) In de MUZIEK mode, klik kort op de MENU button om de folder navigatie mode in te gaan. (2) Klik de PREVIOUS/NEXT knop om een folder of track te selecteren, en klik de MENU knop om de selectie te bevestigen, of klik de PLAY/PAUSE knop om terug te keren. 9 Afspelen video’s (1) Klik en hou de MENU knop ingeklikt om het hoofdmenu te tonen. (2) Gebruik de PREVIOUS/NEXT knop om het “Video” menu te selecteren, en klik de MENU knop om het video afspeel mode in te gaan. (3) Klik de PREVIOUS/NEXT knop om een video bestand te zoeken welke u wilt afspelen, en klik de MENU knop om aftespelen. Voor gedetailleerde informatie over afspelen, zie de “Basis Operatie” sectie. (Opmerking: Tijdens het afspelen, kunt u kort klikken op de MENU knop om de folder navigatie mode in te gaan.) Pagina 5 van 13 Opmerking: Deze speler kan alleen AVI video’s afspelen. Voor andere formaten, dient u de omvormer tool te gebruiken welke inclusief is op de driver CD om ze om te zetten. Voor gedetailleerde informatie over de omvormer, zie AVI Omvormer Snelle Gebruikers Handleiding op de CD. 10 Foto’s bekijken Om foto’s te bekijken, (1) Klik en hou de MENU knop ingeklikt om het hoofdmenu te zien. (2) Selecteer “Photo” en klik de MENU knop om te bevestigen. (3) Klik de PREVIOUS/NEXT knop om een folder of beeld te selecteren, en klik de MENU om te bevestigen. (4) Selecteer de foto welke u wilt tonen en klik de MENU knop om het naar een groot scherm te vergroten. (5) In de volledige schermmodus, kunt u de PREVIOUS/NEXT knop indrukken om de vorige of de volgende foto te tonen. Klik op PLAY/PAUSE om een automatische slideshow te starten of te stoppen. Klik de MENU knop om naar de mapnavigatiemodus te gaan. Opmerking: Sommige beelden worden misschien niet getoond. Probeer om een image viewer te gebruiken (ACDSee bijvoorbeeld) om ze om te vormen. Zie “Appendix – Omvormen beeld bestand”voor details. 11 E-book lezen 11.1 Lezen (1) Klik en hou de MENU knop ingeklikt op het hoofdmenu te tonen. (2) Selecteer “E-book” en klik MENU knop om te bevestigen. (3) Klik de PREVIOUS/NEXT knop om een .txt bestand te selecteren, en klik de MENU knop om het geselecteerde bestand te openen. (4) Klik de PREVIOUS/NEXT -knop om handmatige naar de volgende of vorige pagina te gaan, of klik de PLAY/PAUSE -knop om automatisch naar de volgende of vorige pagina te gaan (door de intervaltijd tussen 1 en 5 te stellen in Instellingen/Auto Slide show/Tekst). (5) Tijdens lezen, kunt u de favorieten gebruiken om de pagina te markeren for het later verder lezen. Voor informatie over favorieten, zie “Gebruik favorieten” sectie. 11.2 Gebruik favorieten (1) Ga naar de pagina welke u wilt markeren. (2) Klik heel even op de VOL+ knop om een “Save Bookmark” scherm te laten zien voor het bewaren van favorieten. (3) Klik de PREVIOUS/NEXT -knop om een favorieten nummer te selecteren en klik de MENU-knop om te bevestigen. De favoriet is bewaard. Het begint vanaf de eerste regel van de huidige pagina. (4) Om de pagina te lezen welke u hebt gemarkeerd, klik even op de VOL- knop om “Load Bookmark” scherm te laten zien. Klik de PREVIOUS/NEXT -knop om een favoriet te selecteren en klik op de MENU -knop om te bevestigen. U zult naar die Pagina 6 van 13 pagina worden gestuurd. Opmerking: Sommige TXT bestanden kunnen misschien niet worden gelezen. Dit kan komen omdat het format niet wordt ondersteund. Sla het over of herlaadt een ander bestand. 12 Alle bestanden bladeren Om alle bestanden te bladeren opgeslagen in de speler, (1) Klik en hou de MENU knop ingeklikt om de hoofdmenu te tonen. (2) Selecteer “Navigatie” ,en klik de MENU knop om de browser mode in te gaan. (3) Klik de PREVIOUS/NEXT knop om een bestand te selecteren welke u wilt bekijken, en klik de MENU knop om het aftespelen of te tonen. 13 Voice Opname z Opname (1) Klik en hou de MENU knop ingeklikt om het hoofdmenu te tonen. (2) Selecteer“Record”,en klik de MENU knop om de opname mode in te gaan. (3) Klik kort op de PLAY/PAUSE knop om de opnamen te starten. Tijdens de opname, kunt u de PLAY/PAUSE knop klikken om te pauseren of om verder te gaan met de opname. (4) Klik en houd de MENU -knop ingedrukt om terug te keren naar het hoofdmenu.. z Afspelen opnames Selecteer “Explorer” in het hoofdmenu om naar de mapnavigatiemodus te gaan. Open de “VOICE”-map, en selecteer het opnamebestand dat u wilt afspelen. 14 Bestand verwijderen Om een bestand te verwijderen, (1) Selecteer “Explorer” op het hoofdmenu om naar de mapnavigatiemodus te gaan. (2) Klik even op de VOL- knop om een dialoogvenster te laten verschijnen. (3) Gebruik de PREVIOUS/NEXT knop om “YES” te selecteren en klik de MENU knop om te bevestigen. 15 Spel spelen Deze speler biedt een populaire en grappig spel - Tetris Wereld. Om het spel te activeren, op het hoofdmenu, selecteer “Game” en klik de MENU knop om naar de spel mode te gaan. Basis operatie is als volgt: Start spel Verplaats het blok naar links of rechts Klik de PLAY/PAUSE -knop Klik de PREVIOUS en NEXT -knop Pagina 7 van 13 Roteer het blok Klik de VOL+ knop Voeg het blok toe Klik de VOL- knop Versnel het blok Klik de MENU -knop 16 Persoonlijke Instellingen Om de speler persoonlijk in te stellen: (1) Op het hoofd menu, selecteer de “Settings” item en klik de MENU knop om naar het system instelling mode te gaan. (2) Klik de PREVIOUS/NEXT -knop om een instellingsoptie te selecteren en klik op de MENU -knop om te bevestigen of klik op de PLAY/PAUSE -knop om te annuleren/terug te keren. Muziek Herhalings mode Éénmaal ( Speel huidige track éénmaal en dan stop) Herhaal Éénmaal (Herhaal huidige track) Folder(Speel alle audio bestanden in de huidige folder en stop nah et afspelen) Folder Herhaling. ( Herhaal alle audio bestanden in de huidige folder) Normaal ( Speel alle audio bestanden opgeslagen in de speler en stop nadat ze allemaal zijn afgespeeld) Herhaal Alles(Herhaal alle audio bestanden opgeslagen in de speler) Pagina 8 van 13 Intro(Speel de eerste 10 seconden van elke audio bestand) Afspelen mode Volgorde(SPeel audio bestanden in volgorde) ( Verwisselen Speel audio bestanden willekeurig) Programmeer EQ Normaal, 3D, Rock, Pop, Klassiek, Bass, Jazz, Gebruiker EQ Gebruiker EQ-instelling (1) Klik op de PREVIOUS/NEXT (Gebruiker-gedefinieerde -knop om de EQ kolom te equalizer-instelling) verzetten. (2) Klik de VOL+/VOL- knop om de waarde van de geselecteerde kolom aan te passen. (3) Herhaal het klikken op de NEXT -knop totdat de cursor op de YES knop staat, en klik dan de MENU -knop om te bevestigen. (4) Ga naar de “Preset EQ”-menu, en selecteer “User EQ” om de equalizer-instelling aan te zetten. FM Radio (optioneel) Stereo SW Aan, Uit (Zet het stereo effect aan of uit) Opname FM regio China, Europa, Japan, Amerika OPNAME Kwaliteit Hoge Kwaliteit, Algemene Kwaliteit OPNAME Volume Automatische dia show +1、+2、+3、+4、+5 Blader Tekst (Stel interval in tussen de vorige en de volgende pagina wanneer het apparaat zich in de auto pagina omhoog-/benedenmodus bevindt). Blader Foto (Stel interval in tussen de vorige en de volgende slide in auto slideshowmodus) Display Achterlicht 5 seconden, 10 seconden, 15 seconden, 20 seconden, 30 seconden, Altijd Aan. Pagina 9 van 13 Helderheid (Stel de helderheid in van het scherm) Achterlicht mode Normaal Electriciteit scherm uit Bewaren wanneer (Zet er het geen activiteit is binnen een zekere tijd) Systeem Over - Informatie over het product Upgrade - Upgrade de firmware Standaard Laden – Herstel de speler naar de standard instelling Sleep Timer Uit, 10 minuten, 15minuten, 30 minuten, 60 minuten, 120 minuten (Stel de continue speel tijd in voordat de speler automatisch wordt uitgeschakeld.) Taal Simplified Chinees, Traditioneel Chinees, Engels, Koreaans, ( Selecteer taal waarin Japans, Spaans, Frans, Duits, Italiaans, Portugees, Russisch, etc. de scherm tekst wordt vertoond in) 17 Probleemoplossing Probleem Mogelijke oorzaak Oplossing Batterij is te zwak. Laad de batterij op. Geen geluid wanneer een Het volume is te laag. Pas het volume aan. audiofile afspeelt. Corrupte audiofile. Verwijder de file of sla deze ove De LCD vertoont niets wanneer het apparaat gestart is. De speler kan niet op de PC aangesloten worden. De tijdsweergave verandert continu. Een storing in de PC wanneer u de speler aansluit en loskoppelt. De USB interface wordt niet door het moederbord van de PC ondersteund. Update of vervang het moederbord van de PC. De bitsnelheid van de MP3 Probeer een vaste bitsnelheid file verandert tijdens het te gebruiken voor compressie afspelen. van de MP3 file De speler wordt plotseling losgekoppeld van de computer tijdens fileoverdracht. Het totale geheugen Het geheugen wordt weergegeven op de speler gedeeltelijk gebruikt om komt niet overeen met de programma’s op te slaan en aangegeven capaciteit. karakters weer te geven. Sommige MP3 files kunnen De MP3 file is niet goed afgespeeld gecompresseerd door een worden. standaard, zoals MPEG I Koppel de speler niet los van de computer tijdens fileoverdracht. 1. Wis de niet-ondersteunde MP3 files. 2. Gebruik standaard MPEG I Pagina 10 van 13 Layer 1 of Layer 2 wat de Layer 3 voor compressie speler niet ondersteunt. van de niet-ondersteunde MP3 files. Zorg ervoor dat de video in AVI formaat is. Zoniet, gebruik Het fileformaat is niet De video kan niet de verstrekte ondersteund. conversiesoftware om het te weergegeven worden. converteren. De videogegevens zijn corrupt. Sla het over of laad een andere file opnieuw. Probeer een image editor (ACDSee Het bestand format wordt niet ondersteund bijvoorbeeld) gebruiken om het te te converteren. Zie "Appendix Converteren De foto kan niet worden afbeeldingsbestand" getoond. meer informatie. voor Het apparaat ondersteunt een Het beeld resolutie is beperkt voor dit apparaat. maximale resolutie van 3520 X 2816. Zorg ervoor dat de resolutie van het beeld deze beperking niet te buiten gaat. De TXT file kan niet Het fileformaat is niet Sla het over of laad een gelezen worden. ondersteund. andere file opnieuw. 18 Technische specificaties Onderwerp Specificatie Capaciteit 128MB of hoger Batterijtype Oplaadbare Lithium Batterij Levensduur van batterij Ca. 5 Uur LCD Display 1,8-inch TFT scherm Vermogen van Oortelefoon 5mW+5Mw Videoformaat AVI (XviD) Audioformaat MP3, WMA Fotoformaat JPEG Afbeeldingresolutie 3520 X 2816 (Max.) Bitsnelheid MP3: 8-320kbps; WMA: 32-384kbps SNR >90dB USB Poort USB2.0 Bedrijfstemperatuur 0℃ ~ +55℃ Pagina 11 van 13 Bewaartemperatuur Operationele Relatieve Luchtvochtigheid * Relatieve Luchtvochtigheid voor Opslag * -20℃ ~ +55℃ 20% ~ 90% (40℃) 20% ~ 93% (40℃) 19 Opmerking z Zorg ervoor dat alle sleutels zijn ingeschakeld vóór u start. Als ze zijn geblokkeerd, houd dan de MENU en VOL- knop ingedrukt om ze te ontgrendelen. z Laadt de batterij metteen wanneer de display lage batterij aangeeft, of het apparaat zal automatisch worden uitgeschakeld. z Het apparaat garandeert niet te werken met alle geheugen kaarten van verschillende fabrikanten. z Sluit de verbinding van de speler met de PC correct af om data verlies te voorkomen. z De transfer snelheid vertoont op de PC kan verschillen afhankelijk van het besturings system. Exact transfer snelheid is onderheving aan de spelers indicatie. z Wanneer de opname spraak bestand is te groot, het antwoord van het apparaat kan traag zijn. Appendix – Omvorming beeld bestand Omvormen stappen: ① Start het ACDSee programma, selecteer het beeld dat u wilt omvormen, en klik “Tool” →”Convert” ② Selecteer “JPG JPEG JFIF Format” en klik dan“Options”. Pagina 12 van 13 ③ Deselecteer de opties omcirkeld in rood en klik dan op de “OK” button om te bevestigen. DIFRNCE kan niet aansprakelijk gesteld worden voor defecte producten als gevolg van misbruik, verkeerde installatie of ander oneigenlijk gebruik. Pagina 13 van 13 Cautions z Do not subject the device to severe impact or drop it from high position. z Do not use the player in extreme hot or cold, dusty or damp field. Do not expose it to direct sunshine. z Back up the data frequently in case of accident data loss. z Avoid using the player in strong magnetic field. z Keep the device away from water or other liquids. In the event that water or other liquids enter the device, power off the product immediately, and clean the device. z Do not use chemical solution to clean the device in order to avoid corrosion. Clean it with a dry cloth. z We are not responsible for the damages or lost data caused by malfunction, misusing, repairing the device or battery replacement. z Do not attempt to disassemble, repair or modify the product. This will invalidate guarantee. z The design of the player or actual display may be different from what is shown in this manual. It should be subject to the actual display or design. Page 1 of 12 1 2 3 Key Features z MP3&WMA Player z AVI Video player z JPEG image viewer z Folder Navigation z Voice Recorder z Removable Storage Device z Funny games z Built-in rechargeable lithium-ion battery z Customized settings System Requirements z Hardware: IBM PC & Compatible PC, Notebook with USB interface z Operating System: Windows98/SE, Windows Me, Windows2000/XP Package Content Please check the package for the following items. If any one of them is missing, please contact the vendor: 4 z Main Unit z Stereo earphones z USB cable z User Manual z Application CD Before Using 4.1 Connect to a PC and download audio files This player is plug & play for WIN2000/XP/ME OS. But for Windows98/SE, you are required to install a driver before connection (See “Driver Installation” section for details). To connect it with PC for transferring files, (1) Plug the larger end of the USB cable to the USB port of the PC, and plug the smaller end to the USB port of the player. (2) When the “ ” icon appear at the right bottom of the PC screen, double click “My Computer” on the desktop, you see a removable disk which indicates the player. Just use the removable disk as a regular local disk, copying files from or to it. 4.2 Removing the player from the PC safely For Windows2000/XP: (1) Left click the icon at the right hand corner of the taskbar. (2) Click the pop-up mini-window with message of “Stop the USB Mass Storage Device – Drive (X)”. (3) When you are prompted to remove the device, pull out the player. For Win98, please make sure the data transfer is completed before unplugging the MP3 player. Page 2 of 12 4.3 Charge the battery The device has a built-in lithium-icon rechargeable battery. It is charged via USB connection. You are required to charge it when you use it for the first time. It takes about 3 hours to fully charge the battery. Connect the larger end of the USB cable to the USB interface of PC, and connect the other smaller end of the USB cable to the USB interface of this player. The device is connected to PC and being charged. NOTICE: For maximum performance, lithium-ion batteries need to be used often. If you don’t use the device often, be sure to recharge the battery at least once per month. 5 Keys Description A. LCD Display B. VOL-: Turn down the volume. C. VOL+: Turn up the volume. D. MENU: Hold for a while to enter the main menu. Briefly press to confirm selection confirm or enter the folder navigation mode. E. Previous: Play the previous track. Also move up. F. Next: Play the next track. Also move down. G. Play/Pause: Turn on or turn off the device. Also play or pause audios. H. Earphone Jack I. Power Switch: Turn on or turn off the power J. USB Port: Connect to a computer Page 3 of 12 6 Power On/Off To power on, (1) Slide the Power Switch to the right to turn on the power. (2) Press and hold the PLAY/PAUSE button until you see prompt on the display. To power off, (1) Press and hold the PLAY/PAUSE button until you see prompt on the display. (2) Slide the Power Switch to the left to turn off the power. (Be sure to complete this step for saving battery charge.) Note: This player has a power-saving feature which enables the device to power off automatically if it is idle for about 3 minutes. 7 Basic operation Function Operation Play/Pause Press the PLAY/PAUSE button to play or pause. Adjust Volume Shortly press the VOL+/VOL- button to decrease or increase volume. Previous Track Shortly press the PREVIOUS button. Next Track Shortly press the NEXT button. Fast Forward Press and hold the NEXT button. Rewind Press and hold the PREVIOUS button. A-B Repeat To repeat a specified section of a track, (1) During playing, press and hold the VOL+ button to select the start point of the repeat. (2) Press and hold the VOL+ button again to select the stop point. The music section between the start point and the stop point is repeated. (3) To stop A-B repeat, press and hold the VOL+ button. 8 Lock/Unlock To protect the buttons against being pressed accidentally or unlock buttons buttons, hold down the MENU button and the VOL- together. Playing music 8.1 Enter the music mode Press and hold the MENU button to display the main menu. Use the PREVIOUS/NEXT button to select “Music” menu, and press the MENU button to confirm selection. Now you are in the MUSIC mode, refer music playing to the basic operations. 8.2 Folder navigation To navigate through folders: (1) In the MUSIC mode, shortly press the MENU button to enter folder navigation mode. (2) Press the PREVIOUS/NEXT button to select a folder or track, and press the MENU button to confirm selection, or press the PLAY/PAUSE button to return. 9 Playing videos (1) Press and hold the MENU button to display the main menu. Page 4 of 12 (2) Use the PREVIOUS/NEXT button to select the “Video” menu, and press the MENU button to enter the video player mode. (3) Press the PREVIOUS/NEXT button to search a video file that you want to play, and press the MENU button to play. For detail information about playing, see the “Basic Operation” section. (Note: During playing, you can shortly press the MENU button to enter folder navigation mode.) Note: This player can only play AVI videos. For other formats, you need to use the converting tool included on the driver CD to convert them. For detail information about the converter, see AVI Converter Quick User Guide on the CD. 10 Viewing photos To view photos, (1) Press and hold the MENU button to display the main menu. (2) Select “Photo” and press the MENU button to confirm. (3) Press the PREVIOUS/NEXT button to select a folder or image, and press the MENU to confirm. (4) Select the photo that you want to display and press the MENU button to enlarge it to full screen. (5) In the full screen mode, you can press the PREVIOUS/NEXT button to display the previous or the next photo. Press the PLAY/PAUSE to start or stop an auto slide show. Press the MENU button to enter folder navigation mode. Note: Some images may not be displayed. Try to use an image viewer to convert them. See “Appendix – Convert image file” for details. 11 Reading E-book 11.1 Reading (1) Press and hold the MENU button to display the main menu. (2) Select “E-book” and press the MENU button to confirm. (3) Press the PREVIOUS/NEXT button to select a .txt file, and press the MENU button to open the selected file. (4) Press the PREVIOUS/NEXT button to page up or page down manually, or press the PLAY/PAUSE button to page up or down automatically (by setting the time interval between 1 and 5 in Settings/Auto Slide show/Text). (5) During reading, you can use the bookmark to mark the page for resuming reading later. For information about bookmark, see “Using bookmark” section. 11.2 Using bookmark (1) Go to the page that you want to mark. (2) Briefly press the VOL+ button to show up a “Save Bookmark” window for saving bookmark. (3) Press the PREVIOUS/NEXT button to select a bookmark number and press the Page 5 of 12 MENU button to confirm. The bookmark is saved. It starts from the first line of current page. (4) To read the page that you marked, shortly press the VOL- button to show up the “Load Bookmark” window. Press the PREVIOUS/NEXT button to select a bookmark and press the MENU button to confirm. You will be guided to that page. Note: Some TXT file may not be read. This may because its format is not supported. Skip it or reload another file. 12 Browsing all files To browse all files stored in the player, (1) Press and hold the MENU button to display the main menu. (2) Select“Navigation”,and press the MENU button to enter the browser mode. (3) Press PREVIOUS/NEXT button to select a file that you want to view, and press the MENU button to play or display it. 13 Voice Recording z Record (1) Press and hold the MENU button to display the main menu. (2) Select“Record”,and press the MENU button to enter the recorder mode. (3) Shortly press the PLAY/PAUSE button to start recording. During recording, you can press the PLAY/PAUSE button to pause or resume recording. (4) Shortly press the MENU button to stop and save recording. Press and hold the MENU button to return to the main menu. z Play recordings To play the recording, (1) Select “Explorer” on the main menu to enter the folder navigate mode. (2) Open the “VOICE” folder, and select the recording file that you want to play. 14 Deleting file To delete a file, (1) Select “Explorer” on the main menu to enter the folder navigate mode. (2) Briefly press the VOL- button to display a dialogue box. (3) Use the PREVIOUS/NEXT button to select “YES” and press the MENU button to confirm. 15 Playing game This player provides a popular and funny game - Tetris World. To activate the game, on the Page 6 of 12 main menu, select “Game” and press the MENU button to enter the gaming mode. Basic operation is as follows: Start game Press the PLAY/PAUSE button Move the block left and right Press PREVIOUS and NEXT button Rotate the block Press the VOL+ button Insert the block Press the VOL- button Speed up the block Press the MENU button 16 Customizing Settings To customize the player settings: (1) On the main menu, select the “Settings” item and press the MENU button to enter the system settings mode. (2) Press the PREVIOUS/NEXT button to select setting item and press the MENU button to confirm or press the PLAY/PAUSE button to cancel/return. Music Repeat mode Once(Play current track once and then stop) Repeat One (Repeat current track) Folder(Play all audio files in the current folder and stop after playing) Folder Rep.(Repeat all audio files in the current folder) Normal(Play all audio files stored in the player and stop after playing all) Repeat All(Repeat all audio files stored in the player) Intro(Play the first 10 seconds of every audio file) Play mode Order(Play audio files in order) Page 7 of 12 Shuffle(Play audio files randomly) Preset EQ Normal, 3D, Rock, Pop, Classical, Bass, Jazz, User EQ User EQ set (1) Press the PREVIOUS/NEXT button to (User-defined switch EQ column. equalizer setting) (2) Press the VOL+/VOL- button to adjust the value of the selected column. (3) Repeat pressing the NEXT button until the cursor is on the YES button, and then press the MENU button to confirm. (4) Go to the “Preset EQ” menu, and select “User EQ” to enable the equalizer setting. FM Radio (optional) Stereo SW On, Off (Enable or disable stereo effect) Record FM region China, Europe, Japan, America REC Quality High Quality, General Quality REC Volume Auto Slide Show +1、+2、+3、+4、+5 Text Browse (Set interval between the previous and the next page when the device is in auto page up/down mode.) Photo Browse (Set interval between the previous and the next slide in auto slide show mode.) Display Backlight 5 seconds, 10 seconds, 15 seconds, 20 seconds, 30 seconds, Always On. Brightness (Set the brightness of the screen) Backlight mode Normal Power Save (Turn off the screen when there is no activity within a certain time) System About - Information about the product Upgrade - Upgrade the firmware Load Default - Restore the player to default setting Sleep Timer Off, 10 minutes, 15minutes, 30 minutes, 60 minutes, 120 (Set the continuous playing minutes time before the player is turned off automatically.) Language Simplified Chinese, Traditional Chinese, English, Korean, ( Select language in which Japanese, Spanish, French, German, Italian, Portuguese, the Russian, etc. on-screen text is displayed) Page 8 of 12 17 Troubleshooting Problem Possible Cause Solution Battery is too low. Charge the battery. No sound when playing an The volume is too low. Adjust the volume. audio file. Bad audio file. Delete or skip the file. The LCD displays nothing when the device is started. The player cannot be connected to the PC. The displayed time is The PC has error when you plug and unplug the player. Total memory displayed on player accordance is not with supported by PC’s motherboard. changing constantly. the The USB interface is not in the marked amount. be played properly. motherboard. The bit rate of the MP3 file is Try to use fixed bit rate to changing during playback. compress the MP3 file. The player is disconnected Do not disconnect the player from the PC abruptly while from the PC when transferring transferring files. files. Part of memory is used to store programs and display characters. The MP3 file is compressed Some of MP3 files cannot Update or replace the PC’s by a standard, such as 1. Delete the unsupported MP3 files. MPEG I Layer 1 or Layer 2 2. Use MPEG I Layer 3 that the player does not standard to compress the support. unsupported MP3 files. Make sure the video is in AVI The video cannot be played. The file format is not supported. format. If not, use the provided converting tool to convert it. The video data is corrupted Skip it or reload another file Try to use an image editor The file format is not supported The photo cannot (ACDSee for example) to convert it. See “Appendix – Converting image file” for be details. displayed The The image beyond resolution limitation of device supports a is maximum resolution of 3520 the X 2816. Make sure resolution device. of the image does not excess this limitation. The TXT file cannot be The file read supported. format is not Skip it or reload another file. Page 9 of 12 18 Technical Specifications Item Specification Capacity 128MB or above Battery Type Rechargeable Lithium Battery Battery Life Approx. 5 Hours LCD Display 1.5-inch TFT screen Earphone Power 5mW+5Mw Video Format AVI (XviD) Audio Format MP3, WMA Photo Format JPEG Image Resolution 3520 X 2816 (Max.) Bit Rate MP3: 8-320kbps; WMA: 32-384kbps SNR >90dB USB Port USB2.0 Operational Temperature 0℃ ~ +55℃ Storage Temperature -20℃ ~ +55℃ Operational Relative Humidity * 20% ~ 90% (40℃) Storage Relative Humidity * 20% ~ 93% (40℃) 19 Notice z Make sure all keys are enabled before operation. If they are locked, hold down the MENU and VOL- button to unlock them. z Please charge the battery immediately when the display indicates low battery, or the device will be powered off automatically. z The device does not guarantee compatibility with all memory cards from various manufacturers. z Please disconnect the player from PC properly to avoid data loss. z The transfer rate displayed on the PC may be different depending on the operating system. Exact transfer rate should be subject to the player's indication. z When the recorded voice file is too large, the response of the device may be slow. Appendix – Converting image file Converting steps: ① Run the ACDSee program, select the image that you want to convert, and click “Tool” →”Convert”. Page 10 of 12 ② Select “JPG JPEG JFIF Format” and then click “Options”. ③ Deselect the options circled in red and then press “OK” button to confirm. DIFRNCE cannot be hold responsible for defective products as a result of misuse, improper installation or other abuse or misuse. Page 11 of 12 Page 12 of 12 Avertissements z Ne pas exposer l’appareil à des impacts sévères et ne pas le laisser tomber. z Ne pas utiliser l’appareil dans des conditions de chaleur ou de froid extrêmes, dans des endroits poussiéreux ou humides. Ne pas exposer l’appareil à la lumière directe du soleil. z Sauvegardez les données fréquemment afin déviter la perte de données accidentelle. z z Évitez d’utiliser le lecteur proche d’un champ magnétique puissant. Veuillez mettre l’appareil à l’abri de l’eau ou de tout autre liquide. Si de l’eau ou un autre liquide venait à pénétrer l’appareil, veuillez l’éteindre immédiatement et le nettoyer. z Ne pas utiliser de solution chimique pour nettoyer l’appareil et ce afin déviter la corrosion. Veuillez le nettoyer avec un chiffon sec. z Nous ne serons pas tenus pour responsables des dommages ou des pertes de données causés par un dysfonctionnement, une mauvaise utilisation, une réparation effectuée par une tierce personne ou un remplacement de la batterie. z Ne tentez pas de démonter, de réparer ou de modifier le produit. Cela annulerait la garantie. z La conception du lecteur ou sa présentation actuelle peuvent différer de ce qui est présenté dans ce manuel. Sa présentation ou sa conception actuelles sont caractéristiques du produit. Page 1 de 13 1 2 3 Caractéristiques principales z Lecteur MP3&WMA z Lecteur vidéo AVI z Visionneuse d’images JPEG z Lecteur de carte mémoire z Navigation de dossiers z Enregistreur vocal z Radio FM Stéréo (facultatif) z Encodage FM (facultatif) z Périphérique de stocakge amovible z Jeux amusants z Batterie lithium-ion rechargeable intégrée z Réglages personnalisés Exigences du système z Matériel : PC IBM & PC compatible, Portable avec interface USB z Système d'exploitation : Windows98/SE, Windows Me, Windows2000/XP Contenu du coffret Veuillez vérifier que le coffret contienne les articles suivants. Si un des articles venait à manquer, veuillez contacter votre vendeur : 4 z Unité principale z Écouteurs stéréo z Câble USB z Manuel de l’utilisateur z CD pilote Avant utilisation 4.1 Connectez à un PC et téléchargez les fichiers audio Ce lecteur est plug & play pour WIN2000/XP/ME OS. Cependant, pour Windows98/SE, vous devez installer un pilote avant la connexion (voir la section ' Driver Installation (Installation du pilote)' pour les détails). Pour le connecter au PC pour transférer des fichiers, (1) Branchez l'extrémité plus large du câble USB dans le port USB du PC et branchez l'extrémité plus petite dans le port USB du lecteur. (2) Lorsque l'icône " " apparaît dans la partie inférieure de l'écran du PC, double-cliquez sur 'My Computer' sur le bureau, vous verrez un disque amovible qui représente le lecteur. Utilisez tout simplement le disque amovible comme un disque local normal, pour copier des fichiers sur ou à partir de ce disque. Page 2 de 13 4.2 Retrait du lecteur du PC en toute sécurité Pour Windows2000/XP: (1) Cliquez à gauche de l'icône située à droite de la barre des tâches. (2) Cliquez sur la mini fenêtre pop-up comportant le message ' Stop the USB Mass Storage Device – Drive (X)'. (3) Lorsque vous êtes invité(e) à retirer le périphérique, tirez le lecteur. Pour Win98, veuillez vous assurer que le trnasfert de données est terminé avant de débrancher le lecteur MP3. 4.3 Charger la batterie L’appareil est équipé d’une batterie lithium-icon rechargeable intégrée. Il se charge pas connexion USB. Il faut le recharger lorsque vous l’utilisez pour la première fois. Il faut environ 3 heures pour charger complètement la batterie. Connectez l’embout le plus large du câble USB à l’interface USB du PC et connectez l’embout le plus petit du câble USB à l’interface USB du lecteur. L’appareil est maintenant connecté au PC et est alors en charge. REMARQUE : Pour une performance maximum, les batteries lithium-ion doivent être utilisées souvent. Si vous n'utilisez pas souvent l'appareil, veuillez vous assurer de recharger la batterie au moins une fois par mois. 4.4 Utilisation de la carte mémoire L’appareil peut comporter un slot pour carte mémoire afin de lire des données depuis une carte mémoire micro SD. Pour utiliser une carte mémoire, (1) Insérez une carte mémoire micro SD dans le slot pour carte situé dans le corps de l’appareil. (2) Appuyez sur le bouton MENU et maintenez-le pour afficher le menu principal. (3) Sélectionnez ‘Explorer’ et appuyez sur le bouton MENU pour accéder au mode navigateur de dossiers. (4) En mode navigation de dossiers, vous trouverez deux dossiers nommés ‘Internal memory’ et ‘Carte SD’. Pour lire les fichiers audio ou vidéo enregistrés sur la carte mémoire, entrez dans le dossier ‘Carte SD’. Page 3 de 13 5 Keys Description A. Affichage LCD B. VOL-: baisse le volume. C. VOL+: augmente volume. D. MENU: Maintenez cette touche pendant un moment pour accéder au menu principal. Appuyez légèrement poyr valider la sélection ou pour accéder au mode de navigation par dossier. E. Previous: Lit la piste précédente. Permet aussi de se déplacer vers le haut. F. Next: Lit la piste suivante. Permet aussi de se déplacer vers le bas. G. Play/Pause: Permet d’allumer/d’éteindre l’appareil. Permet aussi de lire ou de mettre en pause. H. Prise écouteurs I. Bouton marche/arrêt: Permet de mettre en marche ou d’arrêter l’appareil J. Port USB : Pour connecter à un ordinateur 6 Allumer/éteindre Pour allumer, (1) Glissez le bouton Marche/Arrêt vers la droite pour allumer l’appareil. (2) Appuyez brièvement sur le bouton PLAY/PAUSE et maintenez-le jusqu’à ce que vous ayez un message à l’écran. Pour éteindre, (1) Appuyez brièvement sur le bouton PLAY/PAUSE et maintenez-le jusqu’à ce que Page 4 de 13 vous ayez un message à l’écran. (2) Glissez le bouton Marche/Arrêt vers la gauche pour éteindre l’appareil. (Veuillez vous assurer de terminer cette étape afin de conserver l’énergie de la batterie.) Remarque : Ce lecteur est équipé d’une fonction d’économie d’énergie qui permet à l’appareil de s’éteindre automatiquement s’il est inactif pendant environ 3 minutes. 7 Fonctionnement de base Fonction Fonctionnement Lecture/Pause: Appuyez sur le bouton PLAY/PAUSE pour lire ou mettre en pause. Régler le volume Appuyez légèrement sur le bouton VOL+/VOL- pour baisser ou augmenter le volume. Piste précédente Appuyez légèrement sur le bouton PREVIOUS. Piste suivante Appuyez légèrement sur le bouton NEXT. Avance rapide Appuyez et maintenez le bouton NEXT enfoncé. Retour Appuyez et maintenez le bouton PREVIOUS enfoncé. Répéter A-B Pour répéter la section précise d’une piste, (1) Pendant la lecture, appuyez sur le bouton VOL+ et maintenez-le enfoncé pour choisir le point de départ de la section à répéter. (2) Appuyez sur le bouton VOL+ et maintenez-le enfoncé pour choisir le point de fin. La section de musique entre le point de départ et le point de fin sera alors répétée. (3) Pour arrêter la répétition A-B, appuyez sur le bouton VOL+ et maintenez-le enfoncé. Lock/Unlock Afin de ne pas appuyer sur les boutons par accident ou pour buttons débloquer les boutons, maintenez les boutons MENU et le bouton VOL- enfoncés. 8 Lire de la musique 8.1 Accéder au mode musique Appuyez sur le bouton MENU et maintenez-le enfoncé pour afficher le menu principal. Utilisez le bouton PRÉCÉDENT/SUIVANT pour choisir le menu “Music” puis appuyez sur le bouton MENU pour valider votre choix. Vous êtes maintenant en mode MUSIQUE, la lecture de musique se fait par des manipulations simples. 8.2 Navigation de dossiers Pour naviguer dans les dossiers : (1) En mode MUSIQUE, appuyez légèrement sur le bouton MENU pour accéder au mode de navigation de dossiers. (2) Appuyez sur le bouton PREVIOUS/NEXT pour choisir un dossier ou une piste et appuyez sur le bouton MENU pour valider votre choix. Vous pouvez aussi appuyer sur le bouton PLAY/PAUSE pour annuler. 9 Lire des vidéos (1) Appuyez sur le bouton MENU et maintenez-le enfoncé pour afficher le menu principal. Page 5 de 13 (2) Utilisez le bouton PREVIOUS/NEXT pour choisir le menu “Video” puis appuyez sur le bouton MENU pour accéder au mode lecteur vidéo. (3) Appuyez sur le bouton PREVIOUS/NEXT pour rechercher le fichier vidéo que vous souhaitez lire et appuyez sur le bouton MENU pour le lire. Pour les informations détaillées concernant la lecture, veuillez vous référer à la section ‘Fonctionnement de base’. (Remarque : Pendant la lecture, vous pouvez appuyez légèrement sur le bouton MENU pour accéder au mode de navigation de dossiers.) Remarque : Ce lecteur permet de lire des vidéos au format AVI uniquement. Pour les autres formats, vous devez utiliser l’outil de conversion inclus sur le CD pilote pour les convertir. Pour plus d’informations sur le convertisseur, veuillez vous référer au Guide de l’utilisateur convertisseur AVI du CD. 10 Visionner des photos Pour visionner des photos, (1) Appuyez sur le bouton MENU et maintenez-le enfoncé pour afficher le menu principal. (2) Sélectionnez “Photo” et appuyez sur le bouton MENU pour valider votre choix. (3) Appuyez sur le bouton PREVIOUS/NEXT pour choisir un dossier ou une image et appuyez sur le bouton MENU pour valider votre choix. (4) Sélectionnez la photo que vous souhaitez afficher et appuyez sur le bouton MENU pour l’agrandir en plein écran. (5) En mode plein écran, vous pouvez appuyer sur le bouton PREVIOUS/NEXT pour afficher la photo précédente ou suivante. Appuyez sur PLAY/PAUSE pour démarrer ou arrêter le diaporama automatique. Appuyez sur le bouton MENU pour accéder au mode de navigation. Remarque : Il se peut que certaines images ne s’affichent pas. Essayez d’utiliser une visionneuse d’images (ACDSee par exemple) pour les convertir. Voir “Annexe – Convertir un fichier image” 11 Lire un E-Livre 11.1 Lecture (1) Appuyez sur le bouton MENU et maintenez-le enfoncé pour afficher le menu principal. (2) Sélectionnez “E-book” et appuyez sur le bouton MENU pour valider votre choix. (3) Appuyez sur le bouton PREVIOUS/NEXT pour choisir un fichier .txt et appuyez sur le bouton MENU pour ouvrir le fichier sélectionné. (4) Appuyez sur le bouton PREVIOUS/NEXT pour accéder aux pages supérieure ou inférieure manuellement ou appuyez sur le bouton PLAY/PAUSE pour accéder automatiquement aux pages supérieure ou inférieure (en réglant le temps d’intervalle entre 1 et 5 dans Réglages/Diaporama Auto/Texte). (5) Pendant la lecture, vous pouvez utiliser le marque-page pour marquer une page afin d’en reprendre la lecture ultérieurement. Pour plus d’informations concernant les Page 6 de 13 marque-pages, veuillez vous référer à la section ‘Utilisation du marque-page’. 11.2 Utilisation du marque-page (1) Allez à la page que vous souhaitez marquer. (2) Appuyez brièvement sur le bouton VOL+ pour afficher la fenêtre “Save Bookmark” afin de sauvegarder le marque-page. (3) Appuyez sur le bouton PREVIOUS/NEXT pour sélectionner un numéro de marque-page et appuyez sur le bouton MENU pour valider. Le marque-page est sauvegardé. Il démarre à partir de la première ligne de la page en cours. (4) Pour lire la page que vous avez marquée, appuyez légèrement sur le bouton VOLpour afficher la fenêtre “Load Bookmark”. Appuyez sur le bouton PREVIOUS/NEXT pour choisir un marque-page et appuyez sur le bouton MENU pour valider. Vous serez redirigé vers cette page. Remarque : Il se peut que certains fichiers TXT ne soient pas lus. Cela est peut-être lié au format qui ne serait pas supporté. Passez-le ou chargez un autre fichier. 12 Parcourir tous les fichiers Pour parcourir tous les fichiers enregistrés sur le lecteur, (1) Appuyez sur le bouton MENU et maintenez-le enfoncé pour afficher le menu principal. (2) Sélectionnez “Navigation”,et appuyez sur le bouton MENU pour accéder au mode navigateur. (3) Appuyez sur le bouton PREVIOUS/NEXT pour choisir le fichier que vous souhaitez lire et appuyez sur le bouton MENU pour le lire ou l’afficher. 13 Enregistreur vocal z Enregistrer (1) Appuyez sur le bouton MENU et maintenez-le enfoncé pour afficher le menu principal. (2) Sélectionnez“Record” et appuyez sur le bouton MENU pour accéder au mode enregistreur. (3) Appuyez légèrement sur le bouton PLAY/PAUSE pour commencer l’enregistrement. Pendant l’enregistrement, vous pouvez appuyer sur le bouton PLAY/PAUSE pour mettre en pause ou reprendre l’enregistrement. (4) Appuyez sur le bouton MENU et maintenez-le enfoncé pour retourner au menu principal. z Lire les enregistrements Sélectionnez “Explorer” dans le menu principal pour accéder au mode de navigation par dossier. Ouvrez le dossier “VOICE”, et choisissez le fichier d’enregistrement que vous Page 7 de 13 souhaitez lire. 14 Effacer un fichier Pour effacer un fichier, (1) Sélectionnez “Explorer” dans le menu principal pour accéder au mode de navigation par dossier. (2) Appuyez légèrement sur le bouton VOL- pour afficher la boîte de dialogue. (3) Utilisez le bouton PREVIOUS/NEXT pour choisir “YES” puis appuyez sur le bouton MENU pour valider votre choix. 15 Jouer aux jeux Ce lecteur est équipé d’un jeu populaire et amusant – Tétris World. Pour activer le jeu, dans le menu principal, sélectionnez ‘Game’ et appuyez sur le bouton MENU pour accéder au mode jeux. Le principe de base est le suivant : Démarrer le jeu Appuyez sur le bouton PLAY/PAUSE Déplacer le bloc à gauche et à droite Appuyez sur le bouton PREVIOUS ou NEXT Tourner le bloc Appuyez sur le bouton VOL+ Insérer le bloc Appuyez sur le bouton VOL- Accélérer Appuyez sur le bouton MENU 16 Personnaliser les réglages Pour personnaliser les réglages du lecteur : (1) Dans le menu principal, sélectionnez l’élément ‘Settings’ et appuyez sur le bouton MENU pour accéder au mode de réglages du système. (2) Appuyez sur le bouton PREVIOUS/NEXT pour choisir l’élément de réglage et appuyez sur le bouton MENU button pour valider ou appuyez sur le bouton PLAY/PAUSE pour annuler/retourner. Musique Mode répétition Une fois (Lit la piste en cours une fois et ensuite s’arrête) Répéter Un (Répète la piste en cours) Dossier (Lit tous les fichiers audio du dossier en cours et s’arrête après la lecture) Rép. Dossier (Répète tous les fichiers audio du dossier en cours) Normal (Lit tous les fichiers audio enregistrés sur le lecteur et s’arrête après la lecture) Page 8 de 13 Répéter tout (Répète tous les fichiers audio enregistrés sur le lecteur) Intro (Lit les 10 premières secondes de chaque fichier audio) Mode lecture Ordre (Lit tous les fichiers audio dans l’ordre) Aléatoire (Lit tous les fichiers audio dans un ordre aléatoire) Préréglage EQ Normal, 3D, Rock, Pop, Classique, Basses, Jazz, EQ Utilisateur Réglage EQ (1) Appuyez sur le bouton utilisateur PREVIOUS/NEXT pour aller à la (Réglage de colonne EQ. l’égaliseur défini par (2) Appuyez sur le bouton l’utilisateur ) VOL+/VOL- pour régler la valeur de la colonne sélectionnée. (3) Continuez à appuyer sur le bouton NEXT jusqu’à ce que le curseur soit sur le bouton YES. Appuyez ensuite sur le bouton MENU pour valider. (4) Allez au menu “Preset EQ”, et sélectionnez “User EQ” pour activer le réglage de l’égaliseur. Radio FM (facultatif) Stéréo SW On, Off (allumé, éteint) (Active ou désactive l’effet stéréo) Enregistrer Région FM Chine, Europe, Japon, Amérique Qualité Haute qualité, qualité générale d’enregistrement Volume d’enregistrement Diaporama automatique +1、+2、+3、+4、+5 Parcourir du texte (Réglez l’intervalle entre la page précédente et suivante lorsque l’appareil est en mode page sup/inf.) Parcourir des photos (Réglez l’intervalle entre la diapositive précédente et suivante en mode diaporama auto.) Affichage Rétroéclairage 5 secondes, 10 secondes, 15 secondes, 20 secondes, 30 secondes, Toujours allumé. Luminosité (Règle la luminosité de l’écran) Page 9 de 13 Mode rétroéclairage Normal Économie d’énergie (Éteint l’écran lorsque l’appareil est inactif pendant un certain temps) Système À propos de – informations concernant le produit Mise à jour – Met à jour le microprogramme Chargement par défaut- Rétablit le lecteur à ses réglages par défaut Minuteur Sleep Off (éteint), 10 minutes, 15minutes, 30 minutes, 60 minutes, (Règle le temps de lecture en 120 minutes continu avant que le lecteur s’éteigne automatiquement). Langue Chinois simplifié, Chinois traditionnel, Anglais, Coréen, (Sélectionne la langue dans Japonais, Espagnol, Français, Allemand, Italien, Portugais, laquelle Russe, etc. le texte écran s’affiche) 17 Guide de dépannage Problème Cause possible Solution La batterie est trop faible. Chargez la batterie. Pas de son lors de la Le volume est trop faible. Réglez le volume. lecture d'un fichier audio Mauvais fichier audio. Effacez ou sautez le fichier. Le LCD n'affiche rien alors que l'appareil est en marche. Impossible de connecter le lecteur au PC. L'interface USB n'est pas supportée par la carte mère du PC. Le temps affiché change constamment. Mettez à jour ou remplacez la carte mère du PC. Le débit binaire du fichier Essayez d'utilisez un débit MP3 binaire fixe pour compresser change pendant la lecture. le fichier MP3. des Le lecteur a été déconnecté Ne pas déconnecter le lecteur erreurs lorsque je branche brusquement du PC pendant du PC pendant le transfert de ou débranche le lecteur. le transfert de fichiers. fichiers. La mémoire totale affichée Une partie de la mémoire est sur le lecteur n'est pas en utilisée accord avec la quantité programmes et afficher les indiquée. caractères. Le PC comporte pour stocker les Le fichier MP3 est 1. Effacez les fichiers MP3 Certains fichiers MP3 ne compressé dans un non supportés. peuvent pas être lus standard comme MPEG I correctement. Couche 1 ou Couche 2 que Couche 3 pour compresser le lecteur ne supporte pas. les fichiers MP3 non 2. Utilisez le standard MPEG I Page 10 de 13 supportés. Assurez que la vidéo est au Impossible de lire la vidéo. Le format du fichier n'est pas format AVI. Sinon, utilisez supporté. l'outil de conversion fourni pour la convertir. Les données de la vidéo Sautez le fichier sont corrompues rechargez-en un autre ou Essayez d’utiliser un éditeur Le format du fichier n’est pas supporté d’images (ACDSee par exemple) pour les convertir. Voir “Annexe – Convertir un fichier image” pour les détails. La photo ne s’affiche pas L’appareil supporte une La résolution de l’image est résolution maximale de 3520 au-delà X 2816. Veuillez vous assurer de la limite de l’appareil. que la resolution ne dépasse pas cette limite. Impossible de lire le fichier Le format du fichier n'est pas Sautez-le ou rechargez un TXT supporté. autre fichier. 18 Spécifications techniques Élément Spécification Capacité 128MB ou plus Type de batterie Batterie lithium rechargeable Durée de vie de la batterie Environ 5 heures Affichage LCD Écran TFT 1,8’’ Puissance de l'écouteur 5mW+5Mw Format vidéo AVI (XviD) Format audio MP3, WMA Format photo JPEG Résolution de l'image 3520 X 2816 (Max.) Débit binaire MP3: 8-320kbps; WMA: 32-384kbps RAPPORT SIGNAL/BRUIT >90dB Port USB USB2.0 Température fonctionnement Température de rangement Humidité relative de fonctionnement * de 0℃ ~ +55℃ -20℃ ~ +55℃ 20% ~ 90% (40℃) Page 11 de 13 Humidité relative de rangement * 20% ~ 93% (40℃) 19 Attention z Veuillez vous assurer que toutes les touches sont activées avant de faire fonctionner. Si elles sont bloquées, appuyez sur les boutons MENU et VOL- pour les débloquer. z Veuillez recharger immédiatement la batterie lorsque l’affichage indique batterie faible ou si l’appareil s’éteint automatiquement. z Il n’est pas garanti que l’appareil soit compatible avec toutes les cartes mémoire vendus par les différents fabricants. z Veuillez déconnecter correctement le lecteur du PC afin d’éviter la perte de données. z Le taux de transfert affiché sur le PC peut être différent selon le système d’exploitation. Le taux de transfert exact dépend des indications du lecteur. z Si le fichier vocal enregistré est trop large, la réponse de l’appareil peut être lente. Annexe – Convertir un fichier image Étapes de conversion : ① Lancez le programme ACDSee, sélectionenz l’image que vous souhaitez convertir, et cliquez sur “Tool” →”Convert”. ② Sélectionnez “JPG JPEG JFIF Format ” puis cliquez sur “Options”. Page 12 de 13 ③ Désélectionnez les options entourées en rouge et appuyez sur le bouton “OK” pour valider. DIFRNCE ne peut être tenu responsable des produits défectueux si ces défauts émanent d’une mauvaise utilisation, d’une mauvaise installation ou de tout autre abus ou mauvaise manipulation. Page 13 de 13 Vorsichtsmaßnahmen z Setzen Sie das Gerät niemals starker Stoßeinwirkung aus bzw. lassen Sie es niemals aus großer Höhe herunterfallen. z Benutzen Sie das Gerät nicht unter besonders heißen, kalten, staubigen oder feuchten Umständen. Setzen Sie das Gerät niemals direkter Sonnenstrahlung aus. z Führen Sie in regelmäßigen Abständen eine Datensicherung durch, um Datenverlust vorzubeugen. z z Vermeiden Sie die Benutzung des Players im Bereich starker magnetischer Felder. Halten Sie das Gerät fern von Wasser und anderen Flüssigkeiten. Sollte Wasser oder andere Flüssigkeiten in das Gerät gelangen, schalten Sie es sofort aus und reinigen Sie es. z Benutzen Sie keine chemischen Lösungsmittel zur Reinigung des Geräts, um Korrosion zur vermeiden. Reinigen Sie das Gerät nur mit einem trockenen Tuch. z Wir sind nicht verantwortlich für Schäden oder Datenverluste, die durch Funktionsstörungen, unsachgemäße Benutzung, Reparatur oder Batteriewechsel entstehen. z Versuchen Sie nicht das Gerät auseinander zu nehmen, selbst zu reparieren oder zu modifizieren. Dadurch wird die Garantie ungültig gemacht. z Das Erscheinungsbild des Players oder die Anzeige kann u. U. von den Abbildungen in dieser Anleitung abweichen. Orientieren Sie sich ggf. an der Anzeige oder Erscheinungsbild des wirklichen Geräts. Seite 1 von 13 1 2 3 Haupteigenschaften z MP3-/WMA-Player z MTV-Videoplayer z JPEG Bildbetrachter z Kartenleser z Ordnernavigation z Sprachaufnahme z Stereo UKW Radio (freigestellt) z Radioaufnahme (freigestellt) z Wechsellaufwerk z Lustige Spiele z Eingebauter Lithium-Ion-Akku z Benutzereinstellungen Systemanforderungen z Hardware: IBM PC oder kompatibler PC, Notebook mit USB-Schnittstelle z Betriebssystem: Windows 98/SE, Windows Me, Windows 2000, Windows XP. Verpackungsinhalt Überprüfen Sie bitte, ob der Verpackungsinhalt mit der folgenden Liste übereinstimmt. Sollte eines der Teile fehlen, wenden Sie sich bitte umgehend an Ihren Händler. 4 z Hauptgerät z Stereokopfhörer z USB-Kabel z Benutzerhandbuch z Software-CD Vor der Inbetriebnahme 4.1 PC-Anschluss und Dateidownload Dieser Player ist Plug & Play-fähig für die Betriebssysteme Windows 2000/XP/ME. Für Windows 98/SE wird vor der Benutzung eine Treiberinstallation benötigt (siehe Abschnitt „Treiberinstallation“ für detaillierte Informationen). Anschluss an den PC zum Dateitransfer: (1) Verbinden Sie das kleinere Ende des USB-Kabels mit dem USB-Port des Players und das andere Ende mit dem USB-Port eines Computers. (2) Wenn das Symbol am unteren Bildschirmrand links auf dem Computerbildschirm erscheint, doppelklicken Sie auf “My Computer“( „Mein Computer“) und öffnen Sie das Laufwerk des Players. Sie können dieses Laufwerk wie ein normales. Lokales Laufwerk benutzen und beliebige Dateien darauf kopieren. Seite 2 von 13 4.2 Abbrechen der Verbindung zwischen Player und PC Unter Windows 2000/XP: (1) Klicken Sie mit der linken Maustaste auf das Symbol in der rechten Ecke der Taskbar. (2) Ein Fenster mit dem Titel “Stop the USB Mass Storage Device – Drive (X)”(„Hardware sicher entfernen“ erscheint. Wählen Sie“)USB Mass Storage Device“ und klicken Sie auf „Beenden“. (3) Wenn Sie dazu aufgefordert werden das Gerät zu entfernen, können Sie den Player herausziehen. Unter Windows 98 vergewissern Sie sich bitte, dass der Datentransfer beendet, bevor Sie den MP3-Player vom Computer trennen. 4.3 Aufladen des Akkus Das Gerät verfügt über einen eingebauten Lithium-Ionen-Akku. Er wird während der USB-Verbindung aufgeladen. Vor der Inbetriebnahme müssen Sie den Akku zunächst aufladen. Zum vollständigen Aufladen werden ca. 3 Stunden benötigt. Zum Aufladen des Akkus verbinden Sie das kleinere Ende des USB-Kabels mit dem USB-Port des Players und das andere Ende mit dem USB-Port eines Computers. Wenn das Gerät mit dem Computer verbunden ist, wird es aufgeladen. Hinweis: Um eine optimale Leistung zu gewährleisten, müssen Lithium-Ionen-Akkus häufig benutzt werden. Wenn Sie das Gerät nicht besonders oft benutzen, laden Sie den Akku mindestens einmal im Monat auf. 4.4 Benutzung der Speicherkarte Das Gerät verfügt über einen Speicherkartenslot für Micro-SD-Karten. Zur Benutzung einer Speicherkarte: (1) Schieben Sie eine Micro-SD-Karte in den Kartenslot des Geräts. (2) Halten Sie die MENU-Taste gedrückt, um das Hauptmenü aufzurufen. (3) Wählen Sie „Explore“ und betätigen Sie MENU zum Aufrufen des Dateiauswahlmodus. (4) Im Dateiauswahlmodus finden Sie zwei Verzeichnisse mit den Namen „Internal memory” und „SD Card”. Wenn Sie auf Audio- oder Videodateien auf der Speicherkarte zugreifen möchten, öffnen Sie bitte das Verzeichnis mit dem Namen „SD Card”. Seite 3 von 13 5 Keys Description A. LCD Display B. VOL--: Lautstärke verringern. C. VOL++: Lautstärke erhöhen. D. MENU: Zum Aufrufen des Hauptmenüs gedrückt halten. Kurzer Tastendruck zur Bestätigung oder zum Aufrufen der Ordnernavigation. E. Previous: Wiedergabe des vorherigen Tracks bzw. vorherigen Menüpunkts. F. Next: Wiedergabe des nächsten Tracks bzw. nächsten Menüpunkts. G. Play/Pause: Ein- und Ausschalten des Geräts und Wiedergabe/Pause von Tracks. H. Ohrhörerbuchse I. Ein/Aus: Ein- und Ausschalten des Geräts. J. USB Port: Anschluss am Computer. 6 Ein/Aus Einschalten (1) Schieben Sie Ein/Aus nach rechts, um das Gerät einzuschalten. (2) Halten Sie PLAY/PAUSE gedrückt, bis das Logo im Display angezeigt wird. Ausschalten (1) Halten Sie PLAY/PAUSE gedrückt, bis das Logo im Display angezeigt wird. (2) Schieben Sie Ein/Aus nach links, um das Gerät auszuschalten (zum Sparen von Energie). Seite 4 von 13 Hinweis: Dieser Player hat einen Energiesparmodus, der es bei Nichtbenutzung nach 3 Minuten automatisch ausschaltet. 7 Allgemeine Bedienungshinweise Funktion Bedienung Wiedergabe/Pause Betätigen Sie PLAY/PAUSE zum Starten oder Pausieren der Wiedergabe. Einstellen der Lautstärke Zur Kurzer Tastendruck auf VOL+/VOL- zum Erhöhen oder Verringern der Lautstärke. vorigen Datei Betätigen Sie die PREVIOUS-Taste. nächsten Datei Betätigen Sie die NEXT-Taste. gehen Zur gehen Schnellvorlauf Halten Sie die NEXT-Taste gedrückt. Schnellrücklauf Halten Sie die PREVIOUS-Taste gedrückt. A-B Wiederholung eines bestimmten Abschnitts im Track: Abschnittswiederholung (1) Halten Sie im Wiedergabemodus VOL+ zur Festlegung des Startpunkts der Wiederholungsschleife gedrückt. (2) Halten Sie VOL+ erneut zur Festlegung des Endpunkts gedrückt. Der Abschnitt zwischen Start- und Endpunkt wird nun wiederholt. (3) Zur Beendigung der A-B Wiederholung halten Sie VOL+ gedrückt. Lock/Unlock buttons Halten Sie zur Aktivierung der Tastensperre die MENU und VOLgleichzeitig gedrückt. 8 Musikwiedergabe 8.1 Musikmodus Halten Sie die MENU gedrückt, um das Hauptmenü aufzurufen. Benutzen Sie PREVIOUS/NEXT zur Auswahl von „Music“ und betätigen Sie die MENU zur Bestätigung. Sie befinden sich nun im Musikmodus. 8.2 Ordnernavigation Zur Navigation durch die Verzeichnisse: (1) Betätigen Sie im Musikmodus die MENU zum Aufrufen des Navigationsmodus. (2) Mit PREVIOUS/NEXT wählen Sie Ordner oder Track, mit der MENU bestätigen Sie Ihre Auswahl oder drücken Sie PLAY/PAUSE zur Rückkehr. 9 Videowiedergabe (1) Halten Sie die MENU gedrückt, um das Hauptmenü aufzurufen. (2) Benutzen Sie PREVIOUS/NEXT zur Auswahl von „Video“ und betätigen Sie die MENU zur Bestätigung. Sie befinden sich nun im Videomodus. (3) Benutzen Sie die PREVIOUS/NEXT zur Auswahl der gewünschten Videodatei und betätigen Sie die MENU zum Starten der Wiedergabe. Für genauere Informationen zur Wiedergabe lesen Sie bitte den Abschnitt „Allgemeine Bedienungshinweise“ (Hinweis: Seite 5 von 13 Während der Wiedergabe können Sie dann durch Betätigung der MENU den Dateiauswahlmodus aufrufen). Hinweis: Dieser Player unterstützt lediglich das AVI-Format zur Videowiedergabe. Andere Formate müssen durch das mitgelieferte Konvertierungsprogramm umgewandelt werden. Für genauere Informationen zur Dateiumwandlung lesen Sie bitte die Schnellstartanleitung zum AVI Converter auf der mitgelieferten CD. 10 Bilder ansehen Zum Betrachten von Bildern: (1) Halten Sie die MENU gedrückt, um das Hauptmenü aufzurufen. (2) Wählen Sie „Photo” und betätigen Sie die MENU zur Bestätigung. (3) Mit PREVIOUS/NEXT wählen Sie ein Verzeichnis oder ein Bild, mit der MENU bestätigen Sie Ihre Auswahl. (4) Wählen Sie ein anzuzeigendes Bild und vergrößern Sie es mit der MENU zum Vollbild. (5) Im Vollbildmodus drücken Sie PREVIOUS/NEXT zur Anzeige des vorherigen oder nächsten Fotos. Mit PLAY/PAUSE starten oder unterbrechen Sie die Diashow. Mit der MENU rufen Sie die Ordnernavigation auf. Hinweis: Einige Bilder werden möglicherweise nicht angezeigt. Wandeln Sie diese mit einem anderen Bildbetrachter um (z.B. ACDSee). Siehe „Anhang – Umwandeln von Bilddateien”. 11 E-Books lesen 11.1 Lesen (1) Halten Sie die MENU gedrückt, um das Hauptmenü aufzurufen. (2) Wählen Sie „E-book” und betätigen Sie die MENU zur Bestätigung. (3) Mit PREVIOUS/NEXT wählen Sie eine .txt Datei, mit der MENU öffnen Sie die gewählte Datei. (4) Mit PREVIOUS/NEXT blättern Sie manuell um, mit PLAY/PAUSE blättern Sie automatisch um (Zeitintervall zwischen 1 und 5 in Settings/Auto Slide show/Text einstellen). (5) Mit dem Lesezeichen markieren Sie die Seite für späteres Weiterlesen. Weitere Informationen zum Lesezeichen im Abschnitt „Lesezeichen”. 11.2 Lesezeichen (1) Gehen Sie zur zu markierenden Seite. (2) Mit VOL+ rufen Sie ein „Save Bookmark” Fenster zum Speichern des Lesezeichens auf. (3) Mit PREVIOUS/NEXT wählen Sie die Nummer des Lesezeichens und bestätigen mit der MENU. Es beginnt mit der ersten Zeile der aktuellen Seite. (4) Zum Aufrufen der markierten Seite drücken Sie VOL- zur Anzeige des „Load Bookmark” Fensters. Mit PREVIOUS/NEXT wählen Sie ein Lesezeichen und bestätigen mit der MENU. Die entsprechende Seite wird nun angezeigt. Hinweis: Einige TXT Dateien können möglicherweise nicht angezeigt werden, weil das Seite 6 von 13 Format nicht unterstützt wird. 12 Dateien auswählen Zur Auswahl einer auf dem Player gespeicherten Datei: (1) Halten Sie die MENU gedrückt, um das Hauptmenü aufzurufen. (2) Wählen Sie „Navigation” und drücken Sie die MENU zum Aufrufen des Modus. (3) Mit PREVIOUS/NEXT wählen Sie eine Dateie, mit der MENU spielen Sie sie ab. 13 Sprachaufnahme z Aufnahme (1) Halten Sie die MENU gedrückt, um das Hauptmenü aufzurufen. (2) Wählen Sie „Record“ und drücken Sie die MENU zum Aufrufen des Aufnahmemodus. (3) Mit PLAY/PAUSE beginnen Sie die Aufnahme. Während der Aufnahme können Sie PLAY/PAUSE zum vorübergehenden Anhalten der Aufnahme betätigen und mit der gleichen Taste mit der Aufnahme fortfahren. (4) Halten Sie die MENU zur Rückkehr ins Hauptmenü gedrückt. z Aufnahmewiedergabe Wählen Sie im Hauptmenü „Explorer” zum Aufrufen der Ordnernavigation. Öffnen Sie den „VOICE” Ordner und wählen Sie die gewünschte Datei. 14 Löschen von Dateien Zum Löschen einer Datei: (1) Wählen Sie im Hauptmenü „Explorer” zum Aufrufen der Ordnernavigation. (2) Mit VOL- zeigen Sie ein Dialogfenster an. (3) Mit PREVIOUS/NEXT wählen Sie „YES” und bestätigen mit der MENU. 15 Spiele Dieser Player stellt Ihnen das beliebte und lustige Spiel Tetris World zur Verfügung. Gehen Sie ins Hauptmenü, wählen Sie „Game“ und betätigen Sie die MENU zum Aktivieren des Spiels. Die Bedienung des Spiels funktioniert folgendermaßen: Spiel beginnen Drücken Sie PLAY/PAUSE Block nach links und rechts bewegen Drücken Sie PREVIOUS / NEXT Block drehen Drücken Sie VOL+ Block einsetzen Drücken Sie VOL- Block beschleunigen Drücken Sie die MENU Seite 7 von 13 16 Benutzereinstellungen Zum Einstellen verschiedener Playeroptionen: (1) Wählen Sie „Settings” sobald Sie sich im Hauptmenü befinden und betätigen Sie die MENU, um den Einstellungsmodus zu aktivieren. (2) Mit PREVIOUS/NEXT wählen Sie eine Einstellung, mit der MENU bestätigen Sie oder drücken Sie PLAY/PAUSE zum Abbrechen und zur Rückkehr. Musik Wiederholung Einmal (aktuellen Track einmal abspielen, dann anhalten) Einen Track wiederholen (aktueller Track) Ordner (alle Audiodateien im aktuellen Ordner einmal abspielen und dann anhalten) Ordner wiederholen (alle Audiodateien im aktuellen Ordner wiederholen) Normal (alle Audiodateien einmal abspielen, dann anhalten) Alle wiederholen (alle Audiodateien wiederholen) Anspielen (die ersten 10 Sekunden jeder Audiodatei) Wiedergabemodus Reihenfolge (Audiodateien in gespeicherter Reihenfolge abspielen) Mischen (Audiodateien in zufälliger Reihenfolge abspielen) EQ Voreinstellungen Normal, 3D, Rock, Pop, Klassik, Bass, Jazz, User EQ User EQ Einstellungen (Equalizer) (1) Mit PREVIOUS/NEXT rufen Sie die EQ Säule auf. (2) Mit VOL+/ VOL- rufen Sie den Wert der Säule auf. (3) Drücken Sie mehrfach NEXT, bis der Cursor auf YES steht, dann drücken Sie die MENU zur Bestätigung. (4) Gehen Sie ins „Preset EQ” Menü und wählen Sie „User EQ” zur Aktivierung der Equalizer-Einstellung. Seite 8 von 13 UKW Radio (freigestellt) Stereo SW (Stereo Ein, Aus aktivieren/ deaktivieren) Aufnahme Diashow UKW Bereich China, Europa, Japan, Amerika Aufnahmequalität Hohe Qualität, allgemeine Qualität Aufnahmelautstärke +1, +2, +3, +4, +5 Text browsen (Intervall zwischen den Seiten beim automatischen Umblättern einstellen). Fotos browsen (Intervall zwischen den Bildern bei der Diashow einstellen). Display Hintergrundbeleuchtung 5, 10, 15, 20, 30 Sekunden, Immer an. Helligkeit (des Bildschirms) Beleuchtungsmodus Normal Energiesparen (Display nach bestimmter Zeit ausschalten) System Über – Informationen zum Produkt Upgrade – Firmware Upgrade Standardeinstellungen – Rückkehr zu den Werkseinstellungen Einschlaf-Timer Aus, 10, 15, 30, 60, 120 Minuten (Einstellen der Spielzeit, bevor sich der Player automatisch ausschaltet) Sprache Vereinfachtes (Displayanzeige) Koreanisch, und traditionelles Japanisch, Spanisch, Chinesisch, Englisch, Französisch, Deutsch, Italienisch, Portugiesisch, Russisch, etc. 17 Fehlerbehebung Problem Keine Mögliche Ursache Anzeige bei Einschalten des Geräts Kein Ton während der Der Player kann nicht an PC angeschlossen werden. Die Abspielzeit verändert sich fortlaufend. Batteriestand ist zu niedrig. Audiowiedergabe. den Der Behebung Die Lautstärke ist zu niedrig. Defekte Audiodatei. Laden Sie den Akku auf. Verändern Sie die Lautstärke. Löschen oder übergehen Sie d Datei. Das Motherboard Ihres PCs Bauen unterstützt kein USB. Hardware in Ihren PC ein. Die Bitrate der MP3-Datei verändert sich während der Wiedergabe. Sie Benutzen Komprimieren entsprechende Sie beim der MP3-Dateien eine festgelegte Bitrate. Seite 9 von 13 Fehlermeldung auf dem Die Verbindung wird PC beim Anschließen und während des Dateitransfer Abtrennen des Players. plötzlich unterbrochen. Die Angabe des darauf, dass während des Dateitransfers die Verbindung nicht freien Ein Teil des Speichers wird stimmt für Programme und Anzeige mit technischen Sie plötzlich unterbrochen wird. Speichers auf dem Gerät nicht Achten den Daten benutzt. überein. Die MP3-Datei wurde mit Bestimmte können MP3-Dateien nicht abgespielt werden. einem Standard komprimiert, z. B. MPEG 1 Layer 1 oder 1. Löschen Sie die nicht unterstützten MP3-Dateien. 2. Benutzen Sie MP3-Dateien, die im MPEG Layer 2, den der Player nicht 1 unterstützt. Layer 3 Standard komprimiert wurden. Vergewissern Sie sich, dass es sich um ein AVI-Video Videos können nicht Das Dateiformat wird nicht handelt. Falls nicht, benutzen unterstützt. Sie wiedergegeben werden. das Konvertierungshilfsprogramm, um die Datei umzuwandeln. Die Videodaten sind beschädigt. Versuchen es bitte mit einer anderen Datei. Benutzen Sie einen Image Das Dateiformat wird nicht unterstützt. Editor (z.B. ACDSee) zur Umwandlung. Siehe „Anlage – Umwandeln Foto kann nicht angezeigt Bilddateien”. werden. Das Gerät von unterstützt Auflösungen bis 3520 X 2816. Die Auflösung ist zu hoch. Bitte achten Sie darauf, dass Ihre Bilder diese Auflösung nicht übersteigen. Bestimmte können TXT-Dateien nicht angezeigt werden. Das Dateiformat wird nicht Versuchen Sie es bitte mit unterstützt. einer anderen Datei. 18 Technische Daten Bezeichnung Angaben Kapazität 128MB oder mehr Batterietyp Lithium-Akku Batteriebenutzungsdauer ca. 5 Stunden LCD-Display 1,8-Zoll TFT-Bildschirm Seite 10 von 13 Kopfhörerleistung 5mW + 5mW Videoformat AVI (XviD) Audioformate MP3, WMA Bildformat JPEG Bildauflösung 3520 X 2816 (max.) Bitrate MP3: 8-320kbps; WMA: 32-384kbps Rauschabstand >90dB USB-Port USB2.0 Betriebstemperatur 0℃ ~ +55℃ Aufbewahrungstemperatur* -20℃ ~ +55℃ Betriebsluftfeuchtigkeit * 20% ~ 90% (40℃) Aufbewahrungsluftfeuchtigkeit * 20% ~ 93% (40℃) 19 Hinweise z Vergewissern Sie sich vor Inbetriebnahme, dass alle Tasten funktionsfähig sind. Sind sie gesperrt, so drücken Sie gleichzeitig die MENU und VOL- zur Aufhebung der Tastensperre. z Laden Sie den Akku bitte umgehend auf, wenn in der Anzeige ein niedriger Akkustand angegeben wird oder das Gerät sich automatisch abschaltet. z Kompatibilität mit allen Speicherkarten auf dem Markt kann nicht garantiert werden. z Trennen Sie den Player vom PC auf sicher Weise, um Datenverlusten vorzubeugen. z Die Datenübertragungsrate zum PC ist u. U. abhängig vom Betriebssystem. Die genaue Übertragungsrate wird auf dem Player angegeben. z Wenn die Aufnahmedateien zu groß sind, kann es sein, dass das Gerät nur sehr langsam reagiert. Anlage – Umwandlung von Bilddateien Schritte zur Umwandlung: ① Lassen Sie ACDSee ablaufen, wählen Sie das umzuwandelnde Bild und klicken Sie „Tool” →„Convert”. Seite 11 von 13 ② Wählen Sie „JPG JPEG JFIF Format” und klicken Sie „Options”. ③ Deselektieren Sie die rot eingekreisten Optionen und klicken Sie „OK” zur Bestätigung. DIFRNCE übernimmt keine Gewährleistung für defekte Produkte aufgrund unsachgemäßer Handhabung, nicht ordnungsgemäßer Installation oder mutwilliger Beschädigung. Seite 12 von 13 Seite 13 von 13 Precauzioni z Non sottoporre il dispositivo ad urti oppure a cadute. z Non usare il dispositivo in luoghi molto caldi o molto freddi, estremamente polverosi oppure sporchi. Non esporlo ai raggi solari diretti. z Fare frequentemente una copia dei dati nel caso di un’accidentale perdita degli stessi. z Evitare di usare il dispositivo in forti campi magnetici. z Tenere il dispositivo lontano da acqua oppure da altri liquidi. Nel caso in cui acqua o altri liquidi entrino nel dispositivo, spegnerlo immediatamente e pulirlo. z Non usare soluzioni chimiche per pulire il dispositivo per evitare che si corroda. Pulirlo con un panno asciutto. z Non siamo responsabili dei danni o delle perdite di dati causati da malfunzionamento, dal disuso, dalla riparazione del dispositivo oppure dalla sostituzione delle batterie. z Non provare a smontare, riparare o modificare il prodotto. Ciò vanificherebbe la copertura della garanzia. z Il design del dispositivo oppure del display potrebbero essere diversi da quanto mostrato in questo manuale. Dovrebbe essere soggetto al display oppure al design reale. Pagina 1 di 13 1 Caratteristiche z z z Riproduttore MP3&WMA Riproduttore MTV Video Visualizzatore immagini JPEG z Lettore di scheda memoria z Navigazione cartelle z Registratore vocale z Radio stereo FM (facoltativo) z Codifica FM (facoltativo) z Dispositivo di memoria amovibile z Giochi divertenti z Batteria agli ioni di litio ricaricabile incorporata z Impostazioni personalizzate 2 Requisiti di sistema z Hardware: IBM PC & Compatibile PC, Notebook con interfaccia USB z Sistema operativo: Windows98/SE, Windows Me, Windows2000/XP 3 Contenuto della confezione Controllare che la confezione contenga i seguenti articoli. Se manca qualcosa, si prega di contattare il rivenditore: 4 z Dispositivo principale z Altoparlanti stereofonici z Cavo USB z Manuale d’uso z CD dei driver Prima dell’uso 4.1 Collegamento al PC e download dei file audio Questo riproduttore plug & play per WIN2000/XP/ME OS. Ma per Windows98/SE, bisogna installare un driver prima della connessione (Per dettagli, si veda la sezione “Installazione del driver”). Per collegarlo al PC per il trasferimento dei file, (1) Inserire l’estremità più grande del cavo USB nella porta USB del PC, ed inserire l’estremità più piccola nella porta USB del riproduttore. (2) Quando l’icona “ ” appare in basso a destra sullo schermo del PC, fare doppio click su “My Computer” sul desktop, vedrete un disco rimovibile che indica il riproduttore. Usare il disco rimovibile come un dico locale normale copiando i file da esso oppure su esso. 4.2 Rimozione sicura del riproduttore dal PC Per Windows2000/XP: (1) Click sinistro sull’icona nell’angolo destro della taskbar. (2) Fare click sulla mini finestra di pop-up con il messaggio “Stop the USB Mass Storage Device – Drive (X)”. Pagina 2 di 13 (3) Quando vi viene suggerito di rimuovere il dispositivo, tirare il cavo del dispositivo. Per Win98, assicurarsi che il trasferimento dei dati sia completato prima di scollegare il lettore MP3. 4.3 Caricamento della batteria Il dispositivo è dotato di una batteria agli ioni di litio ricaricabile incorporata. È caricata via USB. È necessario ricaricarla al primo utilizzo. Sono necessarie 3 ore per una carica completa. Collegare l’estremità più grande del cavo USB all’interfaccia USB del PC, e connettere l’altra estremità più piccola del cavo USB all’interfaccia USB del lettore. Il dispositivo è connesso al PC e viene caricato. Nota: Per una prestazione ottimale, le batterie al litio devono essere usate spesso. Se non si usa spesso il dispositivo, ricaricare la batteria almeno una volta al mese. 4.4 Uso della memory card Il dispositivo potrebbe avere un comparto per la memory card per leggere i dati da una micro-SD card. Per usare una memory card, (1) Inserire una Micro-SD card nel comparto per la memory card sull’apparecchio. (2) Premere e tenere premuto il pulsante MENU per visualizzare il menu principale. (3) Selezionare “Explorer” e premere il pulsante MENU per entrare nella modalità di ricerca cartella. (4) In modalità sfoglia cartelle, è possibile visualizzare due cartelle chiamate “Internal memory” e “SD Card”. Per riprodurre file audio e video memorizzati sulla scheda memoria, accedere alla cartella “ SD Card”. Pagina 3 di 13 5 Keys Description A. Display LCD B. VOL-: diminuisce il volume. C. VOL+: aumenta il volume. D. MENU: premere questo tasto per qualche secondo per accedere al menu principale. Premere brevemente per confermare la selezione o per attivare la modalità di navigazione cartelle. E. Previous: riproduce la traccia precedente. Sposta il cursore verso l’alto. F. Next: riproduce la traccia successiva. Sposta il cursore verso il basso. G. Play/Pause: accende o spegne il dispositivo. Riproduce anche o mette in pausa l’audio. H. Jack cuffie I. Interruttore di alimentazione: accende o spegnere il dispositivo J. Porta USB: Collegamento ad un computer 6 Accensione/spegnimento Per accendere, (1) Spostare l’interruttore di alimentazione verso destra per accendere il dispositivo. (2) Tenere premuto il tasto PLAY/PAUSE finché non si visualizza il prompt sul display. Per spegnere, (1) Tenere premuto il tasto PLAY/PAUSE finché non si visualizza il prompt sul display. (2) Spostare l’interruttore di alimentazione verso sinistra per spegnere il dispositivo. Pagina 4 di 13 (Assicurarsi di completare questo passo per risparmiare la batteria.) Nota: il lettore dotato di un sistema di risparmio energetico che permette al dispositivo di spegnersi automaticamente se non viene utilizzato per circa 3 minuti. 7 Funzionamento di base Tasto Funzionamento Riproduci/Pausa Premere il tasto PLAY/PAUSE per riprodurre o interrompere. Regola volume Premere brevemente il tasto VOL+/VOL- per aumentare o diminuire il volume. Traccia Premere brevemente il pulsante PREVIOUS. precedente Traccia successiva Premere brevemente il pulsante NEXT. Avanzamento Premere e tenere premuto il pulsante NEXT. rapido Riavvolgimento Premere e tenere premuto il pulsante PREVIOUS. rapido Ripeti A-B Per ripetere una parte specifica di una traccia, (1) Durante la riproduzione, tenere premuto il tasto VOL+ per selezionare il punto di partenza della ripetizione. (2) Tenere premuto il tatso VOL+ per selezionare il punto di interruzione. La sezione musicale tra il punto di partenza e il punto di interruzione viene ripetuta. (3) Per interrompere la parte A-B, tenere premuto il tasto VOL+. Lock/Unlock Per proteggere i tasto da un eventuale utilizzo accidentale, tenere buttons premuto il tasto MENU e il tasto VOL- insieme. 8 Come riprodurre musica 8.1 Attivare la modalità musica Tenere premuto il tasto MENU per visualizzare il menu principale. Utilizzare il tasto PREVIOUS/NEXT per selezionare il menu “Music”, e premere il tasto MENU per confermare la selezione. Ora si è in modalità MUSICA, far riferimento alla riproduzione musicale per le funzioni di base. 8.2 Navigazione cartelle Per navigare tra le cartelle: (1) In modalità MUSICA, premere il tasto MENU per attivare la modalità di navigazione cartelle. (2) Premere il tasto PREVIOUS/NEXT per selezionare una cartella o traccia e premere il tasto MENU per confermare la selezione, o premere il tasto PLAY/PAUSE per ritornare. 9 Come riprodurre video (1) Tenere premuto il tasto MENU per visualizzare il menu principale. (2) Utilizzare il tasto PREVIOUS/NEXT per selezionare il menu “Video” e premere Il tasto MENU per attivare la modalità lettore video. Pagina 5 di 13 (3) Premere il tasto PREVIOUS/NEXT per cercare un file video che si desidera riprodurre e premere il tasto MENU. Per maggiori informazioni sulla riproduzione, consultare la sezione “Funzionamento di base”. (Nota: durante la riproduzione, premere il tasto MENU per accedere in modalità di navigazione cartelle.) Nota: il lettore può riprodurre solo video AVI. Per maggiori dettagli è necessario utilizzare lo strumento di conversione incluso nel CD dei drive per convertirli. Per maggiori dettagli sul convertitore, consultare la Guida Rapida Convertitore AVI presente sul CD. 10 Come visualizzare foto Per visualizzare foto, (1) Premere il tasto MENU per visualizzare il menu principale. (2) Selezionare “Photo” e premere il tasto MENU per confermare. (3) Premere il tasto PREVIOUS/NEXT per selezionare una cartella o immagine e premere MENU per confermare. (4) Selezionare la foto che si desidera visualizzare e premere il tasto MENU per ingrandire l’immagine. (5) In modalità schermo completo, premere il tasto PREVIOUS/NEXT per visualizzare la foto precedente o successiva. Premere PLAY/PAUSE per iniziare o interrompere una visualizzazione di slide. Premere il tasto MENU per attivare la modalità di navigazione cartelle. Nota: alcune immagini potrebbero non essere visualizzate. Utilizzare un visualizzatore d’immagine (ad esempio ACDSee) per convertirle. Consultare “Appendice – Conversione di un file immagine” per maggiori dettagli. 11 Come leggere E-book 11.1 Lettura (1) Tenere premuto il tasto MENU per visualizzare il menu principale. (2) Selezionare “E-book” e premere il tasto MENU per confermare. (3) Premere il tasto PREVIOUS/NEXT per selezionare un file .txt e premere il tasto MENU per aprire il file selezionato. (4) Premere il tasto PREVIOUS/NEXT per passare manualmente alla pagina precedente o successiva, o premere il tasto PLAY/PAUSE per spostarsi automaticamente su o giù (impostando l’intervallo di tempo tra 1 e 5 in Impostazioni/Slide automatiche/Testo). (5) Durante la lettura è possibile utilizzare un segnalibro per segnare la pagina e riprendere successivamente la lettura. Per informazioni relative ai segnalibri, consultare la sezione “Come utilizzare un segnalibro”. 11.2 Come utilizzare un segnalibro (1) Andare alla pagina che si desidera segnare. (2) Premere pil tasto VOL+ per visualizare la finestra “Save Bookmark” per salvare il segnalibro. Pagina 6 di 13 (3) Premere il tasto PREVIOUS/NEXT per selezionare un numero di segnalibro e premere il tasto MENU per confermare. Il segnalibro è salvato. Inizia dalla prima riga della pagina corrente. (4) Per leggere la pagina segnata premere il tasto VOL- per visualizzare la finestra “Load Bookmark”. Premere il tasto PREVIOUS/NEXT per selezionare un segnalibro e premere il tasto MENU per confermare. Sarete guidati a quella pagina. Nota: Alcuni file TXT potrebbero non essere letti. Ciò potrebbe verificarsi in quanto il formato non è supportato. Saltare il file o caricarne un altro. 12 Come sfogliare tutti i file Per sfogliare tutti i file memorizzati nel lettore, (1) Tenere premuto il tasto MENU per visualizzare il menu principale. (2) Selezionare“Navigation”,e premere il tasto MENU per accedere alla modalità sfoglia. (3) Premere il tasto PREVIOUS/NEXT per selezionare un file che si desidera visualizzare e premere il tasto MENU per riprodurlo o visualizzarlo. 13 Registrazione vocale z Registrazione (1) Tenere premuto il tasto MENU per visualizzare il menu principale. (2) Selezionare“Record” , e premere il tasto MENU per accedere alla modalità di registrazione. (3) Premere il tasto PLAY/PAUSE per avviare la registrazione. Durante la registrazione è possibile premere PLAY/PAUSE per mettere in pausa o riprendere la registrazione. (4) Tenere premuto il tasto MENU per ritornare il menu principale. z Come riprodurre registrazioni Selezionare “Explorer” dal menu principale per attivare la modalità di navigazione cartelle. Aprire la cartella “VOICE”, e selezionare il file che si desidera riprodurre.. 14 Come cancellare file Per cancellare file, (1) Selezionare “Explorer” dal menu principale per attivare la modalità di navigazione cartelle. (2) Premere il tasto VOL- per visualizzare una finestra di dialogo. (3) Utilizzare il tasto PREVIOUS/NEXT per selezionare “YES” e premere il tasto MENU per confermare. Pagina 7 di 13 15 Come giocare Questo lettore fornisce un gioco famoso e divertente - Tetris World. Per attivare il gioco, sul menu principale selezionare “Game” e premere il tasto MENU per attivare la modalità gioco. Le funzioni di base sono le seguenti: Premere il tasto PLAY/PAUSE Avviare gioco Spostare il blocco a sinistra e a destra Premere il tasto PREVIOUS e NEXT Ruotare il blocco Premere il tasto VOL+ Inserire il blocco Premere il tasto VOL- Aumentare la velocità del blocco Premere il tasto MENU 16 Come personalizzare le impostazioni Per personalizzare le impostazioni del lettore: (1) Sul menu principale, selezionare la voce “Settings” e premere il tasto MENU per attivare la modalità delle impostazioni del sistema. (2) Premere il tasto PREVIOUS/NEXT per selezionare la voce d’impostazione e premere il tasto MENU per confermare o premere il tasto PLAY/PAUSE per annullare/ritornare. Musica Modalità ripeti Una volta ( riproduci la traccia corrente una volta e interrompi) Ripeti una (Ripeti la traccia corrente) Cartella (riproduci tutti i file video della cartella corrente e interrompi dopo la riproduzione) Rip. cartella (ripeti tutti i file audio della cartella corrente) Normale(riproduci tutti i file audio memorizzati nel lettore e interrompi dopo averli ripetuti tutti) Pagina 8 di 13 Ripeti tutte(Ripeti tutti i file audio memorizzati nel lettore) Intro(riproduci i primi 10 secondi di ogni file audio) Modalità riproduzione Ordine(riproduci i file in ordine) Shuffle ( riproduci i file audio in ordine casuale) EQ preimpostato Normale, 3D, Rock, Pop, Classica, Bassi, Jazz, EQ utente Set EQ utente (1) Premere il tasto (impostazione PREVIOUS/NEXT per passare dell’equalizzatore alla colonna EQ. definito dall’utente) (2) Premere il tasto VOL+/VOL- per regolare il valore della colonna selezionata. (3) Ripetere la pressione del tasto NEXT finché il cursore è sul tasto YES, e poi premere il tasto MENU per confermare. (4) Accedere al menu “Preset EQ”, e selezionare “User EQ” per attivare l’impostazione equalizzatore. Radio FM (facoltativo) Stereo SW (attiva o Attivo, disattivo disattiva l’effetto stereo) Registrazione Regione FM Cina, Europa, Giappone, America Qualità REC Alta qualità, Qualità generale Volume REC +1、+2、+3、+4、+5 Visualizzazione automatica Sfoglia testo (impostare l’intervallo tra la pagina precedente e di slide la pagina successiva quando il dispositivo è in modalità pagina automatica su/giù.) Sfoglia foto (imposta l’intervallo tra il fotogramma precedente e quello successivo in modalità di visualizzazione automatica fotogrammi.) Pagina 9 di 13 Display Retroilluminazione 5 secondi, 10 secondi, 15 secondi, 20 secondi, 30 secondi, sempre attivo. Luminosità (imposta la luminosità dello schermo) Modalità di riproduzione Normale Risparmio energetico (disattiva lo schermo se non v è attività per un certo lasso di tempo) Sistema Info – Informazioni sul prodotto Aggiornamento – Aggiorna il firmware Impostazioni di default – ripristina le impostazioni iniziali Timer Sleep (imposta la Disattivo, 10 minuti, 15 minuti, 30 minuti, 60 minuti, 120 minuti riproduzione continua prima che il lettore sia automaticamente spento.) Lingua Cinese semplificato, Cinese tradizionale, Inglese, Coreano, (Seleziona la lingua nella Giapponese, quale sarà visualizzato il Portoghese, Russo, ecc. Spagnolo, Francese, Tedesco, Italiano, testo sullo schermo) 17 Risoluzione dei problemi Problema Non appare nulla sul display LCD quando viene avviato il dispositivo. Non si sente il suono durante la riproduzione di un file audio. Possibile causa Soluzione La batteria è scarica. Caricare la batteria. Il volume è troppo basso. Regolare il volume. File audio cattivo. Cancellare o saltare il file. Non si riesce a collegare il riproduttore al PC. L’interfaccia USB supportata dalla madre del PC. non è scheda L’ora visualizzata cambia continuamente. Il bit rate del file MP3 cambia durante la riproduzione. Provare ad usare un bit rate fisso per comprimere il file MP3. Il PC fa un errore quando si connette e si disconnette il riproduttore. Il riproduttore viene disconnesso dal PC all’improvviso durante il trasferimento di file. Non disconnettere il riproduttore dal PC durante il trasferimento di file. La memoria totale visualizzata sul riproduttore non corrisponde al totale segnato. Parte della memoria viene usata per memorizzare programmi e caratteri. Alcuni file MP3 non possono essere riprodotti in modo corretto. Il file MP3 è compresso da uno standard, quale MPEG I Layer 1 oppure Layer 2 che il riproduttore non supporta. Aggiornare oppure sostituire la scheda madre del PC. 1. Cancellare i file MP3 non supportati. 2. Usare lo standard MPEG I Layer 3 per comprimere i Pagina 10 di 13 Non si riesce a riprodurre un video. Il formato del file non è supportato. I dati del video sono corrotti. file MP3 non supportati. Accertarsi che il video sia in formato AVI. Se non lo è, usare il convertitore per convertirlo. Saltarlo oppure caricare un altro file. Utilizzare un programma di Il formato del file non è supportato modifica immagini (ad esempio ACDSee) per convertirla. “Appendice Vedere – Come La foto non può essere convertire un file immagine” visualizzata per maggiori dettagli. Il dispositivo supporta una I file TXT non possono essere letti. La risoluzione dell’immagine risoluzione massima di 3520 è superiore alle limitazioni X 2816. Assicurarsi che la del dispositivo. risoluzione dell’immagine non Il formato del file non è supportato. superi queste limitazioni. Saltarlo oppure caricare un altro file. 18 Specifiche tecniche Punto Specifica Capacità 128MB oppure superiore Tipo batteria Batteria al litio ricaricabile Durata della batteria Circa 5 ore Display LCD Schermo 1.8-inch TFT Potenza altoparlanti 5mW+5Mw Formato Video AVI (XviD) Formato Audio MP3, WMA Formato foto JPEG Risoluzione immagine 3520 X 2816 (Max.) Bit Rate MP3: 8-320kbps; WMA: 32-384kbps SNR >90dB Porta USB USB2.0 Temperatura di funzionamento 0 Temperatura di memorizzazione -20 Umidità relativa di funzionamento * 20% ~ 90% (40 ) Umidità relativa di memorizzazione * 20% ~ 93% (40 ) ~ +55 ~ +55 19 Avviso z Assicurarsi che tutti I tasti siano attivati prima del funzionamento. Se sono bloccati, tenere Pagina 11 di 13 premuti contemporaneamente i tasti MENU e VOL- per sbloccarli. z Caricare immediatamente la batteria quando il display indica basso livello della batteria o il dispositivo si spegnerà automaticamente. z Il dispositivo non garantisce compatibilità con tutte le schede memoria di diversi produttori. z Scollegare il lettore dal PC per evitare la perdita di dati. z La velocità di trasferimento visualizzato sul PC potrebbe variare a seconda del sistema operativo. la corretta velocità di trasferimento dovrebbe essere soggetta alle indicazioni del lettore. z Quando il file vocale registrato è troppo grande, la risposta del dispositivo potrebbe essere bassa. Appendice – Come convertire un file immagine Passi del processo di conversione: Avviare il programma ACDSee, selezionare l’immagine che si desidera convertire fare clic su “Tool” →”Convert”. Selezionare “JPG JPEG JFIF Format” e poi fare clic su “Options”. Deselezionare le opzioni cerchiate di rosso e premere il tasto “OK” per confermare. DIFRNCE non è responsabile di difetti dovuti ad un utilizzo incorretto, improprio o installazione Pagina 12 di 13 non corretta del dispositivo. Pagina 13 di 13 Precauções z Não exponha o dispositivo a embates fortes nem o deixe cair de uma posição elevada. z Não utilize o leitor em condições de calor ou frio extremo nem em locais com poeiras ou humidade. Não exponha o leitor à luz solar directa. z Faça cópias de segurança frequentes dos dados para evitar a perda acidental de dados. z z Evite utilizar o leitor em campos magnéticos fortes. Mantenha o dispositivo afastado de água ou outros líquidos. Em caso de penetração de água ou de outros líquidos no dispositivo, desligue imediatamente o produto e limpe o dispositivo. z Para evitar corrosão, não utilize soluções químicas para limpar o dispositivo. Limpe com um pano seco. z O fabricante não se responsabiliza por danos ou perda de dados provocados por avaria, uso indevido, reparação do dispositivo ou substituição da bateria. z Não tente desmontar, reparar ou modificar o produto. Este procedimento invalidará a garantia. z O aspecto do leitor ou o próprio visor podem ser diferentes dos apresentados neste manual. O leitor está sujeito ao visor ou ao aspecto reais. Página 1 de 12 1 2 3 Características principais z Leitor de MP3 e WMA z Leitor de vídeo MTV z Visualizador de imagem JPEG z Leitor de cartão de memória z Navegação de Pasta z Gravador de Voz z Rádio FM Estéreo (opcional) z Codificação FM (opcional) z Dispositivo de Armazenamento Amovível z Jogos divertidos z Bateria de iões de lítio incorporada carregável z Definições personalizadas Requisitos do sistema z Hardware: PC IBM ou compatível, Notebook com interface USB z Sistema operativo Windows98/SE/ME/2K/XP Conteúdo da embalagem Verifique se a embalagem contém os artigos indicados em seguida. Caso algum destes artigos esteja em falta, contacte o fornecedor: 4 z Unidade principal z Auscultadores estéreo z Cabo USB z Manual do Utilizador z CD de drivers Antes de utilizar 4.1 Ligar a um PC e descarregar ficheiros de áudio Este leitor é “plug & play” (ligar e utilizar) para o sistema operativo WIN2000/XP/ME. No entanto, para o Windows98/SE, é necessário instalar um controlador antes de ligar (para mais informações, consulte a secção “Instalação de controladores”). Para ligar ao PC para transferência de ficheiros: (1) Ligue a extremidade maior do cabo USB à porta USB do PC e ligue a extremidade menor à porta USB do leitor. (2) Quando for apresentado o ícone “ ” no lado direito do ecrã do PC, faça duplo clique em “My Computer” no ambiente de trabalho. Será apresentado um disco amovível, que representa o leitor. Utilize o disco amovível como um disco local normal, copiando ficheiros do disco ou para o mesmo. 4.2 Remover o leitor do PC em segurança Para o Windows2000/XP: (1) Clique com o botão esquerdo do rato no ícone no canto inferior direito da barra de tarefas. (2) Faça clique na mini-janela emergente com a mensagem “Stop the USB Mass Storage Device – Drive (X)”. (3) Quando lhe for pedido para remover o dispositivo, retire o leitor. Página 2 de 12 Para Win98, certifique-se que a transferência de dados está completa antes de desligar o leitor MP3. 4.3 Carregar a bateria O aparelho possui uma bateria integrada recarregável de iões de lítio. É carregada através de uma ligação USB. Deve carregá-la quando usar pela primeira vez. Demora cerca de 3 horas a carregar a bateria por completo. Ligue a ponta mais larga do cabo USB à interface USB do PC e ligue a outra ponta mais pequena do cabo USB à interface USB do leitor. O aparelho está ligado ao PC e a carregar. AVISO: Para garantir o máximo desempenho, as baterias de iões de lítio têm de ser utilizadas com frequência. Se não utilizar o dispositivo frequentemente, certifique-se de que recarrega a bateria pelo menos uma vez por mês. 4.4 Utilizar um cartão de memória O dispositivo pode dispor de uma ranhura de cartões de memória para leitura de dados a partir de um cartão micro-SD. Para utilizar um cartão de memória: (1) Introduza um cartão Micro-SD na ranhura de cartões no corpo da unidade. (2) Prima sem soltar o botão MENU para visualizar o menu principal. (3) Seleccione “Explorer” e prima o botão MENU para aceder ao modo de procura de pastas. (4) No modo de pesquisa de pasta verá duas pastas denominadas “Internal memory” e “SD Card”. Para reproduzir um ficheiro áudio ou vídeo guardado no cartão de memória, aceda à pasta “SD Card”. Página 3 de 12 5 Keys Description A. Visor LCD B. VOL -: Diminui o volume. C. VOL +: Aumenta o volume. D. MENU: Prima durante algum tempo para aceder ao menu principal. Prima por instantes para confirmar a selecção ou aceder ao modo de navegação de pasta. E. Previous: Reproduz a faixa anterior. Também move para cima. F. Next: Reproduz a faixa seguinte. Também move para baixo. G. Play/Pause: Liga ou desliga o aparelho. Também reproduz ou pausa o áudio. H. Entrada para Auscultadores I. Interruptor: Liga ou desliga a energia. J. Saída USB: Liga a um computador 6 Ligar/Desligar Interruptor Para ligar, (1) Desligue o Interruptor para a direita para ligar. (2) Mantenha premido PLAY/PAUSE até visualizar uma mensagem no visor. Para desligar, (1) Mantenha premido PLAY/PAUSE até visualizar uma mensagem no visor. (2) Deslize o Interruptor para a esquerda para desligar. (Certifique-se que completa este passo para poupar bateria.) Nota: Este leitor possui função de poupança de energia, que permite que o aparelho se desligue automaticamente, caso esteja inactivo durante 3 minutos. Página 4 de 12 7 Funcionamento Básico Função Funcionamento Reproduzir/Pausa Prima PLAY/PAUSE para reproduzir ou pausa. Ajustar o Volume Prima por instantes VOL+/VOL- para diminuir ou aumentar o volume. Faixa Anterior Prima brevemente o botão PREVIOUS. Faixa Seguinte Prima brevemente o botão NEXT. Avançar Prima sem soltar o botão NEXT. rapidamente Retroceder Prima sem soltar o botão PREVIOUS. Repetir A-B Para repetir uma secção específica de uma faixa, (1) Durante a reprodução, mantenha premido VOL+ para seleccionar o ponto de início da repetição. (2) Mantenha premido novamente VOL+ para seleccionar o ponto de paragem. A secção de música entre o ponto incial e o ponto final é repetida. (3) Para parar a repetição A-B, mantenha premido VOL+. 8 Lock/Unlock Para impedir premir as teclas acidentalmente ou desbloquear as buttons teclas, prima a tecla MENU e VOL- em simultâneo. Reproduzir música 8.1 Aceda ao modo de música Mantenha premida MENU para visualizar o menu principal. Use a tecla ANTERIOR/SEGUINTE para seleccionar o menu “Music”e prima MENU para confirmar. Agora está no modo de MÚSICA, veja a reprodução de música para o funcionamento básico. 8.2 Navegação de Pasta Para navegar entre pastas: (1) No modo MÚSICA, prima por instantes MENU para aceder ao modo de navegação de pastas. (2) Prima PREVIOUS/NEXT para seleccionar a pasta ou faixa e prima MENU para confirmar a selecção ou prima PLAY/PAUSE para voltar. 9 Reproduzir vídeos (1) Mantenha premida MENU para visualizar o menu principal. (2) Use a tecla PREVIOUS/NEXT para seleccionar o menu “Video”e prima MENU para aceder ao modo de leitor de vídeo. (3) Prima PREVIOUS/NEXT para pesquisar o ficheiro de vídeo que pretende reproduzir e prima MENU para reproduzir. Para informação detalhada sobre a reprodução, consulte a secção “Funcionamento Básico”. (Nota: Durante a reprodução, pode premir por instantes MENU para aceder ao modo de navegação de pastas.) Nota: Este leitor só pode reproduzir vídeos AVI. Para outros formatos tem de utilizar a ferramenta de conversão incluída no CD de drivers para converter. Para informação detalhada sobre o conversor, consulte o Guia de Utilização Rápida do Conversor AVI no CD. Página 5 de 12 10 Visualizar fotos Para visualizar fotos, (1) Mantenha premida MENU para visualizar o menu principal. (2) Seleccione “Photo” e prima MENU para confirmar. (3) Prima PREVIOUS/NEXT para seleccionar uma pasta ou imagem e prima MENU para confirmar. (4) Seleccione a foto que pretende visualizar e prima MENU para aumentar para ecrã inteiro. (5) No modo de ecrã inteiro, pode premir PREVIOUS/NEXT para visualizar a foto anterior ou seguinte. Prima PLAY/PAUSE para iniciar ou parar uma apresentação de imagens automática. Prima MENU para aceder ao modo de navegação de pasta. Nota: Algumas imagens podem não ser visualizadas. Tente utilizar um visualizador de imagens (ACDSee por exemplo) para converter. Consulte “Apêndice – Converter ficheiro de imagem” para detalhes. 11 Ler E-book 11.1 Ler (1) Mantenha premida MENU para visualizar o menu principal. (2) Seleccione “E-book” e prima MENU para confirmar. (3) Prima PREVIOUS/NEXT para seleccionar um ficheiro .txt e prima MENU para abrir o ficheiro seleccionado. (4) Prima PREVIOUS/NEXT para subir ou descer de página manualmente, ou prima PLAY/PAUSE para subir ou descer de página automaticamente (ao estabelecer o intervalo de tempo entre 1 e 5 em Definições/apresentação Automática de Imagens/Texto). (5) Durante a leitura pode usar o marcador para marcar a página e continuar a ler mais tarde. Para informação sobre o marcador, consulte a secção “Utilizar marcador”. 11.2 Usar marcador (1) Aceda à página que pretende marcar. (2) Prima por instantes VOL+ para ver a janela “Save Bookmark” para gaurdar a marca. (3) Prima PREVIOUS/NEXT para seleccionar um número de marca e prima MENU para confirmar. A marca será guardada. Começa na primeira linha da página actual. (4) Para ler a página que marcou, prima por instantes VOL- para ver a janela “Load Bookmark”. Prima PREVIOUS/NEXT para seleccionar a marca e prima MENU para confirmar. Será guiado para essa página. Nota: Alguns ficheiros TXT podem não ser lidos. Pode dever-se ao facto do formato não ser suportado. Ignore ou carregue outro ficheiro. 12 Pesquisar todos os ficheiros Para pesquisar todos os ficheiros no leitor, (1) Mantenha premida MENU para visualizar o menu principal. (2) Seleccione “Navigation” e prima MENU para aceder ao modo de pesquisa. Página 6 de 12 Prima PREVIOUS/NEXT para seleccionar o ficheiro que pretende visualizar e prima MENU para reproduzir ou visualizar. 13 Gravador de Voz z Gravar (1) Mantenha premida MENU para visualizar o menu principal. (2) Seleccione “Record” e prima MENU para aceder ao modo de gravação. (3) Prima por instantes PLAY/PAUSE para iniciar a gravação. Durante a gravação, pode premir PLAY/PAUSE para pausar ou continuar a gravação. (4) Mantenha premida MENU para voltar ao menu principal. z Reproduzir as gravações Seleccione “Explorer” no menu principal para aceder ao modo de navegação de pasta. Abra a pasta “VOICE” e seleccione os ficheiros gravados que pretende reproduzir. 14 Eliminar ficheiro Para eliminar um ficheiro, (1) Seleccione “Explorer” no menu principal para aceder ao modo de navegação de pasta. (2) Prima por instantes VOL- para visualizar a caixa de diálogo. (3) Use a tecla PREVIOUS/NEXT para seleccionar o menu “YES”e prima MENU para confirmar. 15 Jogar jogos Este leitor oferece um jogo popular e divertido – Tetris World. Para activar o jogo, seleccione no menu principal " Game " e prima MENU para aceder ao modo de jogar. O funcionamento básico é o seguinte: Começar o jogo Prima PLAY/PAUSE Mover o bloco para a esquerda e direita Prima PREVIOUS e NEXT Rodar o bloco Prima VOL+ Inserir o bloco Prima VOL- Apressar o bloco Prima MENU 16 Personalizar as Definições Para personalizar as definições do leitor: (1) No menu principal, seleccione “Settings” e prima MENU para aceder ao modo de definição do sistema. (2) Prima PREVIOUS/NEXT para seleccionar o item de ajuste e prima MENU para confirmar ou prima PLAY/PAUSE para cancelar/voltar. Página 7 de 12 Música Modo Repetir Uma vez (Reproduz a faixa actual uma vez e depois pára) Repetir Um (Repete a faixa actual) Pasta (Reproduz todos os ficheiros áudio na pasta actual e pára após a reprodução) Rep. Pasta (Repete todos os ficheiros áudio na pasta actual) Normal (Reproduz todos os ficheiros áudio do leitor e pára após a reprodução) Repetir Tudo (Repete todos os ficheiros áudio armazenado no leitor) Intro (Reproduz os primeiros 10 segundos de cada ficheiro áudio) Modo de Reprodução: Ordem (Reproduz os ficheiros áudio em ordem) Aleatório (Reproduz ficheiros áudio aleatoriamente) EQ Predefinido Normal, 3D, Rock, Pop, Clássico, Baixo, Jazz, EQ de utilizador Ajustar EQ de (1) Pima PREVIOUS/NEXT para alterar utilizador (Definição para a coluna EQ. de (2) Prima VOL+/VOL- para ajustar o valor equalizador definida da coluna seleccionada. pelo (3) Volte a premir NEXT até o cursor utilizador) estiver em YES e então prima MENU para confirmar. (4) Vá para o menu “Preset EQ” e seleccione “User EQ” para activar a definição do equalizador. Rádio FM (opcional) Estéreo SW (Activa Ligado/Desligado ou desactiva o efeito estéreo) Gravar Região FM China, Europa, Japão, América Qualidade REC Alta Qualidade, Qualidade Geral Volume REC Apresentação Automática de Slides +1、+2、+3、+4、+5 Pesquisar Texto (Definir o intervalo entre a página anterior e a seguinte quando o aparelho está no modo de subir/descer automático de página. Pesquisar Foto (Definir o intervalo entre a imagem anterior e a seguinte no modo de apresentação automática de imagens.) Página 8 de 12 Visor Luz de fundo 5 segundos, 10 segundos, 15 segundos, 20 segundos, 30 segundos, Sempre Ligado. Brilho (Configura o brilho do ecrã) Modo de Luz de Normal Fundo Economizar Energia (Desliga o ecrã quando não existe actividade durante um determinado período) Sistema Sobre – Informação sobre o aparelho Actualizar – Actualizar o firmware Carregar Predefinição – Restaura as definições predefinidas do leitor Temporizador para Adormecer (Ajusta Desligado, 10 minutos, 15 minutos, 30 minutos, 60 minutos, 120 minutos o tempo de reprodução contínua antes do leitor se desligar automaticamente.) Idioma Chinês Simplificado, Chinês Tradicional, Inglês, Coreano, (Seleccione o idioma em que Japonês, Espanhol, Francês, Alemão, Italiano, Português, o Russo, etc. texto no ecrã é apresentado) 17 Resolução de problemas Problema O LCD não apresenta nenhuma indicação quando o dispositivo é iniciado. Nenhum som ao reproduzir um ficheiro de áudio. Causa possível Solução A bateria está demasiado fraca. Carregue a bateria. O volume está demasiado baixo. Ficheiro de áudio danificado. Não é possível ligar o leitor ao PC. A interface USB não é suportada pela placa mãe do PC. O tempo apresentado muda constantemente. A taxa de bits do ficheiro MP3 muda durante a reprodução. O PC apresenta um erro ao ligar e desligar o leitor. A memória apresentada no total leitor O leitor é subitamente desligado do PC durante a transferência de ficheiros. Parte da memória é utilizada para guardar programas e Regule o volume. Elimine ou ignore o ficheiro. Actualize ou substitua a placa mãe do PC. Tente utilizar uma taxa de bits fixa para comprimir o ficheiro MP3. Não desligue o leitor do PC durante a transferência de ficheiros. Página 9 de 12 não corresponde valor indicado. Alguns ficheiros não podem correctamente reproduzidos. ao MP3 ser Não é possível reproduzir o vídeo. apresentar caracteres. O MP3 está comprimido segundo uma norma como, por exemplo, MPEG I Camada 1 ou Camada 2, que o leitor não suporta. O formato de ficheiro não é suportado. Os dados do vídeo estão danificados O formato do ficheiro não é suportado Não apresenta a foto A resolução da imagem está além dos limites do aparelho. Não é possível ler o ficheiro TXT O formato de ficheiro não é suportado. 1. Elimine os ficheiros MP3 não suportados. 2. Utilize a norma MPEG I Camada 3 para comprimir os ficheiros MP3 não suportados. Certifique-se de que o vídeo está em formato AVI. Caso contrário, utilize a ferramenta de conversão fornecida para convertê-lo. Ignore-o ou recarregue outro ficheiro Tente utilizar um visualizador de imagens (ACDSee por exemplo) para converter. Consulte “Apêndice – Converter ficheiro de imagem” para detalhes. O aparelho suporta uma resolução máxima de 3520 x 2816. Certifique-se que a resolução da imagem não ultrapassa este limite. Ignore-o ou recarregue outro ficheiro. 18 Especificações técnicas Artigo Especificação Capacidade 128MB ou superior Tipo de bateria Bateria de lítio recarregável Autonomia da bateria Aprox. 5 horas Visor LCD Ecrã TFT de 1,8 polegadas Potência do auscultador 5mW+5Mw Formato de vídeo AVI (XviD) Formato de áudio MP3, WMA Formato de fotografias JPEG Resolução da imagem 3520 X 2816 (Max.) Taxa de bits MP3: 8-320kbps; WMA: 32-384kbps SNR >90dB Porta USB USB2.0 Temperatura de funcionamento 0℃ ~ +55℃ Temperatura armazenamento de -20℃ ~ +55℃ Página 10 de 12 Humidade relativa de funcionamento * Humidade relativa armazenamento * de 20% ~ 90% (40℃) 20% ~ 93% (40℃) 19 Aviso z Certifique-se que todas as teclas estão activas antes de utilizar. Se estiverem bloqueadas, mantenha MENU e VOL- premidos para desbloquear. z Carregue imediatamente a bateria quando o visor indicar bateria fraca ou o aparelho desligar-se-á automaticamente. z O aparelho não garante compatibilidade com todos os cartões de memória de vários fabricantes. z Desligue o leitor do PC correctamente, para evitar perda de dados. z O valor de transferência apresentado no PC pode ser diferente, dependendo do sistema operativo. O valor exacto da transferência pode estar sujeito à indicação do leitor. z Quando o ficheiro de voz gravado é demasiado grande, a resposta do leitor pode ser mais lenta. Apêndice – Converter ficheiro de imagem Passos de conversão: ① Execute o programa ACDSee, seleccione a imagem que pretende converter e clique “Tool” →”Convert”. ② Seleccione “JPG JPEG JFIF Format” e clique “Options”. Página 11 de 12 ③ Desmarque as opções a vermelho e prima “OK” para confirmar. A DIFRNC não pode ser considerada responsável por produtos com defeito resultante de má utilização, instalação incorrecta ou outras utilizações inadequadas ou abusivas. Página 12 de 12 Precauciones z No someta el dispositivo a impactos fuertes ni lo deje caer desde lugares altos. z No use el reproductor en lugares extremadamente calientes, fríos, sucios o húmedos. No lo exponga a la luz del sol directa. z Guarde frecuentemente los datos para evitar pérdidas accidentales de datos. z Evite usar el reproductor en campos magnéticos potentes. z Mantenga el dispositivo alejado del agua u otros líquidos. Si se introduce agua u otros líquidos en el dispositivo, apague el producto de inmediato y límpielo. z No use soluciones químicas para limpiar el dispositivo, evitará la corrosión. Límpielo con un trapo seco. z No asumimos ninguna responsabilidad por daños o pérdida de datos provocada por avería, mal uso, reparación del dispositivo o cambio de batería. z No intente desmontar, reparar ni modificar el producto. Hacerlo anulará la garantía. z El diseño del reproductor o la pantalla puede ser distinto del mostrado en este manual. Se corresponde con la pantalla o el diseño real. Página 1 de 12 1 2 3 Características principales z Reproductor MP3 y WMA z Reproductor de vídeo MTV z Visor de imágenes JPEG z Lector de memoria de tarjetas z Navegación de carpetas z Grabación de voz z Radio FM estéreo z Codificación FM (opcional) z Dispositivo de almacenamiento extraíble z Juegos divertidos z Batería Litio-Ión recargable integrada z Configuración personalizada Requisitos de sistema z Hardware: IBM PC o PC compatible, portátil, con interfaz USB z Sistemas operativos: Windows98/SE, Windows Me, Windows2000/XP Contenido del embalaje Compruebe que el embalaje contenga los elementos siguientes. Si falta alguno, póngase en contacto con el vendedor. 4 z Unidad principal z Auriculares estéreo z Cable USB z Manual del usuario z CD de controladores Antes del uso 4.1 Conecte a un PC y descargue archivos audio. El reproductor puede conectarse y usarse en SO WIN2000/XP/ME. Para Windows98/SE, debe instalar un controlador antes de la conexión (Ver la sección “Instalación de controlador” para más detalles). Para conectarlo con el PC para transferir archivos, (1) Conecte el extremo ancho del cable USB al puerto USB del PC, y conecte el extremo pequeño al puerto USB del reproductor. (2) Cuando aparezca el icono “ ” en la esquina inferior derecha de la pantalla del PC, pulse dos veces en “My Computer” en el escritorio; verá un disco extraíble, que indica el reproductor. Use el disco extraíble como un disco normal, copiando archivos desde o hacia el mismo. 4.2 Desconectar el reproductor del PC con seguridad Para Windows2000/XP: (1) Pulse el icono en la esquina derecha de la barra de tareas. (2) Pulse la mini ventana emergente con el mensaje “Stop the USB Mass Storage Device – Drive (X)”. (3) Cuando se le solicite desconectar el dispositivo, saque el reproductor. Página 2 de 12 Para Win98, asegúrese de que la transferencia de datos haya terminado antes de desconectar el reproductor MP3. 4.3 Cargar la batería El dispositivo tiene una batería recargable de litio-ión integrada. Se carga por la conexión USB. Debe cargarla cuando la use por primera vez. La batería tarda unas 3 horas en cargarse por completo. Conecte el extremo ancho del cable USB al puerto USB del PC, y conecte el extremo pequeño al puerto USB del reproductor. El dispositivo está conectado al PC y se está cargando. ADVERTENCIA : Para obtener el máximo rendimiento, las baterías de litio-ión deben usarse a menudo. Si no usa el dispositivo a menudo, asegúrese de recargar la batería al menos una vez al mes. 4.4 Uso de tarjeta de memoria El dispositivo puede tener una ranura de tarjeta de memoria para leer datos de una tarjeta Micro SD. Para usar una tarjeta de memoria, (1) Introduzca una tarjeta Micro-SD en la ranura de tarjeta de la unidad. (2) Presione y mantenga el botón MENU para mostrar el menú principal. (3) Seleccione “Explorer” y pulse MENU para acceder al modo de exploración de carpetas. (4) En el modo de exploración de carpetas, verá dos carpetas, “Internal memory” y “SD Card”. Para reproducir los archivos de audio o vídeo guardados en la tarjeta, acceda a la carpeta “SD Card”. Página 3 de 12 5 Keys Description A. Pantalla LCD B. VOL - : Bajar el volumen. C. VOL +: Subir el volumen. D. MENU: Aguantar un momento para acceder al menú principal. Pulsar brevemente para confirmar la selección o acceder al modo de navegación de carpetas. E. Previous: Reproducir la pista anterior. También mueve arriba. F. Next: Reproducir la pista siguiente. También mueve abajo. G. Play/Pause: Enciende/apaga el dispositivo También reproduce o pausa archivos de audio. H. Toma de auriculares I. Interruptor de encendido: Enciende/apaga la alimentación J. Puerto USB: Conexión al ordenador 6 Encendido/apagado Para encender, (1) Pulse el Interruptor de encendido para encender. (2) Presione y mantenga el botón PLAY/PAUSE hasta que vea la indicación en la pantalla. Para apagar, (1) Presione y mantenga el botón PLAY/PAUSE hasta que vea la indicación en la pantalla. (2) Pulse el Interruptor de encendido a la izquierda para apagar. (Asegúrese de finalizar este paso para ahorrar batería.) Página 4 de 12 Nota: Este reproductor tiene una función de ahorro de energía que permite que el dispositivo se apague automáticamente si está sin actividad durante 3 minutos. 7 Funcionamiento básico Función Reproducir/Pausa Ajuste de volumen Pista anterior Pista siguiente Avance rápido Retroceso Repetición A-B Lock/Unlock buttons 8 Funcionamiento Pulse el botón PLAY/PAUSE para reproducir o pausar. Pulsar brevemente el botón VOL+/VOL- para disminuir o aumentar el volumen. Pulse brevemente el botón PREVIOUS. Pulse brevemente el botón NEXT. Presione y mantenga el botón NEXT. Presione y mantenga el botón PREVIOUS. Para repetir una sección concreta de una pista, (1) Durante la reproducción, presione y mantenga el botón VOL+ para elegir el punto de inicio de la repetición. (2) Presione y mantenga el botón VOL+ de nuevo para elegir el punto de detención. La sección de música entre el punto de inicio y el de detención se repetirá. (3) Para detener la repetición A-B, presione y mantenga el botón VOL+. Para evitar que los botones se pulsen accidentalmente o se desbloqueen, mantener presionados los botones MENU y VOLconjuntamente. Reproducir música 8.1 Acceder al modo música Presione y mantenga el botón MENU para mostrar el menú principal. Use el botón PREVIOUS/NEXT para seleccionar el menú “Music”, y pulse MENU para confirmar la selección. Ahora está en modo MÚSICA, consulte la reproducción de música en el funcionamiento básico. 8.2 Navegación de carpetas Para navegar por las carpetas: (1) En modo MÚSICA, pulse brevemente MENU para acceder al modo de navegación de carpeta. (2) Pulsar el botón PREVIOUS/NEXT para seleccionar una carpeta o pista, y pulse el botón MENU para confirmar la selección, o pulsar el botón PLAY/PAUSE para volver. 9 Reproducción de vídeo (1) Presione y mantenga el botón MENU para mostrar el menú principal. (2) Use PREVIOUS/NEXT para seleccionar el menú “Video”, y pulse MENU para acceder al modo de reproductor vídeo. (3) Use PREVIOUS/NEXT para buscar un archivo de vídeo que desee reproducir, y pulse MENU para reproducirlo. Para información más detallada sobre la reproducción, ver la sección “Funcionamiento básico”. (Nota: durante la reproducción de música, puede pulsar brevemente MENU acceder al modo de navegación de carpetas.) Nota: Este reproductor sólo puede reproducir vídeos AVI. Para otros formatos, debe usar la herramienta de conversión incluida en el CD de controladores para convertirlos. Para información detallada sobre el conversor, ver Guía Rápida del usuario de AVI Converter en el CD. Página 5 de 12 10 Ver fotos Para ver fotos, (1) Presione y mantenga el botón MENU para mostrar el menú principal. (2) Seleccione “Photo” y pulse el botón MENU para confirmar. (3) Pulse el botón PREVIOUS/NEXT para seleccionar una carpeta o imagen, y pulse el botón MENU para confirmar. (4) Seleccione la foto que quiera mostrar y pulse MENU para aumentarla a pantalla completa. (5) En modo pantalla completa, puede pulsar el botón PREVIOUS/NEXT para mostrar la foto anterior o siguiente. Pulsar PLAY/PAUSE para iniciar o detener una presentación automática. Pulsar MENU para acceder al modo de navegación de carpetas. Nota: Puede que algunas imágenes no se muestren.. Pruebe a usar un visor de imágenes (ACDSee, por ejemplo) para convertirlas. Ver “Apéndice – Convertir archivo de imagen” para más detalles. 11 Leer E-Book 11.1 Lectura (1) Presione y mantenga el botón MENU para mostrar el menú principal. (2) Seleccione “E-Book” y pulse MENU para confirmar. (3) Pulse PREVIOUS/NEXT para seleccionar un archivo .txt, y pulse MENU para abrir el archivo seleccionado. (4) Pulsar el botón PREVIOUS/NEXT para retroceder o avanzar página manualmente, o pulsar el botón PLAY/PAUSE para retroceder o avanzar página automáticamente (estableciendo el intervalo entre 1 y 5 en Configuración/Presentación automática/Texto). (5) Durante la lectura, puede usar el marcador para marcar la página y continuar la lectura más tarde. Para información más detallada sobre los marcadores, ver la sección “Usar marcadores”. Página 6 de 12 11.2 Usar marcadores (1) Vaya a la página que quiera marcar. (2) Pulsar brevemente el botón VOL+ para mostrar una ventana “Save Bookmark” para guardar el marcador. (3) Pulse el botón PREVIOUS/NEXT para seleccionar un número de marcador y pulse el botón MENU para confirmar. Se guarda el marcador. Comenzará desde la primera línea de la página actual. (4) Para leer la página marcada, pulsar brevemente el botón VOL- para mostrar la ventana “Load Bookmark”. Pulse el botón PREVIOUS/NEXT para seleccionar un marcador y pulse el botón MENU para confirmar. Accederá a la página marcada. Nota: Puede que algunos archivos TXT no se lean.. Puede deberse a que el formato de archivo no está soportado. Salte el archivo o cargue otro. 12 Explorar todos los archivos Para explorar todos los archivos guardados en el reproductor, (1) Presione y mantenga el botón MENU para mostrar el menú principal. (2) Seleccione “Navigation " y pulse MENU para acceder al modo de exploración. (3) Pulse PREVIOUS/NEXT para seleccionar el archivo que desee ver, y pulse MENU para reproducirlo o mostrarlo. 13 Grabación de voz z Grabación (1) Presione y mantenga el botón MENU para mostrar el menú principal. (2) Seleccione “Record” y pulse el botón MENU para acceder al modo grabación. (3) Pulse PLAY/PAUSE para iniciar la grabación. Durante la grabación, puede pulsar el botón PLAY/PAUSE para pausar o seguir la grabación. (4) Presione y mantenga el botón MENU para volver al menú principal. z Reproducir grabaciones Seleccione “Explorer” en el menú principal para acceder al modo de navegación de carpetas. Abra la carpeta “VOICE”, y seleccione el archivo de grabación que quiera reproducir. 14 Borrar archivo Para borrar un archivo, (1) Seleccione “Explorer” en el menú principal para acceder al modo de navegación de carpetas. (2) Pulse brevemente el botón VOL- para mostrar una ventana de diálogo. (3) Use PREVIOUS/NEXT para seleccionar “YES”, y pulse MENU para confirmar. Página 7 de 12 15 Jugar al juego El reproductor incluye un juego divertido y popular – Tetris World. Para activar el juego, en el menú principal, seleccione “Game” y pulse el botón MENU para acceder al modo de juego. El funcionamiento básico es el siguiente: Iniciar juego Pulse el botón PLAY/PAUSE Mover el bloque a izquierda y derecha Pulse los botones PREVIOUS y NEXT. Rotar el bloque Pulse el botón VOL + Introducir el bloque Pulse el botón VOL - Acelerar el bloque Pulse el botón MENU 16 Configuración personalizada Para personalizar la configuración del reproductor: (1) En el menú principal, seleccione “Settings” y pulse MENU para acceder al modo de configuración de sistema. (2) Pulse PREVIOUS/NEXT para seleccionar el elemento de configuración y pulse el botón MENU para confirmar o PLAY/PAUSE para cancelar/volver. Música Modo repetición Una vez(Reproducir una vez la pista actual y detener) Repetir una (repite la pista actual) Carpeta(Reproduce todos los archivos de audio en la carpeta actual y se detiene después de reproducir) Rep. Carpeta(Reproduce todos los archivos de audio en la carpeta actual) Normal(Reproduce todos los archivos de audio del reproductor y se detiene después de reproducirlos todos) Repetir todo(Repite todos los archivos de música del reproductor) Intro(Reproduce los primeros 10 seg. de cada archivo de audio) Modo reproducción Orden(Reproducir archivos audio en orden ) Mezclar(Reproducir archivos audio Ecualizador preestablecido aleatoriamente) Normal, 3D, Rock, Pop, Clásica, Graves, Jazz, Ecualizador de usuario Página 8 de 12 Configurar EQ usuario (Configuración de ecualizador definida por el usuario) Radio FM (opcional) Grabación Presentación automática Pantalla Sistema Temporizador de reposo (Establece el tiempo de reproducción seguido antes de que se apague automáticamente el reproductor.) Idioma (Establece el idioma en que se muestran los textos de pantalla) (1) Pulse PREVIOUS/NEXT para seleccionar la columna del Ecualizador. (2) Pulse VOL+/VOL- para ajustar el valor de la columna seleccionada. (3) Pulse repetidamente NEXT hasta que el cursor esté en el botón YES, y puse MENU para confirmar. (4) Vaya al menú “Preset EQ”, y seleccione “User EQ” para activar la configuración del ecualizador. Encendido, apagado Interruptor estéreo (Activa o desactiva el efecto estéreo) Región FM China, Europa, Japón, América Calidad de Alta calidad, Calidad normal grabación Volumen de +1、+2、+3、+4、+5 grabación Explorar texto (establecer intervalo entre página anterior y siguiente cuando el dispositivo esté en modo de retroceso/avance de página automático.) Explorar foto (establecer intervalo entre página anterior y siguiente cuando el dispositivo esté en modo de presentación automática.) Iluminación 5 segundos, 10 segundos, 15 segundos, 20 segundos, 30 segundos, siempre encendido. Brillo (Establece el brillo de la pantalla) Modo de Normal iluminación Ahorro de energía (Apagar la pantalla cuando no haya actividad durante cierto tiempo) Acerca de – Información sobre el producto Actualizar – Actualizar el firmware Cargar valores por defecto - Restablece el reproductor a la configuración por defecto Apagado, 10 minutos, 15 minutos, 30 minutos, 60 minutos, 120 minutos Chino simplificado, chino tradicional, inglés, coreano, japonés, español, francés, alemán, italiano, portugués, ruso, etc. 17 Solución de problemas Problema El LCD no muestra nada al arrancar el dispositivo Posible causa Solución Batería demasiado baja Cargue la batería. No hay sonido al reproducir un archivo audio Volumen demasiado bajo Ajuste el volumen Archivo de audio dañado Borre o salte el archivo Página 9 de 12 El reproductor no puede conectarse al PC. La interfaz USB no está soportada por la placa base del PC Actualice o cambie la placa base del PC. El tiempo mostrado cambia constantemente. La tasa de bits del archivo MP3 cambia durante la reproducción. Pruebe a usar una tasa de bits fija para comprimir el archivo MP3. El PC devuelve un error cuando se conecta y desconecta el reproductor. El reproductor se desconecta bruscamente del PC mientras se transfieren archivos. No desconecte el reproductor del PC cuando transfiera archivos. La memoria total indicada en el reproductor no coincide con la cantidad especificada. Parte de la memoria se usa para guardar programas y mostrar caracteres. Algunos archivos MP3 no pueden reproducirse correctamente. El archivo MP3 está comprimido en un estándar, como MPEG I Layer 1 o Layer 2, que el reproductor no soporta. 1. Borre los archivos MP3 no soportados. 2. Use el estándar MPEG I Layer 3 para comprimir los archivos MP3 no soportados. Formato de archivo no soportado Asegúrese de el vídeo esté en formato AVI. Si no, use la herramienta de conversión incluida para convertirlo. Los datos de vídeo están corruptos. Salte el archivo o cargue otro Formato de archivo no soportado Pruebe a usar un visor de imágenes (ACDSee, por ejemplo) para convertirlas. Ver “Apéndice – Convertir archivo de imagen” para más detalles. La resolución de la imagen supera la capacidad de este dispositivo. El dispositivo soporta una resolución máxima de 3520x2816. Asegúrese de que la resolución de la imagen no supere este límite. Formato de archivo no soportado Salte el archivo o cargue otro No se puede reproducir vídeo No se pueden mostrar fotos No pueden leerse archivos TXT 18 Technical Specifications Elemento Capacidad Tipo de batería Duración de batería Pantalla LCD Potencia de auriculares Formato vídeo Especificaciones 128Mb o superior Batería recargable de Litio Aprox. 5 horas Pantalla TFT 1,8 pulgadas 5mW+5Mw AVI (XviD) Página 10 de 12 Formato audio Formato foto Resolución de imagen Tasa de bits MP3, WMA JPEG 3520 X 2816 (Máx.) MP3: 8-320kbps; WMA: 32-384kbps Relación de señal a ruido >90dB USB2.0 Puerto USB Temperatura de uso 0℃ ~ +55℃ Temperatura de almacenaje -20℃ ~ +55℃ Humedad relativa de uso * Humedad relativa de almacenaje * 20% ~ 90% (40℃) 20% ~ 93% (40℃) 19 Advertencia z Asegúrese de que todas las teclas estén activas antes del uso. Si están bloqueadas, mantenga presionados los botones MENU y VOL- para desbloquearlas. z Cargue la batería de inmediato cuando la pantalla indique batería baja, o el dispositivo se apagará automáticamente. z El dispositivo no garantiza la compatibilidad con todas las tarjetas de memoria de todos los fabricantes. z Desconecte el reproductor del PC adecuadamente para evitar pérdidas de datos. z La tasa de transferencia mostrada en el PC puede ser distinta según el sistema operativo. La tasa de transferencia exacta está sujeta a las indicaciones del reproductor. z Cuando el archivo grabado sea demasiado grande, la respuesta del dispositivo puede ser lenta. Apéndice - Convertir archivos de imagen Pasos de conversión: ① Ejecute el programa ACDSee, seleccione la imagen que desee convertir, y pulse “Tool” →”Convert”. Página 11 de 12 ② Seleccione “JPG JPEG JFIF Format” y pulse “Options”. ③ Desmarque las opciones indicadas en rojo y pulse el botón “OK” para confirmar. DIFRNCE no acepta responsabilidad alguna por productos averiados por mal uso, intalación incorrecta u otros abusos o usos inadecuados. Página 12 de 12 Dikkat z Cihazı ağır darbelere maruz bırakmayınız ve yere düşürmeyiniz. z Cihazı aşırı sıcak veya soğuk, tozlu ve nemli yerlerde kullanmayınız. Cihazı doğrudan güneş ışığına maruz bırakmayınız. z Kazara bilgi kaybını önlemek için sık sık yedekleme yapınız. z Cihazı güçlü manyetik ortamlardan uzak tutunuz. z Cihazı su ve benzeri sıvılardan uzak tutunuz. Cihaza su ve benzeri sıvı girdiğinde derhal cihazı kapatınız, ve cihazı temizleyiniz. z Cihazın kaplamasının zarar görmemesi için çözücü maddeler kulanmayınız. Kuru bir bez kullanınız. z Firmamız hasarlardan veya hatalı çalışmadan kaynaklanan bilgi kayıplarından, yanlış kullanımdan, cihazın onarımından veya pil değişimden sorumlu değildir. z Cihazı açmaya, onarmaya veya özelliklerini değiştirmeye çalışmayınız. Bu durum garantinin feshedilmesine neden olacaktır. z Cihazın asıl hali bu klavuzda gösterilen halinden farklı olabilir. Asıl tasarım ve şekle bağlı kalınmıştır. Sayfa 1 / 12 1 2 3 Temel Özellikler z MP3&WMA Çalar z MTV Video çalar z JPEG Resim Görüntüleyici z Bellek kart okuyucusu z Kılasör Gözatıcı z Ses Kaydedici z Stereo FM radyo (optional) z FM Şifreleme z Çıkarılabilir Ortam Depolama Cihazı z Eğlenceli Oyunlar z Doldurulabilir dahili lityum-iyon pil z Kullanıcı Ayarları Sistem Gerekleri z Donanım: IBM PC & Uyumlu PC, USB aarayüzünü destekleyen Notebook z İşletim Sistemi: Windows98/SE, Windows Me, Windows2000/XP Beraber Verilenler Lütfen pakette şunların olduğunu kontrol ediniz. Biri eksikse, satıcınıza başvurunuz: 4 z Ana Birim z Stereo kulaklıklar z USB kablo z Kullanıcı Kılavuzu z Sürücü CDsi Kullanımdan Evvel 4.1 Bir PC’ye bağlama ve ses dosyalarını indirme Bu cihaz WIN2000/XP/ME OS işletim sistemlerinde plug & play (tak & çalıştır) olarak çalışır. Ancak Windows98/SE sisteminde, bağlantı öncesinde sürücüleri yüklemelisiniz (ayrıntılar için bak “Sürücü Yükleme” kısmı). Dosya taşıma için bir PC’ye bağlamak için, (1) USB kablosunun kalın kısmını PC’nizin USB yuvasına takınız, ince kısmı da cihazınızın USB yuvasına takınız. (2) PC ekranınızın sağ alt tarafında “ ” simgesi belirince, masaüstünden “My Computer” tıklayınız, cihazı gösteren çıkarılabilir bir simgeye çift tıklayınız. Çıkarılabilir diski sadece yerel disk olarak, dosya taşıma veya dosya göndermede kullanınız. 4.2 Cihazın PC’den güvenle çıkarılması Windows2000/XP sistemde: (1) Görev çubuğunun sağ tarafındaki simgesine sol tıklayınız. (2) Beliren mönü penceresindeki “Stop the USB Mass Storage Device – Drive (X)” mesajına tıklayınız. (3) Cihazı çıkarabieceğiniz mesajı belirince, cihazı çıkarınız. Win98 için, lütfen MP3 çaları cihazdan çıkarmadan evvel veri aktarım işleminin bittiğinden Sayfa 2 / 12 emin olunuz. 4.3 Pilin doldurulması Cihazın bir de dahili lityum-iyon doldurulabilir pili vardır. Pil USB bağlantısı ile doldurulmaktadır. Pili ilk kullanımdan evvel doldurmanız gerekmektedir. Tam dolurma işlemi yaklaşık 3 saat sürmektedir. USB kablosunun geniş olan ucunu PC nizin USB yuvasına, USB kablosunun daha küçük olan diğer ucunu da bu cihazın USB yuvasına takınız. Cihazınız PC ye bağlanmıştır ve dolum gerçekleşmektedir. Hatırlatma: Azami başarım için, lityum-İon pillerin sık sık kullanıması gerekir. Cihazı sıkça kullanmayacaksanız, pili ayda en az bir defa doldurunuz. 4.4 Ballek kartının kullanılması Cihazın mikro SD kartından dosya okuması için bir bellek kartı olabilir. Bir bellek kartının kullanılması için, (1) Bir Mikro-SD kartını cihazınızın gövdesine takınız. (2) Ana mönüyü görüntülemek için MENU tuşuna basınız. (3) Kılasör gözatma konumuna geçmek için “Explorer” seçiniz ve MENU tuşuna basınız. (4) Kılasör gözatma konumundayken, “Internal memory” ile “SD Card” adlı iki adet kılasör göreceksiniz. Bellek kartındaki ses veya video dosyalarını çalmak için, “SD Card” kılasörünü açınız. 5 Keys Description A. LCD Ekran Sayfa 3 / 12 B. VOL-: Sesi azaltır. C. VOL+: Sesi artırır. D. MENU: Ana mönüye girmk için kısa bir süre basınız. Kısa bi süre basarak seçiminizi onaylayınız veya kılasör gözatma konumuna gidiniz. E. Previous: Önceki parçayı çalar. Aynı zamanda yukarı hareket sağlar. F. Next: Sonraki parçayı çalar. Aynı zamanda aşağı hareket sağlar. G. Play/Pause: Cihazı açar ve kapatır. Aynı zamanda sesleri çalar ve duraklatır. H. Kulaklık girişi I. Şalter: Gücü açmak ve kapatmak içindir J. USB Yuvası: Bir bilgisayara bağlamak içindir 6 Güç Açık/Kapalı Açmak için, (1) Şalteri sağa doğru kaydırarak gücü açınız. (2) PLAY/PAUSE tuşunu ekranda belirinceye kadar basılı tutunuz. Kapatmak için, (1) PLAY/PAUSE tuşunu ekranda belirinceye kadar basılı tutunuz. (2) Gücü kapamak için Şalteri sola doğru kaydırınız. (pil dolumunu sağlamak için bu işlemi yaptığınızdan emin olunuz.) Not: Bu cihazın bir de cihaz 3 dakika beklemede kaldığında cihazı otomatik olarak kapatan enerji tasarruf işlevi bulunmaktadır. 7 Temel Çalıştırma İşlemleri İşlev Çalıştırma Çal/Duraklat Çalmak veya duraklatmak için PLAY/PAUSE tuşuna basınız. Ses Ayarlama Kısa bir süre VOL+/VOL- tuşuna basarak sesi azaltıp artırabilirsiniz. Önceki Parça PREVIOUS tuşuna kısa bir süre basınız. Sonraki Parça NEXT tuşuna kısa bir süre basınız. Hızlı İleri NEXT tuşunu kısa bir süre basılı tutunuz. Geri PREVIOUS tuşunu kısa bir süre basılı tutunuz. A-B Tekrarı Parçanın belli bir bölümünü tekrarlamak için, (1) Çalma esnasında, VOL+ tuşunu basılı tutarak tekrarlanacak kısmın başlangıcını belirleyiniz. (2) VOL+ tuşunu tekrar basılı tutarak bitiş kısmını belirleyiniz. Başlangıç ve bitiş kısımları arası tekrarlanacaktır. (3) A-B tekrarını durdurmak için, VOL+ tuşunu basılı tutunuz. 8 Lock/Unlock Tuşlara kazara basılmasını engellemek veya tuş kilidini kaldırmak buttons için, MENU ile VOL- tuşunu aynı anda basılı tutunuz. Parça Çalma 8.1 Müzik konumunun girilmesi Ana mönüyü görmek için MENU tuşuna basınız. ÖNCEKİ/SONRAKİ tuşuna basarak “Music” Sayfa 4 / 12 mönüsüne giriniz, sona seçiminizi onaylamak için MENU tuşuna basınız. Artık MÜZİK konumundasınız, temel çalma işlemleri için müzik çalmaya bakınız. 8.2 Kılasör Gözatma Kılasörler arasında geçiş için: (1) MÜZİK konumunda, kısa bir süre MENU tuşuna basarak kılasör gözat konumuna giriniz. (2) Kılasör veya parça seçmek için PREVIOUS/NEXT tuşuna basınız, seçiminizi MENU tuşu ile onaylayınız, ya da geri dönmek için PLAY/PAUSE tuşuna basınız. 9 Video Çalma (1) Ana mönüyü görüntülemek için MENU tuşuna basınız. (2) PREVIOUS/NEXT tuşu ile “Video” mönüsünü açınız, sonra da video çalar konumuna girmek için MENU tuşuna basınız. (3) Çalmak istediğiniz video dosyasını aramak için PREVIOUS/NEXT tuşlarını kullanınız, sonra da çalmak için MENU tuşuna basınız. Çalma ile ilgili ayrıntılı bilgi için, “Temel Çalıştırma İşlemleri” bölümüne bakınız. (Not: Çalma esnasında, kısa bir süre MENU tuşuna basarak kılasör gözatma konumuna girebilirsiniz.) Not: Bu cihaz sadece AVI video dosyalarını çalar. Diğer biçimler için, bu dosyaları dönüştürmek için ihtiyacınız olan yazılımı sürücü CDsinde bulabilirsiniz. Dönüştürücü ile ilgili ayrıntılı bilgi için, CD’deki bkz. AVI Dönüştürücü Hızlı Kullanıcı Rehberi. 10 Resim Görüntüleme Resim görüntülemek için, (1) Ana mönüyü görmek için MENU tuşunu basılı tutunuz. (2) “Photo” seçiniz ve onaylamak için MENU tuşuna basınız. (3) Kılasör veya resim seçmek için PREVIOUS/NEXT tuşuna basınız, sonra onaylamak için MENU tuşuna basınız. (4) Görmek istediğiniz resmi seçiniz ve MÖNÜ tuşuna basarak resmi tam ekran büyütünüz. (5) Tam ekran konumundayken, PREVIOUS/NEXT tuşu ile önceki veya sonraki resmi görüntüleyebilirsiniz. Ses slayt gösterisini başlatmak veya durdurmak için PLAY/PAUSE tuşuna basınız. Kılasör gözatma konumuna geçmek için MENU tuşuna basınız. Not: Bazı resimler görüntülenemez. Bir resim görüntüleyici kullanarak (Mesela ACDSee) resimleri dönüştürünüz. Dataylı bilgi için bkz. “Ekler– Resim dosyası dönüştürme”. 11 E-Kitap Okuma 11.1 Okuma (1) Ana mönüyü görmek için MENU tuşunu basılı tutunuz. (2) “E-book” seçerek seçiminizi onaylamak için MENU tuşuna basınız. (3) PREVIOUS/NEXT tuşu ile bir .txt dosyası seçiniz, sonra da seçilen dosyayı açmak için MENU tuşuna basınız. (4) Elle sayfalarda yukarı ve aşağı gitmek için PREVIOUS/NEXT tuşuna basınız, ya da Sayfa 5 / 12 PLAY/PAUSE tuşu ile yukarı ve aşağı otomatik olarak gidiniz (Ayarlar/Otomatik Slayt Gösterisi/Metin zamanlayıcısını 1 ila 5 arası ayarlamalısınız). (5) Okuma esnasında, işaretleyiciyi kullanarak sayfayı daha sonra okumaya devam etmek için işaretleyebilirsiniz. İşaretle ilgili bilgi için, bkz.“İşaretleyicinin kullanılması” kısmı. 11.2 İşaretleyicinin kullanılması (1) İşaretlemek istediğiniz sayfaya gidiniz. (2) Kısa bir süre VOL+ tuşuna basarak sayfa işaretleyicisini kaydetmek için bir “Save Bookmark” penceresi açınız. (3) Bir işaretleyici numarası seçmek için PREVIOUS/NEXT tuşuna basınız ve onaylamak için MENU tuşuna basınız. İşaretleyici kaydedilmiştir. Bulunduğunuz sayfanın ilk satırından başlanır. (4) İşaretleyiniz sayfayı okumak için, kısa bir süre VOL- tuşuna basarak “Load Bookmark” penceresini açınız. Bir işaret seçmek için PREVIOUS/NEXT tuşuna ve onaylamak için de MENU tuşuna basınız. Böylece o sayfaya yönlendirilirsiniz. Not: Bazı TXT dosyaları okunamayabilir. Bunun sebebi dosya biçiminin desteklenmemesindendir. Ya atlayınız ya da başka bir dosya seçiniz. 12 Tüm dosyalara gözatma Cihazda kayıtlı dosyalara gözatmak için, (1) Ana mönüyü görmek için MENU tuşunu basılı tutunuz. (2) “Navigation” seçiniz,sonra da MENU tuşu ile gözatma konumuna gidiniz. (3) Görmek istediğiniz dosyayı seçmek için PREVIOUS/NEXT basınız, sonra da görüntülemek için MENU tuşuna basınız. 13 Ses Kaydetme z Kayıt (1) Ana mönüyü görmek için MENU tuşunu basılı tutunuz. (2) “Record” seçiniz,kaydetme konumuna gitmek için MENU tuşuna basınız. (3) Kısa bir süre PLAY/PAUSE tuşuna basarak kayda başlayınız. Kayıt esnasında, kaydı duraklatmak veya devam etmek için PLAY/PAUSE tuşuna basınız. (4) Ana mönüye dönmek için MENU tuşuna basınız . z Kaydın çalınması Ana mönüden “Explorer” seçerek kılasör gözatma konumuna geçiniz. “VOICE” kılasörünü açınız, çalmak istediğiniz kayıtlı dosyalardan birini seçiniz. 14 Dosyanın silinmesi Bir dosyayı silmek için, (1) Ana mönüden “Explorer” seçerek kılasör gözatma konumuna geçiniz. Sayfa 6 / 12 (2) Kısa bir süre VOL- tuşuna basarak diyalog kutusunu görüntüleyiniz. (3) PREVIOUS/NEXT tuşlarını kullanarak “YES” seçiniz ve onaylamak için MENU tuşuna basınız. 15 Oyun oynama Bu cihazın eğlenceli bir de oyunu bulunmaktadır- Tetris Dünya. Oyunu çalıştırmak için, ana mönüden, “Game” seçiniz ve oyun konumuna girmek için MENU tuşuna basınız. Çalıştırma işlemleri şöyledir: Oyunu başlat PLAY/PAUSE tuşuna basınız Bloğu sağa ve sola hareket ettir PREVIOUS ile NEXT tuşuna basınız Bloğu çevir VOL+ tuşuna basınız Bloğu yerleştir VOL- tuşuna basınız Bloğu hızlandır MENU tuşuna basınız 16 Kullanıcıya Göre Ayarlarlama Cihazı isteğinize göre ayarlamak için: (1) Ana mönüden, “Settings” seçiniz ve sistem ayar konumuna girmek için MENU tuşuna basınız. (2) Ayarlardan birini seçmek için PREVIOUS/NEXT tuşuna basınız ve MENU tuşuna basınız veya ipta/geri dönüş için PLAY/PAUSE tuşuna basınız. Müzik Tekrar Konumu Bir kez(çalınmakta olan parçadan sonra durur) Tek Tekrar (o anki parça tekrarlanır) Kılasör(kılasördeki tüm parçaları çalar ve durur) Kılasör Tekrarı(Kılasördeki tüm parçalar tekrarlanır) Normal(cihazda kayıtlı tüm parçalar çalınır sonra durur) Sayfa 7 / 12 Tüm Tekrar ( cihazdaki tüm parçalar tekrarlanır) Tanıtım ( tüm ses dosyalarının ilk 10 saniyesi dinletilir) Çama konumu sırayla(ses doyaları sırayla çalınır) Karışık(parçalar rasgele sırayla çalınır) Ayarlı EQ Normal, 3D, Rak, Pop, Klasik, Bas, Caz, Kullanıcı ayarlı EQ Kullanıcı EQ ayarı (Kullanıcının (1) PREVIOUS/NEXT tuşu ile EQ sütununa geçiniz. belirlediği (2) VOL+/VOL- tuşu ile seçtiğiniz sütunun ekolayzer ayarı) değerini giriniz. (3) NEXT tuşuna imleç YES tuşuna gelinceye kadar basınız, sonra da onaylamak için MENU tuşuna basınız. (4) “Preset EQ” mönüsüne gidiniz, sonra da “User EQ” seçerek ekolayzer ayarını açınız. FM Radyo (optional) Stereo SW Açık, Kapalı (stereo etkisini açma ve kapatma) FM bölgesi Kayıt Kayıt Çin, Avrupa, Japonya, Amerika (REC) Yüksek kalite, Normal Kalite Kalitesi Kayıt (REC) Sesi Otomatik slayt gösterisi +1、+2、+3、+4、+5 Metin Gözatma (Cihaz otomatik aşağı/yukarı konumundayken önceki ve sonraki sayfalar arasındaki geçiş süresini giriniz.) Resim Gözatma (Otomatik slayt gösterisi konumundayken öncki ve sonraki slayt arası geçiş süresini giriniz.) Ekran Arka plan ışığı 5 saniye, 10 saniye, 15 saniye, 20 saniye, 30 saniye, Daima Açık. Parlaklık (Ekranın parlaklığını ayarlayınız) Arka plan konumu ışık Normal Enerji Tasarrufu (belli bir süre hehangi bir işlem olmadığında ekranı kapatır) Sistem Hakkında – Ürün hakkında bilgi verir Güncelleme – Yazılım güncellemek içindir Sayfa 8 / 12 Varsayılanı Yükle – Ayarlar varsayılana ayarlanır Uyku Zamanlayıcısı (cihaz otomatik Kapalı, 10 dakika, 15 dakika, 30 dakika, 60 dakika, 120 dakika olarak kapanmadan evvel devamlı çalmayı ayarlar.) Dil Baasitleştirimiş Çince, Geleneksel Çince, İngilizce, Korece, (Gösterge üzerinde görüntüleme dilini seçiniz) Japponca, İspanyolca, Fransızca, Almanca, İtalyanca, Portekizce, Rusça, vs. 17 Sorun Giderme Sorun Muhtemel sebep Çözüm Pil oldukça zayıflamıştır. Pili doldurunuz. Ses dosyasını çalarken ses Ses çok düşüktür. Sesi ayarlayınız. gelmiyor. Ses dosyası bozuktur. Dosyayı siliniz veya atlayınız. USB PC’nin LCD ekran çalıştırıldığında cihaz hiçbirşey göstermiyor. Cihazı PC’ye bağlayamıyorum. cihazı PC anakartı ana tarafından güncelleyiniz desteklenmiyordur. değiştiriniz. Çalma sık değişiyor. dosyası bit oranı değişiyor. tek oran kullanınız. Dosya aktarımı esnasında Dosya aktarımı esnasında cihaz cihazla PC bağlantısını takarken veya sökerken PC hata veriyor. PC MP3 veya Görüntülenen zaman sık Cihazı esnasında kartını bağlantısı kesilmiştir. kesmeyiniz. Cihazda gösterilen toplam Belleğin bir miktarı program bellek ve karakter görüntülemede belrtilen oranda değil. MP3 dosyasını sıkıştırırken de kullanılır. MP3 dosysı bir standarda Bazı MP3 dosyalar düzgün göre sıkıştırılır, ör: MPEG I çalınmıyor. Katman 1 veya Katman 2 ki cihaz desteklemiyordur. 1. Desteklenmeyen dosyalarını siliniz. 2. MP3 Sıkıştırmada MPEG I Katman Video çalınamıyor. biçimi desteklenmiyodur. 3 standardını kullanınız. video Dosya MP3 dosyası biçimindedir. verilen aracı Aksi AVI halde, kullanarak dönüştürme yapınız. video dosyası bozuktur Geç veya yeni dosya çalıştır Sayfa 9 / 12 Bir resim düzenleyici (mesela Dosya biçimi desteklenmiyordur ACDSee) dönüştürünüz. Detaylar için bkz. Resim görüntülenemiyor kullanarak “Ekler– Resimlerin dönüştürülmesi”. Cihaz en fazla 3520 X 2816 Resmin çözünürlüğü cihazı çözünürlüğü destekler. Resim aşıyor. çöünürlüğünün bu miktarı aşmamasını sağlayınız. TXT dosyası okunamıyor Dosya biçimi desteklenmiyordur. Geç veya yeni dosya çalıştır. 18 Teknik Özellikler Başlık Özellik Kapasite 128MB veya üstü Pil Tipi Doldurulabilir Lityum Pil Pil Ömrü Yaklaşık 5 saat LCD Ekran 1.8-inç TFT ekran Kulaklık Gücü 5mW+5Mw Video Biçimi AVI (XviD) Ses Biçimi MP3, WMA Resim Biçimi JPEG Resim Çözünürlüğü 3520 X 2816 (en fazla) Bit oranı MP3: 8-320kbps; WMA: 32-384kbps SNR >90dB USB Yuvası USB2.0 Ortam sıcaklığı 0 Saklama Sıcaklığı -20 Nispi Çalışma Nem Oranı* 20% ~ 90% (40 ) Nispi Saklama Nem Oranı* 20% ~ 93% (40 ) ~ +55 ~ +55 19 Not z Çalıştırmadan evvel tüm tuşların çalıştığından emin olunuz. Tuşlar kilitliyse, MENU ile VOL - tuşunu basılı tutarak tuş kilidini kaldırınız. z Ekran pil seviyesini düşük gösterdiğinde lütfen derhal değiştiriniz, aksi halde cihaz otomatik olarak kapanacaktır. z Cihaz farklı üreticiler tarafından üretilmiş bellek kartlarını desteklemeyebilir. z Lütfen veri aktarımından sonra veri kaybını önlemek için cihazı PC’den çıkarınız. z İşletim sistemine bağlı olarak gösterilen veri aktarım oranı PC’de farklı gösteriliyor olabilir. Sayfa 10 / 12 Esas olan veri aktarım oranı cihaz tarafından gösterilen orandır. z Kaydedilen ses dosya bellekten fazlaysa, ciazın çalışması yavaşlayacaktır. Ekler – Resmin Dönüştürülmesi Dönüştürme İşlemleri: ACDSee yazılımını çaıştırınız, dönüştürmek istediğiniz dosyayı seçiniz, ve “Tool” →”Convert” tıklayınız. “JPG JPEG JFIF Format” seçiniz ve sonra “Options” i seçiniz. Kırmızı renkle çevrili seçenekleri kaldırınız sonra da “OK” tuşu ile onaylayınız. Sayfa 11 / 12 DIFRNCE firması hatalı kullanımdan, yanlış kurulumdan veya başka yanlış kullanımlardan dolayı oluşan cihaz arızalarından sorumlu tutulamaz. Sayfa 12 / 12