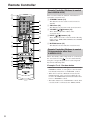
1
Front & Rear Panels—Continued
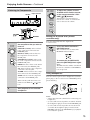
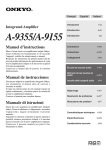
Rear Panel
1
3* 4*
2
5*
A-9355
6 7 8 9 J K L*
1
* Note that the number and geometry of each terminal may vary depending
on product numbers and/or destined countries or lands.
The above illustration depicts a European model.
G CD input
This analog audio input is for connecting a CD
player’s analog audio output.
H TUNER input
A-9155
This analog audio input is for connecting a tuner’s
analog audio output.
I TAPE IN/OUT
This analog audio input and output are for connecting a cassette deck with an analog audio output and
input.
J (A-9355) LINE/MD IN/OUT
(A-9155) LINE/DOCK IN/OUT
This analog audio input and output are for connecting a component’s with an analog audio output and
input. (MD recorder, TV, RI Dock, etc.)
6 7 8 9 J L*
A Grounding terminal
K DOCK IN (A-9355 only)
This analog audio input is for connecting a component’s analog audio output (RI Dock, etc.).
This terminal is for connecting a turntable’s ground
wire.
B SPEAKERS A
These terminal posts are for connecting speaker set
A.
C SPEAKERS B
These terminal posts are for connecting speaker set
B.
D AC OUTLETS
These AC outlets can be used to supply power to
another audio components. The type of outlets
depend on the country in which you purchased the
A-9355/A-9155.
E Power Cord
L
REMOTE CONTROL jacks
The A-9355 has two jacks and the A-9155 has one.
These
(Remote Interactive) jacks can be connected to the
jacks on your other Onkyo audio
components. The A-9355/A-9155’s remote controller can then be used to control all of your components. To use
, you must make an analog audio
connection between the A-9355/A-9155 and each
component.
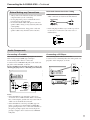
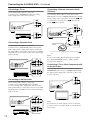
See pages 10–14 for connection information.
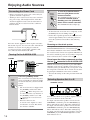
After finished all the required connections, plug the
power cord into a wall socket.
F PHONO (MM) input
This analog audio input is for connecting a turntable
with a moving-magnet cartridge.
7