1
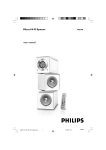
Micro Hi-Fi System
MCM108
MCM108B
MCM108C
Meet Philips at the Internet
http://www.philips.com
MCM108
MCM108B
MCM108C
CLASS 1
LASER PRODUCT
Printed in China
PDCC-JH-0628
English
Controls on the system and
remote control
1 BAND
–
for Tuner (on the set only) selects waveband.
2 SOURCE (CD/ TUNER/ AUX)
–
–
switches on the system.
selects the respective sound source for CD/
FM/ MW/ AUX.
3 STANDBY-ON / y
–
4
1
OP
5 OPEN•CLOSE
6
–
SOURCE
BAND
PROG/CLOCK
-
VOLUME
+
opens/closes the CD door.
6 VOLUME – / +
7
STANDBY-ON
–
activates/deactivates or sets the timer function.
( ALBUM 4
3
for MP3 disc......................selects an album.
) DBB
–
(Dynamic Bass Boost) enhances the bass.
¡ DSC
–
(Digital Sound Control) selects sound
characteristics: JAZZ/POP/CLASSIC/ROCK.
switches the system to standby/on.
for CD ................. programs tracks and reviews the
program.
for clock .............. sets the clock function.
E N / C LO S E
3
* TIMER
4 PROG/CLOCK
5
2
Controls
–
adjusts volume level.
3
MUTE
CD
TUNER
AUX
PROG
4
%
REPEAT
SHUFF
^
&
SLEEP
TIMER
*
2
TUNING
7 TUNING 0
–
tunes to radio stations.
8 iR SENSOR
–
@
0
ALBUM
infrared sensor for remote control.
(
9n
–
connect headphones.
!
0 ÉÅ
M I C R O S Y S T E M M C M1 0 8
8
$
VOLUME
6
for CD ................. starts or pauses CD playback.
iR
! ¡1 / 2™
0
–
–
!
skips to the beginning of a current track/
previous/ next track.
fast searches back and forward within a track/
CD.
)
DBB
DSC
¡
@ STOP 9
–
stops CD playback or erase a CD program.
# AUX IN
–
connects to external audio source.
$ MUTE
9
@
–
#
–
switches playback sound off and on.
% REPEAT
repeats a track/disc/all programmed tracks.
^ SHUFF (SHUFFLE)
AUX-IN
–
plays CD/MP3 tracks in random order.
& SLEEP
–
1
activates/deactivates or selects the sleeper time.
Notes for remote control:
– First select the source you wish to
control by pressing one of the source select
keys on the remote control (for example
CD ,TUNER).
– Then select the desired function (for
exampleÉ, í, ë).
2
General Information
IMPORTANT!
PLEASE NOTE THAT THE VOLTAGE
SELECTOR LOCATED AT THE REAR OF
THIS SYSTEM IS PRESET AT 220V FROM
THE FACTORY. FOR COUNTRIES THAT
OPERATE AT 110V-127V, PLEASE ADJUST
TO 110V-127V BEFORE YOU SWITCH ON
THE SYSTEM.
Supplied accessories
– 2 speaker boxes
– remote control with 1 x CR2032 battery
– MW loop antenna
Environmental Information
All unnecessary packaging has been omitted.
We have tried to make the packaging easy to
separate into three materials: cardboard (box),
polystyrene foam (buffer) and polyethylene
(bags, protective foam sheet).
Your system consists of materials which can be
recycled and reused if disassembled by a
specialized company. Please observe the local
regulations regarding the disposal of packaging
materials, exhausted batteries and old
equipment.
Preparations
Safety Information
● Before operating the system, check that the
operating voltage indicated on the typeplate (or
the voltage indication beside the voltage
selector) of your system is identical with the
voltage of your local power supply. If not, please
consult your dealer.
● Place the system on a flat, hard and stable
surface.
● Place the system in a location with adequate
ventilation to prevent internal heat build-up in
your system. Allow at least 10 cm (4 inches)
clearance from the rear and the top of the unit
and 5 cm (2 inches) from each side.
● The ventilation should not be impeded by
covering the ventilation openings with items,
such as newspapers, table-cloths, curtains, etc.
● Do not expose the system, batteries or discs to
excessive moisture, rain, sand or heat sources
caused by heating equipment or direct sunlight.
● No naked flame sources, such as lighted candles,
should be placed on the apparatus.
● No objects filled with liquids, such as vases, shall
be placed on the apparatus.
● If the system is brought directly from a cold to a
warm location, or is placed in a very damp
room, moisture may condense on the lens of
the disc unit inside the system. Should this occur,
the CD player would not operate normally.
Leave the power on for about one hour with
no disc in the system until normal playback is
possible.
● The mechanical parts of the set contain selflubricating bearings and must not be oiled or
lubricated.
● When the system is switched to Standby
mode, it is still consuming some power.
To disconnect the system from the
power supply completely, remove the
AC power plug from the wall socket.
MW loop antenna
FM wire antenna
Speaker
(left)
Speaker
(right)
AC power cord
A
Rear connections
B Antennas Connection
The type plate is located at the rear of the
system.
1
Power
– Before connecting the AC power cord to the
wall outlet, ensure that all other connections
have been made.
– If your system is equipped with a Voltage
Selector, set the VOLTAGE SELECTOR to match
the local power line.
WARNING!
– For optimal performance, use only the
original power cable.
– Never make or change any connections
with the power switched on.
MW antenna
Unfold the loop antenna and if necessary, use
screws (not supplied)to fix it to a flat, hard and
stable place:
1
2
2
3
Fit the plug of the loop antenna to MW
ANTENNA as shown above.
Adjust the antenna for optimal reception
FM Antenna
It is unnecessary to connect the FM pigtail
antenna since it is fixed to the main unit.
● Position the antenna as far as possible from a TV,
VCR or other radiation source.
3
4
Preparations
Basic Functions
Front Speakers
Connect the speaker wires to the SPEAKERS
terminals, right speaker to "RIGHT" and left
speaker to "LEFT", the wire (marked red) to
"+" and the wire (marked black) to "-".
Adjusting volume and sound
Before using the remote control
C Speakers Connection
1
2
3
Pull out the plastic protective sheet.
Then select the desired function (for example
É, í, ë).
OP
STANDBY-ON
Press VOLUME – / + to increase or decrease
volume.
➜ Display shows the volume level
and a
number from 0-32.
2
Press DSC repeatedly to
select the desired sound effect:
JAZZ / POP / CLASSIC /
ROCK.
SOURCE
BAND
PROG/CLOCK
-
VOLUME
E N / C LO S E
+
TUNING
IMPORTANT:
Before you operate the system, complete
the preparation procedures.
● Fully insert the stripped portion of the speaker
wire into the terminal as shown.
Notes:
– For optimal sound performance, use the
supplied speakers.
– Do not connect more than one speaker to any
one pair of +/- speaker terminals.
– Do not connect speakers with an impedance
lower than the speakers supplied. Please refer to
the SPECIFICATIONS section of this manual.
1
Select the source you wish to control by
pressing one of the source select keys on the
remote control (for example CD, TUNER).
Replacing battery (lithium
CR2032) into the remote
control
1 Pull out the knob A slightly to the left.
2 Pull out the battery compartment B .
3 Replace a new battery and fully insert the
Switching the system on
● Press STANDBY-ON (y on the remote
control).
➜ The system will switch to the last selected
source.
● Press SOURCE (CD, TUNER or AUX on
the remote control).
➜ The system will switch to the selected
source.
battery compartment back to the original
position.
A
VOLUME
DBB
DSC
3
Press DBB (on the remote control) to switch
bass enhancement on or off.
➜ Display shows: DBB if the DBB is activated.
4
Press MUTE on the remote control to stop
sound play-back instantly.
➜ Playback will continue without sound and
the display shows MUTE .
● To start sound playback you can:
– press MUTE again;
– adjust the volume controls;
– change source.
To switch the system to standby mode
● Press STANDBY-ON (y on the remote
control).
➜ The clock is displayed.
B
Power-saving automatic standby
The power-saving feature automatically switches
to standby 15 minutes after a CD playback has
ended and no control is operated.
CAUTION!
Batteries contain chemical substances, so
they should be disposed off properly.
5
6
CD/MP3 Operation
CD/MP3 Operation
Basic playback controls
3
Press ¡1 2™ to select a desired track.
➜ The album number will change accordingly
as you reach the first track of an album by
pressing ¡1 or the last track of an album by
pressing 2™ .
4
Press 2; to star t playback.
To play a disc
M I C R O S Y S T E M MCM108
● Press 2; to start playback.
➜ The current track number and elapsed
playing time of the track are displayed during
disc playback.
iR
POP
TRK
PROG
DBB
MP3
● Press ¡1 2™ once or repeatedly until the
desired track number appears in the display.
CD
Supported MP3 disc formats:
– ISO9660, Joliet, UDF 1.5
– Maximum title number: 512 (depending on
filename length)
– Maximum album number: 99
– Supported sampling frequencies: 32 kHz,
44.1kHz, 48 kHz
– Supported Bit-rates: 32~256 (kbps), variable
bitrates
To find a passage within a track
AUX-IN
1
IMPORTANT:
The lens of the CD player should never be
touched.
2
Press and hold down on ¡1 2™.
➜ The disc is played at high speed and low
volume.
When you recognise the passage you want,
release ¡1 2™.
➜ Normal playback continues.
● Press 2; during playback.
➜ The display freezes and the elapsed playing
time flashes when playback is interrupted.
➜ To resume, press 2; again.
This CD player plays Audio Discs including CDRecordables, CD-Rewritables and MP3 CD.
1
Select CD source.
2
Press OPEN/CLOSE3 on
the top of the system to open
the CD compartment.
➜ OPEN is displayed when
you open the CD
compartment.
3
You can select and change the various play
modes before or during playback. The REPEAT
modes can also be combined with
PROGRAMME.
SHUFFLE ......... tracks of the entire disc are
played in random order
REPEAT ALL ... repeats the entire disc/
programme
REPEAT ............ plays the current track
continuously
REPEAT ALB ....repeats all tracks in the current
(for MP3 only) album
To stop playback
● Press 9.
Notes: CD play will also stop when;
– the CD door is opened.
– the disc has reached the end.
– you select another source: TUNER or AUX.
– you select standby
● CD-ROM, CD-I, CDV, VCD, DVD or computer
CDs, however, are not possible.
Playing an MP3 disc
OP
PROG/CLOCK
-
VOLUME
E N / C LO S E
+
1
TUNING
Insert a disc with the printed side facing up and
press down on OPEN/CLOSE3 to close the
CD door.
➜ READ is displayed as the CD player scans
the contents of a disc, and then the total
number of tracks and playing time (or the total
number of albums and tracks for MP3 disc) are
shown.
2
Programme in the STOP position to select and
store your disc tracks in the desired sequence. If
you like, store any track more than once. Up to
20 (10 for MP3 disc) tracks can be stored in the
memory.
1
In the stop position, use the ¡1 2™ to select
your desired track number.
● For MP3, you may press ALBUM 4 3 to
select a desired album, then press ¡1 2™ to
select your desired track.
2
Press PROG (or PROG/CLOCK on the set)
to store.
is displayed
➜ Display: PROG flashes, and
briefly, then the selected track number (and the
selected album number for MP3).
3
Repeat steps 1-2 to select and store all
desired tracks.
➜ FULL is displayed if you attempt to
programme more than 20 (10 for MP3 disc)
tracks.
Different play modes: SHUFFLE
and REPEAT
To interrupt playback
Loading a disc
Programming track numbers
● During playback, press once ALBUM 4 3 to
show the current album number.
To select a different track
REP ALL
Notes:
– The SHUFFLE and REPEAT functions cannot be
used simultaneously.
– SHUFFLE play is not available in the programe
mode.
Load an MP3 disc.
➜ The disc reading time may exceed 10
seconds due to the large number of songs
compiled into one disc.
➜ "XXX YY" is displayed. XXX is the current
track number and YY is the current album
number.
Press ALBUM 4 3 to select a desired album..
1
To select your play mode, press the SHUFF or
REPEAT on the remote control before or
during playback until the display shows the
desired function.
2
Press 2; to star t playback if in the STOP
position.
➜ If you have selected SHUFFLE, playback
starts automatically.
3
To return to normal playback, press SHUFF or
REPEAT on the remote control until the
various SHUFFLE/ REPEAT modes are no
longer displayed.
4
To start playback of your disc programme,
press 2;.
Reviewing the programme
● Stop playback and press PROG (or PROG/
CLOCK on the set) repeatedly.
➜ Display first shows a programme sequence,
then the stored track number (and the album
number for MP3).
● To exit review mode, pressÇ.
Erasing the programme
You can erase the programme by:
●
●
●
●
pressing 9 once in the STOP mode;
pressing 9 twice during playback;
opening the CD compartment;
Select another sound source.
➜ PROG disappears from the display.
● You can also press 9 to cancel your play mode.
7
8
Radio Reception
Other Connection
Clock/Timer
Helpful hints:
To improve radio reception:
– For FM, extend coil antenna at the back of the
unit fully for optimum reception.
STANDBY-ON
SOURCE
BAND
PROG/CLOCK
-
VOLUME
1
2
+
TUNING
Select AUX source.
Use a line-in cable (not supplied) to connect
MCM 108’s AUX-IN jack (3.5 mm ) to an
AUDIO OUT or headphone jack on an
external equipment (such as CD player, or VCR).
AUX-IN
Select TUNER source.
➜ TUNER is displayed.
2
Press BAND (TUNER on the remote
control) once or more to select your waveband.
3
Turn TUNING 0 to tune to a station.
➜ Display shows: the frequency of the tuned
station.
Setting the clock
1
In Standby mode, press PROG/CLOCK
button.
➜ The clock digits for the hours flash.
2
3
Press ¡1 / 2™ to set the hours.
4
5
Press ¡1 / 2™ to set the minutes.
Maintenance
Cleaning the Cabinet
● Use a soft cloth slightly moistened with a mild
detergent solution. Do not use a solution
containing alcohol, spirits, ammonia or abrasives.
Cleaning Discs
● When a disc becomes dirty,
clean it with a cleaning cloth.
Wipe the disc from the centre
out.
● Do not use solvents such as
benzene, thinner, commercially
available cleaners, or antistatic
spray intended for analogue records.
Press ¡1 / 2™ to set the minutes.
Press TIMER again.
➜ The clock digits for the minutes flash.
Press TIMER to confirm the time.
➜ The timer is now set and actiated.
Notes:
- If source CD is selected and no disc is in the CD
tray or the disc has an error, TUNER will be
selected automatically.
- At the set time of wake up, the set will turn on at
volume level 12.
To activate and deactivate timer
Tuning to radio stations
1
6
7
M I C R O S Y S T E M M C M10 8
You can listen to the sound of the connected
external device through your system’s speakers.
E N / C LO S E
Press ¡1 / 2™ to set the hours.
iR
Listening to an external source
OP
4
5
Cleaning the disc lens
● After prolonged use, dirt or dust may
accumulate at the disc lens. To ensure good
playback quality, clean the disc lens with Philips
CD Lens Cleaner or any commercially available
cleaner. Follow the instructions supplied with
cleaner.
9
Press PROG/CLOCK again.
➜ The clock digits for the minutes flash.
Press PROG/CLOCK to confirm the time.
Note:
– If the clock has not been set, -- --:-- -- will be
displayed.
Setting the timer
● The system can be used as an alarm clock. CD
or TUNER can be set to switch on at a preset
time. The clock time needs to be set first
before the timer can be used.
● If no button is pressed within 90 seconds during
timer setup, the system will exit timer setting
mode automatically.
1
In any mode, press TIMER on the remote
control for more than 2 seconds.
2
Press ¡1 / 2™ (or CD / TUNER on the
remote control) to select sound source.
3
Press TIMER to confirm your desired source.
➜ The clock digits for the hours flash.
● In standby or during playback, press
TIMER once.
➜ Display shows
if activated, and
disappears if deactivated.
Activating and deactivating
SLEEP
The sleep timer enables the system to switch
off by itself after a set period of time. The clock
time needs to be set first before the sleep timer
can be used.
● Press SLEEP on the remote control repeatly
to select desired time before
system shuts off.
➜ Display shows SLEEP and
series of time options for
selection:
,
,
, , ,
...
SLEEP
TIMER
● To deactivate, press SLEEP on the remote
control once or more until “ “ is shown, or
press STANDBY ON y on the system or
remote control.
10
Troubleshooting
Specifications
WARNING
Under no circumstances should you try to repair the system yourself, as this will invalidate the
warranty. Do not open the system as there is a risk of electric shock.
If a fault occurs, first check the points listed below before taking the system for repair. If you
are unable to remedy a problem by following these hints, consult your dealer or service centre.
Problem
CD OPERATION
“NO cd” is displayed.
RADIO RECEPTION
Radio reception is poor.
GENERAL
The system does not react when buttons
are pressed.
Sound cannot be heard or is of poor
quality.
The left and right sound outputs are
reversed.
The remote control does not function
properly.
The timer is not working.
The Clock/Timer setting is erased.
Solution
– Insert a disc.
– Check if the disc is inserted upside down.
– Wait until the moisture condensation at the lens
has cleared.
– Replace or clean the disc, see “Maintenance”.
– Use a finalised CD-RW or CD-R, or a correct
MP3-CD format disc.
– If the signal is too weak, adjust the antenna or
connect an external antenna for better reception.
– Increase the distance between the Micro HiFi
System and your TV or VCR.
AMPLIFIER
Output power ........................................... 2 x 2W RMS
.......................................................................... 200W PMPO
Signal-to-noise ratio .......................... ≥ 62 dBA (IEC)
Frequency response ......... 60 – 16000 Hz, ± 3 dB
Impedance loudspeakers ......................................... 8 Ω
Impedance headphones ................. 32 Ω – 1000 Ω
CD PLAYER
Frequency range .................................. 20 – 20000 Hz
Signal-to-noise ratio ............................................ 75 dBA
TUNER
FM wave range ................................... 87.5 – 108 MHz
MW wave range ................................ 531 – 1602 kHz
Sensitivity at 75 Ω
– mono, 26 dB signal-to-noise ratio ............ 2.8 µV
– stereo, 46 dB signal-to-noise ratio ........ 61.4 µV
Selectivity ................................................................. ≥ 28 dB
Total harmonic distortion ..................................... ≤ 5%
Frequency response ..... 63 – 12500 Hz (± 3 dB)
Signal-to-noise-ratio .......................................... ≥ 50 dB
SPEAKERS
Bass reflex system
Dimensions (w x h x d) . 150 x 150 x 200 (mm)
GENERAL INFORMATION
AC Power.........................................110-127V 60Hz /
220-240V 50Hz, switchable
Dimensions (w x h x d) .. 150 x 150 x 220 (mm)
Weight (with/without speakers) ..................................
............................................................... approx. 4.9 / 2.3 kg
Standby power consumption .......................... < 3 W
Subject to modification
– Remove and reconnect the AC power plug and
switch on the system again.
– Adjust the volume.
– Disconnect the headphones.
– Check that the speakers are connected correctly.
– Check if the stripped speaker wire is clamped.
– Make sure the MP3-CD was recorded within
32-256 kbps bit rate with sampling frequencies
at 48 kHz, 44.1 kHz or 32 kHz.
– Check the speaker connections and location.
– Select the source (CD or TUNER, for example)
before pressing the function button (É,í,ë).
– Reduce the distance between the remote control
and the system.
– Insert the batteries with their polarities
(+/– signs) aligned as indicated.
– Replace the batteries.
– Point the remote control directly toward
IR sensor on the front of the system.
– Set the clock correctly.
– Press TIMER to switch on the timer.
– Power has been interrupted or the power cord
has been disconnected. Reset the clock/timer.
11
12
AUSTRALIA - Philips Manufacturers Warranty for Australia only
These warranty conditions are valid for the
following consumer electronics products:
Colour Televisions, Projection TV, Plasma &
LCD TV, Video Cassette Recorders, CD
Recorders & Players, DVD Players, DVD
Recorders, Audio Systems, Home Theatre
systems & Portable Audio.
The benefits given to the purchaser by this
warranty are in addition to all other rights
and remedies which the purchaser has in
respect of the product under the Trade
Practices Act or other Commonwealth or
State Law.
Philips Consumer Electronics warrants its products
to the purchaser as follows and subject to the stated
conditions.
3 Years free Repair Service - at Philips ASC
Colour Television, Plasma Television, LCD Television,
Projection Televsion, DVDR/VCR Combo, DVD
Recorder, DVD Recorder with Hard Drive, LCD
Projectors, Wireless Audio Systems
1 Year free Repair Service - at Philips ASC
Audio Systems & Home Theatre Systems.
1 Year free Replacement – at your Retailer
Portable Audio, MP3 Infotainment products, Video
Cassette recorders, DVD Player, DVD/VCR Combo
Player, Portable DVD/LCD player.
Conditions of Repair Warranty
1. All claims for warranty service should be made to
your nearest Philips Authorised Service Centre.
Reasonable evidence of date of purchase must be
provided.
2. This warranty extends only to defects in material or
workmanship occurring under normal use of the
product when operated in accordance with the
instructions.
3. If a replacement product is supplied under the repair
policy it is warranted, under this warranty, for the
remainder of the warranty of the original purchased
product only.
4. Home service is provided only within the normal
service area of one of our recommended Authorised
Service Centres (ASC). It will be provided for
television receivers only, regardless of size or type
(i.e. CRT, LCD, PTV, PDP). All other products are to
be taken or sent by the consumer to the workshop
of your nearest ASC (at the Consumer’s expense).
This warranty does not cover:
a) Mileage or travel outside the normal service
area covered by selected Authorised Service
Centre.
b) Service costs arising from failure to correctly
adjust the controls of the product or to observe
the instructions, or inspections that reveal that the
product is in normal working order.
c) Product failures caused by misuse, neglect,
accidental breakage, transit damage, inexpert
repairs or modification by un-authorised persons,
external fires, lightning strikes, floods, vermin
infestation or liquid spillage.
d) Cleaning of video or audio heads.
e) Inadequate receiving antennae.
f) Replacement of worn or used batteries or
other consumables.
g) Consumer products used in commercial
applications (This warranty is limited to 3 months
only).
h) Second hand products.
The conditions contained in this warranty
card replace and override the provision of
the Philips World-Wide Guarantee for
products purchased in Australia and used
in Australia.
Service is provided through more than 100
accredited Authorised Service Centres throughout
Australia. For direct contact with the nearest
recommended Authorised Service Centre in
capital & regional cities/towns
Authorised Service Centre Network
1300 361 392
Customer support is provided in Australia by our
trained call centre staff. For assistance with product
features and specifications, please call
Technology Care Centre
1300 363 391
Please record the following information for
your records and keep in a safe place.
We recommend retaining your purchase
receipt to assist with any warranty claim.
Model number:....................................................
Serial number:....................................................
5. This Manufacturers Warranty is limited to 3 months
for above listed Consumer Electronics products if
used in commercial applications.
6. Philips may, at its discretion choose to replace rather
than repair any product covered by this warranty.
7. This Manufacturers Warranty is neither transferable
nor valid in countries other than Australia.
Date of purchase:....................................................
Retailer :....................................................
Philips Consumer Electronics
a division of Philips Electronics Australia Limited
ABN 24 008 445 743, Level 1, 65 Epping Road
NORTH RYDE NSW 2113
Warranty valid for all new products purchased after 1st April 2006
New Zealand - Guarantee and Service for New Zealand
Thank-you for purchasing this quality Philips
product.
Philips New Zealand Ltd guarantees this
product against defective components and
faulty workmanship for a period of 12 months.
Any defect in materials or workmanship
occurring within 12 months from the date of
purchase subject to the following conditions will
be rectified free of charge by the retailer from
whom this product was purchased.
1.
Conditions
The product must have been purchased in New
Zealand. As proof of purchase, retain the
original sales docket indicating the date of
purchase.
2.
The guarantee applies only to faults caused by
defective components, or faulty workmanship
on the part of the manufacturer.
3.
The guarantee does not cover failures caused
by misuse, neglect, normal wear and tear,
accidental breakage, use on the incorrect
voltage, use contrary to operating instructions,
or unauthorised modification to the product or
repair by an unauthorised technician.
4.
Reasonable evidence (in the form of a sales
docket) must be supplied to indicate that the
product was purchased no more than 12
months prior to the date of your claim.
5.
In the event of a failure, Philips shall be under
no liability for any injury, or any loss or damage
caused to property or products other than the
product under guarantee.
This guarantee does not prejudice your rights
under common law and statute, and is in
addition to the normal responsibilities of the
retailer and Philips.
How to claim
Should your Philips product fail within the
guarantee period, please return it to the retailer
from whom it was purchased. In most cases the
retailer will be able to satisfactorily repair or
replace the product.
However, should the retailer not be able to
conclude the matter satisfactorily, or if you have
other difficulties claiming under this guarantee,
please contact
The Guarantee Controller
Philips New Zealand Ltd.
4 P.O. Box 41.021
Auckland
3 (09) 84 94 160
fax 3 (09) 84 97 858