1
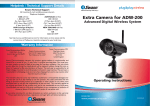
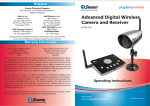
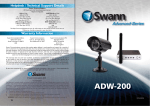
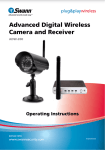
™
Advanced security made easy ™
Additional Camera for
Advanced Digital Wireless System
ADW-400
Operating Instructions
SW322-XDW
www.swannsecurity.com
SW322-XDW-60100-301009
1
Before You Begin
FCC Verification:
NOTE: This equipment has been tested and found to comply with the limits for
Class B digital device, pursuant to part 15 of the FCC Rules. These limits are designed to provide reasonable protection against harmful interference in a residential installation. This equipment generates, uses and can radiate radio frequency
energy and, if not installed and used in accordance with the instructions, may
cause harmful interference to radio or television reception, which can be determined by turning the equipment off and on, the user is encouraged to try to correct the interference by one or more of the following measures:
· Reorient or relocate the receiving antenna
· Increase the separation between the equipment and the receiver
· Connect the equipment into an outlet on a circuit different from that to which
the receiver is connected
· Consult the dealer or an experienced radio/TV technician for help
IMPORTANT NOTE: Prohibition against eavesdropping
Except for the operations of law enforcement officers conducted under lawful
authority, no person shall use, either directly or indirectly, a device operated pursuant to the provisions of this Part for the purpose of overhearing or recording the
private conversations of others unless such use is authorized by all of the parties
engaging in the conversation.
WARNING: Modifications not approved by the party responsible for compliance
could void user’s authority to operate the equipment.
IMPORTANT SAFETY INSTRUCTIONS:
· Make sure product is fixed correctly and stable if fastened in place
· Do not operate if wires and terminals are exposed
2
Table of Contents
Before you Begin
Table of Contents
Package Contents
Overview
Layout of Camera
Layout of Receiver
Pairing
Using the Menus
Recording Modes
Connection Guide
Settings
Playback and Backup
Additional Features
Troubleshooting Guide
Technical Specifications
Technical Support
Warranty Information
2
3
3
4
5
6
7
8
9
10 - 11
12 - 13
14 - 15
16 - 17
18
19
Rear Cover
Rear Cover
Package Contents
ADW-400 Camera with Stand
Power Adaptor (5V)
Power Extension Cable
Screws and Mounting Hardware
3
Overview
Congratulations on your purchase of this additional camera for the ADW-400
system! Adding more cameras to your ADW-400 system is a great way to achieve
additional functionality and value from the ADW-400 receiver.
If you don’t already have an ADW-400 Receiver, then you won’t be able to use
this camera. Talk to the retailer you purchased this camera from - they’ll probably
have them in stock. The camera and receiver are designed very much to operate as
mutually dependent units, and can’t be used with other cameras/receivers.
Note: This manual details the full function of the ADW-400 system, not just the
camera included in this package. We’ve reproduced all the information in the
original manual to save you the time and trouble of hunting down the old one.
Here’s a quick rundown on some of the great features the ADW-400 Camera and
Receiver have to offer:
Digital Wireless Technology
No more interference! Unlike older analog wireless technologies which suffer
greatly from signal distortion and interference, digital wireless technology provides
clean, crisp images, even in environments with other wireless devices active.
Up to four channels (Quad View)
Unlike older wireless systems which require a separate wireless receiver for each
camera, the ADW-400 receiver is capable of receiving and displaying up to four
cameras at once!
Night Vision
With twenty-four infrared LEDs built into the camera, the ADW-400 can see up
to 8m/26ft even in complete darkness, providing you with a 24 hour security
solution.
SD Card Recording
The ADW-400 Receiver is also a stand-alone video recorder, which saves video
directly to SD cards. It will support SD cards up to 32GB, giving you a hassle-free
Note: for the best results, always use high-speed, high-quality SD cards which
conform to either the SD or SDHC standards. Many lower quality SD cards with
slower read/write speeds will not produce desirable results, as they cannot ‘keep
up’ with the video being captured by the ADW-400.
4
Layout of Camera
Lens
Antenna
Infrared LEDs
Stand
Lens: The business end of the camera. For a reliable and clear image, ensure that
the lens stays clean and unobstructed. To clean, use a dedicated lens cleaning
solution and cloth, available from all good photography stores.
Infrared LEDs: These give the camera its limited night vision capabilities. These
LEDs act like a floodlight, but use light that human eyes cannot see, but which the
camera can.
Stand: This stand can be pivoted to face any direction. Additionally, it can be
attached to the camera via the screw thread on the rear of the camera, allowing
for attachment high on a wall or to a ceiling.
Antenna: Used to transmit the wireless signal to the receiver. For the best results,
the antenna should be as unobstructed as possible - ideally having a clear line of
sight to the receiver.
5
Layout of Receiver
Play / Enter
Arrows /
Playback Controls
POWER
ARM
Auto/Manual
MENU
MUTE
QUAD
Power: Activates and deactivates the receiver.
MENU: Opens the main menu, or goes back one step in a submenu.
MUTE: Turns the audio output on or off. Will not affect recording, only live
monitoring and playback.
QUAD: Toggles between single channel view (where the image from one camera
fills the whole screen) and quad view (where all four channels are displayed
simultaneously, each taking 1/4 of the screen).
Auto/Manual: Press to change the channel being displayed in manual switching
mode. Press and hold to toggle between manual switching and auto-switching
mode.
ARM: Turns the motion detection based recording functions on or off. When the
receiver is armed, it will automatically switch to QUAD view. You can subsequently
exit QUAD view without disarming the receiver by pressing the QUAD button. For
more information about recording and recording modes, see page 9.
Play / Enter: Starts and stops footage in playback mode. Acts as a Select / Enter
Arrows / Playback Controls: Used to navigate whilst in the menu system. In live
viewing mode, UP is a shortcut to RECORD. In playback mode, DOWN is a shortcut
to STOP, whilst LEFT and RIGHT are REWIND and FAST-FORWARD respectively.
NOTE: The Receiver is not a part of this package. To use the ADW-400 camera,
you’ll need to have the ADW-400 receiver already. The camera is not compatible
with any other receiver or DVR system - they are designed to operate as one
cohesive unit. If you’ve purchased this camera but don’t have a receiver, ask the
retailer you purchased this camera from about getting the dedicated receiver.
6
Pairing
Pairing Instructions
You might have already noticed that there is no channel switch on the camera
– so, how do you assign the cameras to the channel you want? The answer is
“pairing”.
Pairing, in a nutshell, is a process which associates one camera with one channel,
hence “pairing” them together. There are no physical switches to worry about,
the change is handled by the software in the receiver. The camera and receiver will
retain their pairings even if the power is disconnected and restored.
To pair a camera with one channel on the receiver:
• Press the MENU button on the receiver.
• Using the arrow buttons, navigate to “Pairing”.
• Press PLAY/ENTER.
• Using the LEFT and RIGHT arrows, choose the channel you would like to pair
the camera to, from 1 to 4. Press PLAY/ENTER to confirm.
• Once you’ve selected the channel you’d like to pair a camera to, a countdown
will appear on screen, counting down from 30.
• Whilst this countdown is in progress, press the pairing button on the rear of
the camera you’d like to pair with this channel.
Note: Only one camera can be paired to a channel at a time, and pairing a camera
to a channel which already has a paired camera will replace the previously paired
camera.
The Main Menu with the
Pairing Menu selected.
The Pairing Menu with
the Channel 1 selected.
7
Using the Menus
When you open the Main Menu, you will see the following
four categories, each containing several options. Here’s a
quick rundown of what you’ll see.
Pairing
This is where you pair cameras with channels in the receiver.
See page 7 for more details.
Record
• Auto-Delete: Whilst Auto-Delete is turned on, and the
SD card is full, the receiver will automatically delete the
oldest event to have space to record a new event. If
Auto-Delete is off and the SD card fills up, the receiver
will no longer record.
• Alarm Record Time: The amount of time after a
motion/alarm event that the receiver will continue to
record for. You can set this time between 3 seconds
and 10 minutes.
• Time Stamp: When Time Stamp is set to on the time
and date of a recording will be overlaid on the video.
We suggest leaving this set to on, as recording the
time and date of an event typically makes the footage
more useful.
• Format: Formats the SD card in the receiver. Formatting
removes all data and re-writes the file allocation table.
Only use this option if the SD card seems incompatible
with the receiver, and/or you really want all data on
the card to be erased.
• Playback: Enter playback mode (see pages 14 - 15).
Schedule
• You can set a start and end time for the period that
you want the receiver to record each day.
• Only one recording period can be defined each day.
For the duration of the programmed schedule, the
receiver will record continuously, regardless of whether
there is movement in the camera’s line of sight.
• For more information about Scheduled Recording, see
page 11.
Setting
Here you can access and set many of the settings in the
receiver. You’ll be able to adjust the date and time, your
display settings, and alarm settings. For more details, see
pages 12 - 13.
8
The Main Menu with the
Pairing Menu selected.
The Main Menu with the
Record Menu selected.
Layout of the Record Menu
with Auto Delete selected.
The Main Menu with the
Schedule Menu selected.
The Main Menu with the
Settings Menu selected.
Recording Modes
The ADW-400 Receiver offers two recording modes, Motion Recording and
Schedule Recording. Both of these can be used together - that is, the receiver
can always be ready to record on motion, and also record constantly for a certain
period each day.
Motion Recording
When Motion Recording is enabled, the receiver will record a short video file every
time something moves in the line of sight of the camera. You can choose how long
the receiver will continue to record for after a motion event has occurred.
To turn Motion Recording ON or OFF, press the ARM button on
the top of the receiver. The Motion Icon will be displayed on
screen whilst the receiver is armed for Motion Recording.
The Motion
Detection icon.
The motion detection is sensitive enough to detect a human being (or
human sized object/animal) moving at up to approximately 26ft (8m) from
the camera. Smaller objects/animals proportionally closer to the camera, as
well as larger things which are farther away. The criteria is how large things
appear on the screen and how fast they are moving.
Motion Alarm: You can set the receiver to emit a high-pitch alarm tone when it
detects motion.
The Schedule menu.
Schedule Recording
You can have the receiver record constantly for a certain period each day. To set
this up, access Schedule from the main menu.
Simply enter a start and end time. Use the left/right arrows to navigate, and
up/down to change the values. Choose “On” to exit the schedule menu with
Schedule recording active, or “Off” to exit the menu leaving schedule recording
deactivated.
Note: If you set the schedule to record a long period each day, remember that
you’ll need to have a very large SD card in the receiver to store all that video data!
If the card is smaller than the total file size, then you’ll lose at least part of the
recording, and possibly all of it.
9
Connection Guide
1
Connect the power
adapter plug into the power
he
socket attached to the
camera.
2
Plug the camera’s
power adapter into
the wall socket.
5A. Connect to VCR/DVD recorder (Optional)
i
From Receiver
Connect the A/V cable
to the Input on the back
of the VCR/DVD recorder
Input
Output
ii
10
If your VCR/DVD recorder is
not already connected to your
TV, connect another A/V cable
to the Output on the VCR
To TV
3
5
Connect the power adapter
plug into the receiver’s
power socket.
4
Connect the
power
adapter into
the wall
socket.
Connect the the A/V cable to your
TV or VCR
5B. Connecting to TV
From Receiver
i
Connect the A/V Cable
to a TV Input
INPUT
From VCR
(Optional)
11
Using the Software
Settings
The Main Menu with the
Settings Menu selected.
The Settings Menu with the Date/Time selected.
Date / Time
Here you can update the date and time settings in the receiver to the correct
values. The receiver will retain date and time information if turned off and on
again, or if power is disconnected for a short time.
Note: The date is formatted as YYYY / MM / DD
Brightness
Alter the brightness of the image displayed. There are five levels you can choose
from, with 0 being the darkest and 5 being the brightest. Note that this setting
won’t help if you’re looking into an area without sufficient illumination which is
outside the range of the night vision.
Volume
Adjust the output volume from the receiver. Again, this will not affect the recorded
volume or allow the microphone in the camera to pick up sounds too soft for it to
‘hear’. We suggest leaving the volume here at it’s default setting, and changing the
volume on your TV/monitor.
Scan Time
When Auto-Switching mode is activated, the Scan Time will adjust how long it
will dwell on a channel before automatically switching to the next. This can be set
between 3 and 10 seconds.
12
Resolution
Resolution refers to how many pixels (individual dots which together make up
an image) the receiver will record. There are two settings: low and high. High
resolution records at VGA quality (640 x 480 pixels) and is the suggested setting.
Alarm
The receiver can emit a high pitched alarm tone when it detects movement. This is
great if you’re using the ADW-400 to monitor an area in which there would be no
frequent movement, but could very quickly become annoying if monitoring a main
door or hallway. The alarm can be set to sound for 5 or 10 seconds, or not at all.
Audio
Here you can turn the audio function of the receiver on and off. This functions in
the same manner as the MUTE button on the receiver.
Display Setup
You can select your video standard here, either PAL or NTSC. Only change this if
the image on your TV/monitor is black and white or distorted.
Note: PAL is used in Western Europe and Australia, NTSC is used in North America
and Japan.
Version
This will display information about the receiver and cameras you have attached
to your system. Specifically, this screen will tell you what version of the firmware/
hardware they are running. There is little that you’ll be able to do with this
information, and nothing here is adjustable. The main reason you would access
this window is if you contact our technical support team and they need to know
what type of receiver and camera(s) you are using.
13
Using the&Software
Playback
Backup
There are two ways of playing back footage from the ADW-400 receiver. The first
is through the receiver itself, and the second (possibly more useful option) is to
remove the SD card and insert it into a card reader attached to a computer.
To back up footage, reading the SD card via a computer is the best option.
Alternately, you could run the Video Out from the receiver into a VCR/DVD recorder
and manually re-record your footage to a new medium (however, we recommend
using the computer).
Playback on the Receiver:
•
•
•
•
•
•
•
•
•
Whilst viewing live images, press the Play/Enter button.
Using the arrow buttons, navigate down to the VIDEO folder.
Each folder represents a date on which recordings were done.
Individual recordings are listed by time, formatted as HHMMSS. For
example, a recording taken at two-thirty and twelve seconds will be named
“143012_1”.
The UP and DOWN arrows will navigate through the list one video or folder
at a time. The LEFT and RIGHT arrows are quick navigation options, and scroll
one page at a time.
Simply click on the video you want to play it.
The arrow buttons are the playback controls: left and right are fast-forward
and rewind respectively, and down is stop.
To return to the file list, press MENU.
To exit the file list, also press MENU.
The Playback Interface with a
list of dates. The range in this
example is from the 1st to the 3rd
of January, 2009.
YY-MM-DD
The Playback Interface with
a list of individual recordings.
These are very short recordings
recorded at 7:26 a.m.
14
Playback & Backup on a Computer:
Playback on a PC has some significant advantages over playing back footage on
the receiver itself.
Generally, computer playback offers a higher resolution monitor than most TVs,
and the video quality does not suffer from being transmitted via a composite video
signal.
To playback footage on your computer:
• Remove the SD card from the receiver.
• Insert the SD card into a card reader attached to your computer.
• Open the SD card in your file browser (such as Explorer).
• Open the folder named “Video”.
• Each folder represents a date on which recordings were done.
• Individual recordings are listed by time, formatted as HHMMSS. For example,
a recording taken at two-thirty in the afternoon and twelve seconds will be
named “143012_1”.
Note: If you do not have an SD card reader in your computer, you can purchase a
separate card reader. These are quite inexpensive and, using USB technology, allow
for quick “plug & play” installation.
Backup onto a PC
Once you’ve popped the SD card into a card reader connected to your computer,
the video files can be copied as per any other file. This is great for quick and easy
backing up footage.
To burn a DVD of your footage which will work in a stand-alone DVD player, you’ll
need to use a dedicated DVD authoring program. However, if it is simply for the
purpose of backing up footage to play on a computer, then burning the file as is
to a data DVD will suffice.
If you have difficulty playing back footage on your computer, we suggest using
a different player. VLC player (available online at www.videolan.org/vlc) is a free
program which will can play files created on the ADW-400 without additional
software or codec packs.
15
Additional Features
Quad View:
In Quad View mode, you’ll be able to see images from up to four cameras on
screen at once. For this to function optimally, you’ll need:
• Four ADW-400 cameras,
• connected to power,
• and each correctly paired to each of the four channels.
To enable quad viewing mode, simply press the QUAD button on the top of the
receiver.
Whilst in Quad Viewing mode, some of the buttons on the receiver will no
longer be active - most notably, the MENU button will not be active. This is
because decoding four video signals simultaneously uses the maximum processing
capacity of the miniature computer in the receiver and there is insufficient
processing power to display the menus. To exit Quad Viewing Mode, simply press
the QUAD button again. The full functionality of the MENU button will instantly
return.
You’ll be able to enter Quad Viewing Mode even if there are fewer than four
cameras paired with the receiver. In this case, there will simply be a blank space
where that image would otherwise be displayed.
Auto Delete:
Whilst the Auto Delete function is turned ON, the ADW-400 will automatically
delete old files when it runs out of space on the SD card.
As a result, we suggest checking the recording lists periodically to ensure you don’t
lose an important event. (Of course, depending on your unique situation, it may be
extremely obvious when an incident has occurred.)
If Auto Delete is turned off, when the SD card fills up, that’s it - new events cannot
and will not be recorded. For most implementations, it’s usually better to be able
to record events as they happen at the risk of losing old ones than vice versa.
However, this is something that you’ll need to determine based on your unique
situation. If Auto Delete is turned on and there is a particular incident that
you want to backup, you’ll need to copy it off the SD card before it is overwritten!
The Auto Delete icon will be displayed
on the screen while Auto Delete is
switched on.
16
Recording Time:
If you were to manually set the ADW-400 to record constantly, how long will it
record for? Under ideal conditions, the ADW-400 uses a minimum of 8MB of
space per minute of recording.
Accordingly, we suggest that a 2GB SD card should only be relied on to record
approximately 3 hours (even then, there is a chance that the video might be too
large).
To avoid filling your SD card unnecessarily, we strongly suggest using the
Motion Detection recording mode. This way, the cameras will only record
when there’s something to see, and you can ensure that the space on your
SD card is being used optimally.
Remember that if you have the Auto Delete function active, the unit will automatically
record over the oldest files when it runs out of space. This is important if there is a
particular incident that you want to backup - you’ll need to copy it off the SD card
before it is over-written!
Manual Channel Changing and Auto-Switching
The default channel mode for the ADW-400 is Manual Channel Switching. When
channel switching is set to manual, simply press the Auto/Manual button to cycle
through available channels. The Manual icon will be displayed on the screen to let
you know that the ADW-400 is in this mode.
The Manual Switching Icon
You can set the ADW-400 receiver to automatically switch between all available
channels. To change the mode, simply press and hold the Auto/Manual button for
five seconds. The M icon will change to an “S” to let you know that the ADW-400
is in Auto-Switching mode.
The Auto-Switching Icon
17
Troubleshooting Guide
Problem: I’m getting a “NO SIGNAL” message on my screen where I want to see
my images.
Solutions:
1. Make sure the camera is getting power from the supplied 5V power adaptor.
2. Ensure that the camera is properly paired with the receiver by following the
instructions on page 7.
3. Check that the channel you are displaying is the one paired with the camera.
4. If all else fails, try moving the camera closer to the receiver, and be sure there
are no obstacles (such as thick walls or metal sheets) in between the camera
and the receiver blocking the signal.
Problem: When I view the footage from the camera at night, I see a bright white
spot and no image.
Solution: Having the camera looking out a window is problematic, as the glass
will reflect the infrared beams from the LEDs, over-exposing your image. Move
the camera so that there are no barriers (even transparent barriers such as glass)
between the camera and what you want to see. Also, make sure there are no
objects within 3’/1m of the lens, as these can reflect the infrared beams as well.
Problem: I can’t hear any sound on my TV.
Solution: Check the connections between the receiver and the TV, specifically
the red and/or white connector(s) are plugged in correctly. Check the volume
settings on the TV. Also, remember that the range of the microphone is not the
same as the range of the camera – the camera will record anything in front of it
that it sufficiently lit, however a microphone will only record sound within a few
feet (unless the sound is very loud).
Problem: The image on my TV appears to be distorted.
Solution: Check the PAL/NTSC settings on your television are correct for your
region (NTSC for USA and Canada, PAL for Australia and Western Europe). If
this does not fix the problem, check the connections between the receiver and
your screen. If you are using a long RCA cable (anything over 6’/2m) try using a
shorter one, particularly if there are other electrical devices located close to the
TV and receiver.
Problem: At night, the camera can only see 26’/8m.
Solution: This is not a malfunction – this is the range of the infrared beam that
the camera uses to see at night. Move the camera closer to what you wish to
view. Alternately, you could purchase and install a sensor floodlight, which are
available at most good hardware stores.
18
Technical Specifications
Advanced Digital Wireless (ADW) Camera
Video
Image Sensor
1/4” CMOS
Video Quality
300 TV Lines
Number of Effective Pixels VGA: 640 x 480
Minimum Illumination
0 Lux (IR On)
Day / Night Mode
Color during day, switches to B&W at night
White Balance
Automatic
Signal / Noise Ratio
<45dB
Electronic Shutter
NTSC: 1/60 ~ 1/15, 000 PAL: 1/50 to 1/15, 000 (Automatic)
Gain Control
Automatic
Backlight Compensation
No
Lens
3.6mm
Viewing Angle
53 degrees
Audio
Microphone
Yes
Audio Range
Approximately 9ft / 3m (under typical conditions)
Night Vision
Night Vision Range
Up to 26ft / 8m
Infrared Cut Filter
No
Number of IR LEDs
24
Infrared Wavelength
850nm
Infrared LED Life
10, 000 hours
General
Operating Power
DC 5V
Operating Temperature
-10°C ~ 50°C / -14°F ~ 122°F
Body Construction
ABS Plastic
Dimensions of Camera
5.1” x 2.6” x 2.6” / 130mm x 65mm x 65mm
Dimensions of Stand
4.7” x 2.4” x 2.4” / 120mm x 60mm x 60mm
Weight (Camera and Stand)
7.6 oz / 215g
Wireless
Digital or Analog
Digital
Max. Transmission Range
Up to 165 ft / 50m
Typical Range
65 ft / 20m
Frequency
2.4 GHz FHSS (Frequency hopping)
Transmission Channels
4
Receiver / SD Card Recorder (NOT INCLUDED - For Reference ONLY)
Video
Video Format
NTSC or PAL
Video Inputs
N/A (via ADW-400 Camera only)
Video Outputs
1 x RCA Composite Video
Display Resolution
VGA: 640 x 480
QVGA: 320 x 240
Display Frame Rate
VGA: 9 fps
QVGA: 25 fps
Audio
Audio Input
None (via Camera only)
Audio Output
1 x RCA Line Out
Recording
Compression Format
Motion JPEG
Recording Resolution
VGA: 640 x 480
QVGA: 320 x 240
Recording Frame Rate
16fps
Recording Modes
Manual / Motion
Memory Type
SD Card up to 32GB (SDHC compatible)
General
Operating Power
DC 5V
Dimensions
5.3” x 3.9” x 1.0”
135mm x 100mm x 25mm
Weight
5.8oz / 165g
Backup Method
SD Card
19
Helpdesk
Swann Technical Support
All Countries E-mail: [email protected]
Telephone Helpdesk
USA toll free
1-800-627-2799
(Su, 2pm-10pm US PT)
(M-Th, 6am-10pm US PT)
(F 6am-2pm US PT)
USA Exchange & Repairs
1-800-627-2799 (Option 1)
(M-F, 9am-5pm US PT)
AUSTRALIA toll free
1300 138 324
(M 9am-5pm AUS ET)
(Tu-F 1am-5pm AUS ET)
(Sa 1am-9am AUS ET)
NEW ZEALAND toll free
0800 479 266
INTERNATIONAL
+61 3 8412 4610
See http://www.worldtimeserver.com for information on time zones and the
current time in Melbourne, Australia compared to your local time.
Warranty Information
Swann Communications USA Inc.
12636 Clark Street
Santa Fe Springs CA 90670
USA
Swann Communications PTY. LTD.
Building 4, 650 Church Street,
Richmond, Victoria 3121
Australia
Swann Communications warrants this product against defects in workmanship and material
for a period of one (1) year from it’s original purchase date. You must present your receipt
as proof of date of purchase for warranty validation. Any unit which proves defective during
the stated period will be repaired without charge for parts or labour or replaced at the sole
discretion of Swann. The end user is responsible for all freight charges incurred to send the
product to Swann’s repair centres. The end user is responsible for all shipping costs incurred
when shipping from and to any country other than the country of origin.
The warranty does not cover any incidental, accidental or consequential damages arising
from the use of or the inability to use this product. Any costs associated with the fitting or
removal of this product by a tradesman or other person or any other costs associated with
its use are the responsibility of the end user. This warranty applies to the original purchaser
of the product only and is not transferable to any third party. Unauthorized end user or
third party modifications to any component or evidence of misuse or abuse of the device will
render all warranties void.
By law some countries do not allow limitations on certain exclusions in this warranty. Where
applicable by local laws, regulations and legal rights will take precedence.
20
Advanced
security made easy™
© Swann
Communications
2009