1
Introduction
SolarInfo WiFi (the WiFi) is mainly used in Sungrow string inverters (SG3KTL-M, SG4KTL-M,
SG5KTL-M) to realize simple and quick access to Internet. Users can easily check device
information by logging in the PV power station data monitoring center SolarInfo Bank
(www.solarinfobank.com). The communication topology is as shown below:
1 Electrical Connection
Connect WiFi to the corresponding interface on the inverter. SG5KTL-M will be used as an
example in this manual. Please perform relevant operations as indicated below:
SolarInfo WiFi
iPhone
iPad
Inverter
OFF
SolarInfo WiFi
Wireless Router
SolarInfo WiFi
Quick User Manual
RS485/WiFi
SolarInfo WiFi
WiFi-QIEN-Ver11-201308 Version: 1.1
RS485
AC
ON
SolarInfo
Bank
S
Inverter
DC 2
DC 1
SolarInfo WiFi Installation
Android
PC
Inverter
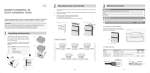
1.Unscrew the adapter.
2.Connect the adapter to the RS485/WiFi interface of the inverter.
3.Insert WiFi into RS485/WiFi interface and fasten the WiFi.
2 5 3
1
4
Please cut off the power supply of the inverter before plugging WiFi.
1
2
3
Groove
Description of Symbols
SolarInfo WiFi Interface
“Note” indicates additional information in the document and provides emphasis and
supplements to the main contents. It also provides optimized product use skills or tips to
save your time.
To ensure normal use of the device, before using the device, be sure that:
Delivery Content:
1 × WiFi
1 × SolarInfo WiFi Quick User Manual
1 × Quality certificate
2 Parameter Setting
2.1 Setting up WiFi connection
Proceed as follows 30s after SolarInfoWiFi power on. Usually it takes 42s for the SolarInfoWiFi to connect
to the BANK.
Step 1 Connect WiFi terminal to SolarInfoWiFi, take iPhone 4 for example:
1
2
a. The selected Wireless Router can access to Internet normally and it is contained in the
SolarInfo WiFi-Compatible Routers List, available at www.sungrowpower.com.
b. The communication address of the inverter is between 1 and 15. The communication
addresses of inverters can be set on the LCD of inverters.
c. A WiFi-enabled mobile phone or a laptop computer are connected to this device for
parameter setting.
d. Don’t use the WiFi and PC monitor simultaneously due to their different communication
protocols
The device must be kept away from large metal objects and electrical devices with strong
magnetic fields, such as microwave oven, refrigerator, cordless phone, concrete wall, PV panel
and metal wall, to ensure the communication quality. Communication quality may be affected
in lightning storms.
a)The “Incomplete setup, please SELECT a router for
Step 2 Enter “11.11.11.1” into the browser address bar and
the available router lists will appear. If the appointed
router appears, click and enter into Step 3. Click Refresh
if otherwise. The interval for clicking refresh should be
more than 5s. If the appointed router still dose not
appear after you clicked Refresh for several times,
please manually enter parameter as shown in Step3 d).
configuration” interface will appear the first time
user enters into the page.
3
Fig 4
Fig 1
Step 3 Input the router-visiting password, click OK and Fig.
3 will appear. The router configuration is finished and
then SolarInfo WiFi will disconnect and restart. Check
the LCD screen of the inverter for router configuration
state.
Select Wi-Fi to enable the
Wi-Fi function
Click Setting
Start WiFi to search wireless
networks
5
4
The network number is the combination of the
product type and serial number on the
nameplate. The serial number of SolarInfo WiFi
above is SG-131006117.
b)If the router password is wrong or the wireless
environment is interfaced, the “Incorrect password
or other errors, please reconfigure” interface will
appear after reconnection.
▪ If the configuration is completed successfully, the WiFi
icon will appear and stay on the LCD screen as shown in
section 2.2.
▪ If the WiFi icon keeps blinking for 2 minutes after the
router configuration finished, user needs to go through
from Step 1 and enter into corresponding pages or
through the LCD display to check if the configuration is
succeeded.
Fig 2
Fig 5
SolarInfo WiFi
WiFi
Serial No.:
131006117
MAC Address:
AC19EC0021
Password:
102548652
Date of Manufacture:
2012/07/06
IP Address:
11.11.11.1
Type:
Click to connect SolarInfo WiFi
If a tick appears, it indicates the
connection is successful
Fig 3
3 Registration and Adding PV Plant
2 Parameter Setting
1. Open a browser and enter the URL www.solarinfobank.com to view the homepage of SolarInfo Bank.
Register a new user by clicking “Register”.
c)The “Configuration is successful” interface will appear
after the configuration succeeds.
4 Viewing Plant Data
You can view the plant data by logging into SolarInfo Bank through computer (see Scenario 1) or
cellphone/iPad (see Scenario 2).
Scenario 1: Logging into SolarInfo Bank through computer
▪Enter the URL www.solarinfobank.com into your computer to view the homepage of SolarInfo Bank.
Enter the correct username and password, and click “login” to log into the SolarInfo Bank system.
1
Fig 6
d) Click Advanced from any page, user can set certain
advanced parameters.
Manually input the router address for connection
during abnormal situation. Input the router name
and visiting password, and then click OK. Fig 3 will
appear;
2. Fill in related information according to the requirements and click “Next” to complete the registration
process.
Fig 7
▪You can view the details of the plant added in 3-2 in SolarInfo Bank system. The system comprises
two areas, as shown in the following figure:
2.2 WiFi configuration on LCD screen.
Corresponding icons will appear located on the upper right corner of the LCD screen in the process
of WiFi configuration.
2
1
P[%]
P-ac
4.OOO
E-day
15.6
kWh
E-tot
4976
kWh
1OO
8O
6O
4O
State
2O
O
8
14
kW
2
Run
2O t
Country, City, Gender, Monetary and Temperature: you can select the information through the
pull-down menu or manually enter the country and city by selecting “Other”.
Other information: you shall manually fill in other information.
2O12/O1/31 1O:3O
Button
Operation
Description
3. Fill in related information according to the requirements and click “Next”.
1
WiFi configuration icon
will appear on LCD screen automatically
30s after the LCD is energized.
2
If you succeed in configuring WiFi , WiFi will automatically connect to
the Router selected .
3
The connection is in process if
icon located on the upper right
corner of the LCD screen blinks every 0.5s.
icon will stay on if
the connection is completed.
4
If WiFi has connected to the router, it will send data to the SolarInfo
Bank server after 5 minutes. The Bank icon
will appear indicating
that WiFi has connected to the Bank.
Scenario 2: Logging into SolarInfo Bank through cellphone/iPad
Log into SolarInfo Bank by downloading and installing APP into your cellphone or iPad. Take iPhone 4
for example, the related pages of SolarInfo Bank are shown below.
1
2
3
3
Username
Password
4. Fill in related information according to the requirements and click “Complete”.
Login
If WiFi is disconnected from the Router, WiFi icon
Bank connection fail icon
will appear.
5
will blink and
Remenber Me
Search for SolarInfo Bank and install
Open SolarInfo Bank
Enter username and password to login
Troubleshooting
4
The
5
icon stays on blinking:
4
▪Information error of the configured Router, e.g. password error. Check and type in the correct
password.
▪Poor quality of the signal. Ensure that the number of signal bars of your selected Router exceed two.
5. After complete all of the above 4 steps successfully, you can see overview information of the PV plant.
Selected the target plant
All Rights Reserved!
Image shown here is for reference only. Actual product you receive may differ.
Specifications are subject to changes without advance notice.
The total or partial reproduction of this document by any means is forbidden without the authorization of SUNGROW.
Sungrow Power Supply Co., Ltd.
Address:
No.1699 Xiyou Rd.,New & High Technology Industrial Development Zone, 230088,Hefei, P. R. China.
ServiceLine: 400-880-5578 (China)
+86 551 65327834 / 65327845 (Overseas)
Web:
www.sungrowpower.com
QUEN F-H-001026
The following browsers can be used for setting: Safari browser in Apple devices, built -in
browser or Chrome browser in Android devices, IE6.0 or above browser, Chrome browser,
Firefox browser in Window devices.
View the plant data
WiFi-QIEN-Ver11-201308 Version:1.1