1
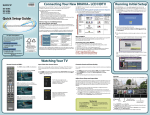
The BRAVIA® Full HDTV Experience Thank you for choosing Sony! Your new BRAVIA® TV opens the door to the “Full HDTV Experience.” This guide will help you get the most out of your TV. Quick Setup Guide Enjoy some of the fun and entertaining features your BRAVIA TV is capable of delivering. Sound Complete the high-definition experience with a BRAVIA Sync™ surround sound system or A/V receiver from Sony. Please take a moment to register your TV at: U.S.A.: http://productregistration.sony.com Canada: http://www.SonyStyle.ca/registration LCD Digital Color TV Features DLNA Certified™ Photo Viewer Setup Share photos from your DLNA Certified™ equipment. Install your TV and connect your sources. See the reverse side of this guide for sample connection diagrams. The following chart shows the high-definition (HD) and standarddefinition (SD) video formats supported by your BRAVIA TV inputs. Four Steps to a Full HD Experience Set, Source, Sound, and Setup. Set Now that you have made the best selection in LCD TV technology, be sure to remove all accessory contents from the packaging before setting up your TV. Source Sony USB Photo and Music Access To experience the stunning detail of your BRAVIA TV, you need access to HD programming. Plug in Sony USB equipment to access your photo or music files. Upgrade your signal or content source to high-definition (HD) by contacting your HD service provider. Sony Customer Support U.S.A.: www.sony.com/tvsupport Canada: www.sony.ca/support United States 1.800.222.SONY KDL-46VL160 KDL-40VL160 Canada 1.877.899.SONY Please Do Not Return the Product to the Store Receive over-the-air HD broadcasts with an HD-quality antenna connected directly to the back of your TV. Visit www.antennaweb.org for more information on antenna selection and setup. Discover the wealth of entertainment now available on super-high resolution Blu-ray Disc™ player and other Sony HD equipment. *For supported PC formats see the Operating Instructions. To help assure the highest quality for your HD experience, use Sony HDMI (High-Definition Multimedia Interface) cables. TV Guide On Screen® A customized program guide allows you to search for programs faster and easier. The Guide collects* and lists TV programming information via cable service (without a cable box) or over-the-air antenna. To learn more about HDTV, visit: U.S.A.: http://www.sony.com/HDTV Canada: http://www.SonyStyle.ca/hd 4-146-180-11(1) *Enabling the TV Guide On Screen feature will increase the amount of time the TV is in Download Acquisition Mode (DAM), see “Specifications” in the Operating Instructions. © 2009 Sony Corporation Printed in U.S.A. Getting Started Watching Your BRAVIA TV Favorites Easily access your favorite channels, inputs, photos, and music files. Initial Setup Select Your Content Screen Shape and Aspect Ratio The first time you turn on your TV, the Initial Setup wizard will appear and guide you through the Initial Setup of your TV. Whether you are watching cable, satellite or broadcast TV; playing a VCR, DVD or Blu-ray Disc™ player; connecting to your PC; or viewing photo files, you will need to properly connect your TV to access content. High-definition and standard-definition signals are transmitted with different aspect ratios (the width-to-height ratio of the image). The 16:9 aspect ratio (common to most HD signals) will fill the TV screen. 9 Before you begin, make sure that your cables are properly connected. Connect an RF cable to the CABLE/ANTENNA input. 1 Select your preferred language. 2 Set up the TV’s tuner to search for available digital and analog channels (if using a cable or satellite box, select Skip to skip the Auto Program). Step 1 of 6 Initial Setup Please select a language. Language settings will apply to on screen display as well as default audio for digital channels. Highlight a choice and press to continue. English Select the Correct Input for Connected Equipment Press INPUT repeatedly until your selection is highlighted on the screen. Refer to the Operating Instructions for details on labeling inputs. CC Français 3 4 or satellite box. Follow the on-screen instructions to set up your system. Select photo or music files from the XMB™ Connect to a DLNA Certified™ media server or Sony USB equipment to view photo files. Plug in Sony USB equipment and listen to music files. TV Home Menu: XMB™ (XrossMediaBar) The XMB™ is an easy way to access the TV settings and fun features. Customize Picture and Sound Quality Press HOME to display the XMB™, use the /// buttons to navigate, and highlight an icon, then press to select. You can choose optimum picture and sound settings to match the content you are displaying on your TV: Product Support FREEZE Clock/Timers Sound Screen Channel TV Press HOME on your remote control to display the XMB™ and select Picture or Sound from the Settings menu. Choose the appropriate setting for your content. Press OPTIONS to quickly access Picture Adjustments and Sound Adjustments. Refer to your Operating Instructions for more information. ECO-BRAVIA TV The 4:3 aspect ratio (common to most SD signals) may not look as clear as a 16:9 HD signal and may need adjustment to fill the TV screen. FREEZE Español 3 Set the date and time. 4 Continue on to set up the TV Guide On Screen® if you are not using a cable CC 16 This TV includes a number of features such as Power Saving, Light Sensor, and PC Power Management. Press WIDE to display the Wide Mode setting of your preference. PREV REPLAY ADVANCE NEXT Wide Mode TV PLAY SYNC MENU PICTURE WIDE PAUSE STOP THEATER SOUND PICTURE WIDE CC Wide Zoom Normal FREEZE 10% Full FREEZE Zoom Adjust RETURN Back Cert no. SCS-COC-001395 To Do List When the Initial Setup is completed, consider carrying out these items: Set Closed Captions (CC) Manage Inputs (Label/Enable Inputs) Set Parental Lock Set Speakers Show/Hide Channels Refer to your Operating Instructions for more information. HD Basic Connection with A/V Receiver HD BRAVIA® Sync™ Basic Connection *Rear of TV Rear of TV 1 3 1 2 1 AUDIO OUT VIDEO IN 1 1 PB 3 4 L L VIDEO IN 1 3 AUDIO R R AUDIO L L L (MONO) AUDIO R AUDIO L S VIDEO (OPTICAL) SAT IN DVD IN VIDEO 2/BD IN L L ANTENNA CABLE / ANTENNA OPT IN SAT OPT IN VIDEO 1 COAX IN DVD AUDIO IN R SA-CD/CD AUDIO IN TV R AUDIO IN VIDEO 1 DMPORT FRONT R FRONT L SUR R SUR L AUDIO R AUDIO R R L AUDIO R (1080p/1080i/720p/480p/480i) CENTER SUBWOOFER AUDIO OUT L AUDIO AUDIO OUT HDMI L 3 4 L (MONO) DIGITAL 1 AUDIO OUT RGB VIDEO (VAR/FIX) AM IN DIGITAL PC IN PR *A/V Receiver R (1080p/1080i/720p/480p/480i) (VAR/FIX) AUDIO OUT AUDIO R R 2 PB L AUDIO AUDIO R (1080p/1080i/720p/480p/480i) 4 AUDIO OUT AUDIO COMPONENT IN 1 Y VIDEO L AUDIO R (OPTICAL) 3 PR VIDEO AUDIO Rear of TV 1 AUDIO OUT RGB PB S VIDEO PR (MONO) 2 Y RGB IN DIGITAL PC IN COMPONENT IN 3 (OPTICAL) Y S VIDEO IN DIGITAL PC IN COMPONENT IN SPEAKERS VIDEO IN HD Basic Connection with Home Theater System (VAR/FIX) Blu-ray Disc/DVD CABLE / ANTENNA A/V Receiver Blu-ray Disc/DVD CABLE / ANTENNA *Blu-ray Disc COMPONENT VIDEO OUT VIDEO OUT Y VIDEO AC IN PB/CB HDMI OUT 5.1CH OUTPUT AUDIO OUT DIGITAL OUT PCM/DTS/DOLBY DIGITAL COAXIAL OPTICAL PR/CR FRONT L L R R S VIDEO SAT (Dish) HD Cable Box or HD Satellite Receiver Splitter SAT (Dish) REAR or CENTER WOOFER Cable/SAT (dish) HD Antenna HD Cable Box or HD Satellite Receiver Cable/Antenna Splitter Home Theater System SD Cable Box or SD Satellite Receiver Cable/Antenna * Signifies a BRAVIA Sync capable device. Required Cable Types for Connection Coaxial DVI-to-HDMI Notes on Connection Mini-Pin Audio Digital Optical Audio Audio (L/R) with Mini-Pin Ethernet Composite HDMI HD15 Component ■ ■ ■ Audio (L/R) PC Connection with SD VCR/DVD Connecting a PC to Your BRAVIA TV Connect your incoming signal source (HD Cable Box, HD Satellite Receiver, or DVD) with HDMI or component video for the best possible picture quality. If your connecting equipment has DVI output instead of the HDMI output, you must use a DVI-to-HDMI cable for the video and also connect an audio cable for the sound. If this is the case, connect the cable to HDMI IN 4 (input) of your TV. P&P/PIP functions require Cable/Antenna connection. Your remote control can be programmed to use other equipment and is pre-programmed to operate the following Sony equipment. Cable/Antenna DISPLAY LIGHT POWER TV POWER DVD VIDEO IN 1 3 COMPONENT IN 1 2 Y S VIDEO PB Router Notebook PC IN DIGITAL PC IN 1 AUDIO OUT AUDIO R 2 T1 POR T2 POR T3 POR SYNC MENU RGB L AUDIO R PAUSE DLNA Certified™ Media Server AUDIO OUT THEATER SOUND PICTURE WIDE CC L AUDIO R AUDIO L AUDIO FREEZE Rear of TV R (1080p/1080i/720p/480p/480i) (VAR/FIX) VIDEO IN 1 3 2 Y S VIDEO PB IN DIGITAL PC IN (OPTICAL) RGB 3 VIDEO L (MONO) AUDIO R 4 L AUDIO R (1080p/1080i/720p/480p/480i) 2 4 1 AUDIO OUT LAN (10/100) PR CABLE / ANTENNA L AUDIO R AUDIO L 31033 AMP Receiver 52172 STB Digital Satellite 01639 Programming Other Equipment , or simultaneously with the button and release. When in the programming mode, the FUNCTION button blinks for approximately 30 seconds until a code is entered. 3Enter the five digit code using – while the FUNCTION button is lit. If the code is not 4Press AUDIO or to confirm the code. If successfully programmed, the FUNCTION button will blink twice, if not, it blinks five times. R (VAR/FIX) 3 4 PC VOL CH MUTING DVD DVD Player entered within 30 seconds, you must repeat step 2. AUDIO OUT CABLE / ANTENNA VCR VCR/DVD Combo DVD 2Press and hold COMPONENT IN 1 Code Number corresponds to the equipment you would like to operate with the Sony remote control. If more than one code is provided, try programming the first code listed. If your equipment’s code is not listed, visit http://esupport.sony.com/remotecodes for a more comprehensive list. STOP 3 4 Sony Equipment 1Look for the code in the Manufacturer’s Code List (see the Operating Instructions) that PLAY T4 POR Function Button Follow the steps below to program your TV remote control. ER PR (MONO) TV POW (OPTICAL) VIDEO L AMP STB FUNCTION PREV REPLAY ADVANCE NEXT Rear of TV ■ Connect PC’s audio output when using an HD15 connection. Press PC’s FUNCTION Key + Select Output to transmit to TV. When using an HD15 connection, adjust TV’s Pitch and Phase to correct sharpness. Refer to your Operating Instructions. Programming the Remote Control DLNA Certified™ Connection Splitter ■ ■ ■ This TV is a DLNA Certified™ Photo Viewer. REC JUMP REC PAUSE REC STOP BD/DVD TOP MENU MENU F1 F2 To Confirm the Programming If you can turn your equipment on and off using the green complete. If not, try the next code listed. POWER button, the programming is Note: ■ In some cases, you may not be able to program your remote control. If this is the case, use your equipment’s remote control. ■ Any of the FUNCTION buttons can be programmed to operate other equipment regardless of the labeling. For example, if programmed with the correct code, a Blu-ray Disc player can be operated with the button. This is useful if your equipment does not match any of the labeled buttons.