1
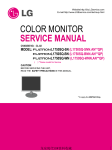
MENU ECO SDM-S75A: U/C, AEP, CH SDM-S75D: U/C, AEP, CH SDM-S75E: U/C SDM-S75F: AEP SDM-S95A: U/C, AEP SDM-S95D: U/C, AEP SDM-S95E: U/C SDM-S95F: AEP, CH Service Manual TFT LCD COLOR COMPUTER DISPLAY CONTENTS PRECAUTIONS Page 3 SPECIFICATIONS 4 TIMING CHART 5 SIGNAL CONNECTOR PIN 6 OPERATING INSTRUCTIONS 7 SERVICE MODE 8 WIRING DIAGRAM 9 DISASSEMBLY 10 ADJUSTMENT 11 EXPLODED VIEW 12 REPLACEMENT PARTS LIST 13、14 -2- SDM-S75A,D,E,F/ SDM-S95A,D,E,F (E) PRECAUTION WARNING FOR THE SAFETY-RELATED COMPONENT. • There are some special components used in LCD monitor that are important for safety. These parts are marked on the schematic diagram and the replacement parts list. It is essential that these critical parts should be replaced with the manufacturer’s specified parts to prevent electric shock, fire or other hazard. • Do not modify original design without obtaining written permission from manufacturer or you will void the original parts and labor guarantee. • If you want to replace with the new backlight (CCFL) or inverter circuit, must disconnect the AC adapter because high voltage appears at inverter circuit about 650Vrms. TAKE CARE DURING HANDLING THE LCD MODULE WITH BACKLIGHT UNIT. • Handle with care wires or connectors of the inverter circuit. If the wires are pressed cause short and may burn or take fire. • Must mount the module using mounting holes arranged in four corners. • Do not press on the panel, edge of the frame strongly or electric shock as this will result in damage to the screen. Leakage Current Hot Check Circuit • Do not scratch or press on the panel with any sharp objects, such as pencil or pen as this may result in damage to the panel. • Protect the module from the ESD as it may damage the electronic circuit (C-MOS). • Make certain that treatment person’s bodies are grounded through wrist band. • Do not leave the module in high temperature and in areas of high humidity for a long time. • The module not is exposed to the direct sunlight. • Avoid contact with water as it may a short circuit within the module. • If the surface of panel becomes dirty, please wipe it off with a soft material. (Cleaning with a dirty or rough cloth may damage the panel.) 3 SDM-S75A,D,E,F/ SDM-S95A,D,E,F (E) SPECIFICATIONS 1. LCD CHARACTERISTICS Type : TFT Color LCD Module Active Display Area : 17 inch- S75A/D/E/F : 19 inch- S95A/D/E/F Pixel Pitch : 0.264 (H) x 0.264 (V) S75A/D/E/F : 0.294 (H) x 0.294 (V) S95A/D/E/F Size : 358.5(H) x 296.5(V) x 17.0(D) S75A/D/E/F : 404.2(H) x 332(V) x 20.0(D) S95A/D/E/F Color Depth : 16.2M Colors- S75A/D/E/F : 16.7M Colors- S95A/D/E/F Electrical Interface : LVDS Surface Treatment : Haze 25%, Hard-coating (3H) Operating Mode : Normally White Backlight Unit : 4-CCFL 3-3. Operating Frequency Analog Horizontal: 28 ~ 80kHz Vertical: 48 ~ 75Hz Dot Clock: < 135MHz Digital 28 ~ 64kHz 60Hz < 108MHz 4. Max. Resolution Analog: 1280 x 1024 /75Hz Digital: 1280 x 1024 /60Hz 5. POWER SUPPLY 5-1. Power: AC 100~240V, 50/60Hz, 1.0A 5-2. Power Consumption 6. ENVIRONMENT 6-1. Operating Temperature: 5°C~35°C (41°F~95°F) 6-2. Relative Humidity: 10%~80% (Non-condensing) 2. OPTICAL CHARACTERISTICS 2-1. Viewing Angle by Contrast Ratio > 10 SDM-S75A/D/E/F-LPL TN Left:+60°min., +70°(Typ), Right:+60° min.,+70°(Typ) Top:+45° min.,+60°(Typ), Bottom:+50°min.,+60°(Typ) SDM-S75A/D/E/F-AUO Left:+60° min.,+70°(Typ), Right:+60° min.,+70°(Typ) Top:+60° min.,+70°(Typ), Bottom:+50°min.,+60°(Typ) SDM-S95A/D/F Left:+85°min., Right:+85° min. Top:+85°min., Bottom:+85° min. SDM-S95E Left:+60°min., Right:+60°min. Top:+85°min., Bottom:+85°min. 2-2. Luminance: 300(Typ)-SDM-S75A/D/E/F 250(Typ)-SDM-S95A/D/E/F 2-3. Contrast Ratio: 450:1(Typ)-SDM-S75A/D/E/F 700:1(Typ)-SDM-S95A/D/E/F 7. DIMENSIONS (with TILT/SWIVEL) SDM-S75A/D Width: 369 mm (14.53'') Depth: 225 mm (8.86'') Height: 369 mm (14.53'') SDM-S75E/F Width: 369 mm (14.53'') Depth: 253 mm (9.96'') Height: 393.5 mm ~ 503.5 mm (15.49'' ~ 19.82'') SDM-S95A/D Width: 414 mm (16.30'') Depth: 277.5 mm (10.93'') Height: 439.5 mm (17.30'') SDM-S95E/F Width: 414 mm (16.30'') Depth: 277.5 mm (10.93'') Height: 409.5 mm ~ 519.5 mm (16.12'' ~ 20.45'') 3. SIGNAL (Refer to the Timing Chart) 3-1. Sync Signal Type : Separate Sync, Composite Sync SOG (Sync On Green), Digital 3-2. Video Input Signal 1) Type: R, G, B Analog 2) Voltage Level: 0~0.71 V a) Color 0, 0: 0 Vp-p b) Color 7, 0: 0.467 Vp-p c) Color 15, 0: 0.714 Vp-p 3) Input Impedance : 75Ω 8. WEIGHT (with TILT/SWIVEL) SDM-S75A/D Net. Weight: 6.30 kg (13.89 lbs) Gross Weight: 8.30 kg (18.30 lbs) SDM-S75E/F Net. Weight: 7.40 kg (16.32 lbs) Gross Weight: 9.90 kg (21.83 lbs) SDM-S95A/D Net. Weight: 8.60 kg (18.96 lbs) Gross Weight: 11.50 kg (25.36 lbs) 4 SDM-S75A,D,E,F/ SDM-S95A,D,E,F (E) 5 SDM-S75A,D,E,F/ SDM-S95A,D,E,F (E) 6 SDM-S75A,D,E,F/ SDM-S95A,D,E,F (E) 7 SDM-S75A,D,E,F/ SDM-S95A,D,E,F (E) SERVICE MODE To go to “Service Mode”, please do the following procedures. 1. Turn off the power. 2. Turn on the power while pressing and holding the “↓” key simultaneously. 3. Press “MENU” key. 4. Select “S” on the left side of displayed OSD menu bar. Service Mode Explanations 「COLOR TEMP」 You can set color temperature (Factory Setting Area). 「INITIAL EEPROM」 You can initialize micro computer data. table data is reset. Therefore, COLOR TEMP data becomes the default “128”. User 「CLR. ETI」 ETI is reset, “0 H”. 「AGING」 You can change aging status ON/OFF. Default is OFF. 「WHITE BALANCE」 There are ADC(Analogue Digital Converter) calibration function and ADC MANUAL calibration function. ADC calibration function adjustment is required when A (Main) board is replaced. Bias is usually input on supplied service boards. MANUAL calibration function is rarely used. * When ADC calibration is enforced, please calibrate with WHITE WINDOW pattern of Analogue VGA signal. (75Ω terminate) ** Input Signal: 31.4kHz, 600×480/60Hz and 0.73VP-P 「DEFAULT TIMING」 You can select 1152×870 or 1152×864. Default is 1152×870. 「MODULE」 You can select γ (table) corresponded to each module. When you replace A board or Panel, it is required to set the Panel inch size and the Panel maker name on selecting “MODULE”. 8 SDM-S75A,D,E,F/ SDM-S95A,D,E,F (E) 9 SDM-S75A,D,E,F/ SDM-S95A,D,E,F (E) 10 SDM-S75A,D,E,F/ SDM-S95A,D,E,F (E) ADJUSTMENT 3. Operation 1. Procedures of how to go to service mode. Data is manually set to improve the productivity. The brightness, contrast, and backlight are set to 50, 70 and 100 respectively. After that, the default data of the color temperature to be adjusted is set. 1) Enter the service mode of this unit by turning on the power while pressing and holding the "↓" key simultaneously. 2) Press "MENU" key----MAINTAIN. 3) Press "OK" key to enter the service menu. 4) Select the desired function. 5) Press the "MENU" key to exit OSD. 6) Turn off the power and then turn on it again. The monitor then enters the normal mode. To enter the service again, repeat the procedure described above. 4. Warm up time Warm up for 30 minutes before performing any adjustment. 5. Adjustment for White Balance a. Display SMPTE at SXGA/60Hz (Input level 0.73V). b. Set up [SERVICE MODE]. c. Click "INITIAL EEPROM" and again setup Service Mode. d. Click "WHITE BALANCE" and then select “AUTO”. Note W/B readjustment is required after the panel, board and microcomputer are replaced. However, be sure to perform aging for more than 30 minutes for RGB reset before W/B adjustment. 6. 9300K color adjustment a. Select "9300K" in "COLOR TEMP" and enter. b. Use a 35% (89Gray) IRE white video field in the primary mode. c. Adjust "SUB CONTRAST" to secure the color temperature. d. Press "MENU" key to exit adjust mode. 2. Setup 1) Prepare timing and pattern data for a signal generator according to the Sony timing specifications. 2) Connect a monitor video cable to the signal generator. 3) Put Color Analyzer (ex. CA-110) 50cm away from the monitor, specify it vertically in the center of the display, and adjust the focus to the optimum level using an eyepiece. 4) Put the monitor and Color Analyzer (ex. CA-110) in a light-shielded room. 5) Set up [SERVICE MODE] of the monitor. 7. 6500K color adjustment a. Select "6500K" in "COLOR TEMP" and enter. b. Repeat the adjustment procedure as steps b to d at 9300K. . 11 SDM-S75A,D,E,F/ SDM-S95A,D,E,F (E) 12 SDM-S75A,D,E,F/ SDM-S95A,D,E,F (E) REPLACEMENT PARTS LIST SDM-S75A, D, E, F No. SONY Part No. Name X20595131 Bezel Assy (S75A, Silver) X20595141 Bezel Assy (S75D, F, Silver) 1 X20595151 Bezel Assy (S75A, E, Black) X20598621 Bezel Assy (S75D,F, Black) 263208301 Knob Control (Silver) 2 263208311 Knob Control (Black) 3 178927311 Mounted PWB, H (Control board) 180542221 Panel: LM170E01-B5K2 (LPL) 4 180588911 Panel: M170EG01-V8 (AUO) 178927711 Mounted PWB, A (Main board) (S75A, E) 5 178927611 Mounted PWB, A (Main board) (S75D, F) 6 178927811 Mounted PWB, G (LIPS) 7 190027571 Connector Assy 8 178928911 Mounted PWB, L (Audio output) 9 263208601 Audio Cover 10 263208401 Back Cabinet 11 263208501 Screw Cover 12-1 X20594741 Hinge Assy (S75A, D) 12-2 X20594761 Hinge Assy (HA17) (S75E, F) 13 263208301 Stopper Pin (S75E, F) 14 263391501 STAND LABEL (Stopper Caution) (S75E, F) 15-1 X20594751 Stand Base Assy (S75A, D) 15-2 X20594771 Stand Base Assy (HA17) (S75E, F) 263212201 Foot (Fix) (S75A, D) 16 263215301 Foot (HA17) (S75E, F) 17 263262801 Thumb Screw ACCESSORIES & PACKING MATERIALS 182711811 AC Power Cord (U/C) 182712011 AC Power Cord (AEP) 18 182711911 AC Power Cord (J) 182712211 AC Power Cord (CH) 19 182775711 D-SUB CABLE 20 182775811 DVI CABLE (S75D, F) 21 182775911 AUDIO CABLE 22 263391103 CD-ROM 263029111 QUICK SETUP GUIDE (U/C, CH) 23 263029101 QUICK SETUP GUIDE (AEP) 263029121 QUICK SETUP GUIDE (J) ※Please refer to the following URL of TV QA web page to see the latest service parts list. http://www.tvqa.sony.co.jp/index(E).htm “TVQA Common” Æ “Flat TV: ID Parts Information” 13 SDM-S75A,D,E,F/ SDM-S95A,D,E,F (E) SDM-S95A, D, E, F No. SONY Part No. Name X20595161 Bezel Assy (S95A, Silver) X20595171 Bezel Assy (S95D, F, Silver) 1 X20595181 Bezel Assy (S95A, E, Black) X20598631 Bezel Assy (S95D, F, Black) 263215601 Knob Control (Silver) 2 263215611 Knob Control (Black) 3 178927311 Mounted PWB, H (Control board) 4 180534721 Panel: FLC48SXC8V-11AA (Fujitsu) 178927511 Mounted PWB, A (Main board) (S95A, E) 5 178927411 Mounted PWB, A (Main board) (S95D, F) 6 178927911 Mounted PWB, G (LIPS) 7 190027571 Connector Assy 8 178928911 Mounted PWB, L (Audio output) 9 263208601 Audio Cover 10 263215701 Back Cabinet 11 263208501 Screw Cover 12-1 X20594741 Hinge Assy (S95A, D) 12-2 X20594781 Hinge Assy (HA19) (S95E, F) 13 263308301 Stopper Pin (S95E, F) 14 263391501 STAND LABEL (Stopper Caution) (S95E, F) 15-1 X20594751 Stand Base Assy (S95A, D) 15-2 X20594791 Stand Base Assy (HA19) (S95E, F) 263212201 Foot (Fix) (S95A, D) 16 263216501 Foot (HA19) (S95E, F) 17 263262801 Thumb Screw ACCESSORIES & PACKING MATERIALS 182711811 AC Power Cord (U/C) 182712011 AC Power Cord (AEP) 18 182711911 AC Power Cord (J) 182712211 AC Power Cord (CH) 19 182775711 D-SUB CABLE 20 182775811 DVI CABLE (S95D, F) 21 182775911 AUDIO CABLE 22 263391103 CD-ROM 263029111 QUICK SETUP GUIDE (U/C, CH) 23 263029101 QUICK SETUP GUIDE (AEP) 263029121 QUICK SETUP GUIDE (J) ※Please refer to the following URL of TV QA web page to see the latest service parts list. http://www.tvqa.sony.co.jp/index(E).htm “TVQA Common” Æ “Flat TV: ID Parts Information” 9-878-349-01 SONY Corporation OSAKI WEST Tec 14 Made in Japan 2005.5 SDM-S75A,D,E,F/ SDM-S95A,D,E,F (E)