1
QUICK START GUIDE
SoMo 655
Handheld Computer
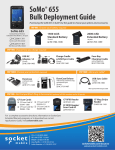
This document pertains to the following family of SoMo 655 models:
• SoMo 655 Standard
• SoMo 655Rx (Antimicrobial)
• SoMo 655DXS (Security: No wireless radio or microphone)
PACKAGE CONTENTS
•
•
•
•
•
•
•
SoMo 655 Handheld Computer
Stylus
Lithium-ion Battery
USB Sync Cable
USB Power Cable*
AC Adapter*
Certificate of Authenticity
NOTE: The optional Sync-Charge Cradle (SKU# HC17001394) or Four Bay Charging Cradles (SKU# HC1702-1396,
SKU# HC1703-1397) can be purchased separately.
*Configuration dependent
Thank you for choosing SocketMobile!
Let’s get started!
© 2012 Socket Mobile, Inc. All rights reserved. Socket, the Socket logo, SoMo, and
Business Mobility Now! are registered trademarks or trademarks of Socket Mobile, Inc.
The Bluetooth word mark and logo are registered trademarks of the Bluetooth SIG, Inc.
USA, and any use by Socket Mobile, Inc. is under license. All other trademarks and trade
names contained herein may be those of their respective owners.
PRODUCT INFORMATION
Front
3
PRODUCT INFORMATION
Back
4
PRODUCT INFORMATION
Bottom
5
PRODUCT INFORMATION
Stylus
Use the stylus in three ways:
• Tap item to select (similar to left-clicking a mouse).
• Tap and hold reveals a submenu if available (similar to
right-clicking a mouse).
• Hold and drag the stylus against the screen to
reposition an item or to highlight multiple items (similar
to left-clicking and dragging a computer mouse).
Using anything other than the stylus may damage
the screen.
6
INSTALL BATTERY
1. To remove the battery cover, press the release button
on the bottom of the battery cover with your thumb.
Use your opposite hand to slide the cover off.
Do not press the battery cover directly down or the
battery door/sensor could be damaged.
7
INSTALL BATTERY
2. Place the Lithium-ion battery into the battery
compartment with the contacts side first (the bar code
label facing up).
8
INSTALL BATTERY
3. To replace the battery cover, align the top end of the
cover carefully, leaving a small gap. Then slide the cover
on till it clicks.
Do not press the battery cover directly down or the
battery door/sensor could be damaged.
9
CHARGE THE SOMO
OPTION 1: Charge the SoMo directly from an outlet
using the AC adapter.
Lift flap to
access port.
Charge the battery for at least 4 hours.
10
CHARGE THE SOMO
OPTION 2: Charge the SoMo using the optional synccharge cradle and the 3 Amp AC adapter that comes
with the cradle.
Charge the battery for at least 4 hours.
11
TURN ON THE SOMO
Press the Power button.
12
WELCOME WIZARD
Welcome to your SoMo!
Once powered on, your SoMo will begin its Welcome
protocol. Follow the simple instructions on each page.
(This process is required only once after the first startup, or after a re-flash.)
1. Windows® Embedded Handheld Set Up
2. Align Screen
3. Date and Time
4. Password
The appearance of the Today screen means you have
successfully launched your SoMo. Congratulations!
If you use a language other than English, go to the
Getting Started Wizards to Select Your Language.
(See page 16.)
13
TODAY SCREEN/START MENU
Today Screen
The Today screen is like the homepage for the
Windows® mobile operating system. Access current
data, utilities and applications from the Today screen.
Also access the Start menu.
Start Menu
The Start menu can be accessed by tapping the
Windows logo
. From the Start menu, access
programs, settings and Help topics.
Today Screen
14
Start Menu
GETTING STARTED
Getting Started Wizards
In the Today screen, tap Getting Started. A list of
wizards will appear, including several customized for
the SoMo.
Find these wizards and more in Getting Started
• Change Language
• Register SoMo 655
• Set Up e-WFC (Enhanced Wi-Fi Companion)
• Configure Mode Switch
• Configure CF/microSD Slots
• Set Up Data Capture Triggers
• Set Up SocketScan 10 (software for CHS barcode scanner)
• Sprite Backup Trial
• MobiScan Rapid Configuration Tool
The SoMo is configured to manage wi-fi connections
using Microsoft Wireless Zero Configuration,
however, we recommend upgrading to Enhance Wi-Fi
Companion TM (e-WFC) which offers advanced security
features. Use the Set up e-WFC in the Getting Started
wizard.
15
CHANGE LANGUAGE WIZARD
Use the Change Language wizard to choose a different
language for your operating system. Follow instructions
in the wizard.
WARNING: This utility will erase all user data from
the SoMo. To change the language an additional time
will require backing up the language files to a microSD
card.
Once the language files are backed up to a microSD
card, the language can be changed again directly from
the card. In addition, the back up files can be used to
change multiple units.
16
INSTALL SYNCHRONIZATION SOFTWARE
To connect your SoMo 655 to a host computer and to
synchronize data, the host computer must be running
Windows Mobile Device Center or Microsoft ActiveSync.
• If your host PC runs Windows 7 or Vista, enable
Windows Mobile Device Center, which comes installed
on your computer. Download the latest version for free
at: http://www.microsoft.com/en-us/download/details.
aspx?id=14
• If your host PC runs Windows XP or Windows 2000,
install Microsoft ActiveSync. Download the latest
version for free at: http://www.microsoft.com/en-us/
download/details.aspx?id=15
Follow instructions to install software.
Once the host computer is running either Windows
Mobile device Center or Microsoft ActiveSync, you are
ready to connect the SoMo to begin synchronizing with
the host computer.
17
SYNCHRONIZATION PARTNERSHIP
Set Up Synchronization Partnership
1. If you will be using a host computer with your
SoMo, when you connect for the first time, the New
Partnership wizard will automatically launch.
2. Follow the wizard to set up the partnership. Once completed, the first synchronization will start automatically.
3. After the synchronization is complete, you will see that
your email, contacts, pictures and songs and other
applications on your SoMo have been updated.
If the wizard does not automatically launch, open
ActiveSync manually by tapping on the Windows
logo
, then tap on ActiveSync
.
For computers running Windows 7 or Vista, the
Windows Mobile Device Center will launch on the
host computer. Follow the instructions to set up the
partnership. Once the synchronization software is set
up, it will automatically open and update your SoMo
whenever it is plugged into the host computer.
18
CONNECT TO HOST COMPUTER
OPTION 1: Connect the SoMo to the host computer
with the sync cable and plug in the AC adapter.
USB Cable
Lift flap to
access port.
The USB cable can be used to power the SoMo,
however, it is recommended you use the AC adapter
to power the SoMo.
19
CONNECT TO HOST COMPUTER
OPTION 2: Using the optional Sync-charge cradle (or
four-bay charging cradle) and the Type B USB cable,
connect to the host computer and plug in the 3 Amp AC
adapter that comes included with the cradle.
Type B
USB Cable
Use the AC adapter to adequately charge the SoMo.
20
WIRELESS MANAGER
Turn on Bluetooth or Wi-Fi Radio
(except DXS model)
1. Tap the Wi-Fi and Bluetooth status line in the Today
screen (below the date).
2. In the Wireless Manager, if the radio is OFF, an X will
appear on the Bluetooth or Wi-Fi button.
3. Tap on the button to turn on the radio.
21
LED STATUS LEFT
The two LEDs on the front of the SoMo 655 indicate the
status of Bluetooth and the wireless radio (left LED) and
the status of the alarm and battery (right LED).
Bluetooth and Wireless Status*
Blue/Green LED (left)
LED Behavior
Flashing blue
Flashing green
Flashing blue and green
OFF
Meaning
Bluetooth radio is ON
Wi-Fi radio is ON
Bluetooth and Wi-Fi
radios are ON
Wireless radios are OFF
or unit is in suspend
mode
*NOTE: The SoMo 655DXS model has no wi-fi, therefore, the
left LED has no function in the DXS model.
22
LED STATUS RIGHT
Alarm and Battery Status
Red/Green/Orange LED (right)
LED Behavior
Flashing red
Meaning
Alarm/Notification,
including Low Battery
Notification
OFF
Running on battery
power or device powered
off
Solid red when connected Charging battery
to charger
Solid green when
Battery is fully charged
connected to charger
Flashing orange
Battery data is
unavailable
23
RESET THE SOMO
The SoMo 655 supports three levels of reset:
• Warm Boot - A warm boot stops all applications and
clears out temporary data associated with running
programs. No files are deleted.
Use a warm boot if an application is not responding.
• Cold Boot - A cold boot clears all processor states,
running programs, and user data. It also drives the
hardware reset line to the processor, thereby clearing
all system states, including the date and time.
A cold boot will clear all user-installed settings,
applications, and data from RAM, but any applications
or configurations saved in the SoMo File Store will
remain.
Use a cold boot if your operating system is not
responding.
• For instructions on a Clean Boot, see the User’s Guide.
24
RESET THE SOMO
To perform a warm boot:
Using the tip of your stylus, lightly press the Reset
button inside the hole on the back of your SoMo 655
and then release.
25
RESET THE SOMO
To perform a cold boot:
1.Provide power to the SoMo using the AC adapter.
2. Press and hold the Start Control button and F2
Configurable button (buttons closest to the screen).
3.While holding the two buttons, use the tip of your
stylus to lightly press and release the Reset button
inside the hole on the back of your SoMo 655.
4.Release the Start Control button and F2 Configurable
buttons.
5. A Socket Mobile Splash Screen will
appear then disappear.
6. The launch of the Today screen will
indicate the completion of the cold
boot.
Splash screen
26
RESET THE SOMO
It is recommended that you hold the SoMo 655 upside-down in your
left hand. Press the Start Control button and F2 Configurable button
(buttons closest to the screen) with the index and middle fingers. Hold
the stylus in your other hand to press and release the reset button.
Release the two buttons.
27
PRODUCT REGISTRATION
Socket highly recommends all customers register their
products. Product registration is required to access
technical support. Registered users also benefit from
free service packs and updates.
If you have a connection to the internet, use the
Getting Started wizard to register your SoMo.
Or, register online at: http://support.socketmobile.com
28
SUPPORT
Online Help
From the Start menu, tap on
.
Help for a program: Open the program and tap Start |
Help.
Technical Support
• Online Knowledge Base: Search for articles, Frequently
Asked Questions or Hot Topics any time, day or night.
http://support.socketmobile.com/EU_S1a.asp
• Online Requests: Register your product and submit a
question. http://support.socketmobile.com/
29
ADDITIONAL DOCUMENTATION
Additional Documentation
For more information, refer to the User’s Guide.
Download it for free at: http://www.socketmobile.com/
support/downloads
30
ACCESSORIES
Accessories
For information on accessories for the SoMo 655,
please visit: http://ww1.socketmobile.com/products/
handheld-computers/accessories-hc.aspx
31
6/2012
# 6430-00340 A
Printed in U.S.A