1
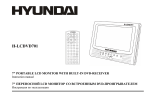
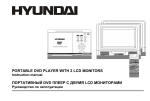
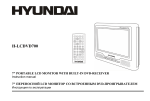
H-LCDVD800
8" PORTABLE LCD MONITOR WITH BUILT-IN DVD-RECEIVER
Instruction manual
8"
LCD
DVD-
Table of contents
Table of contents ..........................................................................................................................................................................2
Precautions ...................................................................................................................................................................................3
Description ...................................................................................................................................................................................5
Disc features .................................................................................................................................................................................6
Control functions ........................................................................................................................................................................10
Remote control ...........................................................................................................................................................................12
Connecting .................................................................................................................................................................................16
Basic operations..........................................................................................................................................................................18
Settings .......................................................................................................................................................................................27
Troubleshooting..........................................................................................................................................................................34
Specifications .............................................................................................................................................................................35
2
Precautions
PLEASE READ THROUGH THE MANUAL CAREFULLY BEFORE CONNECTION AND OPERATION.
CAUTION
RISC OF ELECTRIC SHOCK
DO NOT OPEN
CAUTION: TO PREVENT THE RISK OF ELECTRIC SHOCK, DO NOT REMOVE
COVER (OR BACK). NO USER SERVICEABLE PARTS INSIDE. REFER SERVICING
TO QUALOFIED SERVICE PERSONNEL.
The lightning flash is intended to alert the user to the presence of dangerous voltage within the product's enclosure,
and touching the inner parts may result in a risk of electric shock to persons.
The exclamatory mark is intended to alert the user to the presence of important operating instructions.
This mark indicates this unit belongs to class 1 laser product. The laser beam may produce radiation harm to the
directly touching human body. No harm radiation outside the machine.
Laser product:
DO NOT OPEN COVERS AND DO NOT REPAIR YOURSELF. REFER SERVICING TO QUALIFIED PERSONEL.
This product is equipped with low power laser equipment inside, for using safely, don't take apart any covers or try to take apart
the product inside. Please contact the qualified personnel for repairing.
Don't open the laser radiation protective equipment. Don't look at the laser radiation district when the equipment is operating.
3
Caution:
Use of controls or adjustments or performance of procedures other than those specified here may result in hazardous radiation
exposure. The use of Optical instruments with this product will increase eye hazard.
Warning:
To reduce the risk of fire, electric shock or product damage, do not expose this apparatus to rain, moisture, dripping or splashing
and that no objects filled with liquids, such as vase, shall be placed on the apparatus.
Important notes
Please read through the manual carefully before connection and operation.
Do not open the cover or touch any internal components for non-professional.
During playback, the disc spins at high speed, so do not lift or move the player. Doing so may damage the disc.
When transporting the player, be sure to remove the disc and turn off the power, then unplug the power cord.
Do not put the player on top of a TV or color monitor. Install the player away from cassette decks or other devices that are
easily affected by magnetic forces.
Do not put any objects on top of the player.
Strongly advise against using the player while driving.
Turn off the power when the unit is not being used.
Don't expose this unit to direct sunlight. Keep away the heating sources or equipments.
Don't expose this unit to the rain or moisture.
Clean the player with soft cloth. Detergent, benzene, alcohol etc are forbidden. To clean dirt off the liquid crystal display,
wipe the display gently with a soft, dry cloth (such as an eyeglass cleaning cloth). Note that leaving water droplets on the
display for long periods of time may result in discoloration or stains.
This book is only a guide for user s operation, not a criterion for configuration.
4
Description
Accessories
Power adaptor
Remote control
AV cable
Earphone
User manual
Car power connector
Battery pack
Accessories bag
Head rest bag
This unit can play the following types of discs:
Disc types
Symbol
Contents
DVD
Audio + Video
AC-3
Dolby Digital Audio
MP3
Audio
Video-CD
(VCD)
Audio + Video
CD-DA
Audio
Kodak Picture
CD
Electronic Photo
MP4
Audio + Video
MPEG4
Audio + Video
DivX
Audio + Video
5
Note:
This unit can t read the 8 cm discs.
Support of MPEG4 Standard: playback of digital video compressed in DivX 3.11, DivX 4.0, DivX5.0, DivX 6.0. (It may
not be possible to play certain DivX disc due to the configuration and characteristics of the disc or condition of the
recording).
Disc features
Disc information
Type
Record format
Capacity
Disc size
Horizontal
resolution
Subtitle
Language
DVD
MPEG 2
Single side
Single layer
4.7 GB = 2 Hr
Double side
Single layer
8.5 GB = 4 Hr
12 cm / 8 cm
Single side
Single layer
9.4 GB = 4.5 Hr
Double side
Double layer
17 GB = 9 Hr
VCD
MPEG I
SVCD
MPEG II
DIGIT
650 M
74 min.
650 M
45 min.
650 M
74 min.
12 cm
12 cm
12 cm / 8 cm
500 lines
Up to 32 kinds
Up to 8 kinds
240 lines
2
Symbol
6
350 lines
8
4
CD
Features for DVD disc
Different DVD discs have different combination of features, this is because of the different design created by the order and
manufacturer, the following symbols indicate some features of the DVD disc.
Regional code and the video output
system
5.1 sound channel output
Dolby digital surround
Hiding subtitle
DTS digital cinema surround
Two channel cinema
Subtitle
Restriction
Audio track
Video aspect ratio
Parental lock
Angle
7
Handling discs
When holding discs, please hold it by its rim.
When holding discs, be sure the label side should be upwards.
Do not grasp the non-label side of the disc.
Disc storage
Never store disc in the place with high temperature, strong light or humidity.
Put the disc back to the case after playback.
Cleaning
Wipe the discs from time using a soft cloth. Always wipe from the center towards the edge.
Do not use daily used detergent to clean the disc.
Protect discs against any fingerprint, do not stick or white anything on the surface of the disc.
8
About Disc Terms
Title
Generally, pictures or music compressed on a DVD are divided into several sections that is TITLE .
Chapter
The smaller section unit of picture or music in a DVD under the title, usually one title is comprised of one or more chapters
and each of them is numbered for easy searching. But some discs may not have a recording chapter.
Track
A segment of picture or music on SVCD, VCD or CD. Each track is numbered for searching.
Scene
VCD with playback control function, on which active and stillness picture divided into certain portion is called scene, and
every scene will be showed on screen menu with a scene number, that can be easily found while on playing. A scene usually is
formed with one or several tracks.
PBC function (SVCD, VCD)
If a SVCD or a VCD is played a content menu may be showed on screen, this is what we called Play back control viz. PBC
function.
Disc sort
Functions
VCD without PBC function
Exhibiting both music and images.
(1.1 version)
SVCD/VCD with PBC
function (2.0 version)
Besides VCD picture playing on screen menu can be used for PBC
playback, and if stillness function is made in a disc it also can be
played with high definition.
9
Control functions
Front panel
1. LCD
2. Speakers
3. Control buttons
4. Power LED indicator
5. IR receiver
6. Discs slot
Control buttons:
1. PLAY/ PAUSE/ENTER button
Press it to play. When pressing during playback, pause mode is set. Press
again to resume playback.
In DISC MENU mode use this button as ENTER.
2. STOP/ON/OFF button
Keep pressing for about 2 seconds to turn the power ON. The LED
indicator will lit with blue.
During playback press it to stop the playing.
Keep pressing it for about 2 seconds to go to the standby mode, the LED
indicator will lit with red.
3. PREVIOUS/NEXT buttons
Use it to locate at the beginning of previous/ next tracks or chapters.
Keep pressing it for about 1.5 seconds during playback to switch playing speed of backward/ forward through X2, X4, X8,
X20.
10
4.
5.
6.
MODE button
(Same function as SETUP key on the remote control)
Press MODE button to enter mode, use +/- key to adjust relevant function:
BRIGHTNESS
CONTRAST
SATURATION
HUE
RESET DEFAULT
EXIT ADJUSTMENT
-/+ buttons
When entering MODE, press it to adjust relevant function.
EJECT button
Press it to pop out the disc.
Left side of the unit
1. Phone jack
For connecting stereo headphone or an amplifier.
2. Volume knob
To adjust volume level.
3. AV input jack
Input audio signal to connected device by setting AV IN/OUT mode.
The included AV input cable is connected here.
4. AV out jack
Output video signal to connected device by setting AV IN/OUT mode. The included AV cable is connected here.
5. DC input
Connect to the AC adapter.
11
Remote control
1.
EJECT button
Press this button to eject disc.
2. SET- button
Press this button to decrease the item value for TFT adjustment item.
3. AV/DVD button
Press this button to switch video source as following: DVD => EXT =>
DVD.
4. ROOT/MENU button
Return to DVD root menu.
Press this button to enter the disc menu.
5. Number buttons
Press these buttons to input numbers.
10+ button: input tens digit. For example, to select track 35 you should
push the 10+ button for 3 times and then push the 5 button.
6. RETURN button
7. Cursor buttons
Use these buttons to move the cursor up, down, left and right when
selecting setting items.
8. PLAY/ PAUSE button
Use this button to play or pause playback.
9. ZOOM button
Zoom the picture on screen.
10. SLOW button
Press this button to start slow playing during playback.
12
11. STOP button
Press this button to stop playback.
12. ANGLE button
Press it to switch angle.
13. AUDIO button
Press this button to switch the audio language in DVD play status, and to switch audio channel in other status.
14. MUTE button
Press this button to enter or exit mute status.
15. GOTO button
Use this button to select the title, chapter or time to play.
16. NEXT button
Use this button to search for the beginnings of the next tracks or chapters.
17. PREVIOUS button
Use this button to search for the beginnings of the previous tracks or chapters.
18. MODE button
Use this button to change TFT adjustment item as the following order: Brightness => Contrast => Saturation => Hue =>
Reset Default= >Exit Adjustment.
19. SET+ button
Use this button to increase the item value for the TFT adjustment item.
20. TITLE button
Press this button to display the DVD title.
21. SUBTITLE button
Press it to switch the DVD's subtitle language.
22. OSD button
Press this button to display the disc and playback information on the screen.
23. CLEAR button
Clear the numbers inputted before.
24. ENTER button
Use this button to confirm the settings.
13
25. VOL +/- button
Use this button to increase/decrease the volume level.
26. SETUP button
Use this button to open the on-screen setup menu.
27. PROG button
Press this button to program the play sequence.
28. PBC button
Press this button to enter the menu of a DVD disc or to activate and disable the PBC functions of a VCD disc.
29. REPEAT button
For DVD: use this button to play titles or chapters repeatedly.
For CD/ VCD: use this button to play tracks or the entire disc repeatedly.
(If some discs have photo and music use this button to select between photo and music.)
30. A-B button
Press this button during playback to set two points and play the section between them repeatedly. Press again to cancel the AB playback.
31. P/N button
Press this button to select the TV output system.
32. DIGEST button
33. REV button
Press this button to fast backward play during playback.
34. FORWARD button
Press this button to fast forward play during playback.
Caution:
Do not drop or step on the remote control unit or subject it to shocks.
Note that the remote control unit may not work if there are obstacles between it and the remote sensor.
Do not expose the remote sensor to fierce light.
Use the remote control unit within the specified operating range.
14
Replacing the battery
1. Pull out the battery holder to remove the battery compartment.
2. Insert a new battery into the battery holder. Make sure the positive (+) side is facing upward.
3. Put the battery compartment cover back to the remote.
Note:
To prevent leakage of fluid from the battery, remove the battery when not using the remote control unit for a long period of time
(one month or more).
If the battery leaks fluid, carefully wipe it out of the battery case, then replace by a new lithium battery.
The remote control unit can operate within a distance of approximately 5 meters.
A 30 degree angle is recommended for best operation.
Make sure no objects are between the remote and the player for avoiding remote signal to be blocked.
Similar remote controls could interfere with the function of the player.
15
Connecting
Before connecting turn off the power of the player and the TV set to be connected.
Connecting to a TV set
Connect video and audio cable (RCA) according to the
shape and color or the video/ audio cable to the output jacks
of the TV set you want to be the monitor, connect another
end of the cable to the AV OUT jack of your TV.
Connecting to AC-DC adapter
Connect the AC-DC adapter to AC power socket.
Connect the DC output of adapter to DC in of the main unit.
Note: AC-DC adapter specification: 12 V/ 1.5 A. Us the
adapter that is the standard accessory of the main unit.
Connecting the VCR, DVD, camera or other external
devices
Connect video and audio cable (RCA) according to the
shape and color or the video/ audio cable to the output jacks
of the VCR, DVD, camera or other external devices, connect
another end of the cable to the AV IN jack of your TV.
Connecting earphone
Be careful not to set the volume to too high level when using
earphone.
16
Connecting the battery
Before using the battery
Please fully charge the battery unit before using it for the first time.
The battery unit becomes hot after recharging, but this is not malfunction.
Battery storage
Please place the battery in a proper environment (15ºC-25ºC). Recharge one time every year if the battery is not used in a long
time.
Battery life
The battery unit can be used for about 300 cycles of recharging and operations, though this is variable depending on the
operating conditions.
Using the battery
The main unit can be playing over 3 hours if the battery is fully recharged.
The picture may be unstable if the battery power is not enough.
Please recharge the battery when the main unit is power off. Otherwise the battery recharge will take about 8-9 hours.
Press OSD button when the unit is in play mode, the battery power can be shown in the OSD.
Please remove the battery unit from the main unit when it is not used in a long period of time.
Attaching the battery
1. Attach the battery pack to the unit.
2. Align the guide hole of the player with the guide rod on the battery pack. Turning the battery knob clockwise until the
battery pack is tightened with the player.
3. Now the player can be operated.
Note: If the power is switched on while the battery pack is not fully charged, the player operation may sometimes become
unstable. e sure to charge the battery pack fully before using.
The battery pack is being recharged slowly while the player is playing with AC adapter connected.
The battery pack is being recharged as recharged separately while the player is at STANDBY mode with AC adapter
connected.
17
Basic operations
Region code
The region code is used in DVD players and on DVD discs. To be able to play the DVD disc the regional codes on DVD player
and on DVD disc must be the same. If not, the player will not play the disc. This player is developed and made in compliance
with the zone codes, recorded on DVD disc, and is able to playback discs of all zones.
The region code of DVD:
Region 1: America, Canada, East-Pacific Inlands;
Region 2: Japan, West Europe, North Europe, Egypt, South Africa, Middle East;
Region 3: Taiwan, Hong Kong, South Korea, Thailand, Indonesia, etc.;
Region 4: Australia, New Zealand, Central South America, South Pacific Inlands;
Region 5: Russia, Mongolia, Indian Peninsula, Middle Asia, East Europe, North Korea, North Africa, North-west Asia etc.;
Region 6: China mainland.
Turning On/Off the unit
Press the ON button on the unit to turn the unit on. The LED indicator will lit with blue. If there is a disc in the player Read
appears on the display. If there is no disc No disc will appear.
Press it again to turn the unit off. LED indicator will be off.
Loading
1. Push ON button to switch on the set.
2. Press EJECT to open the disc slot. Open will appear on the screen.
3. Push the disc into disc slot. The disc will be slotted in automatically. Disc loading will be displayed on the screen, the disc
will be played automatically.
Notes:
Insert the disc carefully. Failure to set it securely could result in damage.
Do not use cracked or warped discs. Doing so could lead to damage.
Push single-sided DVDs or CDs in with the label (printed) side up facing to you.
18
4.
5.
For double-side DVDs, check each side carefully, then push the disc in securely.
For CDs or one-sided DVDs, you do not have to worry about touching the label
(printed) side of the disc with your fingers. Since two-sided DVDs, however, have signal recorded on both sides, so be
careful not to scratch them when removing them from the player.
The player starts loading.
Press STOP to stop playback, press EJECT button to remove the disc from the unit.
Playback, pause
1. Press the PLAY/PAUSE button to start playback.
2. When pressing during playback, pause mode is set. Press again to resume playback.
Mute function
Press the MUTE button to turn the sound off. Press it again or use the VOL +/- buttons to turn the sound on.
Stop
1. During playback press STOP button to pause the playing, the unit can memorize the play point.
2. Press PLAY/ PAUSE to continue playing from the pausing point.
3. Press STOP to stop the disc.
Title play
Compatible with DVD discs only.
1. During DVD playback, press TITLE button to display the DVD title content.
2. Press the arrow buttons to highlight the title you want to choose, and press ENTER; also you can press numeric buttons to
choose.
3. The DVD player begins with the chapter 1 of the chosen title.
19
Menu playback
Compatible with DVD, SVCD or VCD2.0 discs.
1. If the disc is a DVD, ROOT MENU will appear on the screen.
When a DVD disc is loaded, you can press arrow buttons to highlight the menu item you want to choose.
Press ENTER or PLAY button to begin play of the highlighted item.
Return when playing: when a DVD disc is playing, press MENU button, and you can return to Root Menu.
2. When a SVCD or VCD 2.0 disc is loaded, SVCD or VCD 2.0 menu will be displayed on the screen (when PBC is off) (At
this moment, press MENU button once t display current PBC state). PBC is initialized on when a SVCD or VCD2.0 disc is
loaded. Press ENTER or PLAY button to begin play of the highlighted item. You also can use the numeric buttons to play
the desired item. Return when playing: when a SVCD, VCD2.0 disc is playing, and PBC is on, press MENU button, you can
return to the menu.
Playing the previous/ next chapter or track (DVDs, video CDs and CDs)
1. Press the PREVIOUS button during playback. Playback returns to the beginning of the previous chapter or track.
2. Press the NEXT button during playback. Playback moves forward to the beginning of the next chapter or track.
Scanning forward and backward
1. Press REV/FORWARD buttons on the remote control to fast the playing when playing in forward/ backward direction.
2. Change the playing speed to X2, X4, X8, X20 and normal for every pressing REV/FORWARD on the main unit.
Note: During the disc playback when Fast/ Reverse Playback gets to the beginning of the playing title/ chapter/ track, it resumes
normal playback.
3. Press PLAY button to resume normal playback.
Note: During CD, HD-CD, MP3, or WMA playback, with the speed F.Rx2, the player has audio output.
20
Slow playing the disc
1. Press SLOW on the remote control unit to slow playing. Change the playing speed to1/2, 1/3, 1/4, 1/5, 1/6 and 1/7 for every
pressing SLOW.
2. Press SLOW to skip frame when the unit is in pause mode.
3. Press PLAY to resume normal playing.
Repeating of the playback
1. Press the REPEAT button to show the current repeat mode.
Press it again to turn on repeat mode.
For SVCD, VCD, CD, CD-G, HD-CD, DTS-CD, WMA, or MP3 /JPEG discs press it again to choose one of the repeat
options: OFF, TRACK repeat, DISC repeat.
For DVD disc: press REPEAT to select OFF, CHAPTER repeat, TITLE repeat.
For WMA, MP3, JPEG discs press REPEAT to select OFF, TRACK repeat, DIRECTORY repeat, DISC repeat.
2. A-B play mode
Press A-B, the LCD will show Repeat A.
Press A-B again, the main unit will repeat the play from A to B.
Press A-B again, the unit will resume normal playing.
Using the display feature
1. Loading and playing DVDs (two pages).
Press DISPLAY button once to show the first page:
"Disc Type, Title */* (the playing title/ total titles), Chapter */* (the playing chapter/ total chapters), Elapsed Time of the
Disc".
Press the button again to show the second page:
"Language*/* (the serial number of playing language/ the amount of optional languages) or Off, Language Type, Audio
Type, Subtitle */* (the serial number of playing subtitle/ the amount of optional subtitles) or Off, Angle */* (the serial
number of playing angle/ the amount of optional angles) or Off".
Press the DISPLAY button for the third time, the display menu fades out.
21
2.
3.
4.
Loading and playing SVCD discs (two pages).
Press DISPLAY button once to show the first page:
"Disc Type, Track * / * (the playing track / total tracks), Mute, PBC, Repeat M ode, Elapsed Time of the Playing Track"
Press the button again to show the second page:
"Language * / * (the serial number of playing language /the amount of optional languages) or Off, Language Type,
Audio Type, Subtitle * / * (the serial number of playing subtitle / the amount of optional subtitles) or Off".
Press the button for the third time, the display menu fades out.
Loading and playing VCD discs.
Press Display button once to show the first page:
"Disc Type, Track * / * (the playing track / total tracks), Mute, PBC, Repeat Mode, Elapsed Time of the Playing Track".
Press the button again. The display menu fades out.
Loading and playing CD, MP3 / JPEG discs.
Press DISPLAY button once to show the first page:
"Disc Type, Track */* (the playing track/ total tracks), Mute, Repeat Mode, Elapsed Time of the Playing Track".
Press the button again, the display menu fades out.
Searching the disc
1. Press SEARCH.
2. Use cursor key and ENTER to select the proper playing item.
3. Input digit to select playing time, title, chapter or track.
4. Press ENTER to confirm the playing item.
5. Press SEARCH to resume the play mode.
Changing the sub-title
Press SUBTITLE to open the subtitle banner. Press it again to select the sub-title when the main unit is in play mode.
There are 8 supported subtitles: Chinese, English, Japanese, French, Spanish, Portuguese, Germany and Latin.
22
Changing an angle
Available for DVD discs only.
Press ANGLE to show the angle icon. Press it again to select the play angle when the main unit is in play mode.
If multiple camera angles are available, the Angle icon displays the current angle number and the number of angles available.
Changing an audio language
Available for DVD, SVCD discs only.
Press AUDIO to open the language banner. Press AUDIO button to select the language if the disc has different languages.
Changing the soundtrack
Press the L/R button to display current soundtrack.
Press the button again on the remote to turn to next soundtrack.
When playing a SVCD or VCD disc, there are five soundtracks: Stereo (L/R), L/L, R/R, L/L Auto A/D Detect, and R/R Auto
A/D Detect. With each consecutive press of the button, the soundtrack switches. If you press the button six times, soundtrack
cycles back to Stereo.
When playing a CD, CD-G, DTS-CD, HD-CD, WMA, or MP3 disc, there are three: Stereo (L/R), L/ L, and R/ R.
Note:
When playing a dual-language VCD movie disc, press the L/R button to select the desired language.
Zoom playing
Press ZOOM every time, the picture will change to Zoom1, Zoom 2, Zoom 3, Zoom ½, Zoom 1/3, Zoom ¼, Zoom off.
Note: Use the arrow buttons to pan across the screen when the zoom factor is 1, 2 or 3.
Changing the TV system
Press P/ N button on the remote to display current TV system.
Press the P/ N button again to change the TV system. There offers four systems: NTSC, PAL60, PAL, and AUTO.
With each consecutive press of the P/ N button the TV system switches. If you press the button five times, the TV system cycles
back.
23
At last, press ENTER button to start layback. For example, entering 01:23:56 will start playback one hour, twenty-three minutes
and fifty-six seconds into the title. If the input number is illegal, the error information "INVALID KEY " will be displayed on the
screen.
Note:
This feature does not work in Program Play mode.
Mode settings
1. When the unit is in play mode press MODE on the main unit. Set the color, brightness, contrast, LCD display mode, reverse
mode and AV output/input mode.
Note:
The unit will stop playing the disc when it is in AV input mode.
Do not connect signal input when the unit is in AV output mode.
AV output mode is default mode.
2. Press MODE for 1.5 seconds, then the unit will come back to AV output mode.
3. Press MODE to set the volume.
Note: The volume setting is the default mode. Press +/- to adjust the volume directly.
24
Programming the playback
Compatible with DVD, SVCD, VCD, CD, CD-G, DTS-CD, HD-CD, WMA, MP3/JPEG discs.
The Program playback option allows you to enter the order in which you t want chapters or tracks to play, maximum to 16.
Program Menu:
DVD, WMA, M /JPEG discs:
T is for Title, C is for Chapter for DVD disc.
SVCD, VCD, CD, CD-G, HD-CD, DTS-CD discs:
If PBC is on, this operation will turn PBC off while the chapters/ tracks plays in programmed order.
According to the highlight use the numeric buttons to enter the chapters/ tracks in the order you want them to play.
Then press PLAY or use arrow buttons to highlight the "Play" item and press ENTER. The chapters/ tracks will play in the
programmed order.
According to the direction indicator on the menu, you can press arrow buttons to highlight where you want to enter.
During Program playback, if PROGRAM button pressed, the programmed order and the contents will be displayed on the screen,
and the Program playback will be stopped; also you can press STOP and PLAY to resume normal playback.
25
Note:
To clear the programmed order, use arrow buttons to highlight the "Clear" item, then press ENTER.
To modify the programmed order, use arrow buttons to highlight the modifying item and enter the new chapter/ track you want to
program directly.
Using the OSD
Press OSD to show the play and disc information on the LCD when the main unit is in play mode.
Press OSD again to disable the information display.
26
Settings
Press SETUP when the main unit is in play mode. The setup menu will be displayed on LCD.
Use the ,
buttons to select the icon of the desired page (System setup, Language setup, Audio setup, Karaoke setup).
Use the ,
buttons to select the desired option. Press the or ENTER button to open the list of adjustments to the right of
the option.
System setup
TV system
According to the color system of the TV, you can choose the TV System:
NTSC: Choose this settings if your DVD player is connected to a NTSC TV.
PAL60: Choose this setting if your DVD player is connected to a PAL 60 TV.
PAL: Choose this settings if your DVD player is connected to a PAL TV.
AUTO: Choose this settings if your DVD player is connected to a multi-system TV.
The default setting is NTSC.
Screensaver
This function can save the TFT life if the unit stays in STOP, OPEN, NO DISC, or there is a
FRAME FROZEN for more than the chosen amount of minutes.
1 MIN: the screen saver will appear in 1 minute.
5 MIN: the screen saver will appear in 5 minutes.
10 MIN: the screen saver will appear in 10 minutes.
30 MIN: the screen saver will appear in 30 minutes.
OFF: screensaver disabled.
27
TV type
4:3PS:select this item when connecting this unit to a normal TV set.
4:3LB:select this item when connecting this unit to a normal TV set.
16:9: select this item when connecting this unit to a 16:9 TV set.
Note:
Picture scale depends on the disc.
Password
When unlock, new parent lock can be input and select the parent lock level.
If you want to set the ratings limit you will need to enter the default password, which is
0000, then press ENTER to confirm.
To change the password you will be prompted for the old password then be prompted for a
new. Enter a 4-digit number (this is your password).
Note: Some time, the password is 6-digit number, the default is 000000.
Rating (parent level)
This setting can control the unit play parent lock DVD disc.
Rating is divided into 3 levels: NO ADULT, KID SAFE, VIEW ALL.
Select VIEW ALL, the lock is cancelled.
Default: VIEW ALL.
Note:
The parent lock level cannot be set if parent lock is locked.
28
Default setting
To restore the factory setting, please select Restore and press ENTER.
Language setup
OSD language
Select the OSD language menu. If the disc you are playing supports this language, the OSD will
be in that language.
Audio language
Select the audio language menu. If the disc you are playing supports this language, the audio will
be in that language
29
Subtitle language
Select the Subtitle language menu. If the disc you are playing supports this language, the subtitle
will be in that language.
Menu language
Select the Menu language menu. If the disc you are playing supports this language, the menu
will be in that language.
Default language: Chinese.
Audio setup
Audio out
SPDIF/OFF: From the Coaxial output jack and the Optical output jack, no signal is output.
SPDIF/ RAW: Choose this setting if your DVD player is connected to a power amplifier
with a coaxial cable or an optical cable; When playing a disc recorded with Dolby Digital,
DTS and MPEG audio formats, the corresponding digital signals will be output from the
Coaxial Output jack or Optical Output jack. This player's digital output jacks are designed
for a connection to a Dolby Digital, DTS, or MPEG receiver or decoder.
SPDIF/ PCM: Choose this setting if your DVD player is connected to a 2-channel digital
stereo amplifier; When playing a disc recorded with Dolby Digital and MPEG audio formats,
audio signals will be modulated into a 2-channel PCM signal, and it will be output from the
Coaxial Output jack or Optical Output jack.
30
Downmix
LT/ RT: Choose this setting, it will be sound like in a movie theatre if the original movie the
disc was recorded from was encoded in the Pro Logic Dolby Digital format.
STEREO: Choose this setting, when 5.1-channel sound playing, two channels of signals will
be output from the left and right soundtrack; when 2-channel sound playing, stereo signal
will be output.
VSS: Choose this setting, when a disc recorded with 5.1-channel sound format playing, the
fictitious surround soundtracks effect will be heard from the main soundtrack.
OFF: Choose this setting to output the 5.1-channel sound.
Dynamic range
When "LINE OUT" is selected, choose this setting to adjust the line out ratio and get
different effect.
If adjusting to FULL, the audio signal peak value will be the minimum; while adjusting to
OFF, Maximum.
Note: This option will be validated when the DOWNMIX OFF.
Down sample
There are 3 optional modes: 48 K, 96 K, 192 K.
31
Karaoke setup
Mic setup
There are two MIC settings in the MIC SETUP option: AUTO and OFF.
When selecting AUTO, the player will auto detect and deal with the input voice.
When selecting OFF, the player will do nothing with the MIC input. For example, when
playing a VCD2.0 karaoke disc, choose AUTO to enable Auto A/D Detect Feature.
Note: When the MIC setup is "OFF", the following setting "ECHO","MIC VOL","KEY" are
disabled.
Echo
Use the
and
button to move the scroll and adjust the echo.
Use the
and
button to move the scroll and adjust the microphone volume.
Mic vol
32
Key
Use the
and
button to move the scroll and adjust the key.
33
Troubleshooting
Symptom
Picture is disturbed when playing a DVD
recorded by a VCR
Remote control unit not working
No sound is produced from speakers or sound is
distorted
Volume is different from DVDs and CDs
The player crashes
8 cm disc can not be popped out
No sound is produced or sound is distorted when
connected to a TV, an amplifier, etc
The temperature of the player can hoist a little
when the player plays back
Comments
This player incorporates copyright Protection technology. Some discs include signal protected
against copied by a VCR. Such recorded discs can not be played properly.
Remote control unit is too far from the main unit or has too large angle with the remote
sensor. Remote control unit's battery is worn out.
For some discs, 96 kHz digital output of linear PCM audio signal is prohibited.
Disc is dirty.
It is in the state of pausing, fast forward or fast backward.
Main unit's volume is set to minimum.
Earphone is plugged in.
This is due to the different recording methods.
Turn off the player and turn on again.
Press EJECT button when Loading appears on screen to pop out the disc.
Ask qualified technician.
Slap on the player with disc window downward.
Ask qualified technician.
Connection cables are not firmly plugged in or not contacted well.
Connection plugs or jacks are dirty.
Audio cables are not properly connected.
Audio digital output is connected to a non-compatible AV amplifier, etc.
Incorrect DTS setting.
This is normal.
Note:
The player may stop operation properly due to static electricity or other external influences. In this case, usually solve the problem by unplugging the power
cord and then plugging it in again. If still can not solve it, consult with the nearest service centre.
Liquid crystal display
A few picture elements may be black or a particular color displayed on the LCD screen. This is normal.
34
Specifications
DVD player
Video
Audio
Power supply
Power consumption
Battery pack capacity
Battery pack discharge time
Display Screen
External dimensions (L x W x H)
Video formats
Output level (RL=75)
Horizontal resolution
Luminance amp-fre response
Chroma amp-fre response
Luminance non-linear distortion
Luminance wave distortion
Luminance S/N ratio
Chroma S/N ratio
Output impedance/ Video input impedance
Video input amplitude
Output level (RL=10k)
Amp-fre respons (20Hz- -20KHz)
S/N ratio
Distortion and noise (1 kHz)
Dynamic range (1kHz)
Output impedance/ Audio input impedance
Audio input amplitude
DC 9 V~13.8 V
< 10 W
7.4 V/ 5400 mAh
> 3 hours
TFT-LCD color display
235 x 185 x 30 mm
NTSC/PAL (including input, output and display) display
1.0 ± 0.2 V
450 TV Line
5.5 MHZ (-6dB)
1.5 MHz (-6dB)
5%
10%
50 dB(No-Weighted)
AM: 60, PM: 50
75 / 75
1V
2.00 ± 2 V
± 1 dB
90 dB
-65 dB
80 dB
600 / 600
1V
Specifications are subject to change without notice.
Mass and dimension are approximate.
35
...............................................................................................................................................................................36
..........................................................................................................................................................37
...................................................................................................................................................................................39
.............................................................................................................................................................40
................................................................................................................................................................44
..........................................................................................................................................46
.............................................................................................................................................................................50
..................................................................................................................................................................52
..................................................................................................................................................................................61
.......................................................................................................................................68
...................................................................................................................................................69
36
,
,
.
.
.
:
,
.
.
.
.
.
,
1
,
.
.
.
:
.
,
.
.
,
.
37
:
,
,
.
,
.
:
,
,
,
,
,
,
,
,
,
,
.
DVD-
,
,
.
,
.
,
.
,
,
.
.
,
.
.
.
,
.
,
.
.
;
.
,
,
,
.
.
38
,
/DC
AV
:
DVD
+
AC-3
Dolby Digital
MP3
Video-CD
(VCD)
+
CD-DA
Kodak Picture
CD
MP4
+
MPEG4
+
DivX
+
39
:
8
MPEG4:
,
.
,
DivX 3.11, DivX 4.0, DivX5.0, DivX 6.0
DivX
).
DVD
VCD
MPEG 2
CD
MPEG I
MPEG II
DIGIT
650
74
650
45
650
74
12/8
12
12
12/8
$500
$240
$350
-
32
-
8
-
8
2
4
-
,
4,7
2
,
9,4
4,5
,
8,5
,
SVCD
4
,
17
9
40
DVD
DVD-
,
:
5.1 -
DTS
2
Dolby digital surround
41
.
.
(
)
.
.
.
.
.
,
.
42
,
,
DVD-
,
,
.
(
)
DVD-
,
.
,
.
SVCD, VCD
VCD,
,
CD.
.
«
,
»
.
.
.
PBC (SVCD,VCD)
SVCD
VCD
,
.
VCD,
PBC (
(
1.1)
SVCD/VCD,
PBC (
),
.
VCD
2.0)
,
43
.
1.
2.
3.
4.
5.
6.
:
:
PLAY/ PAUSE/ ENTER
,
.
1.
.
2.
.
STOP/ ON/ OFF
2
,
.
.
.
3.
2
.
PREVIOUS/ NEXT
.
/
1,5
(
).
/
2, 4, 8, 20.
44
4.
MODE
SETUP
,
)
.
+/
:
5.
BRIGHTNESS:
,
CONTRAST
SATURATION
HUE
RESET DEFAULT
EXIT ADJUSTMENT
/+
0
12.
.
6.
EJECT
.
1.
.
2.
.
3.
AV IN
AV IN/OUT.
AV
4.
.
AV OUT
AV IN/OUT.
AV
5.
DC input (
.
)
AC/DC
.
45
1.
EJECT
2.
SET-
3.
AV/DVD
,
.
.
,
4.
:
DVD=>EXT=>DVD.
ROOT/MENU
DVD
.
.
5.
.
10+:
,
,
.
35,
10+
,
,
5.
6.
7.
RETURN
,
.
8.
PLAY/ PAUSE
9.
(
ZOOM
,
,
,
).
,
.
46
10.
SLOW
11.
STOP
12.
ANGLE
13.
AUDIO
,
.
,
.
,
.
,
DVD
.
14.
MUTE
15.
GOTO
16.
NEXT
17.
PREVIOUS
,
.
,
,
.
.
.
18.
MODE
,
19.
: Brightness=>Contrast=>Saturation=>Hue=>Reset
Default=>Exit Adjustment.
SET+
.
20.
TITLE
21.
SUBTITLE
22.
OSD
,
,
DVD
DVD.
.
47
.
23.
CLEAR
24.
ENTER
25.
VOL+/-
26.
SETUP
,
.
,
.
,
/
.
,
27.
.
PROG
,
28.
.
PBC
,
DVD
PBC
.
29.
REPEAT
DVD:
CD/ VCD:
.
.
,
30.
.)
A-B
,
,
.
31. P/N
,
32.
33.
.
DIGEST
REV
.
34.
FORWARD
.
48
:
.
,
,
.
.
.
1.
2.
3.
,
.
,
, «+»
.
.
:
,
1
,
.
,
.
5
.
5
30
.
,
,
.
.
49
.
AC-DC
AC-DC
DC
RCA
,
(
)
,
AV OUT
.
DC
.
.
, DVD
Note:
AC-DC
,
: 12 / 1.5 A.
.
,
RCA
,
(
)
,
AV IN
.
,
.
50
.
.
.
(15ºC-25ºC).
,
.
300
.
.
3
.
,
,
OSD,
.
.
8-9
,
,
1.
2.
3.
.
.
,
,
.
.
.
:
,
.
,
.
AC/DC
51
.
.
.
AC/DC
.
DVD-
DVD-
.
,
DVD-
.
,
.
,
DVD
.
1:
2:
3:
4:
5:
DVD:
,
,
;
,
,
,
,
,
,
,
,
,
,
,
,
,
;
,
,
;
,
,
;
,
,
,
.;
6:
.
/
ON
,
,
. LED
Read .
,
1.
2.
3.
.
,
No disc
. LED
ON,
EJECT.
.
.
.
.
.
.
52
Open .
Disc loading ,
:
.
.
.
CD
DVD
.
.
DVD
CD
DVD
,
.
DVD
.
,
.
4.
5.
.
STOP,
.
EJECT
.
,
1.
3.
PLAY/ PAUSE,
PLAY/ PAUSE
.
.
,
.
MUTE,
.
,
MUTE
VOL +/- ,
.
1.
STOP,
»
2.
3.
.
.
PLAY/ PAUSE,
STOP
,
.
.
53
DVD
1.
2.
DVD
TITLE,
.
,
,
ENTER.
.
3.
.
DVD, SVCD
1.
VCD2.0
DVD,
.
DVD
,
.
ENTER
2.
PLAY,
DVD
VCD2.0,
VCD2.0,
SVCD
SVCD
.
,
MENU.
PBC,
,
PLAY,
VCD2.0,
,
VCD2.0
MENU (PBC)
CD
CD)
.
.
REV/ FORWARD
.
REV/ FORWARD
2.
X2, X4, X8, X20
MENU.
RETURN.
PREVIOUS,
NEXT,
1.
.
,
.
(DVD,
1.
2.
.
SVCD
ENTER
SVCD
,
,
:
.
54
:
,
,
.
3.
PLAY,
:
1.
SLOW
2.
3.
PLAY,
1.
REPEAT,
2.
.
CD, HD-CD, MP3, WMA
,
2
.
: 1/2, 1/3, 1/4, 1/5, 1/6, 1/7.
SLOW,
.
.
.
.
,
.
SVCD, VCD, CD, CD-G, HD-CD, DTS-CD, WMA
MP3 /JPEG
,
: OFF, TRACK repeat, DISC repeat.
DVD
:
REPEAT,
OFF, CHAPTER repeat, TITLE repeat.
WMA, MP3, JPEG
REPEAT,
OFF, TRACK repeat, DIRECTORY repeat,
DISC repeat.
A-B
A-B,
Repeat A (
).
A-B
,
,
.
,
.
55
1.
DVD (
DISPLAY
*/* (
,
).
,
:
),
/
),
,
:
*/* (
)
,
)
)
*/* (
.
,
,
,
*/*
*/* (
.
,
.
SVCD (
2.
).
,
,
:
*/* (
),
, PBC,
,
.
,
:
*/* (
)
,
)
,
,
,
*/*
.
.
3.
VCD.
,
,
:
*/*(
),
, PBC,
,
.
,
.
CD
4.
,
DISPLAY
*/*(
.
,
MP3/JPEG.
,
:
),
.
56
,
,
1.
2.
3.
4.
5.
SEARCH.
ENTER
,
.
,
.
ENTER,
SEARCH,
.
.
SUBTITLE,
:
,
.
,
,
,
,
,
,
.
DVD
.
ANGLE,
.
.
,
,
.
AUDIO,
AUDIO,
.
.
,
DVD, SVCD.
L/R,
.
,
Auto A/D Detect
SVCD
VCD
R/R Auto A/D Detect.
Stereo.
.
,
5
57
: Stereo (L/R), L/L, R/R, L/L
.
CD, CD-G, DTS-CD, HD-CD, WMA
MP3
,
3
:
Stereo (L/R), L/ L, and R/ R.
:
VCD
L/R,
(Zoom)
ZOOM
,
3, Zoo 1/2, Zoom 1/3, Zoom 1/4, Zoom off.
:
1, 2, 3
P/ N,
P/ N
.
: Zoom1, Zoom 2, Zoom
,
.
.
: NTSC, PAL60, PAL, AUTO.
P/ N.
.
,
01:23:56
.
,
ENTER,
,
"INVALID KEY".
:
,
.
1.
(contrast),
:
LCD
MODE.
(reverse mode)
,
AV
AV
2.
(color),
AV
(brightness),
.
.
.
AV
MODE
.
1.5
,
AV
58
.
3.
ODE,
.
:
.
+/-,
.
DVD, SVCD, VCD, CD, CD-G,DTS-CD, HD-CD, WMA, MP3/JPEG
.
,
16.
:
DVD, WMA, M /JPEG
T,C
:
DVD.
SVCD, VCD, CD, CD-G, HD-CD, DTS-CD
:
PBC
/
,
.
.
PLAY
"Play"
.
59
ENTER.
/
,
PROGRAM,
.
.
PLAY,
.
,
,
STOP,
:
,
CLEAR,
.
,
.
OSD,
.
OSD
,
.
60
ENTER,
,
SETUP
.
(System setup, Language setup, Audio setup, Karaoke setup).
.
ENTER,
,
,
,
.
(System setup)
(TV system)
:
NTSC
PAL60
PAL
AUTO
: NTSC
.
(Screen saver)
,
,
,
1 MIN:
5 MIN:
10 MIN:
30 MIN:
OFF:
1
5
10
30
.
.
.
.
.
61
,
.
(TV type)
4:3PS (pan scan):
.
,
4:3LB (letter box):
.
.
.
16:9 (wide screen):
:
.
.
(Password)
RATING (
)
PASSWORD (
).
,
4.
000000.
)
.
RATING (
),
0000 (
ENTER
.
ENTER,
ENTER
4
:
.
(Rating)
,
.
NO ADULT (
), VIEW ALL (
VIEW ALL
), KID SAFE (
).
.
VIEW ALL.
62
(Default)
).
,
RESTORE (
)
ENTER.
(Language setup)
.
,
.
(Audio lang)
.
.
63
,
(Subtitle lang)
.
,
.
(Menu lang)
.
:
,
.
.
(Audio setup)
(Audio out)
,
.
,
.
SPDIF/OFF:
,
,
SPDIF/RAW:
.
,
,
Digital.
64
Dolby
,
Dolby Digital,
DTS,
DTS,
.
Dolby Digital.
,
SPDIF/PCM
SPDIF/PCM:
,
Dolby Digital,
SPDIF/RAW.
,
Dolby Digital.
(
).
(Downmix)
5.1-
,
DVD-
,
Dolby Digital
Dolby Surround.
LT/RT:
,
Logic.
Dolby Digital 5.1,
Logic,
.
,
Dolby Digital,
Dolby Pro
,
4-
Dolby Pro
STEREO:
.
VSS:
,
Dolby Surround.
:
5.1
.
(Dynamic range)
Line out,
.
:
DOWNMIX
).
65
(Down sample)
48K:
DVD,
48
.
96
.
96K:
DVD,
192K:
DVD,
192
.
(Karaoke setup)
(Mic setup)
: AUTO (
)
OFF (
.).
AUTO,
.
OFF
.
,
:
.
VCD2.0,
A/D Detect.
OFF,
"ECHO","MIC VOL","KEY"
(Echo)
.
66
AUTO,
(Mic vol)
.
(Key)
.
67
.
DVD
,
.
.
.
96
.
.
,
.
.
.
DVD CD
The player crashes
.
.
LOADING
,
EJECT,
.
.
8
.
.
,
.
,
.
.
.
.
DTS.
.
:
.
,
.
,
:
.
.
68
.
DC 9 ~13,8
< 10
7.4 / 5400
>3
DVD
( x
x
)/
(RL=75
(20
)
(RL = 10
20
)
(1
)
(1
)
)
235 x 185 x 30
NTSC/ PAL (
1.0 ± 0.2
450
5.5
(-6 )
1.5
(-6 )
5%
10%
50
(
AM: 60, PM:
75 / 75
1
2.00 ± 2
±1
90
-65
80
600 / 600
1
,
)
)
50
.
.
69