1
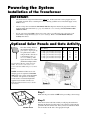
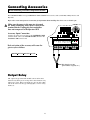
At this stage of the installation, the operator should be installed on
the gate and the closed position stop should be in place.
Check List
• The gate is plumb, level, and swings smoothly on its hinges.
• A plate or support was added for the gate bracket (if necessary).
• The operator is level and mounted on the centerline of the gate.
Mounting the Control Box
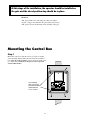
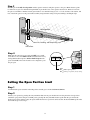
Step 1
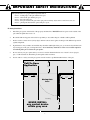
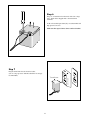
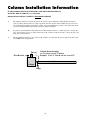
Mount the control box using the screws (provided) or another
secure mounting method. The control box must be mounted at
least 3 feet above the ground to protect it from rain splash, snow,
etc., and at least 3 feet from an AC power source to prevent
electrical interference.
15
Use mounting
holes and screws
provided to mount
control box to a
secure surface.
ALARM
FUSE
1 2 3 4
BAT–
GTO, Inc.
3121 Hartsfield Rd
Tallahassee, FL 32303
ON
DUAL ON
MODES
BAT+
SWITCH
800-543-GATE
1
www.gtoinc.com
2
3
4
OFF
SET
LIMIT
1 2 3 4 5 6 7 ON
MODES ON
1
2
3
4
5
6
7
OFF
LEARN
TRANSMITTER
12'
SWITCH
14'
10'
8'
16'
17
BLK
GRN WHT BLUE
BRN ORG
MASTER INPUTS
RED
BLK
COM COM
SHADOW
LOOP
RED
CYCLE
CLOSE
BRN ORG
SLAVE INPUTS
CLOSE
EDGE
GRN WHT BLUE
EXIT/
OPEN
– + NC RLY-COM NO
SOLAR RELAY OUT
SAFETY
~ ~
18VAC
OPEN
EDGE
GATE LENGTH
GRN BLK
RED
RECEIVER