1
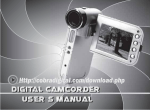
www.cobradigital.com
Content of table
Introduction..........................................................................................................................4
Overview .............................................................................................................................4
Features ..............................................................................................................................4
Package Content .................................................................................................................4
Getting to know Your Camcorder ........................................................................................5
Preparation..........................................................................................................................6
Battery Installation ...............................................................................................................6
Charging the Lithium Battery ...............................................................................................7
Inserting an optional Memory Card .....................................................................................7
How to use the LCD monitor ...............................................................................................8
Power on/off your Digital Video ...........................................................................................9
The Mode Dial Menus .......................................................................................................10
OSD in CAMERA mode.....................................................................................................11
System Setup ....................................................................................................................13
Take a Video .....................................................................................................................19
Take Photos ......................................................................................................................23
Advanced operation ..........................................................................................................25
Other Function...................................................................................................................29
2
Recording audio files .........................................................................................................29
Mp3 Player ........................................................................................................................30
PLAYBACK Mode .............................................................................................................31
Video Clip playback ...........................................................................................................31
Still images playback .........................................................................................................31
Display on TV ....................................................................................................................32
Playing audio file ...............................................................................................................32
Software Installation ..........................................................................................................35
Downloading......................................................................................................................36
Copy Mp3 files from PC to your DV...................................................................................38
Video impression Application ............................................................................................39
Web Cam ..........................................................................................................................46
Video Conference..............................................................................................................46
Chat with MSN ..................................................................................................................47
Print Photos.......................................................................................................................50
Troubleshooting.................................................................................................................51
Specifications ....................................................................................................................53
3
Introduction
Overview
Thank you for purchasing the Cobra Digital Video Camera DVC5200. It can not only take video but can
also be used as a Digital Still camera, audio recorder, MP3 player, MP4 player, webcam, media player,
mass storage, TV out and card reader. Generally, this multi-functional DVC5200 camera will make
your life more colorful and enjoyable.
Features
• Effective resolution: 2592 x 1944 Mega Pixels, interpolated up to 10M pixels.
• 9 in 1- Digital Video, Digital Still Camera, MP3, MP4, AUDIO REC, WEB CAM, MEDIA PLAYER,
MASS STORAGE, CARD READER
• 2.0” LTPS TFT Full Color LCD
• 4x Digital zoom
• Internal DDR (16MB), 32MB NAND FLASH MEMORY
• External SD/MMC Card slot for adding optional SD card memory (available at almost all stores that
sell electronic products.
• USB 2.0 transmission interface
Package Content
Software CD
Earphone
User's manual
Pocket
AV cable (TV connection)
Strap
Charger
4
Lithium Battery
USB cable
Getting to know Your Camcorder
5
Preparation
Battery Installation
Your DV requires lithium battery (3.7V). To insert the battery in the camcorder:
1. Slide the battery bolt to open battery door.
2. Load the lithium battery correctly as the polarity (+ and -) marked on the battery cover.
3. Close battery door.
Notes: If you do not intend to use the device for a long time, remove the battery from your DV.
6
Charging the Lithium Battery
1. Attach the battery pack to the camcorder.
2. Power off your DV and connect it to PC with USB cable correctly.
3. The charging indicator will be turned to blue, showing that the battery is charging.
4. When the battery is fully charged, disconnect the PC from the camcorder.
Notes: When the battery is fully charged, the indicator will turn off.
Inserting an optional Memory Card
You can insert any “SD” compatible memory card before using. Adding a memory card will allow you
to increase the capacity of your DV. Please push the card firmly into the slot as far as it will go until
you hear “click” sound.
7
How to use the LCD monitor
1. Open the LCD monitor.
2. Rotate the LCD screen carefully per your request.
8
Notes:
1. Over rotation may cause damage to the inside of the hinge that connects the LCD screen to the Camcorder.
2. Please don’t contact the surface of screen when you rotate the LCD.
3. When the LCD keeps same direction with digital lens, the image shown on LCD will be adjusted automatically.
Power on/off your Digital Video
Press the POWER button to start your DV, and the LCD Monitor will light up, showing your DV is ready
to use. Under the DV is “ON”, press POWER again button to turn off the device.
9
The Mode Dial Menus
10
OSD in CAMERA mode
1. Capture Mode
Single shoot
2. Resolution
10M (3648x2736)
3. Photo Quality
Sequence
7M (3072x2304)
Normal quality
Fine
5M (2592 X1944)
3M (2048 X1536)
Super quality
4. Number of video/audio files Taken
5. The icon of inserting SD card
11
1M (1280 X 960)
6. Battery level
Full
7. Self Timer
10s self timer
Medium
Low
20s self timer
8. White Balance
AWB
Auto
Daylight
Tungsten
Fluoresce
Cloudy
9. Flash Mode
Force On
Auto
Force Off
12
Red Eye Reductions
System Setup
Rotate dial mode to select “SET” mode. (The arrow points at “SET” position).
Set Frequency
1. Rotate dial mode to select “SET” mode.
2. Press
3. Press
button to select “Frequency” and then press M button.
button to set the frequency, and press M button to confirm.
Date/Time Set
1. Rotate dial mode to select “SET” mode.
button to select “Time” and then press M button.
2. Press
button to select the digit.
3. Press
button to set the digit.
4. Press
5. Press M button to confirm.
13
Beep Sound
Select a beep sound whenever you change a setup value.
1. Rotate dial mode to select “SET” mode.
button to select “Beep” and then press M button.
2. Press
button to select “On” or “Off”, and press M to confirm.
3. Press
Note: . The BEEP SOUND function works in CAMERA, PLAYER, M.REC, and M.PLAY modes.
. When beep is on, you can hear a “beep” sound with your operating.
Format
1. Rotate dial mode to select “SET” mode.
14
2. Press
3. Press
button to select “Format” and then press M button.
button to select “Yes” or “No”, and press M to confirm.
Notes: 1. At step 3, select “Yes”, all files in flash memory will be erased; After inserting SD/MMC card, If you
select “Yes”, either all files in flash memory or external card will be deleted, depending on your
selection of media.
2. Formatting will erased all files, even if the files are locked.
Media Select
1. Rotate dial mode to select “SET” mode.
button to select “Media Select” and then press M button.
2. Press
button to select “Internal Flash” or “External Card”, and press M to confirm.
3. Press
15
Note: The photos will be stored in the device you have selected. The default is Internal Flash storage.
Default Setting
1. Rotate dial mode to select “SET” mode.
button to select “Default Setting” and then press M button.
2. Press
button to select “Yes” or “No”, and press M to confirm.
3. Press
Language Select
1. Rotate dial mode to select “SET” mode.
button to select “language” and then press M button.
2. Press
button to select the language what you want and press M to confirm.
3. Press
16
Power Save
1. Rotate dial mode to select “SET” mode.
button to select “Power Save” and then press M button.
2. Press
button to select the time that power auto off (60Sec, 2min, or None) and press M button
3. Press
to confirm.
TV Mode
1. Rotate dial mode to select “SET” mode.
button to select “TV Mode” and then press M button.
2. Press
button to select the TV mode (NTSC or PAL), and press M button to confirm.
3. Press
17
Logo Display
1. Rotate dial mode to select “SET” mode.
button to select “Logo Display” and then press M button.
2. Press
button to select “On” or “Off”, and press M button to confirm.
3. Press
Version
1. Rotate dial mode to select “SET” mode.
button to select “Version”.
2. Press
3. Press M button to check the current Version of your Digital Video
4. Press M button to exit Version menu.
18
Take a Video
Rotate dial mode to select “Normal” mode of the DV. (The arrow points at “
” position).
Setup the parameter
Set Resolution
1. In VIDEO mode, Press M button, the LCD will show as below.
button to select “Resolution” and press M button.
2. Press
button to select “640 X 480” or “320 X 240”and then press M button to confirm.
3. Press
4. Press button to exit the menu and return to the normal mode.
19
Frame Rate
1. In
mode, Press M button, the LCD will show as below.
button to select “Frame Rate” and press M button.
2. Press
button to select “30fps”or “15fps”and then press M button to confirm.
3. Press
4. Press button to exit the menu and return to the normal mode.
Set Audio
1. In
mode, Press M button, the LCD will show as below.
2. Press
button to select “Audio” and press M button.
button to select “On” or “Off” and then press M button to confirm.
3. Press
4. Press button to exit the menu and return to the normal mode.
20
White Balance
Please refer to the operation (white balance) in
mode.
Take a Video
1. Press the POWER button to start the DV.
2. Rotate the LCD monitor to best angle (The
o
o
scope of rotation is 0 -270 ).
21
3. Rotate dial mode to select “
” mode.
4. Use the LCD monitor to find the things. Hold the
digital video steadily, and press the Shutter Button
to start taking a video.
5. Press the Shutter Button again to stop taking a video.
Zoom In /Out
During shooting, you can press T button to zoom in up to 4x and W to zoom out.
Notes: 1. The video clips will be saved as MPEG 4 format.
2. The shooting time varies depending on the available space of memory card.
22
Take Photos
Rotate dial mode to select “Normal” mode of the camera. (The arrow points at “
Simply take a Photo
1. Press the POWER button to start the DV.
” position).
2. Rotate the LCD monitor to select
best
o
o
angle. (The scope of rotation is 0 -270 ).
23
3. Rotate dial mode to select “
” mode.
4. Use the LCD monitor to find the things for
which you desire to take photos.
5. Hold the digital video steadily, and press the
Shutter button to take photos.
Note:
1. You can press “T” button to zoom in up to 4x during taking photo.
2. When the DV is fully loaded with photos, if you press Shutter Button again, “No Space” will be shown on LCD
monitor.
24
Advanced operation
Flash Function
In “Normal” mode of
1. Repeatedly press
button to select the icon
shown on LCD. The flash function is forced on.
button to select the icon
shown on LCD. The automatic flash function is
2. Repeatedly press
activated.
3. Repeatedly press
button to select
shown on LCD. Flash function is not available.
4. Repeatedly press
button to select the icon
shown on LCD. IGBT function is ready.
Meanwhile, you can also set flash function as the following operation
1. In CAMERA mode, Press M button.
button to select “Flash Mode” and press M button.
2. Press
button to select flash mode, and then press M button to confirm.
3. Press
4. Press button to exit the menu and return to the normal mode.
Continuous/Self-timer Shoot
In “Normal” mode of
1. Repeatedly press
button to select the icon
shown on LCD. Press Shutter button, the timer
25
runs for 10s before the photo is taken.
2. Repeatedly press
button to select the icon
runs for 20s before the photo is taken.
button to select the icon
3. Repeatedly press
photos will be taken at one time.
shown on LCD. Press Shutter button, the timer
shown on LCD. Press Shutter button, three
Meanwhile, you can also achieve the above as below:
1. In CAMERA mode, Press M button.
button to select “Capture Mode” and press M button.
2. Press
button to select the mode of capturing and then press M button to confirm.
3. Press
4. Press button to exit the menu and return to the normal mode.
Date on Photo
1. In
mode, Press M button, the LCD will show as below.
button to select “Date Stamp” and press M button.
2. Press
button to select “On”, and then press M button to confirm.
3. Press
4. Press button to exit the menu and return to the normal mode.
The date will be printed on the photo taken.
26
EV Set
1. In CAMERA mode, Press M button, the LCD will show as below.
button to select “EV” and press M button.
2. Press
button to set EV digit (-2.0 ~ +2.0) per your request.
3. Press
4. Press M button to confirm.
5. Press button to exit the menu and return to the normal mode.
White Balance
1. In CAMERA mode, Press M button, the LCD will show as below.
button to select “White Balance” and press M button.
2. Press
button to select “Auto”, “Daylight”, “Tungsten”, “ Fluoresce” or “Cloudy” per your
3. Press
request, and then press M button.
27
4. Press
button to exit the menu and return to the normal mode.
Image Quality
1. In CAMERA mode, Press M button, the LCD will show as below.
button to select “Quality” and press M button.
2. Press
button to select “Super”, “Fine”, or “Normal” per you request, and then press M
3. Press
button.
4. Press button to exit the menu and return to the normal mode.
Note: The resolution and quality will be shown on the LCD.
Resolution
1. In CAMERA mode, Press M button, the LCD will show as below.
button to select “Resolution” and press M button.
2. Press
28
3. Press
4. Press
button to select the image size, and then press M button.
button to exit the menu and return to the normal mode.
Other Function
In CAMERA mode, you can set some others function excluding the above: “Scenery”, “Color”. Please
refer to the above operation.
Recording audio files
1. Press POWER button to start digital video.
2. Rotate dial mode to make the arrow point at “ ” position.
3. Press Shutter button to start recording, and press Shutter button again to stop recording. You can
play this audio file in Playback mode.
29
Notes: 1. The recording time varies depending on the available space of memory.
2. The audio file that you record will be saved as WAV format.
3. When playing these audio files under PLAYBACK mode, you can press
per your request.
button to adjust volume
Mp3 Player
Before playing, please download some Mp3 files from your PC to this device.
1. Press POWER button to open digital video.
2. Rotate dial mode to make the arrow point at “Mp3” position.
button to select the Mp3 file that you want to play, and press
3. Press
volume.
4. Press Shutter button to start, press Shutter button again to stop playing.
button to adjust the
5. There are three kinds of playing mode in mp3 player. Press M button to select the icon
shown
on LCD, showing the mp3 files will be played in cycle; Press M button to select the icon
shown on LCD, and the selected mp3 will be played repeatedly; Press M button to select the icon
shown on LCD, showing the mp3 files will be played in sequence.
30
PLAYBACK Mode
Rotate dial mode to select “PLAYBACK” mode. (The arrow points at “
” position).
Video Clip playback
In PLAYBACK mode, the video clip with audio can be played.
1. Power on your digital video.
” position).
2. Rotate dial mode to select “PLAYBACK” mode. (The arrow points at “
button to select the clip that you want to play.
3. Press
4. Press Shutter button to play the video clip. Press Shutter button again to pause playing, and then
press this button to continue playing.
Still images playback
In PLAYBACK mode, you can browse the photos in full-screen (or thumbnail mode, zoom in mode,
slideshow).
1. Power on your digital video.
” position).
2. Rotate dial mode to select “PLAYBACK” mode. (The arrow points at “
31
3. Press
button to select the photo that you want to view.
. Digital Zoom: You can press T to zoom in the photo up to 4 x;
button to make all files in memory shown in thumbnails, press M button to exit
. Thumbnail Mode: Press
thumbnail view mode.
button to select“Slide show”.
. Slideshow: 1. Press M button. Press
2. Press M button.
3. All photos will be played in slideshow mode, press Shutter button to pause and press
to exit.
button to select” Rotate” and then press M
. Rotation: Press M button and then press
button to select scope of rotation. Press M button to save the picture after rotation.
button. Press
button to exit the rotation mode if you don’t want to rotate the picture now.
Press
Display on TV
The photos and video clip can be played on TV. Before connecting,
you must select the suitable TV mode (NTSC or PAL) in your DV.
1. Connect DV to TV with AV cable correctly.
2. Power on your DV and TV (AV mode).
3. You can use TV LCD instead of your DV LCD.
Playing audio file
1. Power on your digital video.
2. Rotate dial mode to select “PLAYBACK” mode. (The arrow points at “
button to select the audio files (wav) that you want to play.
3. Press
4. Press Shutter button to play the audio files.
5. Press Shutter button again to stop playing.
32
” position).
Note: You can press
to adjust volume of audio files per your request when playing.
Delete All/Single
1. In PLAYBACK mode, press M button.
button to select “Delete” and press M button.
2. Press
button select to “Delete Current”, and then press M button.
3. Press
button select to “Yes” and then press M button, the current file is deleted; If you
4. Press the
select “Delete All”, all files (exclude the locked files) in memory will be deleted at one time.
Notes: If you select “Delete All”, either all files in flash memory or external card will be deleted, depending on
your selection of media. All files in PLAYBACK mode exclude MP3 files.
33
Protect Video clips/Photos
1. In PLAYBACK mode, press M button.
button to select “Lock” and press M button.
2. Press
button select to “Lock Current”, and then press M button. The current file is locked; If
3. Press
you select “Lock All”, all files in memory will be protected.
4. Press button to exit the menu and return to the Playback mode.
Notes:
. At step 3, if you select “Unlock Current” or “Unlock All”, the relative protection will be canceled.
Crop the Photo
1. In PLAYBACK mode, press M button.
button to select “Crop” and press M button.
2. Press
/
button to select the part that will be remaining. Then press Shutter button to view
3. Press
the area you have cropped in full screen.
4. Press Shutter button again to save it as new image file or press M button
to exit without saving the cropping area.
Note: if the file you delete is locked, a “File Protect” will appear on the LCD.
34
Software Installation
Please put the software CD in your computer. Choose the right language per your request. This will
launch the Video impression software installation. Follow the directions appear on your screen.
NOTE:
• Do not connect the DV to your computer during installing software.
• Please check the “Install DirectX”,which support playing video files.
If your computer can’t install automatically, please install manually as the following steps.
1.
Place the CD into your CD-ROM drive.
2. Click right key at the CD-ROM drive, then click \open\autorun.exe.
3. Follow the directions of the installation wizard.
35
Downloading
Before downloading, please rotate mode dial to select
select” Mass Storage”.
(PC mode), and then press
button to
Transfer still images/video files from DV to your PC
Connect the DV to computer with the USB cable.
1. Double-click the icon My Computer.
2. Double-click the icon MASS STORAGE.
3. Double-click DCIM icon.
4. Double-click 100NVTIM icon.
5. You can now copy and paste the images to any directory you choose.
Notes:
There can be still images, video files (mp4 format) and audio files (wav format) in the file named “100
NVTIM”.
36
37
Copy Mp3 files from PC to your DV
1. Double-click the icon My Computer.
2. Double-click the icon MASS STORAGE.
3. Double-click MP3 icon. You can now copy and paste mp3 files to it.
38
Video impression Application
Video impression software is a tool for producing custom movies and slide shows using your own video
clips, picture, and sound tracks. There are 6 steps to achieve producing wonderful movies.
1. Media
1. On the main interface of this software, click the icon
39
to select files.
2. To our DV, there are two ways to get the video clips, audio files or photos.
Select files directly from the DV
For your DV, In PC Mode, you select “Mass Storage”, and then connect DV to PC with USB cable.
The flash memory will be used as a movable hard disk on your computer, and you can select files
from it.
Select files from memory card
You can also select files directly from a memory card.
3. Add items from your albums to the Storyboard, and they will combine to create your final movie or
slide show.
40
2. Edit
This step is only available for video projects and not slide shows. It lets you adjust the brightness and
contrast of still images and videos on the Storyboard. You can also set the display time for still images
and "trim" audio and video files to play only the sections that you want.
41
3. Effects
Here you may add special effects that occur as one component on the Storyboard changes to the other.
You may either add these “transitions” manually, or apply a "theme" to your entire project.
42
4. Text
You can add text to any video or still image on the Storyboard. Text can appear stationary or move
about the screen in various ways. This step is only available for video projects. Meantime, you can set
the font, size, color, and shadow of text.
43
5. Narrate
This step is labeled as "Audio" when working on a slide show project. Here you may record audio tracks
and add them to the Storyboard. You can include as many audio tracks as you like, with two playing
back simultaneously at any given time. Because your videos may already have sound, you may
actually have a total of three tracks playing at once.
44
6: Produce
The final step saves your project. When you're finished with this step, everything on the Storyboard will
be combined into your video or slide show. Options here will vary depending on the type of project you
make. Video projects will have more save options (tabs) than slide show projects. Some versions of the
program will allow you to save to DVD.
45
Web Cam
Video Conference
Your DV can be used as a PC camera to conduct image transmission or hold online videoconference
1. Connect the camera to your computer with USB cable correctly.
2. Select<My Computer>\<Local Disk(c:)>\<Program Files>\<NetMeeting>, and then run the
videoconference software Microsoft NetMeeting on your computer according installation instruction.
46
Chat with MSN
Your DV can be used as a PC camera when you are chatting with your friends with MSN
1. Rotate mode dial to select PC mode, and then press
button to select“PC Camera”.
2. Run and sign in the MSN software on your computer.
3. Connect the camera to your computer with USB cable correctly.
5. Select the person who you want to chat
and then press “OK”.
4. On the main interface of MSN, you select
[Actions]\Voice/Video]\ [Start a Video
Conversation] in sequence.
47
6. Press “Next” to continue.
7. You can select speaker and adjust
speaker volume, and then press “Next” to
continue.
48
8. You can select Microphone and adjust Microphone volume, and then press “Next” to continue.
9. Press “Finish” to finish setting.
Now, you can chat with your friends with webcam.
49
Print Photos
If there is a printer, which supports PictBridge function in home or office, you can connect DV to your
printer with USB cable directly.
1. Power on your printer.
2. Power on your DV.
mode to select a photo you want to print.
3. Rotate your DV to
to select Print on LCD.
4. Press M button and then
5. Connect DV to your printer with USB cable directly.
to cancel and
to start printing.
6. Press
to have a setting relative to the printing.
7. You can press
50
Troubleshooting
Relative parts
Symptom
Taking video/photos
The DV can’t take
video/photos after you
press Shutter button.
Explanation/Solution
Auto Power off
The camcorder goes off
automatically.
Battery pack
The battery pack is
quickly exhausted.
.The atmospheric temperature is too low.
.The battery pack has not been charged fully.
.The battery pack is completely dead, and cannot be
recharged, Use another battery pack.
. You take too many photos with flash in black.
DV and battery
Photos
The DV or battery is hot
The photos are too blur
Deleting
You can’t delete the files
. Using the DV continually for a long time.
. Exposure is not sufficient, you can set larger EV digit.
. You may take photos without using flash.
. Adjust brightness of the LCD monitor.
. They were locked. You can cancel protection before
deleting these files
.The battery level is too low and you can charge it in time.
/
mode. Please rotate dial mode to
.The DV is not in
the correct position.
. Auto Power off. Restart your device.
. The flash memory or SD card is fully loaded with files.
Please delete some useless files or change an memory
card.
.You have left the camcorder set to STBY for more than 60s
or120s without using it.
.The battery pack is fully exhausted.
51
SD card
SD card
Time Set
Downloading
Video file
You can’t format a SD
card
You can’t insert an
memory card correctly
Date/Time shown on
LCD is incorrect
Clips/ still image/ mp3
can’t be downloaded
from DV to PC.
Can not play video in
your computer
. It is locked. You can cancel protection.
. The direction of inserting card may be incorrect.
. The set is wrong. Please re-set Date/Time.
. There may not install the drive of DV in your PC. Please
install drive before downloading.
. You have not installed the DivX codec for your MPEG4
videos decompression. About your installation please read
“Installing Digital Images Manager Software”.
52
Specifications
Image Sensor
Image Resolution
LCD Display
2592 x 1944 Mega Pixels CMOS Sensor
DigitalCamera:
3648*2736(10M),3072*2304(7.0M),2592*1944(5.0M),2048*1536(3.0M),1280
*960(1.3M)
Video: 640*480 (VGA) / 320*240 pixels (QVGA)
PC CAM: 640*480 pixels (VGA), 320*240 pixels (QVGA)
2.0” TFT (270degree eddy)
Internal Memory
Internal DDR (16MB),32M NAND flash memory
External Memory
SD/MMC card for optional SD cards
Lens
f=7.45mm, F3.0
Zoom
4X Digital Zoom
Optical Viewfinder
N/A
Shutter Speed
About 1/6-1/15000S
Exposure
-2.0EV ~ +2.0EV
White Balance
Auto, Daylight, Tungsten, Fluorescent, Cloudy
Self-timer
10s/20s
File Format
Still Image (JPEG) / Video (Mpeg4)/MP3/WAV
Printer
Pictbridge compatable
53
128 MB SD card:
1. Photos (JPEG format):
Normal quality: about 636pcs (1M); 248pcs (3M); 154pcs (5M); 109pcs
Storage capability (128MB SD card)
(7M); 77pcs (10M)
Fine quality: about 423pcs (1M); 165pcs (3M); 102pcs (5M); 72pcs (7M);
Note: any size SD card can be used up
51pcs (10M)
to 2 GB, which can be purchased at most
Super quality: about 338pcs (1M); 131pcs (3M); 82pcs (5M); 58pcs (7M);
consumer Electronic retail stores.
41pcs (10M)
Please use a good quality card
2. Video clips (AVI format): about 00:05:05 hours(30fps/VGA); 00:10:11
hours (30fps/QVGA)
3. Audio: about 06:17:08 hours
Flash
YES(IGBT)
Interface
USB 2.0
TV out
YES
Microphone
YES
System Requirements
Battery
Win98SE/ME/Win2000/XP/VISTA
Software CD, User's manual, AV cable, USB cable, earphone, Gallus,
hop-pocket
3.7V Li-Battery
Working Temperature
0-40 ℃
Accessories
PO701116
54