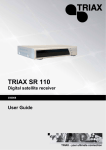
1
VER0220094800 HIGH DEFINITION DIGITALE SATELLITE-RECEIVER DVB 4800 Fig. 1.1: DVB 4800 (Symbol picture) USER MANUAL 1 General Imprint All rights reserved. Any reproduction without consent of cmx® is prohibited. cmx® reserves the right to modifications of the device. Designed by cmx® in Europe | Assembled in China TM©2009 cmx electronics -2- General CONTEXTS 1. GENERAL ...................................................................................... - 4 1.1. Safety precautions ................................................................. - 4 1.2. Disposal of waste electronic equipment ................................ - 4 1.3. Battery disposal ..................................................................... - 4 1.4. Copyright ............................................................................... - 5 1.5. Hearing protection ................................................................. - 5 1.6. Cleaning and maintenance .................................................... - 5 2. FEATURES ..................................................................................... - 5 3. LOCATION OF CONTROLS ................................................................ - 6 3.1. Main unit - front ...................................................................... - 6 3.2. Main unit - rear ...................................................................... - 7 3.3. Remote control ...................................................................... - 8 4. PREPARATION ............................................................................... - 9 4.1. Connection the system .......................................................... - 9 4.1.1. Connection with SCART cable ..................................... - 10 4.1.2. Connection with HDMI cable ........................................ - 10 4.1.3. Connection with component cable ............................... - 11 4.2. Connect to hi-fi system ........................................................ - 11 4.3. Connect to digital audio amplifier ........................................ - 11 4.4. Insert batteries ..................................................................... - 12 5. START OF OPERATION AND CONFIGURATION .................................. - 12 5.1. Start of operation ................................................................. - 12 5.2. General operation ................................................................ - 13 5.3. Configuration ....................................................................... - 14 5.3.1. Edit channel list .......................................................... - 15 5.3.2. Installation ................................................................... - 17 5.3.3. System setting ............................................................ - 19 5.3.4. Setting.......................................................................... - 21 5.3.5. Games .......................................................................... - 23 5.3.6. External memory ........................................................ - 23 6. TROUBLESHOOTING ..................................................................... - 24 7. WARRANTY ................................................................................. - 25 7.1. Warranty procedure ............................................................. - 26 7.2. Warranty has expired .......................................................... - 26 7.3. Shipping the unit .................................................................. - 26 8. TECHNICAL SPECIFICATIONS ......................................................... - 30 -3- General 1. General 1.1. Safety precautions Only connect to mains power supply (230 Volt/50 Hz). Do not place containers filled with water on top of the device. Do not place device in close proximity of water (e.g. sink, wash basin, etc.). The device can fall into the water and cause a short circuit. The device consumes some power during standby operation. For zero power consumption disconnect from mains power supply. During a thunderstorm disconnect the receiver from mains power supply and disconnect the LNB cable to the satellite dish. Place the device on a stable surface to prevent it from tipping over and causing damages or injuries. Condensation can form if the device is placed in cold surroundings. Leave the device for at least one hour in standby mode. Keep at least 10 cm distances at top and rear and 5cm at the sides for proper ventilation to avoid overheating. Do not subject the device to direct sunlight or high temperatures, this can result in fire. 1.2. Disposal of waste electronic equipment Your product is manufactured from high quality raw materials and should be recycled. Ask your municipality for collecting points for waste electronic equipment. Do not dispose of old appliances with the household waste. The symbol on the product, the instructions for use or the packing will advert about the methods for disposal. 1.3. Battery disposal The law requires returning exhausted batteries to public collection points or the dealer. Do not dispose of exhausted batteries with the household waste. -4- Features 1.4. Copyright It is illegal to copy, send, exhibit, broadcast via cable, publicly show or rent copyrighted materials without consent. 1.5. Hearing protection Select a moderate volume to protect your hearing. Only turn the volume to a level where you can still hear ambient noise. 1.6. Cleaning and maintenance Before cleaning disconnect from mains power supply. Do not clean with liquid cleaning agents or a wet cloth, this can cause a short circuit. Cleaning the casing Clean the casing with a dry cloth. 2. Features This satellite receiver DVB 4800 allows you to receive and playback free-to-air not encrypted channels with a CI module (common interface) and corresponding CAM card (smart card). CI-Module and CAM card are not including in delivery and in specialized traders available. -5- Location of controls 3. Location of controls 3.1. Main unit - front Fig. 3.1: front DVB 4800 (Symbol picture) STANDBY 1 On/off 2 VFD Display 3 POWER LED for operation 4 VOL- Decrease volume / cursor left 5 VOL+ Increase volume / Cursor right 6 ▲CH + Channel changing / next channel 7 OK Confirm the range 8 MENU Menu button 9 ▼CH - Channel changing / previous channel 10 USB Port for MP3 player / USB stick 11 CI Port for Smart card -6- Location of controls 3.2. Main unit - rear Fig. 3.2: rear DVB 4800 (Symbol picture) 1 LNB IN SAT antenna input (75 Ω input) 2 VCR SCART in-/output for A/V-recorder 3 TV SCART output for TV 4 HDMI HDMI Digital Audio/Video output 5 YPbPr Component output 6 100-240V~ Power cable 7 ON/OFF Power switch 8 L/R 2 channel audio output 9 COAXIAL coaxial digital audio output -7- Location of controls 3.3. Remote control Fig. 3.3: infrared remote control DVB 4800 (Symbol picture) 1 STANDBY On/off 2 MUTE Mute the sound 3 0-9 numbers / digit entry (A-Z); 0; Sleep timer 4 TV / SAT Toggle between TV/SAT 5 VOL -/+ Decrease volume / increase volume 6 P- / P+ By activated program list: changing between program lists 7 EXIT Menu exit / flashes fade out 8 ► Cursor button, Normal mode: increase volume 9 EPG Electronic program guide 10 TIMER Timer / function button BLUE 11 YELLOW Function button YELLOW 12 FIND Program search by name 13 AUDIO Select audio track 14 PVR For recording and playback 15 SUBT Subtitle disable/enable (if sent) -8- Preparation 16 INFO Accessing program parameters 17 GREEN Function button GREEN 18 V-FMT Changing size of picture / function button RED 19 FAV Favourite lists indicate 20 ▼ Cursor button/ Normal mode: channel change 21 ◄ Cursor button, normal mode: decrease volume 22 OK Confirm the range 23 TEXT View teletext (switch transparent) 24 ▲ Cursor button, normal mode: channel change 25 MENU Menu button 26 RECALL Previous program 27 CH -/+ Previous program /next program 28 TV/ RAD Toggle between TV/RADIO 4. Preparation 4.1. Connection the system Follow these steps to connect the system: Ensure that all units are turned off when connecting. To avoid image interference only connect the satellite receiver via a video connection to your TV set. 1. Connect the mains power cable to a wall outlet. 2. Connect the TV with the receiver. Scart, HDMI, RCA, component, 2-channel or coax cable are not supplied. You can connect the satellite receiver in several modes to TV set, recording device (e.g. VCR) and other devices. Find details in chapter 4.1.1. Heed the user manuals for your TV set ant the other devices. -9- Preparation 4.1.1. Connection with SCART cable 1. Connect the SCART cable into the SCART jack “TV” on the receiver. 2. Connect the SCART cable with the TV. 3. To connect video devices connect a scart cable to the receiver’s “VCR” scart connector. To connect hi-fi systems connect the RCA cable to the receiver’s „AUDIO R“ and „AUDIO L“ connectors. 4.1.2. Connection with HDMI cable Fig. 4.1: Connection with scart cable 1. Connect the HDMI cable into the HDMI jack “HDMI” on the receiver. 2. Connect the HDMI cable with the TV. 3. To connect video devices connect a scart cable to the receiver’s “VCR” scart connector. 4. To connect hi-fi systems connect the RCA cable to the receiver’s „AUDIO R“ and „AUDIO L“ connectors Simultaneous operation of the receiver via SCART and HDMI connectors is not possible. You have a signal either on the SCART or the HDMI output. Playback from a video device connected to “VCR SCART” via the HDMI connector is not possible. Fig. 4.2: Connection with HDMI cable - 10 - Preparation 4.1.3. Connection with component cable Connect a TV set with YUV connectors (YPbPr components) via a YUV component cable (YPbPr) to the receiver’s YPbPr component output. 1. Connect the component cables with the receiver. 2. Connect the component cable with the TV. 3. To connect video devices connect a scart cable to the receiver’s “VCR” scart connector. Fig. 4.2: Connection with component cable The component cable does not send audio signals to your TV set, connect your receiver to a hi-fi system 5. Connect the RCA cable to the receiver’s „AUDIO R“ and „AUDIO L“ connectors Alternatively connect a digital audio receiver for 5-CH audio via the digital “COAX” output to your receiver. 4.2. Connect to hi-fi system For audio playback connect your hi-fi system via RCA cable to the receiver. You need not turn your TV set on to use the digital radio function of the receiver. You have the audio output from your connected hi-fi system. Use your TV set only to select the radio station. 1. Connect the „AUDIO-R“ and „AUDIO-L“ on the audio inputs from the stereo system. Do not connect your hi-fi’s phono input to the receiver; this can damage your hi-fi-system. 4.3. Connect to digital audio amplifier For 5-CH audio (Dolby Digital/AC3) connect your digital audio receiver to the receiver’s coax output. - 11 - Start of operation and configuration Do not connect your hi-fi’s phono input to the receiver; this can damage your hi-fi-system. For radio reception you need not turn your TV set on. To receive the TV sound via your hi-fi system turn your TV set on. 1. Connect the coax cable to the receiver’s „COAXIAL“ connector. 2. Connect the coax cable to the digital audio amplifier. 3. Activate the receiver’s digital audio output in the menu item system settings TV system. 4.4. Insert batteries The battery compartment is at the rear of the remote control. 1. Insert two AAA batteries (1,5V) observing the polarity (+ and -) as marked inside the battery compartment. Point the remote control towards the IR receiver on the main unit. (Range of 5m with 60° angle to both directions). The lifetime of the battery is approximately 6 months with normal use. To avoid damage remove the battery from the remote control during extended periods of non-use. 5. Start of operation and configuration 5.1. Start of operation See the details in chapter preparation (see 4.1 connection the system) 1. Select the AV channel on your TV set. Some TV sets detect the satellite receiver’s output switching voltage and switch SCART connection automatically to AV operation. The satellite receiver’s main power switch is at the rear of the unit and must be set to “ON”. The default password is „0000“. 2. In the submenu installation select the item Antenna connector. Select the antenna type. 3. In the submenu Installation select the item Satellite list. - 12 - Start of operation and configuration A list with all stored satellites is displayed. Press OK to activate or deactivate the desired satellite, a check mark is displayed. 4. Select menu item Antenna connector to set the LNB frequency and press EXIT to finish. 5. The submenus single / multi satellite allow setting the automatic channel search, press OK to confirm and start. 5.2. General operation For general navigation and control via remote control press ▲, ▼, ►, ◄. And confirm with OK or press EXIT to cancel a function. Besides navigation and control via the cursor buttons you have the shortcut keys, which are described in chapter 3.3 remote control. Program name Received satellite Current date Current time (according to setting in time menu) Program memories TXT-Symbol Is displayed if the select channel offers teletext EPG-Symbol Is displayed if the selected channel offers the electronic program guide HEART-Symbol Is displayed if the selected channel is inserted in one of the favourite lists. Info Displays information for the current and next program Info Display information about the active program list. - 13 - Start of operation and configuration 5.3. Configuration Press MENU to display the main menu. Edit channel list TV channel list Radio channel list Delete all Installation Antenna connector Satellite list Antenna setting Single satellite search Multi satellite search TP list System setting Languages TV system Local time setting Timer setting PIN OSD setting Favorite Others Settings Information Default setting Software-Update Common Interface USB Remove safely USB device Games Tetris Othello Sudoku External memory Recording manager - 14 - Start of operation and configuration HDD information HDD format PVR setting 5.3.1. Edit channel list Select the desired menu item and press OK to open the submenu. 5.3.1.1. TV program list FAV (Favorites) 1. Press FAV to select the favorites. The field „FAV“ is highlighted and activated. 2. Select the desired channel and press OK to confirm. Select the favorite list to insert the selected channel. The heart icon is displayed next to the selected channel. locking 1. Press the shortcut key RED to select channels to be locked. The field “locking“ is highlighted and activated. 2. Select the desired channel and press OK to confirm. Enter your PIN (default PIN is „0000“) to confirm your selection. The lock icon is displayed next to the selected channel. Press the shortcut key RED to deactivate the function. Press EXIT to exit the menu. 3. To view locked channels enter PIN first. Channel lock must be activated in system setting – PIN. The locking functions are invalid if deactivated. Skipping 1. Press the shortcut key GREEN o select channels to be skipped. The field „skip“ is highlighted and activated. 2. Select the channel and press OK to confirm. The skip icon is displayed next to the selected channel. Press the shortcut key GREEN to deactivate the function. - 15 - Start of operation and configuration Press EXIT to exit the menu. Moving 1. Press shortcut key YELLOW to select the channels. The field “Move” is highlighted and activated. You can move several channels simultaneously. 2. Select the channel and press OK to confirm. The move icon is displayed next to the selected channel. 3. Navigate the cursor to the position to insert the channels. 4. Press shortcut key YELLOW again to insert the channels in the current position. Press EXIT to exit the menu. Editing 1. Press shortcut key BLUE to edit. ABC Press the shortcut key RED to select the sorting type for the channel list. Name ascending (A-Z) Name descending (Z-A), FTA / Pay TV Locked channels Changing Press shortcut key GREEN to select the channel to be renamed. Press OK to confirm. Follow the screen prompts to rename the channel. Delete Press shortcut key BLUE to select the channel to be deleted. Press OK to confirm. The delete icon is displayed next to the selected channel. Press EXIT to exit the menu. When exiting the menu “Edit channel list” confirm the security prompt to save the changes. - 16 - Start of operation and configuration 5.3.1.2. Radio channel list For editing the radio channel list same above functions as described for TV channels, are available. 5.3.1.3. Delete all Enter your valid password and confirm the security prompt to delete all saved TV and radio channels. Reset to default to restore the factory channel list. 5.3.2. Installation 5.3.2.1. Antenna connector Select your antenna type. 5.3.2.2. Satellite list Display all saved satellites. 1. Press OK to activate/deactivate the desired satellite. A check mark is displayed. Changing Press shortcut key RED to edit the satellite name and the position. This setting is important for rotating motor antenna. New Press shortcut key GREEN to manually add a satellite. Delete Press shortcut key BLUE to delete a saved satellite and its channels. 5.3.2.3. Antenna setting Set the connected satellite antenna. Fixed orientation Satellite List of active satellites from the satellite list. LNB-Frequency Set LNB frequency. Default setting is “universal“. - 17 - Start of operation and configuration Transponder List of programmed transponders DiSEqC 1.0 Set to multi satellite reception 22K Automatically setting Polarization Set polarization Motor Antenna LNB type Set LNB type Motor type Set motor type Local. Longitude Only motor type - USALS Delete all Delete satellite positions Not possible for motor type Motor settings Access DiSEqC 1.2 control centre Limitation Select turning radius Single satellite search Search activated satellite in this submenu for channels. Satellite Select satellite Only for FTA Yes: search free-to-air channels No: search all channels Channel search Search TV channels, radio channels or both Network search Only available in search mode “scan preset” Search mode Auto scan, scan preset, only created Transponders are scanned Search Press OK to start scanning. Channels are added to general satellite list. Multi satellite search For complete satellite scan you have the same functions as for above single satellite search. TP List Edit the transponders of active satellites in this submenu. Changing Press shortcut key RED to change transponder - 18 - Start of operation and configuration parameters. New Press shortcut key GREEN to add new transponder. Delete Press shortcut key YELLOW to delete transponder. Search Press shortcut key BLUE to scan transponder for new channels. 5.3.3. System setting Select the desired menu item and press OK to open the submenu. 5.3.3.1. Language Language Selection the language First audio channel Select audio language. (if offered by station) Second audio channel Select audio language (if offered by station) Tele text Select characters 5.3.3.2. TV system Video resolution Selection of resolution (Standard 1080i_25) HD programs from 720p Size of picture Selection from the size of picture 4:3 LB, 4:3 PS, 16:9, AUTO (preset) Video signal Setting the colour scheme HD programs – setting YUV Screen setting brightness, contrast, saturation HDMI video output Preset Y, CB, CR – 4:4:4 Digital audio output Preset LPCM Out Change digital audio amplifier to “BS OUT”. - 19 - Start of operation and configuration 5.3.3.3. Local time setting GMT use Switch on and off GMT on GMT Difference: select local shift Summer time: on/off GMT off Adjust date Adjust time 5.3.3.4. Timer setting 8 timer settings are available to perform a service at a preset time, e.g. recording. Timer number Select timer 1 through 8 Timer mode Select between Off, Once, daily and weekly. Timer service VCR – at the preset time the receiver switches to the programmed event (also in standby mode). USB – Program time - controlled recording in case an external USB device is connected. Start channel Select the channel to be started. Start date Select the date for the timer. On time Select the on time for the timer. Duration Select the duration for the timer. Press OK to save your settings. 5.3.3.5. PIN Enter your PIN (the default PIN is „0000“) Menu lock Activate/deactivate the menu lock Program lock Activate/deactivate the channel lock - 20 - Start of operation and configuration New password Enter a new password. Confirm password Repeat your new password. After confirming the new password it cannot be cancelled! 5.3.3.6. OSD setting OSD duration Select the duration of the OSD overlay. OSD transparency Select the transparency of the OSD overlay. 5.3.3.7. Favorite 8 favorite lists are available and can be renamed. 5.3.3.8. Other LNB power supply On/off. Preset is activating. Turn the power supply off in case antenna or cable system without power supply is connected to the receiver. Sound signal Activate/deactivate the acoustic satellite finder signal. 5.3.4. Setting 5.3.4.1. Information Open the submenu to view relevant data for the satellite receiver. 5.3.4.2. Default setting Confirm again to reset to default setting. Please follow the screen prompts. Press and hold the standby button on the front of the receiver for 10 seconds to reset to default settings. 5.3.4.3. Software update Software update is normally not necessary for receiver operation. - 21 - Start of operation and configuration Via USB Software update via USB port is preferred. Via satellite Necessary data are preset. Confirm the field “start” by pressing OK. Direct your satellite system to ASTRA1 19,2°east for software update. Software update does not save new TV channels, but only serves the software update of the receiver. Software update may take up to one hour. We recommend resetting to default settings before and after software update. The saved channel lists are deleted. 5.3.4.4. Common Interface The common interface slot serves extension with CI module to receive encrypted channels (Pay TV) with Cam card (smart card). The encryption system must correspond with the used smart card. CI module and Smart card are not supplied. Inserting CI module or smart card incorrectly can lead to receiver, CI module or smart card being damaged. 5.3.4.5. USB This point is only active with a readable storage device being connected. The readable files are JPEG images. 1. Connect the USB storage media. Readable files and folders are displayed. Single images Are displayed in the preview Press OK to switch into the full screen mode. Several images 1. 2. 3. Press the function button GREEN and select add playlist. (Each image single). Confirm with OK. Press the function button RED. Playlist will appear. 5.3.4.6. Remove safely USB device It is for safely removal of the USB storage media from the receiver. - 22 - Start of operation and configuration 5.3.5. Games There are 3 games available for entertainment. 5.3.6. External memory Connect a USB storage device to use this menu item. Programs that were recorded encrypted can be played back and decrypted after inserting the corresponding CI module and smart card. 5.3.6.1. Recording manager Here you can edit recorded programs. Rename Press the function button RED. Lock Press the function button GREEN. Delete Press the function button BLUE. 5.3.6.2. HDD information Information regarding the connected USB storage device. 5.3.6.3. HDD format Format the connected USB storage device. During formatting all saved data on the storage device are deleted. 5.3.6.4. PVR setting Time shift The time shift function allows you to interrupt a currently received program and resume watching it later. The receiver records the program to the USB storage device. The displayed image is frozen and can be resumed later. This menu item must be activated to have the function. 1. Press PAUSE once in normal mode. When you are ready to resume watching, press PLAY. The program is resumed from this point in time, when you pressed PAUSE. - 23 - Troubleshooting In case this menu item is deactivated only the image is frozen after pressing PAUSE. The time shift recording is not permanently saved on HDD: 2. Selecting a different channel or stopping the recording will cancel the time shift recording. The time shift function has a capacity of max 90 minutes. Skipping Select skipping steps in playback mode with the skip buttons. Minimum steps are 30 seconds, maximum steps are 30 minutes. TS file size Select the file size for partitioning the recording to external USB storage de The recommended size is 1GB. Time shifting for recording Activate/deactivate time shift function to record programs. Record subtitles With this function activated the subtitles (if broadcast) are recorded as well. 6. Troubleshooting Contact the service hotline or use the contact form on the homepage in case of problems with the system that are not dealt with here. Malfunction Solution Display is not flashing Check the power cord and the power socket. Turn on the power switch on the rear side. No picture / no sound No / low signal Ensure the connectors. Check the alignment of the antenna. Check the settings of the devices. Check the alignment of the antenna. - 24 - Warranty Remote control does not work Ensure the connectors. Check the function from the LNB. Decrease the distance to the system. Exchange the batteries. Point the remote control towards the system’s IR sensor. Image black & white Software crashed Select correct color standard. Disconnect from mains power supply and reconnect after a few seconds. 7. Warranty This system comes with a 24-month warranty from the date of purchase. Please keep your purchase documents! In case of manufacturing or material defects the warranty consists of rectification of defects or exchange. The warranty does not include damages or Malfunctions due to improper use Wear and tear Repairs by third parties. The warranty does not include Display damage Firmware update Accidental damage. Repair does not extend the warranty period. - 25 - Warranty 7.1. Warranty procedure In case of malfunctions, please contact: Your dealer Service hotline o Austria: +43 0720 502671 – please dial with the zero! o Germany: +49 (0)180 166 66 264 621 o Switzerland: +41 (0) 848 00 3322 Contact form – www.cmx-electronics.com 7.2. Warranty has expired Please contact us by phone or contact form in case your warranty has expired. We will help you! Please inform us about the following: Unit type Purchase date malfunction 7.3. Shipping the unit To ensure a quick response, please observe the following in case you send us the unit: Send unit and accessories Send postage free to service centre Attach purchase documents Attach filled-out warranty card Error description Example for error description - 26 - Warranty Wrong Correct Unit is defect Unit does not respond. unit isn’t working Unit cannot be switched on Sender information: Name, address, ZIP code, city, phone number and e-mail address. Please cut out the warranty card. - 27 - Warranty - 28 - Warranty - 29 - Technical specifications 8. Technical specifications Receiver Frequencies 950 ~ 2150 MHz Video resolution 720 x 576 (Pal) / 720 x 480 (NTSC) / 1280 x 720 / 1920 x 1080 IF bandwidth 55 MHz / 8 MHz (under 5 MS/s) DiSEqc Version 1.0 / 1.2 Symbol rate 1 ~ 45 MS/s Error correction (FEC) 1/2, 2/3, ¾, 5/6, 7/8, auto Input speed Max. 15 Mbit/s LNB Power output 13/ 18V GS / 0,30 A-max. Control 22 kHz ± 2 kHz / 0,6 V pp ± 0,2 V Connectors Inputs Antenna (Type F, IEC 169-24) Scart: Video CVBS, Audio L/R for VCR USB 2.0 Outputs twice Scart: Video CVBS, Audio L/R for VCR, TV 2 channel audio coaxial digital audio HDMI Digital audio/video component (YUV) General Size of picture 44:3 LB, 4:3 PS, 16:9 - 30 - Technical specifications Power consumption 25 Watt (Standby 2 Watt) Mains power AC 100-240 V ~ 50/60 Hz Temperature operation: 0°C ~ 40 °C storage: -40°C ~ 65°C Dimensions 310 x 50 x 200 mm - 31 - Technical specifications www.cmx-electronics.com - 32 -