1
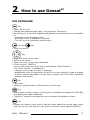
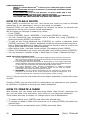
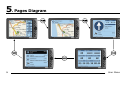
USER MANUAL
GEOSAT2c-v100a941ENG -151104
Dear customer,
thank you for choosing our satellite navigation system Geosat2C GPS Car Navigator.
We hope it will be helpful to give you the right prompts to reach your destination.
Before using it please read carefully the user manual to know all its features and to
be able to enjoy it better. For further information please visit our website
www.avmap.it.
WARNING
For your own safety and to properly use Geosat2C GPS Car Navigator, please observe the following instructions:
♦ Do not place Geosat2C where it can interfere with the vehicle operating controls and safety devices (i.e.
Airbag) or obstruct the driver’s view of the driving conditions.
♦ Before starting to drive be sure Geosat2C is well fixed to its bracket.
♦ While driving, follow only the voice-prompted directions. Do not change the route or touch the unit. You
cannot enter any data while you are in transit, please put vehicle in park before entering data.
♦ Do not leave Geosat2C in direct sunlight. In the event of overheating, let the unit cool away from heat
sources before operating again.
♦ Please handle gently and avoid water/ moisture exposure.
♦ Avoid bumping the unit, which could damage the GPS receiver located in the antenna.
♦ Never format the Memory Compact Flash, or modify its data. Any alteration can damage the navigator.
♦ Geosat2C can operate only with C-Map Memory Compact Flash.
♦ When driving pay full attention to the weather and traffic condition, do not rely only on the information
given by Geosat2C.
♦ The voice guidance and the tracks shown by Geosat2C could be wrong due to errors in the digital chart or
changes of the traffic signs (i.e. One-way, round-about).
♦ Do not follow those suggestions which are wrong or against the law, but decide according to your own
driving experience and if necessary make the unit recalculate the track.
♦ Using Geosat2C implies that the user accepts and follows all the instructions on this manual.
♦ The manufacturer and the dealer disclaim all liability for any use of this product in a way that may cause
accidents, damage or that may violate the law.
Copyright 2004
All right reserved. Printed in Italy. No part of this publication may be reproduced or distributed in any form or by any means, or stored
in a database or retrieval system, without prior written permission of the publisher.
Summary
1. Installation ........................................................................................................................................................................... 25
INSTALLATION ........................................................................................................................................................................ 25
MOUNTING THE BRACKET .............................................................................................................................................. 25
MOUNTING THE GPS ANTENNA .................................................................................................................................. 26
MOUNTING GEOSAT2C ....................................................................................................................................................... 26
2. How to use Geosat2C ..................................................................................................................................................... 27
THE KEYBOARD ...................................................................................................................................................................... 27
HOW TO PLAN A ROUTE .................................................................................................................................................. 28
HOW TO CREATE A MARK .............................................................................................................................................. 28
FURTHER FUNCTIONS ....................................................................................................................................................... 29
HOW TO TUNE GEOSAT2C ............................................................................................................................................... 29
SYSTEM SETUP ....................................................................................................................................................................... 30
3. Warranty Conditions and Technical Supporting ................................................................................ 32
DEFINITIONS ........................................................................................................................................................................... 32
WARRANTY ................................................................................................................................................................................ 32
Validity ................................................................................................................................................................................ 32
Terms for the denunciation of the conformity defect ......................................................................... 32
Check of the conformity defect and reparations on warranty ..................................................... 32
Replacement ................................................................................................................................................................... 32
Immediate expiry of the warranty effects ................................................................................................. 33
Limitations of the Warranty ................................................................................................................................. 33
Modification, Extension, Variation .................................................................................................................... 33
Place of Jurisdiction .................................................................................................................................................... 33
ESECUTION PROCEDURE FOR THE REPARATIONS ON GUARANTEE ................................................ 33
TECHNICAL SUPPORTING CENTER .............................................................................................................. 34
4. Troubleshooting ............................................................................................................................................................... 35
5. Pages Diagram .................................................................................................................................................................. 36
MENU DIAGRAM .................................................................................................................................................................... 37
24
User Manual
1. Installation
INSTALLATION
Geosat2C is easy and quick to install.
MOUNTING THE BRACKET
Geosat2C can easily be mounted on every vehicle provided with car lighter, if installed wrongly it might not work properly. To work well it must be fixed on the
dashboard with one of the brackets given in the box. Do not put it on the passenger
seat, because it might be a dangerous distraction for the driver.
♦ The rotating bracket must be attached on the windscreen by its sucker, it can be
used on most vehicles. Clean the glass well, arrange the sucker on the windscreen
so that the navigator lays on the dashboard, then fix the sucker pulling the
locking lever.
♦ The bracket to fix Geosat2C on the dashboard is less flexible, but less bulky too. To
avoid errors it is better to put the bracket into the navigator and check if it is right
for the dashboard of your vehicle, before fixing it. To fasten the bracket you must
make a hole in the dashboard in a flat part. Be careful to choose the right point
before making the hole, otherwise you might not be able to look at the navigator.
Placing the bracket well is of great importance for the safety of driver and passengers, when you install it remember that:
♦ the higher is the navigator above the dashboard, the fewer are the risks of being
distracted by it while driving
♦ the bracket must be put where it is not dangerous in case of accidents or sharp
braking
♦ the bracket, the unit and its cables must not be placed over airbag panels or in
field of airbag deployment.
User Manual
25
MOUNTING THE GPS ANTENNA
The next step is the GPS antenna installation. The end of the antenna is magnetic
so that you can place it outside the vehicle, its cable is made of a torn proof
material so that it does not break even if it is closed between the door and body of
the vehicle. The antenna can be placed on the dashboard or on the back of the
vehicle, but Geosat2C will work better if it is put outside, on the bonnet or on the
roof. After fastening the antenna take its cable inside the vehicle passing it through
the passenger door, and put it in the glove box, where you will leave the hank; pull
out the part of the cable you need to connect it to Geosat2C by its end pin.
The higher is the GPS antenna, the better it will receive the signal.
WARNING!!!
DO NOT COVER THE ANTENNA WITH SHIELDING MATERIALS (METALS,
ETC.).
DO NOT PUT THE ANTENNA IN THE BOOT NOR IN THE GLOVE BOX.
THERE MUST NOT BE ANYTHING BETWEEN THE ANTENNA AND THE SKY.
IF YOU PUT IT INSIDE MAKE SURE THAT THE GLASSES OF YOUR
VEHICLE ARE NOT SHIELDED, IF THEY ARE, PUT IT IN THE UNSHIELD
AREA OR OUTSIDE.
MOUNTING GEOSAT2C
After fixing the bracket, placing the antenna and connecting it to the navigator put
the end part of the bracket into the runners you find in the back of the unit and
insert the 12 Vdc 12-24 Vdc adapter into the slot of the car lighter.
At this step the installation is completed, pressing [PAGE] you can use Geosat2C.
If the adapter works well the led is on.
According to the type of vehicle you can use Geosat2C also when the engine is not
running.
Summary:
♦ Pay much attention when choosing the part of the dashboard where you want to
fix the bracket. Doing this remember what written above.
♦ Install the magnetic antenna.
♦ Keeping the passenger door open, take the cable into the vehicle.
♦ Put the hank into the glove box.
♦ Close the glove box letting out the part of cable with the connecting pin.
♦ Connect the cable of the GPS antenna to Geosat2C.
♦ Put Geosat2C in the bracket.
♦ Put the 12 Vdc 12-24 Vdc adapter in the car lighter slot.
26
User Manual
2. How to use Geosat
2C
THE KEYBOARD
Key
♦
♦
♦
Power On the unit.
Change the displayed page (Map, Trip Computer, Directions).
By pressing for 1 second to display the Brightness and Contrast menu it is possible
to:
− Activate the fast brightness shift.
- Move the cursor to change the intensity.
- Turn Off the unit (press and hold the key).
Key and
♦
Key
Zoom out and in.
Key
♦
♦
♦
♦
Move the arrow on the map.
Select menu items.
Select the keys on the virtual keyboard.
"Enter function" [ENTER]:
Press in the center the cursor key to activate the "Enter function".
The "Enter function" is available to:
- change or entry data in menu or submenu
- activate the menu (in Map Mode, from GPS or cursor position) to add or change
a Mark, receive information on the chart, activate the A-B function (distance
between two points).
Key
♦
♦
Quit menu.
Return to original position (GPS position) on the map.
Key
♦
♦
Find a place, a town, a Mark, a point given its latitude and longitude (LAT/LON)
and display the latest researches.
Press for 1 second to activate the menu to adjust the speaker volume.
Key
♦
Display the menus: press once to see the menu about the current page, press
twice to see the main menu to set up the unit and to select special functions.
User Manual
27
VERY IMPORTANT!!!
When you switch On Geosat2C a note for your safety will appear on the
display.
If you select YES you can use Geosat2C in passenger mode and all the
functions are activated.
If you select NO you can use Geosat2C in driver mode and a few
functions are not activated if the vehicle is moving.
TO CHANGE THE MODE YOU MUST SWITCH THE UNIT OFF, SWITCH IT
ON AGAIN AND THEN CHOOSE THE MODE YOU PREFER.
HOW TO PLAN A ROUTE
Press [PAGE] to switch On the unit and choose the mode you want to activate
(passenger or non passenger); now you are ready to navigate.
Pressing [FIND] you can make a research by nearest, by name, by latitude and
longitude or among your recently found destinations.
We will guide you through a research by name:
♦ Press [FIND].
♦ Using [CURSOR], select "ADDRESS..." and press [ENTER] to confirm.
♦ You can change the item highlighted with a broken line, using [CURSOR] to
select and press [ENTER] to confirm.
♦ To shift on the virtual keyboard use [CURSOR], to confirm a character press
[ENTER] (selecting EXT another keyboard containing stressed letters and symbols is displayed, selecting it again you restore the common one) to confirm the
choice press [ENTER] on the virtual keyboard.
♦ After setting town, road and house number (if available) press [MENU].
♦ Select “Set destination on cursor and calculate” and confirm pressing [ENTER].
♦ You can choose to visualize a Map + Data Page or a Map + Manoeuvre Page.
NOTE about the suggested route
a. Do not rely only on the voice prompts because they could be incorrect or
late. Check the route on the screen and follow the directions displayed on
the map, read carefully point d.
b. It may happen that such directions as “Keep right” or “Turn right” cannot be
always followed, because of changes in the road. In this case follow the signs
on the road and remember the points a and d of these notes.
c. Pay much attention when turning roundabouts or passing through
crossroads because the voice guidance could not be easy to follow.
Remember the points a and d of these notes.
d. WARNING: do not become distracted to the exclusion of safe driving
practices; do not look at the screen because it might be dangerous. It is
unsafe to operate the controls of the navigator while driving.
Use [+] key to show the map area with more detail, especially in towns with many
streets.
Pressing [FIND] you can also look for a destination: by nearness to your position,
by latitude or longitude or among your latest researches.
HOW TO CREATE A MARK
With Geosat2C you can create and save many Marks (User Points), wherever you
are, you can enter your customers, your house or your favourite restaurant.
These Marks are easy to display, to change and to use as destinations.
♦
♦
♦
28
To create a Mark press [ENTER] and select the desired item.
To change or delete a Mark move the arrow on it, press [ENTER] and select the
desired item.
To use a Mark as a destination press [FIND] and select Mark.
User Manual
♦
To display the list of the Marks you created press twice [MENU] and choose
“Mark list”.
Updating the software and using Compact Flash with different software versions
the Marks located in the inside memory are deleted because the unit, recognizing a
new software, resets its memory.
You should save your Marks on the Compact Flash using File Manager, to avoid this
trouble.
VERY IMPORTANT!!!
THE FIRST TIME YOU USE FILE MANAGER YOU GOT THIS MESSAGE
“DEVICE NOT INITIALISED”. YOU INITIALISE THE DEVICE CREATING
A USER.IMG FILE. TO DO THIS GO TO “FILE MANAGER”, PRESS
[MENU], SELECT `INITIALISE` THEN PRESS [ENTER]. THE WARNING
MESSAGE THAT APPEARS CONCERNS THE DATA (MARKS AND TRACKS)
CONTAINED IN PREVIOUS USER.IMG FILES. CHOOSE OK AND PRESS
[ENTER].
FURTHER FUNCTIONS
TRIP COMPUTER function: pressing [PAGE] you go to the TRIP COMPUTER page,
where you find useful information about your trip (average speed, driving time,
etc.). To delete the data in TRIP COMPUTER, press [MENU].
GPS page: pressing twice [MENU] you go to the GPS page, where you find all the
data concerning the GPS satellites your navigator is receiving. Moreover you find
extra information such as speed, date and time.
FILE MANAGER: pressing twice [MENU] you can save your Marks, your tracks or
travel information on a Memory Compact Flash.
ADJUSTING THE VOLUME: press and hold for 1 second [FIND].
SETTING THE BRIGHTNESS AND CONTRAST: press for 1 second [PAGE] when the
unit is already on and move the cursor to change the intensity. Pressing [PAGE] you
obtain a fast brightness shift.
ABOUT THE MENUS
In every page you can display a submenu concerning that page just pressing
[MENU].
GENERAL NOTES
The digital chart in this navigator might be inaccurate or incomplete to some
degree because of the continuous growth of towns and suburbs. Our software
will be frequently updated and you will be able to download it for free from our
website www.avmap.it.
HOW TO TUNE GEOSAT2C
♦
♦
♦
♦
♦
Press twice [MENU], select "System Setup" and confirm your choice pressing
[ENTER].
To highlight a page move the cursor on it, to confirm a selected page (highlighted
by the broken line) press [ENTER].
To view the submenus use [CURSOR], to confirm press [ENTER].
Select the desired item and press [ENTER].
To quit press [ESC].
User Manual
29
SYSTEM SETUP
In MENU “General” you can enter the following data:
♦ Colour theme
♦ Automatic Brightness
Using a light sensor mounted on the rear panel the unit automatically change the
brightness level of the screen.
♦ Voice instructions: Detailed/Simplifyied
♦ Beeper: On/Off
♦ Regional settings
♦ Factory defaults
In MENU “Map” you can enter the following data:
♦ Map Details (Simple, Normal, Full)
♦ Type of the symbol used to display your position
♦ Scale Format (Bar, level, width)
♦ Automatic Info: to receive automatically the information of the object on the
cursor position
♦ Auto Position: Manual/Auto Zoom/Autocenter
♦ Map Orientation: to orient the map on the screen
In MENU “POI” you can select the point of Interests you would like to display on the
map while navigating.
Points of Interest are locations of commercial, recreation landmarks or services
that are preloaded in Geosat2C. These range from restaurants, parks, petrol stations to hospitals and police stations. The purpose of the POI database is to
provide you a list of destinations that you might be interested in going to. They
are very useful when travelling in an unfamiliar city that is why Geosat2C contains
1,5 million Points of Interest for the whole Europe.
In MENU “Routing” you can enter the following data:
♦ Route Preference: to choose the kind of track to be planned
♦ Avoid: factors to plan the route
♦ Off Route Recalculation: when you don’t follow the way suggested by the navigator
♦ Route Draw Mode: to choose to display the track in the background or foreground.
In MENU “Track” you can enter all the settings regarding the way of recording/
displaying of the track.
In MENU “Alarms” you can enter a speed limit and a speed alarm when you exceed
it. You can also enter a Mark alarm informing you when you reach a Mark. Moreover
you can set a GPS fix lost alarm.
In MENU “Date &Time” you can enter all the settings of time and date and also
activate "Elapsed Timer" and/or "Countdown".
In MENU “Units” you can set the units of measurements.
In MENU “Language” you can set the Language text and/or voice.
In MENU “Simulator” you can enter all the settings of the simulation mode. If your
route is already planned and you set Simulation mode to Route you will see your
simulated position as if you were really driving on that route at the selected speed.
30
User Manual
NOTES on the set-up:
If you modify the configuration settings and then you cannot go back to the
previous set-up anymore, restore the unit to the factory defaults (MENU
“General”).
User Manual
31
3. Warranty Conditions and
Technical Supporting
DEFINITIONS
Warranty
Product
Conformity
SC
(Supporting Center)
Purchaser
indicates the concrete declaration of guarantee.
indicates the equipment with the logo Geosat2C, contained in
the wrap.
indicates the correspondence of the Product to the aesthetical,
the technical and functional features reported in the User Manual, included in the packaging.
indicates the center or the technical service centers authorized
by AVMAP for the control of the presence of a Conformity Defect of the Product, and the carrying out of the repairing on
guarantee.
indicates the physical person who buys the Product from the
seller.
WARRANTY
Validity
This warranty is suitable all along the European Community. The conditions of
guarantee secure the Purchaser in conformity with the 1st Article 1 Dlgs. 2
February, n 24 without prejudice of the rights deriving to the Purchaser in
pursuance of the European laws.
The warranty rights can be exercised by the Purchaser in terms of the prescription of 24 months as from the delivery of the product. It is considered
date of delivery the one printed on tax documents (receipt, invoice or other
equivalent) issued by the seller to the Purchaser at the moment of the
acquisition.
Terms for the denunciation of the conformity defect
The product must be delivered to the Supporting Center when it reveals a
presumed Conformity Defect and, in any case, within and no further than two
months since the finding, otherwise the Purchaser will lose the warranty right.
Check of the conformity defect and reparations on warranty
When the Purchaser verifies a Conformity Defect, he/she has to send the Product only to the Supporting Center, together with the tax document and the
warranty.
Replacement
In case of intervention on guarantee or product replacement, the validity of
the warranty continues to have effect from the date on the tax document.
The product control and the Conformity Defect Check are exclusive competence of the Supporting Center.
32
User Manual
Immediate expiry of the warranty effects
Up to the warranty, the recognized rights to the Purchaser go down absolutely
according to the following eventualities:
♦ If the Supporting Center verifies previous interventions on unauthorized person’s
behalf, and/or interventions on the product making use of replacements that
are not original and/or not officially recommended by the producer.
♦ Conformity Defect caused owing to misuse or inadequate installation in observance of the typical product use, and/or not conformed to what it is reported in
the User Manual, or in contrast with regard to the technical or security regulations in force in the Country in which the product had been used at the moment
of the presumed Conformity Defect manifestation.
♦ Conformity Defects caused by revisions or alterations that have not previously
been certified and properly approved by the producer, that is negligence, missed
adoption of the due precautions use, deterioration owing to the exposure of the
Product to ray of sunlight, humidity, heat source or temperature that are not in
conformity with the ones recommended in the User Manual.
♦ Damages caused directly or indirectly to the Product from the Purchaser during
its carrying or owing to its exposure to lightning, atmospheric phenomena,
excess voltage or electrical over current, inadequate or irregular electrical supply, and generally owing all these operations or interventions carried out to the
product by the Purchaser or by third party who have gone further than the
correct and common use of the product itself.
Limitations of the Warranty
The rights recognized to the Purchaser by the warranty also regard the aesthetical and/or varnished parts of the product, current feeder, but they do not include
the deterioration related to the usual wear and/or inadequate and/or inappropriate employ of the mentioned parts above.
Modification, Extension, Variation
These conditions of the Warranty can be changed, modified or extended in writing, exclusively by the producer.
Place of Jurisdiction
Each possible controversy deriving and/or connected to the previous conditions
of the warranty will be transferred to the exclusive and absolute knowledge of the
jurisdiction of Massa.
ESECUTION PROCEDURE FOR THE REPARATIONS ON
GUARANTEE
When a Conformity Defect has been ascertained, the Purchaser has to contact the
authorized Supporting Center for the European Community using one of the following procedures:
Web Procedure: throughout the Internet site www.avmap.it clicking on “Technical Support” the Purchaser has to fill out the web form of the assisting request.
Once processed, the Supporting Center will let the Purchaser know by e-mail an
authorization number. At that point, the Purchaser will be able to send the broken
equipment to the below address for the reparation on guarantee.
Telephone Procedure: please contact the number (+39) 0585 772410 and tell
User Manual
33
to the operator the problem you have. The operator of the Supporting Center will
tell you the authorization number. At that point, the Purchaser will be able to send
the broken equipment to the below address for the reparation on guarantee.
The seller can follow the previous procedures or contact the telephone number
(+39) 0585 772410
TECHNICAL SUPPORTING CENTER
AvMap S.r.l.
Via Caboto, 9 - 54036 Marina di Carrara (MS) - ITALY
Tel.: +39 0585 772410
Fax: +39 0585 784044
www.avmap.it - [email protected]
34
User Manual
4. Troubleshooting
A) MASTER RESET, to do in case of software malfunctions:
Note
♦
♦
♦
♦
♦
User’s waypoints and settings will be deleted.
Switch Geosat2C Off.
Switch it On pressing [PAGE] together with another key. A new MENU will be
displayed on the screen.
Use [CURSOR] to select RAM Menu and press [ENTER].
With the right [CURSOR] select RAM clear.
When RAM clear is highlighted press [ENTER] and [ENTER] again to confirm.
B) Problems with GPS signal reception:
♦ Check that the antenna is positioned as advised in the manual.
♦ Check that the antenna connector is correctly located in Geosat2C.
♦ Perform a GPS RESTART, pressing [MENU] in the GPS page.
♦ Make another attempt to obtain the GPS signal.
User Manual
35
36
5. Pages Diagram
36
User Manual
MENU DIAGRAM
User Manual
37