1
SETTING A RECORDING
SCHEDULE
About this Guide
This guide is a quick reference for users to install and operate HDIP video surveillance systems. It provides only basic information
regarding the network recorders and cameras. For further details on installation and operation, please refer to the Remote Access
Quick Start Guide, DDNS Installation and Activation Sheet, and User Manual.
Use the Schedule Setup menu to define the start and end times for day,
night, and weekend recording schedules. To access Schedule Setup, rightclick in the Live screen and then click Schedule. In the Schedule menu,
click Schedule Setup. Be sure you have already set the date and time for
your recorder before setting a recording schedule.
START HERE
1
Day and Night Schedule
1. Remove the contents of your HDIP packaging.
2. Choose a location for your recorder that has adequate air circulation
to allow the fans to operate properly.
3. Connect your monitor to either the VGA or HDMI port, depending on
your chosen monitor.
4. Connect the mouse, included in your packaging, to the USB port on
the front or back of the recorder.
Connect power to your recorder.
2
Why Should I Connect a Mouse?
Using a mouse simplifies the process
of setting up the configurations on your
recorder.
2. Click Weekend Start and select the day of the week and the time to
start weekend recording.
3. Click Weekend End and select the day of the week and the time to
stop weekend recording.
SEARCH BY EVENT
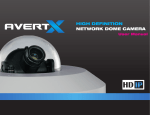
1. Remove the dome cover using the supplied Torx tool.
3. Drill each hole slightly smaller than the supplied screw anchors.
4. Insert the anchors into the drilled holes.
5. Fasten the camera to the wall or ceiling with the supplied screws.
3
6. Connect the Ethernet cable to the camera.
7. Connect the Ethernet cable to the recorder.
Remote Control
Once your recorder is configured, you
can use the remote control to search
saved video, find alarm events, change
your recording schedule, and cycle
through live video.
8. Adjust the camera to the desired angle.
31327AD
1. Right-click the Live screen and then click Search.
2. Set the appropriate dates and times to start and end your search in the
From and End fields, respectively.
3. Select the type of event you want to search for. To search for all
recorded events, select All.
4. Select the appropriate camera channels to search for these events. To
serch the video from all camera channels, select All.
10. Replace the dome cover. Screw the two Torx screws on the side of
the dome cover to tightly fasten the cover in place.
5. Click Enter in the Event List field.
6. Locate your event in the list and click to view the event.
7. Click Replay to start playback at the time of the event.
8. To return to the event list, click Back to List.
1. Set up your recorder for remote viewing, using the information
provided in the Remote Access Quick Start Guide.
9. To search video from before or after the event, click Play.
2. Connect to your recorder over the web using a PC, smart phone, or
tablet.
Connect mobile devices .
You can search video that has been capture based on alarm, motion, video
loss, or other pre-configured events.
9. If desired, adjust the camera focus.
Connect cameras to the recorder.
4
3. Repeat for Night Time Start and Night Time End.
1. Click Weekend Schedule and select On.
1. Press the power button on the front of the recorder and hold for
three seconds. The button will stay lit when the recorder is on.
Turn the power on.
2. Click Day Time End and select the time to end daytime recording as
desired.
Weekend Schedule
5. Attach the power cord to the port on the back of the recorder and
plug it in to a standard household outlet.
2. Mark the positions of the 2 screw holes on the base of the camera
at your chosen location.
1. Click Day Time Start and select the time to start daytime recording as
desired.
You can also search video based on the time of recording. For further
instructions on Search, please refer to the User Manual.
NETWORKING CAN BE DIFFICULT
Power Over Ethernet
Call AvertX Technical Support for a trained professional to walk
you through remote connection on your HDIP system.
The AvertX IP cameras included with this
system use Power over Ethernet (PoE).
Both power and video are trasmitted
over a single cable, simplifying
installation and helping you start using
your system faster.
1-855-228-3789
Copyright © 2012 AvertX. All rights
reserved. Information contained in this
document is subject to change wtihout
prior notice. AvertX does its best to provide
accurate information, but cannot be held
responsible for typos or mistakes.
1-855-2avertX
(1-855-228-3789)
www.avertx.com
VIDEO SURVEILLANCE SYSTEM
USING THE RECORDER
SOFTWARE
FRONT
DATE AND TIME SETUP
Once your HDIP system is operating, you are already recording video.
Follow these instructions to set the time and date on your recorder. For easy
navigation, you can connect a mouse to a USB port on the recorder. For
further instructions regarding date and time, setup details, and configuration,
see the user manual.
MAIN MENU
Use the main menu to configure all of the recorder settings,
schedule recording, configure the alarms, set up user access,
network, display, and system options. To access the menu,
right-click the Live screen and click Menu.
System
Set the date, time, and unit
name; export, import, or reset
system configurations; restart
or shut down the recorder
Users
Manage password protection, user accounts,
passwords, and permission settings.
USB
Connect a flash drive
for backup or a USB
keyboard
IR Receiver
Receves signals
from remote
controller
Network
Illuminates when
recorder is connected
to the network
Rec
Blinks when
video is recording
Alarm
Blinks when an
alarm is triggered
Power
Press and hold this
button to turn off
the recorder
1. Connect the necessary cables to your cameras and recorder and turn the
recorder on.
Network
Configure network communication options and
setup your recorder for
remote access
USB
Configure camera channel settings, including camera name,
camera settings, and Power
over Ethernet
2. Right-click in the Live screen and then click Menu.
3. Log on as an Admin using the default password (1234).
4. Click System.
5. Click Date/Time.
6. Click Date and select the appropriate date on the calendar.
7. Select Time and use the up and down arrow buttons to set the correct
hour and minute.
8. Click the screen and then click Yes.
9. Select Time Zone and use the arrow buttons to select your appropriate
time zone. In the United States, the Eastern Time Zone is -5:00, the
Central Time Zone is -6:00, the Mountain Time Zone is -7:00, and the
Pacific Time Zone is -8:00.
BACK
10. Close Date/Time.
11. Right-click to return to the Main Menu.
12. Right-click again to return to the Live screen.
Schedule
Configure recording quality
and resolution; set up a
recording schedule
Alarms
Set up how the recorder will respond to
alarm events
Display
Change video output
settings
Right-Click Menu
Right-click on the Live screen to access
the Main Menu and other functions, such
as Non-Decoding Mode*, Display Mode,
Sequence, Search, Export, PTZ control,
Fast Playback, or user logout.
*Non-Decoding Mode will disble Live video,
but the HDIP System will continue to record.
When Non-Decoding mode is enabled, you
can still observe live video using the web
viewer or AvertX Go!. To enable remote
access, refer to the Remote Access Quick
Start Guide, included in your packaging.
Info
View hardware version, software
version, and network address
info; upgrade software; view the
system log
Onscreen Menu Bar
Click Channel on the Onscreen Menu Bar to
choose a channel to view full-screen. Click
Function to choose Main Menu, Display Mode,
Sequence, Search, Export, PTZ control, Fast
Playback, or user logout.
SET UP USER AUTHENTICATION
AvertX strongly recomments securing your recorder by setting up user
authentication.
1. Right-click the Live screen and then click Menu.
2. Click System and set Basic/Advanced Setup Mode to Advanced.
3. Click Users.
4. Set Password Protection to On. The default name and password are as
follows:
Username: admin
Password: 1234
5. Click Account Setup to change admin and user passwords.
Reset Switch
Reset the
connection to
your cameras
Connection LEDs
Lit when camera is
connected and
working properly
HDMI Port
For a monitor
with an HDMI
connector
VGA Port
For a monitor
with a VGA
connection
Network Camera Ports
Connect up to 16
high-definition cameras
Alarm I/O
Connect your
alarm sensors
and outputs
e-SATA Port
Backup to an
external e-SATA
hard drive
LAN Network Port
Connect to your local
network for remote
monitoring
Power
Plug in your
recorder
USB Port
Connect a flash
drive, keyboard,
or mouse
31327AD