1
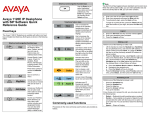
Avaya 1140E
IP Deskphone with SIP
Software
Install Guide
Contents
Contents
Welcome ............................................................................................................................. 4
Basic features ..................................................................................................................... 4
IP Deskphone controls .................................................................................................... 6
Avaya 1140E IP Deskphone display ............................................................................ 12
Context-sensitive soft keys ..................................................................................... 13
Idle display screen after dial pad input................................................................. 19
In-call context-sensitive soft keys........................................................................ 21
Using your I P Deskphone ............................................................................................. 31
Before you begin ....................................................................................................... 31
Connecting the components .................................................................................. 32
Removing the stand cover ................................................................................. 34
Connecting the handset ....................................................................................... 35
Connecting the headset (optional) ................................................................... 36
Selecting the headset tuning parameter ........................................................ 36
Connecting the LAN ethernet cable .................................................................. 37
Installing additional cables ................................................................................. 38
Wall-mounting the IP Deskphone (optional) ................................................ 38
Entering text .......................................................................................................... 40
Entering text using the IP Deskphone dialpad .............................................. 41
Enabling and disabling the # Ends Dialing feature ........................................... 43
Configuring the dialpad to alphanumeric dialing .......................................... 44
Entering text using the USB keyboard............................................................. 45
Accessing the IP Deskphone ....................................................................................... 47
Logging on ........................................................................................................................ 47
Automatic login .......................................................................................................... 48
Selecting a language .................................................................................................. 48
Logging on to your A v ay a 1140E IP Deskphone .................................................. 49
Contents
Configuring the duration of the login .................................................................. 52
User Profile ..................................................................................................................... 53
Logging off from the IP Deskphone .......................................................................... 54
Configuring the Avaya 1140E IP Deskphone ....................................................................... 55
Adjusting the display screen contrast .................................................................. 55
Creating the idle screen text display .................................................................... 57
Configuring the Backlight ........................................................................................ 58
Configuring Menu Auto back-out .............................................................................. 59
Selecting a ring pattern ............................................................................................. 61
Adjusting the volume .............................................................................................. 62
Adjusting the ring volume ................................................................................... 63
Adjusting the volume of the Handset, headset, and Handsfree mode .. 64
Selecting a language ................................................................................................. 67
Selecting the date and time format ..................................................................... 68
Welcome
Welcome
Welcome
Your Avaya 1140E IP Deskphone brings voice and data to your desktop.
The IP Deskphone connects directly to a Local Area Network (LAN)
through an Ethernet connection. The SIP IP Deskphone communicates
using Session Initiated Protocol (SIP) after the firmware (FW) is upgraded
to a SIP-enabled version.
In this guide, user-defined feature key labels appear beside the keys and
context-sensitive soft keys labels appear directly above the keys. Figure 1
shows the user-defined feature keys and context-sensitive soft keys.
Figure 1: User-defined feature keys and context-sensitive soft keys
User-defined
feature keys
Feature Key
Line 1 (Reserved)
Context-sensitive
soft keys
Basic features
Your Avaya 1140E IP Deskphone supports the following features:
•
six user-defined feature keys with labels and indicators
Note: The IP Deskphone designates Key 1 as Feature Key 1 and
reserves it as the line key for the IP Deskphone.
•
four context-sensitive soft keys
Welcome
•
graphical, high-resolution LCD display, backlit, with adjustable
contrast
•
high-quality speaker IP Deskphone
•
volume control keys for adjusting the ringer, speaker, handset, and
headset volume
•
six specialized feature keys:
— Quit
— Directory
— Inbox
— Outbox
— Services
— Copy
•
six call-processing fixed keys:
— Mute
— Hands free
— Goodbye
— Instant Message Log
— Headset
— Hold
•
gigabit Ethernet ports
•
built-in gigabit Ethernet switch for shared PC access
•
headset jack with an On/Off key
•
USB port to support a keyboard or mouse
Note: Powered downstream 1.1-compliant USB hubs are supported,
including USB 2.0 hubs, if they offer USB 1.1 backwards compliancy.
•
automatic Dynamic Host Configuration Protocol (DHCP) network
configuration
•
hearing aid compatibility
•
Wireless headset support using Bluetooth® wireless technology,
compatible up to Bluetooth 2.1
Welcome
Welcome
Note: Backward compatible for Bluetooth 1.2 headsets. Simple
Secure Pairing is supported with Bluetooth 2.1 compliant headsets.
•
intercom/paging support
•
secure digits when accessing voice mail during a call
•
logging off the IP Deskphone without entering a password
•
dialing a call from the Inbox
•
the capacity to attach up to three Expansion Modules for
IP Deskphones 1100 Series, adding up to 54 programmable feature keys
IP Deskphone controls
Figure 2 shows the Avaya 1140E IP Deskphone.
Figure 2: Avaya 1140E IP Deskphone
Welcome
This section describes the controls on your IP Deskphone. Your IP Deskphone
can have fixed keys with icons or with labels. This document presents both
versions of the fixed key.
The keys on either side of the LCD display area
are User-defined feature keys, with labels on
the LCD. The system administrator can reserve
some keys for specific functions during tasks and
for advanced configuration.
You can define these keys for specific functions,
such as Call Forward.
Note: The key on the lower right is reserved as
your default line key.
Context-sensitive soft keys are located below
the display area. The LCD label above each key
changes based on the active feature.
Use the Volume control buttons to adjust the
volume of the ringer, handset, headset, speaker,
and the Handsfree feature. Press the top button
to increase the volume, and press the bottom
button to decrease the volume.
Press the Mute key to listen to the call without
transmitting. Press the Mute key again to return
to two-way conversation. The Mute key applies to
handsfree, handset, and headset microphones.
Note: When you enable mute, a red LED on the
Mute key remains lit.
Welcome
Welcome
Press the Handsfree key to activate the built-in
speaker and microphone of the IP Deskphone.
Note: The Handsfree LED indicator on the
Handsfree key lights to indicate when handsfree
is active.
Use the Navigation Key Cluster to scroll
through menus and lists that appear on the LCD
display screen or for text entry. The outer part of
this key cluster rocks for up, down, left, and right
movements. For more information, see
“Navigation keys” on page 40.
Use the Enter key, at the center of the
Navigation Key Cluster, to select menu items or
to confirm changes.
Note: The Enter key has the same function as
the context-sensitive soft keys Select and Set.
Press the Goodbye/Release key to terminate an
active call. When multiple calls are active, press
the Goodbye/Release key to end the
highlighted call
Use the Goodbye/Release to close menu
navigation or cancel user tasks.
Press the Expand key to access the Instant
Messaging Log.
.
Welcome
Press the Headset key to answer a call using the
headset or to switch a call from the handset or
handsfree to the headset.
Note: The Headset LED indicator on the Headset
key lights to indicate that the headset is in use.
Press the Hold key to put an active call on hold.
Press the Hold fixed key to return to a call on
hold.
You can have several calls in a hold state.
Use the Dialpad to enter numbers and text. To
navigate to an item in a menu, press the
corresponding number on the dialpad to activate
the item or continue navigate the list of items.
When you receive a voice message, the red
Visual Alerter/Message Waiting Indicator
lights. Also, when the ringer sounds, this
indicator flashes.
When you receive an instant message (IM), the
blue Visual Alerter/Feature Status Indicator
lights.
Press the Copy key to copy contact information
from one source such as the Address Book to a
destination such as a feature key.
Welcome
Welcome
Press the Services key to access the following
features:
1. Search—search in the local directory
(personal Address Book) and the global directory
(network Address Book for names and telephone
numbers)
2. Login—log in to your IP Deskphone only
when the call server supports multiple user
logins.
3. Logout—log out of your IP Deskphone.
4. Check For Updates—check for the latest
software update for the
IP Deskphone.Retrieve Parked Call (This feature
is not available on all call servers.)
5. Reset Phone—reset your IP Deskphone.
6. File Manager—manage the
IP Deskphone file system and USB Devices
attached to the IP Deskphone.
7. Logging System—enable or disable the
logging process.
8. Phone Information—view information about
the hardware and software on your IP
Deskphone, including user and location
information.
Press the Services key twice quickly to access
the Network menu
Press the Quit key to cancel the current
operation or to exit the menu.
Note: Pressing the Quit key does not affect the
status of active calls.
Welcome
Press the Inbox key to access your call
inbox.
The call inbox stores all incoming calls on an
active IP Deskphone.
Note: This key does not function to send Instant
Messages.
Press the Outbox key to view a record of all
outgoing calls.
Note: This key does not function as a shift key.
Press the Directory key to access the Address
Book and the Friends list.
Note: You can access the Address Book while
on a call and start a new call with a highlighted
contact.
Welcome
Welcome
Avaya 1140E IP Deskphone display
Your IP Deskphone has three display areas:
•
The upper display area provides line and feature key status.
•
The middle display area contains single-line information for items such as
caller number, caller name, menu items, feature prompt strings, userentered digits, date and time information, and phone information.
•
The lower display area provides context-sensitive soft key label
information.
Figure 3: IP Deskphone LCD screen
Upper display area
User-defined
feature key labels
Middle display area
Date/Time display
Call party information
Menu information
Directories information
Lower Display Area
Context-sensitive key
labels
Welcome
Context-sensitive soft keys
Your IP Deskphone has four context-sensitive soft keys beneath the LCD screen.
The context-sensitive soft keys access different features and menus depending
on the state of the IP Deskphone and the menu you access.
Figure 4 shows the context-sensitive soft keys while the IP Deskphone is in the
idle state.
Figure 4: Context-sensitive soft keys when the IP Deskphone is in the
idle state
Welcome
Welcome
Table 1 lists the context-sensitive soft keys that you can use to access menu
items.
Table 1: Menu items accessed through context-sensitive soft keys (Part 1 of
7)
Item
Function
Press the Redial context-sensitive soft
key to redial the last dialed number.
Redial or NewCall
abc or 123
Msgs
If there is no stored redial number, the
NewCall context-sensitive soft key
appears and has the same effect as
pressing the primary user line key (dial
prompt).
Press the abc context-sensitive soft key
to toggle between alpha and numeric
input modes.
•
To type letters, the abc contextsensitive soft key must be
displayed.
•
To type numbers, press the abc
context-sensitive soft key to display
the 123 context-sensitive soft key on
the menu list.
Press the Msgs context-sensitive soft key
to access the following features:
1. Voice Mail—use to call your Voice
Mail number.
2. Instant Messaging—use to
access the Instant Messaging
Inbox/Outbox.
3. Missed Call Notification—use to
access your Missed Call details.
Welcome
Table 1: Menu items accessed through context-sensitive soft keys (Part 2 of 6)
Item
More…
Function
Press the More… context-sensitive soft
key to select a new menu list of contextsensitive soft keys (three menu lists are
available).
When you press the More… contextsensitive soft key, a different selection of
context-sensitive soft keys appears.
•
If you press the More… contextsensitive soft key once from the first
menu list, you access the following
context-sensitive soft keys:
[CallFwd] [DND] [Retrve] [More…]
•
If you press the More… contextsensitive soft key from the first menu
list twice, you access the following
context-sensitive soft keys:
[ScrnSvr] [Presnce] [Prefs]
[More…]
•
If you press the More… contextsensitive soft key from the first menu
list three times, you return to the first
menu list with the following contextsensitive soft keys.
[Redial] [abc] [Msgs] [More…]
When you press the More… context-sensitive soft key for the first time,
the following context-sensitive soft keys appear on the menu list.
Welcome
Welcome
Table 1: Menu items accessed through context-sensitive soft keys (Part 3 of 6)
Item
CallFwd
Function
Press the CallFwd context-sensitive soft
key to forward all calls to a specified
address.
DND
Press the DND context-sensitive soft key
to block all calls.
Retrve
Press the Retrve context-sensitive soft
key to retrieve parked calls (local and
server calls only).
More…
Press the More… context-sensitive soft
key to select a new menu list of contextsensitive soft keys.
The next available menu list contains the
following context-sensitive soft keys:
[ScrnSvr] [Presnce] [Prefs]
[More…]
When you press the More… context-sensitive soft key for the second time,
the following context-sensitive soft keys appear on the menu list.
ScrnSvr
Press the ScrnSvr context-sensitive soft
key to activate the screensaver (only if
the screensaver feature is enabled).
Welcome
Table 1: Menu items accessed through context-sensitive soft keys (Part 4 of 6)
Item
Function
Presnce
Press the Presnce context-sensitive soft
key to configure the presence status for
your IP Deskphone.
Prefs
Press the Prefs context-sensitive soft key
to display the Preferences menu.
The menu items include the following:
1. Display—use to adjust the display
settings of the LCD screen.
2. Audio—use to adjust tones and
volume settings, access the Codecs
menu to configure a USB headset.
3. Feature Options—use to
configure the following:
— Feature keys
— Call Decline Reasons
— Call Ignore Action
— Call Subjects
— Call Fwd Notification
— Answer Mode Settings appear
when the Auto Answer Mode is
enabled on the IP Deskphone.
Welcome
Welcome
Table 1: Menu items accessed through context-sensitive soft keys (Part 5 of 6)
Item
Prefs
Function
4. Language—use to change the
interface language.
5. Misc Options—use to access the
following options:
— Alpha Dialing
— Search Method
— Incoming Privacy
— Outgoing Privacy
— # Ends Dialing
— Hold Mode: Private
— Time
6. Network—use to access the
following:
— Server Settings
— Device Settings
— Diagnostics
— Disable screensaver
— Licensing
— Lock
7. USB Locks—use to lock or unlock the
following USB devices:
— USB Mouse
— USB Keyboard
— USB Headset
— USB flash drive
Welcome
Table 1: Menu items accessed through context-sensitive soft keys (Part 6 of 6)
Item
Prefs
Function
8. User Settings - use to modify the
following:
— Call Settings
— IM Settings
— Voice Mail Settings
— Change Location
More…
Press the More... context-sensitive soft
key to return to the first menu list of
context-sensitive soft keys.
The next available menu list contains the
following context-sensitive soft keys:
[Redial] [abc] [Msgs] [More...]
Idle display screen after dial pad input
After you enter information using the dial pad (there is no dial tone or preceding
line selection), the context-sensitive soft keys displayed on the idle screen
appear.
Figure 5: Idle display screen after dial pad input
Welcome
Welcome
Table 2 lists the context-sensitive soft keys that you can use to access menu
items after dial pad input.
Table 2: Menu items accessed after dial pad input through contextsensitive soft keys
Item
Send
Function
Press the Send context-sensitive soft key
to dial out the user input using the primary
login of the IP Deskphone.
User input is run against the dialing plan.
abc or 123
Press the abc or 123 context-sensitive soft
key to toggle between alpha and numeric
input mode.
Subject
Press the Subject context-sensitive soft key
to configure a subject line to your outgoing
call before pressing the Send contextsensitive soft key.
Exit
Press the Exit context-sensitive soft key to
clear the user input and return to the initial
idle screen that displays the following
context-sensitive soft keys:
[Redial] [abc] [Msgs] [More...].
Welcome
In-call context-sensitive soft keys
When a call is active, use the context-sensitive soft keys to access the menu
items shown in Figure 6.
Figure 6: In-call context-sensitive soft keys
Table 3 lists the context-sensitive soft keys you can use to access menu items
during an in-call session.
Table 3: Menu items accessed during an in-call session through
context-sensitive soft keys (Part 1 of 10)
Item
Conf
Function
Press the Conf context-sensitive soft
key to obtain a dial tone to place
another call during an active call or to
make a conference call.
The Conf context-sensitive soft key
behaves like the NewCall contextsensitive soft key.
Trnsfer
Press the Trnsfer context-sensitive soft
key to transfer the current call to
another location or to another contact.
Welcome
Welcome
Table 3: Menu items accessed during an in-call session through
context-sensitive soft keys (Part 2 of 10)
Item
Audio
Function
Press the Audio context-sensitive soft
key to access the following features:
Tones
•
Ring Pattern
—
•
Select test patterns from 1 to
8
Alerting Volume
— Set Desired volume
Welcome
Table 3: Menu items accessed during an in-call session through
context-sensitive soft keys (Part 3 of 10)
Item
Audio
Function
Voice
•
Set the volume for the
following:
—
Handset Volume
—
Headset Volume
—
Handsfree Volume
Codecs
Select the Audio Codecs:
•
G722 (wideband codec)
•
PCMU (standard u-law)
•
G729 (729 codec)
•
PCMA (standard a-law)
Headset Selection
Select the active headset device:
•
Wired, USB (if wired, then
select type 1, 2 or 3)
•
Enable HID Commands
(enable or disable)
•
MHA Headset Type:
•
MHA Back Light (enable or
disable)
Welcome
Welcome
Table 3: Menu items accessed during an in-call session through
context-sensitive soft keys (Part 4 of 10)
Item
Function
Bluetooth Setup
•
Enable Bluetooth (enable or
disable)
•
To unpair Device select UnPair. If
Bluetooth is enabled, select:
•
Search devices (IP Deskphone
searches the bluetooth devices and
lists the discovered devices in the
Found field.
•
To set an Active device select
Set.
•
To pair with a found device
select Pair.
•
To unpair Device select UnPair.
Note: You can change the audio
settings to improve audio quality
based on the available band width.
If the Internet bandwidth is low, you
can improve the audio quality by
changing the audio setting to low.
•
Monitor Audio Quality—used to
view details about the audio quality
of an active call.
OR
Welcome
Table 3: Menu items accessed during an in-call session through
context-sensitive soft keys (Part 5 of 10)
Item
Function
Activate
The Activate context-sensitive soft key
appears when the call is not active. The
most common usage of this key is
when the call displayed onscreen is a
call that was parked against the user
(or a call that the user placed on hold).
Note: The Activate contextsensitive soft key never appears
at the same time as the Audio
context-sensitive soft key.
More…
Press the More… context-sensitive soft
key to select a new menu list of contextsensitive soft keys (three menu lists are
available).
When you press the More…
context-sensitive soft key, a
different selection of contextsensitive soft keys appears.
Welcome
Welcome
Table 3: Menu items accessed during an in-call session through
context-sensitive soft keys (Part 6 of 10)
Item
More…
Function
•
If you press the More…
context-sensitive soft key once
from the first menu list, you access
the following context- sensitive
soft keys:
[NewCall] [Park] [Retrve]
[More.…]
•
If you press the More… contextsensitive soft key from the first
menu list twice, you access the
following context- sensitive soft
keys:
[Prefs] [
•
][
] [More…
If you press the More… contextsensitive soft key from the first
menu list three times, you return
to the first menu list with the
following context- sensitive soft
keys.
[Conf] [Trnsfer] [Audio] [More…
When you press the More… context-sensitive soft key for the first time,
the following context-sensitive soft keys appear on the menu list.
NewCall
Press the NewCall context- sensitive
soft key to obtain a dial tone to place
another call during an active call or to a
make a conference call.
The NewCall context-sensitive soft key
behaves like the Conf contextsensitive soft key.
Welcome
Table 3: Menu items accessed during an in-call session through
context-sensitive soft keys (Part 7 of 10)
Item
Park
Function
Press the Park context-sensitive soft
key to park the current call to the
server or another user (not available
for all call servers).
Retrve
Press the Retrve context-sensitive soft
key to retrieve parked calls (local and
server parked calls only).
More…
Press the More… context-sensitive soft
key to select a new menu list of contextsensitive soft keys.
The next available menu list
contains the following contextsensitive soft keys:
[Prefs] [
][
] [More…]
When you press the More… context-sensitive soft key for the second
time, the following context-sensitive soft keys appear on the menu list.
Prefs
Press the Prefs context-sensitive soft
key to display the Preferences menu.
The menu items include the
following:
1.
Display—use to adjust the
display settings of the LCD
screen.
Welcome
Welcome
Table 3: Menu items accessed during an in-call session through
context-sensitive soft keys (Part 8 of 10)
Item
Prefs
Function
2. Audio—use to adjust tones and
volume settings, to configure a
USB headset, and to access the
Bluetooth wireless technology
setup.
3. Feature Options—use to
configure the following:
— Feature keys
— Call Decline Reasons
— Call Ignore Action
— Call Subjects
— Call Fwd Notification
— Answer Mode Settings
appear when the Auto
Answer Mode is enabled on
the IP Deskphone.
4. Language—use to change the
interface language.
5. Misc Options—use to access the
following options:
— Alpha Dialing
— Search Method
— Incoming Privacy
— Outgoing Privacy
— # Ends Dialing
— Hold Mode: Private
— Time
Welcome
Table 3: Menu items accessed during an in-call session through
context-sensitive soft keys (Part 9 of 10)
Item
Prefs
Function
6. Network—use to access the
following:
— Server Settings
— Device Settings
— Diagnostics
— Disable screensaver
— Licensing
— Lock
7. USB Locks—use to lock or
unlock the following USB
devices:
— USB Mouse
— USB Keyboard
— USB Headset
— USB flash drive
8. User Settings—use to modify the
following:
— Call Settings
— IM Settings
— Voice Mail Settings
— Change Location
Welcome
Welcome
Table 3: Menu items accessed during an in-call session through
context-sensitive soft keys (Part 10 of 10)
Item
Function
More…
Press the More… context-sensitive soft
key to return to the first menu list of
context-sensitive soft keys.
The next available menu list
contains the following contextsensitive soft keys:
[Conf] [Trnsfer] [Audio]
[More…]
Unlock
The Unlock context-sensitive soft key
appears if you answer a call when the
IP Deskphone is locked with a
password protected screensaver.
Using your IP Deskphone
Using your IP Deskphone
After you familiarize yourself with the IP Deskphone features, you can start to
use the IP Deskphone.
Before you begin
CAUTION
Damage to Equipment
Do not plug your Avaya 1140E IP Deskphone
into a regular telephone jack. This can result
in severe damage to the IP Deskphone.
Consult your system
administrator to ensure that you plug your IP
Deskphone into a 10/100/1000 BaseT
Ethernet jack.
Using your IP Deskphone
Connecting the components
Figure 7 shows the connections on the Avaya 1140E IP Deskphone.
Figure 7: IP Deskphone connections
Accessory Expansion
Module port
PC Ethernet port
LAN Ethernet port
Tilt Lever
Link lamp
USB
Connector
AC Adapter jack
Headset jack
Handset jack
WARNING Ensure that the protective rubber cap on the Expansion
Module port is in place when the port is not in use. Connection of
anything other than the proper Expansion Module connector to this
port can cause damage to the IP Deskphone.
Using your IP Deskphone
Install your IP Deskphone by completing the following procedures in the
order listed:
•
“Removing the stand cover”
•
“Connecting the AC power adapter (optional)”
•
“Connecting the handset”
•
“Connecting the headset (optional)”
•
“Connecting the LAN ethernet cable”
•
“Installing additional cables”
•
“Wall-mounting the IP Deskphone (optional)”
Figure 8: Wall-mount lever
Wall-mount lever
WARNING Your Avaya 1140E IP Deskphone is shipped with
the base locked in position. To avoid damaging your IP
Deskphone, press the wall-mount lever, located under the
Handsfree key as indicated in the previous figure, to release
the base and pull it away from the IP Deskphone.
Using your IP Deskphone
Removing the stand cover
To access the cable routing tracks and attach cables, you must remove the
stand cover. Pull upward on the center catch as indicated in the following figure,
and remove the stand cover. The cable routing tracks are now accessible.
Figure 9: Remove the stand cover
Connecting the AC power adapter (optional)
Your 1140E IP Deskphone supports AC power or Power over Ethernet
(PoE) options, including IEEE 802.3af standard power.
To use local AC power, use only the Avaya-approved Global Power Supply
(NTYS17xxE6). You can order the Avaya-approved AC adapter separately.
WARNING
Use only the approved Avaya Global Power
Supply with your 1120E IP Deskphone.
Using your IP Deskphone
To use PoE, where power is delivered over the CAT5 cable, your connected LAN
must support PoE. If you use PoE, you do not require an AC adapter.
WARNING
If you are connected to a PoE connection, do not use
the AC power adapter.
To use gigabit Ethernet, you must connect to the LAN through CAT5e (or later)
cables.
To connect the AC adapter to the AC adapter jack in the bottom of the IP
Deskphone use the following procedure:
1. Form a small bend in the cable.
2. Thread the adapter cord through the channels in the stand.
Connecting the handset
Use the following procedure to connect the handset to the IP Deskphone.
1. Connect the end of the handset cable with a short straight section to the
handset.
2. Connect the end of the handset cable with the long straight section, into the
RJ-9 handset jack marked with the + symbol on the back of the IP
Deskphone.
3. Form a small bend in the cable.
4. Thread the handset cord through the channels in the stand so that it exits
behind the handset on the right side, using the handset cord exit in the stand
base marked with the + symbol as shown in Figure 9
Using your IP Deskphone
Connecting the headset (optional)
Perform the following procedure to connect the optional headset to the IP
Deskphone.
1. On the back of the IP Deskphone, plug the headset connector into the
RJ-9 headset jack marked with the ) symbol.
2. Thread the headset cord, along with the handset cord, through the
channels in the stand so that the headset cord exits the channel marked
with the ) symbol
Selecting the headset tuning parameter
You can select a headset from the following list of supported headsets.
•
•
Type 1: Monaural and Binaural headset
—
Monaural headset: Plantronics Model number: H251N (Part number:
64338-01) with cable Model Number: A10 (Part Number:
66268-02)
—
Binaural headset: Plantronics Model number: H261N (Part number:
64339-01) with cable Model Number: A10 (Part Number:
66268-02)
Type 2: Monaural and Binaural headset
— Monaural headset: Plantronics Model number: HW251N (Part number:
75100-06) with cable Model Number: A10 (Part Number:
66268-02)
— Binaural headset: Plantronics Model number: HW261N (Part number:
75101-06) with cable Model Number: A10 (Part Number:
66268-02)
•
Type 3: Binaural headset
— Binaural headset: GN Netcom Model number: GN 4800 (Part
number: 48492-09)
After you select a headset, the corresponding tuning parameters are applied
automatically.
Using your IP Deskphone
Perform the following procedure to select a headset.
1. Press Prefs.
2. Select Audio.
3. Select Headset Type.
Connecting the LAN ethernet cable
Note: Your IP Deskphone supports both AC power and PoE options,
including IEEE 802.3 standard power. To use local AC power, you can order
the optional AC adapter separately. To use PoE, where power is delivered
over the CAT5 cable, the LAN must support PoE, and you do not need an
AC adapter.
To enable full functionality of your IP Deskphone, connect your
IP Deskphone to your LAN using a CAT5e Ethernet cable. If your network is
equipped with PoE, you can power your IP Deskphone through the LAN port.
To connect your IP Deskphone to your LAN use the following procedure:
1. Connect one end of the supplied Ethernet cable to the back of your IP
Deskphone by using the RJ-45 connector marked with the % symbol.
2. Thread the network cable through the channel marked with the %
symbol.
3. Connect the other end of the cable to your LAN Ethernet connection.
To connect your PC through your IP Deskphone use the following
procedure:
1. Connect one end of the PC Ethernet cable to your IP Deskphone using
the RJ-45 connector marked with the % symbol.
2. Thread the cable through the channel marked with the ( symbol.
3. Connect the other end of the cable to the LAN connector on the back of your
PC.
Using your IP Deskphone
Installing additional cables
If applicable, you can plug an optional USB device such as a USB mouse or a
USB keyboard into your IP Deskphone. Connect the USB cable to the USB port
on the back of the IP Deskphone.
Figure 10: Cable routing tracks and mounting holes
Method B
Method A
Wall-mounting the IP Deskphone (optional)
You can mount your Avaya 1140E IP Deskphone on a wall either by: (method A)
using the mounting holes on the bottom of the IP Deskphone stand or (method B)
using a traditional-style wall-mount box with an RJ45 connector and 15 centimeter (cm) (6-inch) RJ-45 cord (not provided).
Complete steps 1-5, as needed, before you wall-mount your IP
Deskphone:
Using your IP Deskphone
Method A:
1. Press the wall-mount lever, and pull the IP Deskphone away from the stand,
as shown in Figure 11.
2. Use the stand cover (the part you removed in “Removing the stand cover”), to
mark the wall-mount holes by pressing the bottom of the stand cover firmly
against the wall in the location where you wish to install the IP Deskphone.
Four small pins on the bottom of the stand cover make marks on the wall.
3.
Use the marks as a guideline for installing the wall-mount screws (not
provided). Install the screws so that they protrude 3 millimeters (mm) (1/8
inch) from the wall.
4. Install the IP Deskphone stand mounting holes over the screw heads as
indicated in Figure 10 (Method A). You need to remove the IP Deskphone
from the wall to adjust the lower screws.
5. When the lower screws are snug, install the IP Deskphone on the
mounting screws, and then tighten the top screws.
Figure 11: Rotate the IP Deskphone into the wall mount position.
Using your IP Deskphone
Method B:
1. Attach the 15-cm (6-inch) CAT5e cable.
2. Position the stand over the mounting rivets, and slide the IP Deskphone
down the wall so that the rivets fit into the slots on the stand, indicated in
Figure 10 (Method B).
3. Replace the stand cover. Ensure that all cables are neatly routed and press
the stand cover into place until you hear a click.
4. Put the IP Deskphone in the wall-mount position (optional). If you wall-mount
your IP Deskphone, put it in the wall-mount position by holding the Tilt Lever
and pressing the IP Deskphone towards the base until the IP Deskphone is
parallel with the base. Release the Tilt Lever and continue to push the IP
Deskphone towards the base until you hear an audible click. Ensure the IP
Deskphone is securely locked in position.
Attention: To add an Expansion Module for Avaya 1100 Series IP
Deskphones, see Expansion Module for Avaya 1100 Series IP
Deskphones (SIP Firmware) User Guide (NN43110-301).
Entering text
You use can use combinations of the letters and numbers on the dialpad of
your IP Deskphone to, for example, spell names or words in Instant
Messages (IMs), enter SIP addresses, create Address Book entries, and to
designate feature key labels.
To make a call, you can dial an alphanumeric SIP address; for example,
[email protected] can enter and edit text on your IP Deskphone using
the following methods:
Note: Some service providers support only the use of a Directory
Number (DN) such as 555-5555 to initiate a call to another IP
Deskphone. Contact your system administrator or service provider to
determine if alphanumeric dialing is supported. Alphanumeric dialing
consists of string of text that contain letters and numbers that make up,
for example, a SIP address.
You can use the following methods to enter and edit text on your IP
Deskphone:
•
“Entering text using the IP Deskphone dialpad”
•
“Entering text using the USB keyboard”
Using your IP Deskphone
Entering text using the IP Deskphone dialpad
For applications that offer text input, when you use the dialpad to enter text the
system activates the abc/123 context-sensitive soft key.
You can toggle between numeric and alphabetic input as follows:
•
When the context-sensitive soft key label is abc, you can enter
alphabetic text.
•
When the context-sensitive soft key label is 123, you can enter
numbers.
Figure 12: Context-sensitive soft key abc/123
For example, if you want to enter the lower case letter a, press the abc/
123 context-sensitive soft key to toggle to alphabetic input. Then press the
number 2 key once. If you want to enter the upper case letter C, press the number
2 key six times. You can cycle through the letters (and the numeral) by pressing
the number button repeatedly.
To create names or words that contain two adjacent letters that appear on the
same button, for example, the word press, you can do the following:
1. To enter the first character, press the dialpad key 6.
2. Pause briefly.
Using your IP Deskphone
•
To enter the next letter, press the dialpad key 6 twice to cycle to the letter r.
When entering alphanumeric information, the 1 key on the dialpad represents the
characters in Table 4. To enter a special character, press the dialpad number 1
to cycle through the characters until you reach the one you need. For example,
to enter a question mark (?), press the number 1 key eight times.
Table 4: Alphanumeric characters for dialpad key 1 (Part 1 of 2)
Character
Name
@
at
.
period
-
dash
_
underscore
&
ampersand
‘
apostrophe
^
carat
?
question mark
!
exclamation point
(
left parentheses
)
right parentheses
,
comma
\
backslash
/
forward slash
:
colon
Using your IP Deskphone
Table 4: Alphanumeric characters for dialpad key 1 (Part 2 of 2)
Character
Name
;
semi-colon
~
tilde
=
equal
+
plus
1
numeral 1
Note: No letters are associated with the 0 key.
Enabling and disabling the # Ends Dialing feature
You can enable the IP Deskphone to use the octothorpe (#) symbol to
immediately dial the address or phone number.
To enable the # Ends Dialing feature:
1. Press the Prefs context-sensitive soft
key, and then select Misc Options.
Highlight # Ends Dialing and press the
Change context-sensitive soft key.
Prefs
On
Back
or
2. Choose one of the following:
— Press the On context-sensitive soft key to
turn on # Ends Dialing.
— Press the Back context-sensitive soft key
to keep existing configurations and return to
the Preferences menu.
Using your IP Deskphone
To disable the # Ends Dialing feature:
1.
Prefs
Off
Back
or
To turn off # Ends Dialing, press the
Prefs context-sensitive soft key, and
then select Misc Options. Highlight #
Ends Dialing and press the Change
context-sensitive soft key.
2. Choose one of the following:
— Press the Off context-sensitive soft
key to turn off # Ends Dialing.
— Press the Back context-sensitive
soft key to keep existing
configurations and return to the
Preferences menu.
Configuring the dialpad to alphanumeric dialing
To eliminate the need to press the abc/123 context-sensitive soft key when
you enter text, you can set the IP Deskphone dialpad default to alphabetic
mode.
To configure the dialpad to alphabetic mode as the default:
1. Press the Prefs context-sensitive soft
key, and then select Misc Options. Highlight
Alpha Dialing, and then press the Change
context-sensitive soft key.
Prefs
2. Choose one of the following:
On
Back
or
— Press the On context-sensitive soft key to
turn on alphanumeric dialing.
— Press the Back context- sensitive soft
key to keep existing configurations and return
to the Preferences menu.
Using your IP Deskphone
To disable alphabetic mode and set numeric mode as the default:
1. Press the Prefs context-sensitive
soft key, and then select Misc
Options. Highlight Alpha Dialing,
and then press the Change
context-sensitive soft key.
Prefs
2. Choose one of the following:
Off
Back
or
-
Press the Off context-sensitive soft
key to turn on alphanumeric dialing.
-
Press the Back context-sensitive
soft key to keep existing
configurations and return to the
Preferences menu.
Entering text using the USB keyboard
You can connect a USB keyboard to the USB port of your IP
Deskphone to enter text and numbers, access some features, and
duplicate some functions.
For example, to dial a directory number, you can use the
keyboard number pad to enter digits and the asterisk (*) and
octothorpe (#) characters and you can use the alphabetic
keys to enter text.
Table 5 describes the associations between the USB keyboard function
keys and the IP Deskphone fixed keys.
Using your IP Deskphone
Table 5: USB keyboard functions (Part 1 of 2)
USB
Keyboard Key
IP Deskphone Fixed Key
Esc
Quit
F1
Services
F2
Expand
F3
Inbox
F4
Outbox
F5
Address Book
F6
Copy
F7
Volume Down
Table 5: USB keyboard functions (Part 2 of 2)
USB
Keyboard Key
IP Deskphone Fixed Key
F8
Volume Up
F9
Mute
F10
Hold
F11
Headset
F12
Handsfree
Break
Goodbye (Release)
Backspace
Left arrow of Navigation Cluster
Arrow Left
Left arrow of Navigation Cluster
Arrow Right
Right arrow of Navigation
Cluster
Arrow Up
Up arrow of Navigation Cluster
Arrow Down
Down arrow of Navigation
Cluster
Enter
Enter
Accessing the IP Deskphone
Accessing the IP Deskphone
You require a log on ID and a password to log on to a server with your IP
Deskphone.
Logging on
Whenever you log on to your IP Deskphone you must do the following:
•
confirm your logon ID
•
enter your password
•
select the duration of this session
Release 2.2 supports admin password protection for login prompt that
appears when you power up the IP Deskphone or after you log off.
Figure 13 shows the User Password protection for domains.
Figure 13: User login screen
When you log on to your IP Deskphone you must confirm your logon ID, enter
your password, and select the duration of this session. However,
Accessing the IP Deskphone
the first time you use your IP Deskphone, you need to complete some of the
following procedures:
•
“Automatic login”
•
“Selecting a language”
•
“Logging on to your Avaya 1140E IP Deskphone”
•
“Configuring the duration of the login”
•
“User Profile”
Note: The system automatically logs you back on after a power outage or
firmware upgrade. The system administrator configures this feature on a
network-wide basis.
Automatic login
Before you first receive your IP Deskphone, your system administrator can
configure your IP Deskphone with your user logon and password. If this is the
case, after you plug in the IP Deskphone you can use it without further
configuration.
Note: If the IP Deskphone is configured with automatic logon, you cannot
use the log off function, and you need a password to access some features
and functions. Contact your system administrator or service provider for
further information.
Selecting a language
Your IP Deskphone has the capacity to operate using other languages, such as
French. The system administrator can provision the IP Deskphone with up to
five languages. If the IP Deskphone is provisioned with other languages, you
can choose an available language during the login process by pressing the
Lang context-sensitive soft key on the User Login page.
Accessing the IP Deskphone
To change the language:
Change
1. Choose one of the following:
— Press the Change contextsensitive soft key to change the
current language.
Back
— Press the Back contextsensitive soft key to keep
existing language and return to
the User Login screen.
2.
Select
Back
Press the Up/Down navigation key to
highlight the new language you want to
use
3. Choose one of the following:
— Press the Select context-sensitive
soft key to change the language
to the highlighted language from
the list. The IP Deskphone returns
to the User Login screen and
uses the selected language.
— Press the Back context-sensitive
soft key to keep the existing
language and return to the User
Login screen
Logging on to your Avaya 1140E IP Deskphone
You need to log on to your Avaya 1140E IP Deskphone when you first install
and restart your IP Deskphone and anytime you log off or reboot.
Note: When you log on to the IP Deskphone for the first time, the system
prompts you for a location. For more information, see “Selecting a
location”.
Accessing the IP Deskphone
Note: The IP Deskphone retains the previous user logon ID, which
appears after the ID prompt whenever the IP Deskphone reboots.
If Authentication is enabled by your system administrator, you can enter your
authentication ID independent of your user ID. The authentication ID is used when
the server challenges the IP Deskphone.
To logon to the Avaya 1140E IP Deskphone:
abc
1. Press the abc/123 context-sensitive soft
key to toggle between alphabetic or numeric
input.
2. Use the dialpad to enter your user ID
login at the prompt.
Note: Use the left navigation key to
backspace and remove a previous user ID.
Login
3. Press the Login context-sensitive soft
key.
If Authentication is enabled by your
system administration, you are
presented with the Authentication ID
screen. The authentication ID is
autofilled with your user ID.
abc
If Authentication is not enabled, a new
screen appears and prompts you for
your password.
a. Press the abc/123 context-sensitive
soft key to toggle between alphanumeric
or numeric input.
b. Use the dialpad to enter your
authentication ID login at the prompt.
Login
c. Press the Login context-sensitive soft
key.
A new screen appears and prompts you
for your user password.
Accessing the IP Deskphone
4. Enter your password by
using the dialpad.
Note 1: When you enter your
password, the last character
entered appears. However, all
previous characters are hidden.
Note 2: When you enter your
password and you use the
navigation key to backspace, you
erase all the characters and must
completely reenter your password
again.
Next
Cancel
5. Press the Next context-sensitive soft key.
Note: You can cancel the login process
by pressing one of the following keys:
— Cancel
— Goodbye
— Quit
Accessing the IP Deskphone
Configuring the duration of the login
After you enter your logon ID and password the Duration screen appears. You
can enter the maximum length of time of the session. If you choose to use the
default duration Permanent, you remain logged on to the IP Deskphone until you
log off.
To configure the login duration:
Next
Timed
1. Choose one of the following:
— Press the Next context-sensitive soft
key to configure the logon duration
to Permanent. A login confirmation
screen appears.
— Press the Timed context-sensitive
soft key to open a screen to
configure a maximum time to remain
logged in.
Note: If you press the Timed contextsensitive soft key, you must then
configure the duration of the login.
Period
2. Press the Period context-sensitive soft
key to toggle the logon duration entries
between hours or days.
3. Do one of the following:
Next
Back
Cancel
— Use the dialpad to enter the number
of hours or days you want to remain
logged on and press the Next
context-sensitive soft key.
— Press the Back contextsensitive soft key to return to
the permanent logon screen.
— Press the Cancel contextsensitive soft key to return to
the first logon screen.
Accessing the IP Deskphone
User Profile
Your User Profile contains your specific settings and data. You are prompted to
create a User Profile the first time you log on to your Avaya 1140E IP
Deskphone. If you delete your User Profile, the IP Deskphone reboots, and you
must log on and create a new User Profile. When you log on to your IP
Deskphone, your specific settings and data are automatically available for you.
The information stored in your user profile includes:
•
Independent volume adjustments for handset, headset, and
handsfree
•
Alerting Volume adjustment
•
Idle Screen display text
•
Voice Mail settings (number and mailbox ID)
•
User location (from a server-provided list)
•
Time, Date, and Zone format settings
•
Call Subjects
•
Call Decline reasons
•
Instant Messaging settings and Instant Message Inbox/Outbox
•
Default dialing (alpha/numeric)
•
Call Ignore action (local/network)
•
Search method (Name, First character, Index)
•
User Presence selection
•
Dialing pattern default (alpha/numeric)
•
Address Book entries
•
Call Inbox and Call Outbox entries
•
Programmable keys configuration
•
# Ends dialing configuration
Accessing the IP Deskphone
Logging off from the IP Deskphone
To log off from the IP Deskphone:
1. Press the Services fixed key, and then
select Logout from the menu.
abc
2. Press the abc/123 context-sensitive soft
key to toggle between alphabetic or
numeric input.
3.
Logout or Back
Use the dialpad to enter your password
at the prompt.
4. Choose one of the following:
— Press the Logout context-sensitive
soft key to complete the logout
process. The IP Deskphone returns
to the User Login screen.
— Press the Back context-sensitive
soft key to remain logged on and
return to the Services menu.
Configuring the Avaya 1140E IP Deskphone
Configuring the Avaya 1140E IP Deskphone
You can adjust a few settings of the Avaya 1140E IP Deskphone to conform to
the environment where you want to use the phone. These settings are saved to
your User Profile. This chapter describes some of the settings that you can
customize on your IP Deskphone.
•
“Adjusting the display screen contrast”
•
“Creating the idle screen text display”
•
“Configuring the Backlight”
•
“Configuring Menu Auto back-out”
•
“Selecting a ring pattern”
•
“Adjusting the volume”
•
“Selecting a language”
•
“Selecting the date and time format”
•
“USB headset”
Adjusting the display screen contrast
Note: Adjusting the display screen contrast of the IP Deskphone also adjusts
the Expansion Module contrast, if you have an Expansion Module connected
to your IP Deskphone.
To adjust the display screen contrast:
Prefs
1.
Press the Prefs context-sensitive soft
key, select Display, Display Settings
and then select Contrast
2. Press the Left/Right navigation key to
increase or decrease the display contrast
level.
Configuring the Avaya 1140E IP Deskphone
Apply
Cancel
3. Choose one of the following:
— Press the Apply context-sensitive
soft key to save the changes and
return to the Display menu.
— Press the Cancel context-sensitive
soft key to keep the existing
configurations and return to the
Display menu.
Configuring the Avaya 1140E IP Deskphone
Creating the idle screen text display
You can create a text to display on the screen, while the phone is idle.
To create the idle screen display text:
Prefs
abc
1. Press the Prefs context-sensitive soft
key, select Display, and select Idle Screen
Text Display.
2. Press the abc/123 context-sensitive soft
key to toggle between alphabetic or numeric
input.
3. Use the dialpad to enter the display text
you want to appear on the idle screen
display of the IP Deskphone.
Save or Back
4. Choose one of the following:
— Press the Save context-sensitive
soft key to save the idle screen
text display.
— Press the Back context-sensitive
soft key to keep the existing
screen display text and return to
the Display menu.
Configuring the Avaya 1140E IP Deskphone
Configuring the Backlight
Note: Configuring the length of time the LCD screen remains backlit on the
IP Deskphone also adjusts the Expansion Module backlight time if you have
an Expansion Module connected to your IP Deskphone.
To configure the amount of time the LCD screen remains backlit:
Prefs
1. Press the Prefs context-sensitive soft
key, select Display, Display Settings
and then select Backlight from the menu.
2. Press the Left/Right navigation key to
increase or decrease the length of time you
want the idle screen to remain backlit.
Apply or Cancel
3. Choose one of the following:
— Press the Apply context-sensitive
soft key to configure the length of
time for the phone to remain backlit
and return to the Display menu.
— Press the Cancel context-sensitive
soft key to keep the existing
configurations and return to the
Display menu.
Configuring the Avaya 1140E IP Deskphone
Configuring Menu Auto back-out
You can use the Menu Auto back-out feature to configure the time interval required
for the IP Deskphone to go back to the idle screen when the IP Deskphone is left
inactive.
To configure Menu Auto back-out:
Prefs
1.
Press the Prefs context-sensitive soft
key, choose Display, and then Menu
Auto back-out.
2. Choose one of the following:
Select or Back
— Press the Select contextsensitive soft key.
— Press the Back contextsensitive soft key to return
to the previous menu.
3. Press the Up/Down navigation key to
scroll through the screen and choose the
required time interval.
Choose one of the following values:
— Never
— 10 min
— 5 min
— 2 min
— 1 min
— 30 sec
— 15 sec
Note: The Never option turns off Menu
Auto back-out.
Configuring the Avaya 1140E IP Deskphone
4. Choose one of the following:
Select or Back
— Press the Select contextsensitive soft key to configure
the Auto back- out time to the
selected (highlighted) value
and return to the Display
menu.
— Press the Back contextsensitive soft key to dismiss
the Auto back-out time menu
and return to the Display
menu.
Note: When you enter the Auto back-out menu, the current
configuration for the Menu Auto back-out time is pre-selected
(highlighted) on the list.
When you press the Select context-sensitive soft key, the time interval is flagged
to commit to the configured preferences (done after the idle screen is displayed),
and is used for menu auto back-outs from that point forward.
Configuring the Avaya 1140E IP Deskphone
Selecting a ring pattern
You can use the ring pattern feature to select the ring pattern for an
incoming call.
To select the ring pattern for an incoming call:
Prefs
1. Press the Prefs context-sensitive soft
key, select Audio, select Tones, and then
select Ring Pattern.
2. Press the Up/Down navigation key to
scroll through and highlight the different ring
patterns displayed on the LCD screen.
3. Choose one of the following:
Select or Test Back
— Press the Select context-sensitive
soft key to configure the ring pattern
and return to the Tones menu.
— Press the Test context-sensitive soft
key to briefly play the selected ring
pattern.
— Press the Back context-sensitive
soft key to keep the existing
configurations and return to the
previous menu.
Configuring the Avaya 1140E IP Deskphone
Adjusting the volume
You can adjust the volume of the IP Deskphone for the following:
•
Ring Volume
•
Handset Volume
•
Headset Volume
•
Handsfree Volume
•
Paging Ring Volume
A sliding scale appears on the LCD screen display when you adjust the volume.
Figure 14 shows how to adjust the volume.
Figure 14: Adjusting the volume
Configuring the Avaya 1140E IP Deskphone
Adjusting the ring volume
You can adjust the ring volume for an incoming call.
To adjust the ring volume for an incoming call:
Prefs
1. Press the Prefs context-sensitive soft
key, select Audio, select Tones, and then
select Alerting Volume.
2. To adjust the ring volume of an incoming
call do one of the following:
— Press the Left/Right navigation key.
— Press the Volume fixed keys to
increase or decrease the volume.
Set or Back
3. Choose one of the following:
— Press the Set context-sensitive soft
key to configure the selected volume
and return to the Tones menu.
— Press the Back context-sensitive
soft key to keep the existing
configurations and return to the
Tones menu.
Configuring the Avaya 1140E IP Deskphone
Adjusting the volume of the Handset, headset, and
Handsfree mode
You can adjust the volume for the handset, headset, and the handsfree
speaker of the IP Deskphone.
To adjust the volume of the handset:
Prefs
1. Press the Prefs context-sensitive soft
key, select Audio, select Voice, and then select
Handset.
2. To adjust the handset volume use one of the
following methods:
— Press the Left/Right navigation key to
increase or decrease the volume of the handset.
— Press the Volume + fixed key to
increase the handset volume or press the Volume
- fixed key to decrease the handset volume.
Note: To adjust the volume during a call, use only
the Volume + and
Volume - fixed keys.
Set or Back
3. Choose one of the following:
— Press the Set context-sensitive soft key
to configure the selected volume and
return to the Voice menu.
— Press the Back context-sensitive soft
key to keep existing configurations
and return to the Voice menu.
Configuring the Avaya 1140E IP Deskphone
You can adjust the headset volume on the IP Deskphone.
To adjust the headset volume:
Prefs
1. Press the Prefs context-sensitive soft
key, select Audio, select Voice, and then select
Headset.
2. To adjust the handset volume use one of the
following methods:
— Press the Left/Right navigation key to
increase or decrease the volume of the
handset.
— Press the Volume + fixed key to
increase the handset volume or press the
Volume - fixed key to decrease the handset
volume.
Note: To adjust the volume during a call, use
only the Volume + and
Volume - fixed keys.
Set or Back
3. Choose one of the following:
—
Press the Set context-sensitive
soft key to set the selected
volume and return to the Voice
menu.
— Press the Back contextsensitive soft key to keep the
existing configurations and
return to the Voice menu.
Configuring the Avaya 1140E IP Deskphone
You can adjust the handsfree mode volume on the IP Deskphone.
To adjust the handsfree mode volume:
Prefs
1. Press the Prefs context-sensitive soft
key, select Audio, select Voice, and then
select Handsfree.
2. To adjust the handsfree volume use one
of the following methods:
— Press the Left/Right navigation key to
increase or decrease the volume of the
handset.
— Press the Volume + fixed key to
increase the handset volume or
press the Volume - fixed key to decrease the
handset volume.
Note: To adjust the volume during a call, use
only the Volume + and Volume - fixed keys.
Set or Back
3. Choose one of the following:
— Press the Set context-sensitive soft
key to configure the selected volume
and return to the Voice menu.
— Press the Back context-sensitive
soft key to keep the existing
configurations and return to the
Voice menu.
Configuring the Avaya 1140E IP Deskphone
Selecting a language
The display is available in multiple languages. A maximum of five
languages are accessible through the IP Deskphone. The system
administrator determines which languages are available for your IP
Deskphone.
To select a language:
Prefs
Change
1. Press the Prefs context-sensitive soft
key, and then select Language. The current
language displays.
2.
Press the Change context-sensitive soft
key to change the language.
3. Press the Up/Down navigation key to
scroll and highlight the desired language (for
example, German [Deutsche]).
Select or Back
4. Choose one of the following:
— Press the Select contextsensitive soft key to save the
desired language and return to
the previous screen.
— Press the Back contextsensitive soft key to keep
the existing configurations
and return to the
Preferences menu.
Configuring the Avaya 1140E IP Deskphone
Selecting the date and time format
Several date and time formats are available. Formats are based on the
12-hour and 24-hour clocks.
To select a date format:
Prefs
Change
1. Press the Prefs context-sensitive soft
key, select Misc Options, and then
select Time.
2. Press the Change context-sensitive soft
key.
3. Press the Up/Down navigation key to
highlight Date Format in the menu.
Change
4. Press the Change context-sensitive soft
key to change the Date Format.
5. Press the Up/Down navigation key to
scroll and highlight either a
month/day (MM/DD) or a day/month
(DD/MM) format.
Select or Back
6. Choose one of the following:
— Press the Select contextsensitive soft key to save
the format and return to the
Time Format menu.
— Press the Back contextsensitive soft key to keep
the existing configurations
and return to the Time
Format menu.
Configuring the Avaya 1140E IP Deskphone
You can select a time zone for your IP Deskphone.
To select a time zone:
Prefs
1. Press the Prefs contextsensitive soft key, select Misc
Options, and then select Time.
Change
2. Press the Change contextsensitive soft key.
3. Press the Up/Down navigation
key to highlight Timezone in the
menu.
Change
4. Press the Change contextsensitive soft key to change the
Date Format.
5. Press the Up/Down navigation key to
scroll through and highlight the time
zones.
Note: Time zones are listed based on
GMT format, for example:
— GMT -11:00 Samoa
— GMT -10:00 Hawaii
Select or Back
6. Choose one of the following:
— Press the Select context-sensitive
soft key to save the time zone
selection and return to the Time
Format menu.
— Press the Back context-sensitive
soft key to keep the existing
configurations and return to the
Time Format menu.
101
Configuring the Avaya 1140E IP Deskphone
You can select the time zone format for your IP Deskphone.
To select a time format:
Prefs
Change
1. Press the Prefs context-sensitive soft
key, select Misc Options, and then
select Time.
2. Press the Change context-sensitive soft
key.
3. Press the Up/Down navigation
key to highlight Time Format in
the menu.
Change
4. Press the Change contextsensitive soft key change the date
format.
5. Press the Up/Down navigation
key to scroll and highlight a
time format:
— 12-hour
— 24-hour
— French
Select or Back
6. Choose one of the following:
— Press the Select contextsensitive soft key to save the
time format and return to the
Time Format menu.
— Press the Back contextsensitive soft key to keep
the existing configurations
and return to the Time
Format menu.