1
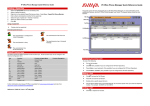
How to configure an H.323 IP trunk between an Avaya™
IP600 Internet Protocol Communication Server and
Avaya™ IP Office Server - Issue 1.2
Abstract
Existing Avaya Call Processing (ACP) platform customers may choose to use the new IP
Office server to meet data and telephony needs at smaller remote sites. One way of achieving
this integration is via H.323 IP trunks. These Application Notes describe the system
configuration parameters required for H.323 IP trunk interoperability between an Avaya™ IP
Office server and either a Avaya DEFINITY® Server, IP600 Server or a MultiVantage™
Software platform.
GAK; Reviewed:
WCH/JK 2/19/2003
Solution & Interoperability Test Lab Application Notes
© 2003 Avaya Inc. All Rights Reserved.
1 of 21
deftoipoiptrunk.doc
1. Introduction
Avaya Call Processing (ACP) based platforms such as the Avaya™ IP600 Server and Avaya
DEFINITY® Business Communication Server have a large installed base. Some of these ACP
platform customers may choose to interconnect to an IP Office server via an IP trunk. This
document describes the basic administration tasks necessary to interconnect these systems
together via an H.323 IP trunk. A sample configuration with provisioning tasks has been
provided in this document for use as a reference.
2. Configuration
The sample configuration, depicted in Figure 1, illustrates an Avaya™ IP600 Server and
Avaya™ IP Office server operating in different subnets, connected via an H.323 trunk.
Extension 30029 is registered with the IP600 server, while extensions 20001 through 20004
belong to the IP Office server. All Avaya™ IP telephones have been provisioned statically in
this example.
Note: IP Office servers (controllers) are equipped with an onboard DHCP server and a TFTP
server (located on the Manager PC) that can optionally be used for IP telephone DHCP address
assignment and firmware upgrade.
.3
ManagerPC
Windows NT 4.0
Workstation
.4
IP600Serv er
P580 Interf ace
112.16.10.1/24
VLAN id 112
name "IPOf f iceArray "
.2
Uplink
IP403Of f ice
.2
.3
C-LAN
MedPro
P2
P3
.6
P580 Interf ace
111.16.10.1/24
VLAN id 111
name "IP600 Array "
.4
P1
S Y S MO N
.5
x20001
4606 IP Telephone
x20003
4612 IP Telephone
(registeredtoIP Office)
(registeredtoIP Office)
x20002
4612 IP Telephone
(registeredtoIP Office)
P4
P580 Switch
x30029
4624 IP Telephone
(registeredtoIP600)
P580 Switch Notes:
M8024-100TX module in slot 2
Px = Port Number
Figure 1: Sample H.323 Trunk Configuration
3. Hardware and Software Used
The following hardware and software versions were used for this configuration:
• Avaya™ IP600 Internet Protocol Communication Server release R009c.05.0.122.2
• Avaya Cajun® P580 Switch version 5.2.10
• Avaya™ IP403 Office Server build 1.1(19)
• Avaya™ IP Telephone firmware version 1.1 (registered with the IP Office server)
• Avaya™ IP Telephone firmware version 1.6 (registered with the IP600 Server)
• Manager PC - 750MHz, 20GB HD, 512MB RAM, Microsoft NT 4.0 Workstation
GAK; Reviewed:
Solution & Interoperability Test Lab Application Notes
2 of 21
WCH/JK 2/19/2003
© 2003 Avaya Inc. All Rights Reserved.
deftoipoiptrunk.doc
4. IP600 Server Configuration via a Terminal Emulator
These notes assume that all customer and feature options have already been provisioned to
support IP trunks, shuffling and hairpinning on the Avaya™ IP600 Server. Please refer to the
Administration for Network Connectivity Guide for additional details.
4.1. Basic H.323 Trunk Administration Tasks
1. Define IP Network Region for optimal audio packet performance.
At the terminal command prompt, enter change ip-network-region 1 and match
the parameters in Figure 2. Then apply the changes.
Important Notes: Administrators may need to use a different network region number
depending on the configuration being used. Be sure that both servers are configured as
follows in order to allow Avaya™ IP Telephones registered on each system the ability to
establish media paths directly.
IP600 Server ip-network-region, station and signaling-group:
Direct IP-IP Audio Connections = y
IP Audio Hairpinning = y
IP Office server IP trunk and station level:
Allow Direct Media Path = Enabled
change ip-network-region 1
Page
1 of
2
IP Network Region
Region: 1
Name:
Audio Parameters
Codec Set: 1
UDP Port Range
Min: 2048
Max: 65535
DiffServ PHB Value: 0
Direct IP-IP Audio Connections? y
IP Audio Hairpinning? y
802.1p/Q Enabled? n
Figure 2: Configuring the IP Network Region
GAK; Reviewed:
WCH/JK 2/19/2003
Solution & Interoperability Test Lab Application Notes
© 2003 Avaya Inc. All Rights Reserved.
3 of 21
deftoipoiptrunk.doc
2. Specify the type of codec used for voice encoding and companding.
At the terminal command prompt, enter change ip-codec-set 1 and match the
parameters in Figure 3. Then apply the changes.
Note: Administrators may need to use a different codec-set number for a particular
configuration if 1 is already being used. If this is the case the Administrator must be sure
to match the codec-set value with the network region being used. All of the mutually
supported codecs supported between the Avaya™ IP Office server and IP600 Server are
shown in Table 1 along with their respective nomenclature. The ordering and availability
of these codecs can be customized to fit a particular application. It is important to keep in
mind the bandwidth used by each codec and the bandwidth available between locations.
If the bandwidth were limited, it would be best to specify only a low bandwidth codec in
the codec set, for example G.729.
IP600 Server
G.711MU
G.711A
G.729
G.723-6.3K
IP Office Server
G.711 ULAW 64K
G.711 ALAW 64K
G.729(a) 8K CS-ACELP
G.723.1 6K3 MP-MLQ
Table 1: Mutually Supported Speech Codecs
change ip-codec-set 1
IP Codec Set
Codec Set: 1
1:
2:
3:
4:
Audio
Silence
Codec
Suppression
G.711MU
n
G.711A
n
G.729
n
G.723-6.3K
n
Frames
Per Pkt
2
2
2
1
Packet
Size(ms)
20
20
20
30
Figure 3: Configuring the IP Codec Set
GAK; Reviewed:
WCH/JK 2/19/2003
Solution & Interoperability Test Lab Application Notes
© 2003 Avaya Inc. All Rights Reserved.
4 of 21
deftoipoiptrunk.doc
3. Assign node names and IP addresses to each node in the network.
At the terminal command prompt, enter change node-names ip and match the
parameters in Figure 4. Then apply the changes.
Note: The C-LAN and MedPro cards must have unique names and IP addresses assigned
in the node-names list. These values will eventually be matched to the physical card
interfaces in step 4. Be sure to add the IP address for the IP Office server along with a
unique name so that it can be provisioned in the signaling-group between the systems in
section 4.2. The naming conventions used are open, but remember to carry the names
throughout the remaining tasks.
change node-names ip
Name
clan
medpro
ipoffice
default
Page
IP Address
111.16 .10 .2
111.16 .10 .3
112.16 .10 .2
0 .0 .0 .0
.
.
.
.
.
.
IP NODE NAMES
Name
1 of
1
IP Address
.
.
.
.
.
.
.
.
.
.
.
.
.
.
.
.
.
.
Figure 4: Configuring IP Node Names
4. Define the IP interface for the C-LAN and MedPro cards being used for the trunk.
At the terminal command prompt, enter change ip-interfaces and match the
parameters in Figure 5. Then apply the changes.
Note: Administrators may need to use a different Slot value depending on the particular
configuration. The Node Names used for each card interface must match those specified
in the Node Names table (step 3) in order to correctly correlate each IP address to its
respective card.
change ip-interfaces
Page
1 of
6
IP INTERFACES
Enable
Eth Pt Type
Slot Code Sfx Node Name
y
C-LAN 01A04 TN799 C clan
y
MEDPRO 01A05 TN2302
medpro
n
n
Subnet Mask
255.255.255.0
255.255.255.0
255.255.255.0
255.255.255.0
Net
Gateway Address Rgn
111.16 .10 .1
1
111.16 .10 .1
1
.
.
.
.
.
.
Figure 5: Configuring IP Interfaces
GAK; Reviewed:
WCH/JK 2/19/2003
Solution & Interoperability Test Lab Application Notes
© 2003 Avaya Inc. All Rights Reserved.
5 of 21
deftoipoiptrunk.doc
5. Assign Link via Ethernet Data Module to the C-LAN.
At the terminal command prompt, enter add data-module next and match the
parameters in Figure 6. Then apply the changes.
Note: Administrators may need to use a different data-module and C-LAN slot
depending on the particular configuration. If multiple C-LAN cards are in use the
administrator may be required to change the link number. However, port 17 must be
used on the C-LAN card regardless.
change data-module 31209
Page
1 of
1
DATA MODULE
Data Extension:
Type:
Port:
Link:
31209
ethernet
01A0417
1
Name: clan ip 1a04
Figure 6: Configuring the Date Module
GAK; Reviewed:
WCH/JK 2/19/2003
Solution & Interoperability Test Lab Application Notes
© 2003 Avaya Inc. All Rights Reserved.
6 of 21
deftoipoiptrunk.doc
4.2. Detailed H.323 Trunk Administration Tasks
1. Create a signaling group for the H.323 trunk connecting to the IP Office server.
At the terminal command prompt, enter add signaling-group 5 and match the
parameters in Figure 7. Then apply the changes.
Note: You may need to use a different signaling-group depending on your setup. Since
you have not created a trunk group so you must leave the Trunk Group for Channel
Selection field blank. The Near-end Node Name and the Far-end Node Name must
match the values from the Node Names table (section 4.1, step 3). Be sure to use port
1720 for the Near-end and Far-end. The Direct IP-IP Audio Connections and IP Audio
Hairpinning fields must be enabled.
Note: The field Calls Share IP Signaling Connection must be set based on the IP Office
server release in use. For release 1.3(15) or earlier, this field must be set to “y”. For
release 1.3(16) or later it must be set to “n”.
change signaling-group 5
Page
1 of
5
SIGNALING GROUP
Group Number: 5
Group Type: h.323
Remote Office? n
Max number of NCA TSC: 0
Max number of CA TSC: 0
Trunk Group for NCA TSC:
Trunk Group for Channel Selection: _
Supplementary Service Protocol: a
Near-end Node Name: clan
Near-end Listen Port: 1720
LRQ Required? n
RRQ Required? n
Far-end Node Name: ipoffice
Far-end Listen Port: 1720
Far-end Network Region:
Calls Share IP Signaling Connection? n
Bypass If IP Threshold Exceeded? n
Direct IP-IP Audio Connections? y
IP Audio Hairpinning? y
Interworking Message: PROGress
Figure 7: Configuring the Signaling Group
2. Create a new trunk group for H.323 trunks.
At the terminal command prompt, enter add trunk-group 5 and match the parameters
shown in Figures 8 through 10. Then apply the changes.
Note: You may need to use a different trunk-group number depending on your setup.
The parameters on ACP page 1 of 10 (see Figure 8) that need to be changed are:
GAK; Reviewed:
WCH/JK 2/19/2003
Solution & Interoperability Test Lab Application Notes
© 2003 Avaya Inc. All Rights Reserved.
7 of 21
deftoipoiptrunk.doc
•
•
•
•
•
Group Type
TAC
Carrier Medium
Service Type
Codeset to Send Display
display trunk-group 5
Page
1 of
10
TRUNK GROUP
Group Number:
Group Name:
Direction:
Dial Access?
Queue Length:
Service Type:
5
Group Type: isdn
CDR Reports: y
IP Trunk to IP Office
COR: 1
TN: 1
TAC: 105
two-way
Outgoing Display? n
Carrier Medium: IP
n
Busy Threshold: 99
Night Service:
0
tie
Auth Code? n
TestCall ITC: unre
Far End Test Line No:
TestCall BCC: 0
TRUNK PARAMETERS
Codeset to Send Display: 0
Codeset to Send National IEs: 6
Max Message Size to Send: 260
Charge Advice: none
Supplementary Service Protocol: a
Digit Handling (in/out): enbloc/enbloc
Trunk Hunt: cyclical
QSIG Value-Added? n
Digital Loss Group: 13
Calling Number - Delete:
Insert:
Numbering Format:
Bit Rate: 1200
Synchronization: async
Duplex: full
Disconnect Supervision - In? y Out? y
Answer Supervision Timeout: 0
Figure 8: Configuring Trunk-Group ACP Page 1 of 10
Note: The parameters on ACP page 2 of 10 (see Figure 9) that need be changed are:
•
•
•
Send Name
Send Calling Number
Send Connected Number
change trunk-group 5
TRUNK FEATURES
ACA Assignment? n
Page
Measured:
Internal Alert?
Data Restriction?
Send Name:
Used for DCS? n
Suppress # Outpulsing? n
Outgoing Channel ID Encoding: preferred
none
n
n
y
2 of
10
Wideband Support? n
Maintenance Tests? n
NCA-TSC Trunk Member:
Send Calling Number: y
UUI IE Treatment: service-provider
Replace Restricted Numbers? n
Replace Unavailable Numbers? n
Send Connected Number: y
Send UCID? n
Send Codeset 6/7 LAI IE? y
Network (Japan) Needs Connect Before Disconnect? n
GAK; Reviewed:
WCH/JK 2/19/2003
Solution & Interoperability Test Lab Application Notes
© 2003 Avaya Inc. All Rights Reserved.
8 of 21
deftoipoiptrunk.doc
Figure 9: Configuring Trunk-Group ACP Page 2 or 10
Note: The number of trunk group members can vary. It is recommended that the
number of trunk group members match the number of media channels available by the
voice compression module (VCM) installed on the IP Office server at a minimum. It is
possible for this number to be larger, but this is beyond the scope of these application
notes. The parameters on ACP page 4 of 10 (see Figure 10) that need to be set are:
•
•
Port
Sig Grp.
display trunk-group 5
GROUP MEMBER ASSIGNMENTS
Port
1:
2:
3:
4:
5:
ip
ip
ip
ip
ip
Code Sfx Name
trktoipo1
trktoipo2
trktoipo3
trktoipo4
trktoipo5
Page
TRUNK GROUP
Administered Members (min/max):
Total Administered Members:
Night
4 of
10
1/7
7
Sig Grp
5
5
5
5
5
Figure 10: Configuring Trunk-Group ACP Page 4 of 10
GAK; Reviewed:
WCH/JK 2/19/2003
Solution & Interoperability Test Lab Application Notes
© 2003 Avaya Inc. All Rights Reserved.
9 of 21
deftoipoiptrunk.doc
3. Add a trunk group for channel selection to the signaling group.
At the terminal command prompt, enter change signaling-group 5 and match the
parameters in Figure 11. Be sure to change the Trunk Group for Channel Selection to
the number of your trunk group you chose in section 4.2, step 2 then apply the changes.
Note: You may have to use a different trunk-group value depending on your setup. Only
basic trunk connectivity has been provisioned at this point. You will still need to
administer call routing in order to be able to place calls between the systems using the
H.323 trunk. Older Avaya Call Processing (ACP) platforms may require you to busy
signaling-group 5 first and then change signaling-group 5 and finally
release signaling-group 5 for this operation to complete.
change signaling-group 5
Page
1 of
5
SIGNALING GROUP
Group Number: 5
Group Type: h.323
Remote Office? n
Max number of NCA TSC: 0
Max number of CA TSC: 0
Trunk Group for NCA TSC:
Trunk Group for Channel Selection: 5
Supplementary Service Protocol: a
Near-end Node Name: clan
Near-end Listen Port: 1720
LRQ Required? n
RRQ Required? n
Far-end Node Name: ipoffice
Far-end Listen Port: 1720
Far-end Network Region:
Calls Share IP Signaling Connection? n
Bypass If IP Threshold Exceeded? n
Direct IP-IP Audio Connections? y
IP Audio Hairpinning? y
Interworking Message: PROGress
Figure 11: Linking the Signaling Group with a Trunk Group
GAK; Reviewed:
WCH/JK 2/19/2003
Solution & Interoperability Test Lab Application Notes
© 2003 Avaya Inc. All Rights Reserved.
10 of 21
deftoipoiptrunk.doc
4.3. Administering Basic UDP Call Routing Tasks
This section represents one way in which 5-digit UDP dialing can be administered for
interoperability with the IP Office. Some applications may require a different routing method.
Please refer to the Administration Guide for further details.
1. Change UDP to route 20xxx numbers to the IP Office server.
At the terminal command prompt, enter change udp 2 and match the parameters
shown in Figure 14. Then apply the changes.
Note: The UDP entry created in Figure 12 tells ACP to use AARCode 200 when it
receives a 5-digit dial string beginning with 20xxx. After ACP process this step, the 5digit number will become a 7-digit number. For example, if the user dialed 20123, the
digit 2 is removed leaving 0123. The prefix 200 is then inserted, resulting in a 7-digit
number 200 0123.
Change udp 2
Page
1 of
2
UNIFORM DIALING PLAN
Ext Codes: 2ddxx
Ext Code: 2xxxx Type:
dd
Type
dd
Type
0x: AARCode 200 1x:
00:
10:
01:
11:
02:
12:
03:
13:
04:
14:
05:
15:
06:
16:
dd
2x:
20:
21:
22:
23:
24:
25:
26:
Type
dd
Type
3x:
30:
31:
32:
33:
34:
35:
36:
dd
Type
4x:
40:
41:
42:
43:
44:
45:
46:
Figure 12: Configuring the Uniform Dialing Plan
GAK; Reviewed:
WCH/JK 2/19/2003
Solution & Interoperability Test Lab Application Notes
© 2003 Avaya Inc. All Rights Reserved.
11 of 21
deftoipoiptrunk.doc
2. Change AAR Analysis to route 7-digit calls starting with 200 to the IP403 Office.
At the terminal command prompt, enter change aar analysis 200 and match the
parameters shown in Figure 13. Then apply the changes.
Note: This AAR entry created in Figure 13 tells ACP to use route-pattern 5 when it
receives a 7-digit dial string beginning with 200xxxx.
change aar analysis 200
AAR DIGIT ANALYSIS REPORT
Dialed
String
Total
Min
Max
2
200
3
5
6
7
7
7
7
7
7
7
7
7
7
7
7
7
Route
Pattern
254
5
254
254
254
254
Call
Type
Node
Number
aar
aar
aar
aar
aar
aar
Figure 13: Configure AAR Analysis
3. Configure a route pattern.
At the terminal command prompt, enter change route-pattern 5 and match the
parameters in Figure 14. Then apply the changes.
Note: You may need to use a different route pattern depending on availability. In this
step ACP removes the leading three digits (200) and re-inserts the digit 2. For example if
the 5-digit number 21234 was dialed it would be processed as 200 1234 according to
AARcode 200 in Figure 12. The route pattern specified forces ACP to strip the leading
three digits (200) from the 7-digit dial-string then re-insert the digit 2. The result will be
the original 5-digit extension 21234, which is then routed over trunk-group 5.
GAK; Reviewed:
WCH/JK 2/19/2003
Solution & Interoperability Test Lab Application Notes
© 2003 Avaya Inc. All Rights Reserved.
12 of 21
deftoipoiptrunk.doc
change route-pattern 5
Page
Grp. FRL NPA Pfx Hop Toll No. Inserted
No.
Mrk Lmt List Del Digits
Dgts
1: 5
0
3
2
2:
3:
4:
5:
6:
BCC VALUE TSC CA-TSC
0 1 2 3 4 W
Request
ITC BCIE Service/Feature BAND
1 of
1
DCS/
QSIG
Intw
n
n
n
n
n
n
IXC
user
user
user
user
user
user
No. Numbering LAR
Dgts Format
Figure 14: Configure a Route Pattern
5. P580 Switch Configuration
The Cajun® P580 switch may be administered via a web interface or via the CLI (Command
Line Interface). When administering via the CLI, the administrator must enter configure mode to
create the necessary interfaces. In this example both interfaces were provisioned to send and
receive RIP versions 1 and 2, as well as, support OSPF in backbone area 0.0.0.0. These
parameters should be modified to fit your particular security concerns and routing scheme.
Please refer to the “Avaya Cajun P580 User Guide” for additional information.
Important Note: The IP Office servers do not support RIP or OSPF routing protocols. It is
meant to be an edge device at a remote location. In most deployments the IP Office server
would use a statically assigned default route to the WAN only. Routing was only enabled to
allow the P580 switch to interconnect with other switches and routers in a larger network.
Cajun# configure
Cajun(configure)# set vlan 112 name "IPOffice Array" # create a VLAN
Cajun(configure)# set port vlan 2/1 112 # assign the VLAN to a mod 2 port 1
Cajun(configure)# interface "IPOffice Array" # configure the interface
Cajun(config-if:IPOffice Array)# ip address 112.16.10.1 255.255.255.0
Cajun(config-if:IPOffice Array)# ip vlan 112 # link the port/vlan with the interface
Cajun(config-if:IPOffice Array)# ip routing-mode rt_mgmt
Cajun(config-if:IPOffice Array)# ip rip send version 1 2
Cajun(config-if:IPOffice Array)# ip rip receive version 1 2
Cajun(config-if:IPOffice Array)# exit
Cajun(configure)# set vlan 111 name "IP600 Array" # create a VLAN
Cajun(configure)# set port vlan 2/2-4 111 # assign the VLAN to mod 2 ports 2 to 4
Cajun(configure)# interface "IP600 Array" # configure the interface
Cajun(config-if:IP600 Array)# ip address 111.16.l0.1 255.255.255.0
Cajun(config-if:IP600 Array)# ip vlan 111 # link the ports and vlan with the interface
Cajun(config-if:IP600 Array)# ip routing-mode rt_mgmt
Cajun(config-if:IP600 Array)# ip rip send version 1 2
Cajun(config-if:IP600 Array)# ip rip receive version 1 2
Cajun(config-if:IP600 Array)# exit
Cajun(configure)# router ospf # configure OSPF for network interconnection
GAK; Reviewed:
WCH/JK 2/19/2003
Solution & Interoperability Test Lab Application Notes
© 2003 Avaya Inc. All Rights Reserved.
13 of 21
deftoipoiptrunk.doc
Cajun(configure router:ospf)# network 112.16.10.1 0.0.0.255 area
0.0.0.0
Cajun(configure router:ospf)# network 111.16.10.1 0.0.0.255 area
0.0.0.0
Cajun(configure router:ospf)# exit
Cajun(configure)# router rip # configure RIP for network interconnection
Cajun(configure router:rip)# network 112.16.10.1 0.0.0.255
Cajun(configure router:rip)# network 1 11.16.10.1 0.0.0.255
Cajun(configure router:rip)# exit
Cajun(configure)# exit
Cajun# copy running-config startup-config
Wrote running-config to '/nvram/startup.txt'
6. IP Office Server Configuration
The Avaya™ IP Office server is configured as a DHCP server out of the box. If you wish to
statically provision the IP Office server and associated hardware you must first get the controller
up and running in DHCP mode and then change the configuration to use static addressing.
Note: The steps below assume that physical connectivity, call routing and IP trunk provisioning
have been completed on the IP600 Server and the Cajun® P580 switch.
1. Get the controller running in DHCP mode and then change it for static addressing.
Connect a DHCP enabled PC equipped with Avaya™ IP Office Manager directly to the
controller. Using the Manager software on the PC, modify the configuration to use a
preferred IP address and IP mask and disable the DHCP server mode. See Figure 15. In
this example the address 112.16.10.2/24 was used for the controller. Apply the changes.
Note: Since DHCP is now disabled you can no longer access the unit using the DHCP
enabled Manager PC. You must now change the Manager PC to use a static address
within the same subnet as the controller (assuming direct attach). In this example the PC
was changed to address 112.16.10.3 mask 255.255.255.0 with the default gateway
112.16.10.2.
GAK; Reviewed:
WCH/JK 2/19/2003
Solution & Interoperability Test Lab Application Notes
© 2003 Avaya Inc. All Rights Reserved.
14 of 21
deftoipoiptrunk.doc
Figure 15: LAN1 Static Configuration
2. Configuring the default route.
Add a static route for use on LAN1 ports which points to the Cajun™ P580 switch interface
address 112.16.10.1 as the default route. To administer the default uplink route click on
IPRoute in the Navigation tree then right click on the white space to right side of the screen
and select add. Match the parameter in Figure 16.
Note: The Avaya™ IP Office server is equipped with an onboard hub. To reduce your
Ethernet collision zone you should always uplink the controller to a switch such as an
Avaya™ P333R Stackable Routing Switch or other.
GAK; Reviewed:
WCH/JK 2/19/2003
Solution & Interoperability Test Lab Application Notes
© 2003 Avaya Inc. All Rights Reserved.
15 of 21
deftoipoiptrunk.doc
Figure 16: Adding a Default Uplink Route
3. Check connectivity.
From the Manager PC, ping the 111.16.10.1 interface to verify connectivity with the
Avaya™ IP600 Internet Protocol Communication Server. See Figure 17.
Figure 17: Ping Test
4. Add a new line configuration to create an IP trunk.
Click Line in the Navigation tree and then right click the white space to the right of the
screen and select new. The VPN Line must have a unique Line Number, Incoming
Group ID and Outgoing Group ID. For this example 6 was chosen as the Line Number,
Incoming Group ID and Outgoing Group ID. See Figure 18.
GAK; Reviewed:
WCH/JK 2/19/2003
Solution & Interoperability Test Lab Application Notes
© 2003 Avaya Inc. All Rights Reserved.
16 of 21
deftoipoiptrunk.doc
Figure 18: New VPN Line for H.323 IP Trunk
5. Modify the VoIP tab to enable trunking with the IP600 Server.
Click on the VoIP tab under the VPN Line configuration window. See Figure 19.
Change the Gateway IP Address to match the IP address of the IP600 Server C-LAN
card. In this example 111.16.10.2 was used. The Faststart, Out of Band DTMF and
Allow Direct Media Path radio buttons are checked and the Compression Mode dropGAK; Reviewed:
WCH/JK 2/19/2003
Solution & Interoperability Test Lab Application Notes
© 2003 Avaya Inc. All Rights Reserved.
17 of 21
deftoipoiptrunk.doc
down menu is set to Automatic Selection by default and should be left this way for
interoperability.
Note: Users may wish to use a specific Compression Mode in a particular configuration.
Use the Compression Mode drop down menu to select a specific speech codec, but make
sure that both sides support the selected value. When connecting to an IP600 Server it is
best to use G.711 ALAW 64K, G711 ULAW 64K or G.729(a) 8K CS-ASCELP.
Figure 19: VoIP tab for H.323 IP trunk
6. Add a short code to route 5-digit extensions beginning with digit 3 to the IP600 Server.
Click on the Short Code group in the Navigation tree, right click on the white space to the
right and select new. Match the parameters in Figure 20, Short Code = 3xxxx, Telephone
Number = 3NJ, Line Group ID = 6 and Feature = Dial then save the changes.
GAK; Reviewed:
WCH/JK 2/19/2003
Solution & Interoperability Test Lab Application Notes
© 2003 Avaya Inc. All Rights Reserved.
18 of 21
deftoipoiptrunk.doc
Note: The 3xxxx indicates that the number must be 5-digits in length starting with 3 in
order to use the route specified. The 3N indicates that the system should send the entire
5-digit dial string to the route specified, including the leading digit 3. The J bypasses the
need to append a # after the dialed string. The Line Group ID = 6 indicates that IP Office
call processing should route 3xxxx calls to the IP trunk for the IP600 Server. The Feature
= Dial field indicates that upon receiving a dial string 3xxxx, the IP Office should out
pulse the required number specified in the Telephone Number field over the trunk
specified in the Line Group ID field.
Figure 20: IP Office UDP Short Code
7. Install Avaya™ IP telephones using the static provisioning.
Change the Hunt Group, Extensions and Users parameters to use 5-digit dialing on the IP
Office server. Apply the changes then install all required IP telephones. Refer to page 32 of the “4600 Series IP Telephone Installation Guide” for static installation instructions.
4606 telephone parameters for x20001:
Phone=112.16.10.4
CallSv=112.16.10.2
CallSvPort=1719
Router=112.16.10.2
Mask=255.255.255.0
FileSv=112.16.10.3
4612 telephone parameters for x20002:
Phone=112.16.10.5
CallSv=112.16.10.2
CallSvPort=1719
Router=112.16.10.2
GAK; Reviewed:
WCH/JK 2/19/2003
Solution & Interoperability Test Lab Application Notes
© 2003 Avaya Inc. All Rights Reserved.
19 of 21
deftoipoiptrunk.doc
Mask=255.255.255.0
FileSv=112.16.10.3
4624 telephone parameters for x20003:
Phone=112.16.10.6
CallSv=112.16.10.2
CallSvPort=1719
Router=112.16.10.2
Mask=255.255.255.0
FileSv=112.16.10.3
4624 telephone parameters for x30029:
Phone=111.16.10.4
CallSv=111.16.10.2
CallSvPort=1719
Router=111.16.10.1
Mask=255.255.255.0
FileSv=0.0.0.0
Important Note: IP telephones registering with the IP Office server must use the
controller IP address for the CallSv (gatekeeper) IP address. The IP telephones (x20001,
x20002 and x20003) registered with the IP Office server are running firmware version
1.1, which requires a TFTP server IP address in order to complete the boot up sequence.
Important Note: The IP telephone (x30029) registered with the IP600 Server is running
firmware version 1.6 which does not require a TFTP server IP address in order to
complete the boot up sequence.
7. Conclusion
These Application Notes provide administrators with the basic steps necessary to provision an
H.323 IP trunk between an Avaya™ Call Processing (ACP) platform, such as an IP600 Server,
or Avaya MultiVantage™ Software platform with an Avaya™ IP Office server. The steps
provided should be helpful for implementing most deployments, but they do not address all
possible configuration scenarios. There is no QSIG feature transparency between DEFINITY®
Servers and Avaya™ IP Office for 1st GA release. Basic call setup information necessary for
point-to-point calling is supported. Some components of the Q.931 standard (which are
considered a subset of QSIG) such as Name Identification and Number transport via setup
message Information Elements (IEs) have been implemented across H.323 IP trunks between the
two systems.
8. Product Documentation References
!
Administration for Network Connectivity, Issue 2.0, November 2000
GAK; Reviewed:
WCH/JK 2/19/2003
Solution & Interoperability Test Lab Application Notes
© 2003 Avaya Inc. All Rights Reserved.
20 of 21
deftoipoiptrunk.doc
!
4600 Series IP Telephone Installation Guide, Issue 1.5, Comcode 700197858, June 2001
!
IP Office Manager Application, Issue 4.0, November 2001
© 2003
Avaya Inc. All Rights Reserved.
Avaya and the Avaya Logo are trademarks of Avaya Inc. All trademarks identified by ® and ™
are registered trademarks or trademarks, respectively, of Avaya Inc. All other trademarks are the
property of their respective owners. The information provided in these Application Notes is
subject to change without notice. The configurations, technical data, and recommendations
provided in these Application Notes are believed to be accurate and dependable, but are
presented without express or implied warranty. Users are responsible for their application of any
products specified in these Application Notes.
Please e-mail any questions or comments pertaining to these Application Notes along with the
full title and filename, located in the lower right corner, directly to the Avaya Solution &
Interoperability Test Lab at [email protected]
GAK; Reviewed:
WCH/JK 2/19/2003
Solution & Interoperability Test Lab Application Notes
© 2003 Avaya Inc. All Rights Reserved.
21 of 21
deftoipoiptrunk.doc