Download Avaya 1608/1616 Digital Phone User Guide
Transcript
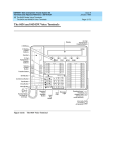
www.consoltech.com CTI INSIGHT Avaya 1608/1616 Digital Phone User Guide Answering and Making Calls Answering a call If you are not already on a call, lift the handset. If you are already on a call, press the alerting call appearance button (slow flashing green lamp) puts the existing call on hold and answers the alerting call. To answer the call on speakerphone, press the SPEAKER button. To answer the call using a headset, press the HEADSET button. Making a call 1. For local calls dial 9 and the number you want to call. For long distance calls dial 9-1 and the number 2. When answered, either lift the handset or continue on speakerphone. Calling a person from the call log 1. Press the CALL LOG button. 2. Scroll left or right to view a separate list of all, missed, answered, or outgoing calls. 3. Scroll up or down to select the person or number you want to call. 4. Press the OK button or the Call soft key Calling a person from the contacts list 1. Press the CONTACTS button. 2. Scroll up or down to select the person or number you want to call. 3. Press the OK button or the call soft key. Conference Calls Making a conference call 1. While active on a call, press the CONFERENCE button. The call is put on hold. 2. Call the person you want to add to a conference. 3. When they answer, if they want to join the conference press the CONFERENCE button again. If they do not want to join the conference, press the DROP button. Then press the fast flashing green button. Transferring Calls Transferring a Call 1. While connected to the call you want to transfer, press TRANSFER. 2. Dial the telephone number. 3. Press TRANSFER again to complete the transfer. Transferring to Voicemail 1. When connected to a call, press the Message key. You can still continue talking. 2. Dial the extension number of the user or group and press Select. Adding a person to a conference call 1. Press the HOLD button to put the conference on hold. 2. Call the person you want to add to a conference. • When they answer, if they want to join the conference press the CONFERENCE button again. • If they do not want to join the conference, press the DROP button. Then press the fast flashing green button to rejoin the conference. Contacts Adding a new contact CTI INSIGHT 1. Press the CONTACTS button. 2. Press the More soft key. 3 Press the New soft key. 4. Enter the name using the dial pad. To enter characters using the dial pad: a. Repeatedly press the number key that corresponds to the letter or number you want to enter until it is displayed. b. Pause before entering the next characters if on the same key. c. To enter a space, press 0. d. Enter remaining letters or numbers. e. Press the Bksp soft key to delete the last character. 5. Press the OK button or the OK soft key. 6. Enter the telephone number. 7. Press the Save soft key or the OK button. Forwarding Calls Forward Unconditionally (External forwarded numbers) 1. Press the Features soft key 2.Use to scroll the menu to Fwd Uncon. · To switch off forward unconditional, press the Off soft key. · To change the forwarding settings, press the Edit soft key. Use to scroll through the editing options. Use to switch the forwarding on or off. Use to select which calls should be forwarded. The options are Adding an entry from the call log to your contacts list 1. Press the CALL LOG button. 2. Scroll to the number that you want to add to your contacts list. 3. Press the Details soft key. 4. Press the +Contact soft key. 5. To edit the name or number, scroll up or down and edit as appropriate. 6. Press the Save soft key or the OK button. 1. Press the CONTACTS button. 2. Scroll to the contact you want to edit. 3. Press the Details soft key. 4. Press the Edit soft key. 5. Scroll up or down to choose the field you want to edit. 6. Use the dial pad and soft keys to make changes to the contact information. 7. Press the Save soft key or the OK button to save your changes. Common Phone Features (Not available with Transfer calls without ringing the user’s phone 1. Once you have the caller on the phone press [Transfer]. 2. Press [DirectVM] or [DVM]. 3. Wait for the announcement instructing you to enter the user’s extension number. 4. Press [Transfer] right away Call user’s voicemail directly 1. Pick up handset and press [DirectVM] or [DVM]. 2. Wait for the announcement instructing you to enter the user’s extension number. 3. Enter user’s extension and leave a message after the tone. Call Park This feature can put a call on hold and retrieved from any other extension within the office. 1. Whenever you receive a call and wish to Park it, press [CPark1] or [CPark2], [CPark3]. 2. Because you parked the call you will see a diamond shape w next to park slot you selected. Everyone else will see an underline under the parked slot, i.e. CPark1. To retrieve the call from another extension 1. Press the park slot that you were notified to retrieve, i.e. CPark1 Select Edit to change the number to which calls are forwarded. Follow Me (Redirect to another extension) Editing a contact Direct to Voicemail External Only, External and Group, Non Group Calls and All Calls. 1.Press Features. Use to highlight Forward. Press Select. 2.Use to highlight Follow me To. Press Select. 3. Dial the number of another user. When the number matches the user, the name appears. Alternatively, use the Dir soft key to select a user from the directory. · Save Save the selected number as the follow me to destination. All calls to your extension number will be redirected to that destination. · Clear Clear the currently selected or set number. · Back Go back to the previous menu. every system, check with your administrator) Intercom This feature allows you to page another user’s phone. 1. Press [IAuto]/ [Intercom] 2. Enter the user’s extension followed by # or press [Done] 3. The other user will hear a tone indicating they are being intercom. However, if the user is currently on a call the phone will ring to user and a regular call. Page Page all phones in the system 1 . Press [Page] or #[9] 2. Make your announcement 3. Press [Drop] or hang up handset Call Pickup This feature allows a user to answer calls ringing at another phone To answer a ringing phone, press the Call Pkup button and enter the extension of the phone that is ringing. That call will now be on the user’s phone that picked up. Do Not Disturb Send all calls directly to voicemail 1. To activate press [DND]. When this feature is activated you will see next to the feature. You will hear a half ring as a reminder when a call comes in and [DND] is activated. When you pick-up the handset while [DND] is activated you will hear a stuttered dial-tone as another reminder, however you will still be able to make calls. 2. To deactivate press [DND] again. Voicemail * Voicemail systems vary, but your IP Office is equipped with Visual Voice. For traditional use of your voicemail system check with your system administrator. Visual Voice Controls Allows you to see your voicemail options on your phone screen rather than following spoken mailbox prompts. You can use mail screens. to move between the visual voice To access your Voicemails or your Group Voicemails: 1. Press Voice or [Message] button. 2. You’ll be able to access the following menus: Listen You will be presented with the following message categories for your messages: · New (X) · Old (X) · Saved (X) 1. Use the feature key to select the category, for example New. The first message in the selected category will play; and the available controls will be: · Previous – Plays previous message · Next - Plays next message. · << - rewinds current message by 5 sec · >> – fast forwards current message by 5 sec · Pause- pauses the current message/resumes playing · Delete - Delete the current message. · Save - Change the current message's category to 'saved' · Copy- Copy the message to another mailbox or mailboxes. If selecting more than one mailbox, the entries must be separated with a #. To add a covering message to the copied voicemail. 1. Press Copy, and add the recipients. The feature keys change to the copy options. 2. Press Pre-Rec 3. Record your message 4. Press Stop 5. Press Listen to check your message. You can change the message by selecting Pre-Rec again. 6. Press Send. Message Record and send a voicemail message to another mailbox Greeting Change the main greeting used for callers to your mailbox. If no greeting is selected then the default system greeting is used. By pressing Greeting you will have the following options: To change your mailbox greeting: · Record - starts recording a new greeting. · Listen - to hear your current greeting. · Submit - saves the new greeting. · Delete - deletes your current greeting. Email This control allows you to change the current voicemail to email mode being used for new messages received. Use Change to change the selected mode. Press Done when correct mode is displayed. The possible modes are: · Email Mode Off – Voicemail to email is disabled · Email Mode Copy - New voicemail messages are copied to email and original is left in voicemail box · Email Mode Fwd - New voicemail messages are forwarded to the user’s email and original is deleted from voicemail box · Email Mode Alert – A alert email is sent. Original message is not attached and is left in the voicemail box CTI INSIGHT


