1
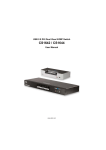
Chapter 1. Introduction No. Component Description 1 LED Status Panel This panel contains LED icons that light to indicate mode and port status. The Mode and Port Selection Pushbuttons have three corresponding LED icons that light to indicate status – KVM, Audio, and USB. 2 Port Selection Pushbuttons For manual port selection (see Manual Switching, page 13): To bring complete focus (audio, KVM, and USB) to a computer, either, a) press the port selection pushbutton that corresponds to that computer; or b) press the Mode pushbutton once (the Mode pushbutton’s three icons light up) and then press the port selection pushbutton that corresponds to that computer. All three port icons light up. To bring only the KVM focus to a computer, press the Mode pushbutton twice (the Mode pushbutton’s KVM icon lights up), and then press the port selection pushbutton that corresponds to that computer. The port’s KVM icon (the port number) lights up. To bring only the audio focus to a computer, press the Mode pushbutton three times (the Mode pushbutton’s audio icon lights up), and then press the port selection pushbutton that corresponds to that computer. The port’s audio icon lights up. To bring only the USB focus to a computer, press the Mode pushbutton four times (the Mode pushbutton’s USB icon lights up), and then press the port selection pushbutton that corresponds to that computer. The port’s USB icon lights up. Press and hold port selection pushbuttons 1 and 2 simultaneously for 2 seconds to start Auto Scan Mode (see Auto Scanning, page 17) Note: If a port is not selected within two seconds of the pushing the Mode pushbutton, the Mode pushbutton will power off. 3 Mode Selection Pushbutton This pushbutton allows you to cycle through the four focus modes – complete, KVM, audio, and USB. 4 Console Audio Ports Your console speakers and microphone plug in here. 5 USB 2.0 Peripheral Port USB 2.0 peripherals (printers, scanners, etc.) plug in here. 7