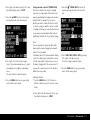
1
LEICA DIGILUX 1 Anleitung / Instructions
LEICA DIGILUX 1
Anleitung / Instructions
Abbildungen in den vorderen und hinteren Umschlagseiten
Illustrations inside front and rear covers
Vorbereitungen / 1
LEICA DIGILUX 1
Instructions
Illustrations inside front and rear covers
1.1
1.2
1.3
1.22
1.21
1.20
1.19
1.23
1.24
1.25
1.4
1.38
1.34
1.5
1.6
1.7
1.35
1.36
1.32
1.26
1.2
1.28
1.33
1.29
1.30
1.31
1.37
1.15
1.14
1.16
1.17
1.13
1.12
1.18
1.11
1.10
1.9
1.8
1.42
1.40
1.41
1.39
1.1
1.2
1.3
1.22
1.21
1.20
1.19
1.23
1.24
1.25
1.4
1.38
1.34
1.5
1.6
1.7
1.35
1.36
1.32
1.26
1.2
1.28
1.33
1.29
1.30
1.31
1.37
1.15
1.14
1.16
1.17
1.13
1.12
1.18
1.11
1.10
1.9
1.8
1.42
1.40
1.41
1.39
Warning notice
You should exclusively use the recommended
accessories to prevent faults, short circuits or
electric shock. Do not expose the device to moisture or rain. Do not attempt to remove parts of
the housing (covering); specialist repairs can only
be carried out in authorised service centers.
Note
Some components of this device contain low
quantities of mercury or lead. Disposal of these
components may be subject to special environmental protection rules in your country.
For information on proper disposal or recycling,
please contact the relevant authorities or an
office of the suppliers and manufacturers of
electronic products. (http://www.eiae.org)
Please ensure that you observe copyright laws.
The copying of pre-recorded media such as tapes,
CDs or other published or broadcast material for
purposes other than personal use may contravene
copyright laws. Some material may even be subject to restrictions on copying for private use.
Warning notice / 98
The SD logo is a registered trademark.
Other names, company or product names referred
to in this manual are trademarks or registered
trademarks of the relevant companies.
Scope of delivery
Before using your LEICA DIGILUX 1 for the first
time, please check that the accessories supplied
are complete.
A. 64 MB SD memory card
B. Battery
C. Mains/charging unit with mains cord
D. USB connecting cord
E. A/V cord
F. Carrying strap
G. Wrist strap
H. Lens cap inc. fastening cord
I. LCD monitor hood
J. 2 CD ROMs
Scope of delivery / 99
Contents
Contents / 100
102
104
105
108
Nomenclature
Camera body
Displays in the LCD data field
Displays in the LCD monitor
Menu items
113
113
113
Quick guide
Presets
Taking photographs/videoing
Viewing the pictures
Detailed guide
114
114
115
115
115
115
116
116
117
118
Preparation
Attaching the carrying strap
Attaching the wrist strap
Fitting the monitor hood
Opening the monitor hood
Closing the monitor hood
Fitting/removing the lens cap
Inserting and removing the battery
Charging the battery
Mains operation
Inserting and removing the memory card
119
119
119
119
120
120
120
121
122
123
124
124
125
The most important settings/controls
Turning the camera on/off
Optical viewfinder
Diopter setting
Markings
LED displays
Switching the monitor displays
The displays in record mode
The displays in review mode
Selecting menu items
Setting the date and time
Record/review selector
Exposure mode setting 0dial
Shutter release
126
126
127
128
129
129
130
131
132
Record mode
Using the optical zoom
Using the digital zoom
Using AUTO mode
Video recordings
Using automatic single image replay
AUTO REVIEW
Checking the last picture REVIEW
Deleting the picture during viewing
Taking photographs with the built-in flash
unit
Taking photographs with the self timer
144
145
146
147
148
148
150
151
152
153
134
134
135
136
136
137
138
139
139
140
141
142
143
Further functions, Record mode
Series exposures
Pictures with sound
Taking photographs with automatic program mode P
Taking photographs with speed priority
mode T
Taking photographs with aperture priority
mode A
Taking photographs with manual shutter
speed and exposure settings M
Selecting the exposure metering method
Metering memory-lock
Exposure compensation
Taking photographs with the automatic
exposure bracketing mode
Using the autofocus spot metering mode
Using the macro function
Using manual focus setting
155
155
156
157
157
158
159
161
162
165
Taking photographs with the automatic
focus bracketing mode
Taking photographs with flash synchronised to the end of the exposure
Flash exposure compensation
Using an additional flash unit
Setting the resolution
Setting the compression rate
Setting the white balance
Setting the ISO sensitivity
Setting the picture properties
(contrast, sharpness, color saturation)
Using lens attachments
Review mode
Review of single pictures
Review of single pictures with sound
Simultaneous review of up to nine pictures
Zooming and trimming while reviewing
single pictures
Enlarging the picture and selecting the
trimming
Review of video recordings
Deleting pictures
Formatting the memory card
Protecting pictures
Print order (DPOF) settings on the memory
card
178
178
179
180
181
182
Further functions, Review mode
Adding sound to existing pictures (Audio
Dubbing)
Reducing the resolution after recording
Changing the trimming after recording
Creating new folder numbers
Automatic review of a series of pictures
SLIDE SHOW
Setting the LCD monitor brightness
Setting the acknowledge tones
Setting automatic switch off
Playback on a television
Transferring data to a computer
Epson PIM (Print Image Matching) format
183
183
183
184
184
184
185
185
185
186
187
Miscellaneous
Storing the camera
Care and maintenance instructions
General care instructions
Maintenance instructions
For the camera
For the battery
For memory cards
Storage
Data structure on the memory card
Warning messages
Malfunctions and troubleshooting
188
Technical data
170
171
173
176
176
Contents / 101
Designation of parts
Camera body
Front view
1.1 Autofocus sensor windows
1.2 Optical viewfinder window
1.3 Flash exposure metering cell
1.4 Flash reflector
1.5 Self timer LED
1.6 Focus mode selector E/L/+
1.7 LEICA DC VARIO SUMMICRON
7-21 mm f/1:2-2.5 ASPH. lens.
Top view
1.8 Removable front ring
1.9 Manual focusing ring
1.10 Zoom lever
1.11 Shutter release
1.12 Self timer button Q
1.13 Flash mode button !
1.14 Record/review selector J/Ü/ü
1.15 Exposure mode dial AUTO/P/A/T/M/Ka
1.16 Microphone
1.17 Flash unit (hot) shoe
1.18 LCD data field
Rear
1.19
1.20
1.21
Designation of parts / 102
view
Diopter setting roller
Red LED
Green LED
1.22 Viewfinder eyepiece
1.23 Button for exposure compensation,
automatic exposure bracketing, automatic
focus bracketing and flash exposure
compensation AE MENU
1.24 Exposure metering method
selection button U
1.25 Main switch ON/OFF
1.26 Monitor display selection button DISPLAY
1.27 Menu system on/off button MENU
1.28 Memory card slot door
1.29 Direction pad
1.30 Speaker
1.31 Review and setting confirmation button
VIEW/SET
1.32 LCD monitor
1.33 Connecting socket door
Left view
1.34 Eyelet for carrying strap
1.35 USB socket (5-pole, for connecting to
computers)
1.36 A/V OUT socket (for connecting to a TV)
1.37 DC IN socket (for external power supply)
Right view
1.38 Eyelet for carrying strap
1.39 Memory card slot
Bottom view
1.40 Locking lever for battery compartment door
1.41 Battery compartment door
1.42 Tripod connection thread
Designation of parts / 103
Displays in the LCD data field
The functions displayed correspond to those of
the LCD monitor.
2.1
2.1
2.17
2.15
2.4
2.2
2.3
2.16
2.5
2.14
2.13
2.6
2.12
2.10
2.11
Designation of parts / 104
2.7
2.8
2.9
Flash mode
a. N Automatic flash activation
b. B Automatic flash activation with
pre-flash
c. 1 Manual flash activation
d. V Manual flash activation with pre-flash
e. C Automatic flash activation with
pre-flash and slower shutter speeds
(depending on the setting either with
synchronisation to the beginning or end
of the exposure)
f. X Manual flash deactivation
2.2 Sound recording
2.3 Battery status (does not appear when using
the camera with the mains charger)
2.4 Manual focus
2.5 Spot autofocus
2.6 Exposure metering method setting
2.7 Remaining pictures/recording time
2.8 Exposure compensation setting
2.9 White balance mode setting
(does not appear in AUTO mode)
2.10 Automatic focus bracketing mode
2.11 Automatic exposure bracketing mode
2.12 Resolution/PLAY: indication of review mode
2.13
2.14
2.15
2.16
Image data compression rate setting
ISO sensitivity setting
Flash exposure compensation setting
Self timer mode setting (2 or 10 seconds
lead time possible)
2.17 Macro mode setting
Displays in the LCD monitor
In record modes
3.4
3.29
3.3
3.2
3.30
3.1
3.13 3.1
3.5
3.11
3.6
3.7
3.8
3.31
3.14/27/28
2.13
3.16/15
3.9
3.10 3.2
3.12
3.26
3.17
3.24
3.25
3.19
3.23
3.22
3.20
3.21
Exposure mode
a. AUTO Fully automatic
b. P Programmed automatic exposure mode
c. A Aperture priority mode
d. T Speed priority mode
e. M manual shutter speed and exposure
settings
f. K Video recording
Flash mode
a. No display: Automatic flash activation
b. 3 Automatic flash activation with
pre-flash
c. 1 Manual flash activation
d. 4 Manual flash activation with
pre-flash
e. 5 Automatic flash activation with
pre-flash, slower shutter speeds and
synchronisation to the beginning of
the exposure
f. 6 Automatic flash activation with
pre-flash, slower shutter speeds and
synchronisation to the end of the exposure
(only appears if this function is set)
g. 2 Manual flash deactivation
3.3
Use of a (telephoto, macro or wide-angle)
lens attachment (function should also be set
with the digital adapter when using Leica
spotting scopes)
3.4 Focusing mode
a. No display: Autofocus
b. + macro setting
c. MF manual setting
3.5 Spot AF
3.6 Sound recording
3.7 Resolution
a. 2240: 2240 x 1680
b. 1600: 1600 x 1200
c. 1120: 1120 x 840
d. 640: 640 x 480
3.8 Image data compression rate
a. y Fine (low compression rate)
b. Y Standard (normal compression rate)
c. TIFF no compression
3.9 Battery charge level
a. s sufficient capacity
b. S falling capacity
c. D insufficient capacity
d. d Replacement or recharging
necessary
3.10 Remaining pictures/recording time
(for video recordings)
Designation of parts / 105
3.11 ISO sensitivity
a. No display: AUTO (automatic setting)
b. ISO 100
c. ISO 200
d. ISO 400
3.12 * Recording to memory card signal
(flashing)
3.13 White balance
a. No display: automatic setting
b. $ daylight
c. % cloudy conditions
d. & halogen lighting
e. / fluorescent tube lighting
f. ( electronic flash illumination
g. ) manual setting
3.14 Zoom lens position (with digital zoom range
if activated)
3.15 Self timer mode
a. W 2 seconds lead time
b. q 10 seconds lead time
3.16 Signal for activated spot metering
3.17 Marking for spot rangefinder field
3.18 Marking for (normal) rangefinder field
3.19 Light balance for manual exposure setting
3.20 Shutter speed
3.21 Aperture value
3.22 Exposure metering method symbol
Designation of parts / 106
3.23 Signal for activated exposure compensation
including compensation value
3.24 Signal for activated automatic exposure
bracketing mode
3.25 Date and time
3.26 Infinity setting signal
3.27 ; Focus setting complete signal
3.28 ß Focus setting aid for manual setting
3.29 Signal for activated automatic focus
bracketing mode
3.30 Flash functions
a. Signal for activated flash exposure compensation including compensation value
b. Signal for external flash unit fitted and
turned on
ba. 9 with automatic camera control
PRESET
bb. 0 with manual camera control
MANUAL
3.31 Signal for activated series exposure function
Displays in the LCD monitor
In review mode
3.34
3.33
3.32
3.35
3.36
3.37
3.38
3.39
3.40
3.41
3.42
3.32 j Review mode activated signal
3.33 v Signal for picture with print order
setting DPOF
3.34 M Signal for protected picture
3.35 ö Signal for picture with sound recording
3.36 Picture number/total number of pictures
3.37 Resolution (see 2.7)
3.38 Image data compression rate (see 2.8)
3.39 Battery charge level (see 2.9)
3.40 Folder/folder number
3.41 Picture data (only if activated)
a. Exposure metering method
b. Exposure
c. Shutter speed
d. ISO sensitivity setting
e. Flash mode
f. White balance setting
3.42 Picture date and time for picture shown
Designation of parts / 107
Menu items
For record modes
In AUTO mode
4.4 Ö AUDIO REC.
4.5 c PICT. SIZE
4.6 y QUALITY
4.7 i D. ZOOM
4.10 # CONVERSION
Sound recording
Resolution
Compression rate
Digital zoom
Optical attachments
In modes
4.1 ?
4.2 e
4.3 Z
4.4 Ö
4.5 c
4.6 y
4.7 i
4.8 7
P, A, T, M
W. BALANCE
SENSITIVITY
SPOT AF
AUDIO REC.
PICT. SIZE
QUALITY
D. ZOOM
SLOW SYNC.
White balance
ISO sensitivity
Spot autofocus
Sound recording
Resolution
Compression rate
Digital zoom
Flash with slower
shutter speeds
4.9 9 EXT. FLASH Flash using additional
external flash unit
4.10 #
CONVERSION Optical attachments
4.11 H PICT. ADJ.
Picture properties
Designation of parts / 108
In mode K (video)
4.10 # CONVERSION Optical attachments
For basic settings in record mode
4.12 $ MONITOR
Monitor brightness
4.13 o AUTO REVIEW Automatic review of
single pictures
4.14 ä BEEP
Acoustic acknowledge
tones
4.15 A POWER SAVE Automatic switch off
4.16 F NO. RESET
Change picture number
4.17 f CLOCK SET
Date and time
Designation of parts / 109
Menu items
For review mode
For review mode
4.18 , DELETE
4.19 M PROTECT
4.20 v DPOF
4.21 p SLIDE SHOW
Delete
Protect
Print order settings
Automatic review of all
pictures
4.22 Ö AUDIO DUB. Adding sound recording
4.23 x RESIZE
Reducing the resolution
after recording
4.24 n TRIMMING Changing the trimming
4.25. b FORMAT
Formatting the memory
card
Designation of parts / 110
For basic settings in review mode
4.11 $ MONITOR
Monitor brightness
4.26 Ä VOLUME
Volume of sound
playback
4.14 ä BEEP
Acoustic acknowledge
tones
4.15 A POWER SAVE Automatic switch off
4.16 f CLOCK SET Date and time
4.27 l VIDEO OUT TV standard
Designation of parts / 111
Quick guide / 112
Quick guide
You will need the following items:
_ Camera
_ Battery (B)
_ Memory card (A)
_ Mains/charging unit with mains cord (C)
Viewing the pictures
12. Set the Record/review selector to J
(see p. 155). Press left or right on the direction pad (1.29) to view the desired pictures.
Presets
1. Set the main switch (1.25) to OFF.
2. Insert the battery (B) into the camera
(see p. 116).
3. Connect the mains/charging unit (C) to charge
the battery (see p. 116).
4. Insert the memory card (A) (see p. 118).
5. Turn the main switch to ON.
6. Set the date and time (see p. 123).
7. Set the correct diopter value for your eye on
the viewfinder (1.19/1.22) (see p. 119).
Taking photographs/videoing
8. Set the exposure mode dial (1.15) and the
record/review selector (1.14) to the desired
modes (see p. 124).
9. Set the focus mode selector (1.6) to the
desired mode (see p. 141).
10. Press the shutter release (1.11) to the first
pressure point to activate the focus setting
(see p. 127).
11. Press the shutter release all the way down to
take the photograph.
Quick guide / 113
Detailed guide
Preparation
Attaching the carrying strap
Open the triangular key rings on the carrying
strap (e. g. using a coin) until they can be clipped
onto the two eyelets (1.34/1.38) located on the
side of the camera housing.
Detailed guide / Preparation / 114
Attaching the wrist strap
As an alternative to the carrying strap, you can
use the wrist strap supplied.
1. To do this, thread the short loop through one
of the eyelets and then
2. pull the other end through the loop.
Fitting the monitor hood
When using the camera outside in bright sunlight,
particularly with the sun behind you, it may be difficult to see the monitor screen. The monitor hood
attached to the monitor (I, in scope of delivery)
normally enables the image to be seen much more
easily even under the conditions mentioned
above.
Attaching the monitor hood
1. Fold the larger flap from the smaller bottom
section by 90°.
2. Slide the clip on the upper edge of the flap
frame underneath the corresponding downward
pointing section of the viewfinder window
(1.22)
3. Tighten the screw in the bottom section of the
flap (e. g. with a coin) to attach it to the
camera’s tripod thread (1.42).
Opening the monitor hood
1. Lift the clip on the lower edge of the monitor
hood cover against the resistance and
2. fold the cover upwards by 90°. The two sprung
side flaps automatically open to the left and
right.
Closing the monitor hood
1. Press the two side flaps inwards onto the monitor surface.
2. While holding the flaps in place, press the
cover downwards until you hear and feel it lock
in place.
Notes:
The closed monitor hood protects the LCD monitor from damage caused by external factors to a
limited extent. It can – and therefore should –
remain attached permanently.
As it has its own tripod thread, the camera can be
placed on a tripod even with the monitor hood
attached.
However, it must be (temporarily) taken off to
remove the battery.
Fitting/removing the lens cap
The lens cap (H) should always be fitted when you
are not using the camera, to protect the front
lens. Two clips on the back of the cap hold it in
place in the lens front ring thread. For fitting and
removal, they are pressed inwards using the two
buttons on the edge of the cap.
To prevent loss, the cap can be attached to the
carrying strap with a cord.
1. To do this, thread the untied end of the cord
through the opening in the cap and
2. pull the other end of the cord through the
resulting loop.
3. Thread the free end of the cord through one of
the key rings and
4. then pull the cap through this loop.
If you are not using the carrying strap, the cap
can be attached to one of the carrying strap eyes
(1.34/1.38) rather than to the key ring.
Detailed guide / Preparation / 115
Note:
Remove the lens cap when turning the camera on
in one of the record modes. Otherwise, an error
message appears (see p. 119).
Inserting and removing the battery
The LEICA DIGILUX 1 is powered by a powerful
and fast-charging lithium ion battery. This type of
battery should be used exclusively in the camera,
and the battery should only be charged with the
equipment provided for this purpose.
1. Set the main switch (1.25) to OFF.
2. Open the battery compartment door (1.41) by
turning the locking lever (1.40) to the right. The
spring-loaded door then opens automatically.
3. Inset the battery into the compartment with its
contacts facing forwards. Press it into the
compartment until the light grey sprung locking
catch moves over the battery to hold it in
place.
4. Close the battery compartment door by turning
the locking lever to the left.
To remove the battery, follow these instructions in
reverse order. The light grey sprung locking catch
in the battery compartment must be pushed to
the side to unlock the battery.
Detailed guide / Preparation / 116
Notes:
Remove the battery, if you will not be using the
camera for a long period of time. When doing so,
turn the camera off using the main switch first.
Each time the battery is inserted, the date and
time must be reset, unless it has been removed
for less than 5 minutes (see p. 123).
The battery supplied is designed to be used exclusively with this camera. Do not use it in any
other equipment.
Charging the battery
1. Set the main switch (1.25) to OFF.
2. Insert the battery.
3. Open the door (1.33) for the connecting
sockets. First of all move the door slightly
backwards (in the direction of the arrow) to
unlock it. The spring-loaded door then opens
automatically.
4. First insert the mains/charging unit (C) plug
into the lowest socket (1.37), marked “DC-IN”,
then insert the smaller plug on the mains lead
into the mains/charging unit and finally plug
the unit into the mains socket.
The green LED (1.21) then begins to flash to indicate that charging is in progress. When charging
is complete, the LED is first of all lit continuously,
before it finally goes out.
When charging is complete – after approx. 2
hours – the mains/charging unit should be
disconnected from the mains and the camera
in that order. However, there is no risk of
overcharging.
With the 64 MB SD memory card supplied, the
following recording times/number of pictures
are then available:
with monitor turned on
approx. 120 min/240 pictures
with monitor turned off
approx. 180 min/360 pictures
5. Close the door again, by pressing it down and
sliding it forwards until it locks into place.
Charge level displays
The battery charge level is shown in both the LCD
data field (1.18) and the LCD monitor (1.32) (but
not when the mains/charging unit is connected).
s sufficient capacity
S falling capacity
D insufficient capacity
d Replacement or recharging necessary
Notes:
Lithium ion batteries such as that used in the
LEICA DIGILUX 1 do not develop any “memory
effect”. They can therefore be charged at any time
regardless of the current charge level. If the
battery is only partially discharged when charging
commences, it takes correspondingly less time to
fully charge it.
Only load the battery if its temperature and room
temperature are between 10 and 35°C.
If the green LED flashes faster than at approx.
2Hz (2x per second) after commencing charging,
this indicates a charging error.
In this case, disconnect the mains/charging unit
from the mains and the camera and remove the
battery. It is not sufficient to simply turn the
camera off and back on using the main switch.
Ensure that the above temperature conditions are
met and then restart the charging process. If the
problem persists, please contact your dealer, the
Leica office in your country or Leica Camera AG.
Mains operation
You can also operate the camera from the mains
using the mains/charging unit, so that you will not
be restricted by the battery capacity. Connect as
described under “Charging the battery”.
Note:
When operating the camera from the mains, the
camera gets warm – this is quite normal and is
not a malfunction.
Detailed guide / Preparation / 117
Inserting and removing the memory card
The LEICA DIGILUX 1 saves the picture data on an
extremely compact SD (secure digital) card. Alternatively, MultiMediaCards can be used. SD memory cards and MultiMediaCards are small, light and
removable external storage media. SD memory
cards, particularly those with high capacity, allow
pictures to be taken and reviewed much more
quickly. They have a write protection switch,
which you can use to lock the card against data
being unintentionally saved or deleted. This switch
takes the form of a slider on the non-bevelled side
of the card; the data is protected in the lower
position, marked with “LOCK”.
SD memory cards and MultiMediaCards are available from various suppliers and with various
capacities.
A 64 MB SD memory card is included with the
LEICA DIGILUX 1.
Note:
When using MultiMediaCards, the monitor screen
can temporarily go off during video recording, this
is not a malfunction.
To remove the memory card, follow these instructions in reverse order. For unlocking, the card – as
specified in the door – must first of all be pushed
a little further in.
1. Set the main switch (1.25) to OFF.
Notes:
Do not touch the memory card contacts.
If you cannot insert the memory card, check that
it is aligned correctly.
If you cannot close the door after removing the
memory card, try it again after inserting and
removing the memory card.
When you open the door (1.28) or remove the
memory card, the green LED (1.21) flashes; when
re-inserting the red LED (1.20) lights up while the
data is read in.
Do not open the cover or remove either the
memory card or the battery while the red LED is
flashing, i. e. while picture data is being saved.
Otherwise, the data on the card can be destroyed
and the camera may malfunction.
As electromagnetic fields, electrostatic charge, as
well as defects on the camera or the card can
lead to damage or loss of the data on the memory
card, we recommend that you also transfer the
data to a computer and save it there (see p. 181).
For the same reason, we recommend that you
always store the card in the yellow antistatic plastic pouch supplied.
2. Open the door (1.28) of the memory card slot.
First of all move the door slightly backwards
to unlock it. The spring-loaded door then opens
automatically.
3. Insert the memory card (A) into the slot with
the contacts at the back and with the bevelled
corner pointing downwards. Push it in against
the spring resistance until you hear it click into
place.
4. Close the door again, by pressing it down and
sliding it forwards until it locks into place.
Detailed guide / Preparation / 118
The most important settings/controls
Turning the camera on/off
The camera is turned on and off using the main
switch (1.25). This is done by turning it to the
appropriate position, marked with ON and OFF.
If the record and review function selector (1.14) is
set to one of the record modes when the camera
is turned on, the lens moves from the idle to
standby position and the green LED (1.21) lights
up.
However, if the lens cap is still on, the lens cannot
move into standby position and the error message
REMOVE LENS CAP AND PRESS SET BUTTON
appears on the LCD monitor (1.32). In this case,
remove the lens cap and then press the
VIEW/SET button (1.31).
When turning the camera on and off, there should
be no objects directly in front of the lens, as this
will prevent it from moving into the appropriate
positions. In such cases, the error message described above appears.
If the record/review selector is set to review, the
lens cap can remain in place when turning the
camera on, until you switch to a record mode.
Optical viewfinder
The LEICA DIGILUX has an optical viewfinder that,
as in traditional cameras, can be used to set the
trimming when changing the focal length and to
select the picture composition. It is particularly
useful when you are using fully automatic mode
(AUTO, see p. 127).
Note:
It is only possible to make a visual check of the
focus setting and the resulting image frame when
using the digital zoom on the LCD monitor (1.32).
Diopter setting
For optimum viewing of the subject and the locating marks in the optical viewfinder, it is necessary
to adjust the diopter setting for your eye. To do
this, use the locking roller (1.19) on the left next
to the viewfinder eyepiece (1.22) to set the viewfinder image so that you can see it in sharply
including the locating marks.
Markings
There are 2 groups of locating marks in the visual
viewfinder:
_ In the middle are cross hairs to align the subject
with the autofocus metering field and
_ two horizontal marks on the left and right at the
upper edge for parallax compensation, i. e. as
a display of the limit of the image field at image
spacings of between 70cm and 1m with the
zoom lens telephoto setting.
Detailed guide / The most important settings/controls / 119
LED displays
The LEDs (Light Emitting Diodes) act as status
and warning displays.
The green LED (1.21) flashes when the battery is
being charged to indicate that charging is still
underway, or that the capacity of the battery is
almost used up. It lights up permanently when the
battery is charged but the mains/charging unit is
still connected (see p. 117).
The green LED also lights up after the camera is
turned on as confirmation that it is ready to use.
To confirm that the automatic focus setting has
been carried out (Autofocus, see p. 127) it flashes
once and then continues to be lit. However, if the
autofocus is not able to set the focus, for example
if the distance is too short, it flashes.
It also flashes if the memory card slot door (1.28)
is open or if no memory card is inserted.
The red LED (1.20) flashes until the built-in flash
unit is charged, i. e. when it is not yet ready for
use (again). Even if the flash function has been
turned off, it flashes if the available light is not
enough to give a sufficiently exposed picture
without use of the flash.
It is lit up permanently if the built-in flash unit is
activated by pressing the shutter release (1.11) to
its pressure point and is ready to use (see p. 131).
It also flashes (for different lengths of time depending on the compression rate set, (see p. 148)
after the picture has been taken, while the image
data is being transferred to the memory card.
Switching the monitor displays
The monitor display selection button (DISPLAY,
1.26) can be used to turn the monitor screen on
or off in the record or review modes or to select
whether it should appear with or without function
displays.
In review mode, you can select between a monitor
screen without or with function displays or with
expanded function displays.
You scroll through the different display options in
an endless loop and therefore select them by
pressing the button once or twice.
The sequences:
In record mode:
Monitor screen with function displays – without
function displays – off
In review mode:
Monitor screen with function displays – with
expanded function displays – without function
displays
The displays in record mode
1. Monitor screen with function displays
a. Exposure mode
b. Flash mode (not in default setting: automatic
flash activation)
c. Focus mode (only for macro and manual setting, in the latter case also ß (electronic
focus setting confirmation) or w (infinity).
Detailed guide / The most important settings/controls / 120
d. Resolution
e. Image data compression rate
f. Battery charge level
g. Remaining pictures/recording time
h. Marking for rangefinder field
After turning on the camera or after
switching the exposure mode (only briefly,
for approx. 6 s).
i. Date and time
Additionally when pressing the shutter release to
its pressure point and with autofocus set
j. Focus signal ; ; flashes if setting not
possible or incorrect, constantly lit if setting
correct. Constantly lit also indicates setting is
memory-locked.
Additionally for exposure modes P, A, T and M
k. White balance setting (not in automatic
balancing mode)
l. Exposure metering method
Additionally, if function is set
m. Marking for spot exposure metering area
Additionally for exposure modes A, T and M
n. ISO sensitivity (not in default setting: AUTO)
Additionally (and only) for exposure mode P and
when pressing shutter release to pressure point
o. The automatically controlled shutter speed
and aperture values
Additionally (and only) for exposure modes A and
T and when pressing shutter release to pressure
point
p. The manually set shutter speed (for A) and
aperture values (for T). The yellow arrows to
the right and left next to the numbers show
the possible adjustment directions: up
and/or down for aperture priority mode for
larger or smaller aperture values, and left
and/or right for speed priority mode for
faster or slower shutter speeds.
Additionally (and only) for exposure mode M and
when pressing shutter release to pressure point
q. The manually set shutter speed and aperture
values and the light balance
After a picture has been taken and during video
recordings
r. Flashing red dot
If sound recording is set
s. Corresponding symbol
In video recording mode, only the displays a, b, c,
f, g, r and s appear. During video recording a and
q flash.
2. Monitor screen without function displays
3. Monitor screen off (not possible if digital zoom
is activated)
The displays in review mode
1. Monitor screen with function displays
a. j for review mode
b. Resolution
c. Image data compression rate
d. Battery charge level
e. Picture number/total number of
pictures/folder number/picture number in
appropriate folder
f. Picture date and time
Notes:
The functions/modes you have set are only
retained when you turn the camera off and back
on in record (REC) modes.
If the digital zoom function (i D. ZOOM, see
p. 126) is set, the monitor screen cannot be
turned off.
If immediate review of pictures is turned on
(o AUTO REVIEW, see p. 129), the monitor
screen appears – briefly, approx. 2 s – even if the
monitor is turned off. It then goes off again.
After a picture has been taken and the review and
input confirmation button (VIEW/SET, 1.31) has
been pressed, the monitor screen appears even if
the monitor is turned off. However, it goes off
again after a short time (see p. 129).
If the menu system is activated, the monitor cannot be turned off.
2. Monitor screen with expanded function displays
In addition to displays a to e and k:
g. Exposure metering method
h. Exposure
i. Shutter speed
j. ISO sensitivity
k. Flash mode
l. White balance setting (not when set to
AUTO)
3. Monitor screen without function displays
Detailed guide / The most important settings/controls / 121
Selecting menu items
Many of the LEICA DIGILUX 1 modes and functions are operated using a menu system, which is
shown clearly and step by step in the LCD monitor
(1.32). You can select the appropriate menu items
to set the different functions within the various
record and review modes.
You can also use this menu system to set all other
functions, such as the date and time or the volume of the acknowledgement tones.
To familiarise yourself, you should follow or select
the menu items listed below on your camera while
you read.
1. Press the menu display button (MENU, 1.27)
In single or series exposure modes, the record
menu then appears, or the review menu in review
mode (see p. 110). After the menus appear, they
are always in their initial positions – marked in
yellow: a REC in record mode and j PLAY in
review mode.
Note:
In AUTO record mode, only 5 of the total of
11 functions can be selected (see p. 108), only
one for video recordings (see p. 109).
2. From these initial positions, you can then
either:
press up or down on the direction pad (1.29) to
select the desired menu items, or:
Detailed guide / The most important settings/controls / 122
press right on the direction pad to access the
appropriate basic setting menu (h SETUP).
Pressing the left on the direction pad allows you
to exit this menu area again.
The currently activated menu items are marked in
yellow.
Please note that the record and review menus
contain more functions (11 or 8, see p. 108) than
the 6 that can be shown on the monitor at the
same time. These menu items are accessed simply
by continuing to press down on the direction pad.
3. You can then press right on the direction pad
(6x in recording-, 5x in playback mode) to set
the function of the currently selected menu
item.
Please note that:
In the record menu:
The arrows appearing to the left and/or right of
the function variants show which direction you
should use on the direction pad to select the possible further settings.
The 1st function (? WHITE BALANCE, 4.1)
allows you to make 5 settings, of which only the
first 3 can be shown on the monitor at the same
time. The other two possible functions are
accessed simply by continuing to press right on
the direction pad.
The last, 11th function (H PICT. ADJ., 4.11) has
a sub-menu, in which the settings are essentially
made in the same way as described above.
In the review menu, most functions also have
sub-menus.
The various functions in these sub-menus are
essentially set in the same way as described
above – using the yellow arrows, but in many
cases in association with the MENU (1.27) and
VIEW/SET (1.31) buttons.
3. Select the menu item f CLOCK SET by
repeatedly (6x in recording-, 5x in playback
mode) pressing down on the direction pad.
4. You save your settings by either selecting another function by pressing up or down on the
direction pad or by pressing the MENU button
again to exit the menu system.
You can exit the menu system at any time simply
by pressing the MENU button again.
4. Press right on the direction pad.
Setting the date and time
The date can be set anywhere between 2001 and
2099. The 24-hour clock is used to display the
time.
Setting the data
1. Press the MENU button (1.27). It makes no
difference whether you are in record or review
modes.
2. Press right on the direction pad (1.29) to
access the basic settings menu (h SETUP).
5. Press right on the direction pad again to select
the first data item to be set. This data item is
identified by arrows pointing upwards and
downwards.
Detailed guide / The most important settings/controls / 123
6. Set the desired figure by pressing up or down
on the direction pad. Pressing up increases the
value, pressing down decreases it. The remaining figures or the month are set in the same
way. The set value/month is saved by selecting
the next value/month.
7. After setting the year, go to the next line by
pressing right on the direction pad, where the
sequence in which the figures are shown can be
adjusted. You can switch between Day/Month/
Year (D/M/Y) or Month/Day/Year (M/D/Y) by
pressing up or down on the direction pad.
8. Press the MENU button twice to exit the menu
system.
The original monitor screen appears again.
ü Single exposures (see p. 127)
A picture is taken when you press the shutter
release (1.11).
9. Check whether the date and time are set
correctly by turning the camera off and then
back on again.
Ü Series exposures (see p. 134)
If you hold down the shutter release (and the
memory card has sufficient capacity), a maximum
of 4/8 pictures are taken one after the other,
depending on the compression rate (see p. 148) at
a frequency of 3.8 f/s.
Note:
Even if no battery is inserted or it is dead and the
mains/charging unit is not connected, the date
and time setting is retained for around 5 hours
thanks to a built-in backup battery. However, after
this time, the date and time have to be reset as
described above.
Record/review selector
This selector (1.14) can be used to select the
desired record mode:
Detailed guide / The most important settings/controls / 124
J Review mode (see p. 155)
This mode allows you to view the saved pictures
or recordings.
Exposure mode setting dial
This dial (1.15) can be used to select the following
modes:
AUTO Fully automatic (see p. 127)
All of the important functions for the
exposure, such as exposure mode,
exposure metering method, flash control
and focussing are set automatically.
P Programmes automatic exposure mode
(see p. 135)
The shutter speed and aperture values are
controlled automatically, but other functions
can be set according to the situation.
A Aperture priority mode (see p. 136)
The shutter speed is automatically
controlled, depending on the manually set
aperture.
T Speed priority mode (see p. 136)
The aperture is automatically controlled,
depending on the manually set shutter
speed.
M Manual exposure control (see p. 137)
Shutter speed and aperture are set manually
using the electronic light balance in the
monitor.
K Video recording (see p. 128)
In this mode, you can record scenes of
various lengths (depending on the capacity
of the memory card) in moving pictures.
The possible length of your recordings
depends on the capacity of the memory
card in use (approx. 6 minutes with the
64 MB card supplied, see p. 148).
Shutter release
The shutter release (1.11) works in two stages.
Pressing it lightly (to the pressure point) activates
automatic focussing (Autofocus, see p. 127) and
exposure metering (see p. 138) and saves the
appropriate values determined. In addition, the
shutter speed and aperture values calculated
and/or selected are shown on the LCD monitor
(1.32).
Pressing the shutter release all the way down
takes the picture or begins video recording. Both
types of recording are transferred to the memory
card. Video recording is ended by completely
depressing the shutter release again.
Notes:
The volume of the acknowledge tones can be
changed using the menu system.
The shutter release should be pressed gently and
not jerkily to prevent blurring. Before completely
depressing the shutter release, ensure that
focussing/autofocus and exposure metering have
been carried out, i. e. the signal for focussing
complete (;, 3.27) is in the LCD monitor or the
green LED (1.21) is lit.
Detailed guide / The most important settings/controls / 125
Record mode
Using the optical zoom
The LEICA DC VARIO SUMMICRON
7-21 mm f/2–2.5 ASPH. in the LEICA DIGILUX 1
is a high-performance 3x zoom lens. Its range of
focal lengths corresponds to 33-100 mm on a
35 mm camera and allows both somewhat larger
trimmed areas, e. g. for interior shots, and picture
composition concentrated on individual sections
of the subject, e. g. for portraits.
Pressing it to the left reduces the focal length
(wide-angle range) for larger trimmed areas.
Pressing it to the right increases the focal
length (telephoto range) for smaller trimmed
areas.
A scale marked with W (for wide-angle) and T
(for telephoto) appears in the center of the
monitor when zooming, along with an index
mark, which shows the approximate setting of
the lens.
Setting the focal length:
1. Set the record/review selector (1.14) and
the exposure mode dial (1.15) to the desired
functions.
Setting the function:
1. Set the record/review selector (1.14) to one of
the record modes and the exposure mode dial
(1.15) to the desired function.
2. Press the MENU button (1.27).
3. Select the function i D. ZOOM by pressing
(7x, the menu item only appears after you
press for the 7th time) down on the direction
pad (1.29).
2. Aim at your subject using the optical viewfinder
(1.22) or the LCD monitor (1.32).
3. Selected the desired trimming using the zoom
lever (1.10):
4. Pictures are taken as described in the section
“Using AUTO mode” (see p. 127).
Note:
Except in macro mode (see p. 142), the focus can
be set starting from a distance of around 30 cm to
the subject.
Detailed guide / Record mode / 126
Using the digital zoom
In addition to the 3x zoom range of the lens, the
2x digital zoom function allows the trimmed area
to be halved again, i. e. the center of the subject
area is double the size. This gives a total focal
length range of 6x.
4. Activate the digital zoom function by pressing
right on the direction pad.
The option currently set is marked in yellow.
5. Press the MENU button again to save your
setting and to exit the menu system.
The original monitor screen appears again.
Zooming itself, and taking the pictures, is done in
exactly the same way as described in the previous
section (Using the optical zoom”. However, the
zoom scale in the monitor is extended to the right
with a digital zoom area marked in blue. The
corresponding symbol i also appears next to it
when you change the focal length.
Notes:
The digital zoom function is only available when
the monitor screen is turned on.
The additional digital zoom range cannot be
controlled in the optical viewfinder.
The digital zoom function is not available for video
recordings.
The digital zoom function works by reducing the
area of the sensor used. It therefore reduces the
resolution and the image quality.
Using AUTO mode
For fast, fully automatic photography. In this
mode, all of the important settings for the photograph are made automatically: When you press
the shutter release, both all of the exposure settings – shutter speed and aperture or use of flash
– and the focus – by autofocus – are controlled
automatically.
5. When using the optical viewfinder (1.22):
Aim at your subject with the cross hairs
(autofocus metering field) and press the
shutter release (1.11) to its pressure point.
As soon as the focus is set, the green LED
(1.21) flashes once as confirmation.
When using the LCD monitor (1.32):
Aim at your subject with the rectangle (autofocus
metering field, 3.17/18) and press the shutter
release to its pressure point.
As soon as the focus is set, the ; (3.27)
appears as confirmation.
Setting and using the mode:
1. Insert a memory card (see p. 118).
2. Turn on the camera (see p. 119).
3. Set the Record/review selector (1.14) to Single
exposures ü (see p. 124).
4. Set the exposure mode dial (1.15) to AUTO.
If your main subject is to be off-center, and
cannot be detected by the autofocus metering
field, you should use the Exposure/focus value
memory-lock function (see p. 139).
Detailed guide / Record mode / 127
6. Press the shutter release all the way down to
take the photograph.
If the automatic review function is set
(o AUTO REVIEW, see p. 129), the picture will
appear in the monitor for around 2 s after it has
been taken.
Notes:
If you have set an automatic switch off time (see
p. 179), the camera automatically switches into an
energy-saving standby mode after the selected
time. You can activate it again either by pressing
the shutter release or by turning if off and back
on again.
Depending on the prevailing light conditions, the
brightness of the monitor screen can differ from
that of the actual pictures taken. Particularly for
long exposures on dark subjects, the monitor
screen appears considerably darker than the –
correctly exposed – picture.
Video recordings
You can also use the LEICA DIGILUX 1 to produce
video recordings. The possible duration of your
recording sequences depends on the capacity of
the memory card you are using. The 64 MB card
included with the camera allows you recording
times of around 6 minutes. Recordings are made
in Quick Time (Movie) format, at a resolution of
320 x 420 pixels and an image frequency of
10B/s. Both of these are fixed preset values.
The required software can be found on the CD
ROMs supplied, or it can also be downloaded from
the Internet free of charge:
http://www.apple.com/quicktime/download
Setting and using the mode:
1. Insert a memory card (see p. 118).
2. Turn on the camera (see p. 119).
3. Set the Record/review selector (1.14) to one
of the record modes ü/Ü (see p. 124).
4. Set the exposure mode dial (1.15) to video
recording K.
The signal for sound recording (2.2/3.6) also
appears in the data field (1.18) and in the title
line of the monitor screen.
Detailed guide / Record mode / 128
5. Aim at your subject with the rectangle (autofocus
metering field, 3.17/18) in the LCD monitor
(1.32) and press the shutter release (1.11) to
its pressure point.
As soon as the focus is set, the symbol ;
appears as confirmation.
Note:
At the beginning of video recordings (the first
image), the focus and exposure settings are
saved, i. e. they cannot be changed while recording
is in progress. Likewise, the focal length cannot
be adjusted during recording.
6. Press the shutter release all the way down to
start recording.
This also starts sound recording.
7. Pressing the shutter release all the way down
stops recording.
Video recording ends automatically when the
memory card capacity is reached.
The following functions are available for video
recordings, although they cannot be changed
during recording:
_ Macro setting
_ Manual focus
_ Use of optical attachments
Notes:
Video recordings are always made with sound
recording. The corresponding symbol appears in
the data field and the monitor.
The (remaining) recording time shown in the data
field and the monitor is an approximate value.
At the beginning of video recordings (the first
image), the focus, exposure and focal length
settings are saved.
With other memory card types than that supplied
(i. e. a MultiMediaCard), video recordings may be
suddenly aborted.
Using automatic single image replay
(AUTO REVIEW)
If AUTO REVIEW is turned on, every picture is
shown in the monitor for approximately 2 s after it
has been taken. This provides a quick and easy
way for you to check whether the picture was
taken successfully or you need to repeat it.
Notes:
The AUTO REVIEW function is always activated
for series exposures with or without sound recording, single pictures with sound recording, and for
automatic exposure and focus series and recording in TIFF format.
The AUTO REVIEW function is not available for
use in conjunction with video recordings.
For series exposures, and for automatic exposure
and focus bracketing modes, AUTO REVIEW
always shows only the first picture.
Setting the function:
1. Set the Record/review selector (1.14) to single
or series exposures.
5. Select OFF or ON by pressing left or right on
the direction pad.
The active function is marked in yellow.
6. Press the MENU button to save your setting
and to exit the menu system.
Checking the last picture (REVIEW)
If the automatic single image replay review
function is set (AUTO REVIEW), the last picture
taken will immediately appear in the monitor
(1.32) for around 2 s. However, you can also view
your pictures at any time.
2. Press the MENU button (1.27).
3. Press right on the direction pad (1.29) to open
the basic settings menu (h SETUP).
4. Set the function o AUTO REVIEW by pressing
(2x) down on the direction pad.
Setting the function:
1. After taking a picture, press the review/
enlargement button (VIEW/SET, 1.31).
The last picture taken is then shown in the
monitor for around 3 s.
Detailed guide / Record mode / 129
Deleting the picture during viewing
While a picture is shown enlarged in the monitor
using this function, you can take this opportunity
to delete it if you wish to do so.
1. To do this, press the MENU button (1.27) again.
Note:
This function is only available for as long as the
camera has not turned itself off automatically (see
p. 179).
2. If you the VIEW/SET button again during
viewing of the enlarged picture, a 4x enlarged
trimmed area of the picture is shown. Pressing
the button again leads to a trimmed area
enlarged again to 8x. If the VIEW/SET button
is pressed while viewing this enlargement, the
original monitor screen appears again.
3. The direction pad (1.29) can be used to select
any section of the picture at 8x enlargement.
To do this, press the direction (repeatedly) in
which you want to move the trimmed area.
If the edge of the picture is reached in one or
two directions, this is indicated by the fact that
the corresponding arrows go out.
Detailed guide / Record mode / 130
2. Select NO – to retain a picture – or YES – to
delete – by pressing up or down on the direction pad.
Notes:
If you are using the exposure series function,
only the first picture in the last series is shown.
The viewing function is not available for video
recordings.
Likewise if another record or review mode has
been selected after taking the picture, or the
camera has been turned off, the viewing function
is not available.
3. Finally, press the VIEW/SET button. If you
previously selected YES, the picture data is
deleted.
The original monitor screen appears again.
Warning:
Picture data is permanently deleted. You cannot
subsequently retrieve it.
Taking photographs with the built-in flash unit
Six flash modes are available for various
situations:
AUTO (Automatic flash activation) This is the
default mode.
A corresponding symbol appears in the LCD data
field (1.18).
AUTO 3 (Automatic flash and pre-flash
activation) to reduce “red eye” effects.
The corresponding symbols appear in the LCD
data field and the monitor (1.32).
1 (Manual flash activation) e. g. for backlighted
pictures, in which your main subject is not
frame-filling and is in shadow (fill in flash).
The corresponding symbols appear in the LCD
data field and the monitor.
4 (Manual flash and pre-flash activation) for
a combination of the situations or functions
described above.
The corresponding symbols appear in the LCD
data field and the monitor.
The corresponding symbols appear in the LCD
data field and the monitor.
Notes:
In this flash mode, the synchronisation can be
set to the beginning of the end of the exposure
(see p. 145).
To prevent blurred pictures with the slower
shutter speeds, you should hold the camera
steady, i. e. support it or use a tripod.
2 (Manual flash off) for situations in which flash
photography is not allowed or inappropriate or if
you want to reproduce the actual lighting atmosphere in your pictures.
The corresponding symbols appear in the LCD
data field and the monitor.
Setting the function:
1. Set the record/review selector (1.14) to one of
the record modes and the exposure mode dial
(1.15) to the desired function.
By repeatedly pressing the flash mode button
(1.13) you can set the various function types.
They scroll through in an endless loop in the
sequence listed above.
The corresponding symbols appear in the data
field (1.18) and the monitor (1.32).
2. Pictures are taken as described in the section
“Taking pictures in AUTO mode” (see p. 127).
Note:
To prevent blurred pictures with the slower shutter speeds involved with this flash mode, you
should hold the camera steady, i. e. support it or
use a tripod.
5/6 (Automatic flash and pre-flash activation
with slower shutter speeds) for simultaneous
more adequate (brighter) reproduction, particularly
of dark backgrounds and flash fill in of the
foreground, as well as to reduce the “red eye”
effect.
Detailed guide / Record mode / 131
Record modes
AUTO
AUTO 3
1
4
5/6
2
AUTO
P
A
T
M
K
x
x
x
–
–
x
x
x
x
x
x
x
x
x
x
x
x
x
x
x
x
x
–
x
x
x
x
x
–
x
–
–
–
–
–
x
The table tells you which of the flash modes can
be used with which record modes.
The flash range for automatic (autofocus) and
manual focus is as follows:
at maximum wide-angle setting
approx. 0.3-4.5m
at maximum telephoto setting
approx. 0.3-3.5m
with macro setting:
at maximum wide-angle setting
approx. 0.1-0.5m
at maximum telephoto setting
approx. 0.2-0.5m
Detailed guide / Record mode / 132
Notes:
The built-in flash unit is automatically turned off
for video recordings.
It is only ever possible to take single pictures with
the flash unit turned on, i. e. series exposures and
automatic exposure and focus bracketing modes
cannot be combined with use of the flash.
You can individually correct the flash exposure
control (see p. 146).
Please note that you should not cover the flash
exposure metering cell (1.3) with your fingers or
other objects. This can lead to incorrect exposures.
Taking photographs with the
automatic self timer
The automatic self timer allows you to take a
picture with a delay of either 2 or 10 s. This is
particularly useful for group photographs, where
you want to appear in the picture yourself or if
you want to avoid the picture being out of focus
due to camera shake when releasing the shutter.
In such cases, we recommend that you attach the
camera to a tripod.
Notes:
Automatic self timer mode is not possible in
conjunction with video recordings.
It is only ever possible to take single pictures with
the automatic self timer turned on, i. e. series
exposures and automatic exposure and focus
bracketing modes cannot be combined with
automatic self timer mode.
Setting the function:
1. Set the record/review selector (1.14) to one of
the record modes and the exposure mode dial
(1.15) to the desired function.
2. By repeatedly pressing the self timer button
(Q, 1.12) you can set the various function
types. They scroll through in an endless loop
as follows:
Self timer mode with 10 s delay
Self timer mode with 2 s delay
Self timer off (= default setting)
The corresponding symbols appear in the
LCD data field (1.18) and the monitor (1.32)
(but with no time details in the data field).
3. Press the shutter release all the way down to
take the photograph.
Progress – with 10 s delay – is indicated by
flashing of the automatic self timer LED (1.5),
first of all slow (at 1Hz) and more quickly (at
2Hz) in the last 2 s. At the same time, the display
in the monitor switches between white and blue
(at 1.6Hz).
With a 2 s delay, the displays flash as described
above for the last 2 s.
Notes:
In automatic self timer mode, the focus and
exposure are not set when the shutter release
reaches its pressure point, but immediately before
the picture is taken.
The picture can be cancelled at any time during
the automatic self timer delay by pressing the
MENU button (1.27).
Detailed guide / Record mode / 133
Further functions
Series exposures
You can not only use the LEICA DIGILUX 1 to take
single pictures but also to produce sequences of
pictures. At a maximum image frequency of
3.8B/s, a maximum of 4/8 pictures are possible
in this mode, which means that sequences of
movement with a maximum length of 2 s can be
recorded.
Notes:
Series exposures are not possible either with
video recordings or with uncompressed “TIFF”
image data recording (see p. 148).
Series exposures are not possible when using
the flash. If a flash function is activated, only one
picture is taken.
For pictures with a low compression rate y, a
maximum of 4 pictures can be taken in sequence,
with a high compression rate Y it is a maximum
of 8 pictures.
The maximum image frequency of 4B/s is only
achieved with shutter speeds of 1/25 s or faster.
Regardless of how many pictures have been taken
in a sequence, only the first is subsequently
shown in the monitor (1.33) when using the
REVIEW (see p. 129) and AUTO REVIEW
(see p. 129) functions.
Detailed guide / Record mode / 134
Setting the function:
1. Set the record/review selector (1.14) to series
exposures Ü and the exposure mode dial
(1.15) to the desired function.
3. Select the function AUDIO REC. in the menu by
pressing (4x) down on the direction pad (1.29).
2. Pictures are taken as described in the section
“Taking pictures in AUTO mode” (see p. 127).
Pictures with sound
Single pictures can be taken with sound recording
for a maximum of 5 s, for example accompanying
noises or commentary on the picture.
Note:
Sound recording is not possible when saving the
data in TIFF format (see p. 148), for series exposures (see p. 134) or for automatic exposure and
focus bracketing modes (see p. 140 and 144).
Setting the function:
1. Set the record/review selector (1.14) to single
picture and the exposure mode dial (1.15) to
the desired function.
2. Press the MENU button (1.27).
4. Activate the sound recording function by
pressing right on the direction pad.
The option currently set is marked in yellow.
5. Press the MENU button again to save your setting and to exit the menu system.
The original monitor screen appears again, as
do the corresponding symbols (2.2/3.6) in the
LCD data field (1.18) and the monitor.
Taking photographs with programmed
automatic exposure mode P
As for AUTO mode (see p. 127), the exposure is
controlled by automatic setting of the shutter
speed and aperture. However, in contrast to
AUTO, this mode does not obligatorily include
other settings. For example, with P you can freely
select the focus and flash modes. Furthermore, a
range of further functions are available with P.
6. Press the shutter release (1.11) all the way
down to take the photograph.
Notes:
It is not necessary to hold down the shutter
release to continue with sound recording.
The microphone (1.16) for sound recording is
located on top of the camera, so that both
spoken commentary and background noise can
be recorded.
Sound recording ends after 5 s.
The full range of available modes/functions with
programmed automatic exposure mode P is as
follows:
_ Selection of flash mode (see p. 131)
_ Flash exposure compensation (see p. 143)
_ Manual setting of an external flash unit
(see p. 147)
_ Selection of exposure metering method
(see p. 138)
_ Exposure compensation (see p. 139)
_ Automatic exposure bracketing mode
(see p. 140)
_ Spot AF (see p. 141)
_ Automatic focus bracketing mode (see p. 144)
_ Automatic self timer (see p. 132)
_ Selection of resolution (see p. 148)
_ Uncompressed image data storage in
TIFF format (see p. 148)
_ Selection of white balance setting (see p. 150)
_ Selection of ISO sensitivity (see p. 151)
Setting the function:
1. Set the Record/review selector (1.14) to one of
the record modes.
2. Set the exposure mode dial (1.15) to P.
3. Pictures are taken as described in the section
“Taking pictures in AUTO mode” (see p. 127).
Notes:
To prevent blurred pictures with dark subjects and
the then generally slower shutter speeds, you
should hold the camera steady, i. e. support it or
use a tripod.
Detailed guide / Record mode / 135
Taking photographs with speed priority mode T
Speed priority mode automatically controls the
exposure with manual setting of the shutter
speed. It is therefore particularly well suited for
taking pictures of moving subjects, where the
sharpness of the movement portrayed – which is
determined by the shutter speed used – is the
crucial element of composition.
By manually pre-selecting an appropriately fast
shutter speed, you can therefore prevent unwanted
blurring of the movement – you can “freeze” your
subject. Or, in reverse, you can express the
dynamics of the movement with a deliberate
“wiping” effect using a correspondingly slower
shutter speed.
Shutter speeds from 8 s to 1/1000 s can be set,
in half steps.
Note:
The flash modes with slower shutter speeds
(5/6, see p. 132) and automatic setting of the
ISO sensitivity (see p. 151) are not available with
automatic aperture setting.
Detailed guide / Record mode / 136
Setting the function:
1. Set the record/review selector (1.14) to one of
the record modes.
2. Set the exposure mode dial (1.15) to T.
3. Select the desired shutter speed by pressing
left or right on the direction pad (1.29).
4. Pictures are taken as described in the section
“Taking pictures in AUTO mode” (see p. 124).
Notes:
If shutter speeds of 1/500 s or faster are set, the
range of automatically controlled aperture values
is limited: at 1/1000 s only f/8 is available, at
1/750 s only values up to a maximum of f/5.6, at
1/500 s up to a maximum of f/4.8.
If, as a result of the brightness of the subject being
too high or low, correct exposure is not possible
with the set shutter speed and the available
aperture values, the colour of the display of the
value changes from white to red.
To prevent blurred pictures when using slower
shutter speeds, you should hold the camera
steady, i. e. support it or use a tripod.
Taking photographs with speed priority mode A
Speed priority mode automatically controls the
exposure with manual setting of the aperture. It is
therefore particularly well suited for taking pictures
where the depth of field – which is determined by
the aperture used – is the crucial element of
composition.
By manually pre-selecting an appropriately low
aperture value (= large aperture) you can reduce
the depth of field range, for example in a portrait
to let the face that is shown “stand out” clearly
from an unimportant or distracting background.
Or, in reverse, with a correspondingly high aperture
value (= small aperture) you can increase the
depth of field range, in order to reproduce
everything from the foreground to the background
clearly in a landscape photograph.
Aperture values from 2.0 to 8.0 can be set, in half
steps.
Notes:
Depending on the focal length setting of the zoom
lens, the smallest aperture value that can be set
varies due to the changing lens speed (between
2.0 and 2.5, see p. 126).
Automatic setting of the ISO film sensitivity
(see p. 151) is not available with the speed priority
mode.
Setting the function:
1. Set the Record/review selector (1.14) to one of
the record modes.
2. Set the exposure mode dial (1.15) to A.
3. Set the desired aperture value by pressing up
or down on the direction pad (1.29).
4. Pictures are taken as described in the section
“Taking pictures in AUTO mode” (see p. 127).
Notes:
If, as a result of the brightness of the subject being
too high or low, correct exposure is not possible
with the set aperture and the available shutter
speeds, the colour of the display of the value
changes from white to red.
To prevent blurred pictures when using slower
shutter speeds, you should hold the camera steady,
i. e. support it or use a tripod.
Taking photographs with manual shutter
speed and aperture settings M
If, for example, you want to achieve a particular
effect, which is only possible with a quite specific
exposure, of if you want to ensure that several
pictures with different trimming have an absolutely
identical exposure, then you can use manual setting
of the shutter speed and aperture.
On the LEICA DIGILUX 1, shutter speeds from 8 s
to 1/1000 s can be set, and aperture values from
2-8, both in half steps.
3. Select the desired shutter speed (2.20) by
pressing left or right on the direction pad (1.29)
and the desired aperture value (2.21) by pressing
up or down.
A light balance (2.19) appears above the figures
in the monitor to help you adjust the exposure.
It is divided in 1/4 steps and runs from +1 to
–1EV. Within this range, the blue marking
shows the difference between your setting and
the correct setting according to the exposure
meter.
Note:
The flash modes with slower shutter speeds
(5/6, see p. 132) and automatic setting of the
ISO sensitivity (see p. 151) are not available with
manual setting of the shutter speed and aperture.
Setting the function:
1. Set the Record/review selector (1.14) to one of
the record modes.
2. Set the exposure mode dial (1.15) to M.
4. Pictures are taken as described in the section
“Taking pictures in AUTO mode” (see p. 127).
Detailed guide / Record mode / 137
Notes:
If shutter speeds of 1/500s or faster are set, the
range of automatically controlled aperture values
is limited: at 1/1000s only f/8 is available, at
1/750s only values up to a maximum of f/6.7,
at 1/500s a maximum of f/4.8.
If, as a result of the brightness of the subject being
too high or low, correct exposure is not possible
with the set shutter speed and the available
aperture values, the colour of the display of the
value changes from white to red.
To prevent blurred pictures when using slower
shutter speeds, you should hold the camera steady,
i. e. support it or use a tripod.
Selecting the exposure metering method
The LEICA DIGILUX 1 offers you a selection of 3
exposure metering methods. They allow adjustment
to the prevailing light conditions, the situation and
your style of work and your creative ideas.
In the default setting, the camera uses multi-field
metering. (U)
With this metering method, the camera automatically analyses the brightness differences in the
subject and, by comparing them with programmed
brightness distribution patterns, arrives at the
likely position of the main subject and the corresponding best (compromise) exposure.
By consequence, this method is particularly
suitable for spontaneous, uncomplicated but reliable
photography even under difficult conditions.
Logically, multi-field metering is automatically
Detailed guide / Record mode / 138
activated in AUTO exposure mode and for
video recordings.
Center-weighted metering (T)
This metering method allocates the highest
weighting to the center of the image field, but
also records all other areas. Particularly when
used in conjunction with metering memory-lock
(see p. 139), it allows selective adjustment of the
exposure to particular sections of the subject
with simultaneous consideration of the entire
image field.
Spot metering (t)
This metering feature concentrates exclusively
on a small field in the center of the image.
It allows exact measurement of small or tiny details
for precise exposure – preferably in conjunction
with manual setting (see p. 137) and is therefore
primarily suitable for (static) subjects, where you
can afford to spend time taking the picture.
Setting the function:
1. Set the record/review selector (1.14) to one of
the record modes and the exposure mode dial
(1.15) to P, A, T or M.
By repeatedly pressing the exposure metering
method selection button ( U,1.24) you can set
the 3 options. They scroll through in an endless
loop in the sequence listed above.
The corresponding symbols (2.6/3.22) appear in
the data field (1.18) and the monitor and, for spot
metering, a blue cross hair (3.16) also appears in
the center of the monitor.
You can use this cross hair to aim precisely at the
details to be measured; it is therefore recommended that you use the monitor for spot metering.
2. Pictures are taken as described in the section
“Taking pictures in AUTO mode” (see p. 127).
Metering memory-lock
For composition reasons, it can be beneficial
not to have the main subject in the center of the
picture. However, the autofocus metering field is
then normally focused on a section of the subject,
which is significantly nearer or further away – the
result would normally be that the main subject is
blurred. In principle, the same thing applies to
exposure metering with regard to the brightness
differences.
In such cases, with all record modes, metering
memory-lock allows you to first of all measure the
main subject and then to retain this setting until
you have decided on your final trimming and want
to take the picture.
When using the LCD monitor (1.32):
Aim at your subject with the rectangle (autofocus
measuring field, 3.17/18) or with the blue cross
hairs (3.16) for spot exposure metering and press
the shutter release to its pressure point.
As soon as the focus and exposure are set (in
record or exposure modes AUTO, P, T, A and K),
; appears as confirmation.
Setting the function:
1. Set the record/review selector (1.14) and
the exposure mode dial (1.15) to the desired
functions.
Exposure compensation
Exposure meters are calibrated to an average grey
scale value (18 % reflection), which corresponds to
the brightness of a normal, i. e. average photographic subject. If the relevant subject detail does
not meet these requirements, for example large
areas of snow or, in the opposite case, a black
steam locomotive filling the frame, it is necessary
to make the appropriate exposure compensation.
Particularly when taking several pictures one after
another, e. g. to ensure the correct exposure for
subjects such as those described above, or if for a
particular reason you want a series of pictures to
deliberately have a slightly lower or higher exposure,
exposure compensation is a very useful function.
2. When using the optical viewfinder (1.22):
Aim at your subject with the cross hairs and
press the shutter release (1.11) to its pressure
point.
As soon as the focus and exposure are set (in
record or exposure modes AUTO, P, T, A and
K), the green LED (1.21) flashes once as
confirmation.
3. Continue to hold down the shutter release and
then decide on your final trimming by moving
the camera.
4. Press the shutter release all the way down to
take the photograph.
In contrast to metering memory-lock (see p. 139),
once set it remains effective until it is (deliberately)
reset.
Note:
Exposure compensation is not possible for video
recordings or in AUTO and M exposure modes.
Setting the function:
1. Set the record/review selector (1.14) to one of
the record modes and the exposure mode dial
(1.15) to P, A or T.
2. Press the AE-MENU button (1.23) once.
Detailed guide / Record mode / 139
Note:
The AE-MENU button is used to set several kinds
of functions. They scroll through in an endless
loop and can therefore be selected by repeatedly
pressing the button.
3. Select the desired compensation value by pressing left or right on the direction pad (1.29).
The digital display and the yellow marking show
your setting.
The symbol R (2.8) appears in the LCD data
field to indicate that an exposure compensation
is set.
4. To confirm and save your setting, press
the VIEW/SET button (1.31) or press the
AE-MENU button 4 times.
The corresponding displays in the LCD monitor
disappear, with the display R appearing instead
to indicate the activated function, along with
the compensation value in the bottom line (3.23).
5. Pictures are taken as described in the section
“Taking pictures in AUTO mode” (see p. 127).
Taking photographs with the automatic exposure bracketing mode
Many attractive subjects are very rich in contrast,
i. e. they have both very light and very dark areas.
The effect can be quite different, depending on
which sections you base your exposure on. In
such cases, you can use the automatic exposure
bracketing mode to produce several alternatives
with graduated exposure. You can then select the
most appropriate picture for further use.
4 graduations are available: 0.25, 0.5, 0.75 and
1EV, as well as 2 numbers of pictures: 3 or 5.
Exposures are in the following sequence: under
exposure, correct exposure, over exposure; with 5
pictures there are 2 additional exposures with
intermediate values in the corresponding sequence.
An exposure bracketing series is only ever activated
for a single process, i. e. to repeat it, you have to
set it again.
Note:
Exposure series are not possible in AUTO
exposure mode, with uncompressed image data
storage (TIFF), or when using the flash. With low
compression (y), only exposure series of 3 are
possible.
Detailed guide / Record mode / 140
Setting the function:
1. Set the record/review selector (1.14) to one of
the record modes and the exposure mode dial
(1.15) to P, A, T or M.
2. Press the AE-MENU button (1.23) twice.
Note:
The AE-MENU button is used to set several kinds
of functions. They scroll through in an endless
loop and can therefore be selected by repeatedly
pressing the button.
3. Press right on the direction pad (1.29) to open
the next menu level for this function.
The symbol r appears in the LCD data field to
indicate that an automatic exposure bracketing
series is set (3.11).
6. Press right on the direction pad if you want 5
pictures.
If you want to use 3 pictures, the option that is
shown first, you can proceed immediately with
step 7.
Note:
If you subsequently want to change the exposure
graduation (again), press up on the direction pad
and proceed as described under point 4.
4. Select the desired exposure graduation between
the individual pictures by pressing left or right
respectively on the direction pad to increase or
decrease the graduation.
If you want to use the graduation 0.25EV that is
shown first, you can proceed immediately with
step 5.
Note:
When 0.25EV is displayed, you can press left on
the direction pad to exit this menu level again and
confirm the appropriate settings.
7. To confirm and save your setting, press the
VIEW/SET button (1.31) or press the AE-MENU
button 3 times.
The displays in the LCD monitor described
above disappear, with the display r appearing
instead to indicate the activated function (3.24).
8. Pictures are taken as described in the section
“Taking pictures in AUTO mode” (see p. 127).
Using autofocus spot metering
In certain situations, or for certain subjects, it can
be crucial for the effect that particular details are
reproduced very clearly. For portraits, for example,
it is normally recommended that the eyes are very
well-defined.
The autofocus spot metering field (3.17) is much
smaller than that of standard measuring (3.18)
and allows you to selectively define this kind of
details – and it is still automatic.
Note:
Autofocus spot metering is not available in
AUTO mode or K.
Setting the function:
1. Set the record/review selector (1.14) to one of
the record modes and the exposure mode dial
(1.15) to P, A, T or M.
2. Press the MENU button (1.27).
5. Move to the line below by pressing down on the
direction pad, where you can select the desired
number of pictures.
Yellow arrows pointing up and to the right
indicate how you should make the subsequent
settings.
3. Select the z SPOT AF function in the menu
by pressing (3x) down on the direction pad
(1.29).
Detailed guide / Record mode / 141
Notes:
The macro function is not available for video
recordings K.
At extremely close range, the monitor should be
used to set the trimming, as the parallax error in
the optical viewfinder is too great in such cases.
If the AUTO mode is used, the operating range of
the aperture control is limited to values from
f/4-8 due to the extremely low depth of field for
close-range pictures and the resulting critical
focus setting.
4. Select the desired function by pressing left or
right on the direction pad.
The option currently set is marked in yellow.
5. Press the MENU button again to confirm and
save your setting and to exit the menu system.
The displays in the monitor described above
disappear, with the appropriate displays (2.5,
3.5) appearing in the data field (1.8) and the
monitor to indicate that the function is activated,
and the narrower green markings of the
AF measuring field (3.17) in the center of the
monitor screen.
Detailed guide / Record mode / 142
6. Pictures are taken as described in the section
“Taking pictures in AUTO mode” (see p. 127).
Using the macro function
In AF mode, the LEICA DIGILUX 1 allows pictures
to be taken at a distance of up to 30cm. The
macro function supplements the automatic focus
range for the frame-filling depiction of tiny objects
(reproduction ratio 1:11) at distances of up to
6cm (at maximum wide-angle lens position) or
20cm (at maximum telephoto lens position). The
maximum distance to the subject in macro mode
is 50cm.
Setting the function:
1. Set the record/review selector (1.14) to one of
the record modes and the exposure mode dial
(1.15) to the desired function.
2. Set the focus mode dial (1.6) to +.
The display + then appears in the data field
(1.8) and the monitor (1.32) (2.17, 3.4.b).
3. Pictures are taken as described in the section
“Taking pictures in AUTO mode” (see p. 127).
Using manual focus
For certain subjects and situations, it can be
beneficial to set the focus yourself, rather than
using autofocus (see p. 127). For example, if the
same setting is needed for several pictures and
using metering memory-lock (see p. 139) would
therefore involve more effort, or if the setting for
landscape pictures is to be kept at infinity, or if
you want to focus on particular details, which are
even smaller than the Spot AF metering field
(see p. 141).
Manual focus settings can be controlled using the
monitor screen (not in the optical viewfinder). In
many cases (see below) displays also appear in
the monitor to assist you in setting the focus.
Notes:
The manual focussing range is from 6 or 20 cm
(in wide-angle or telephoto position) to infinity.
Manual focussing is also possible for video recordings (K). However, as soon as video recording is
started by pressing the shutter release, the last
setting is saved, i. e. it is not possible to change
the focus during the sequence.
If the setting is made in the wide-angle range, it is
possible that the focus will no longer be correct
after zooming in to the telephoto range due to the
lower depth of field. The opposite is also possible
to a lesser extent, which means that corrections
may need to be made. As a consequence, we
recommend that you always set the focus in the
telephoto range.
As a result of the higher depth of field in the
wide-angle range on the one hand, and the critical
focus setting for close-range pictures on the other,
it is recommended that the focus is not set
manually in such situations due to a lack of
precision.
Setting the focus:
1. Set the record/review selector (1.14) and the
exposure mode dial (1.15) to the desired
functions.
2. Set the focus mode dial (1.6) to the E position
The corresponding display (2.4, 3.4c) appears
in the data field (1.18) and the monitor (1.32),
and the green LED (1.21) flashes.
Note:
If you have set spot autofocus (see p. 141), the
associated displays (2.5/3.5) also remain visible,
as well as the smaller rectangle of the spot
AF metering field (3.17). Correspondingly, the
acoustic and visual acknowledgement signals
listed under point 4 are each based on the sections
of the subject located in the set AF metering field.
3. Aim at your subject with the autofocus
metering field rectangle (3.17/18), and
4. slowly turn the focussing ring (1.9) until the
image or the most important detail of the
image is reproduced clearly in the monitor.
Turning to the left, i. e. anticlockwise (when
looking at the monitor screen) adjusts the lens
towards infinity for more distant subjects,
while turning to the right adjusts it for shorter
ranges down to 30 cm.
As soon as your setting is close to the optimum,
two square “brackets” (3.28) appear above the
metering field as a focussing aid, when the
setting is correct the green dot (3.27) also
appears between them and the green LED (1.21)
lights up.
If acoustic acknowledgement tones are turned
on (see p. 178), two short beeps also indicate
that the setting is correct.
Regardless of the correct focus, with the
corresponding setting the infinity symbol (w,
3.26) is displayed below the brackets.
Detailed guide / Record mode / 143
mode to produce several alternatives with different
levels of sharpness. You can then select the most
appropriate picture for further use.
2 numbers of pictures are available: 3 or 5.
Notes:
The focussing ring uses electrical transmission
and does not have a stop point at its shortest and
longest setting. As a consequence, there are no
fixed distance positions.
The rotating speed does not influence the focusing speed.
There are no focussing aids in very low light.
5. Pictures are taken as described in the section
“Taking pictures in AUTO mode“ (see p. 127).
Taking photographs with the
automatic focus bracketing mode
Most subjects consist of different elements,
which are staggered in depth and therefore –
depending on the distance and the focal length
and aperture used – reproduced with differing
degrees of sharpness. Depending on the set
distance, the effect can vary considerably. In such
cases, you can use the automatic focus bracketing
Detailed guide / Record mode / 144
Pictures are taken in the following sequence:
_ to the front (close-range) limit of the relevant
depth of field,
_ to the subject in the metering field (3.17/3.18),
_ to the rear (long-range) limit of the relevant
depth of field.
With 5 pictures, the extra 2 are taken with settings
between those described above.
Once a focus bracketing series has been completed,
it is turned off again, i. e. to repeat it, you have to
set it again.
Note:
Automatic focus bracketing mode is not possible
in AUTO exposure mode, when using the flash or
in conjunction with uncompressed image data
storage TIFF.
At low compression, only focus bracketing series
with 3 pictures are possible.
Setting the function:
1. Set the record/review selector (1.14) to one of
the record modes and the exposure mode dial
(1.15) to P, A, T or M.
2. Press the AE-MENU button (1.23) three times.
Note:
The AE-MENU button is used to set several kinds
of functions. They scroll through in an endless
loop and can therefore be selected by repeatedly
pressing the button.
3. Press right on the direction pad (1.29) to open
the next menu level for this function.
4. Move to the line below by pressing down on the
direction pad, where you can select the desired
number of pictures.
Yellow arrows pointing up and to the right
indicate how you should make the subsequent
settings.
5. Press right on the direction pad if you want 5
pictures (only possible with low compression
rate).
If you want to use 3 pictures, which is the first
option shown, you can proceed immediately
with step 6.
Note:
When 3 FRAMES is displayed, you can press left
on the direction pad to exit this menu level again
and confirm your setting.
6. To confirm and save your setting, press the
VIEW/SET button (1.31) or press the
AE-MENU button twice.
The displays in the LCD monitor described
above disappear, with the display P appearing
instead to indicate the activated function
(3.29).
7. Pictures are taken as described in the section
“Taking pictures in AUTO mode” (see p. 127).
Taking photographs with flash synchronised
to the end of the exposure
The LEICA DIGILUX 1 allows you to synchronise
firing of the flash either with the beginning or the
end of the exposure time. This makes it possible
for the very short flash exposure to be either at
the beginning or at the end of the – relatively
much longer – exposure of the available light. Particularly for subjects in dark surroundings, which
shine themselves or reflect light – e. g. vehicles –
synchronisation to the end of the exposure often
results in a more natural effect.
2. Press the MENU button (1.27).
Note:
As the different flash timings naturally only have
an effect on the picture at slower shutter speeds,
synchronisation to the end of the exposure is
exclusively available in conjunction with the flash
mode 5/C (see p. 132) and not, by contrast,
with AUTO mode, exposure modes T and M, or K.
3. Select the 7 SLOW SYNC function in the
menu by pressing (8x) down on the direction
pad (1.29).
Setting the function:
1. Set the record / review selector (1.14) to one
0of the record modes, the exposure mode dial
(1.15) to P or A and then set automatic flash
and pre-flash activation with slower shutter
speeds 5/C by repeatedly pressing the
flash mode selection button (1.13).
The corresponding symbols (2.1e, 3.2e) then
appear in the data field (1.18) and the monitor
(1.32).
5. Press the MENU button again to confirm and
save your setting and to exit the menu system.
The displays in the monitor described above
disappear, with the display 5/C (3.2f)
appearing instead to indicate the activated
function. By contrast, the display in the data
field does not change.
4. Select the desired function by pressing left or
right on the direction pad.
The option currently set is marked in yellow.
Detailed guide / Record mode / 145
Flash exposure compensation
This function can be used to selectively reduce or
strengthen the flash exposure regardless of the
exposure of the available light, e. g. in a picture
taken outside in the evening, to lighten the face of
a person in the foreground while retaining the
lighting atmosphere.
Once set, a flash exposure compensation remains
effective until it is (deliberately) reset.
6. Pictures are taken as described in the section
“Taking pictures in AUTO mode” (see p. 127).
Note:
Flash exposure compensation is not possible for
video recordings (K) or in AUTO exposure mode.
Note:
To prevent blurred pictures with slower shutter
speeds, you should hold the camera steady, i. e.
support it or use a tripod.
Setting the function:
1. Set the record/review selector (1.14) to one of
the record modes and the exposure mode dial
(1.15) to P, A, T or M.
2. Press the AE-MENU button (1.23) four times.
Detailed guide / Record mode / 146
Note:
The AE-MENU button is used to set several kinds
of functions. They scroll through in an endless
loop and can therefore be selected by repeatedly
pressing the button.
3. Select the desired compensation value by
pressing left or right on the direction pad (1.29).
The digital display and the yellow marking show
your setting.
The symbol 8 (2.15) appears in the LCD data
field to indicate that a flash exposure compensation is set.
4. To confirm and save your setting, press the
VIEW/SET button (1.31) or press the AE-MENU
button. The displays in the LCD monitor described above disappear, with the display 8
appearing instead to indicate the activated
function, along with the compensation value in
the 2nd line (3.30a).
5. Pictures are taken as described in the section
“Taking pictures in AUTO mode” (see p. 127).
Using an additional flash unit
To extend the flash range, you can attach a
(more powerful) external flash unit to the LEICA
DIGILUX 1.
Notes:
It is not possible to make video recordings (K) in
flash mode – even with an external unit (charging
time!).
If you want to control the flash exposure yourself
using the MANUAL function (see below), it is
recommended that you use one of the camera’s
two exposure modes in which you set the aperture
manually, i. e. with aperture priority (A) or manual
mode (M). In the other two exposure modes
(P and T), the aperture is set automatically, which
means that correct flash exposure cannot be
ensured. With aperture priority, the shutter speed
is set to 1/30 s – 1/25 s.
It is recommended that you turn off the built-in
flash when using an external flash unit. However,
the built-in flash can be used for direct lighting
if you are using the external unit for indirect
illumination.
Please refer to the relevant manual for more
details on setting the flash unit.
When used with larger external flash units, the
camera can become somewhat top-heavy; it is
therefore recommended that the flash unit is
removed before carrying the camera with the
carrying strap.
5. Select the 9 EXT FLASH function in the
menu by pressing (9x) down on the direction
pad (1.29).
Setting the function:
1. Ensure that the camera and flash unit are turned
off and then insert the foot of the flash unit
into the camera’s flash shoe (1.17).
6. Select the desired function by pressing left or
right on the direction pad.
The option currently set is marked in yellow.
If you select PRESET, the shutter speed –
1/60s – and ISO sensitivity are controlled
automatically regardless of the exposure mode
selected. You must set the sensitivity – to
ISO 100 – and the aperture – to 2.8 – on the
flash unit. PRESET is therefore always the
recommended function if you want to make
things as simple as possible, i. e. automatic.
By contrast, you can use the MANUAL function
to make the settings on the camera yourself.
2. Turn on the camera.
3. Set the record/review selector (1.14) to single
picture mode and the exposure mode dial (1.15)
to aperture priority (A) or manual mode (M).
4. Press the MENU button (1.27).
Detailed guide / Record mode / 147
7. Press the MENU button again to confirm and
save your setting and to exit the menu system.
The displays in the monitor described above
disappear, with the previous monitor screen
appearing instead.
Available resolutions
Setting to:
2240 corresponds to 2240 x 1680 pixels
1600 corresponds to 1600 x 1200 pixels
1120 corresponds to 1120 x 840 pixels
640 corresponds to 640 x 480 pixels
8. Turn on the flash unit.
A display appears in the monitor to indicate
that the flash unit is attached, either with an
additional M (0 3.30.ba, for MANUAL) or
without (9 3.30.bb, for PRESET).
Note:
For video recordings (K), the resolution is fixed
at 320 x 240 pixels at 10 B/s.
9. Pictures are taken as described in the section
“Taking pictures in AUTO mode” (see p. 127).
Setting the function:
1. Set the record/review selector (1.14) to one of
the record modes and the exposure mode dial
(1.15) to the desired function.
Setting the resolution
The picture data can be recorded at four different
pixel settings, i. e. resolutions. This allows you to
adjust it precisely to the intended use or to the
available memory card capacity.
At the highest resolution (which also means the
largest data volume), which you should select for
optimum quality for larger prints, it is of course
possible to save considerably fewer pictures to
a card than at the lowest resolution, which is
perfectly adequate for sending a picture by e-mail
or for a website.
Detailed guide / Record mode / 148
2. Press the MENU button (1.27).
3. Select the c PICT. SIZE function in the menu
by pressing (5x) down on the direction pad
(1.29).
4. Select the desired resolution by pressing left or
right on the direction pad.
The option currently set is marked in yellow.
5. Press the MENU button again to save your
setting and to exit the menu system.
The original monitor screen appears again, as
do the corresponding symbols (2.12/3.7) and
the resulting number of pictures remaining or
recording time in the data field (1.18) and the
monitor.
Setting the compression rate
Picture data can be recorded at three different
compression rates (data reduction process). This
allows you to adjust it precisely to the intended
use or to the available memory card capacity.
Uncompressed data, which contains the most
information about the picture and which you
should select for further processing with image
processing programs, of course allows you to save
considerably fewer pictures per memory card than
the highest compression, with reduced picture
information, which is perfectly adequate for
sending a picture by e-mail or for a website.
Available compression rates:
Setting to:
y low compression rate
Y high compression rate
TIFF uncompressed recording
(Tagged Image File Format)
Notes:
In AUTO record mode, uncompressed data
recording TIFF is not available.
Saving uncompressed data in TIFF format takes
considerably longer than compressed data – in
extreme cases, i. e. for subjects with a great many
details, up to around 30s. This is indicated by the
red signals that appear during saving; the red LED
(1.20) is constantly lit and the red signal in the
monitor (3.12) flashes. The compression rate for
video recordings cannot be changed.
A high compression rate can result in very fine
structures in the subject being lost.
The remaining number of pictures or recording
time shown in the LCD and data field and monitor
does not necessarily change each time you take a
picture. This depends on the subject, as very fine
structures result in higher data volumes, homogenous surfaces lower volumes. The details in the
table are based on the maximum possible file size
for the resolution set. The file sizes are often
smaller, depending on the picture content and the
compression rate, which means that the remaining
memory capacity is then greater than previously
calculated and displayed.
Resolution
Single pictures
Video recordings
2240 x 1680
1600 x 1200
1120 x 840
640 x 480
320 x 240
Note:
The details in the table relate to the 64 MB memory
card supplied and the default settings. However, if
you change the functions, the resulting number of
pictures will be different.
Setting the function:
1. Set the record/review selector (1.14) to one of
the record modes and the exposure mode dial
(1.15) to the desired function.
Compression rate
Y
y
64
124
242
484
362 s
32
64
124
298
TIFF
5
10
20
59
4. Select the desired compression rate by pressing left or right on the direction pad.
The option currently set is marked in yellow.
5. Press the MENU button again to save your
setting and to exit the menu system.
The original monitor screen appears again, as
do the corresponding symbols (2.13/3.8) and
the resulting number of pictures remaining or
recording time in the data field and the monitor.
2. Press the MENU button (1.27).
3. Select the QUALITY function in the menu by
pressing (6x) down on the direction pad (1.29).
Detailed guide / Record mode / 149
Setting the white balance
In electronic photography, white balance provides
neutral, i. e. natural, reproduction of color in any
light. It is based on the camera being set in
advance to reproduce a particular color as white.
With the LEICA DIGILUX 1, you can choose from
seven different settings:
§ automatic control, which almost always provides the correct results,
five fixed presets for the most common light
sources,
$
e. g. for outdoor pictures in sunlight,
% e. g. for outdoor pictures in cloudy conditions,
&
e. g. for indoor pictures with halogen lights,
/ e. g. for indoor pictures with fluorescent
lighting,
( e. g. for indoor pictures with (predominantly)
electronic flash lighting, and
) a manual setting
Note:
To make it as easy as possible to use the camera,
in AUTO exposure mode, the white balance is
fixed in the automatic setting.
Detailed guide / Record mode / 150
Setting the function:
1. Set the record/review selector (1.14) to one of
the record modes and the exposure mode dial
(1.15) to P, A, T or M.
The option currently set (apart from the manual
setting) is marked in yellow.
If you have selected the automatic setting or one
of the presets, the further settings are made as
follows:
2. Press the MENU button (1.27).
3. Select the function ? W.BALANCE in the
menu by pressing (1x) down on the direction
pad (1.29).
5. Press the MENU button again to confirm and
save your setting and to exit the menu system.
The original monitor screen appears again. WB
or the symbol for the relevant preset also
appears in the data field and the monitor.
4. You can set the 7 options by repeatedly pressing left or right on the direction pad. They
scroll through in an endless loop as follows:
§ $ % & / ( )
6. Pictures are taken as described in the section
“Taking pictures in AUTO mode” (see p. 127).
Setting the white balance manually
By contrast, if you have selected manual white
balance, the corresponding display SET flashes to
indicate that this function requires further settings
to be made. To do this, proceed as follows:
7. Press the VIEW/SET button (1.31).
8. Aim the camera at an object which you know is
white or neutral grey. It should fill the frame in
the monitor.
10. Pictures are taken as described in the section
“Taking pictures in AUTO mode” (see p. 127).
Setting the ISO sensitivity
In traditional photography, the ISO value is selected
to take account of the light-sensitivity of the film
being used. More sensitive films allow faster shutter
speeds and/or smaller apertures, or vice versa, at
the same brightness.
The ISO setting on the DIGILUX 1 also allows the
shutter speed/aperture value to be adjusted to
meet the requirements of the relevant situation,
in 3 steps. However, as the actual sensitivity of
the sensor cannot be changed, in these cases the
only thing that is defined is the quantity of light
that is to be reproduced as white.
As a consequence of this, the optimum picture
quality is obtained at ISO 100, the lowest of the
3 possible settings. The two higher sensitivities of
ISO 200 and ISO 400 result in a successively lower
contrast range and, possibly a slight blackening of
the dark sections of the picture.
For easy use, an automatic setting is also available.
Note:
In AUTO mode and for video recordings (K), the
sensitivity is fixed at the automatic setting (AUTO).
In aperture and speed priority exposure modes (A,
T) and the manual setting (M), this AUTO setting
is not available.
Setting the function:
1. Set the record/review selector (1.14) to one of
the record modes and the exposure mode dial
(1.15) to P, A, T or M.
2. Press the MENU button (1.27).
3. Select the ISO SENSITIVITY function in the
menu by pressing (2x) down on the direction
pad (1.29).
9. Press the shutter release all the way down and
hold it.
Depending on the available light, you can see
how the originally “incorrect” colors are
corrected after a short time. When the setting
is made, the display switches back to the menu
items.
Detailed guide / Record mode / 151
4. You can set the options (see point 3) by repeatedly pressing left or right on the direction pad.
They scroll through in an endless loop as
follows:
AUTO 100 200 400
The option currently set is marked in yellow.
5. Press the MENU button again to confirm and
save your setting and to exit the menu system.
The original monitor screen appears again. If a
value (not AUTO) has been set, it also appears
in the data field and the monitor.
6. Pictures are taken as described in the section
“Taking pictures in AUTO mode” (see p. 127).
Setting the picture properties
(contrast, sharpness, color saturation)
One of the many advantages of electronic photography over traditional photography is that it is
very easy to change critical properties of a picture, i. e. those that determine its character. While
photographic software – after recording and
transfer to a computer – provides great scope for
doing this, the LEICA DIGILUX 1 itself allows you
to influence three of the most important picture
properties even before taking the picture:
Detailed guide / Record mode / 152
_ The contrast, i. e. the difference between light
and dark areas, determines whether a picture
has a more “pale” or “brilliant” effect. As a consequence, the contrast can be influenced by
increasing or reducing this difference, i. e. by
making light areas lighter and dark areas darker
or vice versa.
_ Sharp reproduction – at least of the main subject
– by using the correct distance setting is a prerequisite for a successful picture. In turn, the
impression of sharpness given by a picture is, to
a great extent, determined by the contour sharpness, i. e. how small the light/dark transition is
on contours in the picture. The sharpness effect
can therefore be changed by increasing or reducing these areas.
_ The color saturation determines whether the
colours in the picture appear as “pale” and
pastel-like or “bright” and colorful. While the
lighting and weather conditions (hazy/clear) are
given as conditions for the picture, the reproduction can definitely be influenced here.
Alongside the normal (“STD”/standard), i. e.
unchanged reproduction, for each of the three picture properties you can – independently – also
select a weakened (LOW) or strengthened (HIGH)
option.
Note:
It is not possible to change the picture properties
for video recordings or in AUTO exposure mode.
Setting the function:
1. Set the record/review selector (1.14) to one of
the record modes and the exposure mode dial
(1.15) to P, A, T or M.
2. Press the MENU button (1.27).
3. Select the function H PICT. ADJ. (PICTURE
ADJUSTMENT) in the menu by pressing (11x)
down on the direction pad (1.29).
4. Open the relevant sub-menu by pressing right
on the direction pad.)
5. Select the desired contrast by pressing left
and/or right on the direction pad.
The option currently set is marked in yellow.
6. Switch to the other two picture properties by
pressing down on the direction pad. They are
set as described in point 4.
The option currently set is marked in yellow.
7. Press the MENU button twice to save your setting and to exit the menu system.
The original monitor screen appears again.
Using lens attachments
Your photographic specialist will have lens attachments, which – with the aid of an adapter – can
be used on the LEICA DIGILUX 1. This additional
equipment allows you to extend or reduce the lens
focal length for an even smaller or even larger
trimmed area.
Leica also offers a special adapter for use with
TELEVID spotting scopes (Code No. 42 302),
which provides a simple method for taking photographs of the up to 60x enlarged image from the
spotting scope.
Standard E49 filters can also be used with a
special adapter (Code No. 18 609). Leica offers a
corresponding UVA filter (Code No. 13 238) and a
universal polarizing filter that folds out for viewing
and setting (Code No. 13 356).
Notes:
Lens attachments can also be used for video
recordings.
If the camera is set up for the use of lens
attachments, the built-in flash unit is deactivated.
External distance measurement is also turned off.
The focussing process is therefore slower and the
shutter release delay is longer.
Please refer to the relevant manuals for more
details on lens attachments.
Setting the function:
1. Set the record/review selector (1.14) and the
exposure mode dial (1.15) to the desired
functions.
2. Press the MENU button (1.27).
3. Select the # CONVERSION function in the
menu by pressing (10x) down on the direction
pad (1.29).
4. Select the desired function by pressing left or
right on the direction pad.
The option currently set is marked in yellow.
Detailed guide / Record mode / 153
5. Press the MENU button again to confirm and
save your setting and to exit the menu system.
The displays in the monitor described above
disappear, with the monitor showing the display
# (3.3) to indicate that the function is active.
The appropriate symbol (2, 3.2g) also appears
to indicate that the flash unit is turned off.
6. Unscrew the lens front ring (1.9) anticlockwise.
7. Screw the adapter and/or lens attachment
clockwise onto the lens mount.
8. Pictures are taken as described in the section
“Taking pictures in AUTO mode” (see p. 127).
Notes:
Use the monitor (1.32) to determine the trimming
when using lens attachments.
Detailed guide / Record mode / 154
Review mode
Reviewing single pictures
As described in the section “Checking the last
picture (REVIEW) on p. 129, pictures are briefly
shown in the monitor directly after they have been
taken. By contrast, review mode allows you to
view the pictures at any time, with no time limit,
e. g. to decide whether you want to delete a
picture or to view other pictures on the memory
card.
Notes:
The LEICA DIGILUX 1 saves pictures according to
the DCF standard (Design Rule for Camera File
System).
This camera produces image files either in Exif
JPEG 2.0/2.5 format (Joint Photographic Expert
Group) or in TIFF format.
It may not be possible to review files that have
not been created by the LEICA DIGILUX 1, or the
quality may be impaired. In this case, the monitor
remains black and ––– is displayed as the file
number (see below).
Setting the function/Selecting pictures:
1. Set the Record/review selector (1.14) to
review J.
The last picture taken is then shown.
All displays disappear from the data field and
PLAY appears instead.
the corresponding pictures. It can then be used
later, for example as part of a presentation or as
an aid to archiving.
Setting and using the function:
1. Set the Record/review selector (1.14) to
review J.
The last picture taken is then shown.
2. Select the desired picture with sound recording
by pressing left or right on the direction pad
(1.29).
2. To view the next or previous picture, press left
or right on the direction pad (1.29). Holding it
down (approx. 2 s) allows you to scroll quickly
through the pictures. As the pictures scroll
through in an endless loop, you can reach all
pictures in either direction.
The picture and file numbers in the monitor
change accordingly.
Reviewing single pictures with sound
As already described in the section “Pictures
with sound” on p. 134, you can also record sound
to go with your pictures if you wish. The LEICA
DIGILUX 1 can play back this sound along with
3. To play back the recording, press the
VIEW/SET button (1.31).
During playback, the line PLAY AUDIO SET
in the monitor disappears, and
The red LED (1.20) is lit constantly.
Detailed guide / Review mode / 155
Notes:
For playback, make sure that the speaker (1.30)
is not covered, e. g. by one of your fingers.
The playback cannot be interrupted and it is not
possible to select or set any other functions while
it is going on.
Simultaneous review of up to nine pictures
The LEICA DIGILUX 1 allows you to view up to 9
pictures (or less if less pictures are saved) in the
monitor simultaneously, e. g. to gain an overview
or to find the picture you want more quickly.
The playback volume can be adjusted to your
preferences or the situation in five steps.
Setting the volume:
1. Set the Record/review selector (1.14) to
review J.
2. Press the MENU button (1.27).
3. Select h SETUP (default settings menu) by
pressing right on the direction pad (1.29).
4. Select the function Ä VOLUME by pressing
(2x) down on the direction pad.
Detailed guide / Review mode / 156
5. Select the desired volume by pressing left or
right on the direction pad. 6 levels are available,
with the height of the bar representing the
volume.
The setting is shown by the bar being marked in
yellow.
6. Press the MENU button again to confirm and
save your setting and to exit the menu system.
The menu displays in the monitor disappear,
and the monitor once again shows the previous
displays.
Setting the function/Selecting pictures:
1. Set the Record/review selector (1.14) to
review J.
The last picture taken is then shown.
All displays disappear from the data field and
PLAY appears instead.
Note:
Pictures stored in different folders are shown
separately even if there are less than 9 pictures in
total.
2. Press the zoom lever (1.10) to the left (into the
wide-angle position).
By pressing the zoom lever to the right (into
telephoto position), you can restore the picture
marked with a yellow number to normal size.
Zoom and trimming selection for reviewing
single pictures
To assess a single picture more accurately on the
monitor, you can enlarge it by up to 16x in several
stages and select any trimming. Likewise, it is
also possible to view up to six – considerably
reduced – pictures in sequence on the monitor.
3. You can use the direction pad (1.29) to show
the other saved pictures in the monitor or
select them.
Pressing left or up on the direction pad takes
you to the pictures with lower numbers, right
and down to those with higher numbers. Up
and down moves you from line to line. After
the highest and lowest numbers, the sequence
of pictures arranged in an endless loop starts
again from the beginning.
The selected picture is identified by a yellow
number.
Enlarging the picture and selecting
the trimming
2. Press the zoom lever (1.10) to the right (into
the telephoto position).
The previous displays disappear from the monitor
and the picture previously shown is enlarged
by 2x.
Notes:
Zooming and selecting the trimming is not possible
for video recordings.
The more the picture is enlarged, the more the
quality of reproduction in the monitor is reduced,
due to the proportionally lower resolution.
It may not be possible to enlarge pictures from
other types of camera.
Setting the function/Selecting pictures:
1. Select the desired picture as described in the
section “Reviewing single pictures” on p. 155?
under points 1 and 2.
The further steps are different depending on
the selected function.
The enlargement factor can be increased for
even smaller trimmed areas by repeatedly
pressing the zoom lever (up to 4x in total) up to
a maximum enlargement of 16x. Pressing the
zoom lever to the left (into the wide-angle
position) reduces the picture.
The displays change according to the current
setting.
Detailed guide / Review mode / 157
3. You can use the direction pad (1.29) to select
any trimming at any enlargement. To do this,
press the direction in which you want to move
the trimmed area.
If the edge of the picture is reached in one or
two directions, this is indicated by the fact that
the corresponding arrows go out.
If, after viewing the enlarged picture, you decide
that you do not want to use it, you can delete
immediately at this point.
6. Finally, press the VIEW/SET button. If you
previously selected YES, the picture data is
deleted.
Note:
Protected pictures must first of all be unlocked,
before they can be deleted. See the section
“Protecting pictures” on p. 162 for details.
Warning:
Picture data is permanently deleted. You cannot
subsequently retrieve it.
4. Press the MENU button (1.27).
Reviewing video recordings
Just like single pictures, video recordings can be
viewed on the monitor.
Notes:
Only video files in QuickTime Motion JPEG format
can be played back. Therefore, it may not be
possible to play back video files to other standards
or those recorded using other cameras.
5. Select NO – to retain a picture – or YES –
to delete – by pressing up or down on the
direction pad.
Detailed guide / Review mode / 158
Setting the function/Selecting pictures:
1. Set the Record/review selector (1.14) to
review J.
The last picture taken is then shown.
All displays disappear from the data field and
PLAY appears instead.
2. Press left or right on the direction pad (1.29) to
open the desired video file. Holding it down
allows you to scroll quickly through the files. As
the files scroll through in an endless loop, you
can reach all recordings in either direction.
The first frame of the selected video recording
is then shown.
3. Press the VIEW/SET button (1.31) to start
playback of the film recording. You can use the
direction pad as described below at any time
during playback.
start/stop
fast
rewind
fast
forward
Deleting pictures
Pictures on the memory card can be deleted at
any time. This can be useful, e. g. if you have
already saved the pictures to other media, if you
no longer need them or if you need to free up
more memory space on the card.
The LEICA DIGILUX 1 also offers you the option of
deleting single pictures, or several or all pictures
at the same time, as required.
Note:
Protected pictures must first of all be unlocked,
before they can be deleted. See the section
“Protecting pictures” on p. 162 for details.
video off
Note:
When using memory cards with high capacity, fast
rewind may be slower.
3. Select the , DELETE function in the menu by
pressing (1x) down on the direction pad (1.29).
Warning:
Pictures are permanently deleted. You cannot
subsequently retrieve them.
4. Open the sub-menu by pressing right on the
direction pad.
Setting the function:
1. Select the desired picture as described in the
section “Reviewing single pictures” on p. 155
0under points 1 and 2.
2. Press the MENU button (1.27).
The further steps are different depending on the
selected function.
Detailed guide / Review mode / 159
Deleting single pictures
5. Open the corresponding sub-menu by pressing
right on the direction pad.)
Deleting several pictures simultaneously
5. Select MULTI by pressing down and/or up on
the direction pad to delete up to 50 pictures
simultaneously.
The menu line is marked in yellow and the
arrow described above under point 4 appears,
along with a further arrow pointing upwards.
7. Select each picture to be deleted individually by
pressing left and/or right on the direction pad.
The number of the active picture is always
shown in yellow.
6. Open the corresponding sub-menu by pressing
right on the direction pad.
The picture and menu displays disappear
from the monitor; they are replaced by up to
6 pictures in miniature format, each with their
number, with the active picture being marked in
yellow.
6. To delete the picture, press the VIEW/SET
button (1.31).
If a picture is deleted, the next one then appears
in the monitor.
Note:
While carrying out an operation, you can also
select the other pictures by pressing right and/or
left on the direction pad.
7. Press the MENU button once to return to the
previous menu level or twice to exit the menu
system.
Detailed guide / Review mode / 160
8. Mark each picture to be deleted individually by
pressing up on the direction pad.
The , symbol appears on the relevant picture,
or cancel the marking by pressing down on the
direction pad the , symbol disappears.
9. Press the VIEW/SET button to delete the
selected pictures.
The pictures disappear, the monitor screen
goes grey and PLEASE WAIT… appears for a
short time while the data is being deleted. The
next pictures then appear.
10. Press the MENU button once to return to the
previous menu level or twice to exit the menu
system.
Deleting all pictures on the memory card
5. Select ALL by pressing down on the direction
pad to delete all pictures on the memory card.
The menu line is marked in yellow and the left
and right arrows described above under point
4 appears, along with a further arrow pointing
upwards.
6. Open the associated sub-menu by pressing
right on the direction pad.
7. Press up or down on the direction pad to select
NO to retain a picture or YES to delete.
8. Finally, press the VIEW/SET button. If you
previously selected YES, the picture data is
deleted.
The picture in the background disappears, the
monitor screen goes grey and PLEASE WAIT…
appears for a short time while the data is being
deleted. NO VALID IMAGES TO PLAY then
appears.
9. Press the MENU button once to return to the
previous menu level or twice to exit the menu
system.
Formatting the memory card
It is not normally necessary to format (initialise)
the memory card. However, if the error message
MEMORY CARD ERROR is shown, it is necessary.
Warning:
When formatting, all information on the card,
such as picture files, sound recordings and all
other data, e. g. music files, is irretrievably lost.
You should therefore make a habit of transferring
all your pictures to a secure mass storage medium,
e. g. your computer’s hard drive, as soon as
possible.
Notes:
Do not turn the camera off while the memory card
is being formatted.
If the memory card has been formatted in another
device, such as a computer, you should reformat
it in the camera.
If the memory card cannot be formatted, you
should ask your dealer or Leica for advice.
Setting the function:
1. Set the record/review selector (1.14) to
review J.
2. Press the MENU button (1.27).
Detailed guide / Review mode / 161
3. Select the b FORMAT function in the menu by
pressing (8x) down on the direction pad (1.29) .
5. Press up or down on the direction pad to select
NO or YES.
NO if you do not want to format the card in
order to preserve the saved picture data.
YES if you definitely want to format the card,
even though any remaining picture files will be
lost (marked with upwards arrow and in yellow
when activated).
6. Finally, press the VIEW/SET button (1.31).
If you previously selected NO,
the sub-menu disappears and the review menu
reappears.
4. Open the corresponding sub-menu by pressing
right on the direction pad.
If you previously selected YES,
the picture and displays disappear, the monitor
screen goes grey and PLEASE WAIT… appears
for a short time while the memory card is
being formatted. The following message then
appears: NO VALID IMAGES TO PLAY.
Protecting pictures
The pictures saved on the memory card can be
protected against being accidentally deleted.
Notes:
When formatting the memory card, even protected
pictures are deleted.
If you attempt to delete protected pictures,
warning messages appear in the monitor. When
deleting a single picture: THIS PICTURE IS
PROTECTED, when deleting several or all pictures:
SOME PICTURES CAN’T BE DELETED. If you still
want to delete, remove the protection as described
below. The protection against deletion is only
effective on this camera.
Setting the function:
1. Select the desired picture as described in the
section “Reviewing single pictures” on p. 155
under points 1 and 2.
2. Press the MENU button (1.27).
Detailed guide / Review mode / 162
3. Select the M PROTECT function in the menu
by pressing (2x) down on the direction pad
(1.29).
Protecting single pictures/
Removing protection
5. Open the picture again by pressing right on the
direction pad.
The symbol M PROTECT appears in the top
left of the monitor .
Note:
These displays also appear if a picture that is
already protected is opened.
4. Open the sub-menu by pressing right on the
direction pad.
6. To protect the picture, press the VIEW/SET
button.
The display in the monitor changes, with M
UNPROTECT now appearing in the top left,
with the symbol for a protected picture m
below it.
To remove the protection, you also press the
VIEW/SET button.
The displays change back to those described in
point 5.
Note:
While carrying out this operation, you can also
select the other pictures by pressing right and/or
left on the direction pad.
7. Press the MENU button once to return to the
previous menu level or twice to exit the menu
system.
The further steps are different depending on the
selected function.
Detailed guide / Review mode / 163
Protecting several pictures on the
memory card
5. Select MULTI by pressing down on the
direction pad to protect several pictures
on the memory card.
The menu line is marked in yellow and the
arrow described above under point 4 appears,
along with a further arrow pointing upwards.
Deleting all protection settings
5. Select CANCEL by pressing down and/or up
on the direction pad if you want to delete all
existing protection settings.
The menu line is marked in yellow and the left
and right arrows described above under point
4 appears, along with a further arrow pointing
upwards.
6. Open the associated sub-menu by pressing
right on the direction pad.
6. Open the associated sub-menu by pressing
right on the direction pad.
The number of the active picture is always shown
in yellow.
8. Mark each picture to be protected individually
by pressing up on the direction pad.
The m symbol appears on the relevant picture,
or cancel the marking by pressing down on the
direction pad
the m symbol disappears.
7. Select each picture to be protected individually
by pressing left and/or right on the direction
pad.
Detailed guide / Review mode / 164
9. Press the VIEW/SET button to protect the
selected pictures.
The small pictures and the displays in the
monitor disappear, the monitor screen goes
grey and PLEASE WAIT… appears while the
settings are being saved. The last active picture
then appears on the whole field with the original
displays. For pictures marked accordingly, the
protection symbol m also appears in the
center of the header.
7. Press up or down on the direction pad to select
NO to retain or YES (marked with upwards
arrow and in yellow, if activated) to delete all
protection settings.
8. Finally, press the VIEW/SET button. If you
previously selected YES, all protection settings
are deleted.
The 1st menu level appears again in the monitor.
9. Press the MENU button to exit the menu
system.
Print order (DPOF) settings on the
memory card
As with traditional photography, you can have
prints of digital pictures produced by a photographic studio or do it yourself on the appropriate
machines, or print them yourself using compatible
printers.
With your LEICA DIGILUX 1 you can prepare this
kind of printing job in advance, by defining how
many of which pictures you want to order on the
memory card. This is done using the common
DPOF standard (Digital Print Order Format).
The LEICA DIGILUX 1 also offers you the option of
marking single pictures, or several or all pictures
at the same time accordingly, as well as defining
individual print quantities of up to 99 units for
each marked picture.
Notes:
If the picture files are not compatible with the
DCF standard, it is not possible to make print
order settings on the memory card. This standard
specifies the file structure.
If print order settings with this camera include
pictures, which have already been defined as part
of an automatic review sequence (SLIDE SHOW,
see p. 176) on other devices, these settings are
overwritten. The automatic review sequence then
contains only those pictures for which print order
settings exist.
4. Open the sub-menu by pressing right on the
direction pad.
Setting the functions:
1. Select the desired picture as described in the
section “Reviewing single pictures” on p. 155
under points 1 and 2.
2. Press the MENU button (1.27).
3. Select the v DPOF function in the menu by
pressing (3x) down on the direction pad (1.29).
The further steps are different depending on the
selected function.
Detailed guide / Review mode / 165
8. Press the MENU button once to save your
setting and return to the previous menu level,
or twice to exit the menu system.
On the monitor, the symbol for the print order
setting including the number of copies entered
also appears in the header on the right next to
the symbol for review mode.
Print order settings for one picture
5. Open the corresponding sub-menu by pressing
right on the direction pad.
Note:
As part of steps 5, 6 and 7, at any time you can
press right and/or left on the direction pad to
select other pictures to be marked.
6. Press the VIEW/SET button (1.31) to mark the
picture shown as one for which you want to
make print order settings.
Notes:
If you only want a single copy of this picture, you
can proceed immediately with step 8.
Settings already made can be deleted at this point
by pressing the VIEW/SET button again.
7. If you want more than one copy, set the number
by pressing down and/or up on the direction
pad, down for a lower number, up for a higher
number. Hold down the relevant direction, to
scroll quickly through the numbers.
Note:
The numbers in the display do not scroll in an
endless loop, i. e. from 1 you can only go
upwards and from 99 you can only go downwards.
Detailed guide / Review mode / 166
Deleting individual print order settings
Settings already made can be deleted at any time
by repeating steps 1-5 as described above and
pressing the VIEW/SET button.
Print order settings for several pictures
5. Select MULTI by pressing down and/or up on
the direction pad, if you want to mark up to 50
pictures simultaneously.
The menu line is marked in yellow and the
arrow described above under point 4 appears,
along with a further arrow pointing upwards.
8. For each picture selected, individually set the
desired number of copies by pressing up
and/or down on the direction pad,
the v symbol including the set quantity
appears on the relevant picture, or cancel the
Deleting all print order settings
5. Select CANCEL by pressing down and/or up
on the direction pad if you want to delete all
existing DPOF markings.
The menu line is marked in yellow and the
arrow described above under point 4 appears,
along with a further arrow pointing upwards.
6. Open the corresponding sub-menu by pressing
right on the direction pad.
setting by (repeatedly) pressing down on the
direction pad.
The v symbol disappears. Hold down the
relevant direction, to scroll quickly through the
numbers.
7. Select each picture to be marked individually by
pressing left and/or right on the direction pad.
The number of the active picture is always
shown in yellow.
displays. On the monitor, the symbol for the print
order setting including the number of copies
entered also appears in the header for marked
pictures, on the right next to the symbol for review
mode.
Note:
The flashing arrow pointing to the right only appears if print order settings exist. If there are
none, it is not possible to access the sub-menu
and the steps described below.
6. Open the associated sub-menu by pressing
right on the direction pad.
9. Press the VIEW/SET button to save all
settings.
The small pictures and the displays in the
monitor disappear, the monitor screen goes
grey and PLEASE WAIT… appears while the
settings are being saved. The last active picture
then appears on the whole field with the original
Detailed guide / Review mode / 167
Print order settings for an index print
In addition to normal sized copies, many photographic studios also offer an “Overview print”.
This index print shows the pictures from a memory
card in a miniature format. They make it easier to
order additional copies and are used as a simple
form of archiving.
7. Press up or down on the direction pad to select
NO to retain all print order settings or YES to
delete them.
8. Finally, press the VIEW/SET button. If you
previously selected YES, all print order settings
are deleted.
The picture in the background disappears, the
monitor screen goes grey and PLEASE WAIT…
appears while the settings are being deleted.
The original menu level then appears again.
9. Press the MENU button to exit the menu
system.
6. Open the associated sub-menu by pressing
right on the direction pad.
5. Select INDEX by pressing down on the direction
pad, if you want to order an index print.
The menu line is marked in yellow and the left
and right arrows described above under point
4 appear, along with a further arrow pointing
upwards.
7. Select NO if you do not want an index print or
YES if you do want one by pressing up or down
on the direction pad.
8. Finally, press the VIEW/SET button. If you
previously selected YES, the order is saved
The picture in the background disappears for a
short time, the monitor screen goes grey and
PLEASE WAIT… appears while the order is
being saved. The original menu level then
appears again.
9. Press the MENU button to exit the menu
system.
Detailed guide / Review mode / 168
Deleting print order settings for an index print
An index print order can be deleted independently
of all other print order settings. To do this repeat
the steps described under “Deleting all print order
settings”.
Detailed guide / Review mode / 169
Further functions
Adding sound to existing pictures
(AUDIO DUBBING)
With the LEICA DIGILUX 1, you can add up to 10 s
of sound recording to each picture at a later date,
e. g. as commentary.
Notes:
Once recorded, a sound recording cannot be
deleted, only overwritten with a new recording
(see below from point 5 onwards).
Later sound recordings are neither possible
for pictures in TIFF format (see p. 148) nor for
video recordings (see p. 128) and protected
images (see p. 162).
3. Select the Ö AUDIO DUB function in the menu
by pressing (5x) down on the direction pad
(1.29).
Note:
While carrying out steps 4 and 5 you can also
select the other pictures using right and left on
the direction pad, so that they can also be given
sound.
The following two steps are only required if a
sound recording already exists for this picture.
Otherwise, you can continue as described in point
7 onwards.
5. Press the VIEW/SET button (1.31).
4. Return to the picture by pressing right on the
direction pad.
Setting the function:
1. Select the desired picture as described in the
section “Reviewing single pictures” on p. 155 in
points 1 and 2.
Note:
Pictures which already have an existing sound
recording are identified on the monitor by the
corresponding symbol (3.6) in the header, and by
an additional 3rd line with: PLAY AUDIO: SET to
indicate how the sound is played back.
2. Press the MENU button (1.27).
Detailed guide / Review mode / 170
6. Press up or down on the direction pad to select
NO or YES.
NO if you want to retain the existing sound
recording, i. e. you do not want a new recording.
YES if you want to overwrite the existing sound
recording with a new one (marked with
upwards arrow and in yellow, if activated).
7. Finally, press the VIEW/SET button to start the
sound recording.
If you previously selected NO,
the sub-menu disappears and the displays
described in point 4 appear.
If you previously selected YES,
the previously white microphone symbol
turns blue and flashes for the duration of the
recording. Below it, a row of 10 small black
triangles appears, which turn yellow one after
another at one second intervals to show the
progress of the maximum 10 s of recording
time.
On the bottom line, only STOP: SET remains on
the right to indicate how the sound recording
can be ended at any time.
Afterwards, the displays change back to their
original state, with the sound recording symbol
also appearing in the header.
Reducing the resolution after recording
You can reduce the resolution of a picture you
have already saved at a later date. This is particularly recommended if you want to increase the
remaining memory capacity of the card, send the
picture as an e-mail attachment or use it as part
of a website.
8. Press the VIEW/SET button again, if you want
to interrupt the sound recording.
The displays then change back to the state
described in point 4, with the sound recording
symbol also appearing in the header.
9. Press the MENU button twice to deactivate
sound recording and to exit the menu system.
Notes:
The resolution of video recordings, pictures saved
in TIFF format and pictures with a resolution of
640 x 480 pixels or with a aspect ratio other than
4:3 cannot be reduced.
Existing sound recordings are deleted when the
resolution is reduced.
For pictures saved with other devices, this may
not be possible.
Setting the function:
1. Select the desired picture as described in the
section “Reviewing single pictures” on p. 155
in points 1 and 2.
2. Press the MENU button (1.27).
3. Select the x RESIZE function in the menu by
pressing (6x) down on the direction pad (1.29).
Detailed guide / Review mode / 171
4. Return to the picture by pressing right on the
direction pad.
If it is possible to reduce the resolution, the
following monitor screen appears:
Note:
While carrying out step 4 you can also select the
other pictures using right and left on the direction
pad, so that their resolution can also be reduced.
The following step is only necessary if you want to
reduce the resolution by more than one level.
Otherwise, you can continue as described in point
7 onwards.
If it is not possible to reduce the resolution
(for the reasons given above under “Notes”), the
monitor screen above appears with the following
differences:
CAN’T RESIZE THIS PICTURE is displayed in the
center of the screen, and
On the bottom line, only CANCEL: MENU is
shown to indicate how you can exit this menu
level.
6. Select the desired resolution by pressing up
and/or down on the direction pad.
Depending on whether only a lower resolution
is available, only a higher resolution, or both,
the different corresponding arrow symbols
appear.
1600 = 1600 x 1200
1120 = 1120 x 840
640 = 640 x 480
The following step is only necessary if it is not
possible to reduce the resolution. Otherwise, you
can continue as described in point 6 onwards.
7. Press the VIEW/SET button (1.31).
5. In such cases, select one of the other pictures,
for which you want to reduce the resolution, by
pressing left or right on the direction pad.
Detailed guide / Review mode / 172
8. Press up or down on the direction pad to select
NO or YES.
NO if you want to retain the picture with the
original resolution and additionally store the
one with the reduced resolution.
YES if on the contrary, you want to erase the
picture with the original resolution and store
only the one with the reduced resolution
(marked with upwards arrow and in yellow
when activated).
9. Finally, press the VIEW/SET button to save the
picture with the reduced resolution.
If you previously selected NO,
The picture and displays disappear for a
short time, the monitor screen goes grey and
PLEASE WAIT… appears while the picture is
being saved at the reduced resolution (in addition
to the original resolution). The review menu then
appears. If you then press right on the direction
pad again, the new picture file with the reduced
resolution appears (and the new picture number).
If you previously selected YES,
The picture and displays disappear for a
short time, the monitor screen goes grey and
PLEASE WAIT… appears while the picture file
with the original resolution is being deleted and
resaved with the reduced resolution. The review
menu then appears. If you then press right on the
direction pad again, the new picture file with the
reduced resolution appears (and the new picture
number).
Note:
The (additional) resolution versions are numbered
in the same way as new pictures, i. e. they are
added at the end regardless of the number of the
original picture.
10. Press the MENU button to exit the menu
system.
Changing the trimming after recording
With the LEICA DIGILUX 1 you can change the
trimming of pictures you have already saved at a
later date. This trimming makes it possible to
remove less important areas at one or more of
the edges or to make the main subject more
prominent, thereby optimising the composition of
the picture.
However, the following must be taken into
account:
If the (originally smaller) trimming is subsequently
made as large as the original picture, this always
means a simultaneous reduction in the resolution,
as a lower number of pixels has to cover the same
area.
Note:
Trimming is not possible for video recordings,
pictures saved in TIFF format, pictures with a
sound recording and pictures with a resolution
of 640 x 480 pixels and those saved on other devices.
Setting the function:
1. Select the desired picture as described in the
section “Reviewing single pictures” on p. 155 in
points 1 and 2.
2. Press the MENU button (1.27).
3. Select the n TRIMMING function in the
menu by pressing (7x) down on the direction
pad (1.29).
Detailed guide / Review mode / 173
4. Return to the picture by pressing right on the
direction pad.
If it is possible to reduce the resolution, the
following monitor screen appears:
The following step is only necessary if it is not
possible to change the trimming. Otherwise, you
can continue as described in point 6 onwards.
5. In such cases, select one of the other pictures,
for which you want to change the trimming, by
pressing left or right on the direction pad.
The following step is only necessary if you want to
reduce the resolution by more than one level.
Otherwise, you can continue as described in point
7 onwards.
Note:
While carrying out step 4 you can also select the
other pictures using right and left on the direction
pad, so that you can also change the trimming for
them.
If it is not possible to change the trimming (for the
reasons given above under “Notes”), the monitor
screen above appears with the following
differences:
-CAN’T TRIM THIS PICTURE is displayed in the
center of the screen, and
-on the bottom line, only CANCEL: MENU is
shown to indicate how you can exit this menu
level.
Detailed guide / Review mode / 174
Note:
The lower the selected resolution, the smaller
the resulting, center trimming. The smaller the
trimming, the more it can be moved from center
in step 8.
7. Press the VIEW/SET button.
The displays described above in point 4 appear
on the monitor, along with
a yellow arrow pointing outwards at the edge of
the monitor in the center, to indicate how the
trimming can be changed.
6. Select the desired resolution by pressing up
and/or down on the direction pad. Depending
on whether only a lower resolution, only a higher
resolution or both is available, yellow arrows
pointing downwards, upwards or both appear
either below, above or below and above the
suggested resolution, to indicate the setting
options.
1600 = 1600 x 1200
1120 = 1120 x 840
640 = 640 x 480
8. Select desired trimming by using the direction
pad.
On the monitor, the image “moves” in the
direction you press on the direction pad.
10. Press up or down on the direction pad to
select NO or YES.
NO, if you want to retain the picture with the
original resolution and trimming and additionally store the one with the reduced resolution
and the changed trimming.
YES, if on the contrary, you want to erase the
picture with the original resolution and trimming and store only the one with the reduced
resolution and the changed trimming (marked
with upwards arrow and in yellow, if activated).
Note:
The edges of the original picture are the limits
of where you can move.
9. Press the VIEW/SET button again.
the direction pad again, the new picture file
with the new trimming appears (and the new
picture number).
Note:
The (additional) resolution versions are numbered
in the same way as new pictures, i. e. they are
added at the end regardless of the number of the
original picture.
12. Press the MENU button to exit the menu
system.
11. Finally, press the VIEW/SET button to save
the picture with the reduced resolution.
If you previously selected NO,
The picture and displays disappear for a
short time, the monitor screen goes grey and
PLEASE WAIT… appears while the picture is
being saved with the new trimming (in addition
to the original picture). The review menu then
appears. If you then press right on the direction pad again, the new picture file with the
new trimming appears (and the new picture
number).
If you previously selected YES,
The picture and displays disappear for a
short time, the monitor screen goes grey and
PLEASE WAIT… appears while the picture file
with the original resolution is being deleted
and resaved with the new trimming. The review
menu then appears. If you then press right on
Detailed guide / Review mode / 175
Creating new folder numbers
The LEICA DIGILUX 1 writes the picture numbers
to the memory card in ascending order. Initially,
the corresponding files are all stored in one folder.
You can create a new folder at any time, which
you can use to store subsequent pictures, e. g. to
group them together more clearly.
5. Open the corresponding sub-menu by pressing
right on the direction pad.
Setting the function:
1. Set the Record/review selector (1.14) to single
or series exposures.
Notes:
Automatic playback is not available for video
recordings.
2. Press the MENU button (1.27).
3. Press right on the direction pad to open the
default settings menu (h SETUP).
4. Select the F NO. RESET function in the menu
by pressing (5x) down on the direction pad
(1.29).
6. Select NO to retain the existing folder number
or YES (marked with the upwards arrow and in
yellow if activated) for a new number by pressing up or down on the direction pad.
Setting the function:
1. Set the Record/review selector (1.14) to
review J.
2. Press the MENU button (1.27).
7. Finally, press the VIEW/SET button. If you
previously selected YES, the new folder number
is set for the subsequent pictures.
The 1st menu level appears again in the
monitor.
8. Press the MENU button to exit the menu
system.
The original monitor screen appears again.
Detailed guide / Review mode / 176
Automatic playback of a series of pictures
(SLIDE SHOW)
With the LEICA DIGILUX 1 you can automatically
play back a sequence of pictures saved on the
memory card on the camera monitor or the
screen of a connected computer like a slide show.
You can also select how long each picture is
shown for and whether any sound recordings are
to be played back at the same time.
3. Select the p SLIDE SHOW function in the
menu by pressing (4x) down on the direction
pad (1.29).
The menu line is marked in yellow and the left and
right arrows described above under point 4 appear,
along with a further arrow pointing upwards.
6. Open the relevant sub-menu by pressing right
on the direction pad.
4. Open the sub-menu by pressing right on the
direction pad.
The following three steps are only required if you
want to change the display time for the individual
pictures. Otherwise, you can start automatic
playback as described in point 13.
can be seen, arrows pointing to the left and/or
right also appear.
8. Select the desired display time by pressing left
or right on the direction pad.
The selected time is marked in yellow.
9. Return to the SLIDE SHOW menu item by
pressing up on the direction pad.
The following three steps are only required if you
want to playback any sound recordings. Otherwise,
you can start automatic playback as described in
point 13.
10. Select AUDIO ON by pressing down on the
direction pad.
The menu line is marked in yellow, in addition
an arrow pointing upwards is displayed, along
with ON and OFF to the right. Depending on
whether playback of sound recordings is turned
on or off, an arrow pointing to the left or the
right also appears.
5. Continue the settings from step 6 if all pictures
are to be shown.
However, if only the pictures with print order
settings are to be shown, select DPOF by
pressing down on the direction pad. The other
settings are the same.
7. Press up or down on the direction pad to select
DURATION 3SEC .
The menu line is marked in yellow, in addition
arrows pointing upwards and downwards are
also displayed, along with two of the four available display times 1 SEC, 2 SEC, 3 SEC, 5 SEC
to the right. Depending on which of the times
11. Select the desired function type by pressing
left or right on the direction pad.
The selected function type is marked in yellow.
12. Return to the SLIDE SHOW menu item by
pressing up on the direction pad.
Detailed guide / Review mode / 177
13. Start automatic playback by pressing right on
the direction pad.
Some of the displays change. For a short time,
the following appear
_ in the header p ALL SLIDE SHOW;
_ below it START SLIDE SHOW, and
_ below that STOP: MENU to indicate how
you stop playback.
Automatic playback then proceeds with short
dark intervals between the pictures until you
press the MENU button. The only display is
the file and consecutive picture number in the
top right.
14. Press the MENU button to stop automatic
playback.
The picture no longer changes, the message
END OF SLIDE SHOW appears in the center
of the screen for a short time and then the
original displays appear on the monitor.
Setting the LCD monitor brightness
The brightness of the LCD monitor on the LEICA
DIGILUX 1 can be set so that you can adjust it
optimally for any situation, i. e. the prevailing light
conditions.
Notes:
The monitor brightness setting has an effect on
the battery life: the brighter it is, the more power
it consumes and therefore the shorter the life.
For this reason, the brightness is always reset to
the default value when the camera is turned off.
Setting the function:
1. Press the MENU button (1.27). It makes no
difference whether you are in record or review
modes.
2. Press right on the direction pad (1.29) to open
the default settings menu h SETUP.
3. Select the desired brightness level by pressing
left and/or right on the direction pad.
The selected level of the scale is marked in
yellow. At the two maximum settings, the
relevant arrow disappears.
4. Press the MENU button again to exit the menu
system.
Setting the acknowledge tones
With the LEICA DIGILUX 1, you can decide whether
you want your settings and other functions to be
acknowledged by an acoustic signal – two
volumes are available, or whether operation of the
camera and actually taking photographs should be
predominantly free of noise.
The acknowledgement is a beep, which sounds for
each step and when the focus and exposure are
calculated and saved when the shutter release is
pressed down halfway.
Setting the function:
1. Press the MENU button (1.27). It makes no
difference whether you are in record or review
modes.
Detailed guide / Review mode / 178
2. Press right on the direction pad (1.29) to open
the default settings menu h SETUP.
3. Select the ä BEEP function in the menu by
pressing (3x) down on the direction pad.
4. Press right or left on the direction pad to
select Ä (loud acknowledge tones), - (quiet
acknowledge tones) or _ (no acknowledge
tones).
The active function is marked in yellow.
5. Press the MENU button to save your setting
and to exit the menu system.
Setting automatic switch off (POWER SAVE)
This function switches the camera to standby
mode after a certain length of time, which saves
power by deactivating the displays in the monitor
and data field, for example. You can choose
whether you want to activate this function and, if
so, after how long you want the camera to switch
to standby. In this way, you can tailor this function
to your own personal working methods and also
significantly extend the life of your battery charge.
Notes:
If you are running the camera directly from the
mains using the mains/charging unit, automatic
switch off is not available.
If automatic switch off is activated and the battery
needs to be charged, you should turn the camera
off at the main switch (1.25) before you connect
the mains/charging unit to the camera socket. If
you leave the camera turned on in this situation,
malfunctions are possible.
3. Select the A POWER SAVE function in the
menu by pressing (4x) down on the direction
pad.
4. Select 2MIN, 5MIN, 10MIN or OFF by pressing
left or right on the direction pad.
The active setting is marked in yellow.
5. Press the MENU button to save your setting
and to exit the menu system.
Setting the function:
1. Press the MENU button (1.27). It makes no
difference whether you are in record or review
modes.
2. Press right on the direction pad (1.29) to open
the default settings menu h SETUP.
Detailed guide / Review mode / 179
Playback on a TV
The LEICA DIGILUX 1 allows you to view or present
your pictures on a TV, and therefore on a large
screen. The camera is connected to the TV via the
A/V lead supplied, after it has been set to the TV
standard applicable in your country – PAL or
NTSC.
The camera’s monitor screen (“Livecam”) can
also be reproduced on NTSC compatible TVs or
computer monitors.
Notes:
The (brief) automatic review of the pictures taken
in record modes is not possible on a TV.
Do not use any leads other than the one supplied.
If your TV has a scart socket rather than a cinch
socket, you will also need an appropriate adapter.
Please refer to the relevant manual for details of
the required TV settings.
Selecting the TV standard
1. Set the Record/review selector (1.14) to
review mode J.
2. Press the MENU button (1.27).
3. Press right on the direction pad (1.29) to open
the default settings menu h SETUP.
Detailed guide / Review mode / 180
4. Set the function l VIDEO OUT by pressing
(6x) down on the direction pad (1.29).
Connecting/Playing back pictures
1. Turn off the camera and the TV.
2. Plug the small individual strip plugs of the lead
into the camera’s “A/V OUT” socket (1.35) and
plug the cinch plugs into the relevant sockets
on the TV: the yellow plug in the video in socket,
the white one in the audio in socket.
5. Select NTSC or PAL by pressing right or left on
the direction pad.
The active setting is marked in yellow.
6. Press the MENU button to save your setting
and to exit the menu system.
The original monitor screen appears again.
3. Turn on the TV and switch to the AV channel.
4. Turn on the camera and set the Record/review
selector (1.14) to review J.
The image set on the camera is then reproduced
on the TV.
Transferring data to a computer
The LEICA DIGILUX 1 is compatible with the
following operating systems:
_ Microsoft Windows: Windows 98, Windows ME,
Windows 2000, WindowsXP
_ Apple Macintosh: MacOS 9, MacOS X
Connecting and transferring the data
For Windows 98
1. Connect the DIGILUX 1 to a free USB port on
your computer using the USB lead supplied.
2. Set the DIGILUX 1 to review mode (not to the
record modes!).
3. The computer automatically detects the
camera.
4. Windows 98 then starts the hardware assistant.
When asked for the location of the driver, enter
your CD ROM drive. Windows will automatically
find the driver for the DIGILUX 1. Confirm the
subsequent queries with OK. This process only
has to be completed the first time you connect
to the Windows 98 computer.
5. The DIGILUX 1 appears as a “Changeable storage medium” with its own drive letter, like a
hard drive in Windows Explorer.
6. To transfer data, open Windows Explorer (right
click on START, then left click on Explorer).
7. Then open the folder “DCIM” under the appropriate drive letter, where you will find individual
directories called “100LEICA”, “101LEICA”…
8. From there, you can then copy the picture files
into a folder of your choice on your hard drive
using the normal Windows Explorer method.
For Windows ME, Windows 2000, WindowsXP
1. Connect the DIGILUX 1 to a free USB port on
your computer using the USB lead supplied.
2. Set the DIGILUX 1 to review mode (not to the
record modes!).
3. The computer automatically detects the
camera. Under Windows ME/2000/XP, you do
not have to install an additional driver.
For MacOS9 and Mac OSX
1. Connect the DIGILUX 1 to a free USB port on
your computer using the USB lead supplied.
2. Set the DIGILUX 1 to review mode (not to the
record modes!).
3. The computer automatically detects the
camera.
4. The DIGILUX 1 appears as an icon on the
desktop, like a CD ROM for example.
5. To transfer data, open the folder “DCIM” by
double clicking on the DIGILUX 1 icon. You will
find individual directories called “100LEICA”,
“101LEICA” etc.
6. From there, you can then copy the picture files
into a folder of your choice on your hard drive
in the normal way.
For other computers
The picture files can be transferred to these
computers with an optional card reader for
SD memory cards. Further details are available
from your dealer.
4. You can therefore proceed as described above
in points 5-8.
Detailed guide / Review mode / 181
Epson PIM (Print Image Matching) format
PRINT Image Matching is the first system by which
each digital image includes specific instructions
on exactly which printing style should be followed
at print time (designated by the camera at the
time the photo was exposed). Printers and their
sophisticated drivers then provide the photographer
with complete control over print quality, allowing
by-the-numbers adjustments or fully automated
printing using P.I.M. as set in the camera.
The new industrial standard ExifPrint is a
technology based on P.I.M. and which is suitable
for more easy P.I.M. concept enjoyment. PRINT
Image matching II covers additional setting parameters from P.I.M. and works together
with ExifPrint to provide full of print matching
performance.
In the PRINT Image Matching II mode, the camera
can transfer P.I.M.II data along with images to a
computer, or directly to a printer with the ability
to print directly from camera memory cards.
P.I.M.II instructions in the image determine how
P.I.M.II is carried out by the printer driver software.
PRINT Image Matching II data provides the
missing link in digital images so that the consumer can use P.I.M.II data to provide instructions to
the printer for print quality to be delivered by
embedded P.I.M.II data in the digital camera file.
Detailed guide / Review mode / 182
In order to take advantage of P.I.M. II information
embedded in a digital camera image, it is necessary
to have a P.I.M.II-enabled printer. Printers are
available for use with, and without a computer.
For use with the computer, it is necessary to have
P.I.M. II support in the printer driver, and P.I.M. II
software to read P.I.M.II information in the JPEG
header of the digital camera image file. For use
without a computer, no additional software is
necessary to print images with P.I.M.II, but just
insert the memory card to P.I.M. II support
stand alone printers and execute print. P.I.M. II
technology ensures digital cameras and printers
work together perfectly to produce the best prints
possible.
Miscellaneous
Storing the camera
If you are not using the camera for a longer period
of time, we recommend that you
1. turn it off (see p. 119)
2. remove the memory card (see p. 118)
3. remove the monitor hood, if fitted (see p. 115)
4. remove the battery (see p. 116), and (after 5
hours, the life of the integrated backup battery,
the date and time entered are lost)
5. replace the lens cap (see p. 115).
Care and maintenance instructions
General care instructions
Do not use the camera in the immediate vicinity
of devices with powerful magnets or magnetic
fields (e. g. microwave ovens, television sets, video
games consoles).
_ If you place the camera on or very close to a
television set, its magnetic field could interfere
with sound and picture recordings.
_ The same applies to use close to mobile
telephones.
_ Strong magnetic fields, e. g. from speakers or
large electric motors, can damage the stored
data or the pictures.
_ The magnetic fields from microwave ovens can
interfere with sound and picture recordings.
_ If the camera does not work correctly as a
result of the effects of magnetic fields, turn if
off, remove the battery or unplug it from the
mains, re-insert the battery or reconnect to the
mains and then turn it on again.
_ Do not use the camera in the immediate vicinity
of radio transmitters or high-voltage power lines.
_ Their magnetic fields can also interfere with
sound and picture recordings.
Protect the camera from contact with insect
sprays and other aggressive chemicals. Petroleum spirit, thinner and alcohol should never be
used for cleaning purposes.
_ Certain chemicals and liquids can damage the
camera’s housing or the surface finish.
_ As rubber and plastics sometimes emit aggressive chemicals, they should not remain in contact
with the camera for a long time.
Ensure that sand and dust cannot get into the
camera, e. g. on the beach.
_ Sand and dust can damage the camera and the
memory card. You should pay particular attention to this when inserting and removing the
card.
Ensure that water cannot get into the camera,
e. g. when it is snowing or raining and on the
beach.
_ Moisture can cause malfunctions and even irreparable damage to the camera and the memory
card.
_ If salt water spray gets onto the camera, wet a
soft cloth with tap water, wring it out thoroughly
and wipe the camera with it. Then wipe the
camera down thoroughly with a dry cloth.
Miscellaneous / 183
The LEICA DIGILUX 1 is designed exclusively for
private use. Do not use if for long-term observation
or other commercial purposes.
_ If used for a very long time, the resulting
temperature inside the camera can cause
malfunctions.
LCD monitor/Viewfinder/
Lens front ring/LCD monitor
_ If the camera is exposed to significant temperature fluctuations, condensation can form on the
monitor. Wipe it carefully with a soft, dry cloth.
_ If the camera is very cold when turned on, the
monitor screen will initially be slightly darker
than normal. As soon as the LCD element
warms up, it will reach its normal brightness
again.
The LCD monitor is manufactured using a
high-precision process. This ensures that, of
the total of around 200,000 pixels, more than
99.99 % work correctly and only 0.01 % remain
dark or are always light. However, this is not a
malfunction and does not impair the reproduction
of the image.
Viewfinder
_ Never point the viewfinder and the lens at the
sun, as this can lead to serious damage to
internal components.
Miscellaneous / 184
Lens front ring
_ Only attach the intended accessories to the
lens, other objects cannot be attached.
_ If you want to fit an attachment, you first of all
have to unscrew the front ring anticlockwise.
_ If an attachment is fitted, the corners of the
image may get darker when zooming in the
wide-angle range (vignetting). For more details,
please refer to the manuals for the relevant
accessories.
Condensation
If condensation has formed on or in the camera,
you should turn it off and leave it to stand at
room temperature for around an hour. Once the
camera temperature has adjusted to room
temperature, the condensation will disappear by
itself.
Maintenance instructions
For the camera
_ Unplug the mains/charging unit before you
clean the camera.
_ Only clean the camera with a soft, dry cloth.
Stubborn dirt should first of all be covered with
a well-thinned cleaning agent and then wiped off
with a dry cloth.
For the battery
The rechargeable lithium ion battery produces a
current through internal chemical reactions.
These reactions are also influenced by the external
temperature and humidity. Very high or low
temperatures reduce the life of the battery.
Always remove the battery, if you will not be using
the camera for a long period of time. Otherwise,
after several weeks the battery could become
totally discharged, i. e. the voltage is significantly
reduced, as the camera uses a low idle current
(to save the date) even when it is turned off. A
totally discharged battery cannot be recharged.
_ Store the battery only when it is discharged. For
very long storage periods, it should be charged
up and discharged again around once a year.
_ Always keep the battery contacts clean and
freely accessible. Protect the contacts from
metal objects such as paper clips or pieces of
jewellery, which can cause short circuits. A
short circuited battery can get very hot and
cause combustion.
_ If the battery is dropped, check the housing and
the contacts for any damage. Using a damaged
battery can damage the camera.
_ Batteries have a limited service life.
_ Take damaged batteries to a collection point so
that they can be properly recycled.
_ Never throw the battery into a fire, as it can
explode.
For memory cards
_ Whilst a picture is being stored or the memory
card is being read, it may not be removed, the
camera turned off or exposed to vibrations.
_ Do not store the memory card where it will be
exposed to high temperatures, direct sunlight,
magnetic fields or static discharge.
_ Do not drop the memory card or bend it, as this
could damage the card and result in loss of the
saved data.
_ Always remove the memory card, if you will not
be using the camera for a long period of time.
_ Do not touch the contacts on the back of the
memory card and keep them free of dirt, dust
and moisture.
Storage
_ Always remove the battery and memory card
when storing the camera.
_ You should preferably store the camera in a closed and padded container so that nothing can
damage it and it is protected from dust.
_ Store the camera somewhere that will not have
high temperatures.
Data structure on the memory card
If the data saved on a card is transferred to a
computer, the following
folder structure is used:
_ The 100LEICA, 101LEICA etc. folders can be
used to store up to 999 pictures.
_ The MISC folder can be used to store pictures
with print order settings (DPOF).
Miscellaneous / 185
Warning messages
NO MEMORY CARD
Insert a memory card
THIS MEMORY CARD IS PROTECTED
Reset the write protection for the memory card.
MEMORY CARD DOOR OPEN
Close the door over the memory card slot.
NO VALID IMAGE TO PLAY
No pictures are saved on the inserted card. In
order for playback to take place, pictures first of
all need to be taken or another card with saved
pictures inserted.
MEMORY CARD FULL
Insert another memory card or delete pictures you
no longer need.
REMOVE LENS CAP AND PRESS SET BUTTON
The lens cap was still in place when the camera
was turned on. Remove it and then press the
VIEW/SET button.
MEMORY CARD ERROR
It was not possible to access the memory card.
Remove it and re-insert it. The memory card may
be damaged.
Miscellaneous / 186
READ ERROR
The data on the memory card cannot be read.
Open the desired picture again.
WRITE ERROR
The picture data could not be written to the
memory card. Remove it and re-insert it or turn
the camera off and back on. However, the memory
card may be damaged.
THIS PICTURE IS PROTECTED
After removing the protection, the picture can be
deleted or overwritten.
THIS PICTURE CAN’T BE DELETED/
SOME PICTURES CAN’T BE DELETED
After removing the protection, the picture(s) can
be deleted.
NUMBER OF PRINTS IS OVER
You want to delete, protect or give print order
settings to too many pictures at the same time.
CAN’T BE SET ON THIS PICTURE/
CAN’T BE SET ON SOME PICTURES
The pictures on the memory card are not
compatible with the DCF standard, therefore it is
not possible to make print order settings or sound
recordings.
MEMORY CARD ERROR
FORMAT THIS CARD?
The data format on the memory card cannot be
read by this camera. Format the memory card
with this camera.
CAN’T TRIM THIS PICTURE
Trimming cannot be performed for this picture.
CAN’T RESIZE THIS PICTURE
Resolution cannot be reduced for this picture.
Malfunctions and troubleshooting
1. The camera does not respond when I turn it
on.
1-1. Is the battery correctly inserted or the
mains/charging unit correctly connected?
1-2. Does the battery have sufficient charge?
Use a charged battery.
2.
The camera turns itself off again as soon as
I turn it on.
2-1. Does the battery have sufficient charge to
operate the camera? Charge the battery or
insert a charged battery.
2-2. Is there any condensation? This occurs if the
camera is moved from a cold place to a hot
place. Wait until the condensation has
evaporated.
3. I cannot save a picture.
3-1. Is a memory card inserted?
3-2. The record/review selector is not set to one
of the record modes.
3-3. The memory card is full. Delete pictures you
no longer need before you take new ones.
4. The picture is not shown on the monitor.
4-1. Is the monitor turned off?
6.
The picture(s) on the monitor is/are out of
focus.
6-1. Set the focus correctly or set an automatic
focussing mode (AF, macro) and press the
shutter release to the 1st pressure point.
7. The flash does not work.
7-1. The flash unit is turned off; select another
flash mode.
8. I cannot review the picture.
8-1. Is a memory card inserted?
8-2. There is no data on the memory card.
8-3. The record/review selector is not set to one
of the review modes.
9. I cannot view the picture on a television.
9-1. Check whether the television and the camera
are connected correctly.
9-2. Set the television to the AV input to which the
camera is connected.
10. The camera is connected to a computer but I
cannot transfer data.
10-1.Check whether the computer and the camera
are connected correctly.
5. The LCD monitor is too bright or too dark.
5-1. Set your preferred monitor brightness.
Miscellaneous / 187
Device description
and technical data
Technical data / 188
Camera Picture type/format Digital camera,
1/1.76“ CCD sensor with 4 million pixels,
3.9 million effective
Resolution Variable: 2240 x 1680, 1600 x 1120,
1120 x 840, 640 x 480 pixel, 320 x 240 for video
recordings.
Picture data Variable: high, low, none
(TIFF standard) data compression.
Data recording Still pictures: To JPEG, TIFF
(RGB) and DPOF standards.
Still pictures with sound recording: To JPEG standard and 640 x 480 pixel to QuickTimeMotion JPEG
standard. Moving pictures (video recordings): To
QuickTimeMotion JPEG standard.
Storage media SD memory card and MultiMediaCard
Sensitivity setting Automatically to ISO
100/21° for AUTO and video recordings, in other
exposure modes variable: ISO 100/21°, ISO
200/24° or ISO 400/27°.
White balance Variable: Automatic, presets for
daylight, cloud, halogen lighting, fluorescent
lights, electronic flash, and manual setting.
Lens LEICA DC VARIO-SUMMICRON 7–21 mm
f/2–2.5 ASPH. (corresponds to 33–100 mm in
35 mm format). Focal length adjustment using
convenient zoom lever located below shutter
release.
Digital zoom max. 2x, in conjunction with lens
gives a total of 6x zoom range.
Distance setting range Automatic distance setting from 30 cm to infinity. Manual distance setting from 6 cm to infinity. In the macro range (AF)
Close range limit in wide-angle position 6cm, telephoto position 20cm
Smallest object field In macro range in wideangle position 6cm and telephoto position 20 cm
(60 x 80 mm, (reproduction ratio 1:11)
Autofocus system Combined system comprising
infrared AF for the basic setting and passive
contrast comparison AF for fine adjustment.
Automatic focus bracketing mode Variable:
3 or 5 pictures, each graduated within the
appropriate depth of field range.
Exposure modes Fully automatic AUTO,
programmed automatic P, aperture priority A,
speed priority T and manual setting M.
Fully automatic for video recordings K.
Exposure metering Multi-field, center weighted,
spot.
Metering memory-lock Pressing the shutter
release to the pressure point stores the metered
distance and exposure values.
Exposure compensation ±2 EV in 1/4 EV steps.
Automatic exposure bracketing mode Variable:
3 or 5 pictures with 0.25, 0.75 or 1EV graduations.
Shutter speed range Mechanical central shutter
and additional electronic shutter function. In
AUTO and P (with automatic ISO setting): 1/8 to
1/1000s, in P (with manual ISO setting) and A: 1
to 1/1000s (with normal flash mode from 1/30s),
in T and M: 8 to 1/1000s, for video recordings
1/30 to 1/1000s.
Series exposures Maximum 3.8 f/s, maximum
8 pictures (with high data compression) or 4
pictures (with low data compression).
Flash modes Automatic flash activation (AUTO,
no display in monitor), Automatic flash and preflash activation (3), manual flash activation (1),
manual flash and pre-flash activation (4),
manual (flash and pre-flash activation with longer
exposures (5/6)*, manual flash deactivation
(2).
* Depending on the setting either with synchronisation to the beginning or end of the exposure.
Flash exposure compensation ±2 EV in 1/4 EV
steps.
Operating range of built-in flash unit (at ISO
100/21°) 0.3–4.5 m at 7 mm or 0.3–3.5 m at
21 mm, guide number 10.
Flash recovery time of built-in flash unit
approx. 6 s with new battery.
Flash range of external flash unit LEICA SF20
(at ISO 100/21°) Up to approx. 10 m at 7 mm or
up to approx. 8 m at 21 mm. Guide number 20.
Viewfinder Real image viewfinder with cross
hairs for autofocus metering field, markings for
close-range pictures.
Viewfinder magnification 0.3x at 7 mm or 0.86x
at 21 mm, adjustable from –2.8 to 0.8
diopters.
Monitor 2.5” color TFT LCD with 200.000 pixels
Displays see p. 104-110
Auto release Delay optionally 2 or 10 s (not for
video recordings, for AUTO only 2 s), indicated by
flashing LED on front of camera and corresponding symbol in data field and monitor.
Turning the camera on/off With main switch on
back of camera. Lens moves to ready or idle position. Optional automatic switch off of camera
electronics after approx. 3/5/10 minutes (standby mode). Reactivation by tapping shutter release
or turning camera off and back on.
Connections 5-pin mini USB socket 1.1 for fast
data transmission to computer, EIAC type 3 socket
DC IN for mains power supply, A/V output with
2.5 mm mini jack for picture transmission to
television.
Compatibility EPSON Print Image System (PIM),
Digital Print Order Format (DPOF),
MacOS9.x- MacOS X, Windows 98/ME/2000/XP..
Operating voltage 9.5 V
Power supply Lithium ion battery
Housing Solid ultra-light magnesium outer
housing. Side attachment for carrying strap or
wrist strap. ISO flash shoe with central contact for
connecting external, more powerful flash units,
e. g. LEICA SF20.
Tripod thread A1/4 DIN 4503 (1/4").
Dimensions (WxHxD) 127 x 83.3 x 67.4 mm
Weight approx. 385 g/460 g (without/with battery)
Scope of delivery Mains/charging unit, lithium
ion battery, 64 MB SD memory card, monitor
hood, A/V cord, USB cord, carrying strap,
Adobe Photoshop Elements 1.0 (Win/Mac),
ACDSee 1.6 (Mac), ACDSee 3.1/3.11 (Win),
Apple QuickTime 5 (Win/Mac), USB-Treiber
Battery Lithium ion battery, 7.2 V, 1400 mAh
Mains/charging unit
Input AC 100-240 V, 50/60Hz, adapts
automatically
Input capacity 21 VA (at 100 V), 31 VA (at 240 V)
Output DC 9.5 V, 1 A
Technical data / 189