1
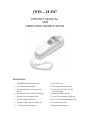
jWIN -- JT-P87 OWNER’S MANUAL AND OPERATING INSTRUCTIONS DESCRIPTION 1. English/Spanish/French Selectable 9. Real Time Clock 2. Up to 99 Messages Recalled 10. Last Outgoing Number Redial 3. Name and Number of Incoming Call Display 11. Private Call, Out of Record and Message Display 4. Date and Time of Incoming Call Display 12. Displayed Number Redial 5. Recorded List of Incoming Calls 13. 3 (One-Touch Number) Speed dial 6. New Incoming Call Indicator 14. 10 (Two-Touch Number) Speed dial 7. Indicator of Repeated Incoming Calls 15. Tone/Pulse Selectable 8. Total Incoming Call Indicator 16. Mute & Pause Functions INSTALLATION 1. Insert 4 “AA” 1.5V batteries. Please note the correct position of + and – (Batteries not included.) 2. Connect the phone with the telephone line using the flat cord. 3. Connect the handset to the phone base using the coiled cord. THE DISPLAY The display window, on the back of the handset is a 3-line LCD. - The upper line displays the basic information. - The middle line displays the number of in-coming calls. - The bottom line displays the name of the caller. The following table explains the LCD Messages that will display in the window of your JT-P87: DISPLAY FILTER NEW CALL# RPT# ___:__ AM/PM __/__ MSG VIP REJ DEFINITION The filter function is activated There are new incoming calls Shows the total number of incoming calls Shows the total number of repeated in-coming calls Hour, minute day, night, month, date (Current time & date) Message The displayed number has been set in the VIP memory bank The displayed number has been set in the REJ (rejected) bank If a number was received more than once, the LCD will display only the time and date of the last call. If the time and date of an incoming call is different than that of your Telephone Company (different time zone), the telephone will adjust the time to reflect the time according to your Telephone Company. During periods of inactivity (of 30 seconds or more) the LCD displays only the time and date, total number of received calls, and number of new incoming calls. LED lights up to signal a new incoming call. This telephone can store up to 99 incoming call records. After the 99th call, the oldest record will be erased automatically and the new one will be stored. SETTING UP SELECT LANGUAGE After installing the batteries, the LCD will display “ENTER LANGUAGE”. Then, it will offer the selections: 1. Press [] or [] to select from language options: English, Spanish, or French. 2. Press [DEL] to confirm. SET AREA CODE After setting the language, the LCD will prompt you to enter the area code setting: 1. Press [] or [ ] to select the first digit of the area code. 2. Press [DEL] to confirm. 3. Repeat steps 1 and 2 to select each number of the area code. 2 DATE/TIME After setting the area code, the LCD will prompt you to enter the time and date setting: 1. Press [] or [] to set the hour, minute, AM/PM, month, and date. 2. Press [DEL] to confirm. RESETTING Whenever you want to change the previous settings, do the following: Press [] and [] together more than 6 seconds. The LCD will prompt: “ENTER LANGUAGE” and you can begin anew. CALLER ID INFORMATION Note: You must make sure that your telephone company offers Caller ID service, and that this function can be activated on your service. Displaying Incoming Calls When there is an incoming call, the LCD will display the number, area code, name, time, and date of the call with two “beep” sounds. Sometimes you will see one of these messages: UNAVAILABLE The call is made through a telephone company, which does not offer Caller ID service or does not transfer calls by long distance net. PRIVATE Some areas allow the option for callers to prevent the telephone data from being displayed on other telephones. If you received such a call, this message would show on your LCD. MES If you have messaging service through your telephone company, the LCD will alert you that a message has been left for you. When you retrieve your messages, this code and the icon will disappear. Viewing the Caller ID List Press [] or [ ] to view the last incoming calls (max. 99). Erasing Data from the Caller ID List 1. Press [] or [ ] to select the wanted number. 2. Press [DEL] twice in rapid succession. Calling from the Caller ID List 1. Press [] or [ ] to select the wanted number. 2. Pick up the handset. 3. Press [DIAL] twice to automatically dial the selected number. 4. 5. 6. 7. 8. 9. Use [DEL] to erase an unwanted phone number. Re-enter a new phone number. Use [SET] to confirm changes and the cursor will move to the Name position. Use [UP], [DOWN] to move the cursor. Use [DEL] to erase letters. Use the keypad to enter new letters. NOTE: Use the “0” key to insert a blank space during entry. 3 OPERATION MAKING A CALL 1. Lift the handset or press [SPEAKER]. You should get a dial tone. 2. Enter the phone number you wish to call. If necessary use [DEL] to correct the number, then 3. Press [SPEAKER] or [RD/BACK] to dial the number. REVIEW INCOMING CALLS AND DIAL BACK 1. Use [UP], [DOWN] to review and select incoming call records. 2. Press [RD/BACK] to dial the number. SAVE INCOMING CALLS TO THE PHONEBOOK 1. Use [UP], [DOWN] to review and select from the list of incoming call records. 2. Press [STORE]. 3. Press [BOOK] to save the record in the phone book. DELETE INCOMING CALLS 1. Use [UP], [DOWN] to review and select the incoming call records. 2. Press [DEL] to erase a single record. NOTE: Holding [DEL] for more than 4 seconds will delete the entire incoming call record list. REVIEW DIALED CALLS 1. Press [DIALED] to review the last dial out record, and 2. Press [DIALED] repeatedly to review all records. 3. Press [DEL] to delete a dialed call record. PHONE BOOK REVIEW AND DIAL OUT 1. Press [BOOK] to go to the phone book. 2. Use [UP], [DOWN] to review and select records, or enter the first letter of the record by pressing the corresponding key. You can press the same key continuously to go through a range beginning with the same letter. 3. Press [RD/BACK] to dial a number after the record is located. AUTO REDIAL When a dialed number is busy: 1. Press [AUTO-RD] to activate the auto-redial function. The phone will dial the last dialed number 5 times. 2. Press [SPEAKER] or lift the handset to converse when the call gets through. MUSIC HOLD The music feature is automatic. Music is played for the ‘holding’ party when you press the HOLD button. When you are conversing with someone by phone and you need to put them on HOLD: - Press [HOLD] to start music hold. 4 - Resume your conversation by picking up the handset or pressing [SPEAKER].When you resume your conversation the music will stop. DIGITAL LOCK Use this function to block specific numbers from being dialed on your phone. To Activate Lock Function 1. Press [CODE] to enter the lock function. “INPUT PIN CODE” will display on the LCD. 2. Enter “8888” (the preset PIN code) and press [CODE] again. “UPDATE DATE CODELOCK” will display on the LCD. 3. Enter the desired digits you would like to block and press [CODE] again. NOTE: Use “#” to separate the numbers, if necessary. If you would like to block all digits, enter “#**” and press [CODE] to confirm. To Deactivate the Lock Function 1. Press [CODE] to enter the manual lock function. The LCD will display “INPUT PIN CODE”. 2. Enter “8888” (the preset PIN code) and press [CODE] again. The LCD will display “UPDATE DATE CODELOCK”. 3. Press [ DEL] to erase the locked digits and press [CODE] again to confirm. 5 Modify the PIN Code 1. Press [CODE]. 2. Enter the preset PIN Code: 8888 and press [CODE] again.. The LCD will display “UPDATE CODELOCK”. 3. Press [UP] to enter the modify mode. The LCD will display “MODIFY PIN CODE”. 4. Enter the desired personal PIN Code (must be 4 digits) and press [CODE] again to confirm. If you forget your pin code, do the following: 1. Remove the batteries. 2. Disconnect the unit from the telephone line for 3 hours. The pin code will reset back to the factory code “8888” and all other information (i.e., phone book and incoming call records) will be erased. 6