1
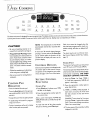
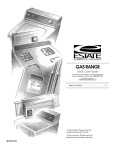
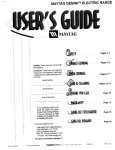
JENN-AIR ELECTRIC SLIDE-IN RANGE
JES8750, JES8850
UID
_h
BLE OF CONTENTS
SafetyInstrucdons...................................................................
I-3
SurfaceCooking.......................................................................
4-5
Oven Cooking........................................................................
6-13
Care & Cleaning..................................................................
J4-J6
Maintenance
...............................................................................
17
BeforeYou Callfor Service...................................................
18
Warranty....................................................................................
19
GuidedeI utTsateur................................................................
20
Guh delUsuario.......................................................................
40
mBm_.IENN-AIR
FormNo. A/11/00 Par_No. 8113P278-60 74005524 Litho U.S.A.
JMPORTANT
SAFETY INSTRUCTIONS
Read and follow all instructionsbeInstaller: Pleaseleavethismanual
with thisappliance,
Consumer: Pleaseread and keep
thismanual
forfuturereference.
Keep
salesreceiptand/orcancelled
check
asproofof purchase.
ModelNumber
fore usingthisapplianceto preventthe
potentialriskof fire,electricshock,personalinjuryor damageto theappliance
as
aresultof improperusage
oftheappliance.
Useappliance
onlyfor itsintendedpurpose
asdescribedinthisguide,
If you havequestions,call:
Jenn-AirCustomerAssistance
1-800-688-1100
1-800-688-2080
( U.S.TTYfor hearingor speechimpaired)
(Mon.-Fri.,8 am-8pm EasternTime)
Internet: http://www.jennair.com
For serviceinformation, seepage
19.
GENERAL
INSTRUCTIONS
I,_WARNING:
WARNING: NEVERuseappliancedoor,
or drawer,if equipped,asa step stoolor
seatasthismayresultin possibletippingof
_,
INJU-
seriousinjuries.
CAN TO
TIP AND
RIES
PER- _
SONS
_
theappliance,
to theappliance,
and
If applianceisdamage
installed
near a window,
precautionsshouldbe takento prevent
ANTI-TIP DE• VICE
I N S T A L L _
WITH PACKED
RANGE
ments.
curtains
from
blowing
surfaceeleNEVERuse
appliance
toover
warmor
heatthe
• FOLLOW ALL INSTALLATION INSTRUCTIONS
room.Failure
to followthisinstruction
can
leadto possible
burns,injury,fire,or damageto the appliance.
WARNING: To reduce risk of
tipping of the appliancefrom abnormal usage or by excessive
loading of the oven door, the
appliance must be secure by a
NEVERwearloose-flttingorhanginggarmentswhileusingthe appliance.
Clothing
couldcatchutensilhandlesor igniteand
causeburnsif garmentcomesin contact
with hot heatingelements.
properly installedanti-tip device.
To ensureproperoperationandto avoid
damageto the appliance
or possible
injury,
donot adjust,service,repairor replaceany
part of the applianceunlessspecifically
recommended
inthisguide.Referallother
servicingto a qualifiedtechnician.
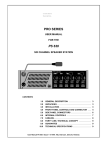
To checkifdeviceisproperlyinstalled,
look
underneathrangewith aflashlightto make
sureoneoftherearlevelinglegsisproperly
engagedin the bracketslot. The anti-tip
devicesecuresthe rear levelinglegto the
floor whenproperlyengaged.
Youshould
checkthis anytime the rangehasbeen
moved,
In our continuingeffort to
improvethe qualityandperformance of our cooking
products,it may be necessaryto makechangesto the
appliancewithout revising
thisguide.
Do not usewater on greasefires.Use
bakingsoda,a dry chemicalor foam-type
extinguisher
to smotherfire orflame.
Appliancemustbe properlyinstalledand
groundedbya qualified
technician.
CAUSE
Dateof Purchase
• Oven: Smotherfireor flameby closing
theovendoor.
To ensureproper andsafeoperation:
• ALL RANGES
SerialNumber
NEVER pickupor movea flamingpan.
NEVER store or usegasolineor other
combustibleor flammable
materialsin the
oven,nearsurfaceunitsor inthevicinityof
thisapplianceasfumescouldcreatea fire
hazardor anexplosion.
IN CASE OF FIRE
To preventgreasefires,do not let cooking
Turn off applianceandventilatinghoodto
avoidspreading
the flame.Extinguish
flame
thenturn on hoodto removesmokeand
odor.
• Cooktop: Smotherfire or flameinapan
with a lidor cookiesheet,
greaseor otherflammablematerialsaccumulatein or nearthe appliance.
Useonly dry potholders.Moist or damp
potholderson hot surfacesmayresultin a
steamburn.Do not let potholderstouch
hot heatingelements.Do not usea towel
or other bulky cloth which could easily
facturer'sinstructionswhenusingglass,
movethe gasket.
touchhot heatingelementsandignite.
Alwaysturnoffallcontrolswhencookingis
compJeted,
Turnpanhandletowardcenterofcooktop,
not out into the room or over another
surfaceelement.This reducesthe risk of
Do not useovencleaners.No commercial
ovencleaneror ovenlinerprotectivecoatingofanykindshouldbeusedin or around
NEVER heatunopenedcontainersonthe
surfaceunitor inthe oven.Pressure
bui)dupinthe containermaycausecontainerto
burstresultinginburns,injuryor damage
to
burns,ignitionof flammablematerials,or
spillageif pan is accidendybumpedor
reachedbysmallchildren,
anypartof the oven.
Before self-cleaningthe oven, remove
broilerpan,oven racksandother utensils
to preventexcessivesmoking,discolora-
the appliance.
GLASS"
tion
of the ovenracksor possibledamage
to utensils.
CERAMIC
This appliancehasbeen testedfor safe COOKTOP
performanceusingconventionalcookware.
Do not useanydevicesor accessories
that
NEVER cook on broken cooktop. If
are not specificallyrecommendedin this
cooktopshouldbreak,cleaningsolutions
manuaI.Donotuseeyel(dcovers,
stovetop
andspilJovers
may penetratethe broken
grillsor add-onovenconvectionsystems, cooktopandcreateariskof electricshock.
Theuseof devicesor accessories
that are
Contactaqualifiedtechnician
immediately,
not expressly
recommended
inthismanual
cancreateserioussafetyhazards,resultin
performance
problems,andreducethe life
of the componentsof this appliance,
Cleancooktopwithcaution.Somecleaners
canproducenoxiousfumesif appliedto a
hotsurface.Irawet sponge,cloth,or paper
towel is usedon a hot cookingarea,be
NI:YER usealuminumfoil to line drip
bowlsor coverovenracksor ovenbottom,
Thiscould resultin risk of electricshock,
fire, or damageto the appliance.Use foil
onlyasdirectedin thisguide.
Aerosol-typecansare EXPLOSIVE
when
exposedto heatandmay behighlyflaremable.Do not useor storenearappliance,
carefulto avoidsteamburn.
Wipe up excessivespillovers,especially
greasyspills,beforethe cleancycleto prevent smoking,flare-upsor flaming.
It isnormalfor the cooktopto becomehot
duringacleancycle.Therefore,avoidtouching the cooktop, door, window or oven
vent duringa cleancycle.
Slide-inrangesfeaturea coolingfanwhich
operatesautomaticallyduringa
cleancycle.
If
thefandoesnot
turnon, cancel
the clean
operation
and contact
an authorized
servicer.
DEEP FAT FRYERS
Use extreme cautionwhen movingthe
greasepan
or
disposing
of hot grease.
Allow grease
to cool
beforeattempting
to
movepan.
HEATING
ELEMENTS
NEVERtouchsurfaceorovenheating
elements, areas near elements, or
interior surfacesof oven.
Heatingelementsmaybehot eventhough
they aredarkin color.Areasnearsurface
COOKTOP
Usecarewhenopeningdoor.Lethot airor
elementsandinterior surfacesof anoven
NEYFR leavesurfaceunits unattended steamescapebeforeremovingor replacing maybecomehot enoughto causeburns.
especiallywhenusinghigh heat.An unat- food.
tendedboilovercouldcausesmokinganda
Duringandafteruse,donot touch or let
greasyspillovercancausea fire.
For proper oven operationand perforclothingor otherflammablematerialsconmance,do not blockor obstructovenvent tactheatingelements,areasnearelements,
Thisapplianceis equippedwith different duct. When oven is in use,the vent and or interiorsurfacesofovenuntiltheyhave
sizesurfaceelements.Selectpanswith flat surroundingareabecomehot enoughto
hadsufficienttime to cool
bottomslargeenoughto coverelement, causeburns.
Fittingpan sizeto elementwill improve
Other potentially hot surfacesinclude:
cookingefficiency.
Alwaysplaceoven racksin desiredIota- Cooktop,areasfacingthe cooktop,oven
tions while oven is cool. If rack mustbe vent,andsurfacesnearthe vent opening,
If panissmallerthanelement,a portion of
movedwhi)eovenishot,
donotletpotholder ovendoor,areasaroundthedoorandoven
the elementwill beexposedto directcon- contacthot elementin oven.
window.
tactandcouldigniteclothingor potholder.
OVEN
Only certaintypesof glass,glass/ceramic,
ceramic,
earthenware,
orotherglazedutensilsaresuitablefor cooktopor ovenservice
withoutbreakingdueto the suddenchange
in temperature. Follow utensil manu-
SELF'CLEANING
OVEN
CHILD
SAFETY
Cleanonlypartslistedinthisguide.Do not
NEVER leavechildrenaloneor unsupercleandoor gasket.Thegasketis essential visedinareawhereapplianceisin useor is
for a goodseal.Do not rub, damage,or
still hot.
2
,MPORTANT
SAFETY INSTRUCTIONS,
CONT.]
NEVER allowchildrento sit or standon
anypartof the applianceasthey couldbe
alsfromaccumulating
onhoodor filter and
to avoidgreasefires,
injuredor burned.
CAUTION:NEVERstoreitemsofinterestto childrenin cabinetsaboveanapplianceor on backguardof a range.Children
climbingon appliance,door or drawer to
Turnthefanonwhenflambeingfoods(such thesesubstancescan
beminimizedbypropasCherriesJubilee)underthe hood.
erly ventingthe oven to the outdoors
duringthe
self-cleancycle
openinga
window
and/ordoor
in theby
room
where
reachitemscoulddamage
theappliance
or
beburnedor seriouslyinjured.
Childrenmustbetaughtthatthe appliance
andutensilsinor on it canbehot. Let hot
utensilscoolin asafeplace,out of reachof
smallchildren.Childrenshouldbe taught
that an appliance Js not a toy. Children
shouldnot beallowedto playwithcontrols
or other partsof the unit.
VENTILATING
HOODS
Cleanrangehoodandfiltersfrequentlyto
preventgreaseor other flammable
materi-
IMPORTANT SAFETY
NOTICE AND
exposureto someofthe listedsubstances,
includingcarbonmonoxide.Exposureto
the applianceis located.
WARNING
IMPORTANT NOTICE REGARDING
PET BIRDS: Neverkeeppetbirdsinthe
kitchenor inroomswherethe fumesfrom
The CaliforniaSafeDrinkingWater and
ToxicEnforcementAct of 1986(Proposition 65)requiresthe Governorof Californiato publishalistofsubstances
knownto
the Stateof Californiato causecanceror
the kitchencouldreach.Birdshavea very
sensitiverespiratory system.Fumesreleasedduring an oven self-cleaning
cycle
may be harmfulor fatal to birds. Fumes
releaseddueto overheatedcookingoil,fat,
reproductiveharm,andrequiresbusinesses margarineandoverheatednon-stickcookto warncustomersof potentialexposures waremaybeequallyharmful.
to suchsubstances.
Users of this applianceare hereby warned
that whenthe ovenis engagedin the selfcleancycle,there maybesomelow level
SAVE THESE INSTRUCTIONS
FOR FUTURE REFERENCE
C URFACE
SURFACE
COOKING
CAUTION:
CONTROLS]
Useto turn on the surfaceelements.An
BEFORECOOKING
AFTER COOKING
infinitechoiceof heatsettingsisavailable
• Alwaysplaceapanonthe surfaceunit
• Makesuresurfaceunit isturnedoff.
fromIo to hi. Theknobscanbeseton or"
betweenanyof the settings,
SETTING
beforeyouturn it on.To preventdam- • Cleanupmessyspillsassoon asposageto range,never operatesurface
sible.
unitwithout a panin place.
THE
. NEVER use the cooktop as a storage
CONTROLS
areafor foodor cookware.
I. Placepanon surfaceelement,
2. Pushin and turn the knob in either
directionto the desiredheatsetting.
DURING COOKING
• Besureyouknowwhichknobcontrols
which surfaceunit. Make sure you
• Thecontrolpanelis markedto
identifywhichelementthe knob
turnedonthe correct surfaceunit.
OTHER TIPS
• If cabinetstorageis provideddirectly
abovecookingsurface,limit it to items
that are infrequentlyusedandcanbe
safelystored in an areasubjectedto
heat.
Temperaturesmaybeunsafefor items
rightfront
,) indicates
controls.Forexample,
element,
3. Thereis anindicatorlightaboveeach
control knob.Whena surfacecontrol
knobisturnedon,thelightwillturnon,
Thelightwill turn offwhenthe surface
to alowersetting
to comsol
sprays.
• thenreduce
Begincookingona
higherheatsetting
such
asvolatileliquids,cleanersor aeropletethe operation.Never usea high • NEVERLeaveanyitems,
especiallyplasheatsettingfor extendedcooking,
tic items,on the cooktop.The hot air
, NEVER allowa panto boil dry. This
from the vent may ignite flammable
could damagethe pan andthe appliitems,melt or softenplastics,or inance.
creasepressurein dosed containers
elementisturnedoff.
4. After cooking,turn knob to OFF.
Removepan.
. NEVER touch cooktop until it has
causing
themto burst.
cooled. Expect some parts of the • NEVER allow aluminumfoil, meat
cooktop,especially
aroundthe surface
probesoranyothermetalobject,other
units,to becomewarm or hot during
thana pan on a surfaceelement,to
cooking.Use potholdersto protect
contactheatingelements.
hands.
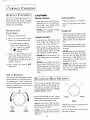
DVAL ELEMENT
Thecooking
surface
isequipped
ith adual
element located
in the
rightfrontwposition.
To operate, push in on the control knob
[ SUGGESTED
and turn to the right to control the large
element, or push in and turn to the left to
control the smallelement,
The size, type of cookware and cooking
operation willaffect the heat setting. For
information on cookware and other factors affectingheatsettings,referto "CookingMade Simple" booklet.
hi
hi: Useto bringliquidto a boil. Always
reducesettingto a lowerheatwhenliquids
medlhi
]
(_
LARGE
ELEMENT
C)
SMALL
ELEMENT
t
HEAT
]
SETTINGS
beginto boil or foodsbeginto cook.
meal. hi: Useto brownmeat,heatoil for
deepfatfryingorsauteing.
Maintainfastboil
amounts
large
liquids.
for
of
medium: Use to maintain slow boil for
largeamountsof liquidsandfor mostfrying
operations.
4
I
I
.
/f_...
Io
•
meal.Io
med'ium
med.lo:Usetocontinuecookingcovered
foods or steamfoods.
Io: Use to keep foods warm and melt
chocolateandbutter.
c- URFACE
COOKING,
[GLAsS-CERAMIC
CONT.
SURFACE]
...................................................................
NOTES:
• Do not usenon-flatspecialtyitemsthatare
oversizedor unevensuchasroundbottom
• On Canadianmodels,someor all of the surfacewill not operateduringaself-clean
cycle,
• Cooktopmayemit lightsmokeandodorthe firstfewtimesthe cooktopisused.This
isnormal,
woks,rippledbottomand/oroversizedcanhersandgriddles.
• Do not slideheavymetalpansacrossthe
surfacesincethesemayscratch.
• Whenacontrolisturnedon,aredglowcanbeseenthroughtheglass-ceramicsurface.• Do not usefoil or foil-typecontainers.Foil
Theelementwill cycleonandoffto maintainthe presetheatsetting,
maymeltontotheglass.Ifmetalmeltsonthe
• Glass-ceramic
cooktopsretainheatfor a periodof time afterthe unitisturned off.
Whenthe HOT SURFACE
lightturnsoff (seebelow),the cookingareawill becool
enoughto touch.
cooktop, do not use. Call an authorized
Jenn-AirServicer.
• Ifa spilloveroccurswhilecooking,immedi.
• NOTE: Do not attemptto lift the cooktop,
..... .........................................
COOKING
AREAS
atelycleanthe spillfrom the cookingarea
while it is hot to preventa toughcleanin_
chorelater.Usingextremecare,wipespil!
with a cleandry towel.
• Donot allow plastic, sugar or foods with
high sugarcontent to melt onto the hot
cooktop. Shouldthis happen,deanimme- • Do not allowspillsto remainonthecookin_
diately.(SeeCleaning,page15.)
areaorthecooktoptrimforalongperiodot
Thecookingareasonyour rangeareidentifled by permanentpatternson the glass-
ceramicsurface.Formostefficientcooking, • Neverlet a panboildry asthiswill damage
fit the pansizeto _heelementsize.
the surfaceandpan.
•
Pansshouldnot extendmarethan _12
to I • Never usecooktopasa work surfaceor
inch beyondthe cookingarea.
cuttingboard.Nevercookfood directlyon •
Formoreinformationoncookware,referto
the surface,
"Cooking Made Simple" booklet,
• Never placea trivet or wok ring between
the surfaceandpan.Theseitemscanmark •
HOT SURFACE LIGHTS
or etch the top.
time.
Do not useabrasivecleansing
powdersor
scouringpadswhichwill scratchthecooktop.
EachelementhasaHOTSURFACEindicator•
light. A light will be illuminatedwhenthe
matchingcookingareais hot. it wi[[ remain
on, evenafterthe controlisturnedoff,until
the areahascooled.Theyarelocatedadja- °
Do not slidealuminumpansacrossa hot
surface.Thepansmayreavemarkswhich
needto beremovedpromptly.(SeeCleaning,page15.)
Makesurethe surfaceandthe panbottom
NOTES;
centto eachelement.
are clean before turning on to prevent
scratches.
HOTSURFACE
LIGHTS ON COOKTOP
• To preventscratchingor damageto the
glass-ceramic
top,donot leavesugar,saltor
fatsonthe cookingarea.Wipethe cooktop
surfacewith a cleancloth or papertowel
beforeusing,
• Neverusea soileddishclothor spongeto
TIPs
TO PROTECT THE
GLASS- CERAMIC SUR-
clean the cooktop surface. A film will remainwhichmaycausestainsonthe cooking
FACE
surfaceafterthe areaisheated.
Do not usechlorinebleach,ammoniao
other cleansersnot specificallyrecom
mendedfor useonglass-ceramic.
To retain the appearanceof the glass
ceramic cooktop, clean after each use.
" Turn
Glassceramicsurfacesretain
heat.
the elementsoff a few minutes
beforefoodiscompletelycookedand
usethe retainedheatto completethe
cooking.
teristics,theelementswillnotrespond
to changes
in settingsasquicklyascoil
elements.In the eventera potential
beilover,
pan from the
Because
oremovethe
f the heatretentioncharaccookingarea.
..........
COOKWARE
To achieveoptimumcookingperformance
useheavy-gauge,
fiat, smoG:hbottom pan.,
• Do not usea smallpanon a largeelement. _hatconformto the diameterofthe cookin_
• Beforefirst use,cleanthe cooktop.(See Not onlydoesthiswasteenergy,but it can
Cleaning,page15.)
alsoresult in spi(Ioversburningonto the area.(
See"Cooking Made
Simple" for
cookwarecharacteristics
andrecommenda.
• Do not useglasspans.Theymayscratch cookingareawhichrequiresextracleaning
tiGriS.)
the surface.
5
OvEN COOKING
Keep
Warm
Clock
_y o_
Bread
Timer 2
Oven
Light
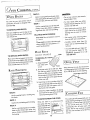
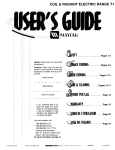
Theelectroniccontrolisdesigned
for easeinprogramming.
Thedisplay
windowonthecontrolshowstimeofday,timerandovenfunctions.
Control panelshownincludesConvectandother modelspecificfeatures.(Stylingmayvarydependingon model.)
CAUTION:
, Be sure all packingmaterialis removedfromovenbeforeturningon.
• Prepared FoodWarning: Follow
food manufacturer's
instructions.Ifa
plasticfrozenfoodcontainerandor
itscoverdistorts,warps,or isotherwisedamaged
duringcooking,immediatelydiscard the food and its container. The food could be contaminated.
• Followthemanufacturer's
directions
whenusingovencookingbags.
, Do not useovenfor storingfoodor
cookware.
NOTE: Thetemperatureor time will be
automaticallyenteredfour secondsafter
selection,
Clocktime cannotbe changedwhen the
ovenhasbeenprogrammedfor clockcontrolled cooking,self-cleanor delayedself-
If more than 30 secondselapsebetween
pressingafunctionpadandthe Auto Set
pador numberpads,the functionwill be
canceled
andthedisplaywill return to the
previousdisplay.
clean.
Theclock maybe setto a 24-hourclock.
SeeControl Options(12/24Hour Clock),
page12.
CONTROL
OPTIONS
Severalcontrol options are indicatedunder
TIMER PADS
Thetimer(s) maybesetforanytimeperiod
upto 99 hours and 59 minutes (99:59).
the numberpadson the control. Factorysetoptionscanbechanged
to yourpreferences.Seepage12for moreinformation.
Tbetimer(s)operatesindependendyofany
otherfunctionandcanbesetwhileanother
SETTING
I. Press the Timer I or 2 pad. TIMERI
or 2 willflashrespectively.0HR:00will
appear in the display.
CONTROL
ovenfunctionisoperating.THE TIMER
DOES NOT CONTROL THE OVEN.
CONTROL PAD
FUNCTIONS
OPERATION
• Pressthe desiredfunctionpad.
CLOCK PAD
I. PressClock pad. Indicatorword TIME
2. Press the appropriate number pads to
enter desiredtime.
• PresstheAuto Set pador theappropriate numberpad(s)to entertimeor ternperature,
will flashin the display.
2. Pressthe appropriatenumberpadsfor
the currenttime.
3. TIMERI or TIMER2will bedisplayed.If
bothtimersare active,the Timer with
the leastamountof time left will be
displayed.
• Abeepwillsoundwhenanypadispressed.After a powerinterruption,POWERIN. A doublebeepwill soundif a program- TERRUPTION
will scrollfollowedby SET
ruingerror occurs.
• Furtherinstructionswill scrollin display
afterfunctionpadsarepressed,
CLOCK.
To recall the time of daywhen another
functionisshowing,pressClock pad.
EXAMPLE:
To setatimerfor
5 minutes,
press
the Timer
I padandthe
number
pad5. Thecontrolwill begincountdown
afterafour seconddelay.
4. Thelastminuteofthecountdownwill be
displayedin seconds.
]O EN
COOKING,
coNJ
5. Attheendofthesettime,"END"willbe
displayedand two chimeswill sound
followed by two chimes every 30 secondsfor upto fiveminutes.Press the
corresponding Timer pad to cancel the chimes.
BAKE PAD
Usefor bakingandroasting.
CONVECT BAKE PAD/
CONVECT ROAST PAD
(SELECT MODELS)
I.PressBake pad.
2.Pressagainfor 330oFor presstheAuto
Set pad. Eachadditionalpressof Auto
I. PressConvect Bakeor Convect Roast
pad.
NOTE:The Timer reminderchimesat
Setwillraisethetemperature25°F.Or,
the endof a settime maybe changed,
pressthe appropriatenumberpadsfor
See Control Options (End-of-Timer
the desiredtemperaturebetweenI O0° F
Signal),page12.
and550° F.
To Cancel a Set Time:
3.Whenthe oventurns on, ared preheat
indicatorwill lightandthe bakeiconwill
2. Pressagainfor 325° For presstheAuto
Set pad. Eachadditionalpressof Auto
Setwill raisethe temperature25° F.Or,
pressthe appropriatenumberpadsfor
the desiredtemperaturebetween100° F
and550° F.
Pressandholdthe correspondingTimer
padfor severalseconds.Afteraslightdelay
the time of daywill appear.
3. Whenthe oventurnson, a red preheat
indicatorwill lightandtheconvect
I_
iconwill be displayed.
bedisplayed.
PREHEAT
SAKE
ICON
/NDfCATOR
OR
Pressthe Timer padandthe "0" number
pad.After a slightdelaythe timer will be
4. A singlechimewill indicatethe ovenis
preheatedto the set temperature.The
preheatindicatorwill turn off.
canceled.
5. Whencookingis complete,pressCan-
CANCEL PAD
Useto cancelallprogrammingexceptthe
ClockandTimerfunctions.
4.A singlechimewill indicatethe ovenis
preheatedto the settemperature.The
preheatindicatorwill turn off.
5.When cookingis complete,pressCancel pad. Removefoodfrom oven.
eel pad.Removefoodfrom oven.
AUTO SET PAD
NOTES:
Usewithfunctionpadstoautomaticallyset: BAKING
• As a general rule, when convection baking,set the oventempera• To recallthe set temperatureduring
ture 25° F lower than the convertpreheatpressthe Bake pad.
tional recipe or prepared mix di• To changeoven temperatureduring
rections. Baking time will be the
cooking,pressthe Bake padandthe
same to a few minutes less than
. 3500Fbaketemperature
• 325° Fconvectbakeor roasttemperature (selectmodels)
• hi or Io broil
• three hoursof cleaningtime
• 140° Fdryingtemperature(selectroodels)
• 160° Fprobetemperature(selectroodels)
• 170° F keepwarmtemperature(select
models)
• quickor standardbreadproofing(select
models)
• to changecontroloptions
i
appropriatenumberpads.
• Allow 10-12minutesfor the ovento
directions.
Convect Roast functioncyclesboth
preheat,
the bakeandbroil elementsalongwith
• Donot usetemperatures
below140°F
the convectionfanat a highspeed.
to keepfoodwarmor below200°Ffor • When roastingmeat usingthecon_ cooking.Forfoodsafetyreasons,
lower
vectionsetting,roastingtimes may
temperaturesarenot recommended, be up to 30%less.(Useconventional
roastingtemperatures.)
i • Foradditionalbakingandroastingtips,
refertothe"Cooking MadeSimple" • Seeroastingchartin "Cooking Made
i booklet.
Simple" booklet for recommended
CONVECT BAKING AND
ROASTING (select models)
roastingtemperatureand times, and
additionalbakingandconvectioncookingtips.
• Convect Bake functioncyclesboth
the bakeandbroil elementsalongwith • The convectionfanwill stop wheni the convectionfanat a low speed,
ever the oven door is opened,
7
BROIL PAD
Usefor top browningor broiling.Forbest
results,usethe broiler panprovidedwith
your range,
I. Pressthe Broil pad.
2, Pressthe Auto Set padfor hi broil,
pressagainfor Io broil, or pressthe
appropriatenumberpadsto setdesired
broil temperaturebetween300° and
550° F.
3. For optimalbroiling,preheatthree to
four minutesor untilthe broil element
isred.
4. At the end of cooktime, the ovenwill
4. PressStop Time pad again.STOP
shutoffautomatically,
"End"andCOOK
TIMEwill bedisplayed
andthree chimes
will sound.
TIME must be flashing to set the
delay start time.
5. Pressthe appropriatenumberpadsto
5.PressCancel pad. Removefoodfrom
oven. If the programis not canceled,
enter the time you want the oven to
stop.
therewillbetwo reminderchimesevery
minutefor upto 30minutes.
6. DELAYwill bedisplayed.
7. At the endofthedelayperiod,BAKEand
NOTE: TheCookTimeStopTimereCOOK TIME will be displayedalong
minder chimesmay be changed.See
with the temperature.
Control Options (End-of-Cook-Time
Signal),
page12.
8. Followsteps3-5in precedingsection.
4, Placefoodinovenleavingtheovendoor TO DELAYTHE START OF COOKopento the first stop position(about ING AND TURN OFF AUTOMATIfour inches).
CALLY:
QUICK PREHEAT PAD {SELECT
MODELS)
Use to decreasepreheatingtime when
5, Follow broiling recommendationsin
"Cooking MadeSimple" booldet,
usingthe Bake or Convect Bake pad.
Usefor allfoodswhenbakingononerack.
• Pressthe Quick Preheat pad.QUICK
PREHEAT
- I RACKBAKINGwill scroll
twice and then PREHEATING
will be
displayed.
TO RETURN TO STANDARD
PREHEAT:
• Press Quick Preheat pad again.This
COOK TIME/STOP TIME
PADS (CLOCK CONTROLLED
I. PressCook Time pad. COOK TIME
willflash.Pressthe appropriatenumber
padsto enter cookingtime in hoursand
minutes.
2. Pressthe Bake or Convect Bake or
Convect Roast (selectmodels)pad
and selectthe temperature. COOK
TIMEwill be displayedalong with the
temperature.
OVEN COOKING)
3. when
Press Stop
Time pad.
the ovenwill
stopDisplayshows
basedon an
6. Whenbroilingiscomplete,pressCancel pad. Removefoodandbroiler pan
from oven.
Useto programtheovento startandstop
automaticatly.
Cooktimemaybesetfor up
to II hoursand59 minutes(I 1:59). The
clockmustbefunctioningandcorrectlyset
for this feature to work.
TO START IMMEDIATELY AND
TURN OFF AUTOMATICALLY:
I, PressCook Time pad. COOK TIME
willflash.Presstheappropriatenumber
padsto entercookingtimeinhoursand
minutes,
will
provide standard preheat and the
displaywilIscrolISTANDARDPREHEAT.
immediatestart.
................................
NOTES:
BROILING
• Expectbroil times to be longerand
• Hi broilis usedfor mostbroiling,
UseIo broilwhenbroilinglonger
cookingfoodsto allow them to
cook to well done stagewithout
excessive
browning.
2. Pressthe Bake or Convect Bake or
Convect Roast (selectmodels)pad
and selectthe temperature. COOK
• A cooling fan will automatitally turn on during broiling. If
TIMEwill be displayedalongwith the
temperature,
it doesnot operate, contact an
authorizedservicer.
3, One minutebeforethe endof the programmedcooktime,the ovenlightwill
turn on.Thelightwill turn offautomaticallywhen Cancel pad is pressedor
afterovendoor isopenedandclosed.
• Nevercoverbroilerpaninsertwith
aluminum
foil.Thispreventsfatfrom
drainingto the panbelow,
................................
8
browningto beslightly
lighterifapplianteisinsta(ledona 208volt circuit.
CLOCKCONTROLLEDOVEN
COOKING
, Highlyperishablefoodssuchasdairy
products,pork, poultry or seafood
are not recommendedfor delayed
cooking.
• Clockcontrolledbakingisnotrecommendedfor bakeditemsthat require
apreheated
oven,suchascakes,cookiesandbreads.
OVEN
COOKING
r CONT.
QuickProofingprovidesfasterresultsthan
countertop or standard proofing,without
harmingthe yeast.
KEEP WARM PAD (SELECT
BREAD PROOFING PAD
MODELS)
For safelykeepingfoodswarm or for warmingbreadsandplates,
(SELECTMODELS)
For proofingor allowingyeast bread productsto risepriorto baking.Therearetwo
I. PressKeep Warm pad.
proofingmethodsavailable-STANDARD
andQUICK.
2. Pressthe Auto Set padfor Standard
Proof,pressagainfor QuickProof.
StandardProofingtemperatureis slightly
3. When proofingis complete,pressthe
2. PressAuto Set padfor 170° For press
the appropriatenumberpadsfor temperaturesbetween145° and 190° F.
3. KEEPWARM andthe temperatureselectedwill bedisplayedwhenthe function isactive.
4. Whenwarmingiscomplete,pressCancel pad.Removefood fromthe oven.
higherthanroomtemperature,protecting
doughfromtemperaturechanges
anddrafts
that canaffectproofingresults.
I. PressBread Proofingpad.
Cancel pad.
NOTESI
/_/_EATPROBE PAD (SELECT
QUICK PREHEAT
- useonlyoven-safeplates,check
with the manufacturer.
• Foroptimumbakingandbrowningresuits, Quick Preheatis not recom- do not setwarm dishesona cold
mendedwhenbakingonmultipleracks, surfaceas rapidtemperature
MODELS)
To roast and bakeitemsto the desired
temperaturewithout overor undercook-
• Forbestresults,userackposition2 or
changescouldcausecrazing.
3whenusingtheQuickPreheatoption.
MEAT PROBE
ing.
KEEP WARM
• The probe must be removedfrom the
I. Inserttheprobeintothefooditem.(For
meats,theprobetipshouldbelocatedin
the center of the thickestpart of the
meatandnot into the fator touchinga
bone.)
, Foroptimalfood qualityandnutrition, ovenwhenit isnot beingused.
oven cookedfoods shouldbe kept • Because
of theexcellentinsulationof the
warmfor no longerthan I to 2 hours, oven,the retainedheatcontinuesto cook
the food afterthe signalhassoundedand
• For optimalfood qualityand color,
foodscookedonthe rangetop should the ovenhascycledoff.Forthisreasonit
2. Inserttheprobeplugintothereceptacle
bekeptwarmfor anhouror (ess.
isimportantto removethe foodfromthe
locatedonthetop rightof the oven.Be
_
ovenassoonasthe signalsounds.
certaintoinsert plugintothereceptacle
" To keep foods from drying, cover
allthe way.Thecontrolwill readPRESS
looselywith foil or a lid.
• andremoving.
Usethe handleD
ofothe
inserting
notprobefor
pull on the
cable.
PROBEPAD.
3. PressProbe Pad.
• TO WARM DINNER ROLLS:
- coverrollslooselywith foil and
Use a potholder to remove since
probe becomes hot.
4. Setthe desiredinternaltemperatureof
the food bypressingAuto Set padfor
placein oven.
• Forfrozenmeats,insertprobeafter I-2
- pressKeepWarm andAuto Set
hoursof roasting.
160° For pressthe appropriatenumber
padsfor temperaturebetween100° and
1850F.
5. Pressthe Bake, Convect Bake, or
Convect Roastpad.Pressthe appropriatenumberpadsfor the desiredtern-
pads.
- warmfor 12-15minutes,
peraturebetween100° and550° F.
6. When the probe hasreachedthe set
temperature,the oven will shut off,
"END"will bedisplayed
andfour chimes
will soundfollowedbyonechimeevery
minutefor onehouror untiltheCancel
padispressed,
• TO WARM PLATES:
- place2 stacksof upto four plates
eachin the oven.
- pressKeepWarm andAuto Set
pads.
- warmfor fiveminutes,turn off the
ovenandleaveplatesin the oven
for I 5 minutesmore.
• To cleancooledprobe,wipewithasoapy
dishcloth.Do not submergeprobe in
water or washin the dishwasher.
BREAD PROOFING
• For any dough that requiresone rise,
eitherStandardor QuickProofingcanbe
used.
• For doughrequiringtwo rises,Standard
Proofingmustbeusedfor the first rising
period.EitherStandard
or QuickProofing
canbeusedfor the secondrise.
9
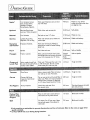
RYING
GUIDE
Apples*
FirmVarieties:Graven
Stein,GrannySmith,
Jonathan,Winesap,
RomeBeauty,Newton.
Wash,peelif desired,coreandslice
into 118"slices,
Apricots*
Blenheim/Royal
most
Wash,halve,andremovepits.
common.Tilton alsogood.
Bananas*
FirmVarieties
Peelandcut into I/4" slices.
17-24hours. Pliableto crisp.
Cherries
Lambert,RoyalAnn,
Napoleon,Vanor Bing.
Washandremovestems.Halveand
removepits.
18-24hours. Pliableandleathery.
Halveandremovepits.Peelingis
optionalbut resultsin better-looking
24-36hours Pliableandleathery.
Nectarines
FreestoneVarieties.
and Peaches*
.......................
Pears*
.........
•
. ..............
/ 24-36hours Softandpliable.
]
Freshor canned.
i ..............
Pliableto crisp.Dried
applesstorebestwhenthey
areslightlycrisp.
18-24 hours Soft,pliable.
.......................................
Pineapple
..........
driedfruit.
Peel,halveandcore.
Bartlett
4-8 hours
...........
Wash,peelandremovethorny eyes. 1Canned: I Softandpliable.
Slicelengthwiseandremovethesmall _14-18hours I
core.Cut crosswiseinto I/2 slices. _Fresh:
I
,
.I12-16hours I
..........................................
Orange and
Lemon Peel
Selectrough-skinned
fruit. Washwell.Thinlypeelthe outer 1/16
Do not dry the peelof fruit to 1/8"of the peel.Do not usethe
marked"color added",
whitebitter pith underthe peel.
I-2 hours
Tomatoes
Plum,Roma
Halve,removeseeds.Placetomatoes
skinsideupon rack.Prickskins.
12-18hours Toughto crisp.
Carrots
DanversHalfLong,
Imperator,RedCored
Chantenay
Do not usecarrotswith woodyfiber or 4-8 hours
Ipithycore.Wash,trim tops andpeelif
desired.Slicecrosswiseor diagonally I
in I/4 slices.Steamblanchfor 3 min. I
Toughto brittle.
_Wash,halveandseed.Prick
skinseveraltimes,
Podsshouldappearshriveled,
darkred andcrisp.
Hot Peppers
Ancho,Anaheim
Parsley,Mint,
Cilantro, Sage,
Oregano
Rinsein coldwater.Leavestemson
until leavesaredry, thendiscard.
Basil
Cut leaves3to 4" from top of plant
ustasbudsappear.Rinseleavesin
coldwater.
i Toughto brittle.
....
14-6hours
I-3 hours
Brittleandcrumbly.
........................
....................1......1...............
2-5hours
I
Brittleandcrumbly.
I
!
*Fruits requiring an antioxidantto prevent discolorationandlossof nutrients. Refer to the noteson page I 0 for
specificmethods.
** 12Hour Off will not occur during dryingfunctions.
II
IOv N
CooKING,
coN
r .
I CONTROL
OPTIONS1
TO CHANGE FACTORY SET
DEFAULT OPTIONS:
I. Pressthe Setup Options (0) padand
the desiredoption pad.(SeeOptions
below.)
2. Currentoption will appearin the display.
3, Pressthe Auto Set padto changethe
option.
4. Pressanyfunctionpadother than the
Cancelpadto setthe displayed
option
andexit the program.
OPTIONS
AVAILABLE:
END-OF-TIMER
SIGNAL
tTIMER 1 _9_TIMER 2}
There are threechoicesfor theendof
"timer" reminder signals,
• Two chimes (Timer l) or four chimes
(Timer 2) followedby onechimeevery
30secondsforuptofiveminutes
(default
setting).
• Two chimes(Timer I) or four chimes
(Timer2) followedby one chimeevery
minutefor upto 30 minutes.
• Two chimes(Timer l) or four chimes
(Timer2) followedby noother chimes,
NOTE: Theremindersignalchosenwill
applyto bothtimers.
COmROLLock (1)
The
function
on the
control can
be locked
to pads
prevent
unwanted
use
for safety and cleaning benefits.
Control Lockwill not lockout the Timer,
Clockor OvenLight.
12 HOUR
MODE
(2) OFF/SABBATH
The oven may be set to turn off after
12hoursor stayon indefinitely. The
defaultis set to turn off after 12hours.
SOUND LEVEL (3)
The sound of the chimes may be
changedwith 11111111(8)
beingthe highest volume and I(I) being the lowest.
Thedefaultissetat level6.
DEFAULT
(9) resetto restorethe
The
control canbe
factorysettingfor eachoption.
DISPLAY ON/OFF
(CLOCK)
The time-of-daydisplaymay be shutoff
when the oven is not in a cooking or
cleaningfunction.
OVEN TEMPERATURE
12/24 HOUR CLOCK (4)
The clock may be set for a 12-houror
24-hour clock. Thedefaultissetfor a 12-
ADJUSTMENT
If youthinkthe ovenisoperatingtoo cold
or hot, youcanadjustit. Bakeseveraltest
items and then adjust the temperature
settingnot morethan I0° Fat a time.
hourclock.
TO ADJUST:
SCROLL SPEED (5)
1. Press the Bake pad and enter 550° F.
The scroll speed of the messages in
the display may be changed from
FAST to MEDIUM to SLOW. The
defaultis setfor the mediumspeed,
2. PressandholdtheBakepadforseveral
secondsuntil TEMPADJisdisplayed.
3. Pressthe Auto Set pad- eachpress
changes
thetemperatureby 5° F. The
controlwillacceptchanges
from-35°to
END-OF-COOK
SIGNAL
TIME
{6)
Therearethreechoicesfortheendof
"clock controlled cooking" reminder
signals,
• Three chimesfollowedby two chimes
everyminutefor upto 30minutes(default setting).
• Three chimesfollowed by no other
chimes,
• Three chimesfollowedby two chimes
every30secondsfor upto fiveminutes.
TEMP
C/F (7)
+350F.
4, Ifthe ovenwaspreviouslyadjusted,the
changewill bedisplayed.Forexample,
ifthe oventemperaturewasreducedby
15° F,the displaywill show- I5° F.
5. Whenyou havemadethe adjustment,
press any function pad, OPTION
CHANGEDwill scrollandthe time of
daywill reappearin the display. The
oven will now bake at the adjusted
temperature.
I OVEN
LIGHT
The temperature scale may be
changed to Centigrade or Fahrenheit, Thedefaultis setfor Fahrenheit.
The oven light automaticallycomeson
LANGUAGE {8)
Thewordswhichscrollin the displaymay
bechanged
from English
to Frenchor Spanish.
The oven lightwillcome on automatically
one minute before the end of a clock
controlledcookingoperation.
12
whenthe doorisopened.Whenthe door
isclosed,presstheOven Light padonthe
controlpanelto turn the lightonor off.
OVEN
COOKING,
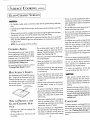
OVEN RACKS
The oven hastwo racks(three racks if
convection).A}I racksaredesignedwith a
Iock-s_op
edge.
TO REMOVE OVEN RACKS:
Pull
rackstraight
outuntil
itstops
atthe
lock-stop
position;
lift
uponthefront
ofthe
rackandpull
out.
"_
-"
CONT.
I
RACK
2: roastingsin3,11
Usefor
cutsofmeat,casseroles,bakingloavesof bread,bundtcakes
or custardpies,andtwo-rackbaking,
...................
NOTES:
RACK I:
Usefor roastinglargecutsof meatand
poultry,
frozen
pies,
dessert
souffles
or
• For best results,allow two inches
betweenthe panplacedonthe rack
andthe ovensidewail
angei
foodcake,
andtwo-rack
baking.
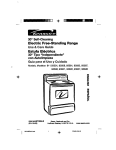
MULTIPLE RACK COOKING:
Two rack: Userackpositions2 and4,
or [ and4.
Three rack: (convection
functionsonly,
selectmodels)UserackpositionsI, 3
andS.Seeillustration,
HALF RACK
TO REPLACEOVEN RACKS:
(SELECT
Place
rackonthe
racksupportinthe
oven;
tilt
thefront
endupslightly;
sliderackback
untilit clearsthe lock-stopposition;lower
TOINSTALLIN
OVEN:
eo_ a_ s_ide_acki_o _e oven.
L A_w_ysi_ulJhaJf
-_
is cool.
RACK POSITIONS
F- _
....
,
-- I
-,..._ \
Three-rackConvection
i_Baking
_ (Racks 1,3 and 5)
Support_
,d"_
_
_
Y
• Use cautionwhen removingitems
from the halfrackto avoidburns.
. Carefullyremoveitems from the
lower rack to avoiddisturbingthe
halfrack.
• If not includedwith yourrange,contact your Jenn-Airdealerfor the
HALFRACKAccessoryKit or call i
1-800-688-8408.
.....................................
I OVEN
t
i
VENT
Front
the sidearm supportbetweenthe top
s
'/_
Tabs
#
• When opening
theovendoor,
allow
steamandhotairtoescape
before
reaching
intotheoventoremove
food.
2. Grasptop centerof the halfrack.Align Whenthe ovenisin use,the ventandsur-
-_.
I_
MODELSI
• Do not usecookwarethat extends
beyondedgeof rack.
413
RACK 5:
thin
foods.
Usefor
toastingbreador broilingvery
RACK 4:
roundingareabecomehotenoughtocause
fourth
andfifth
oventad,,guides.
Insert
vent opening.
the
twocabs
onche
backframe
ofthe
half burns.NEVERblockthe
OVENVENTLOCATION
3. Pushfirmlyonthe top surfaceof the half
rackuntilthe tabsslideintothe slotsand
the halfrack sidearmsupportrestson
the
fourth
oven
rack guide.
of
rackintothe
_the
ovenwall.
slotsonthe
upperleftrear
4, Checkfor proper installationbyp[acing
your handonthe top surfaceof the half
i COOLING FAN
rackandpressingdownfirmly,
TO REMOVE FROM THE OVEN:
The coolingfan willautomatically
turn on
duringcleaning,broilingand somebaking
operations.It isusedto keepinternalparts
on the control panelcool. The fan will
automaticallyturn off when parts have
cooled.The fan maycontinueto operate
Usefortwo-rackbakingandforbroiling. When _he oven is _RACK 3:
cool, graspthe top _ I
centerofthehalfrack
Usefor mostbakedgoodson a cookie
sheetor jellyroll pan,layercakes,fruit
andpullupwarduntil ---_
the backtabsonthe
pies,or frozen convenience
foods,and
for broiling,
rackslideout of the _
ovenbackslots.
13
"J
'
I
_"
afterthe ovenhasbeenturnedoff. Thisis
normal.
I ARE & CLEANING
CLEAN PAD
TO CANCEL SELF-CLEAN:
Useto seta self-cleancycleor a delayed
self-deancycle.One pressof the Clean
padsetsup an immediatecleancycle.A
I. PressCancelpad.
2. If LOC is NOT displayed,openoven
secondpressof the Clean padsetsupa
delayedcleancycle,
• Clean
frame,
oven ;
door
frame(areaoutside of gasket)
andaroundthe
openingin the
door gasketwith anonabrasive
cleaner
suchasBonAmi*. Theseareasarenot
exposedto cleaningtemperatures.
• Removeovenracks.Ifracksareleftin
duringa cleancycle,it mayimpairfunction andtheywill discolor.Turnoffthe
ovenlightandclosedoor.
• Brandnamesfor cleaningproductsare
registeredtrademarksof the respective
manufacturers,
TO SET FOR IHHEDIATE START:
I. PressClean padonce.
2. Press
theAuto Set padfor 3 hoursof
cleaningtime,pressagainfor 4 hours
and
againif 2 hours of cleantime is
desired.
3. CLEANINGand LOC plusthe clean
time will appearin the display,
4. When the clean cycle is complete,
CLEANEDwill bedisplayed.LOC will
remainon until the oven hascooled
(approx.I hour).
door.
allowovento
cool. If LOCisdisplayed,
TO SET FOR DELAY START:
I. PressClean padtwice,
2. Pressthe Auto Set padto programa
2-hour delay.Eachadditionalpressof
Auto Setwill add2-hoursupto atotal
delayof eight hoursfrom the current
time.
3. Thestarttimeandthetimeofdaywillbe
displayedduringthe delayperiod.
4. Attheendofthedelayperiod, CLEANING,LOCandthe cleantimewillappear
in the display.
S. Followsteps4-6 in precedingsection.
.........................................
NOTES;
• To preventdamage
to ovendoor, do
not attemptto openovendoorwhen
touchingcooktop,door, window or
ovenventareaduringa cleancycle.
the LOC indicatorword isdisplayed.
• Duringthecleaning
process,
thekitchen
shouldbewellventilatedto helpelimi-
• Acoolingfanwillautomaticallyturnon
duringcleaning.
If it doesnot operate,
contactanauthorizedservicer.
nate normal odors associatedwith
cleaning.Odorswill lessenwith use.
• It is normalfor flare-ups,smokingor
flamingto occurduringcleaningifthe
ovenisheavilysoiled.It is betterto
cleantheovenregularlyratherthanto
wait untilthere isa heavybuildupof
• Wipe up sugaryandacidicspillovers
suchas sweet potatoes,tomato or
milk-based
saucesprior to aself-clean
cycle. Porcelainenamelis acidresistant,not acidproofandmaydiscolor
if spillsarenotwipedupbeforeaselfcleancycle.
soil.
• A whitediscoloration
mayappearaf• Wipeupexcessgreaseorspilloversto ter cleaningif acidicor sugaryfoods
preventflare-ups.Foreaseincleaning,
are not wiped up before the clean
the bakeelementin the ovencanbe
cycle.Thisdiscolorationisnormaland
liftedslightly(I inch),
will NOT affectperformance.
• It is normalfor partsof the rangeto
becomehotduringacleancycle.Avoid
5. When the oven is cool, LOC will no
longerbedisplayed
andthe doormaybe
opened.
6. Wipeout the oveninteriorwitha damp
cloth.Ifsoilremainsit indicates
the cycle
wasnot longenough.
14
CARE
CLEANING
CLEANING,
CONT.
PROCEDURES
CAUTION:
• Be sure appliance is off and all
partsare coolbeforehandlingor
cleaning.This is to avoiddamage and possible burns,
COOKTOP -- GLASS-CERAMIC
Neveruseovencleaners,
chlorine
bleach,
ammaniaorglasscleaners
withammonia.
NOTE:
Callanauthorized
servicer
if theglass-ceramic
top shouldcrack,breakor if metalor alumihumfoil shouldmeltonthecooktop.
• To prevent stainingor discoloration,
cleanappliance
aftereachuse.
• Allow the cooktop to cool before
cleaning.
COOKTOP TRIM
• GeneralCleaning/HeavySoils- See
• If a part is removed,be sure it is
correctlyreplaced,
, General - Cleancooktop aftereach
use,or whenneeded,
with adamppaper
towel and Cooktop CleaningCreme
(PartNo. 20000001
)**. Then,buffwith
a cleandry cloth,
directionsforglass-ceramiccookingarea.
Do not userazorbladeoncooktoptrim,
, For Difficult Stains, Minor Distalorations or Yellowing - Gentlyscour
usingamild-abrasive
cleanersuchasSoft
BROILER PAN AND INSERT
• Placesoapyclothoverinsertandpan;let
soakto loosensoil.
sugar or plasticfrom hot surface to a
coolarea.Thenturn elementOFFand
allowto cool.Cleanresiduewith razor
bladescraperand Cooktop Cleaning
Creme*.
NOTE:PermanentstainswilldevelopifsoilScrub*and a greenScotch-Brite*pad.
isallowed
tocookonbyrepeatedly
usingthe
(Donot useScotch-Britepodonglass. Washinwarmsoapywater.Usescouring
cooktopwhensoiled,
ceramicsurface.)Rinseanddry.Follow
padto removestubbornsoil.
withHOPE'SCOUNTERTOP
POLISH**
• Heavy Soils or Metal Marks toenhancethecooktop'scolorandshine.
• Broilerpanandinsertcanbe cleanedin
Dampen a "scratchless" or "never
Followpackagedirections.
dishwasher,
scratch" scrubber sponge. Apply
Cooktop CleaningCreme* (Part No. • To
Protect
and Renew
the Surface
Shine
- UseHOPE'S
COUNTERTOP
CLOCK AND CONTROL
20000001)**and scrub to remove as
POL_SH**.Followpackagedirections.
PAD AREA
muchsoilaspossible.
Applyathinlayer
of the creme,coverwith adamppaper
• To activate"Control Lock"for cleaning,
towel and let stand30 to 45 minutes. DOOR HANDLE -- PLASTIC
seepage12.
Scrubagain,then buffwith a cleandry FINISHES
• Wipe with a dampclothanddry.
• Glasscleanersmaybeusedif sprayedon
aclothfirst.DO NOT spraydirectlyon
controlpod anddisplayarea.
CONTROL PANEL
• Wipe withdampcloth.
• Forstubbornsoil,usemildJy
abrasive
denningagentssuchas800Ami*.Do NOT use
abrasivecleanerssuchassteelwool pads
or oven cleaners.These productswiIl
permanentlydamage
the surface.
CONTROL KNOBS
• Removeknobs in the OFFpositionby
pullingforward.
cloth.
NOTE: Only use a CLEAN,DAMP
• Whencool,cleanwith soapandwater,
rinseanddry.
"scratchless"
padthatissafefornon-stick • Useaglasscleaneranda softcloth.
cookware.Thepatternandglasswill be
damaged
ifthepadisnotdamp,if thepad NOTE: Neveruseovencleaners,abrasive
issoiled,or if anothertypeof padisused. or causticliquidor powderedcleansers
on
plasticfinishes.Thesecleaningagentswill
• Burned-on or Crusty Soils - Scrub scratchor marfinish.
with a "scratchless"or "neverscratch"
scouring pad and Cooktop
CleaningCreme*. Hold a
razor bladescraperat
30° angle and
scrapeanyremain-
NOTE: To preventstainingor discoloration, wipe upfat, greaseor acid(tomato,
lemon,vinegar,milk,fruit juice,marinade)
immediatelywith a dry papertowel.
ing soil. Then,
dean as de-_
scribedabove.
OVEN WINDOW _L DOOR -GLASS
•
NOTE:Donotusetherazorbladefordaily
• Wash,rinseanddry.Do not useabrasive
cleaning
asit maywearthepatternonthe
denningagentsas they mayscratchthe
glass.
finish.
•
• Melted Sugar or Plastic- (mmedi• Turn
on eachelementto be sure the
atelyturn elementto LOW andscrape
knobshavebeencorrectlyreplaced.
15
Avoidusingexcessive
amountsofwater
whichmayseepunderor behindglass
causingstaining.
Washwith soapandwater.Rinsewith
clearwateranddry. Glasscleanercan
beusedif sprayedon a clothfirst.
• Do not useabrasivematerialssuchas
STAINLESS STEEL
• DiscolorationmUsingadampsponge
scouringpads,steelwool or powdered
(SELECT MODELSt
cleanersastheywil) scratchglass.
• PRODUCT
DO NOT USE
ANY CLEANING
CONTAINING
CHLO-
OVEN INTERIORS
• Followinstructionson page 14to set a
RINE BLEACH.
• ALWAYS WIPE WITH THE GRAIN
or softcloth,wipewith CameoStainless
SteelCleaner*.Rinseimmediatelyand
dry.To removestreaksandrestoreluster, follow with StainlessSteel Magic
Spray*.
self-cleancycle.
WHEN CLEANING.
OVEN RACKS
. Daily Cleaning/Light Soil -- Wipe
with oneof the following-soapywater,
• Cleanwith soapywater,
white vinegar/watersolution,Formula
• Removestubbornsoil with cleansing
409 Glassand SurfaceCleaner*or a
powderorsoap-filledscouringpad.Rinse similarglasscleaner- usinga spongeor
anddry.
softcloth. Rinseanddry. To polishand
help preventfingerprints,follow with
• Ifovertime,racksdonotslideout easily,
StainlessSteel MagicSpray (Jenn-Air
wipe the rack edgeand rack support
ModelA912,PartNo. 20000008)**.
with a smallamountof vegetableoil to
restoreeaseofmovement,
thenwipeoff , Moderate/Heavy Soil -- Wipe with
excessoil. Likewise,placeone drop of
one of the following- BonAmi, Smart
vegetableoil on rackguides.
Cleanser,or SoftScrub*- usinga damp
NOTE: Remove
ovenracksduringa clean
spongeor soft cloth. Rinseand dry.
Stubbornsoilsmaybe removedwith a
cycle.Ifracksareleftintheoven,it mayimpair
functionandtheywilldiscolor,
dampScotch-Brite*pad;rubevenlywith
the grain. Rinseand Dry. To restore
lusterandremovestreaks,follow with
Stainless
SteelMagicSpray*.
STORAGE DRAWER -PAINTED ENAMEL
• When cool, wash with warm soapy
water, rinse and dry. Never wipe a
warmor hotsurfacewitha dampcloth
asthismaydamagethesurfaceandmay
causea steamburn.
• For stubborn soil, usemildly abrasive
cleaningagentssuch as baking soda
pasteor Bon Ami.* Do not useabrasire,
causticor harshcleaningagents
suchassteelwool
padsor oven cleaners. These products will scratch or
permanentlydamagethe surface.
NOTE: Use dry towel or cloth to
wipe up spills, especially acid or
sugary spills. Surface may discolor
or dull if soil is not immediately
removed. This is especially important for white surfaces.
* Brandnamesfor cleaningproductsare registeredtrademarksof the respectivemanufacturers.
** To order direct,call 1-800-688-8408.
16
1/ NTEN CE
I
OVEN
DOOR
CAUTION:
• NEVER placeexcessiveweight on
or standon an open ovendoor. This
could causethe range to tip over,
break the door, or injurethe user.
• NEVER attempt to open or close
door or operate oven until door is
properly replaced,
• NEVERplacefingersbetweenhinge
and front oven frame. Hinge arms
are spring mounted. If accidentally
hit, the hinge will slam shut against
oven frame and could injure your
fingers,
TO REMOVE:
I. When cool, open the oven door to the
broil stop position(opened about four
inches),
OVEN
WINDOW
TO PROTECT THE OVEN DOOR
TO REPLACE OVEN LIGHT BULB:
WINDOW:
I. When oven is cool, use fingertips to
I, Do not hit the glasswith pots, pans,
furniture, toys, or other objects,
2 Do not closethe oven door until the
oven racksare in place,
graspedge of bulb cover. Pullout and
remove.
2. Carefully remove old bulb by pulling
straight out of ceramicbase.
Scratching,hitting, jarring or stressingthe
glassmay weaken its structure causingan
increasedrisk of breakageat a later date.
3. To avoiddamagingor decreasingthe life
of the new bulb,do not touch the bulb
with bare handsor fingers.Hold with a
cloth or paper towel. Pushnew bulb
prongs straight into small holes of
LEVELING LEGS
ceramic base.
4. Replace bulb cover by snapping into
place.
• Be surethe anti-tip bracket securesone
of the rear levelinglegsto the floor. This
bracketpreventsthe rangefrom accidentally tipping,
5. Reconnect power to the range. Reset
clock.
The rangeshouldbe leveledwhen installed.
If the range is not level, turn the plastic
levelinglegs,locatedat eachcorner of the
range,until rangeis level.
2. Graspdoorat eachside. Do not usethe
door handleto lift door.
3. Lift up evenly until door clears hinge
arms.
I ,
STORAGE
DRAWER
The storagedrawer at the bottom of the
range is safe and convenient for storing
metalandglasscookware.DO NOT store
plastic,paperware,food or flammablematerial in this drawer. Remove drawer to
cleanunder range.
ANTI-TIPBRACKET
To remove: Empty drawer then pull out
"LEVELING
LEG
TO REPLACE:
I. Grasp door at eachside.
2. Align slots in the door with the hinge
arms on the range.
3. Slidethe door down onto the hingearms
until the door iscompletely seatedon the
hinges.Pushdown on the top corners of
the door to completely seat door on
hinges.Door shouldnot appearcrooked,
NOTE: The oven door on a new rangemay
feel"spongy"when it isclosed.This isnormal
and will decreasewith use.
tO the first stop position. Lift up front of
drawer and pull to the second stop posi-
OVEN LIGHT
tion.
Grasp
sides and lift up and out to
remove
drawer.
To assure the proper replacement bulb
is used, order bulb from Maytng CustomerService. Call 1.800-688-8408, ask
for part number 74004458 - halogen
bulb.
To replace: Fit the ends of the drawer
glides onto the rails. Lift up drawer front
and gently pushin to first stop position. Lift
up and continue to slide drawer to the
closed position.
CAUTION:
• Disconnectpower to range before
replacinglight bulb.
° Allowoven to cool before replacing
light bulb.
• Make sure bulb cover and bulb are
cool before touching.
17
[ EFORE
YOU CALL FOR SERVICE
I
FORMOST CONCERNSt TRYTHESE • Broilelement wasnot preheated.
FIRST:
5. Pittingor flaking.
. Aiuminumfoilwasincorrectlyused.
Never
• Sugaryboiloversthat were not
linethe broiler insertwith foil
removedpromptly.Seepg. 15.
• Checkif ovencontrolshavebeenproperly set.
• Oven door was closedduring broiling. ]_OISTURE COLLECTS ON OVEN
• Checktobesureplugissecurelyinserted Leavethe door open to the first stop WINDOW OR STEAM COMES
into receptacle,
position(about4 inches),
FROM OVEN VENT.
• Checkorre-setcircuitbreaker.Checkor • Trimexcessfatfrommeatbeforebroiling.
• Thisisnormalwhencookingfoodshighin
replacefuse.
• A soiledbroiler panwasused.
moisture.
• Checkpowersupply.
OVEN WILL NOT SELF-CLEAN•
PARTORALLOFAPPLIANCEDOES
NOT WORK.
• Checktomakesurethecycleisnotsetfor
a delayedstart. See pg. 14.
THERE IS A STRONG ODOR OR
NOTE: On Canadian models during a • Check ifdoor is closed.
self-cleancycle- glass-ceramiccooking
surface will not operate.
OVEN DID NOT CLEAN PROPERLY.
• Checkif surfaceand/or oven controls • Longercleaningtime maybeneeded,
havebeenproperlyset.Seepgs.4 & 7.
• Checkifovendoorisunlockedafterselfcleancycle.Seepg. 14.
• Checkifovenissetfor adelayedcookor
cleanprogram.Seepgs.8 & 14.
• CheckifControlLockisactivated.
Seepg.
12.
• Checkthatoven
temperatureisdecreased
Whencool,cleanwith Cooktop
by 25° Fwhenconvectbaking.
CleaningCreme.Seepg, 15.
3.Brownstreaks
andspecks.
• See"Cooking Made Simple" booklet
for more informationon bakewareand
, Spillsnot removedpromptly.Wiping
baking,
with
soiledclothor
bottom
not clean, sponge.Pan
4.Areaswith a metallicsheen,
• Mineraldeposits from water and food.
• Checkovenrackpositions.Foodmaybe
too closeto element,
LIGHT SMOKE WHEN OVEN IS
TURNED ON.
• This is normal for a new range and will
disappearafter a few uses. Initiatinga
• Excessive
spillovers,especially
sugaryand/
cleancyclewill "burnoff' theodorsmore
or acidfoods,werenot removedpriorto
quickly.
the self-cleancycle.
• Turning on a ventilationfan will help
removethe smokeand/orodor.
OVEN DOOR WILL NOT UNLOCK • Excessive
foodsoilsonthe ovenbottom.
AFTER SELF-CLEAN CYCLE.
Usea self-clean
cycle,
• Oveninteriorisstillhot. Allowaboutone
A FAN SOUND CAN BE HEARD
hourfortheovento coolafterthecompletion of a self-cleancycle.The door can be . This isthe coolingfan and is normal.The
openedwhenthe LOC indicatorword is
fanwill continueto runafteruseuntilthe
not disp(ayed,
oven cools.
BAKING RESULTS ARE NOT AS
EXPECTED OR DIFFER FROM
PREVIOUS OVEN.
• Makesure the oven vent hasnot been
blocked. See pg. 13for location.
GLASS-CERAMIC SURFACESHOWS
WEAR.
• Checkto makesurerangeislevel.
I.Tiny scratches or abrasions.
• Temperatures
oftenvarybetweena new
ovenand anold one.As ovensage,the
• Cooktopandpanbottomareclean.
oventemperatureoften"drifts" andmay
Do not slideglassor metalpans
becomehotteror cooler. Seepg, 12for
acrosstop. Makesurepanbottom is
instructionson adjustingthe oventernnot rough.Usethe recommended
perature.NOTE:It isnot recommended
cleaningagents.Seepg. 15.
to adjustthe temperatureif onlyoneor 2.Metalmarks,
two recipesarein question.
• Do not slidemetalpansacrosstop.
FOOD IS NOT BROILING PROPERLYOR SMOKES EXCESSIVELY.
• Excessive
moisturewasusedwhencleaningthe window.
18
"F" PLUS A NUMBER AND THE
MESSAGE: I_CALL AN AUTHORIZED SERVICER OR 800-6881100."
• Thisiscalleda faultcode. Ifafault code
appearsin the displayandbeepssound,
pressthe Cancel pad. If the fault code
andbeepscontinue,disconnectpowerto
the appliance.
Wait a few minutes,then
reconnectpower.Iffaultcodeandbeeps
still continue,disconnectpower to the
appliance
andcallanauthorizedservicer,
• If the oven is heavilysoiled,excessive
flare-upsmayresultinafaultcodeduring
aclean
cycle.
PressCancelpadandallow
the
ovento
coolfor
onehour,thenreset
thecleancycle,lfthefaukcodeandbeeps
still continue, disconnect power to the
applianceandcallanauthorizedservicer.
JENN-AIR
RANGE
WARRANTY
Full One Year Warranty - Parts and Labor
Forone (I) yearfromthe originalretailpurchase
date,anypartwhichfailsinnormalhomeusewill be
repairedor replacedfreeof charge,
Limited Warranties - Parts Only
SecondYear - After the first year from the
originalpurchasedate,partswhichfail in normal
homeusewill berepairedor replacedfreeofcharge
for the partitself,withthe owner payingallother
costs,includinglabor,mileage
andtransportation.
Third Through Fifth Year - Fromthe original
purchasedate, parts listed below which fail in
normalhomeusewillberepairedor replacedfree
of chargefor the partitself,withthe ownerpaying
allother costs,includinglabor,mileageandtransportation.
• ElectronicControls
• Glass-ceramicCooktop:Dueto thermal
breakage.
• Electric Heating Elements:Surface,broil
and bake elements on electric cooking
appliances.
CanadianResidents
The abovewarrantiesonly cover an appliance
installedinCanada
that hasbeencertifiedor listed
by appropriatetest agencies
for complianceto a
NationalStandardof Canadaunlessthe appliance
wasbroughtinto Canadadueto transferof residencefromthe UnitedStatesto Canada.
LimitedWarrantyOutsidetheUnitedStates
and Canada- Parts Only
Fortwo (2) yearsfrom the dateof originalretail
purchase,anypart whichfailsin normalhomeuse
will berepairedor replacedfreeof chargefor the
part itself,with the ownerpayingall other costs,
includinglabor,mileageandtransportation,
Thespecific
warrantJes
expressed
abovearetheONLY
warranties
providedbythemanufacturer.
Thesewarrantiesgiveyouspecificlegalrights,andyoumayalso
haveotherrightswhichvaryfromstateto state.
WHAT
IS NOT
WARRANTIES:
COVERED
BY
THESE
I. Conditionsanddamages
resultingfrom anyof the following:
a.lmproperinstallation,
delivery,or maintenance.
b.Anyrepair,modification,
alteration,or adjustmentnot authorizedbythe
manufactureror anauthorizedservicer.
c. Misuse,abuse,accidents,
or unreasonable
use.
d.lncorrectelectriccurrent,voltage,or supply.
e.Impropersettingof anycontrol.
2 Warrantiesarevoid ifthe originalserialnumbershavebeenremoved,
altered,or cannotbereadilydetermined.
3. Lightbulbs.
4. Productspurchasedfor commercialor industrialuse.
5. Thecostof serviceor servicecallto:
a. Correct installationerrors.
b. Instructthe useronthe properuseof the product.
c. Transportthe applianceto the servicer.
6. Consequential
or incidentaldamages
sustainedbyanypersonasa result
of anybreachof thesewarranties.Somestatesdo not allowthe exclusion
or limitationofconsequential
or incidentaldamages,
sotheaboveexclusion
maynot apply.
IF You NEED
SERVICE
• Cal_thedealerfrom whomyour appliance
waspurchasedor callMaytag
AppliancesSalesCompany,Jenn-AirCustomerAssistance
at 1-800-688II00 to locateanauthorizedservicer.
• Besureto retainproof of purchaseco verifywarrantystatus.Referto
WARRANTYfor further informationon owner'sresponsibilitiesfor
warrantyservice.
. If the dealeror servicecompanycannotresolvethe problem,write to
MaytagAppliancesSalesCompany,Attn: CAIR®Center,P.O.Box2370,
Cleveland,
TN 37320-2370,
or call1-800-688-1100.
U.S.customersusingTTYfor deaf,hearingimpairedor speechimpaired,
call1-800-688-2080.
NOTE: Whenwritingor callingabouta serviceproblem,pleaseinclude
the followinginformation:
a. Your name,addressandtelephonenumber;
b. Modelnumberandserialnumber;
c. Nameandaddressof your dealeror servicer;
d. A cleardescriptionof the problemyouarehaving;
e. Proofof purchase(salesreceipt).
• User'sguides,servicemanualsandpartsinformationare available
from
MaytagAppliancesSalesCompany,Jenn-AirCustomerAssistance.
19